







Posted on lørdag, september 29, 2018 in Hal9k, Planets
This is the considerations I did when building 1S80P 18650 battery packs, for a DIY powerwall.
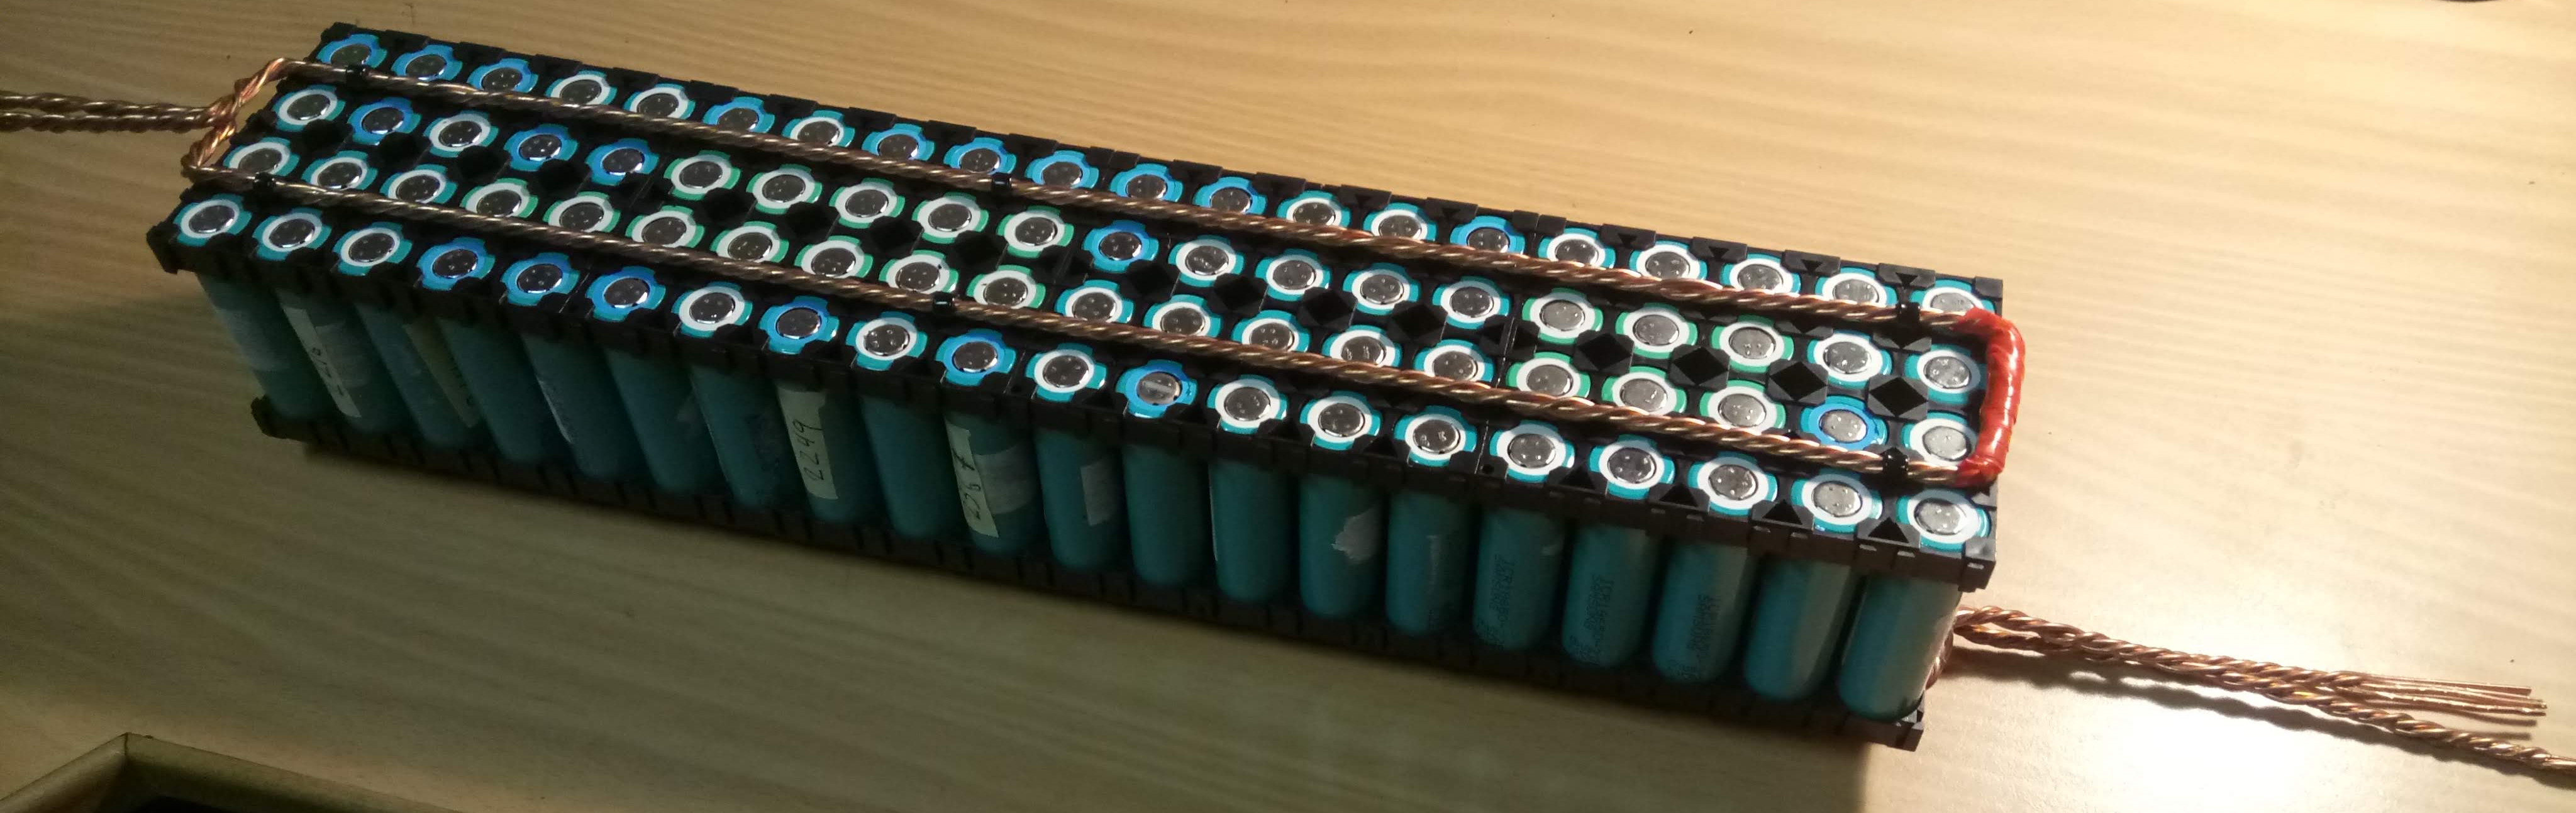
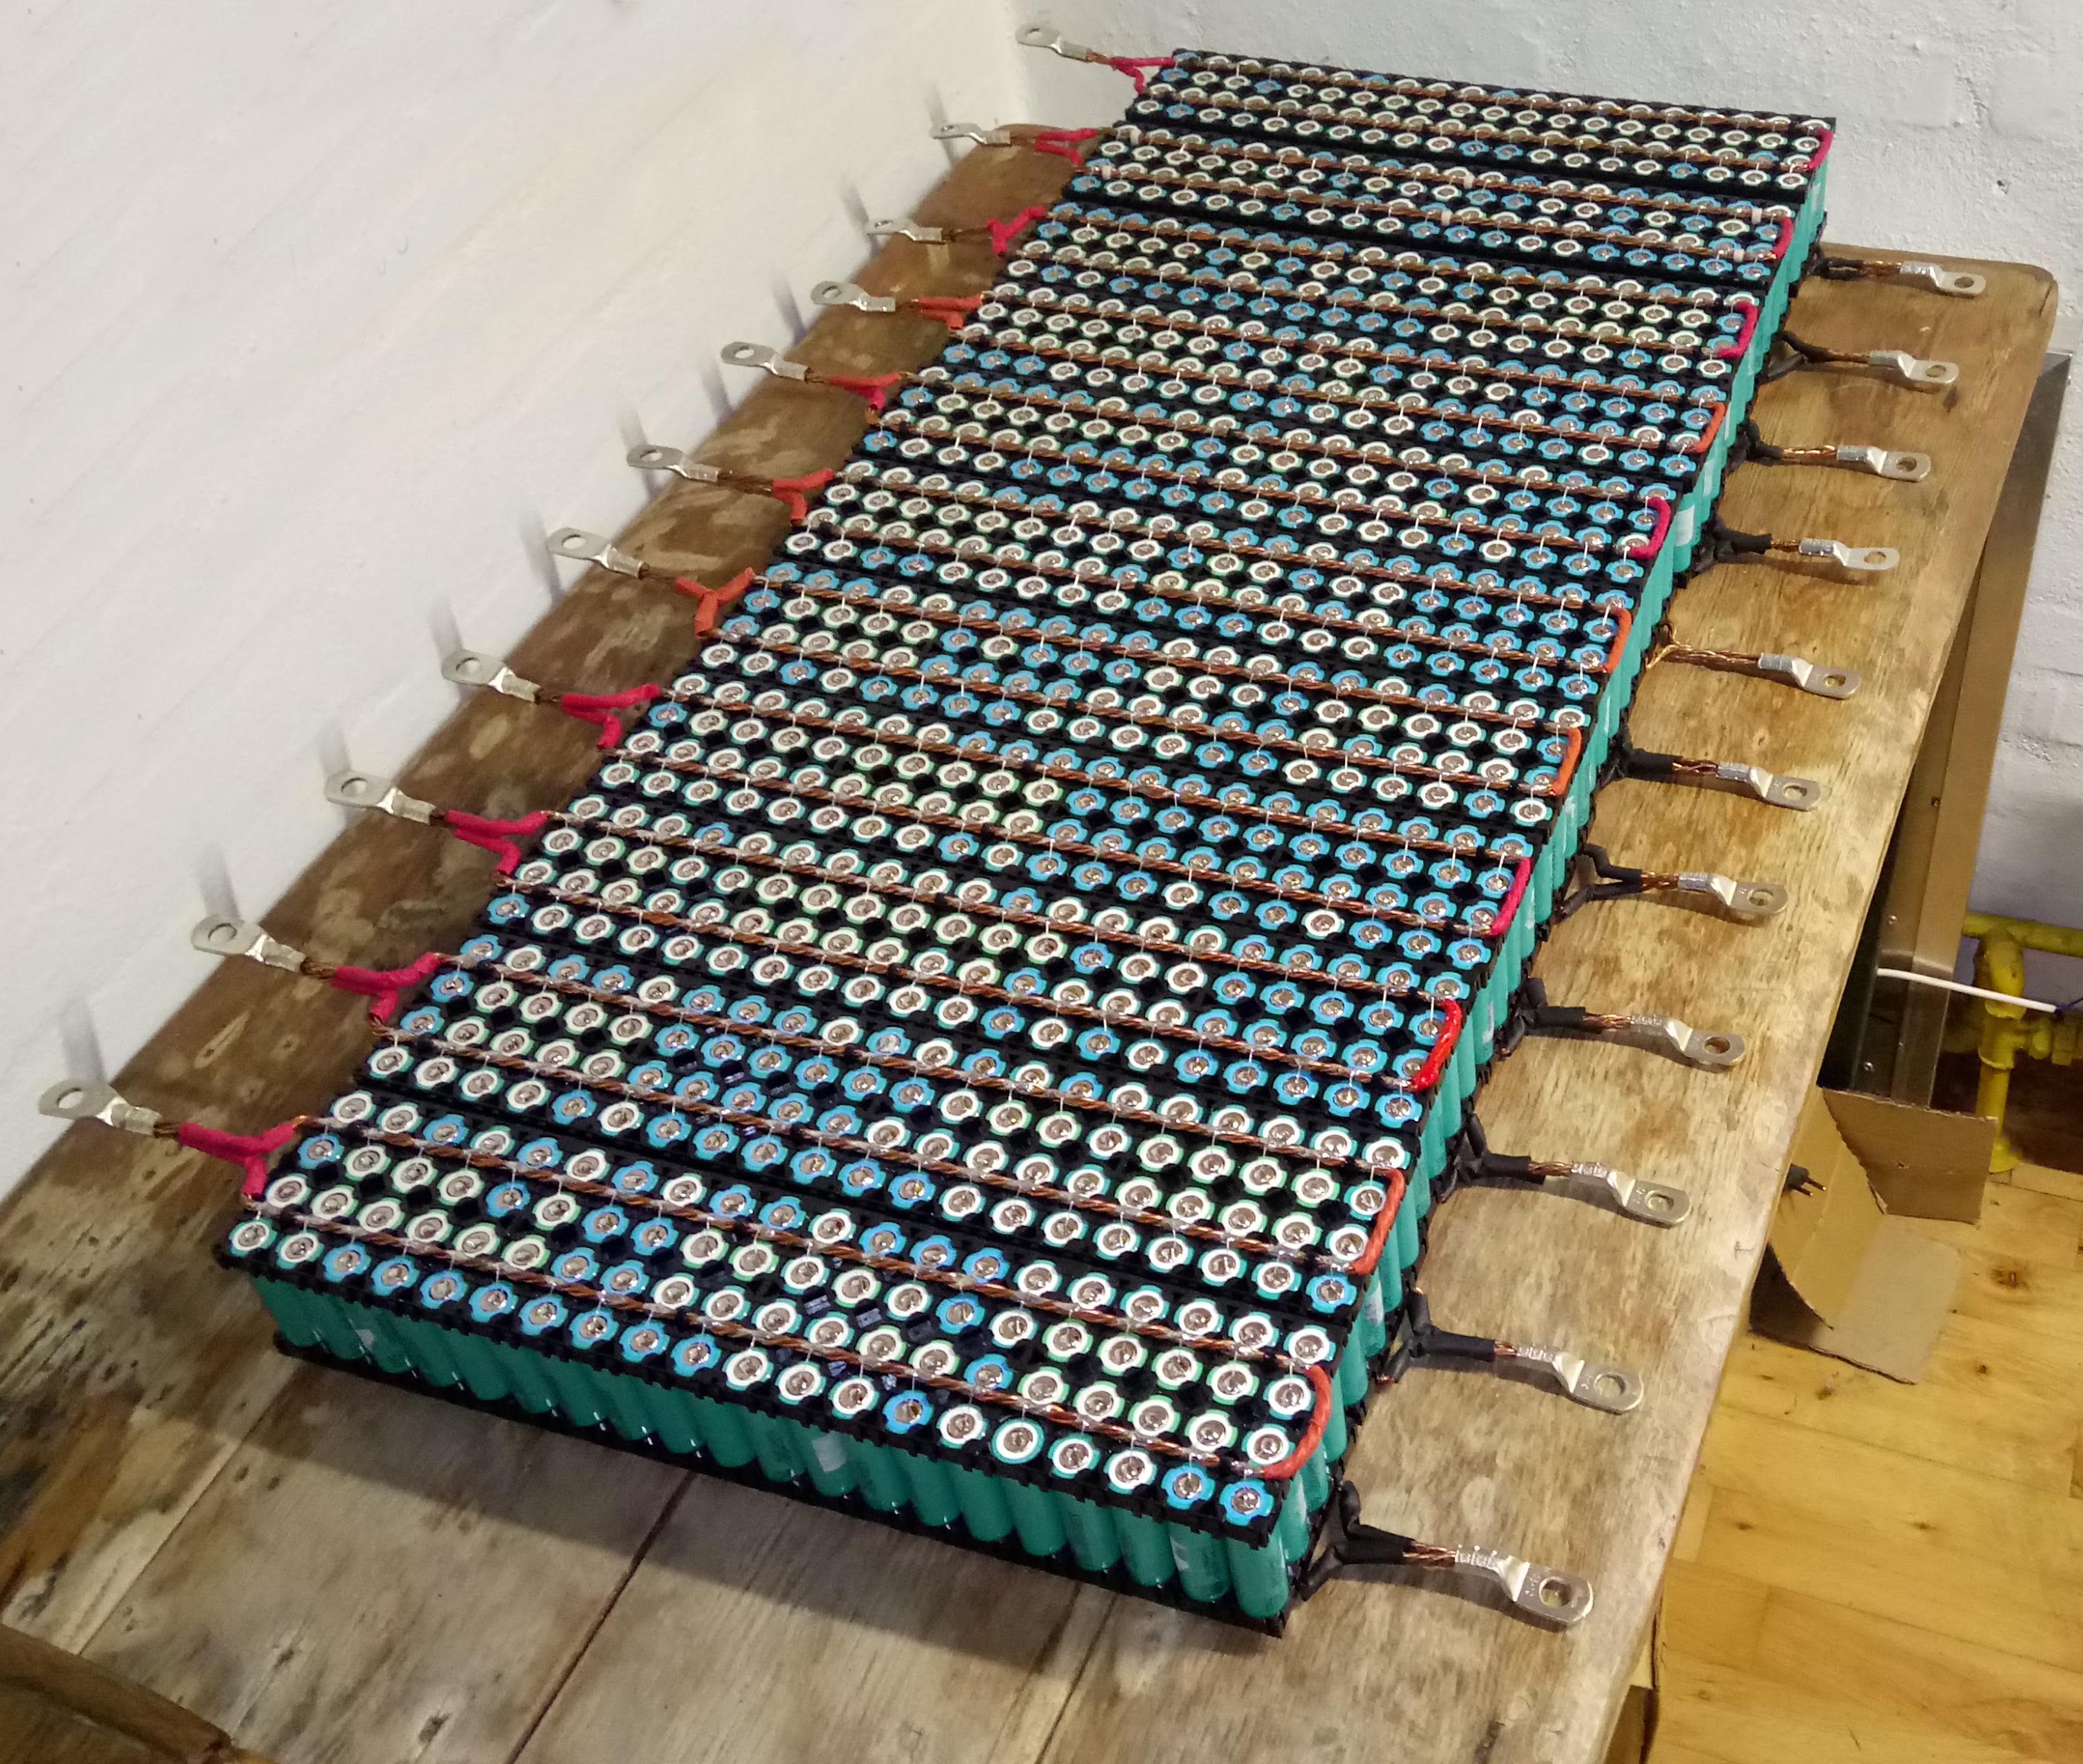
My design will go for 14 of these packs in series, for a nominal 48V system.
I wanted a design that was:
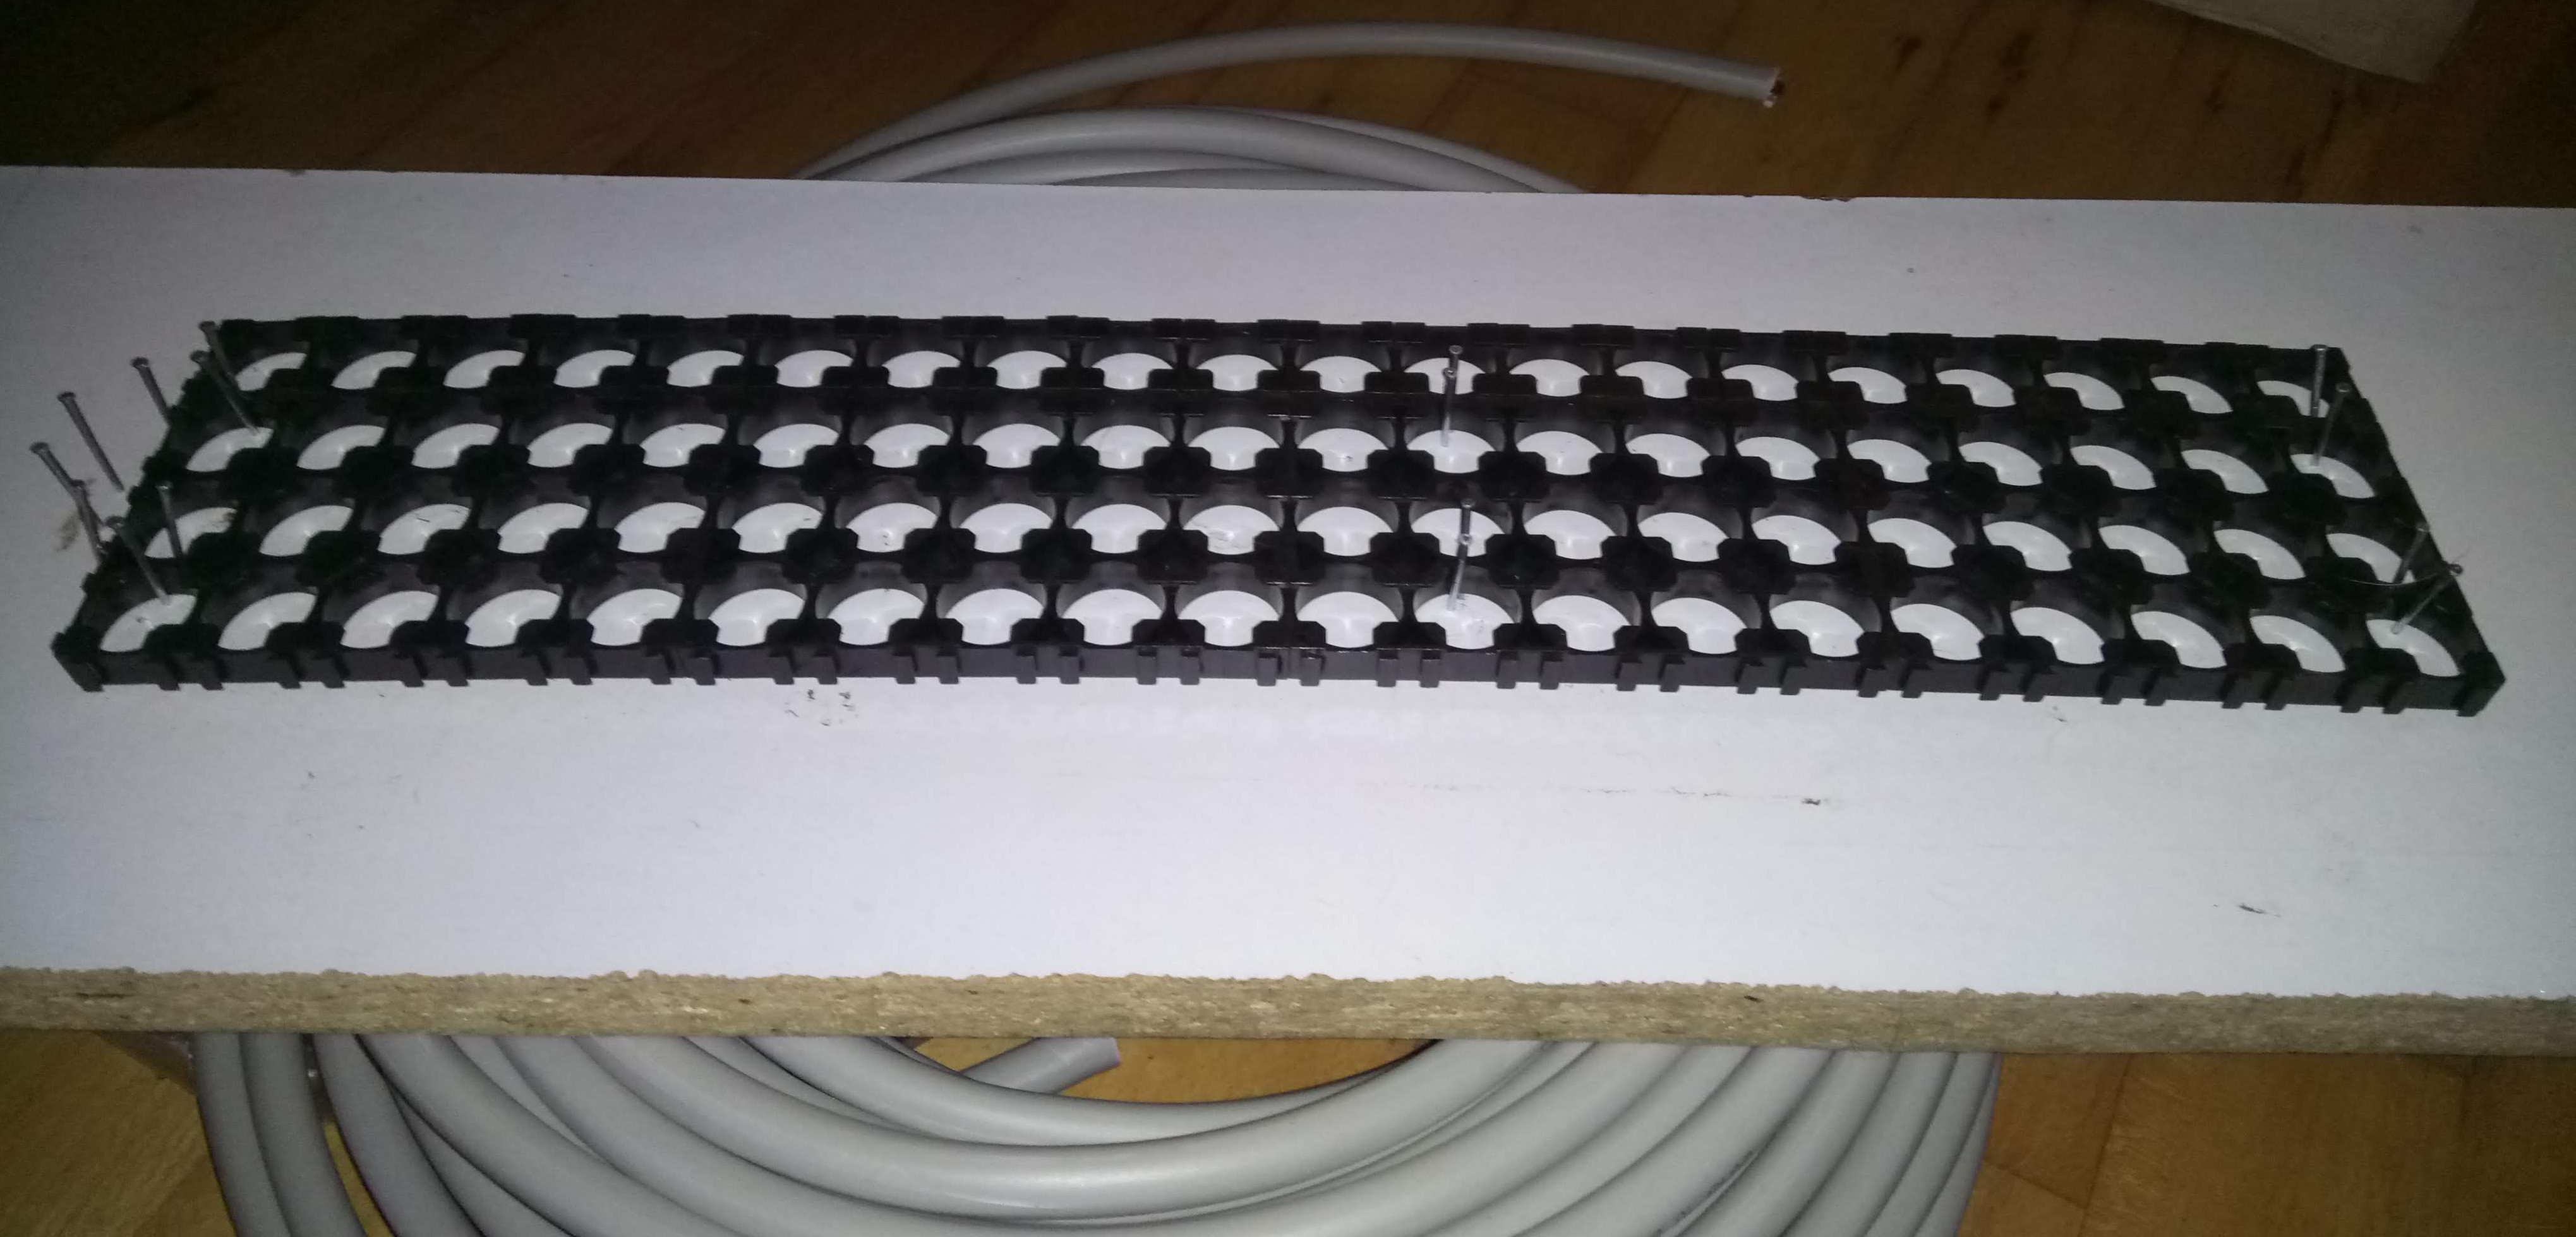
The design is basically 4 4×5 18650 holders for the top and bottom. The cells I used were all tested for capacity (all above 2000 mAh) and self-discharge (all above 4,1V after several weeks/months), and are all Samsung cells. When assembling the packs I tried to mix the cells as much as possible: this should mean that on average the packs will be approximately the same capacity.
The packs have all the positive metal on the top, and the negative on the bottom. This means that any metal would have to touch both the top and the bottom, to short circuit the pack; this is not possible with a straight piece of metal. The connectors are going out on each side: if they went out the same side it would be possible to short-circuit them. Also, this will ensure that all the cells are discharged at the same rate: if they went out the same side the cells closest to the connectors would be loaded harder than the ones further away. This layout will not be a problem when they are put in series, they will just be alternating up-down. The busbars are shrink-wrapped on both ends, so only the connector is connected.
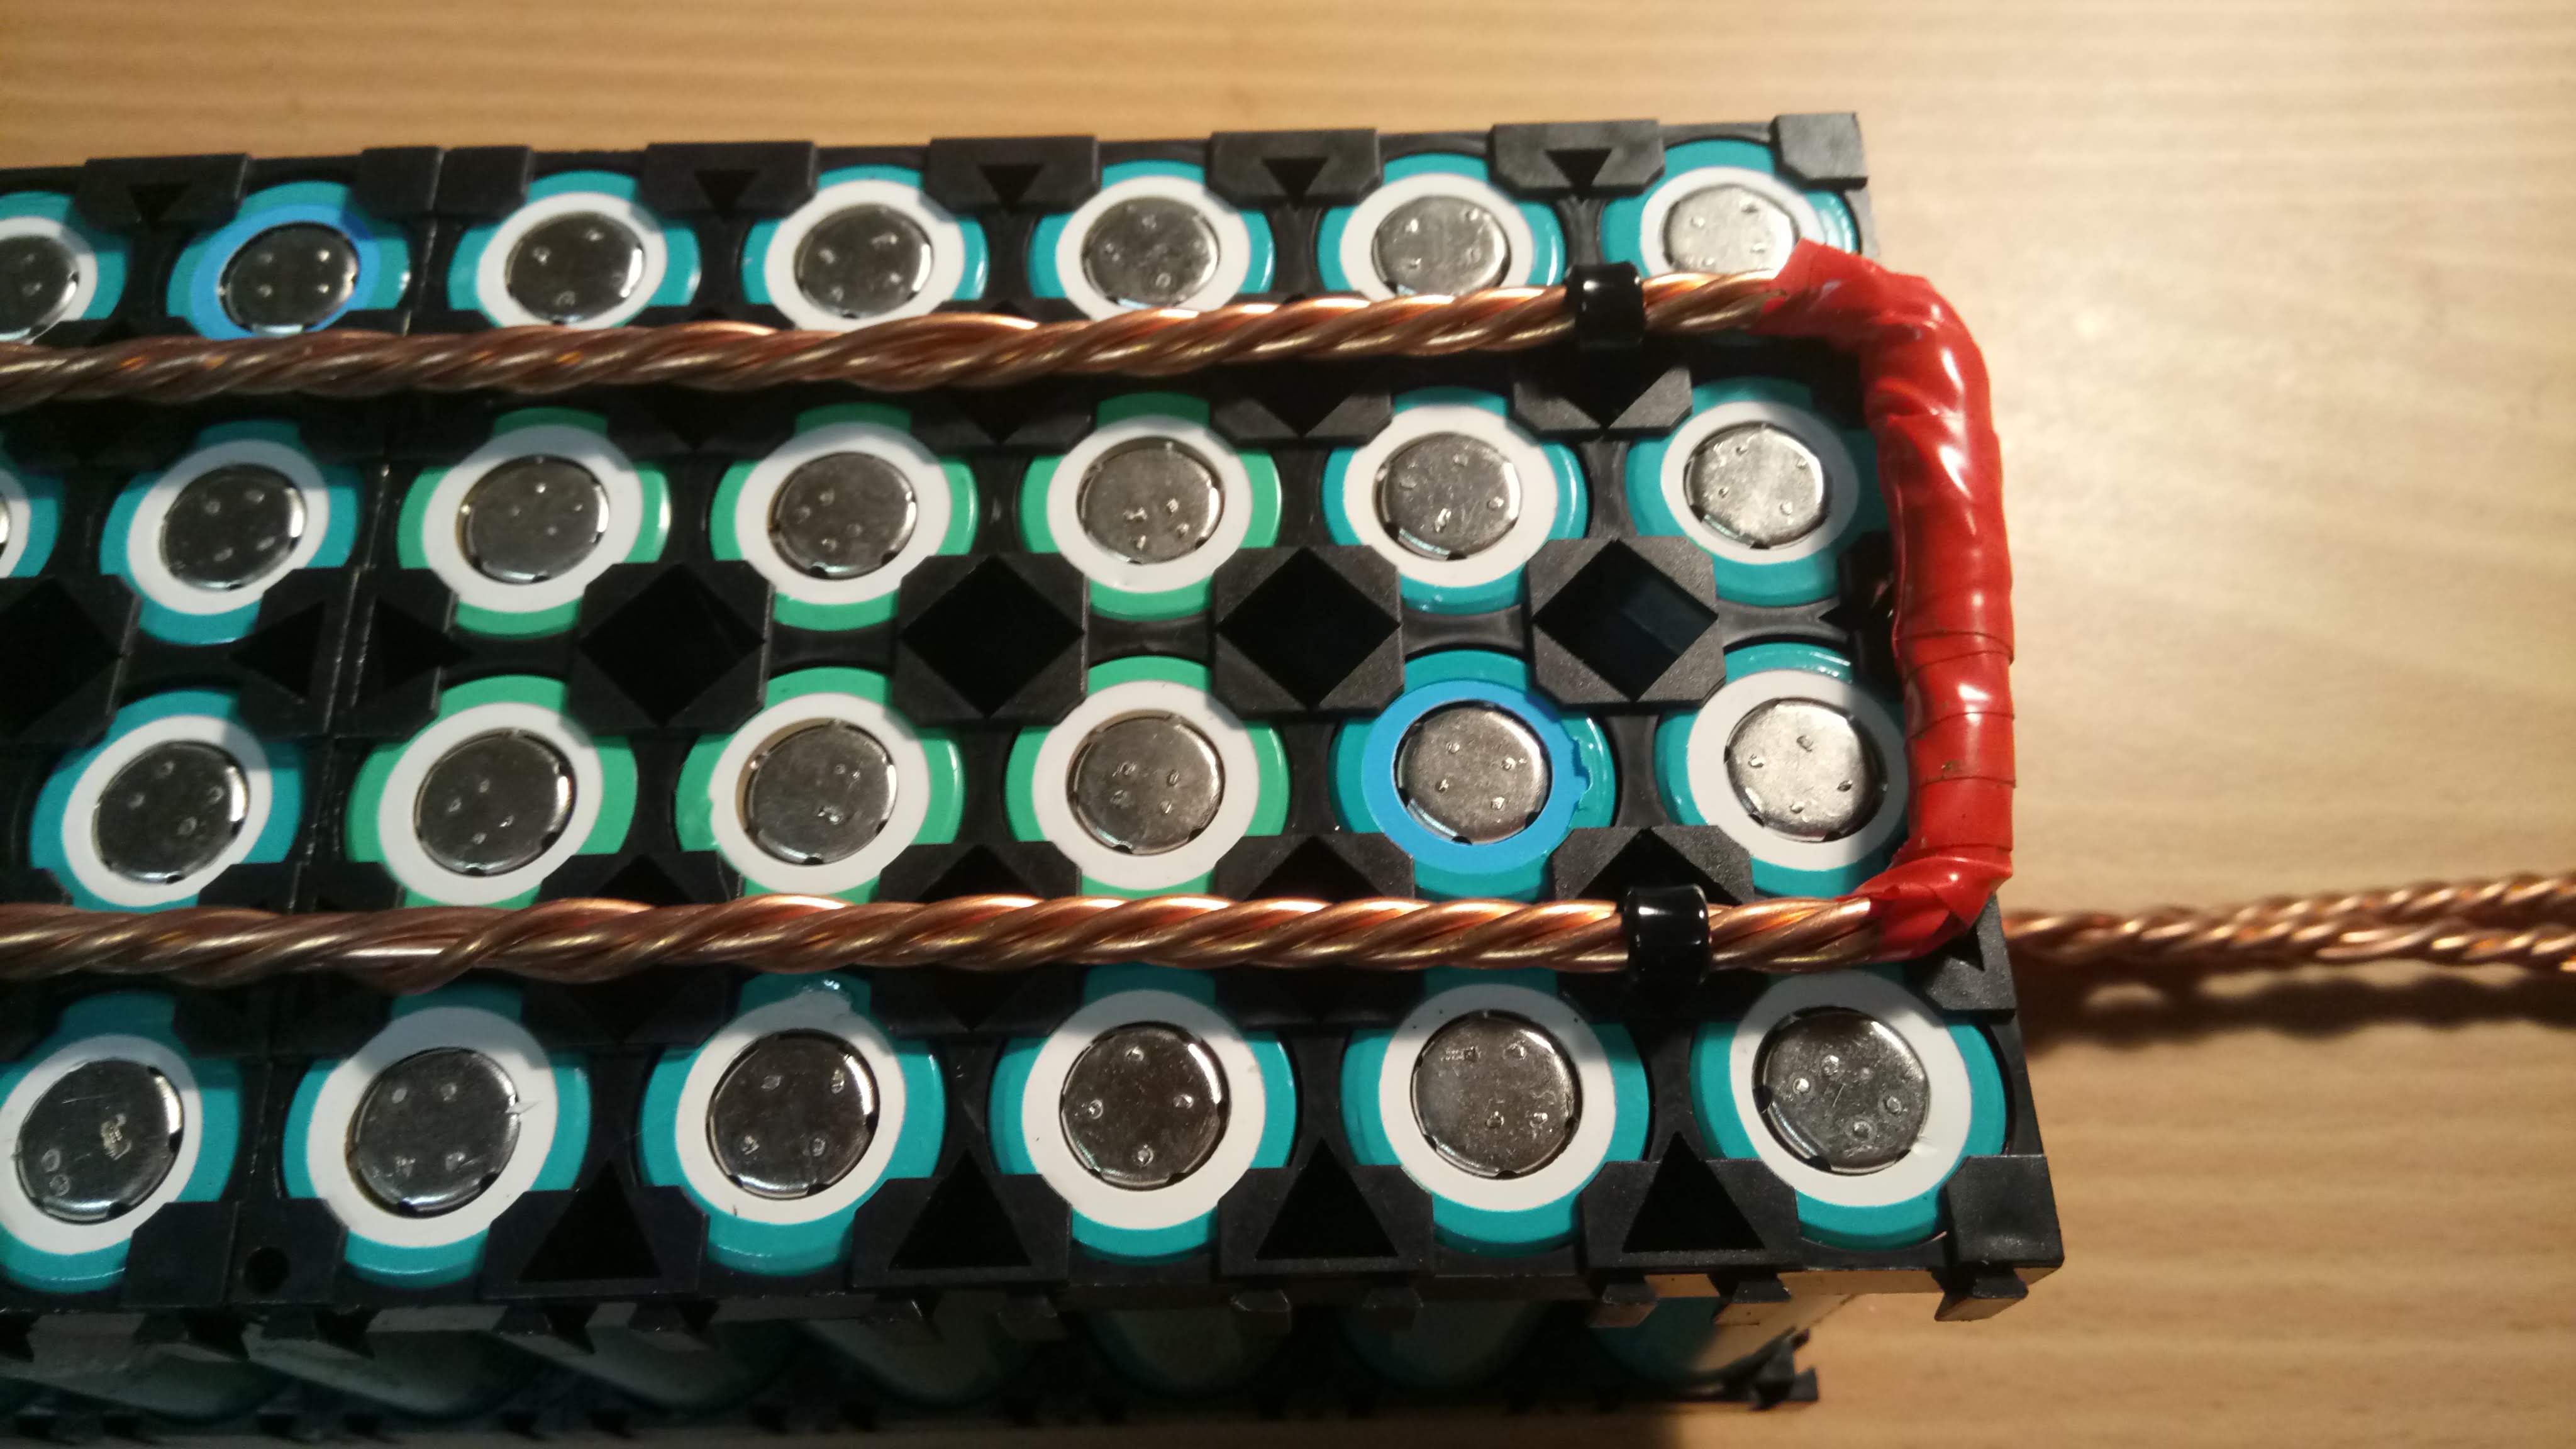
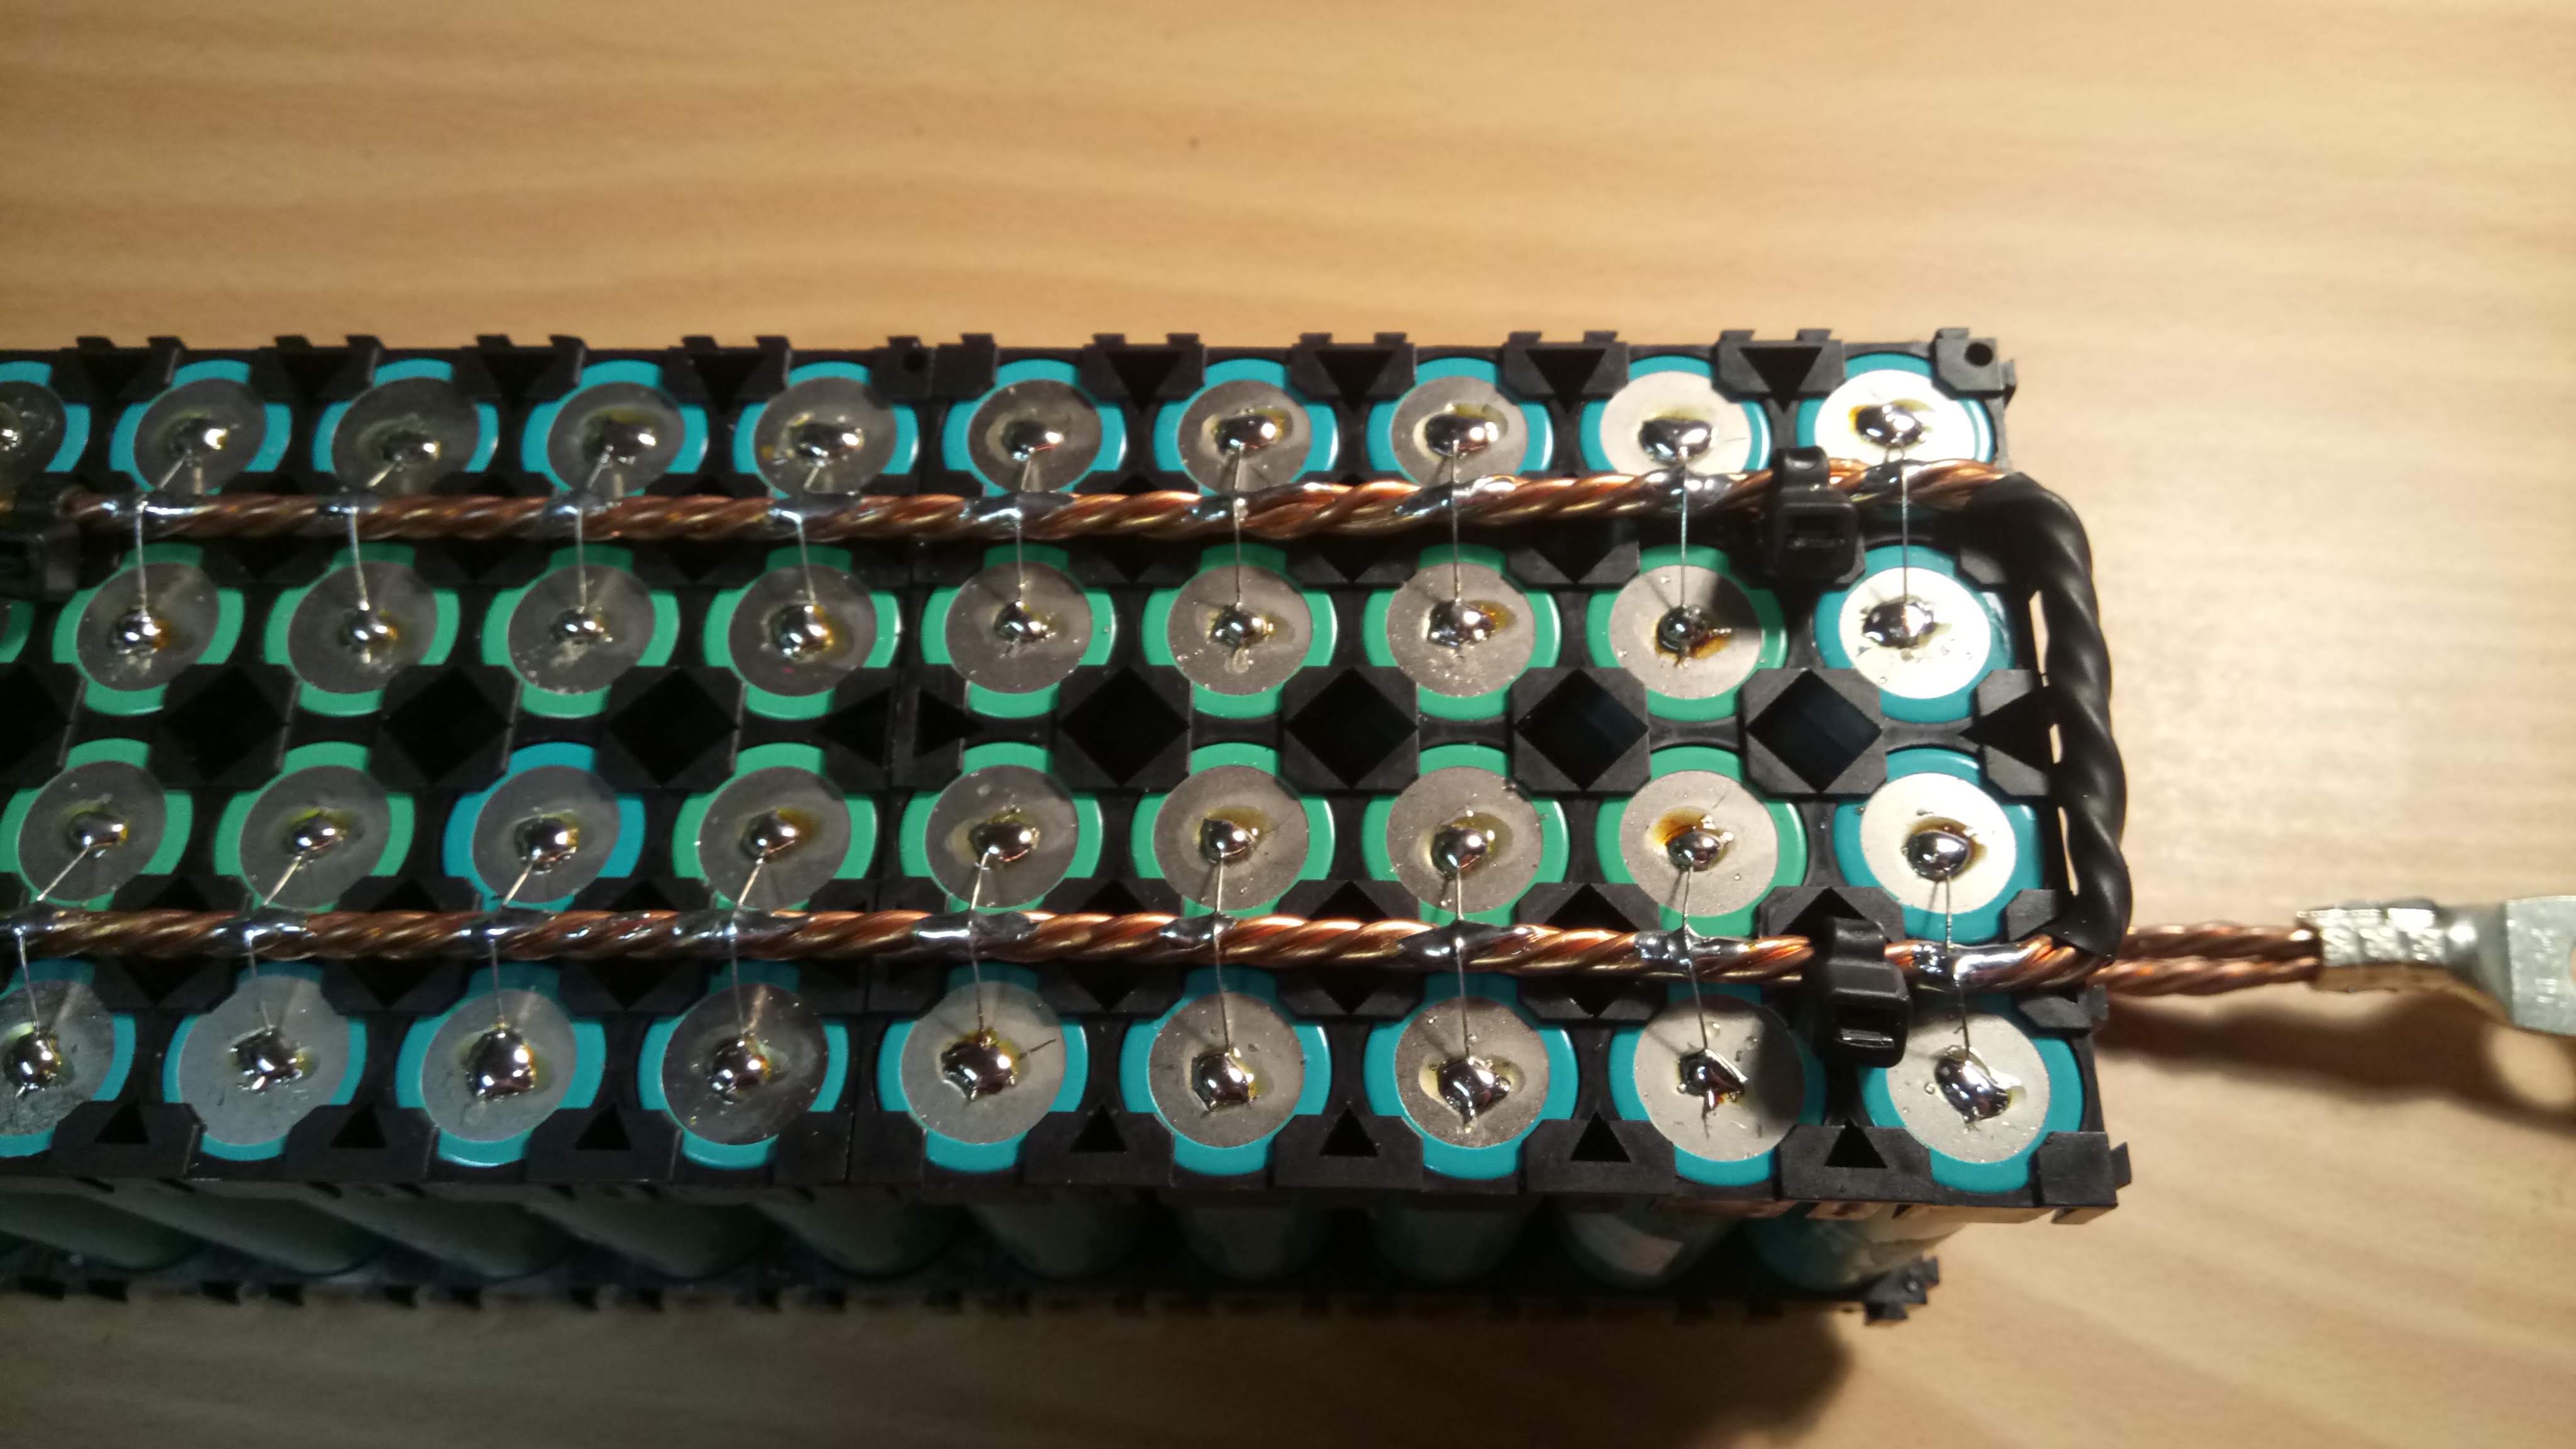
This means that the packs are impossible to short-circuit by themselves.
The packs are held together by 6 zip-ties: 2 at each end, and 2 in the middle. 5mm holes are drilled in the holders. The zip-ties go through the packs and around the busbars on each side.
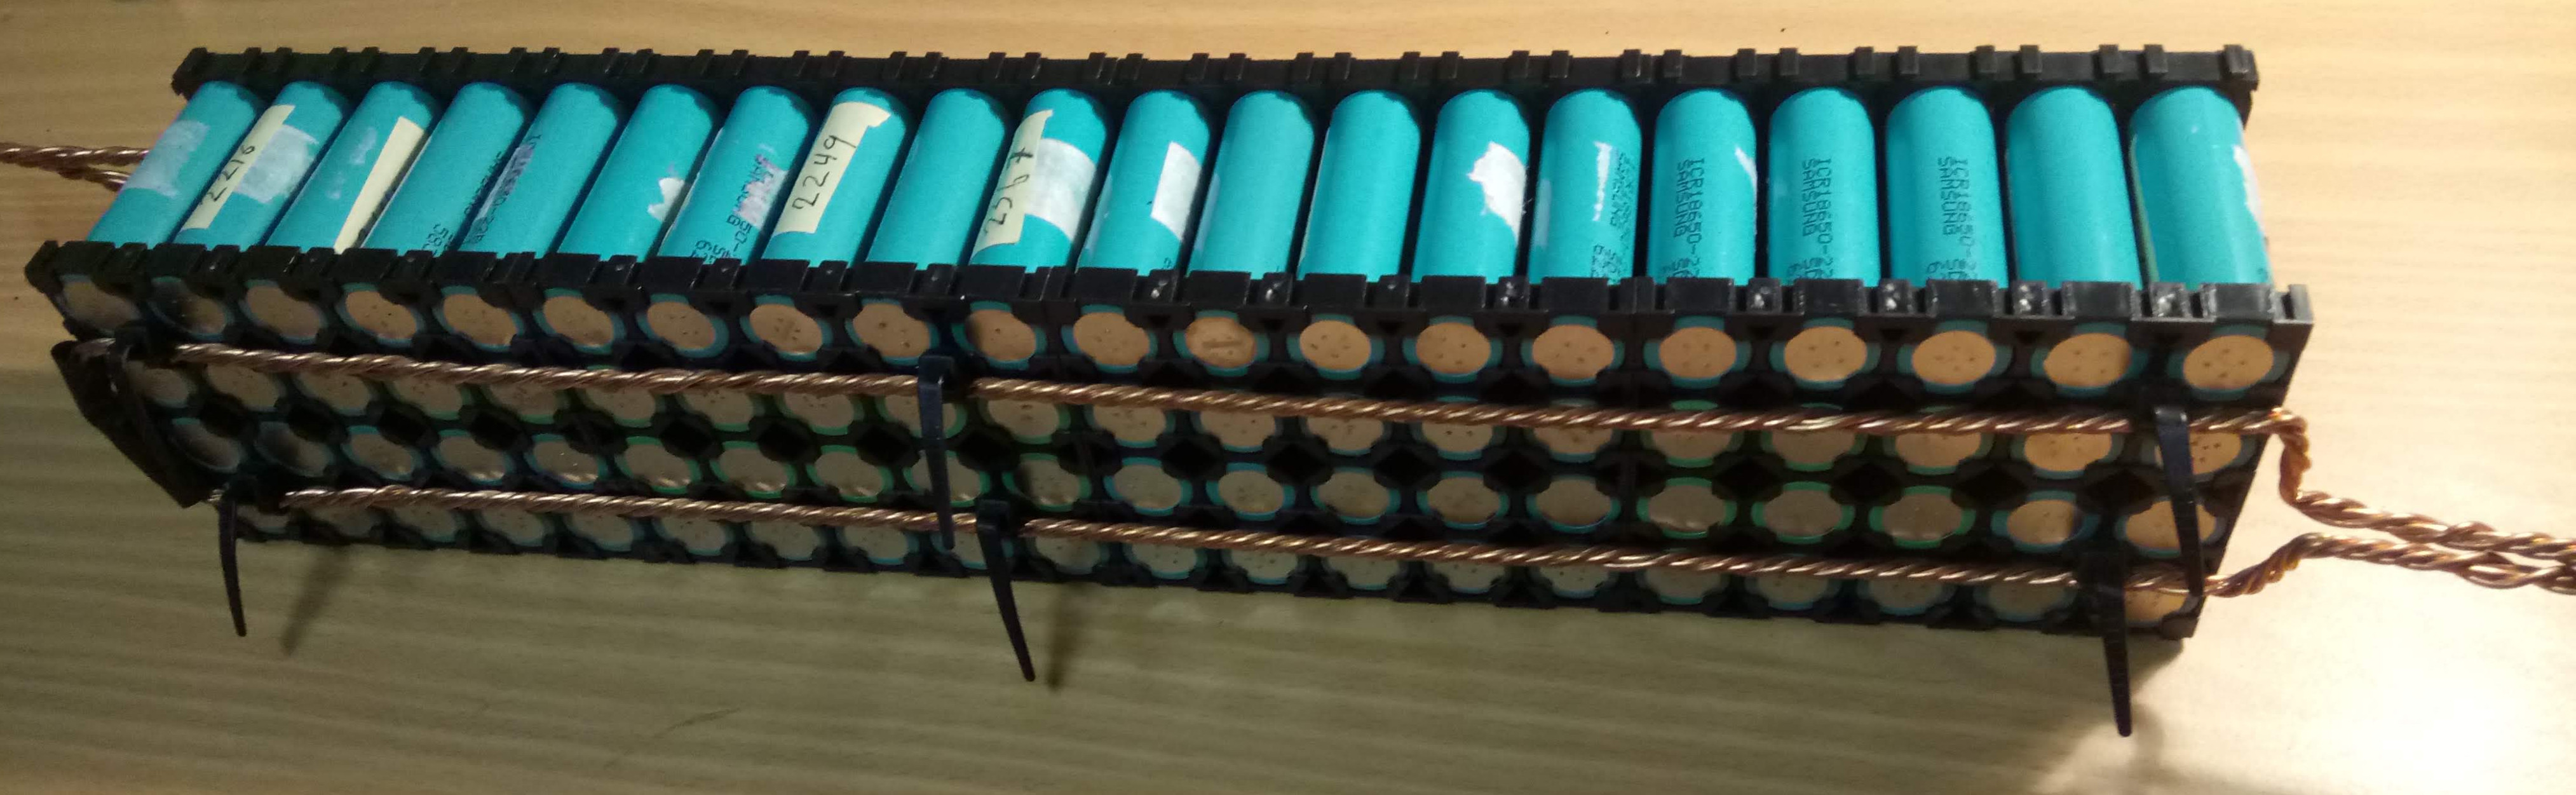
The busbars are 4 wires of 2.5mm² wires, that are extracted from a standard AC cable. They are twisted together using a bench vise, and a cordless drill. They are then pre-bent using a template.
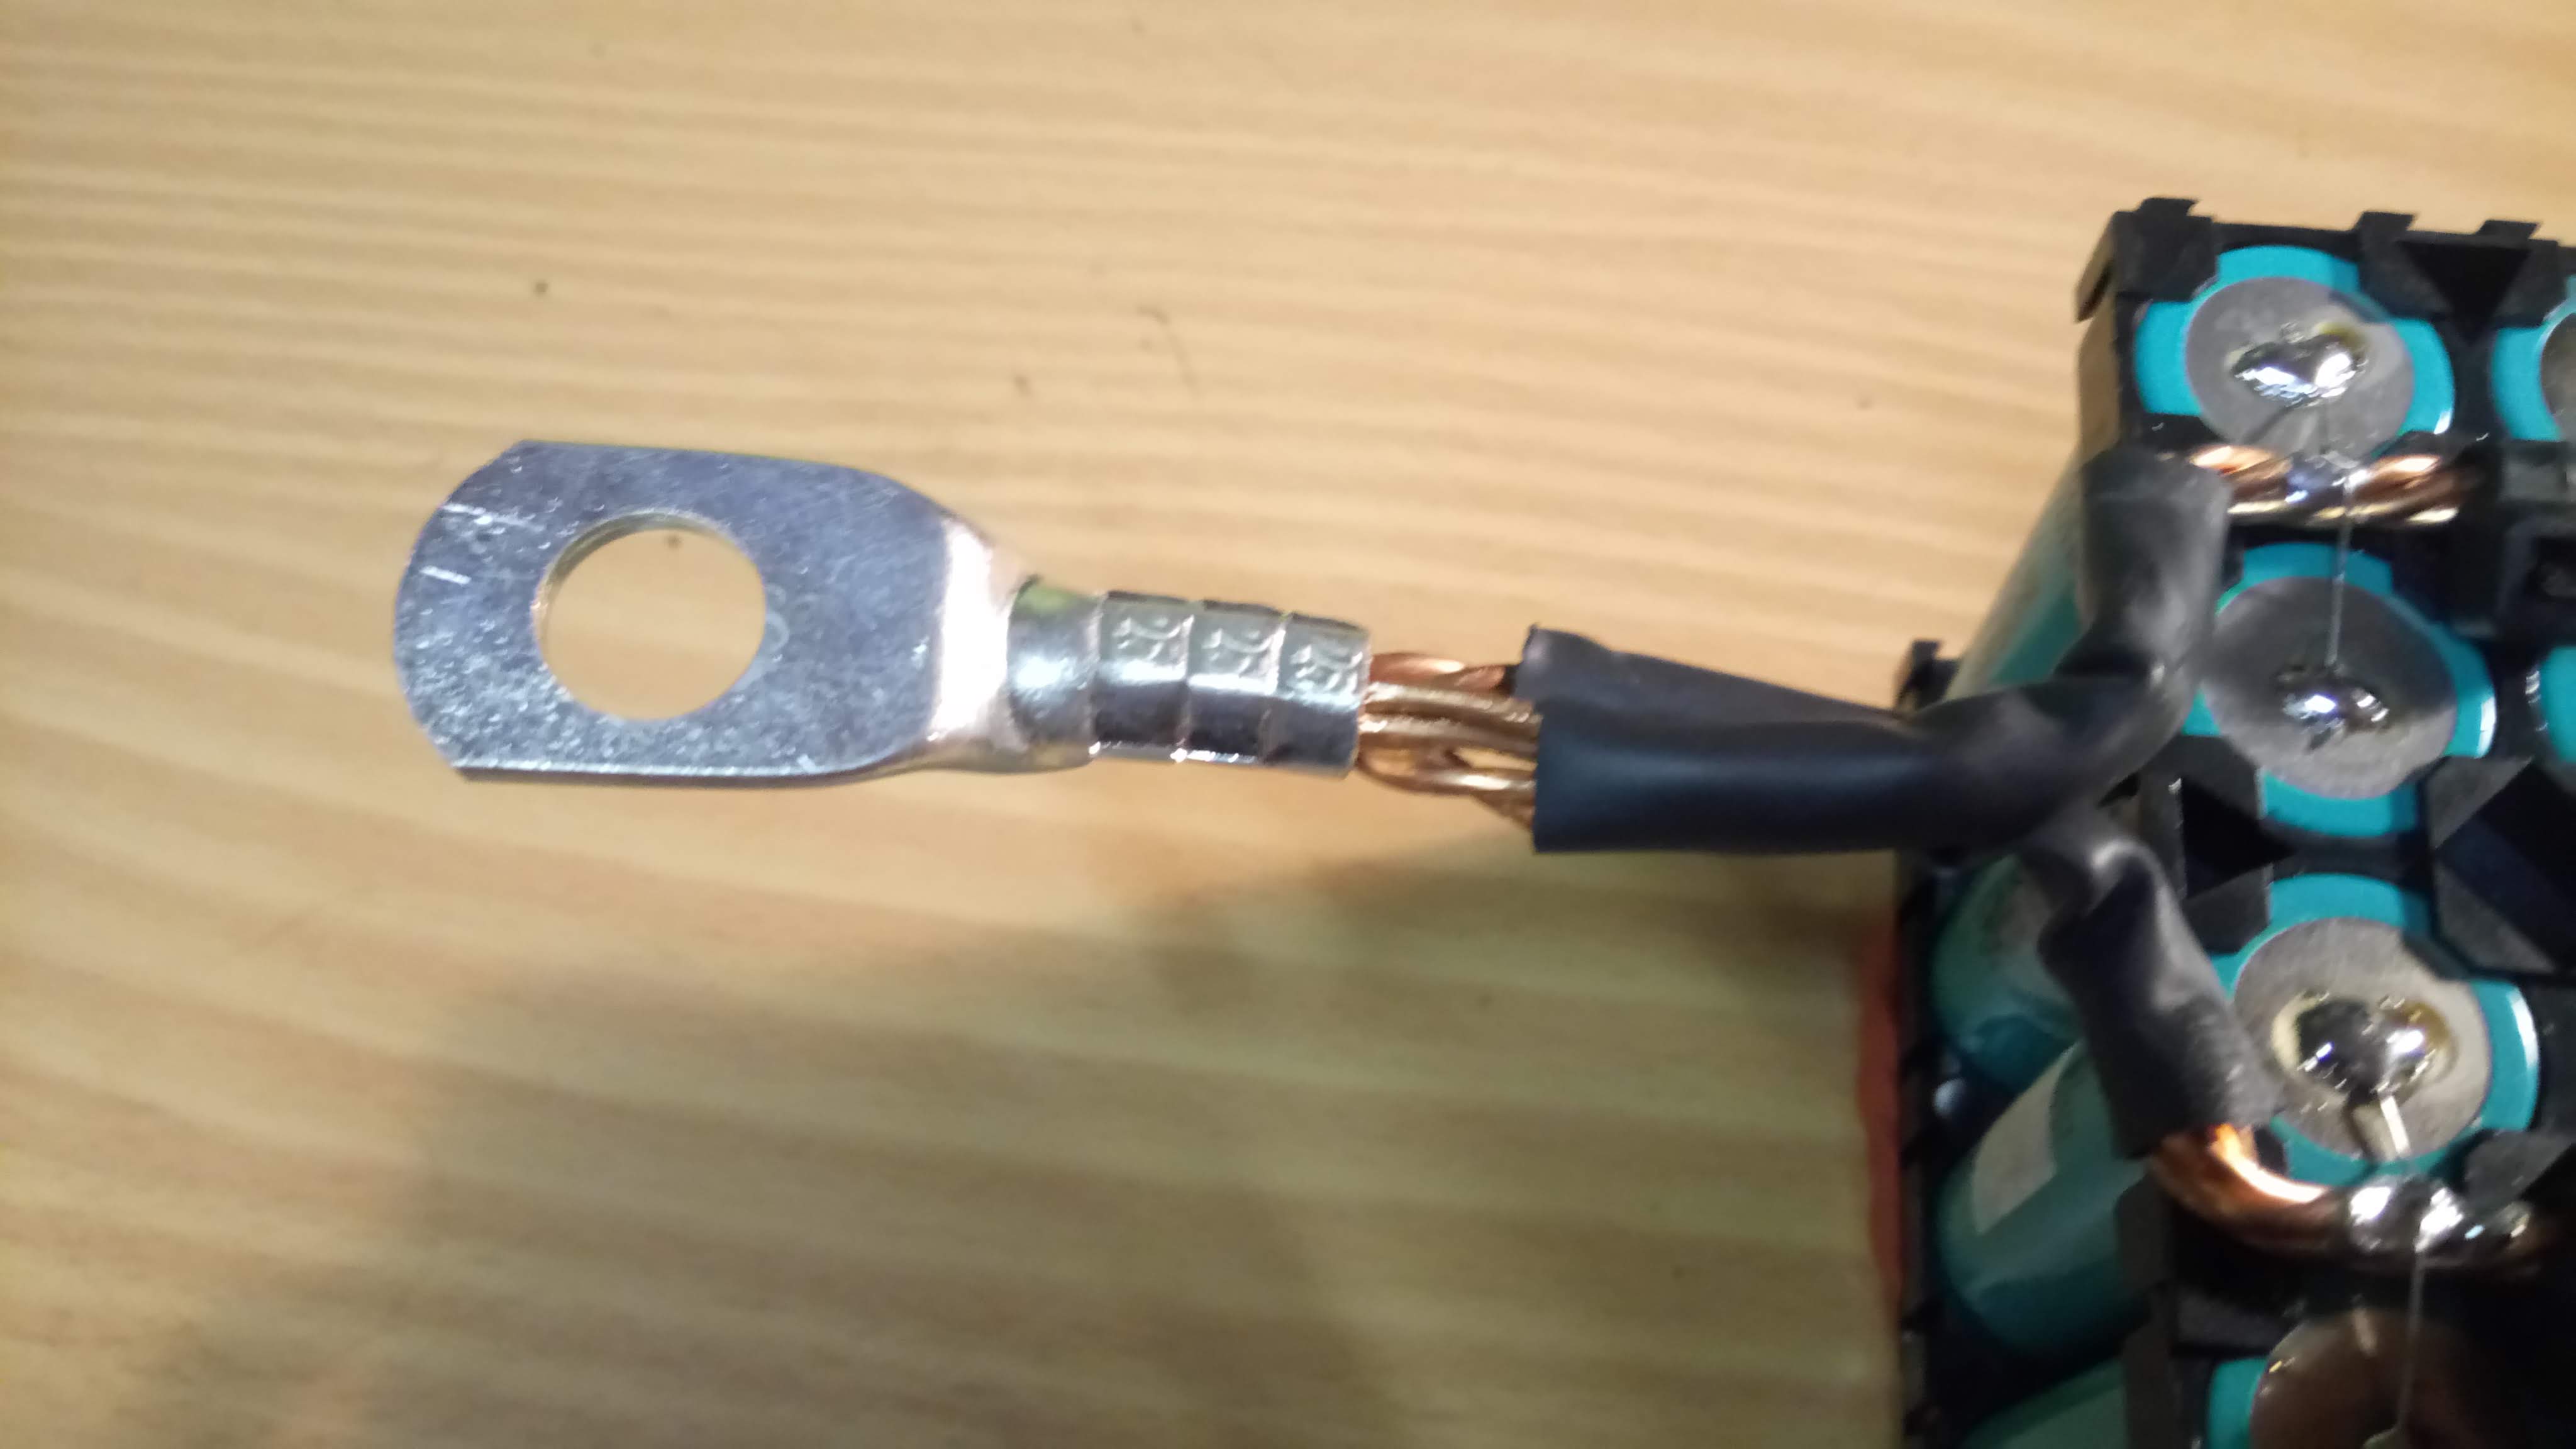
The connectors are 25mm² cable lugs. The two ends of the busbar go into the lug, meaning 8 wires of 2.5mm², or 20mm² in total. Depending on the exact calculations, this should be good up to 80A-160A. I intend to load the packs with at most 80A, and normally much less, so this should be fine.
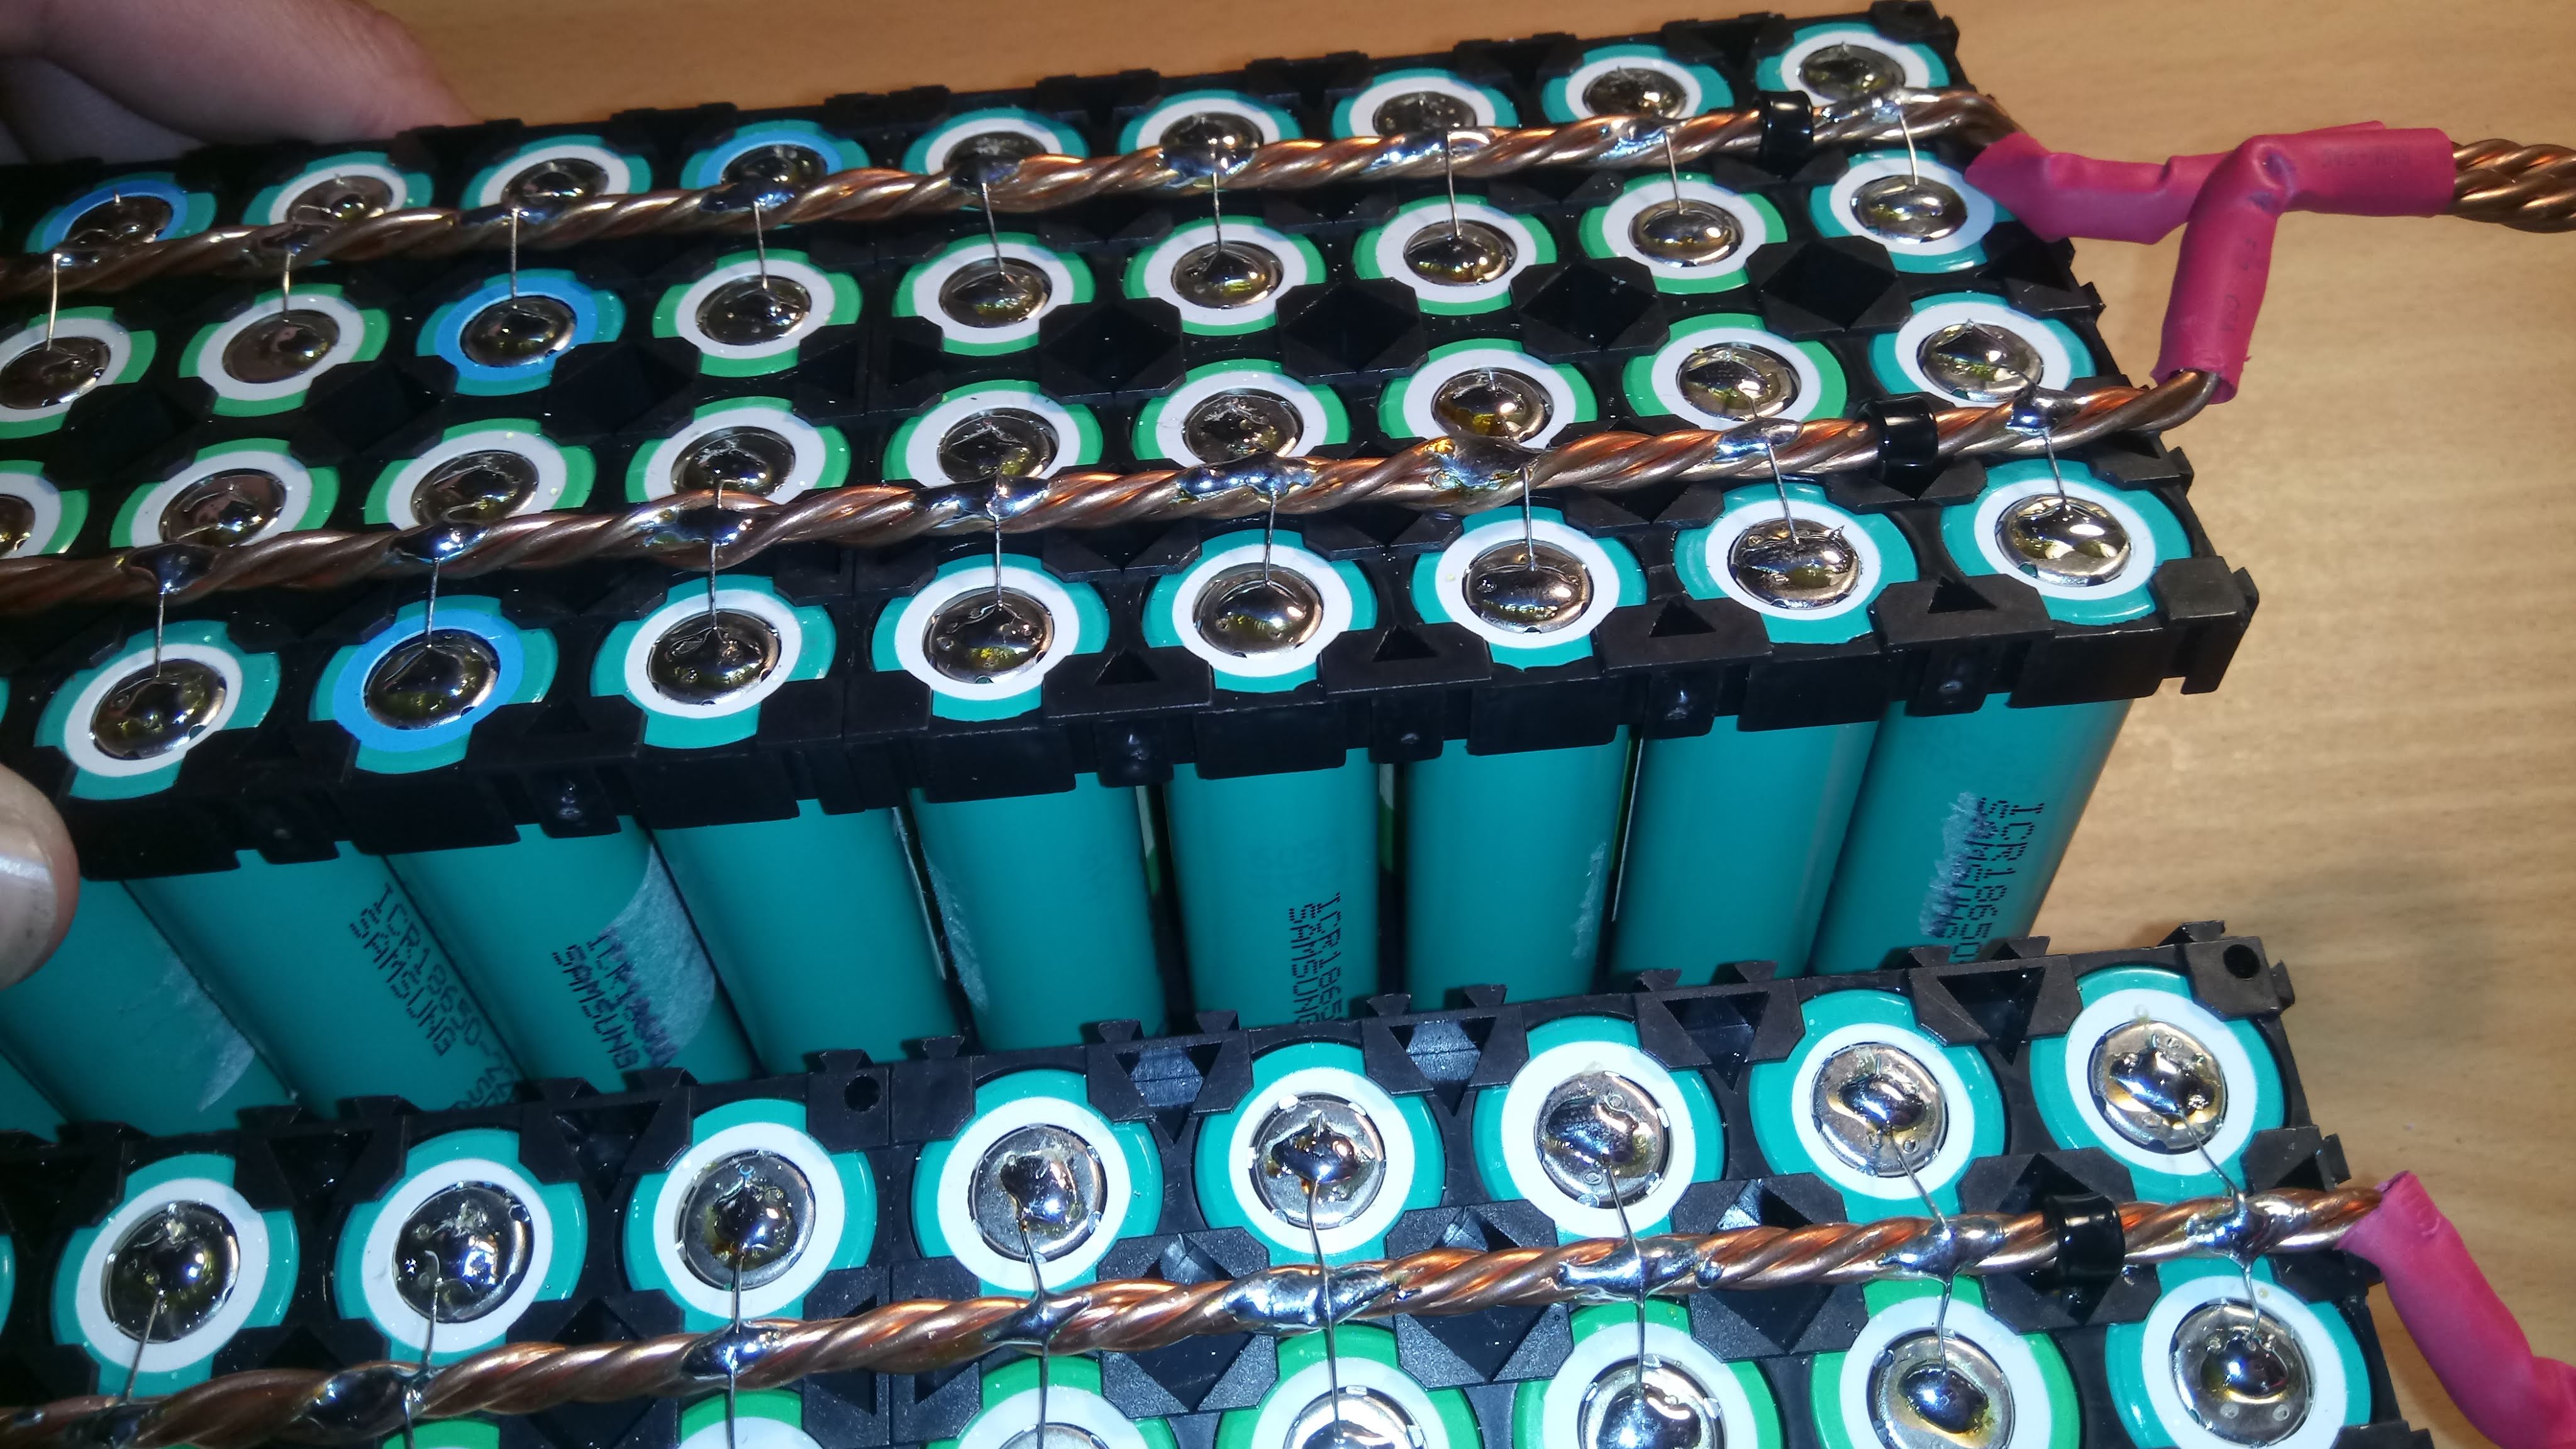
The cells are connected to the busbars by fuse-wires. I used legs from 1/8W resistors, from a batch I tested beforehand. The resistor legs blows at 5A after some time, and in a few seconds at 6A. This should be well within spec, since the fuse-wires are mainly intended to isolate cells that go short-circuit: in this case the other 79 cells will be delivering current to the one bad cell, and the fuse wire should blow very quickly. This is another reason to not build too small packs: you need enough current available that the fuses will blow quickly.
The fuse wire is soldered to the cells, and soldered to the busbars. I used good lead-based solder, I tried crappier and lead-free solder but the results were poor. The positive side is soldered at about 340C, while the negative needs a bit more heat at 350C. For soldering to the busbars I go up to 380C, and move around in a circle since heat management is very much needed.
One concern I have heard from several people is that the cells are losing capacity by soldering. I did a test by soldering a few cells, and leaving a few control cells unsoldered. Then I capacity tested all the cells for a few cycles to check if any capacity is lost. I was unable to find any capacity loss on the soldered or unsoldered cells, so for me that is “myth busted”.
The packs are prepared for a future extension to 1s160P or similar. The holders are all oriented in the same way, and in such a way that 2 80P packs should be able to click together side by side:


Each pack (or set of 2 packs if expanded) will get one Batrium LongMon. It should be fully capable of balancing such a system.
If the hivemind has any ideas or things I missed, I’m very interested in hearing about it!
此内容由惯性聚合(RSS阅读器)自动聚合整理,仅供阅读参考。 原文来自 — 版权归原作者所有。