惯性聚合 高效追踪和阅读你感兴趣的博客、新闻、科技资讯
阅读原文 在惯性聚合中打开

推荐订阅源

MyScale Blog
MyScale Blog
博客园 - 叶小钗
小众软件
小众软件
宝玉的分享
宝玉的分享
Apple Machine Learning Research
Jina AI
Jina AI
Last Week in AI
Last Week in AI
量子位
腾讯CDC
罗磊的独立博客
酷 壳 – CoolShell
酷 壳 – CoolShell
博客园 - Franky
博客园 - 【当耐特】
Hugging Face - Blog
Hugging Face - Blog
有赞技术团队
有赞技术团队
钛媒体:引领未来商业与生活新知
钛媒体:引领未来商业与生活新知
V
Visual Studio Blog
爱范儿
爱范儿
月光博客
月光博客
博客园 - 三生石上(FineUI控件)
雷峰网
雷峰网
V
V2EX
WordPress大学
WordPress大学
Google DeepMind News
阮一峰的网络日志
阮一峰的网络日志
K
Kaspersky official blog
Vercel News
Vercel News
L
LINUX DO - 热门话题
The Hacker News
The Hacker News
The Register - Security
IT之家
IT之家
C
Cybersecurity and Infrastructure Security Agency CISA
Threat Intelligence Blog | Flashpoint
人人都是产品经理
人人都是产品经理
Martin Fowler
Martin Fowler
S
SegmentFault 最新的问题
N
News | PayPal Newsroom
奇客Solidot–传递最新科技情报
奇客Solidot–传递最新科技情报
Attack and Defense Labs
S
Securelist
T
The Blog of Author Tim Ferriss
GbyAI
GbyAI
Microsoft Security Blog
H
Hacker News: Front Page
博客园 - 聂微东
Exploit-DB.com RSS Feed
Project Zero
Project Zero
I
InfoQ
K
KPMG report finds enterprise disconnect between AI and its ROI | CIO
PCI Perspectives
PCI Perspectives

Comments for TrueNAS – Open Enterprise Storage

Yes, You Can (Still) Virtualize TrueNAS TrueNAS enables Container Storage and Kubernetes | TrueNAS - Open Enterprise Storage TrueNAS 12.0-U2 is Released | TrueNAS - Open Enterprise Storage OpenZFS 2.0 Ships First on TrueNAS | TrueNAS - Open Enterprise Storage TrueNAS 12.0-U1 is Scheduled for early December | TrueNAS - Open Enterprise Storage iXsystems TrueNAS M60 Recognized as SDC Awards Storage Hardware Innovation of the Year Finalist | TrueNAS - TrueNAS 12.0 is Released! The TrueNAS Mini X and Mini X+ are here! Cross-Site Disaster Recovery with TrueNAS TrueNAS SCALE Release Plan | TrueNAS - Open Enterprise Storage iXsystems Unveils Industry's Fastest OpenZFS Storage System with Launch of TrueNAS M60 | TrueNAS - Open TrueNAS 12.0 BETA2 Showcases Performance Improvements | TrueNAS - Open Enterprise Storage Be One of the First to Test Drive TrueNAS 12.0 BETA | TrueNAS - Open Enterprise Storage TrueNAS is Multi-OS New-New TrueNAS Logo Unveiled | TrueNAS - Open Enterprise Storage Recession Proof Storage | FreeNAS 11.3-U3.1 Now Available - Issue #80 | TrueNAS - Open Enterprise Storage Open Source Infrastructure is Recession-Proof | TrueNAS - Open Enterprise Storage Understanding How OpenZFS Keeps Your Data Safe | TrueNAS - Open Enterprise Storage You Can Influence the TrueNAS CORE Roadmap! | TrueNAS - Open Enterprise Storage TrueNAS CORE is the new FreeNAS Setting Up Users, Permissions, and ACLs on FreeNAS | TrueNAS - Open Enterprise Storage TrueNAS Updates for VMware vSphere 7 | TrueNAS - Open Enterprise Storage How to Set Up Windows SMB Shares on FreeNAS | TrueNAS - Open Enterprise Storage FreeNAS and TrueNAS are Unifying Introducing the FreeNAS Mini E+ and All-Flash Minis | TrueNAS - Open Enterprise Storage Plex Permissions in FreeNAS 11.3 | TrueNAS - Open Enterprise Storage Latest TrueNAS and FreeNAS Release Delivers Wizards, Plugins, and Accelerated Replication | TrueNAS - Open How To Back Up Google Drive to FreeNAS | TrueNAS How To Enable Wireguard on FreeNAS 11.3 | TrueNAS - Open Enterprise Storage The Official FreeNAS Hardware Guide | TrueNAS - Open Enterprise Storage December 11 Plugins Update: ClamAV Fix & CloudStack FreeNAS Mini Black Friday Sale Starts Now! - Issue #73 | TrueNAS - Open Enterprise Storage Breaking Down the FreeNAS Mini E! | TrueNAS TrueCommand Shifts to Prime Time | TrueNAS - Open Enterprise Storage AMD EPYC 7002 Powers Scalable TrueNAS Solutions FreeNAS and TrueNAS 11.3 make their Debuts October 30 Plugins Update | TrueNAS - Open Enterprise Storage Overview of Datasets and Snapshots in FreeNAS | TrueNAS - Open Enterprise Storage September 13 Plugins Update | TrueNAS - Open Enterprise Storage August 27 Plugin Updates: Security & Version Fixes July 24 Plugins Update | TrueNAS - Open Enterprise Storage Mount a TrueNAS or FreeNAS Share to a Docker Host | TrueNAS - Open Enterprise Storage TrueNAS Updates for VMware vSphere | TrueNAS - Open Enterprise Storage July 10 Plugins Update | TrueNAS - Open Enterprise Storage June 26 Plugins Update | TrueNAS - Open Enterprise Storage Open ZFS vs. Btrfs | and other file systems | TrueNAS - Open Enterprise Storage ZFS vs. OpenZFS Backup Evolved: Asigra Plugin for FreeNAS Back Up Plugins and Jails on FreeNAS | TrueNAS Take Command of Your NAS Fleet with TrueCommand™ | TrueNAS - Open Enterprise Storage Next Batch of Updated Plugins and How to Recover from Failed Plugin Updates | TrueNAS - Open Enterprise Run S3 Object Storage on FreeNAS and TrueNAS | TrueNAS - Open Enterprise Storage Sync Files to Dropbox with TrueNAS or FreeNAS February Plugin Updates & New Plugins for Testing Why SATA-DOMs Are Better than USB Drives for Booting Up Your FreeNAS System | TrueNAS - Open Enterprise Six Metrics for Measuring ZFS Pool Performance Part 2 | TrueNAS - Open Enterprise Storage Six Metrics for Measuring ZFS Pool Performance Part 1 | TrueNAS - Open Enterprise Storage TrueNAS M-Series Certified for Veeam Backup FreeNAS 11.1 is Now Available for Download! | TrueNAS FreeNAS 11.0 Released with VM & S3 Storage Support To SLOG or not to SLOG: How to best configure your ZFS Intent Log | TrueNAS - Open Enterprise Storage vCenter Web Client Plug-in for TrueNAS Now Available | TrueNAS - Open Enterprise Storage The ZFS ZIL and SLOG Demystified | TrueNAS - Open Enterprise Storage FreeNAS: A Worst Practices Guide | TrueNAS - Open Enterprise Storage FreeNAS Hardware Guide III: Pools, Performance & Cache FreeNAS vs TrueNAS FreeNAS 8.0.1‑RELEASE & Official Documentation Released
How to Set Up and Install TrueNAS CORE
iX Team · 2024-04-05 · via Comments for TrueNAS – Open Enterprise Storage

*Updated March 2024

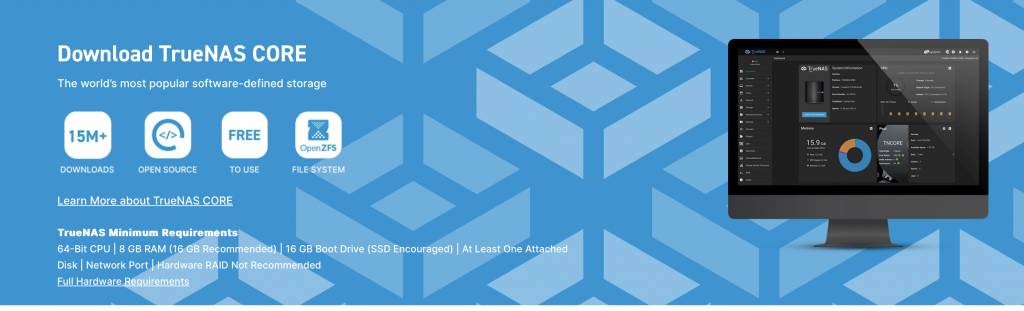
We’re going to walk you through the basic requirements to run the TrueNAS CORE storage operating system, creating the installation media, and installing it onto your system.

Minimum Requirements

Here are the basics of what you’ll need to run TrueNAS:
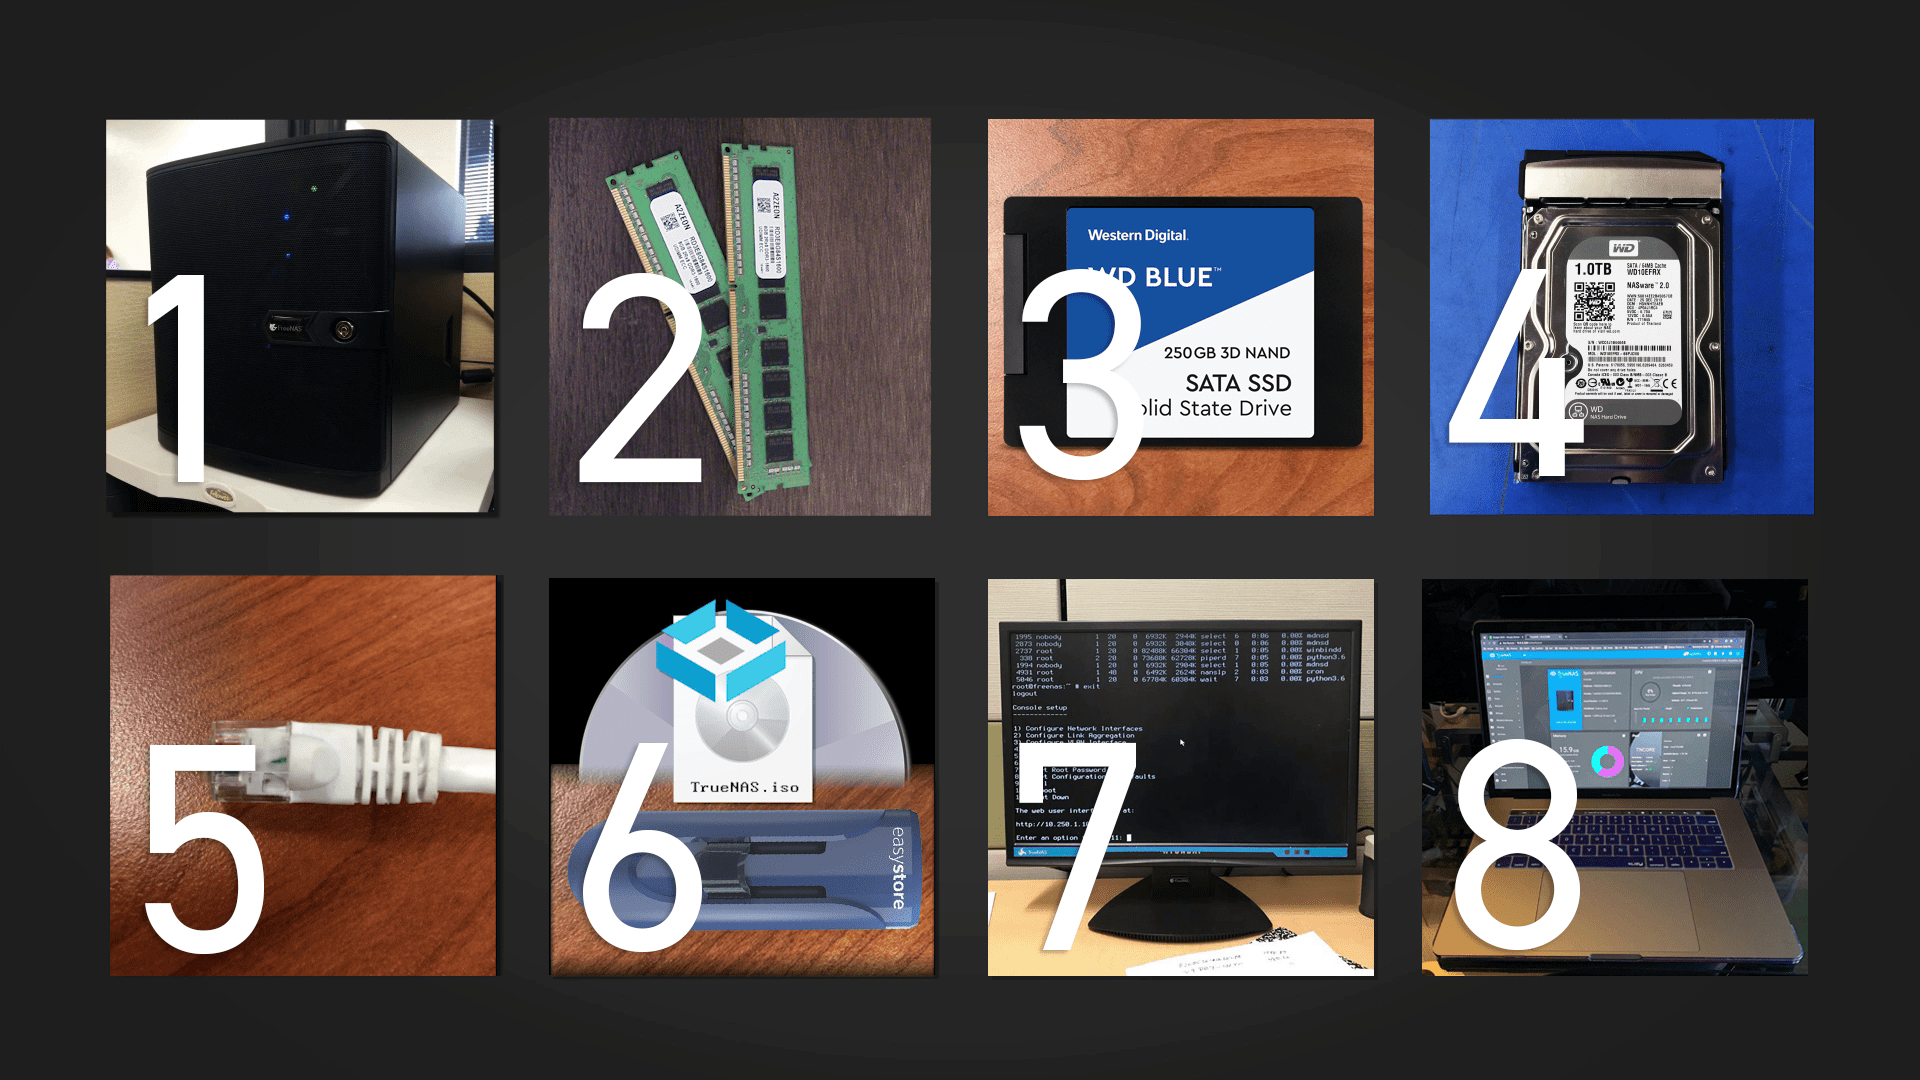
  1. 64-bit system: Used solely for TrueNAS CORE. TrueNAS is NOT dual-boot friendly, so make sure you’re only using the system for TrueNAS.
  2. Minimum 8 GB of RAM: Use more if you’re installing virtual machines or plugins.
  3. Boot device (SSD or HDD): Also known as the boot drive. At least 16 GB of storage capacity is required to serve as the boot device for TrueNAS. An SSD is an ideal choice for longevity; keep in mind that the entire disk will be used for the TrueNAS operating system. USB sticks are no longer recommended, due to the high amount of write tasks on TrueNAS.
  4. Storage drives (SSDs or HDDs): At least one hard drive for storage of files, but multiple drives of the same capacity can be easily bundled together to provide redundancy if a drive fails. Western Digital drives are a great choice for data storage, but as with any vendor, make sure to avoid drives using SMR (Shingled Magnetic Recording) technology in ZFS applications.
  5. Ethernet cord: To connect your system to the network, through a router or modem. There is no wireless support in TrueNAS.
  6. Blank DVD or USB stick: Required to create the TrueNAS installation media. The TrueNAS ISO image exceeds 700 MB so CDs will not work. Your USB stick should be at least 1 GB. Please note that the installation media is not the same as the boot device.
    To access the latest TrueNAS image: https://www.truenas.com/download-truenas-core/
  7. Monitor & keyboard: After the setup is complete and you’ve written down your TrueNAS system’s IP address, the monitor can be disconnected.
  8. Computer or laptop & internet browser: To access the GUI and administer your TrueNAS system.

Creating the Installation Media and Operating System Device for TrueNAS

It’s important to understand that TrueNAS needs two devices during the installation process, the install media and the operating system device (boot device). The install media is used to install TrueNAS to the operating system device on a computer.
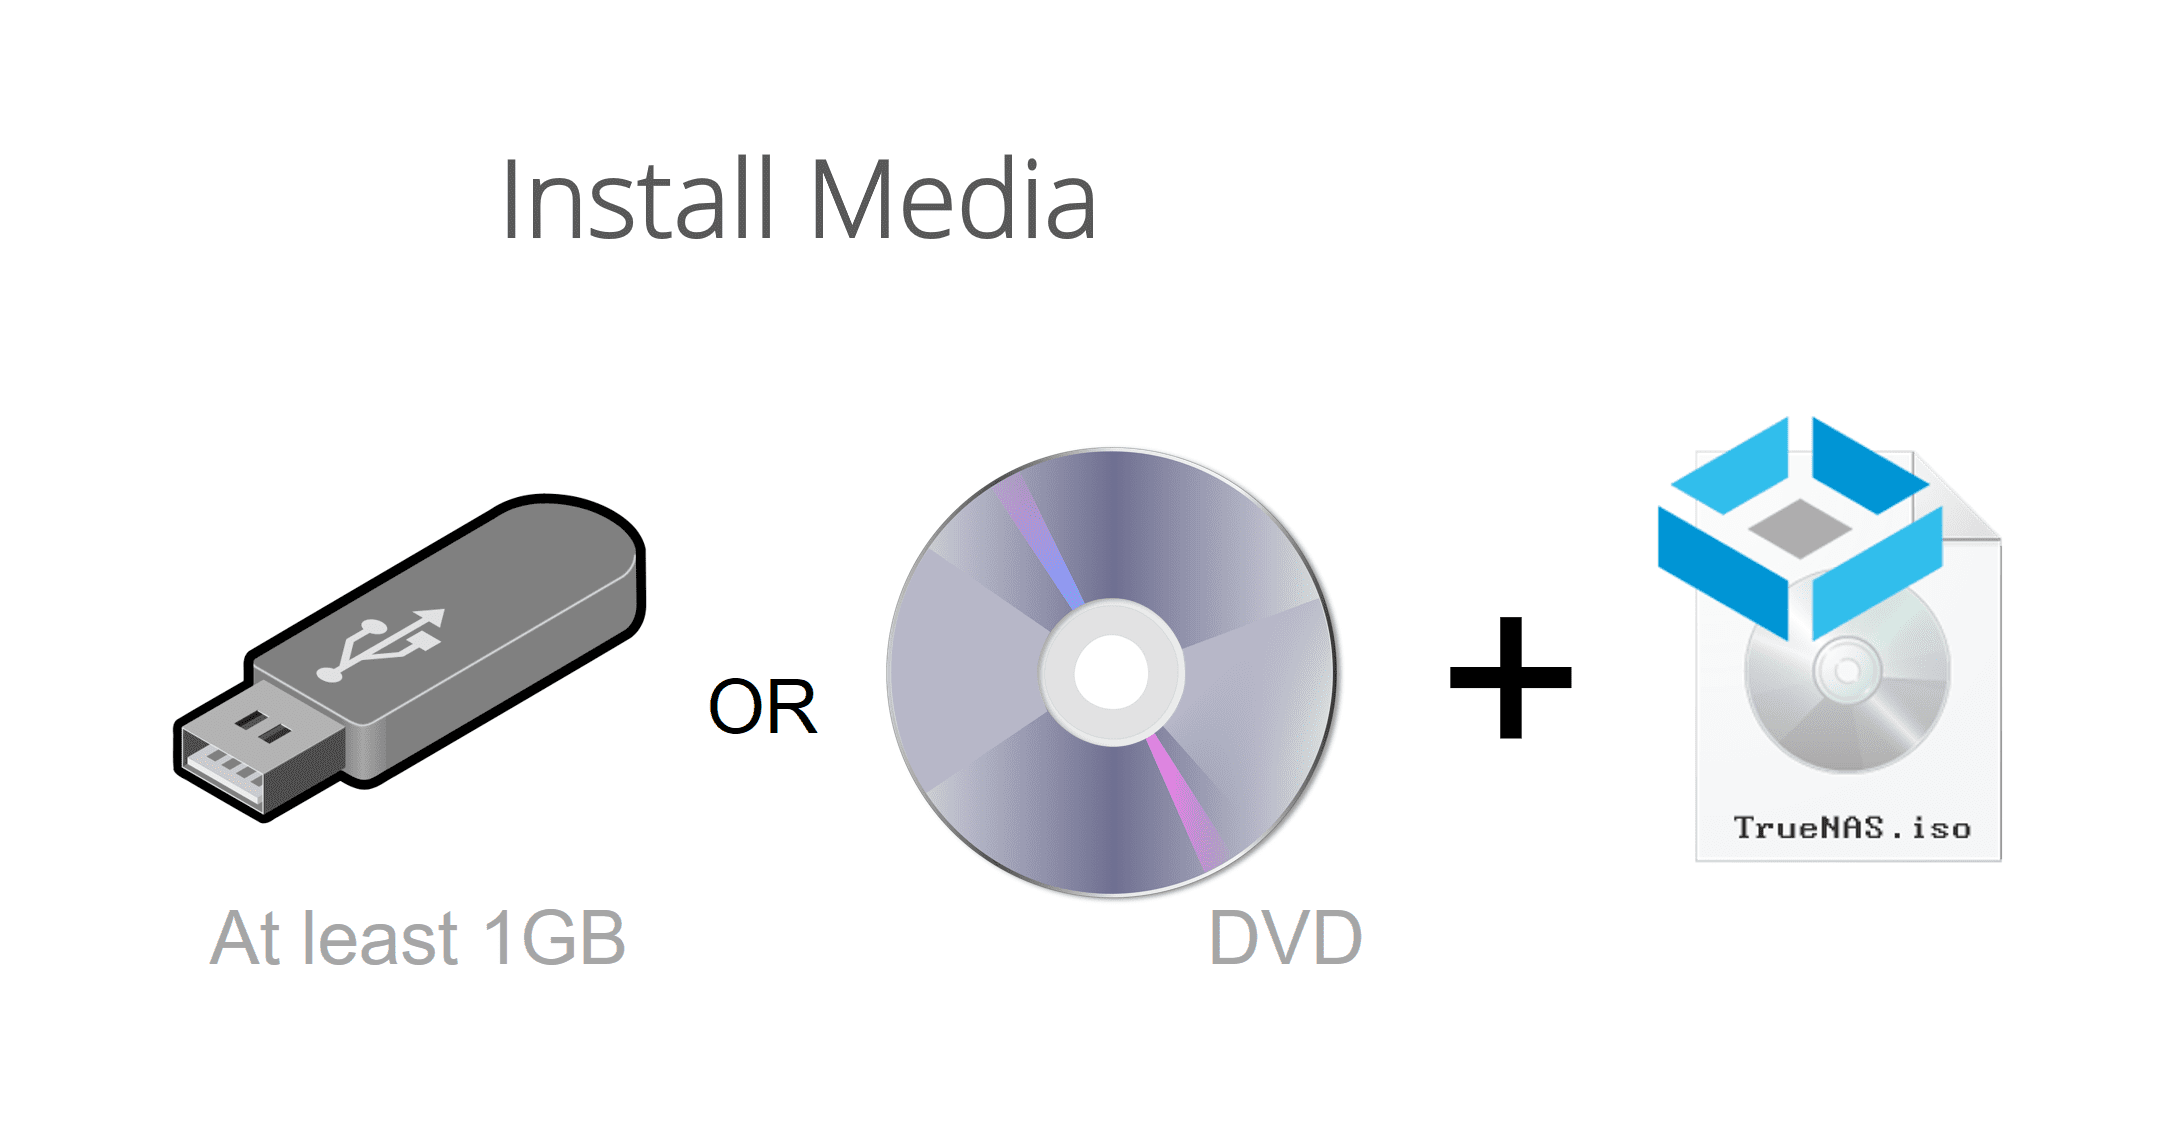

A USB stick or DVD can be used as the install media. In this tutorial, we will be using an 8 GB USB stick as our install media. The minimum size required is 1 GB.
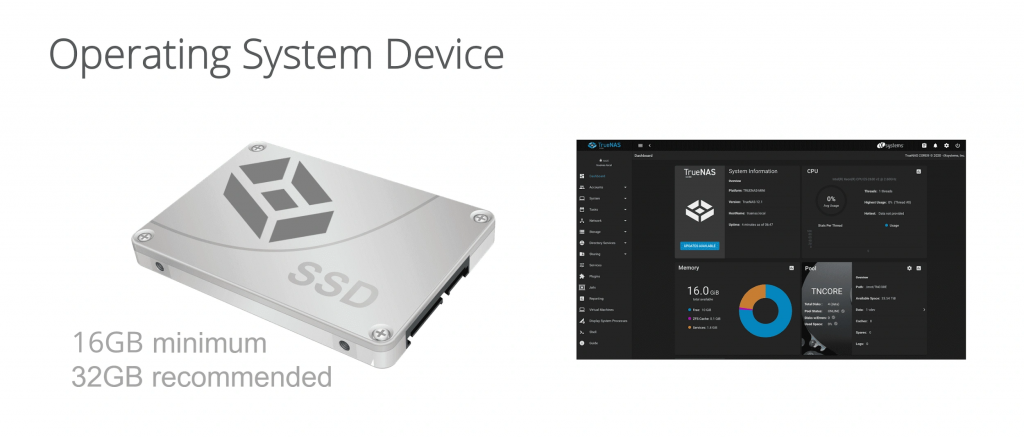
The TrueNAS CORE operating system device can be an SSD or hard drive. The operating system device must have at least 16 GB of space, but we recommend 32 GB or more for operating system device storage capacity to provide room for logging, operating system environments, and future upgrades. An SSD is recommended to improve overall responsiveness as well as the speed of installing further upgrades.

Note that the entire operating system device will be used for the TrueNAS operating system. The drive cannot be used for sharing data through TrueNAS.

TrueNAS reads and writes to the operating system device, so reliability counts. Using a small SSD or hard drive will provide the best longevity. Due to the high write tasks in TrueNAS CORE, USB sticks are not very reliable over the long term. With TrueNAS CORE scheduled to receive continued updates for stability and security, choosing a quality, reliable boot device is the first step towards a well-built TrueNAS system.
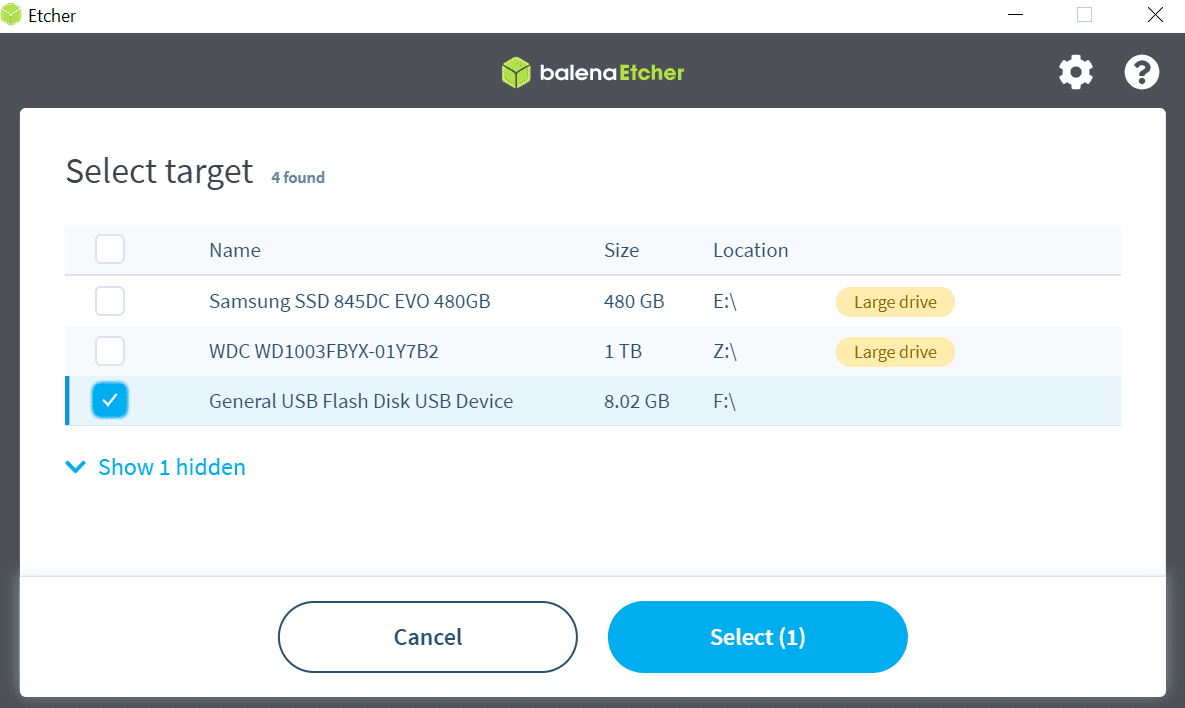
For this example, we will be using a tool called balenaEtcher also known as Etcher. Scroll down the web page and click on the Download button for Etcher. Download, install, and run Etcher.

Now insert your USB stick into your machine. Verify the drive letter by going to “This PC”.
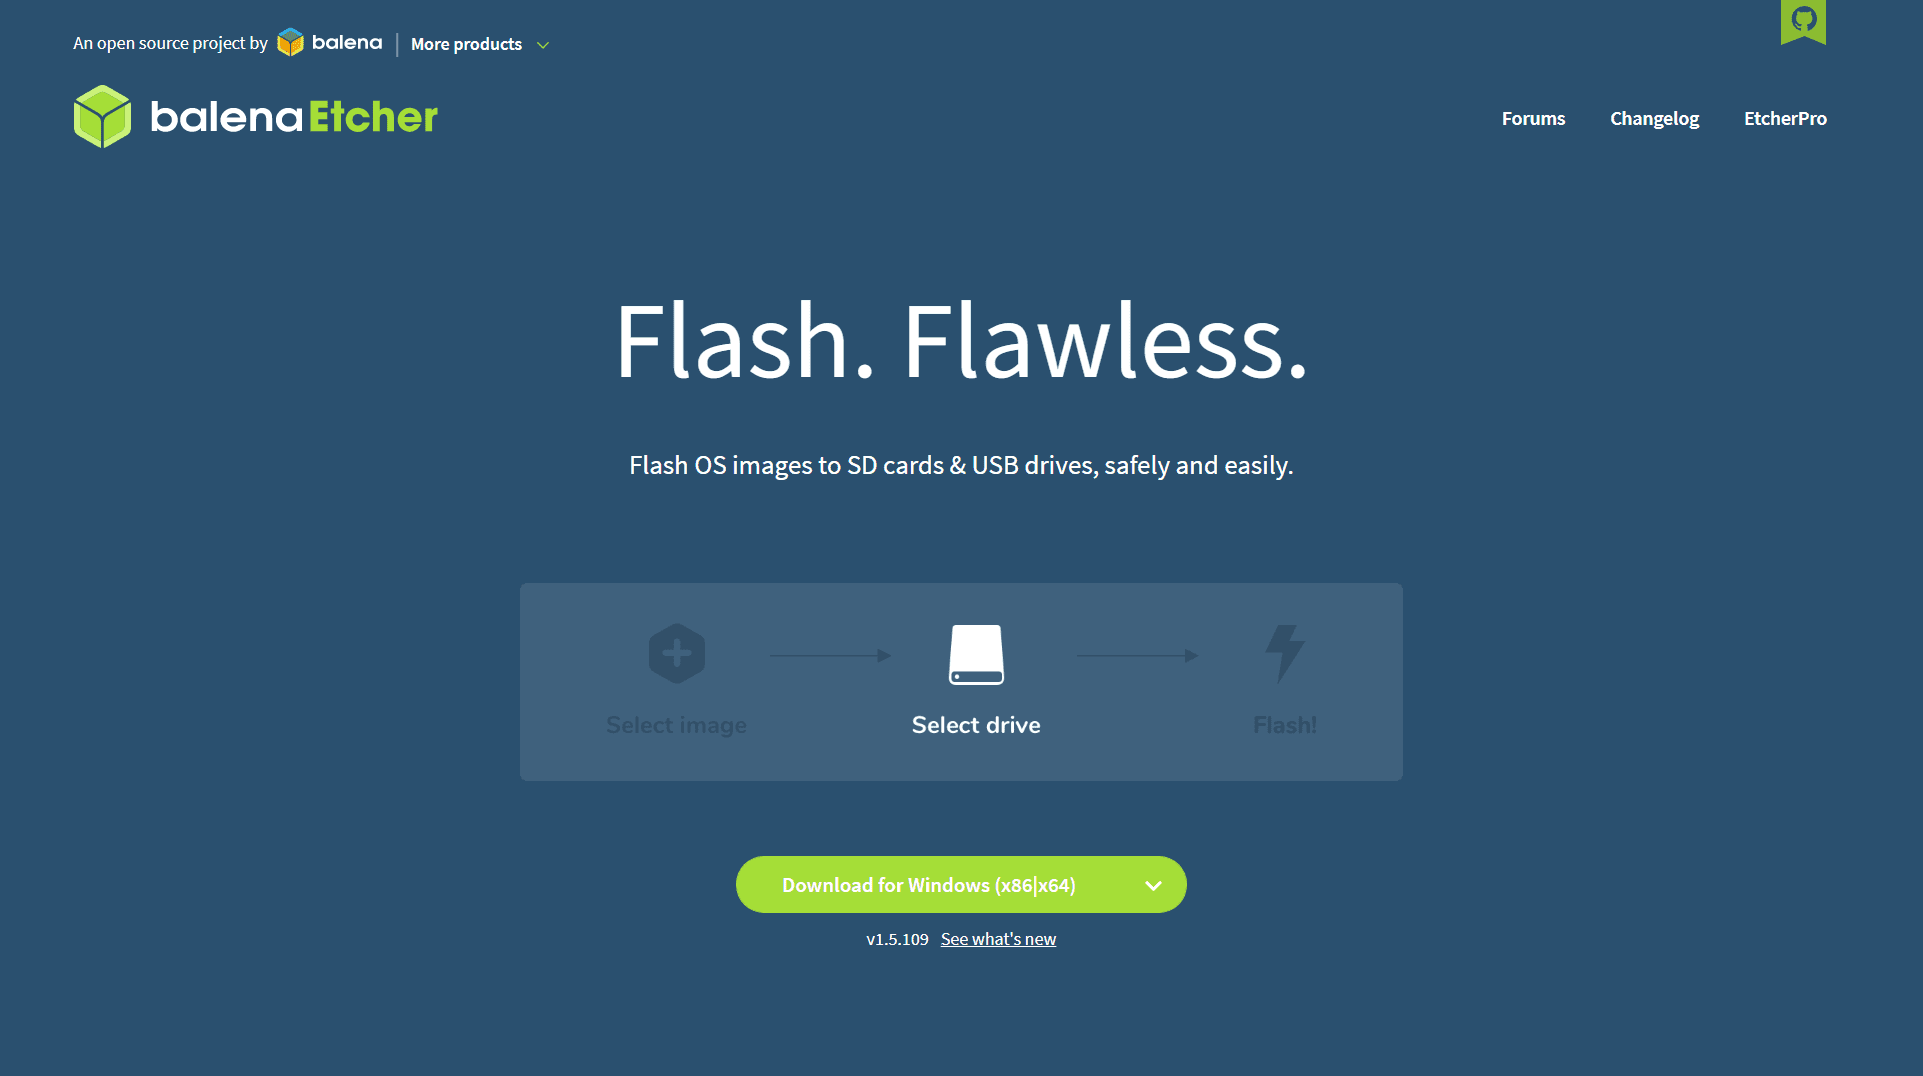
For this example, we will be using a tool called balenaEtcher also known as Etcher. Scroll down the web page and click on the Download button for Etcher. Download, install, and run Etcher.

Now insert your USB stick into your machine. Verify the drive letter by going to “This PC”.
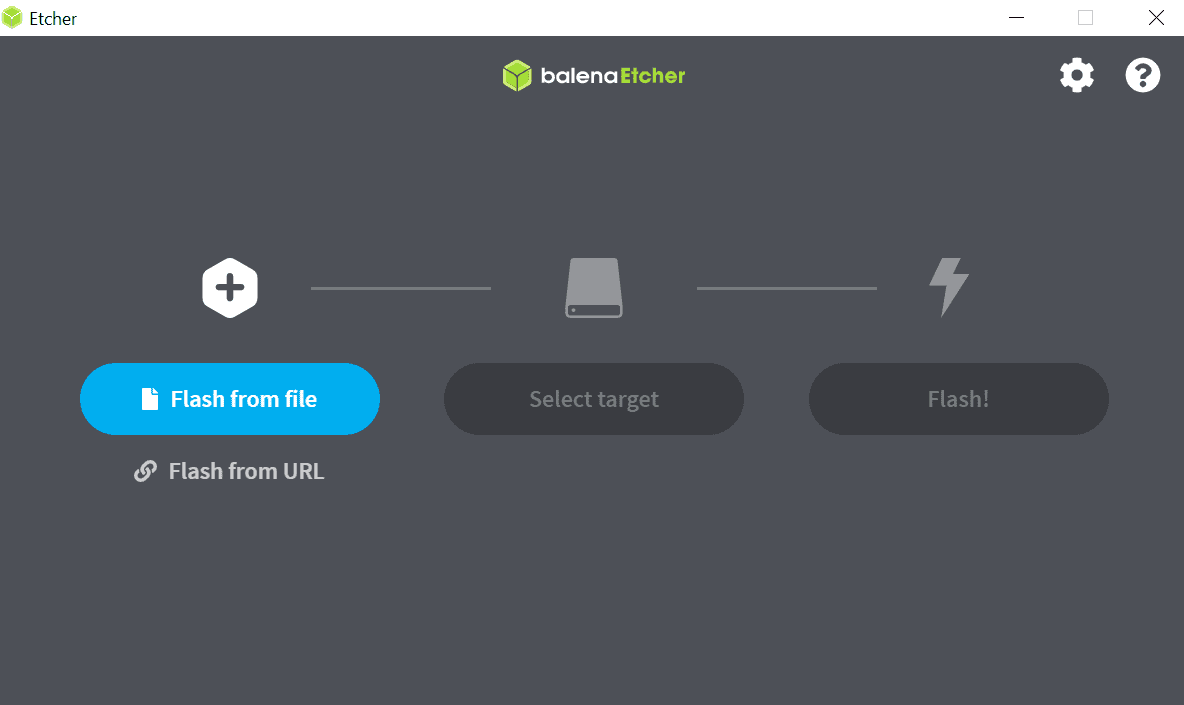


In the Etcher application, click “Flash from file” and browse to the TrueNAS .iso file that you downloaded earlier. If your USB stick is not already selected, click “Select Target” and choose the drive to use as the install media. Remember, this is the install media, not the operating system device. Now, click “Flash!” It takes a few minutes to write the image to the disk. A “Flash Complete!” message is shown when done.
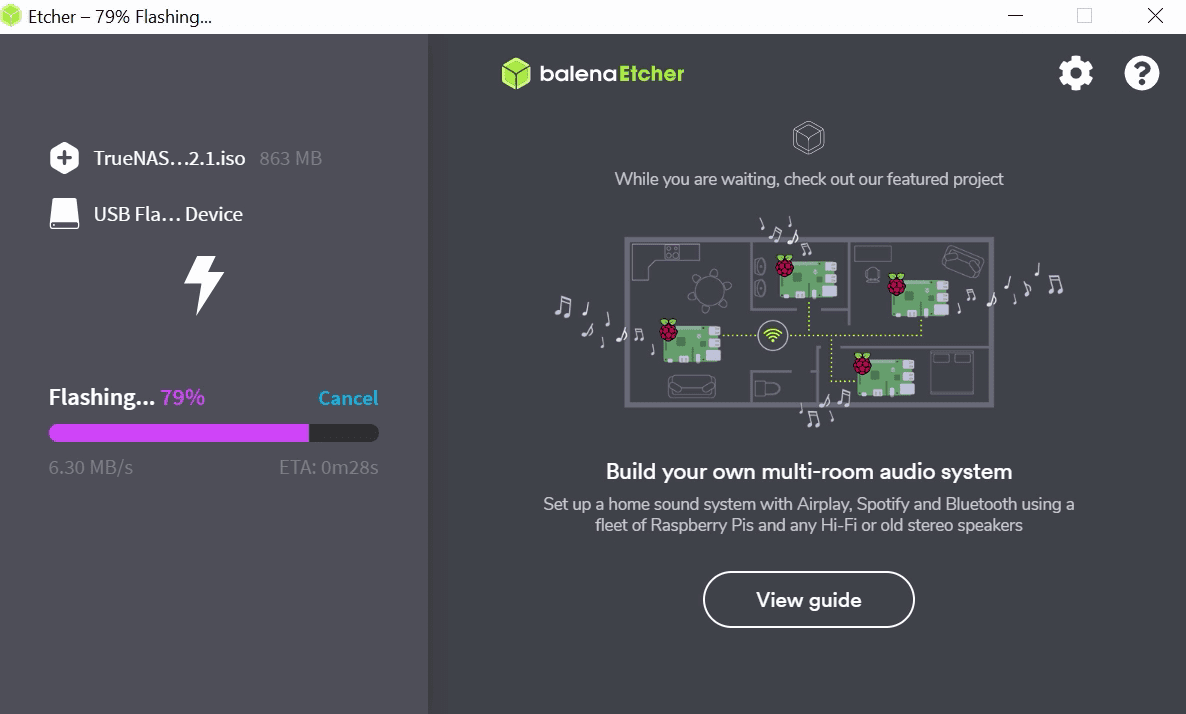

After the installer file has been written to the install media, you’re ready to install TrueNAS.

Installing TrueNAS

Now that we’ve gone through the basics of what you need to get started, let’s begin the installation of TrueNAS.
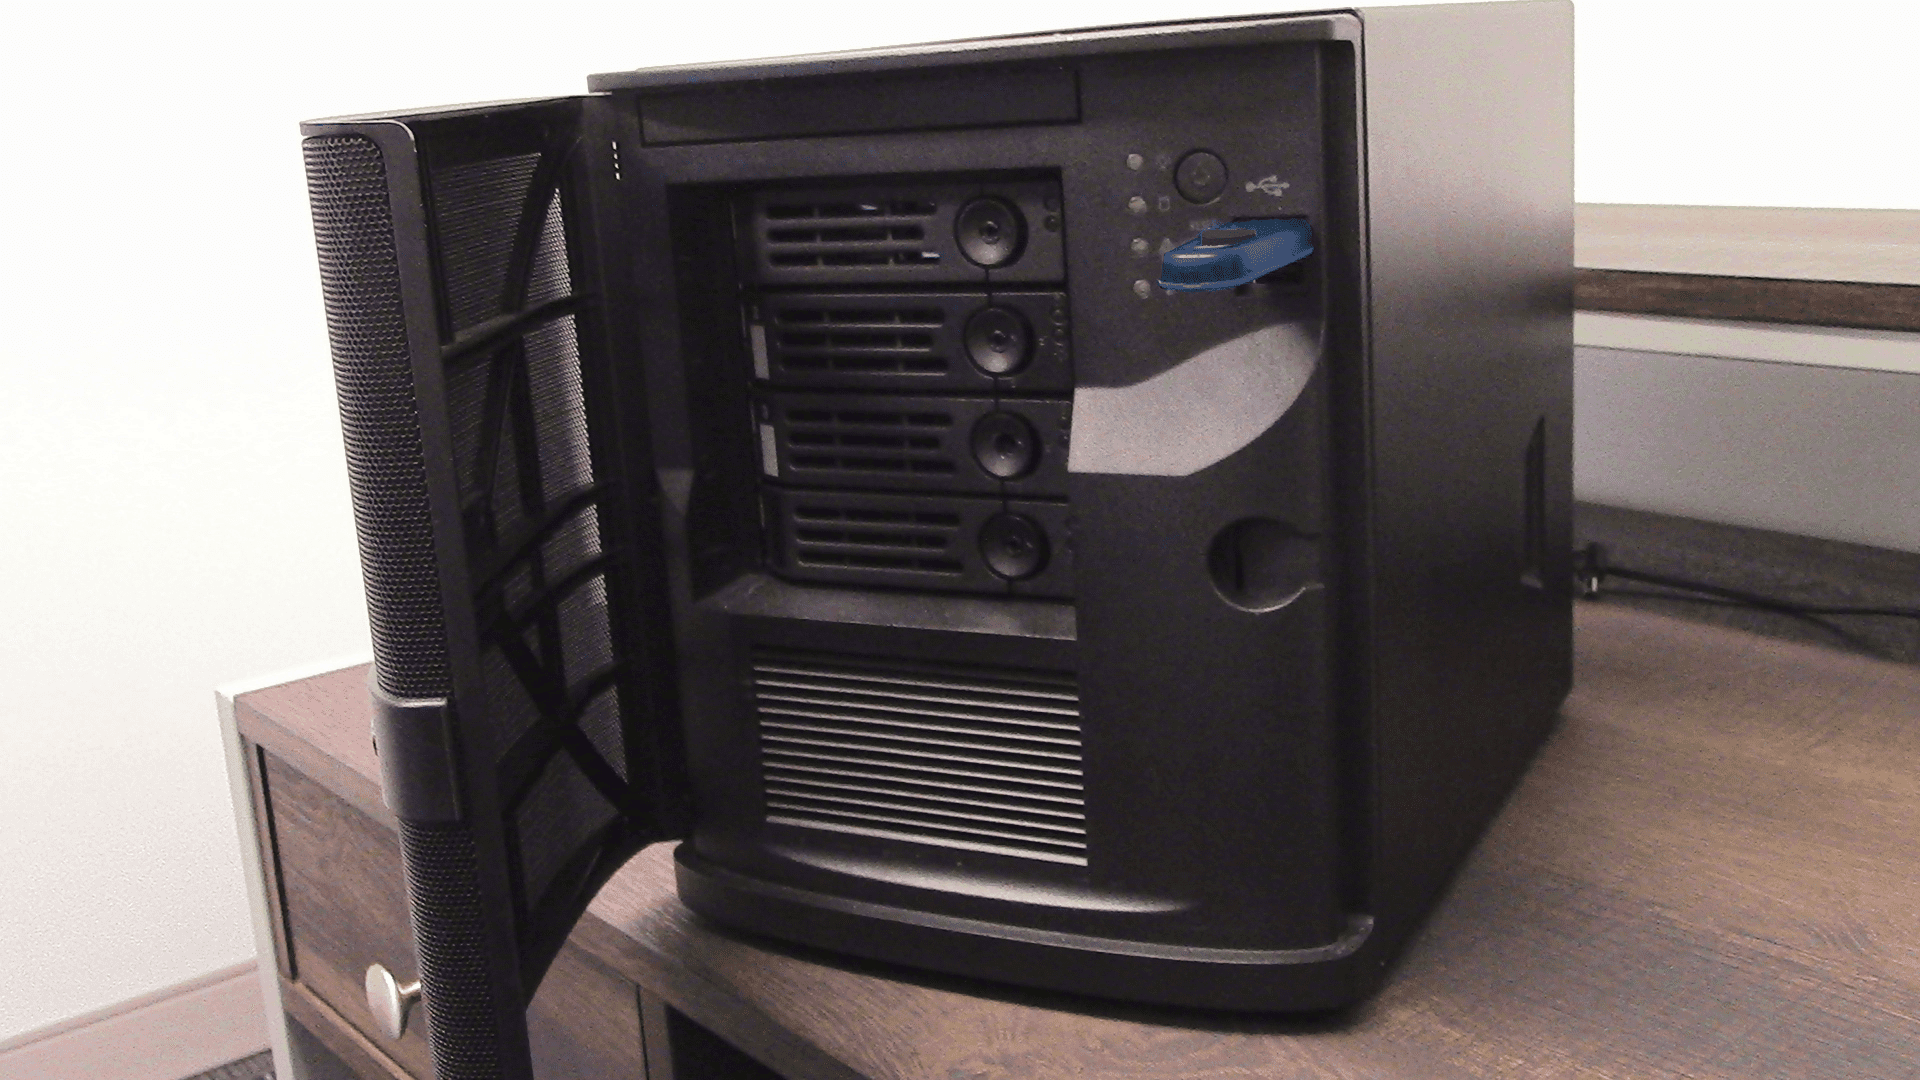

Make sure that both the boot device and the TrueNAS installation media are inserted in the machine that you chose to run TrueNAS.
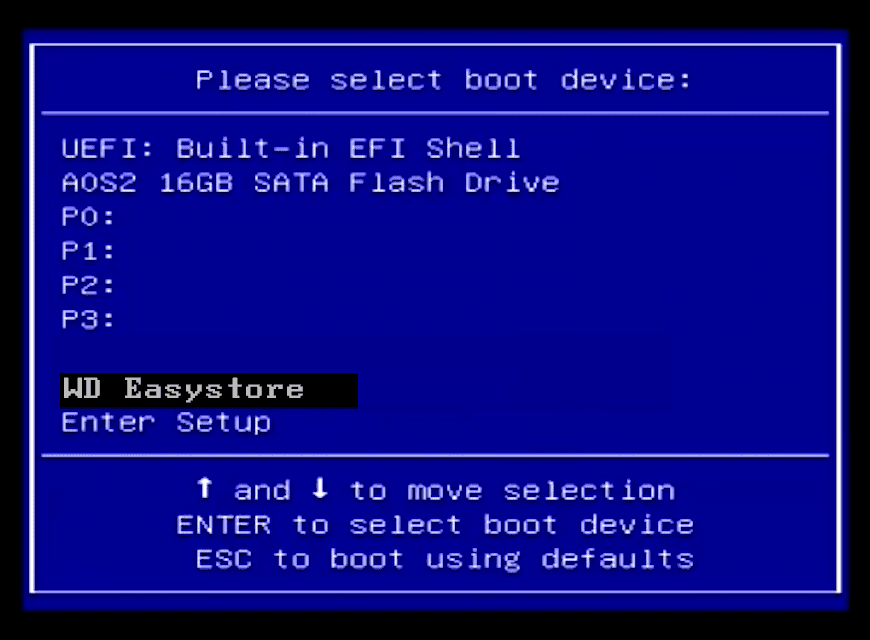

Boot into the BIOS of the system and double-check that your system is set to boot from the device that contains the TrueNAS installation media that you created earlier. After confirming, reboot the system.
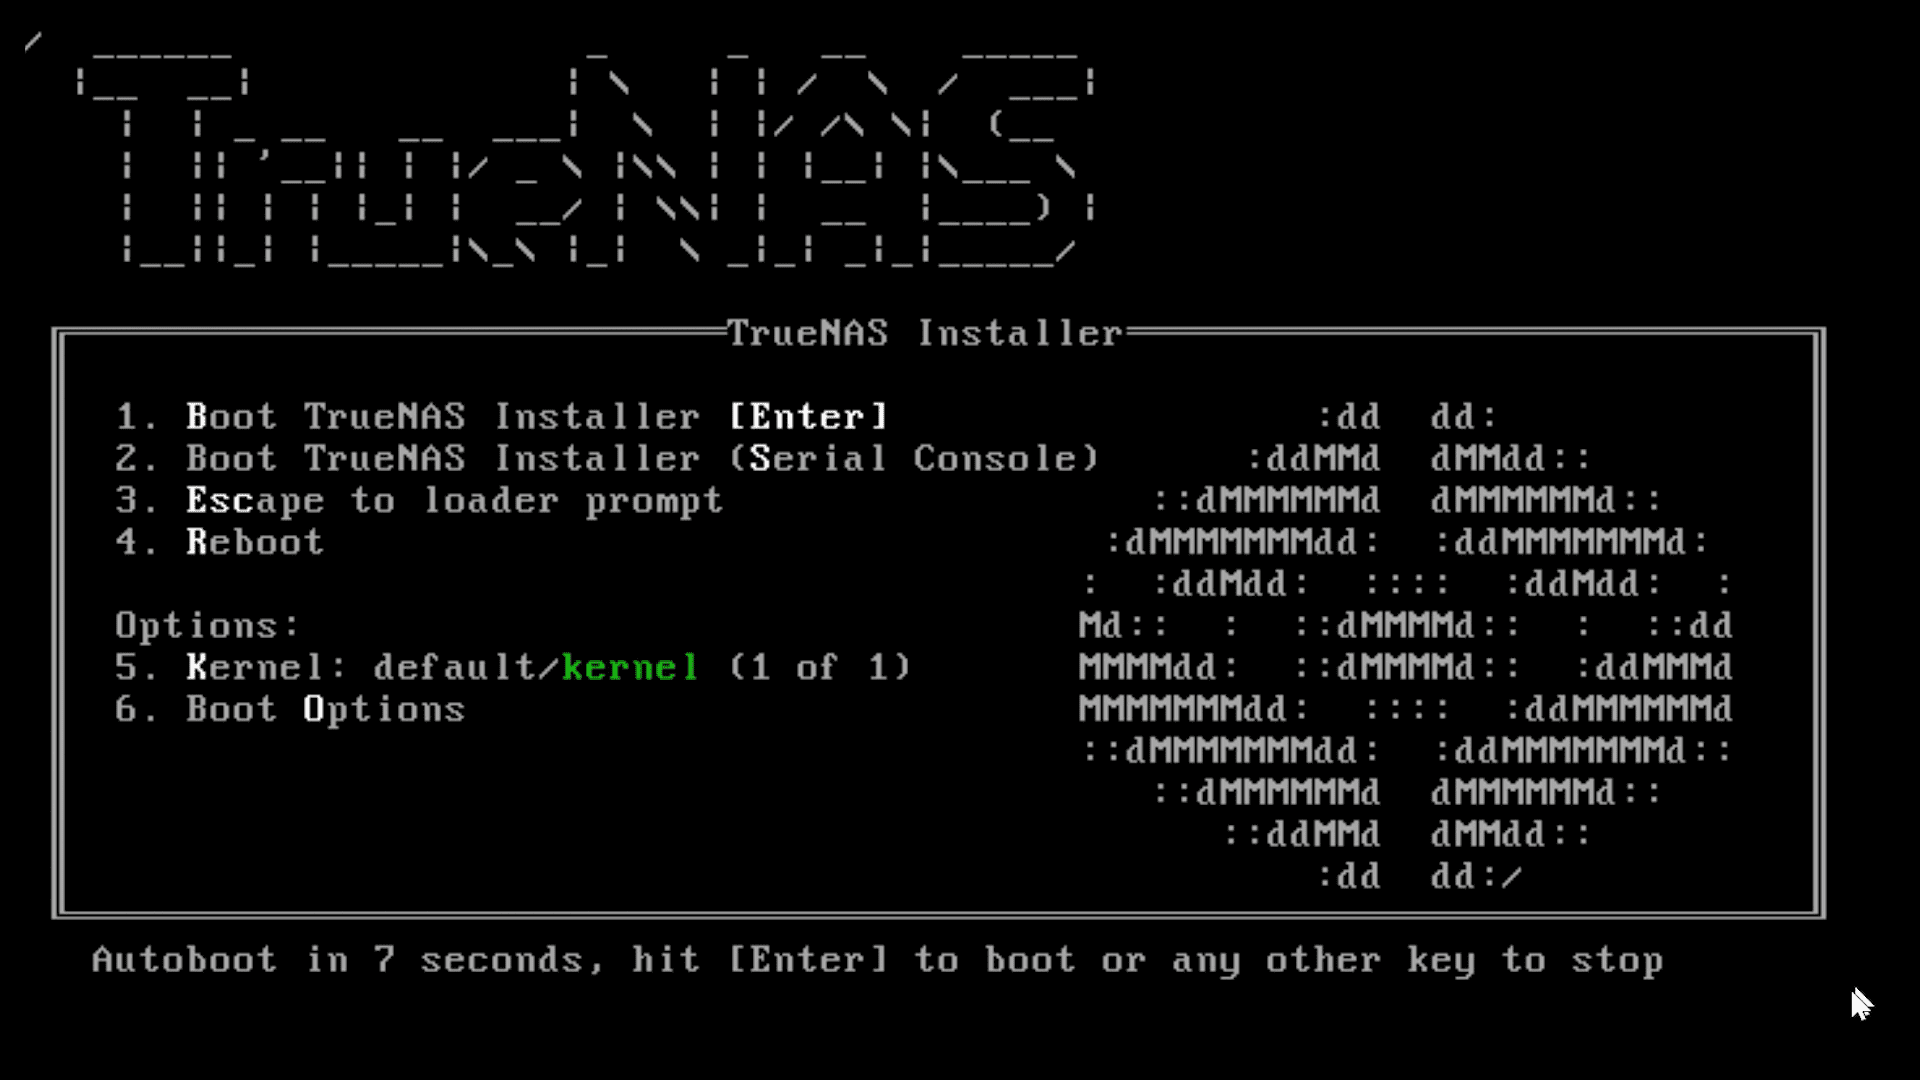
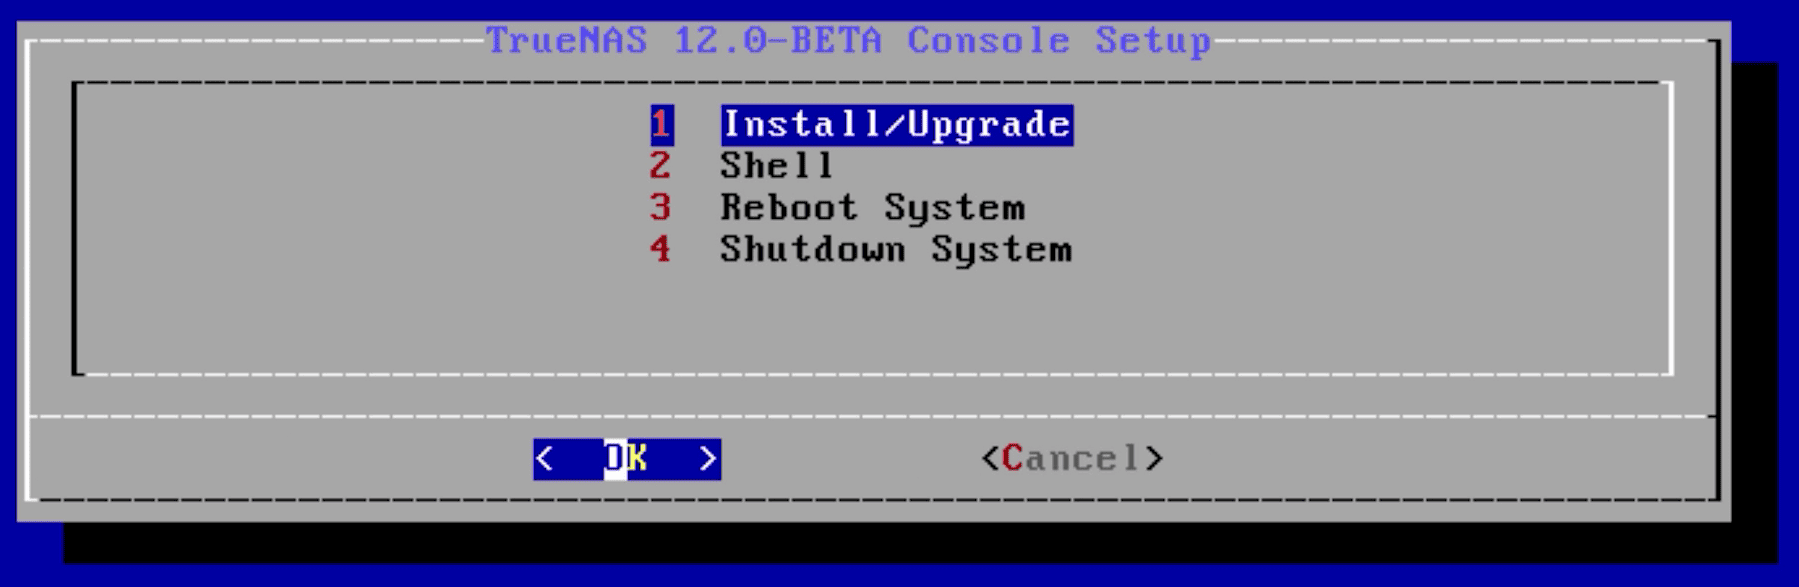

The TrueNAS install menu will be displayed. Choose option 1 on the menu to begin the TrueNAS installation. This will load the Console Setup menu. Hit enter to choose the “Install/Upgrade” option.
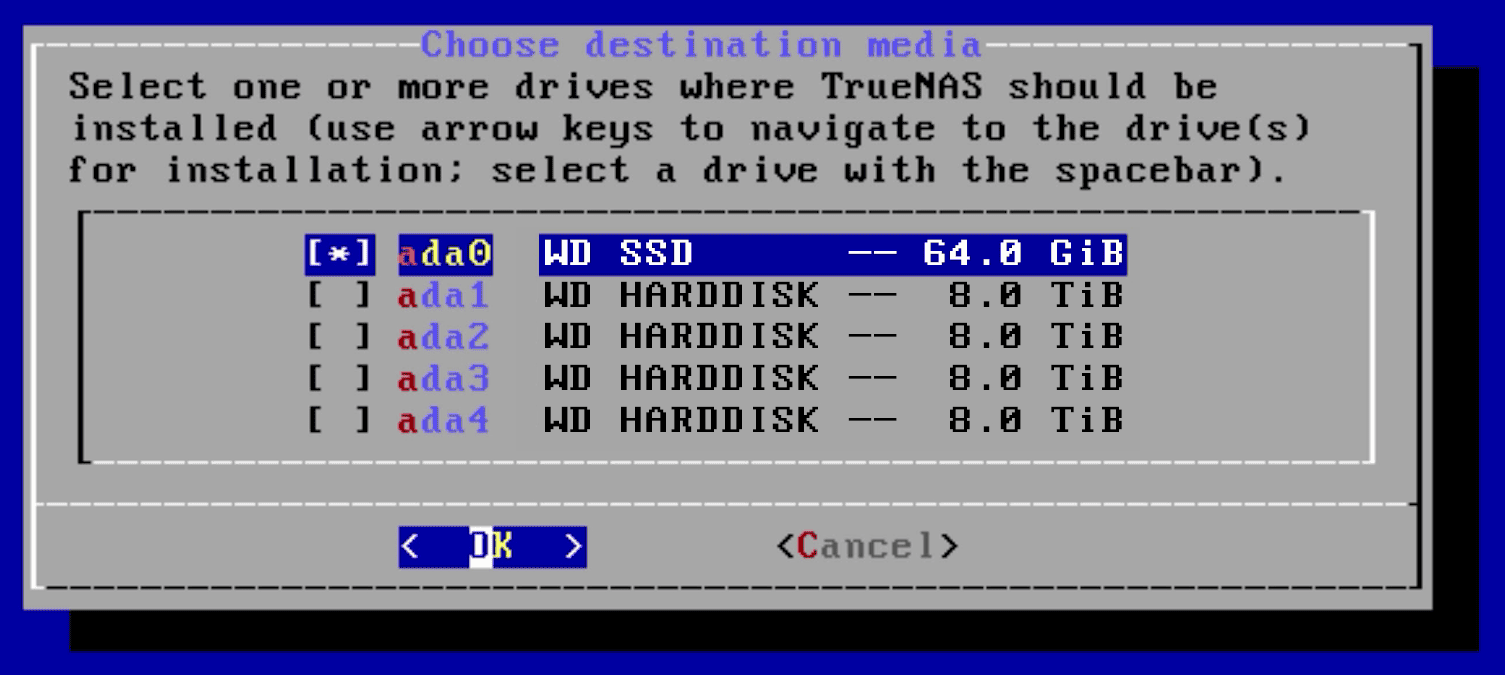

The next menu asks which drive should be used for TrueNAS. Make sure to select the boot device and not the storage disk. This menu will show the size of the disks to make it easier to determine the boot device, which is generally a smaller size than the storage disks (which will be larger). The one you want will likely be the smallest on the list. Note that the names of your drives will be different.
Press the arrow keys to select a drive, and press the spacebar to designate it as the drive you wish to use.
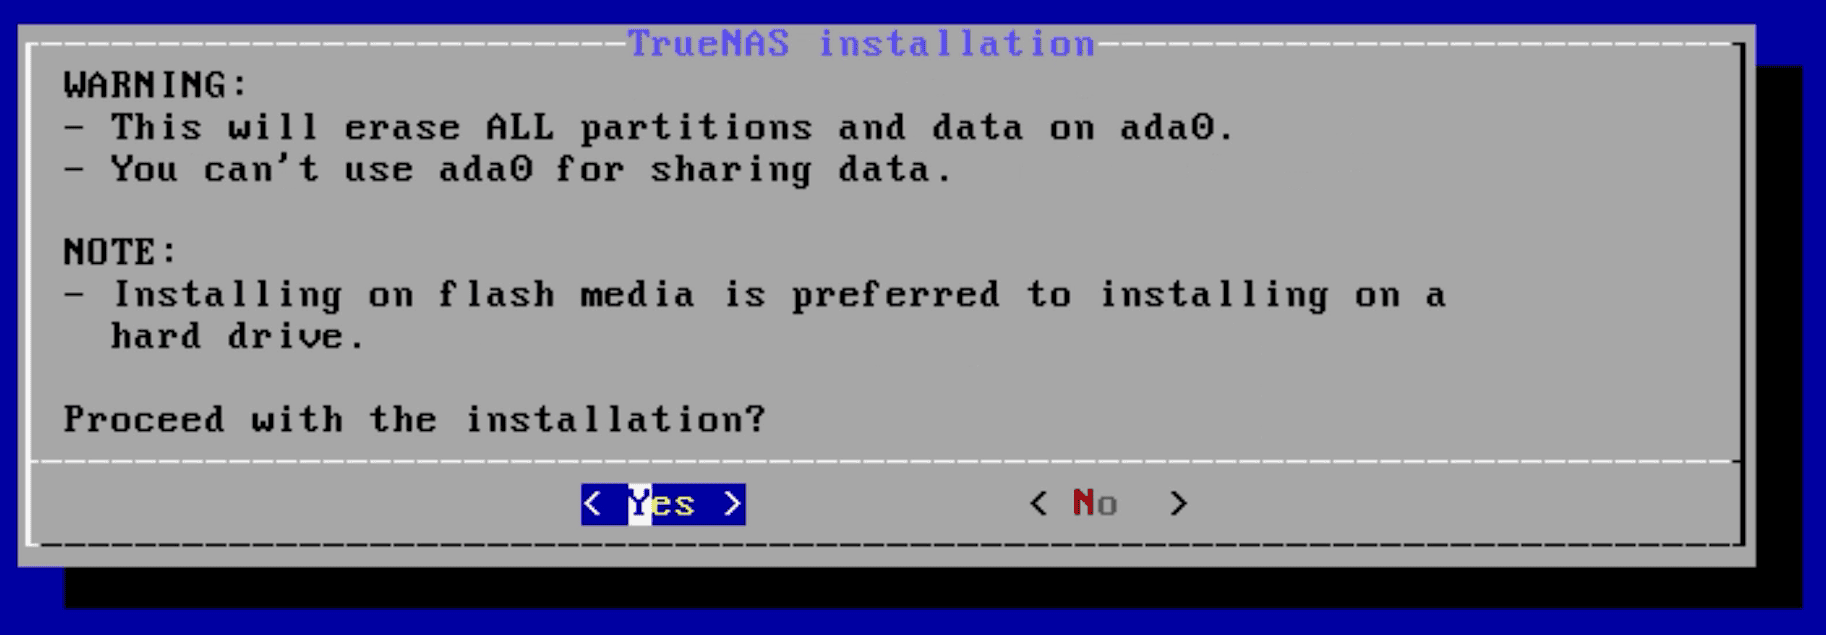

The boot device cannot be used for anything other than the operating system itself. Press OK, then YES, to proceed.
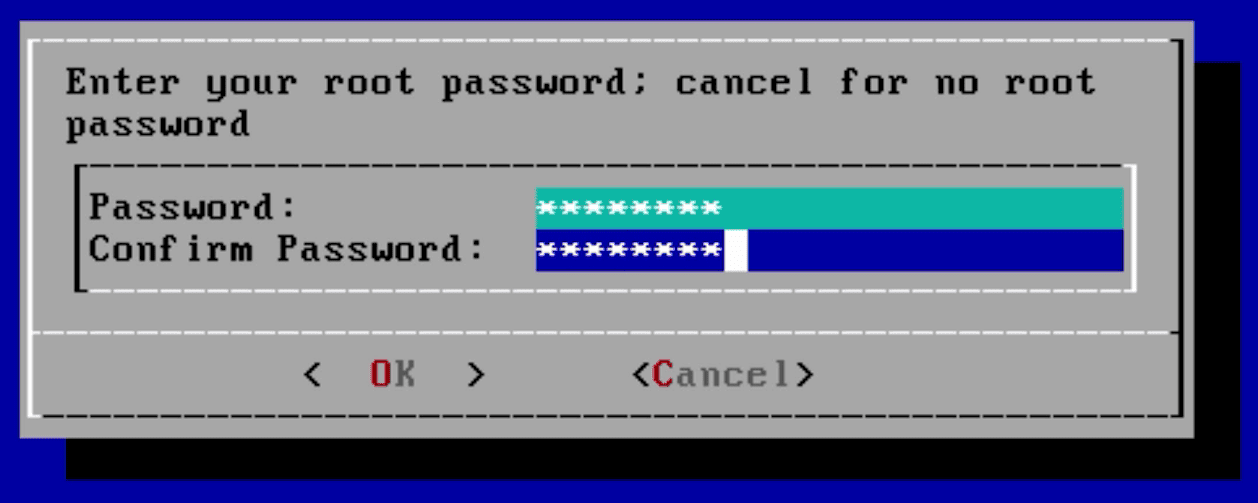

Next, type in and confirm the password that will be used to login to TrueNAS.
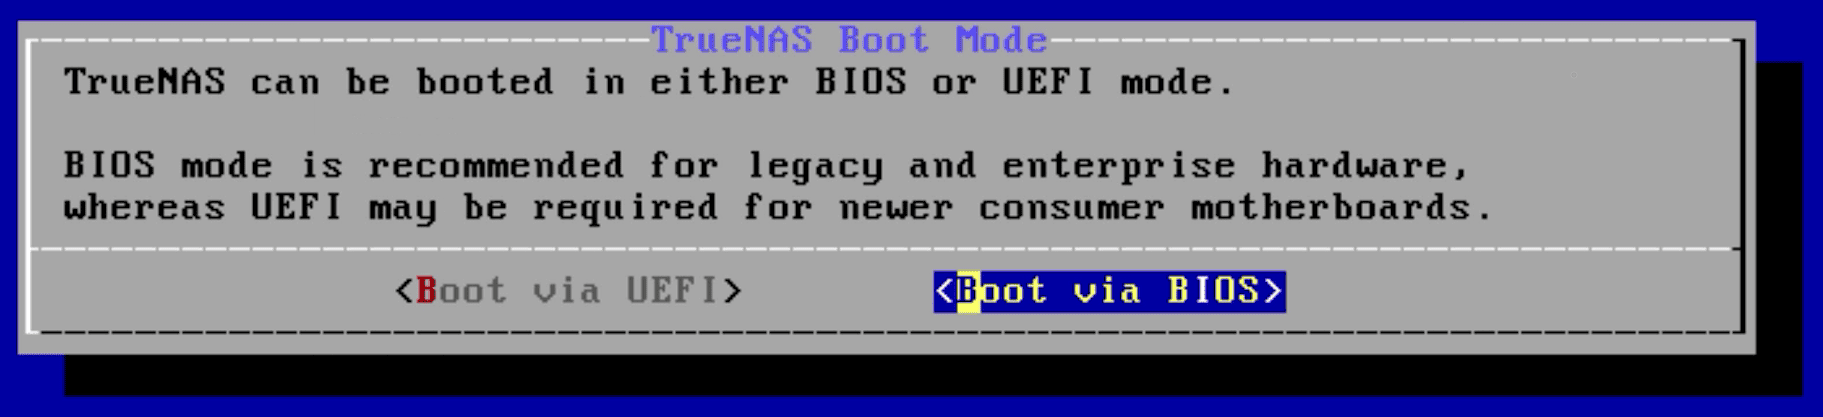

TrueNAS can be booted in either BIOS or UEFI mode. For the purposes of this video, I’ll be choosing BIOS. BIOS works for almost all motherboards and is typically the option to choose for older hardware. Choosing UEFI will require that your motherboard is more modern and UEFI capable.
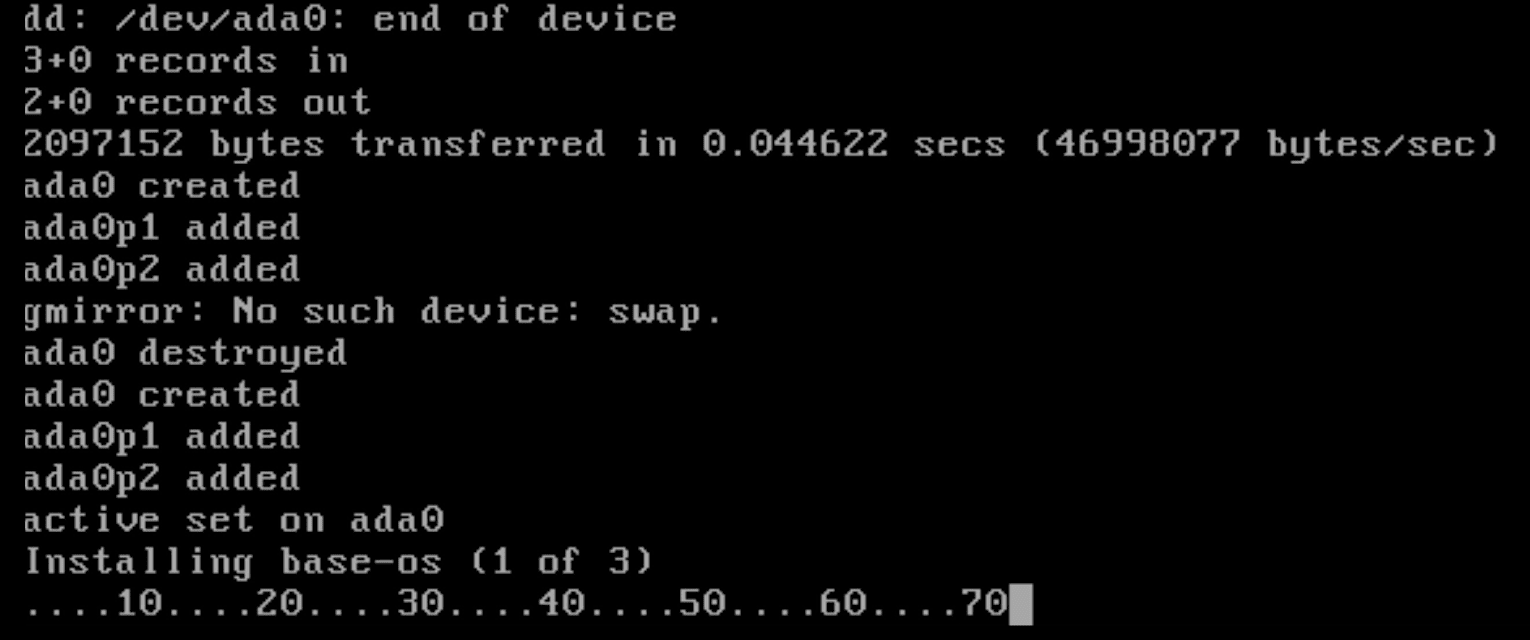

Once chosen, your installation will begin. Wait for a bit, all those commands popping up on the screen are perfectly normal. It should take a few minutes.


A message will appear saying to reboot and remove the installation media. Choose OK to reboot. Remove the installation media from your system. As the system reboots, double-check the BIOS to make sure the boot order now defaults to the boot device.

Fire up TrueNAS

When the system boots from the boot device, messages will appear as the TrueNAS operating system loads. When it is done loading you will see the “Console setup” menu. At the bottom of this screen, an IP address will be listed.
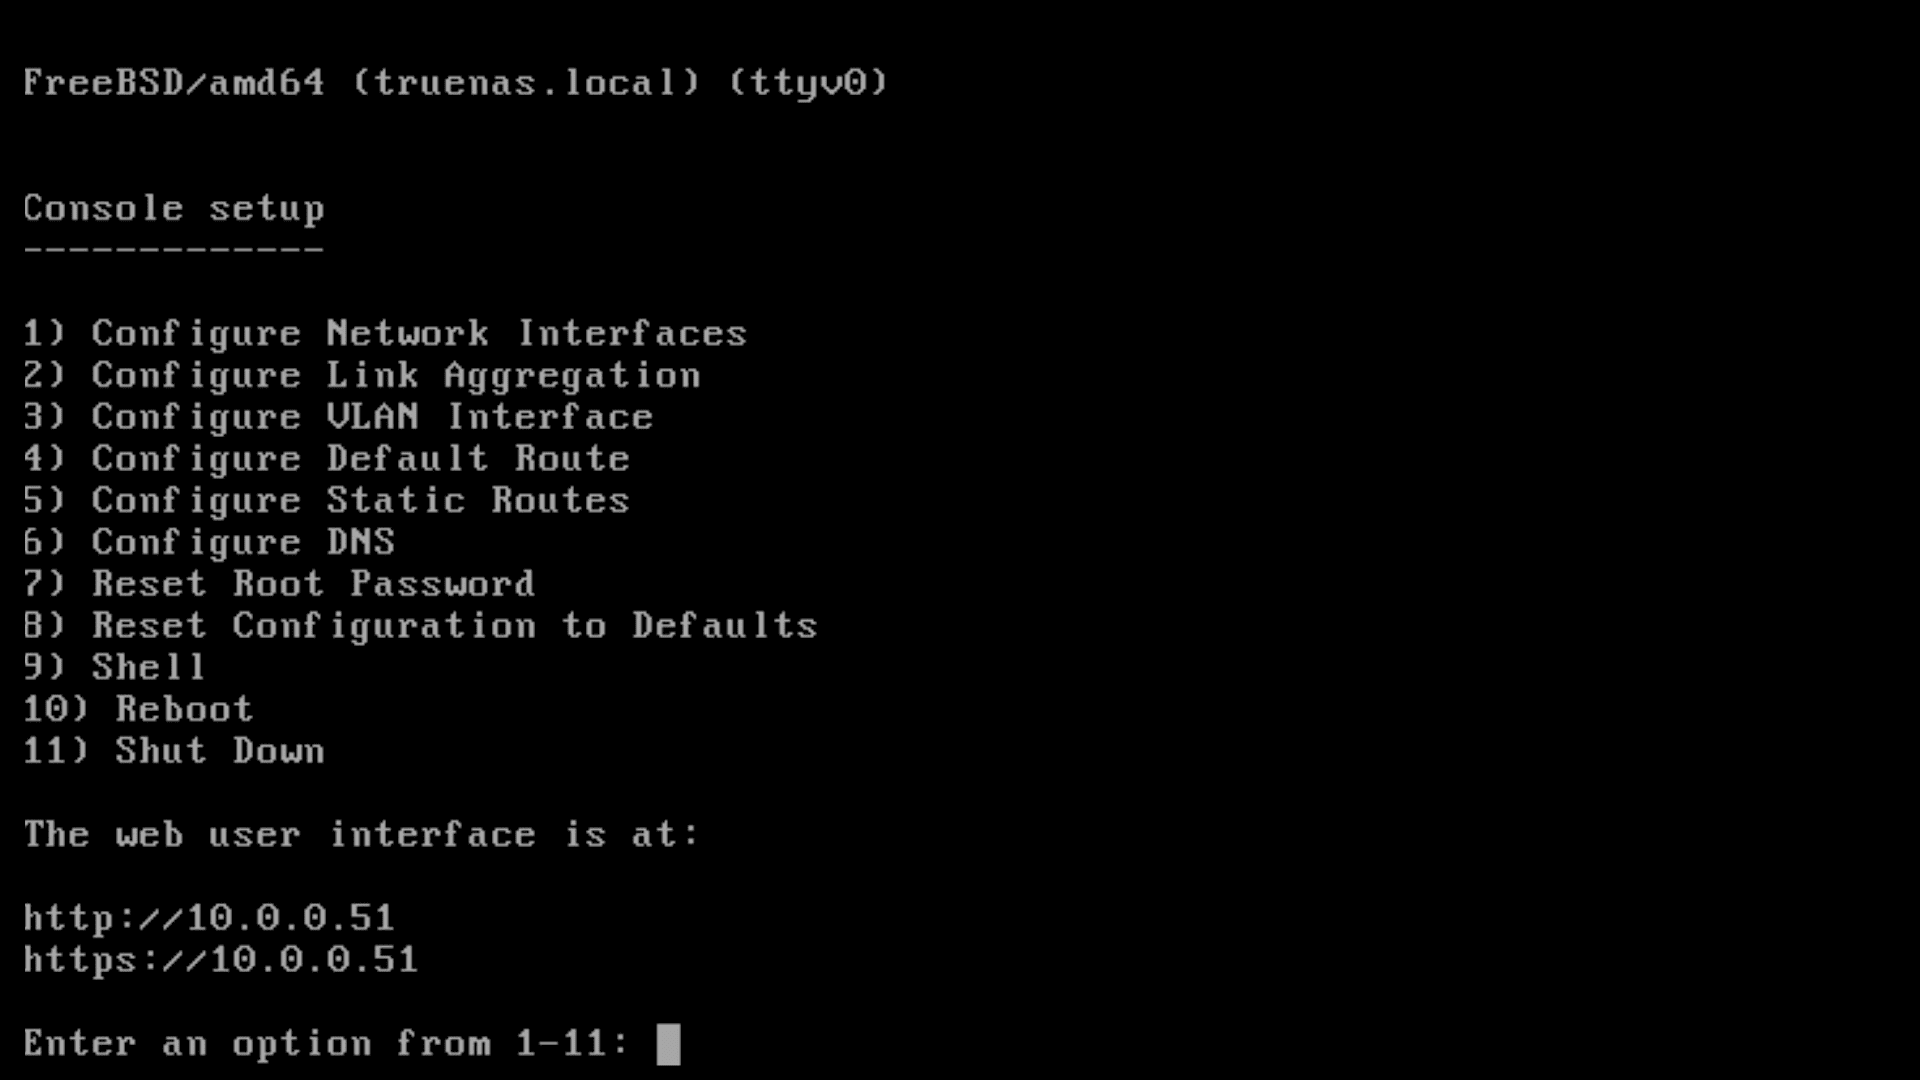

From a separate computer that is connected to the same network, open a web browser and type in that address. If it instead shows “0.0.0.0”, check if the network cable is plugged in, and that the network has a DHCP server.
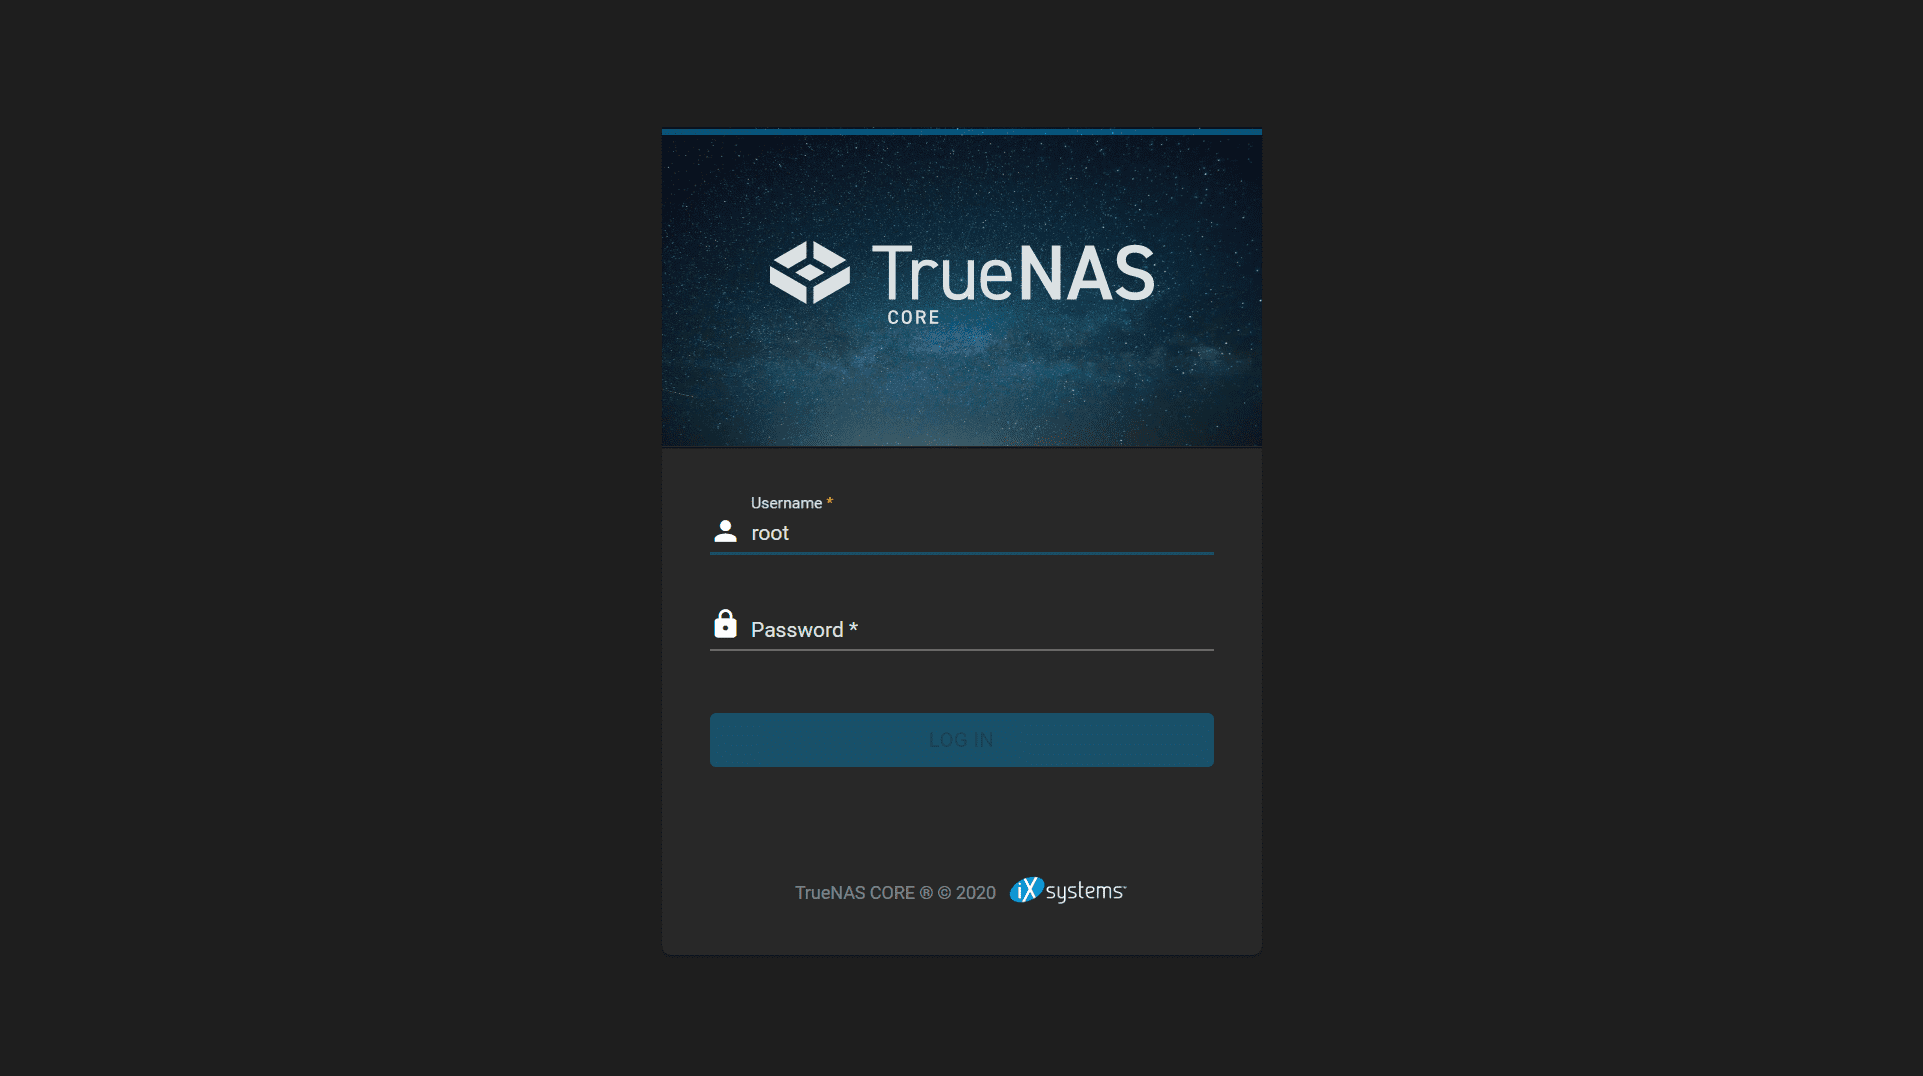

The TrueNAS login menu will appear once the bootup is complete. Type in root for the username and the password you created during the installation.
Once you are logged in, you will have access to the TrueNAS web interface which is used to manage your storage disks, configure access to the stored data, and view the status of the system.
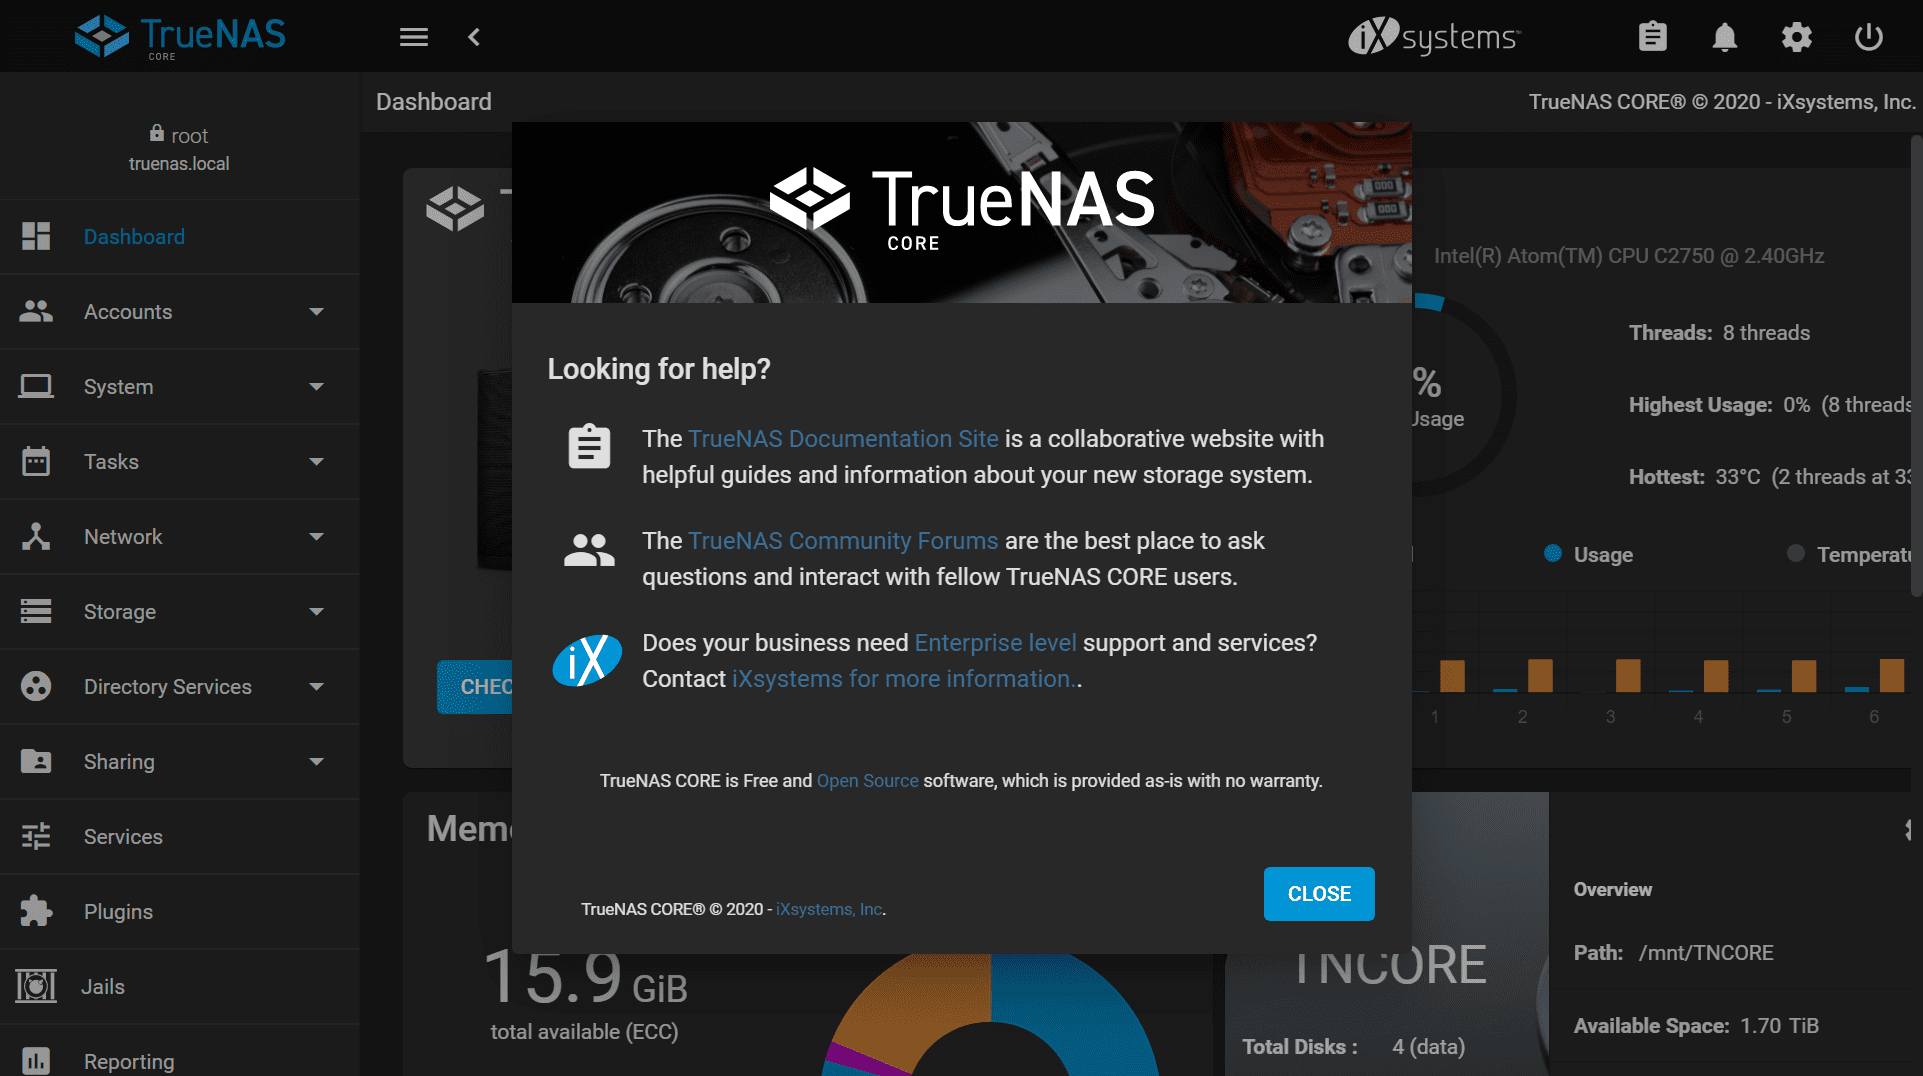

Congratulations! You have just installed TrueNAS. Be sure to check out our other tutorials and videos to learn more about configuring and using TrueNAS.
For comprehensive information on configuring TrueNAS, visit docs.truenas.com.