Dropbox is one of the most common file-sharing services around, with over 500 million registered users and 400 billion pieces of content. The platform makes it easy to upload content, share links to files, and has free and business versions so organizations can tailor how they wish to implement.
Syncing FreeNAS or TrueNAS with Dropbox has many advantages:
Step 1: Go to your Dropbox account, click on the three dots on the lower right-hand side, and choose Developers. Click Create apps to open the DBX platform and create an app. This process is needed to create a unique access token which FreeNAS and TrueNAS use to identify the account and files.
Step 2: After the app is created, generate the key by clicking Generate access token. 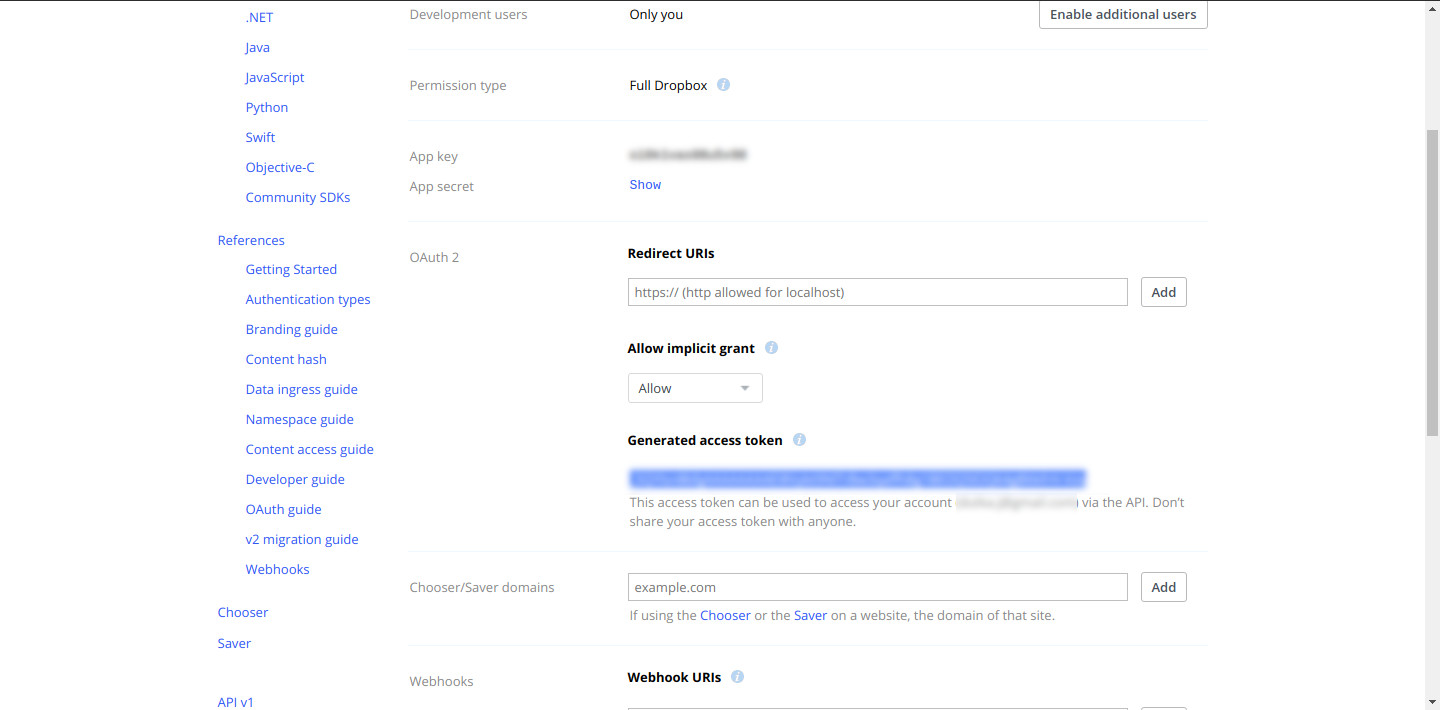
Step 3: In the FreeNAS or TrueNAS web interface set up your Cloud Credentials under System ➡️ Cloud Credentials. Select Dropbox from the menu and copy in your access token.
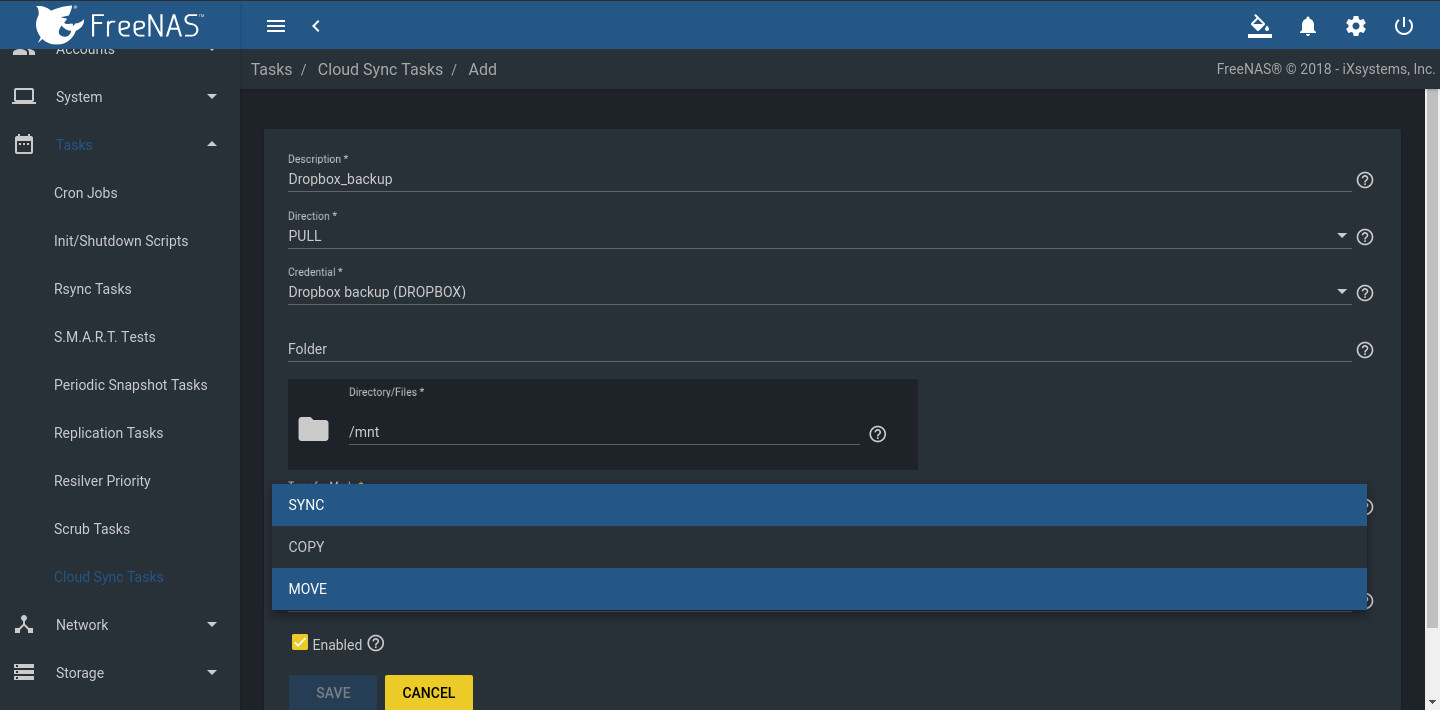
Step 4: Save, then go to the Tasks section. Under Cloud Sync Tasks, select your Dropbox account and schedule a sync task. Select the folder on the FreeNAS or TrueNAS system. This can be an existing dataset to sync to Dropbox or a new dataset to back up files in your Dropbox share.
Note: Set the kind of sync needed (Push or Pull) and how to transfer the content: Sync, Copy, or Move.
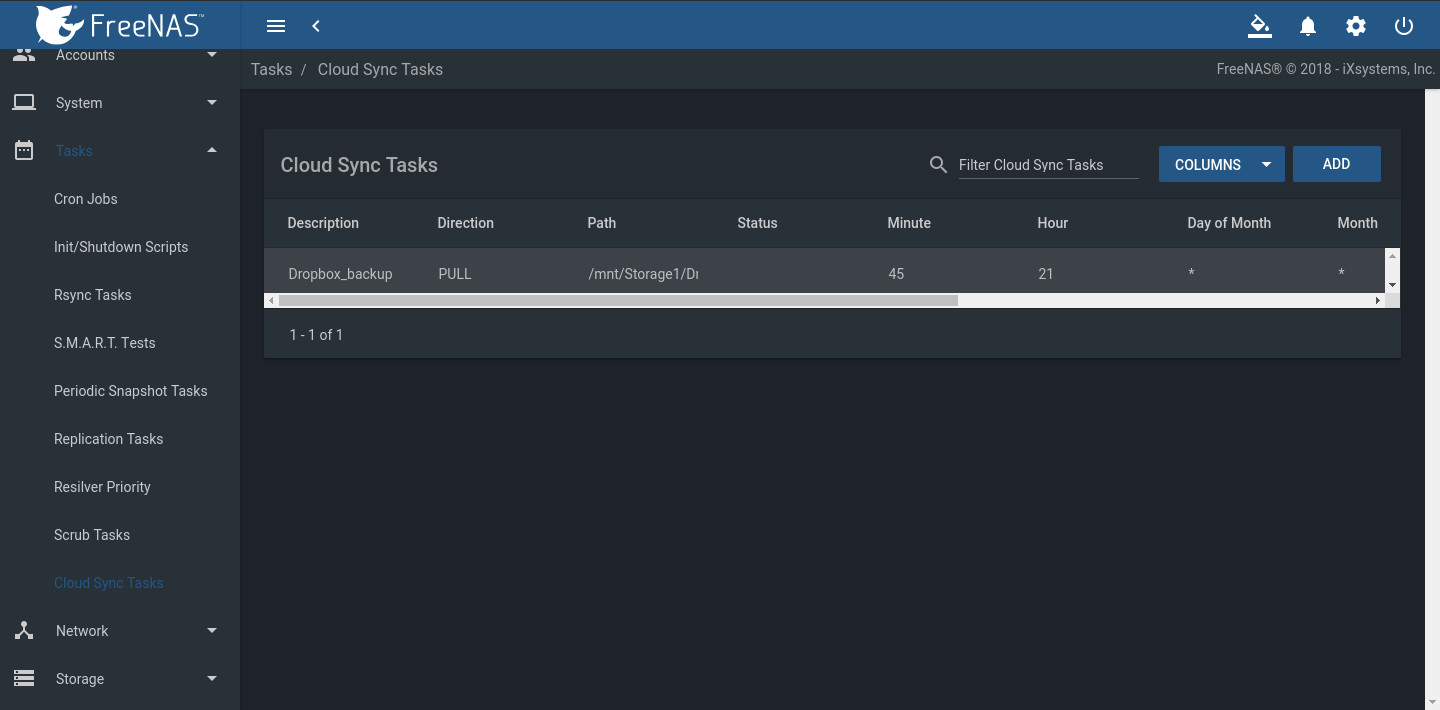
Step 5: The Cloud Sync is ready to run at the set time. In the example, FreeNAS is the backup target for a Dropbox account, providing several good features:
Step 6: Check the files. In this example, the Cloud Sync pulled files from Dropbox to the FreeNAS dataset. Creating an SMB, NFS, or WebDAV share of the dataset makes it possible to see if the files are available. If the transfer is set to push data from the FreeNAS or TrueNAS to Dropbox, log in to Dropbox to verify that the files uploaded correctly. 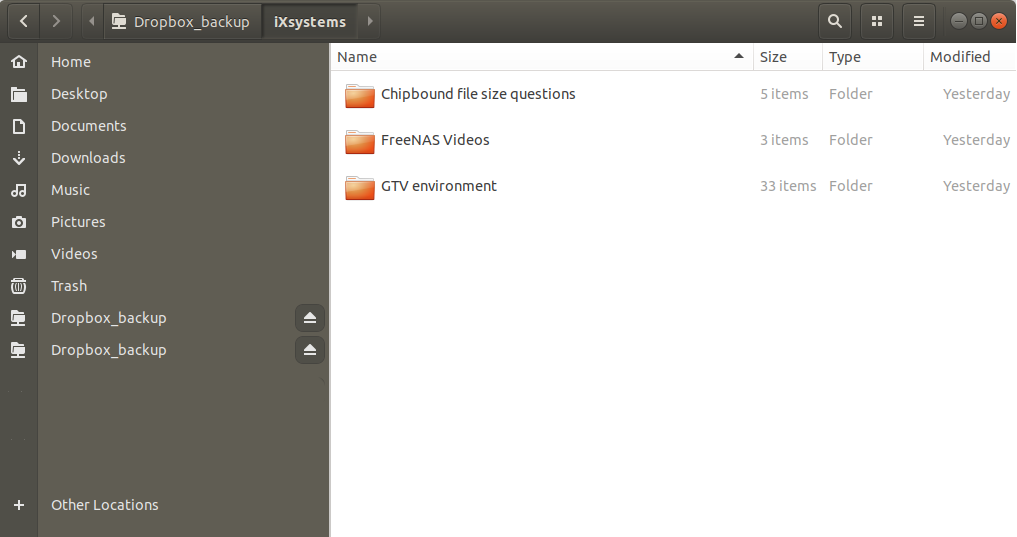
此内容由惯性聚合(RSS阅读器)自动聚合整理,仅供阅读参考。 原文来自 — 版权归原作者所有。