









I had been using Cryptomator for quite a long time to manage my content. Its advantage is that local data also requires a password to access. After encryption, the content can be placed on sync drives like Nutstore, Dropbox, etc., and uploaded to the cloud in real-time after each file addition or modification.
If you're storing content that doesn't need editing and you mainly add or replace resources, I would still highly recommend trying Cryptomator. It's well-suited for saving electronic scans, images, and spreadsheet documents.
However, on macOS, if you use software like Obsidian to manage your knowledge base and frequently need to edit content, editing text files after decrypting with Cryptomator becomes quite unfriendly. To avoid issues, when editing plain text files, I had to copy them out, edit them, and then replace the original files, which was quite cumbersome.
I happened to learn about Restic. If you want to encrypt and backup your Obsidian or other note-taking software vaults and upload them to cloud drives or S3-compatible platforms, then Restic is perfect for that.
Installing Restic
macOS
$ brew install restic
It supports mainstream operating systems. For details, see: https://restic.readthedocs.io/en/latest/020_installation.html
Initializing a Local Repository
Simply put, a repository is a folder for storing encrypted files. The initialization process generates some metadata.
$ restic init --repo ~/Documents/NoteE2EE
enter password for new repository:
enter password again:
created restic repository 0a40262533 at /Users/xxxxx/Documents/NoteE2EE

Please note that knowledge of your password is required to access
the repository. Losing your password means that your data is
irrecoverably lost.
Remember your password. Once forgotten, there's no way to decrypt the data.
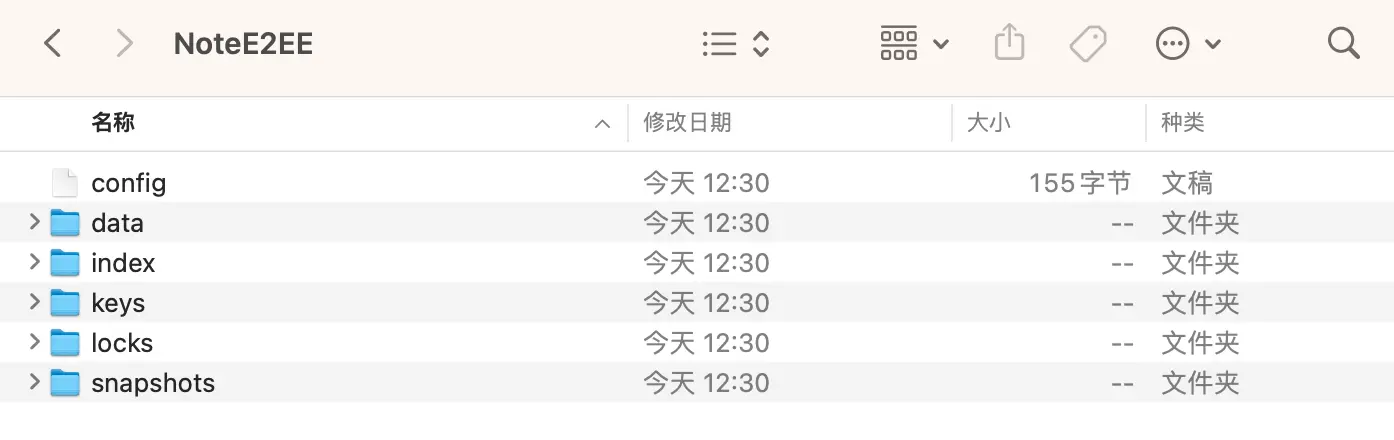
Backing Up Data
Execute the command to back up the ~/Note folder to the ~/Documents/NoteE2EE repository.
$ restic -r ~/Documents/NoteE2EE backup ~/Documents/Note
On the first run, you can see the number of files and directories backed up, and the "snapshot" ID is displayed.
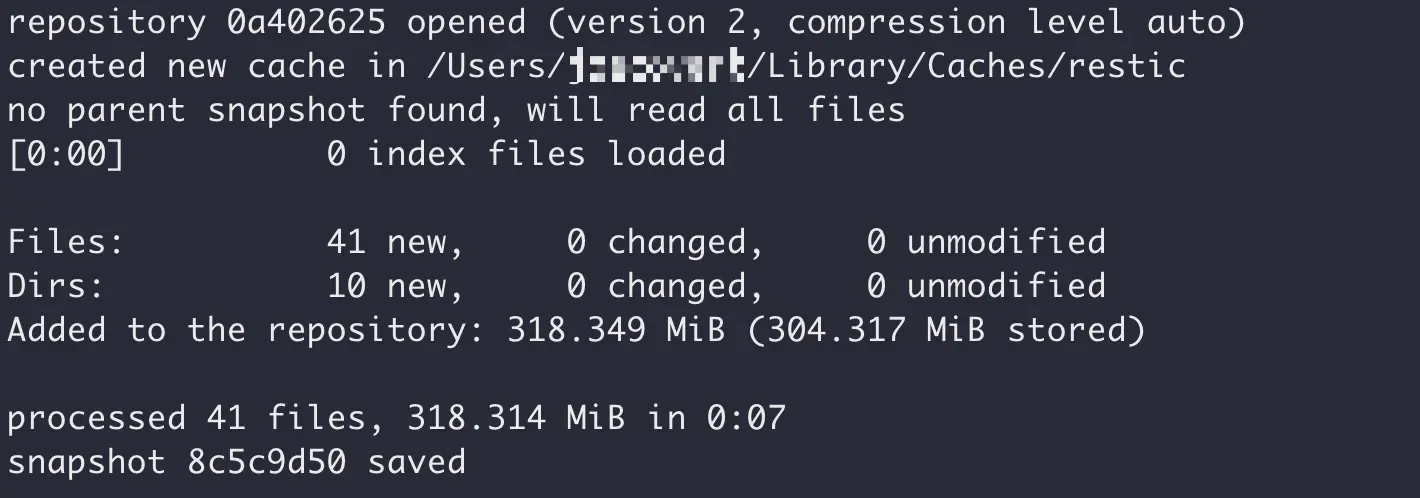
The command can be run multiple times (each run creates a snapshot).
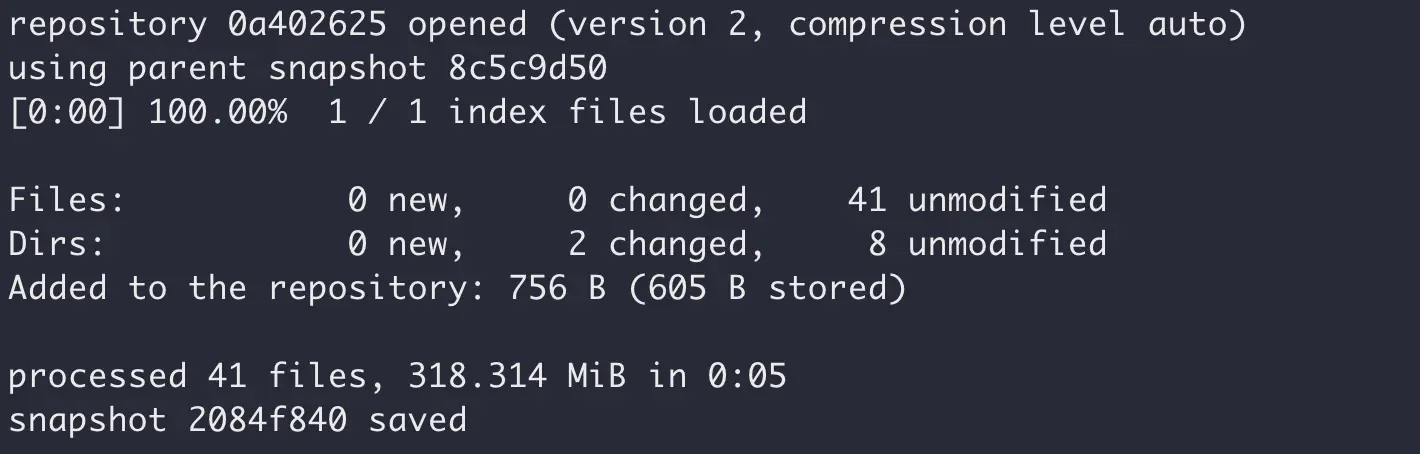
Since it creates incremental backups, you don't need to worry about snapshots taking up too much space.
Use the following command to view the list of snapshots in the repository:
$ restic -r ~/Documents/NoteE2EE snapshots
This repository folder "NoteE2EE" contains encrypted content. Following the 3-2-1 principle, it can be safely stored on local hard drives, external drives, and cloud storage without worrying about data leaks.
$ restic -r ~/Documents/NoteE2EE backup ~/Documents/Note \
    --pack-size 32 \
    --exclude="*.tmp" \
    --iexclude="*.LOG" \
    --limit-upload 1024 \
    --json
Good use of the --pack-size parameter can effectively control the number of target files, preventing large files from being split into too many small files. Historical files won't be affected; it only impacts the current incremental backup.
Corresponding to --limit-upload, there's a --limit-download parameter for limiting download speed.
If you're developing small tools based on Restic, the --json parameter is quite necessary:
{"message_type":"status","percent_done":0,"total_files":29,"total_bytes":204482794}
{"message_type":"status","percent_done":0,"total_files":41,"total_bytes":333776710}
{"message_type":"status","percent_done":0,"total_files":41,"total_bytes":333776710}
{"message_type":"status","percent_done":0,"total_files":41,"total_bytes":333776710}
{"message_type":"status","percent_done":0,"total_files":41,"total_bytes":333776710}
{"message_type":"status","percent_done":0,"total_files":41,"total_bytes":333776710}
{"message_type":"status","percent_done":0,"total_files":41,"total_bytes":333776710}
{"message_type":"status","percent_done":0.2808864315308279,"total_files":41,"files_done":13,"total_bytes":333776710,"bytes_done":93753349}
{"message_type":"status","percent_done":1,"total_files":41,"files_done":41,"total_bytes":333776710,"bytes_done":333776710}
{"message_type":"summary","files_new":0,"files_changed":0,"files_unmodified":41,"dirs_new":0,"dirs_changed":2,"dirs_unmodified":8,"data_blobs":0,"tree_blobs":2,"data_added":756,"data_added_packed":608,"total_files_processed":41,"total_bytes_processed":333776710,"total_duration":5.552792709,"backup_start":"2025-04-02T18:30:04.949151+08:00","backup_end":"2025-04-02T18:30:10.501995+08:00","snapshot_id":"74e465ed71f7fb5b7abb562d4cb9d067f20d89a1a9f3ed4ed32a0bc73e8abab1"}
Based on this data, you can create progress bars and display the volume of backed-up files.
Using the command restic init --repo ~/Documents/NoteE2EE, we created a local repository.
Below is an example of an S3-compatible storage:
# Setting environment variables
$ export AWS_ACCESS_KEY_ID=id7O9M0H****tXJ2romrN
$ export AWS_SECRET_ACCESS_KEY=bFA0dL0u********ndnxVcrwPh31u
$ export AWS_DEFAULT_REGION=cn-east-1

# Initializing repository and backup
$ restic -r s3:https://s3.bitiful.net/note-e2ee init
$ restic -r s3:https://s3.bitiful.net/note-e2ee --verbose backup ~/Documents/NoteE2EE
Note: If the AWS_DEFAULT_REGION environment variable is not set, us-east-1 will be used as the default value.
For other platforms and storage options like Amazon S3, Backblaze B2, Google Cloud, etc., refer to the documentation: https://restic.readthedocs.io/en/latest/030_preparing_a_new_repo.html
Keeping Recent Snapshots
We might run backup on a schedule, but too many backups can be overwhelming. Run the following command to keep only the 7 most recent snapshots:
$ restic -r [repository path] forget --keep-last 7 --prune
Snapshot Tags
You can specify multiple tags when backing up (--tag "v1.0" --tag "daily"):
$ restic -r ~/Documents/NoteE2EE backup --tag "v1.0" ~/Documents/Note
You can also modify tags for existing snapshots:
# Add a tag
$ restic -r ~/Documents/NoteE2EE tag --add "important" 8c5c9d50

# Remove a tag
$ restic -r ~/Documents/NoteE2EE tag --remove "important" 43547193

# Set multiple tags
$ restic -r ~/Documents/NoteE2EE tag --set "important,project2" a1ff1a78
It's worth noting that after each modification, the snapshot ID will change.
Backups stored in the cloud can't guarantee 100% file preservation or prevent damage. You can verify integrity using the check command:
$ restic -r ~/Documents/NoteE2EE check
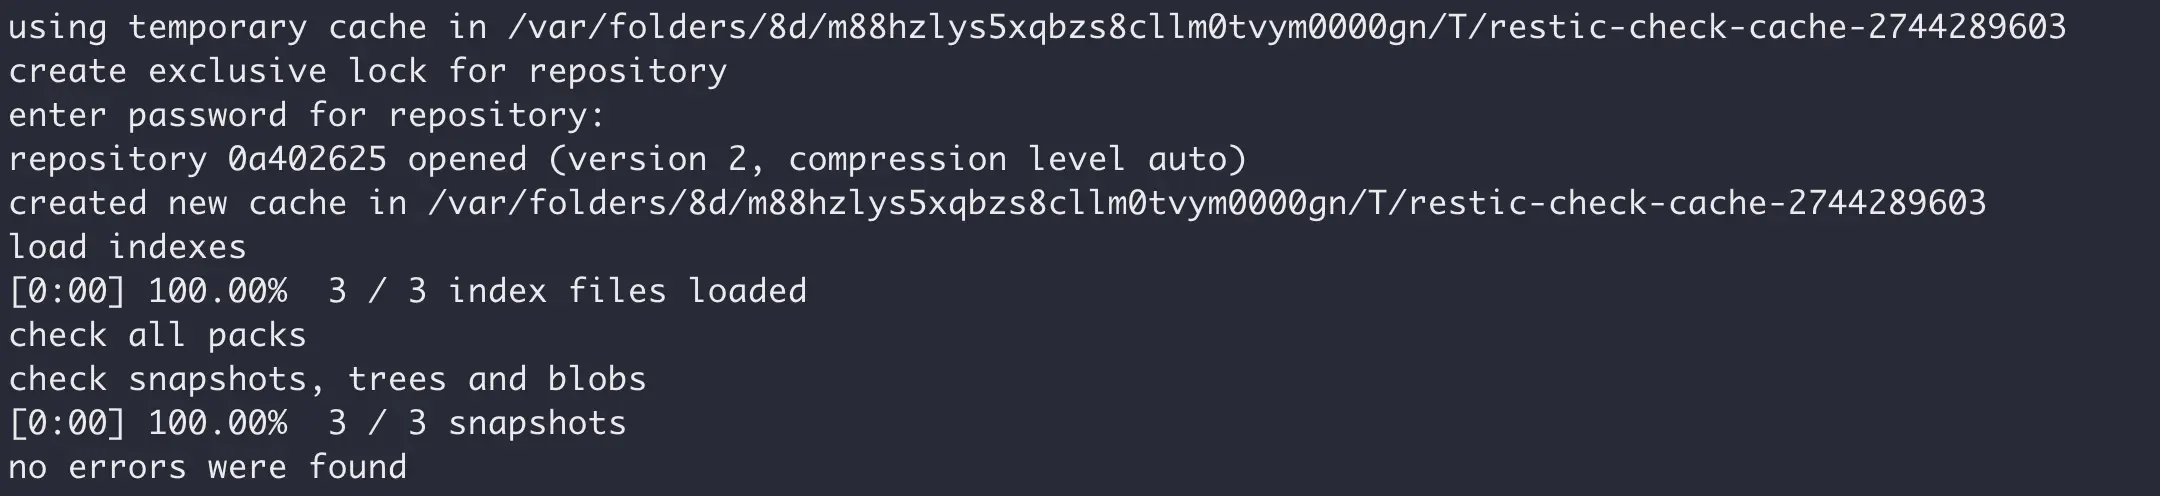
Now let's simulate "damage". For example, find a file in the data directory within the NoteE2EE directory, modify its filename by adding an underscore at the beginning to simulate file damage/loss.
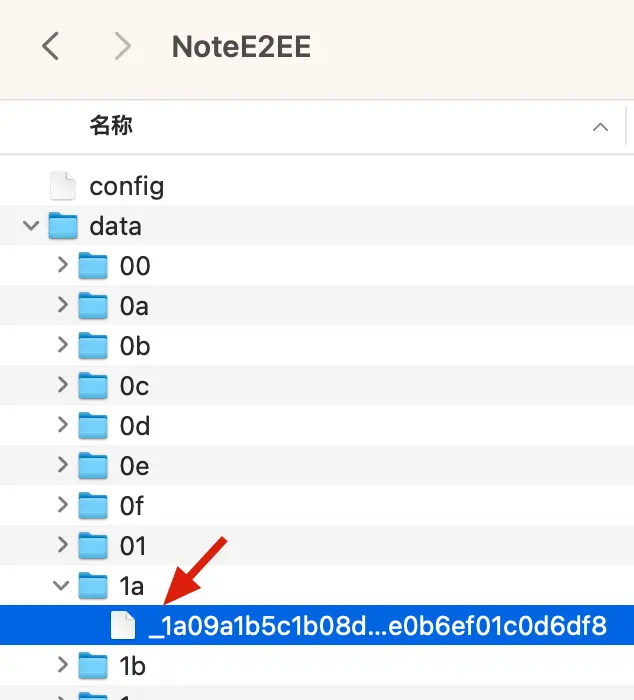
Running the check command again shows that the repository is abnormal and needs repair, which is expected.
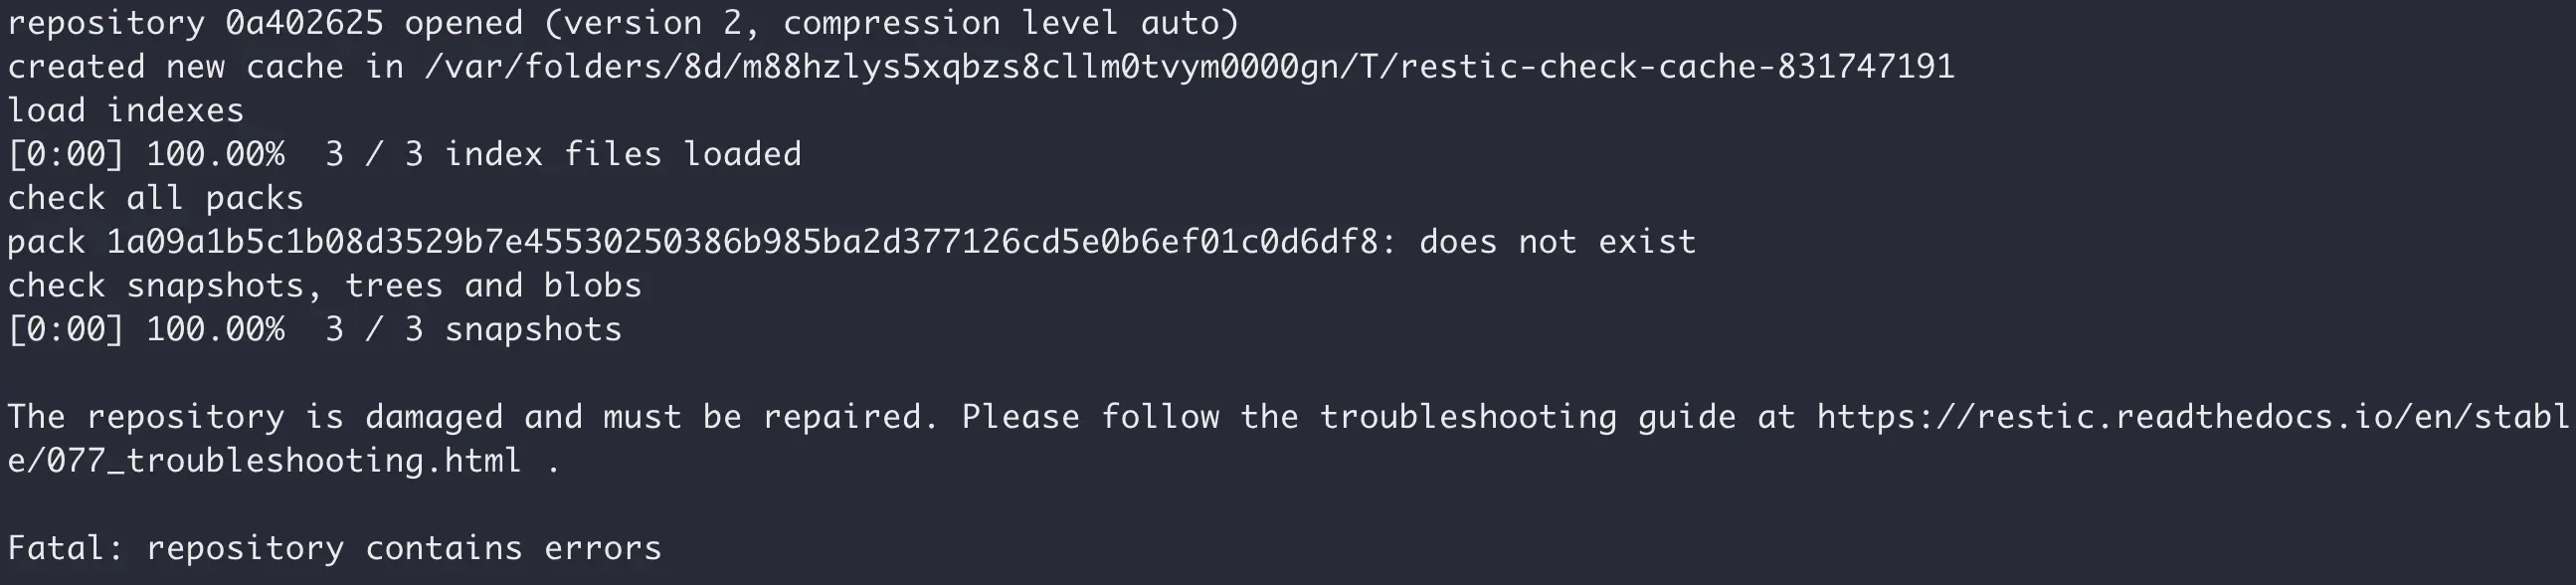
View existing snapshots:
$ restic -r ~/Documents/NoteE2EE snapshots
Export a specific snapshot:
$ restic -r ~/Documents/NoteE2EE restore 5fcd966f --target ~/Downloads/NoteRestore/
5fcd966f is the snapshot ID, which can be found using the snapshots command; additionally, the NoteRestore directory will be created automatically if it doesn't exist.
If your repository is large and you only want to export certain files or directories, use the following command:
$ restic -r ~/Documents/NoteE2EE restore 5fcd966f --target ~/Downloads/NoteRestore/ --include Epub电子书
In this case, "--include Epub电子书" refers to a folder in the root directory of the repository.
If you only have one encrypted repository, using backup each time works fine. However, if you follow the 3-2-1 principle for backups and have multiple encrypted repositories, running backup multiple times to different repositories is inefficient.
In this case, you need to use copy, which ensures strict data consistency and performs well:
$ restic init --repo ~/Documents/NoteE2EE-copy

$ restic -r ~/Documents/NoteE2EE-copy copy --from-repo ~/Documents/NoteE2EE
From an AI summary (which I think is quite good):
If you need to synchronize data between multiple Restic repositories,
copyis always the preferred choice—it acts like a professional "data mover" between repositories, whilebackupis like a "collector" for original data.
If you're not a fan of command-line operations, you can try this open-source tool: emuell/restic-browser
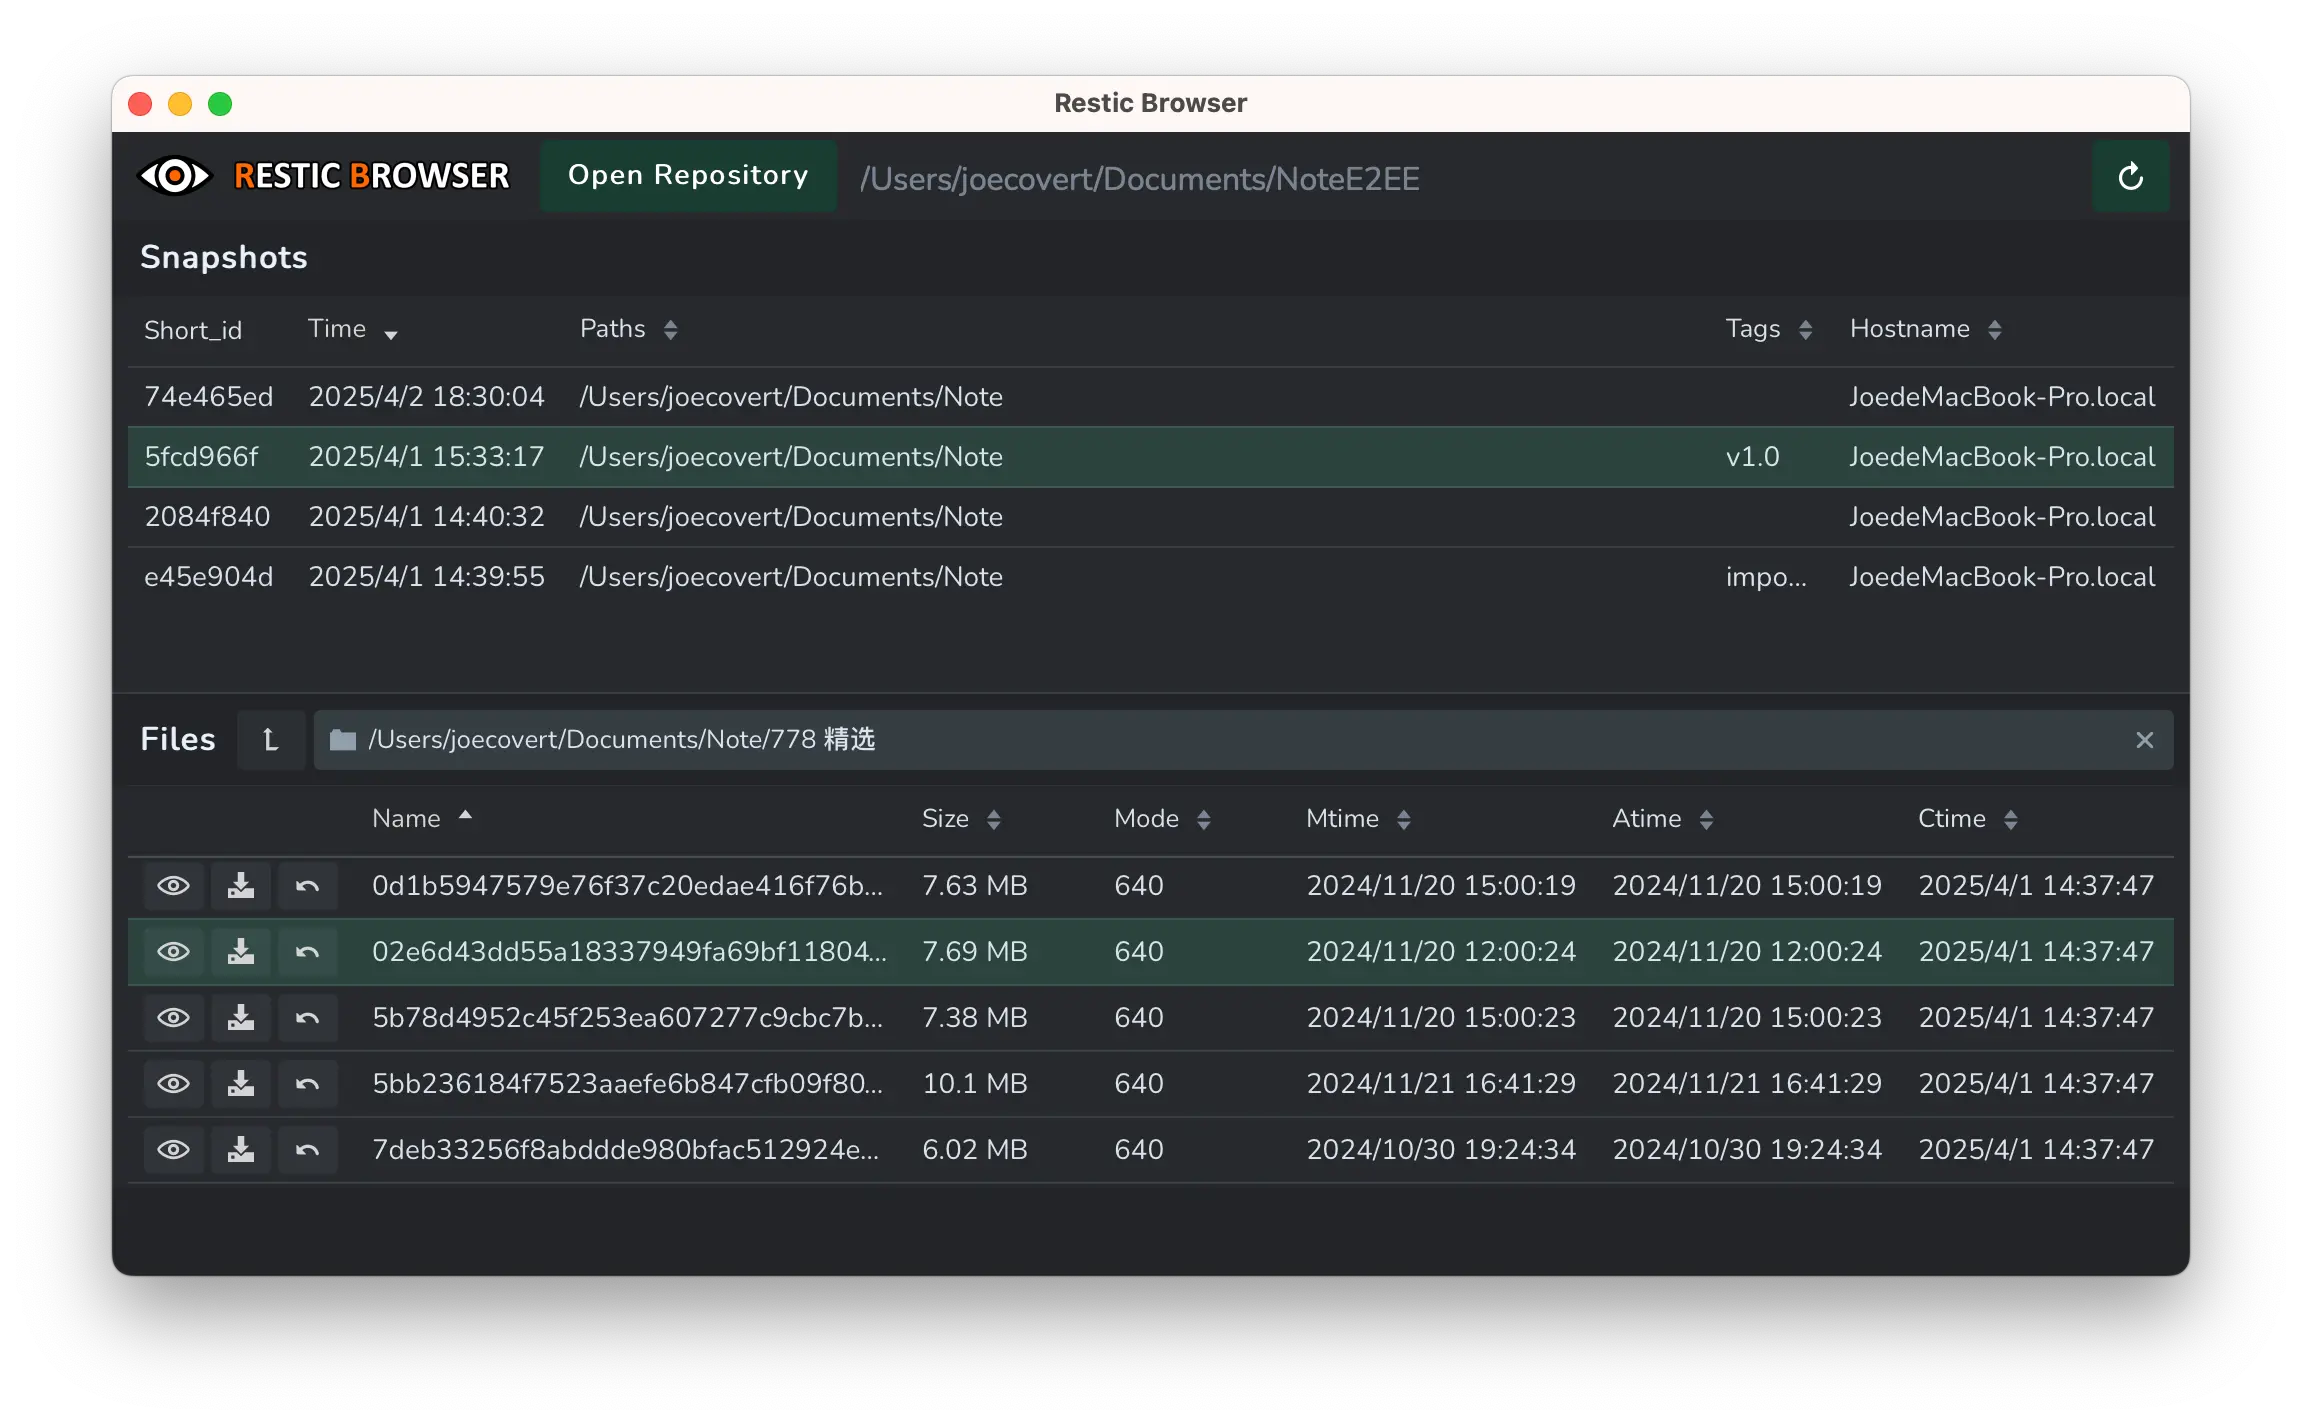
Developed with Rust + TypeScript, it's only a few megabytes in size and has read-only functionality. As the name "Browser" suggests, it allows you to browse encrypted repositories and makes it more convenient to look for files in snapshots.
Documentation: Autorestic Quick Start
Autorestic is a wrapper around the amazing restic. While being amazing the restic cli can be a bit overwhelming and difficult to manage if you have many different location that you want to backup to multiple locations. This utility is aimed at making this easier 🙂
Autorestic is a wrapper developed around the excellent restic tool. Although the restic command-line tool itself is outstanding, when you need to synchronize backup data from multiple different locations to multiple storage targets, its operation can seem complex and difficult to manage. This tool aims to simplify this process, making multi-target backup management easier and more convenient.
Installation
$ brew install autorestic
Configuration File
Create a configuration file with the following content:
version: 2
backends:
  note_primary:
    type: local
    path: "~/Documents/NoteE2EE"
    env:
      RESTIC_PASSWORD: "your-restic-vault-passowrd"
  note_backup:
    type: local
    path: "~/Documents/NoteE2EE-copy"
    env:
      RESTIC_PASSWORD: "your-restic-vault-passowrd"

locations:
  notes:
    from: "~/Documents/Note"
    to:
      - note_primary
      - note_backup
    options:
      forget:
        keep-last: 7
Change the configuration file permissions (recommended):
$ chmod 600 ~/.autorestic.yml
Locations and Backends
In Autorestic, Location describes the backup content and target (from / to), and Backend defines the backup destination.
Configuration Verification
$ autorestic check

Everything is fine.
Manual Backup Execution
Complete backup:
$ autorestic backup -a
Specific Location backup:
$ autorestic backup -l notes
Output:
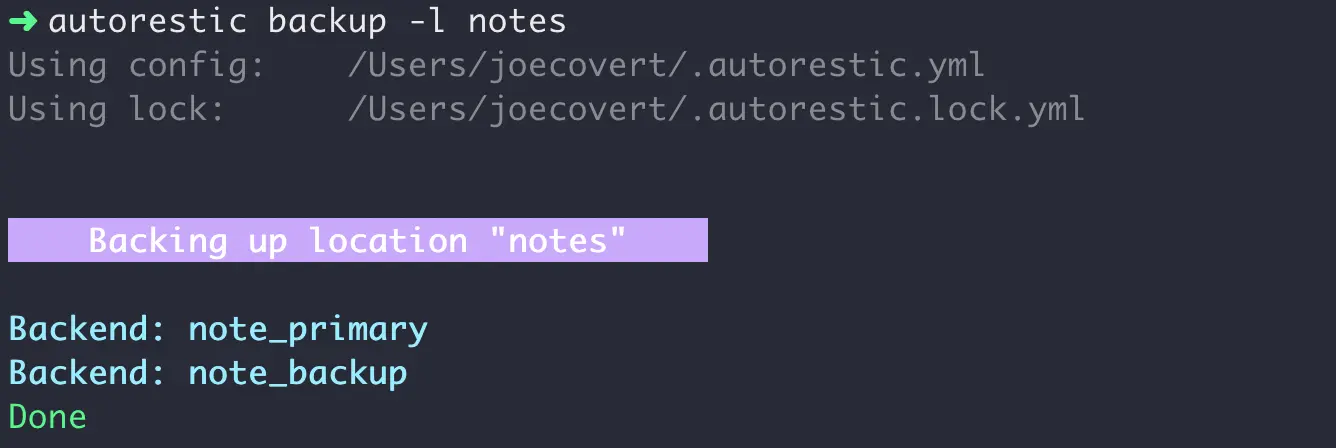
Currently, this solution perfectly fits my needs and is easy to use. I'll update this post with any additional information after using it for a while.
此内容由惯性聚合(RSS阅读器)自动聚合整理,仅供阅读参考。 原文来自 — 版权归原作者所有。