


We’re excited to announce that Netlify now supports configurable Python versions in your builds! Previously, only Python 2.7 and 3.8 (in specific patch versions) were supported. Now, you can use any version of Python by specifying the desired version through the PYTHON_VERSION environment variable.
Whether you’re working on a legacy project that requires an older Python version or taking advantage of the latest features in Python 3.x, you now have full control over which Python version runs in your builds. This change allows for greater flexibility and ensures that your projects can evolve with the language as new versions are released.
At Netlify, we understand that developers need the freedom to choose the tools and technologies that best fit their projects. Python has undergone significant changes over the years, and supporting multiple versions allows you to build, test, and deploy your projects with the version that fits your requirements.
By allowing you to define the Python version via the PYTHON_VERSION environment variable, we’re giving you more control over your build environment, reducing friction when transitioning between versions, and ensuring your builds are always optimized for your needs.
How to use configurable Python versions
Using a specific Python version in your build can be achieved by setting the PYTHON_VERSION=3.13 environment variable in your Netlify configuration or the UI.
For example, to specify Python 3.13, you can set it either through the UI or in your netlify.toml file:
[build]
environment = { PYTHON_VERSION = "3.13" }
Alternatively, you can set this variable directly in your project’s build settings in the Netlify dashboard:
- Navigate to your project settings.
- Under Build & Deploy, click Environment Variables.
- Add a new variable named
PYTHON_VERSIONand set it to the desired version (e.g.,3.13).
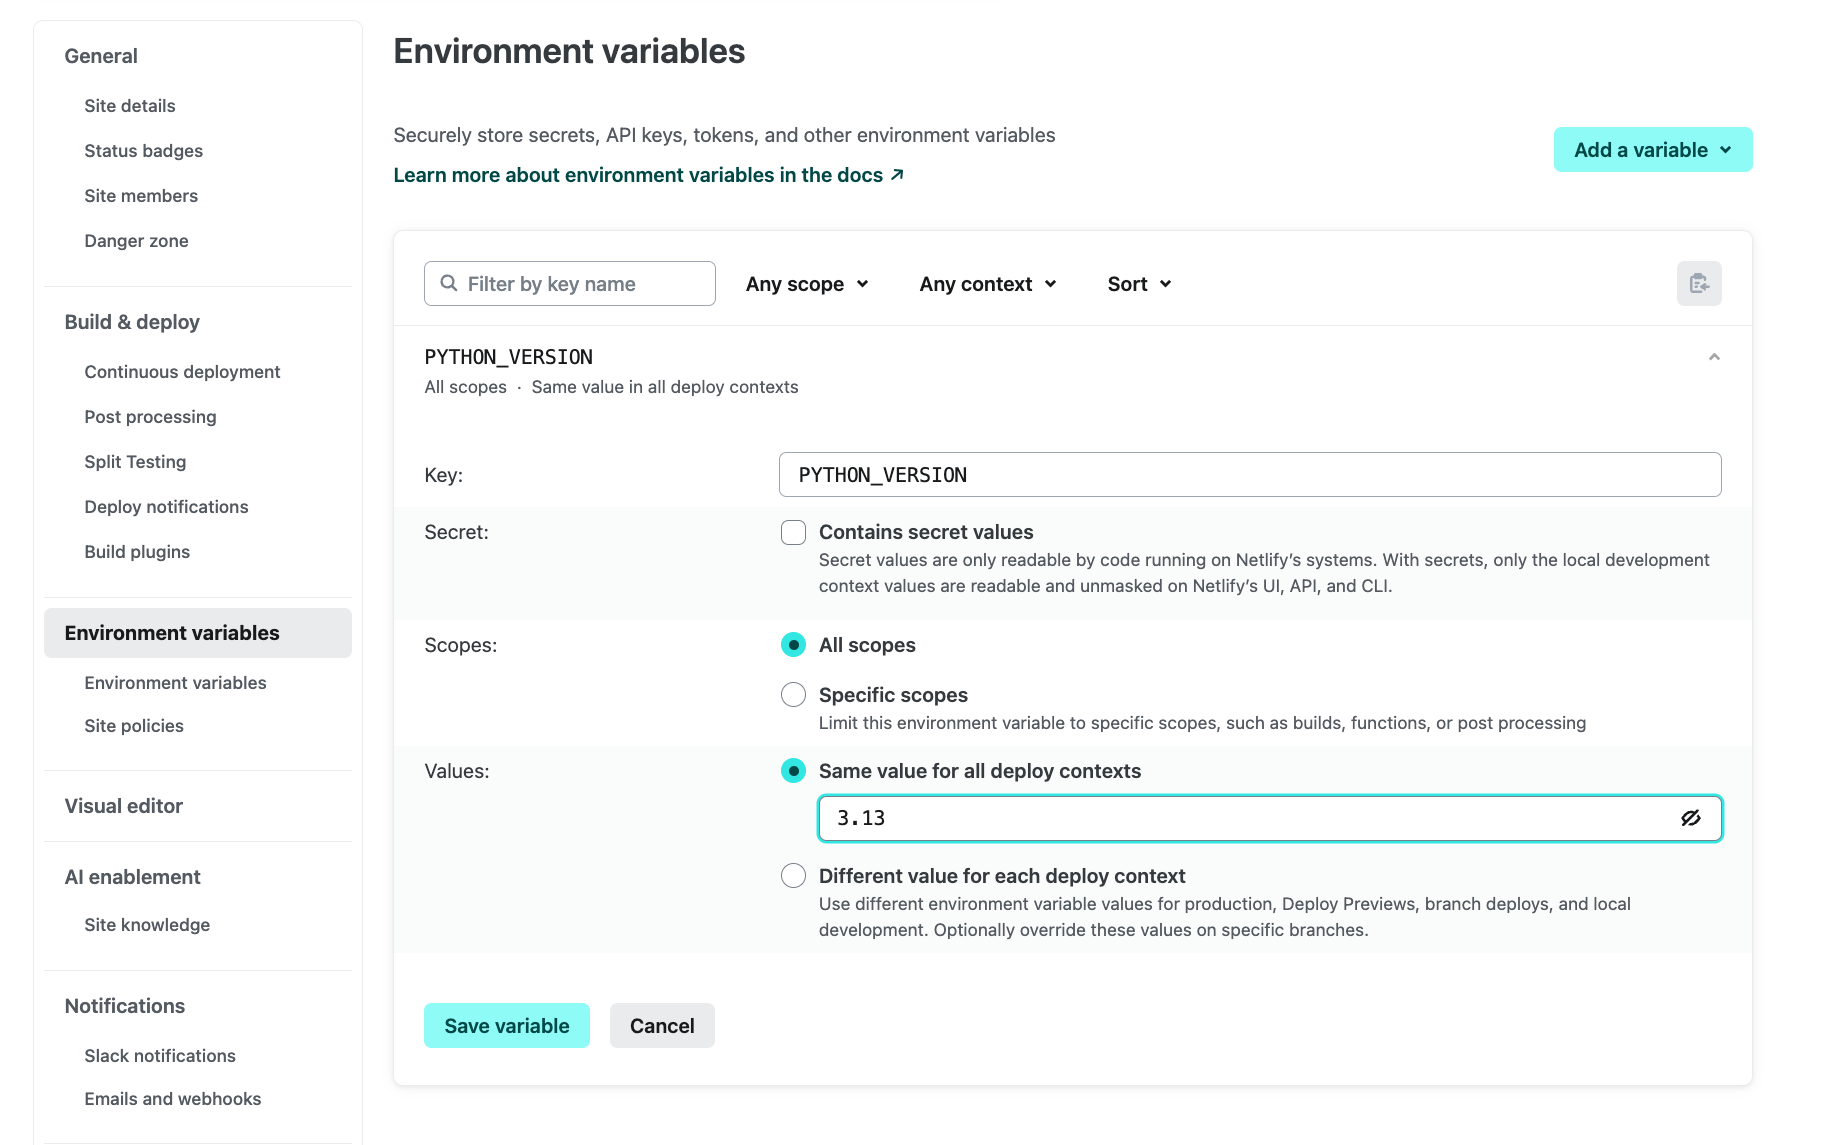
That’s it! Netlify will now use the specified Python version when running your builds.
Example: Creating a documentation site with MkDocs
With Netlify’s flexible build settings and the newly introduced configurable Python versions, deploying a static site generated with MkDocs has never been easier. MkDocs is a static site generator that’s perfect for documentation sites, and in this guide, we’ll walk through how to deploy a documentation site on Netlify using MkDocs and the popular Material theme.
Step 1: Install MkDocs with Material theme
First, you need to install MkDocs and the Material theme by adding them to a requirements.txt file, which helps define the Python dependencies for your project.
Create a requirements.txt file with the following content:
mkdocs==1.6
mkdocs-material==9.5.41
This tells Python’s package manager pip to install MkDocs and the Material theme when Netlify runs your build.
Step 2: Create the MkDocs configuration file
Next, create a file called mkdocs.yml in the root directory of your project. This file contains all the necessary settings for your MkDocs site.
Here’s an example of the mkdocs.yml file:
site_name: My Project
theme:
name: material
nav:
- Home: index.md
- About: about.md
site_name: This sets the name of your documentation site. Replace"My Project"with your project’s name.theme: We are using the Material theme for MkDocs here, which provides a modern and clean design for your documentation.nav: This sets up the navigation structure for your site. In this case, we have two pages:HomeandAbout, which we’ll define in the next step.
Step 3: Create your documentation pages
Now, let’s create the actual content for your site. Inside your project directory, create a folder called docs. This folder will contain your Markdown files that MkDocs will use to generate the site.
In the docs/ folder, create two Markdown files:
-
index.mdfor the homepage:# Welcome to My Project
This is the home page for your documentation.
-
about.mdfor the “About” page:# About My Project
This page gives more information about the project.
These Markdown files are automatically rendered as HTML by MkDocs, and the navigation structure you set up in the mkdocs.yml file will link to these pages.
Step 4: Configure Netlify for deployment
To deploy your MkDocs site on Netlify, you need to configure the build settings.
In the root of your project, create a netlify.toml file with the following content:
[build]
command = "mkdocs build"
publish = "site/"
environment = { PYTHON_VERSION = "3.13" }
command: This tells Netlify to run themkdocs buildcommand, which generates the static files for your documentation site.publish: MkDocs outputs the static site in thesite/folder by default, so we specify that as the directory to publish.environment: Here, we set the Python version to3.13to benefit from the latest version.
Step 5: Deploy to Netlify
You’re now ready to deploy your MkDocs site! Push your project to a Git repository (e.g., GitHub, GitLab, or Bitbucket), and connect it to Netlify.
Step 6: Customize and expand your documentation
Now that your MkDocs site is live, you can continue adding new documentation pages by simply creating more .md files in the docs/ folder and updating the navigation structure in mkdocs.yml.
Wrapping up
With just a few simple steps, you’ve successfully deployed a flexible documentation site powered by MkDocs on Netlify. By using the mkdocs.yml file for configuration and Markdown files for content, MkDocs makes it easy to manage and scale your documentation over time.
If you want to learn more about MkDocs or dive deeper into customizations, check out the MkDocs documentation.
Happy documenting and deploying!