







The Sentry Build plugin is now archived. To integrate Sentry with Netlify Functions we recommend following Sanity’s AWS Lambda documentation. If you have any questions, reach out in our support forums.
The Sentry Build Plugin for Netlify was initially developed to provide users with improved error monitoring and management capabilities. Specifically, it was designed to work with Netlify’s build and deploy pipeline, allowing developers to easily monitor their application’s performance, quickly identify, and resolve any issues that occur. This means that users can receive real-time notifications of any issues that occur during the build process, such as syntax errors, broken links, and other issues.
However, based on feedback from all of you, you voiced that the plugin wasn’t providing adequate visibility around functions usage and spike patterns..
You asked, we listened. We’re proud to announce the newest integration with Sentry—designed to address this specific limitation and enable users to add Sentry error monitoring to Netlify Functions, Scheduled Functions, and Background Functions. Good news; this integration also includes minimal configuration for Sentry Cron Monitoring on Scheduled Functions and centralizes all errors in the Sentry project to help users debug them more efficiently.
As developers continue to build increasingly complex sites and apps, using serverless functions to execute tasks on a recurring basis or perform long-running tasks becomes more commonplace. This latest integration between Netlify and Sentry provides developers with the efficiency and visibility they need to ensure that their sites and apps are up and running smoothly.
Before you begin
To get started with the Sentry Integration on Netlify, you’ll need:
Create a function that uses error monitoring
With the Sentry Integration, you can add error monitoring to your Netlify Functions. To get started and enable the integration, install the necessary dependencies to your project:
npm install @netlify/sentry @netlify/integrations
Sentry automatically assigns a Data Source Name (DSN) when you create a project to start monitoring events in your app. Create an environment variable on your Netlify site to store the DSN assigned to your Sentry project:
- In your Sentry account, select Settings > Projects, then the project you want to associate with your Netlify site.
- Under SDK Setup, select Client Keys (DSN) to access your DSN.
- Copy the DSN value from the list of client keys.
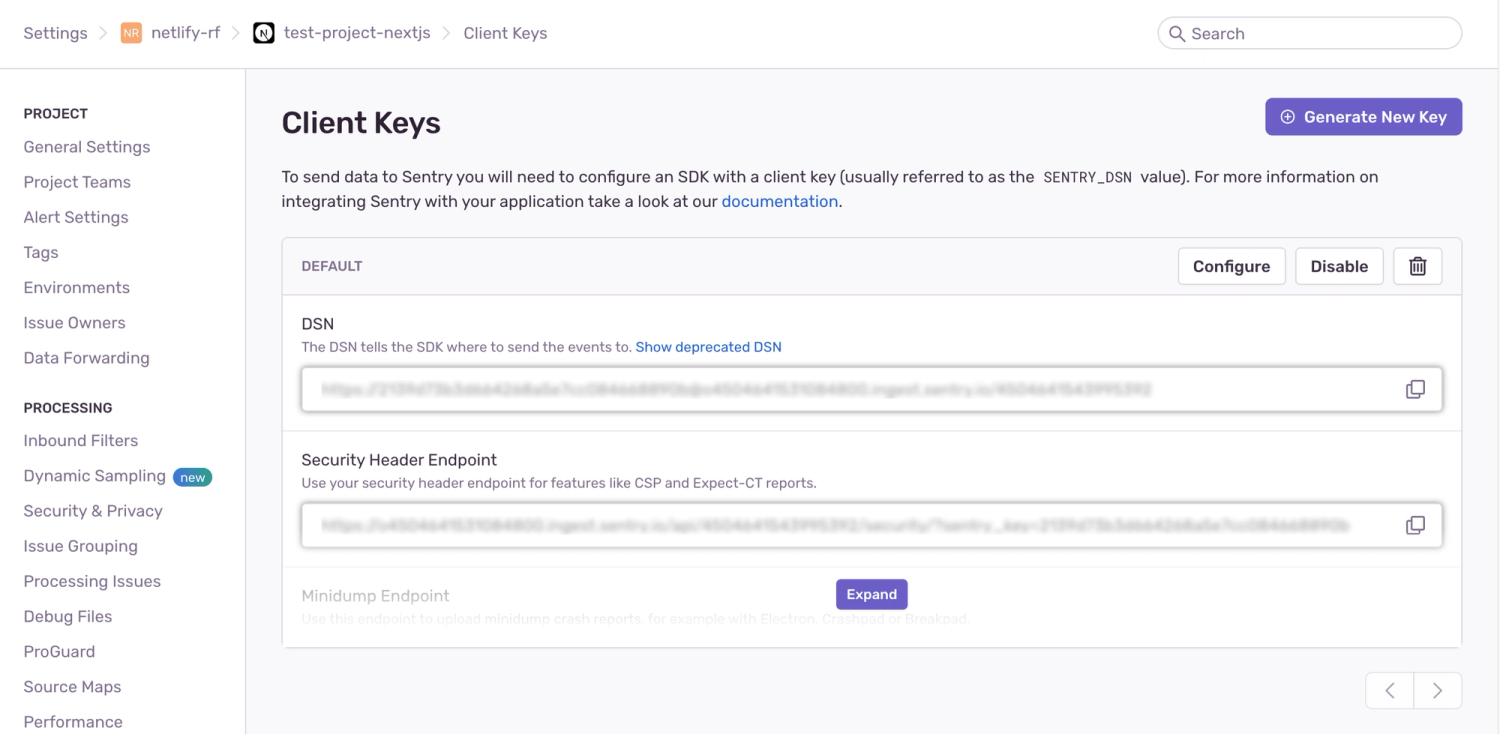
Return to the Netlify UI to enable the Sentry Integration:
- Select your site, then select Integrations > Sentry > Enable.
- Under Function monitoring > Function monitoring configuration, select Edit settings.
- Paste the DSN from Sentry into the value field.
- Select Save.
After the Sentry Integration is enabled and your Sentry DSN is configured, you can create a function with a handler method. Add the Sentry wrapper around the function like in the following example:
import { wrap } from "@netlify/integrations";
import { HandlerEvent, HandlerContext } from "@netlify/functions";
import { SentryContext, withSentry } from "@netlify/sentry";
const withIntegrations = wrap(withSentry);
const handler = withIntegrations(
async (event: HandlerEvent, context: HandlerContext & SentryContext) => {
// Add handler function content here
}
);
export { handler };
Here are additional examples to test your functions, scheduled functions, and background functions.
For more information on creating functions that use cron monitoring and identifying basic errors, be sure to refer to our Sentry Integration docs page.