






Core ML offers a great way for conducting machine learning on Apple devices. Developers could download existing Core ML models from various sources such as here or train a model from various templates in CreateML. For more flexibility, they could also train a model with other frameworks and convert it to Core ML. This article records my experiment on conducting on-device semantic segmentation by converting a Keras model to Core ML. The goal of the demo in this article aimed at creating a proof-of-concept application that segments the liver's region in CT scanning images.
Some Python package synonyms are given as follows.
1 | import coremltools as ct |
In semantic segmentation tasks, the machine learning model gives a segmentation mask from its input. The segmentation mask has the same resolution as the model's input. In its channel dimension, elements of each vector represent the probability of the corresponding pixel in the input image belonging to the class. The liver segmentation task only has one class output: liver. Thus, with the input image's resolution being 512 x 512, the output's shape is (512, 512, 1).
In most machine learning frameworks, training is done in batches and epochs. A batch is a small group of data feeds to the model, providing a reference on optimizing the model's parameters. And an epoch contains all batches that cover the entire training set. You could load the entire dataset and feed it to Keras using the fit method and let it split the dataset into batches for you. However, the dataset could be too large to be loaded entirely sometimes. In such cases, we could provide Keras a generator alternatively. The generator provides a tuple containing a batch of corresponding samples and labels in each iteration. We need to manually specify the number of batches in an epoch in the fit_generator method to split the epochs accordingly.
I'm also adding data augmentation using imgaug at this stage. The augmentation would augment the image and segmentation mask simultaneously, making them look different to the model every time, thus reduce the chance for overfitting during training.
Although the CT scanning images are single-channel, 3-channel image representation (initial values are duplicated to 3 channels, rescaled to 0 - 255, then normalized to 0 - 1) is used here since I'm not sure whether it's okay to keep single-channel images on iOS albums. Finally, in each iteration, data_generator yields images with shape (BATCH_SIZE, 512, 512, 3) with each element range from 0 to 1, and labels with shape (BATCH_SIZE, 512, 512). Related code is shown as follows.
1 | def rescale(grey_scale_image): |
There are lots of model architectures that tackles the problem of semantic segmentation, including but not limited to U-Net, Mask-RCNN, and DeepLab. In the Python package segmentation models, you could get easy access to multiple model architectures. By simply specifying the input shape, class count, and possibly model backbone (feature extractor architecture), you can get the Keras model for semantic segmentation with one single line of code. In this article, I'm using U-Net model with ResNet backbone. Since CT scanning images are visually different from normal images by a lot, I'm not adopting the pre-trained weights.
1 | unet_model = sm.Unet( |
I am using binary cross entropy with Adam optimizer in the training phase. Both are traditional selections. However, due to the unbalanced class distribution problem, binary cross entropy may not be the ideal selection all the time. If time allows, you could try other loss functions such as Jaccard, dice, or Lovasz hinge. These loss functions use the overlap between the ground truth and prediction as their measures, thus alleviates the class unbalance problem.
In the fit_generator method, I'm using two callbacks: learning rate scheduler and model checkpoint. The learning rate scheduler could decay the learning rate after certain numbers of epochs, and the model checkpoint could dump the model after each epoch. These callbacks could help achieve better model performance and select the model with best-fit.
1 | unet_model.compile( |
When the training process is finished, you can choose the dumped checkpoint file with the best evaluation performance. The checkpoint can be loaded by Keras in the future. To perform predictions on Core ML, a Core ML format file (file with .mlmodel extension) is required. Apple provides coremltools for converting models with other types to Core ML's format. The following script help loads the Keras model checkpoint, convert to Core ML format, and dump the converted model. As image inputs from users' albums have integer pixel values from 0 to 255, the corresponding scale is specified to help the model get its correct input.
1 | keras_model = tf.keras.models.load_model( |
The final result of the previous steps is the Core ML format model file, which could help us perform on-device machine learning. With on-device machine learning, the application could have less dependency on the internet connection, be more responsive, and keep the user's data on their devices.
After dragging the model file to the Xcode project, Xcode automatically generates its model class with the name identical to the model file's name. The model class serves as the initializer for the VNCoreMLModel class, a container for a Core ML model used with Vision requests. This class receives VNCoreMLRequest and generates VNObservation. During the initialization of the VNCoreMLRequest, one states the callback for handling the prediction result of the model. The related initialization code is given as follows.
1 | private func setupModels() { |
Note: The default
MLModelConfigurationis recommended in most of the cases, which could fully utilize on-device computing resources such as the CPU, GPU, and NPU. However, as these devices adopt different float point prevision, the prediction result could be different. If you find the result strange, try to modifycomputeUnitsin the configuration.
The model's input is represented as a CGImage, then wrapped as a VNImageRequestHandler. The prediction is made in a separate queue in order to prevent the logic from blocking the UI updates. The prediction result will be provided in the corresponding VNCoreMLRequest object's callback.
1 | let mlProcessingQueue = DispatchQueue(label: "ml_processing") |
VNObservation is a generic type for prediction outputs in Vision. For semantic segmentation, we need to downcast the VNObservation object to VNCoreMLFeatureValueObservation, which contains the segmentation mask as an MLMultiArray. In our case, the segmentation model's output has the shape (1, 512, 512, 1). The specific probability prediction for each pixel can be fetched as follows.
1 | func segmentationSubscript(array: MLMultiArray, columnIndex: Int, rowIndex: Int) -> NSNumber { |
For visualization, I used Quart2D. By overlaying another transparent view over the image view showing the original image, then draw a rectangle for each value in the prediction mask with the alpha value being the corresponding probability, we could visualize the model's prediction result.
1 | class ObservationVisualizerView: UIView { |
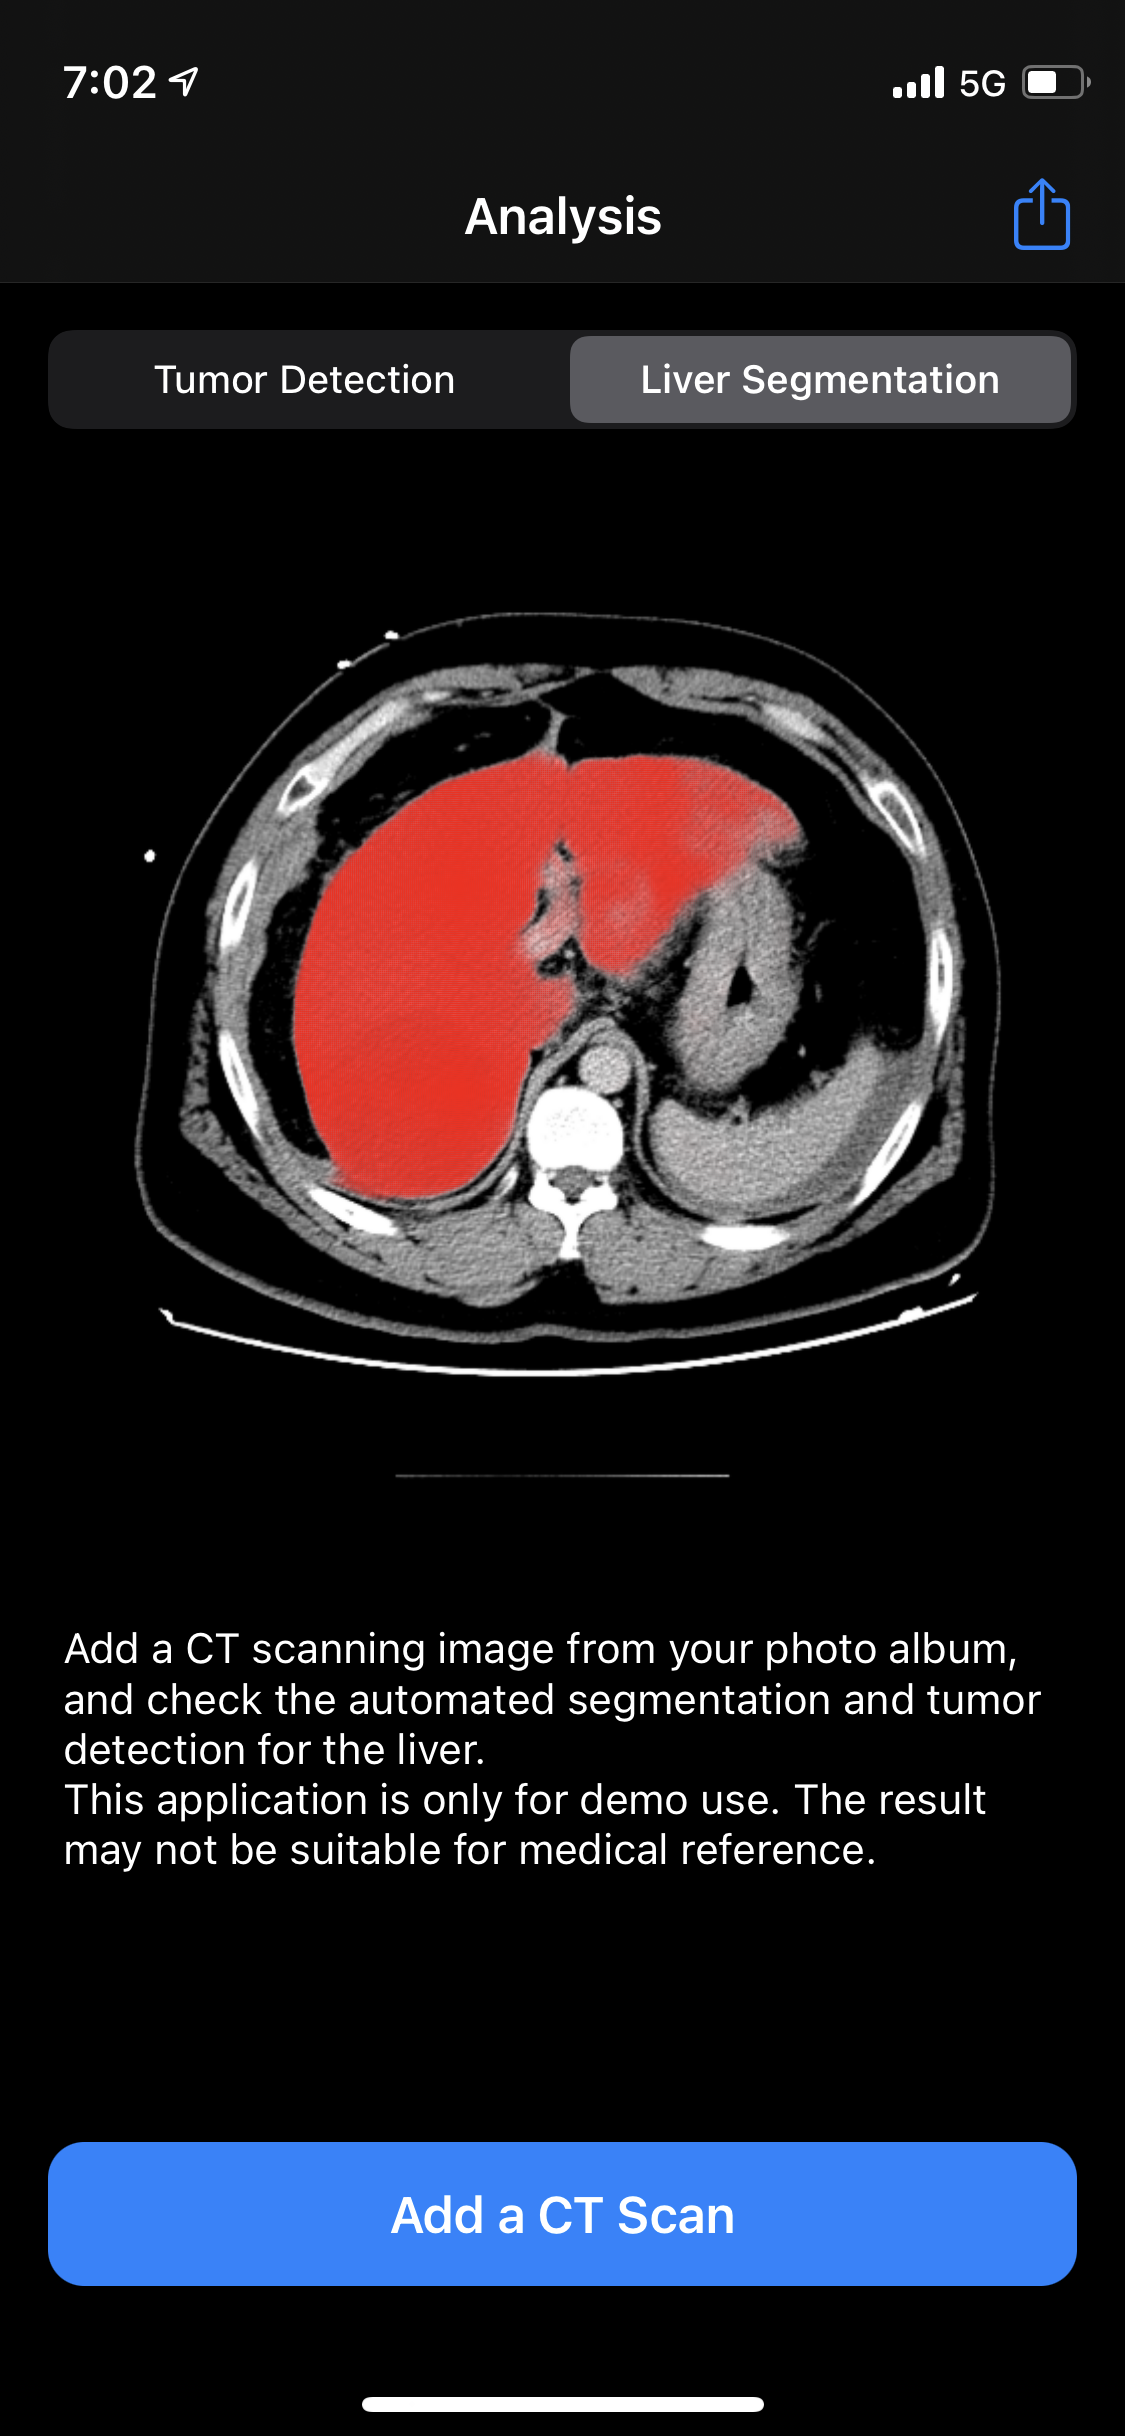
Here's a screenshot of the final application.
此内容由惯性聚合(RSS阅读器)自动聚合整理,仅供阅读参考。 原文来自 — 版权归原作者所有。