


Image resizing is computationally expensive and usually done on the server-side so that right-sized image files are delivered to the client-side. This approach also saves data while transmitting images from the server to the client.
However, there are a couple of situations where you might need to resize images purely using JavaScript on the client side. For example -
Resizing images before uploading to server
Uploading a large file on your server will take a lot of time. You can first resize images on the browser and then upload them to reduce upload time and improve application performance.
Rich image editors that work on client-side
A rich image editor that offers image resize, crop, rotation, zoom IN and zoom OUT capabilities often require image manipulation on the client-side. The speed is critical for the user in these editors.
If a user is manipulating a heavy image, it will take a lot of time to download transformed images from the server. Imagine this with operations like undo/redo and complex text and image overlays.
Image manipulation in JavaScript is done using the canvas element. There are libraries like fabric.js that offer rich APIs.
Apart from the above two reasons, in almost all cases, you would want to get the resized images from the backend itself so that client doesn't have to deal with heavy processing tasks.
In this post-
We will first talk about how to do resizing purely in JavaScript using the
canvaselement.Then we will cover in great detail how you can resize, crop, and do a lot with images by changing the image URL in the
srcattribute. This is the preferred way to resize images without degrading the user experience programmatically.Also, we will learn how you can do this without needing to set up any libraries or backend servers.
Image resizing in JavaScript - Using canvas element
The HTML <canvas> element is used to draw graphics, on the fly, via JavaScript. Resizing images in browser using canvas is relatively simple.
drawImage function allows us to render and scale images on canvas element.
drawImage(image, x, y, width, height)The first argument image can be created using the Image() constructor, as well as using any existing <img> element.
Let's write the code to resize a user-uploaded image on the browser side 300x300.
<html>

<body>
    <div>
        <input type="file" id="image-input" accept="image/*">
        <img id="preview"></img>
    </div>

    <script>
        let imgInput = document.getElementById('image-input');
        imgInput.addEventListener('change', function (e) {
            if (e.target.files) {
                let imageFile = e.target.files[0];
                var reader = new FileReader();
                reader.onload = function (e) {
                    var img = document.createElement("img");
                    img.onload = function (event) {
                        // Dynamically create a canvas element
                        var canvas = document.createElement("canvas");

                        // var canvas = document.getElementById("canvas");
                        var ctx = canvas.getContext("2d");

                        // Actual resizing
                        ctx.drawImage(img, 0, 0, 300, 300);

                        // Show resized image in preview element
                        var dataurl = canvas.toDataURL(imageFile.type);
                        document.getElementById("preview").src = dataurl;
                    }
                    img.src = e.target.result;
                }
                reader.readAsDataURL(imageFile);
            }
        });
    </script>
</body>

</html>
Let's understand this in parts. First, the input file type field in HTML
<html>
  <body>
    <div>
      <input type="file" id="image-input" accept = "image/*">
      <img id="preview"></img>
    </div>
  </body>
</html>
Now we need to read the uploaded image and create an img element using Image() constructor.
let imgInput = document.getElementById('image-input');
imgInput.addEventListener('change', function (e) {
    if (e.target.files) {
        let imageFile = e.target.files[0];
        var reader = new FileReader();
        reader.onload = function (e) {
            var img = document.createElement("img");
            img.onload = function(event) {
                // Actual resizing
            }
            img.src = e.target.result;
        }
        reader.readAsDataURL(imageFile);
    }
});
Finally, let's draw the image on canvas and show preview element.
// Dynamically create a canvas element
var canvas = document.createElement("canvas");
var ctx = canvas.getContext("2d");

// Actual resizing
ctx.drawImage(img, 0, 0, 300, 300);

// Show resized image in preview element
var dataurl = canvas.toDataURL(imageFile.type);
document.getElementById("preview").src = dataurl;
You might notice that the resized image looks distorted in a few cases. It is because we are forced 300x300 dimensions. Instead, we should ideally only manipulate one dimension, i.e., height or width, and adjust the other accordingly.
All this can be done in JavaScript, since you have access to input image original height (img.width) and width using (img.width).
For example, we can fit the output image in a container of 300x300 dimension.
var MAX_WIDTH = 300;
var MAX_HEIGHT = 300;

var width = img.width;
var height = img.height;

// Change the resizing logic
if (width > height) {
    if (width > MAX_WIDTH) {
        height = height * (MAX_WIDTH / width);
        width = MAX_WIDTH;
    }
} else {
    if (height > MAX_HEIGHT) {
        width = width * (MAX_HEIGHT / height);
        height = MAX_HEIGHT;
    }
}

var canvas = document.createElement("canvas");
canvas.width = width;
canvas.height = height;
var ctx = canvas.getContext("2d");
ctx.drawImage(img, 0, 0, width, height);
Controlling image scaling behavior
Scaling images can result in fuzzy or blocky artifacts. There is a trade-off between speed and quality. By default browsers are tuned for better speed and provides minimum configuration options.
You can play with the following properties to control smoothing effect:
ctx.mozImageSmoothingEnabled = false;
ctx.webkitImageSmoothingEnabled = false;
ctx.msImageSmoothingEnabled = false;
ctx.imageSmoothingEnabled = false;
Image resizing in JavaScript - The serverless way
ImageKit allows you to manipulate image dimensions directly from the image URL and get the exact size or crop you want in real-time. Start with a single master image, as large as possible, and create multiple variants from the same.
For example, we can create a 400 x 300 variant from the original image like this:
https://ik.imagekit.io/ikmedia/ik_ecom/shoe.jpeg?tr=w-400,h-300
You can use this URL directly on your website or app for the product image, and your users get the correct image instantly.

If you don't want to crop the image while resizing, there are several possible crop modes.
https://ik.imagekit.io/ikmedia/ik_ecom/shoe.jpeg?tr=w-400,h-300,cm-pad_resize,bg-F5F5F5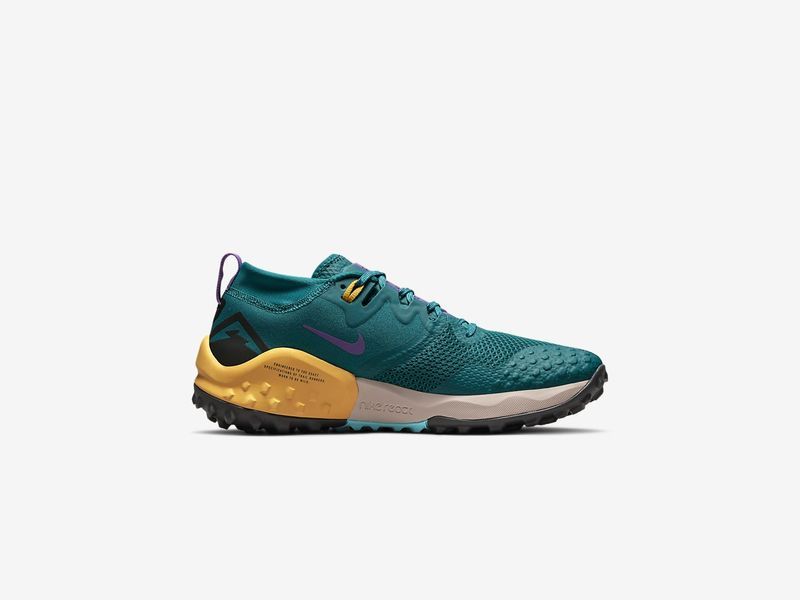
We have published guides on how you can do the following things using ImageKit's real-time image manipulation.
- Resize image - Basic height & width manipulation
- Cropping & preserving the aspect ratio
- Face and object detection
- Add a watermark
- Add a text overlay
- Adapt for slow internet connection
- Loading a blurred low-quality placeholder
Summary
In most cases, you should not do image resizing in the browser because it is slow and results in poor quality. Instead, you should use an image CDN like ImageKit.io to resize images dynamically by changing the image URL. Try our forever free plan today!
If your use-case demands client-side resizing, it is possible using the
canvaselement.