


Now that we have everything wired up, it’s time to record, direct and stream! If you missed the previous parts, check out the table of contents to quickyl jump to a previous section.
Ready? Let’s go!
For this tutorial we use OBS, aka Open Broadcaster Software. This thing is a beast. There’s almost nothing you can’t do with OBS. I could fill pages, but this shouldn’t be an OBS guide book, rather a gentle introduction so you can get started easily.
There are of course other programs out there that might have a nicer user interface or are generally more intuitive to use, but OBS is free, cross-platform, can do a ton, and is totally sufficient for your videos.
One thing that I don’t share in this tutorial is how to operate the YouTube live studio or similar. There are just too many options out there, and especially YouTube changes look and feel way too often. I just can’t keep up with those changes.
I try to lead you to the correct settings you need for your YouTube stream, though.
Ready? Let’s go!
I already spoke about it in the last parts, but here’s a quick rundown of some important hardware requirements and settings you have to take to successfully stream your meetup:
All good? Than check out this one important software setting.
OBS works without much hassle. You open it and everything is like you left it before. It has a ton of settings for you to fiddle around, but there is one really important setting you shouldn’t miss.
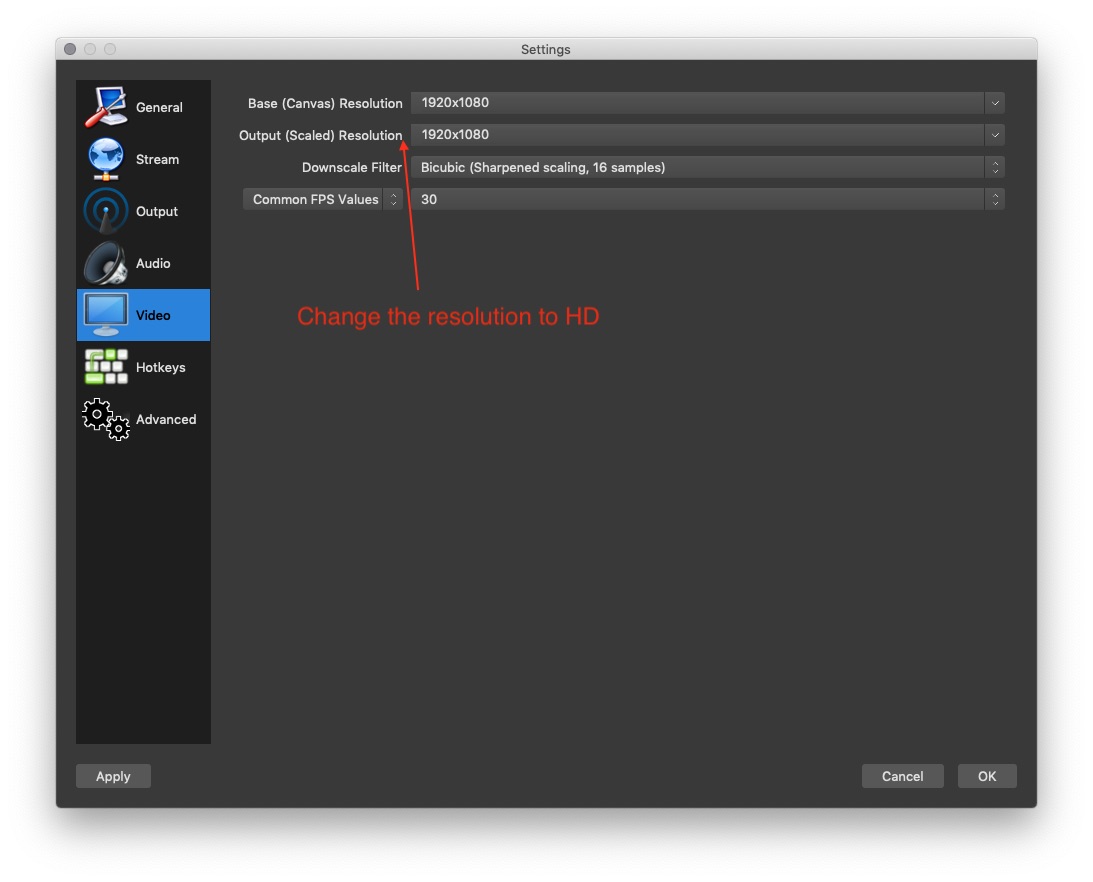
The original output and canvas resolution of OBS is some weird value. You want to have HD, at least. To change this, click Settings (button) → Video (tab) and change both canvas resolution and output resolution to HD.
Now you can start designing your scenes.
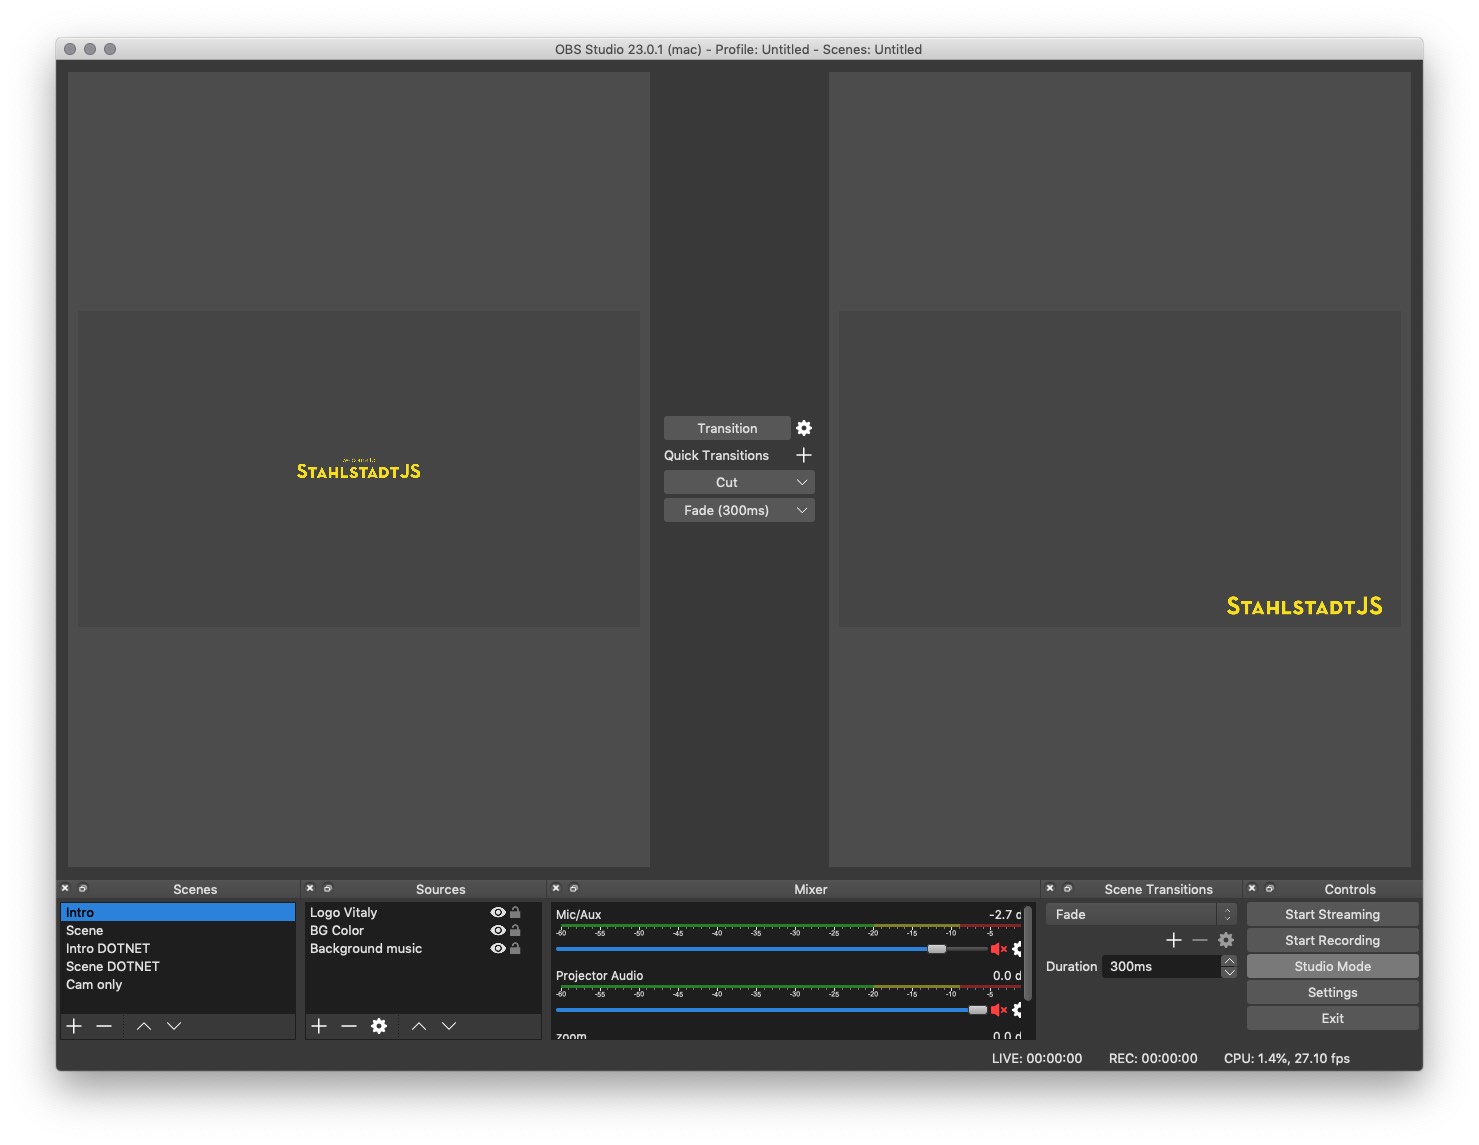
OBS works in scenes. Think of it as different arrangements for your content. You can switch easily between scenes to get more dynamic into your live streams.
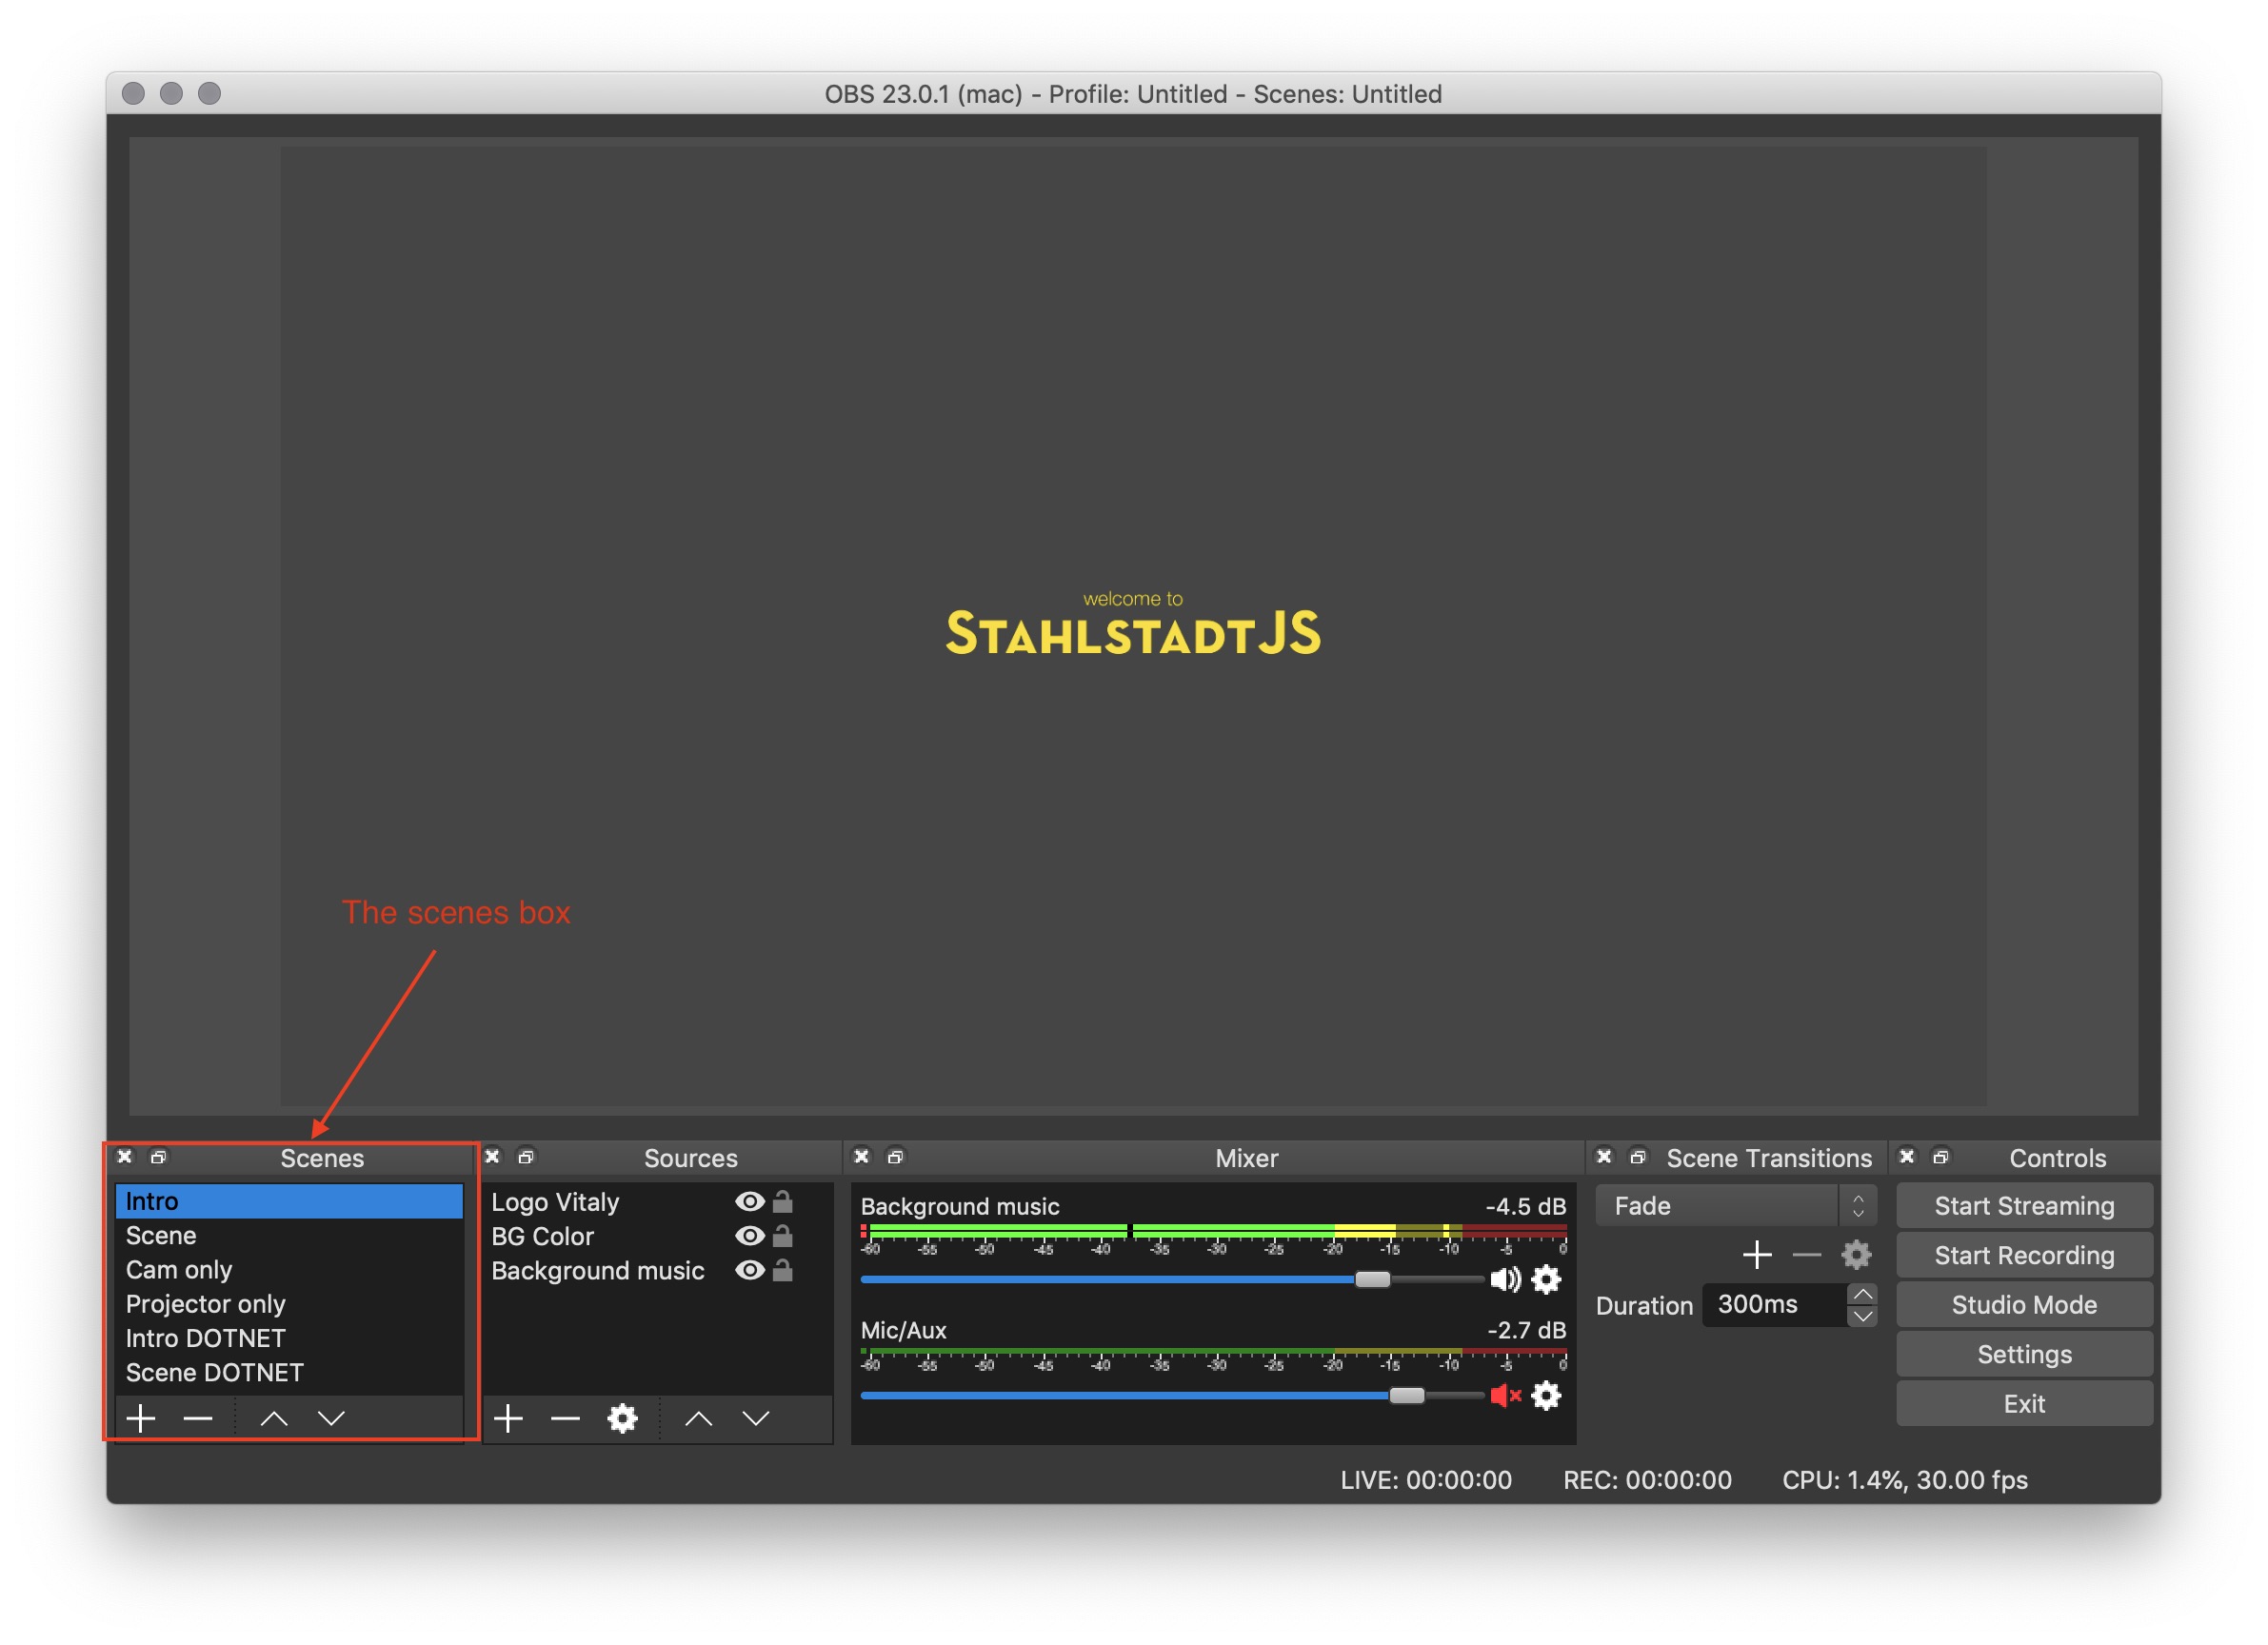
The scenes box is located at the bottom left of the OBS screen. With the + button you can add new screens, with - you delete them. You know how this works.
I usually create four different scenes:
You can switch between scenes by clicking on them. If you want to have keyboard shortcuts, go to Settings → Hot Keys and assign shortcuts at every Switch to scene entry.
The scenes are set, now we add the sources.
Sources are, well, the input sources for your live stream. This can also be anything. Starting from everything we have attached to the laptop over to images, pre-recorded videos, media of any kind or simple things like colored areas. This can be overwhelming. So here’s a list of important sources that you need.
Depending on how you want to style your stream, you also can have some text sources with the speaker names or similar.
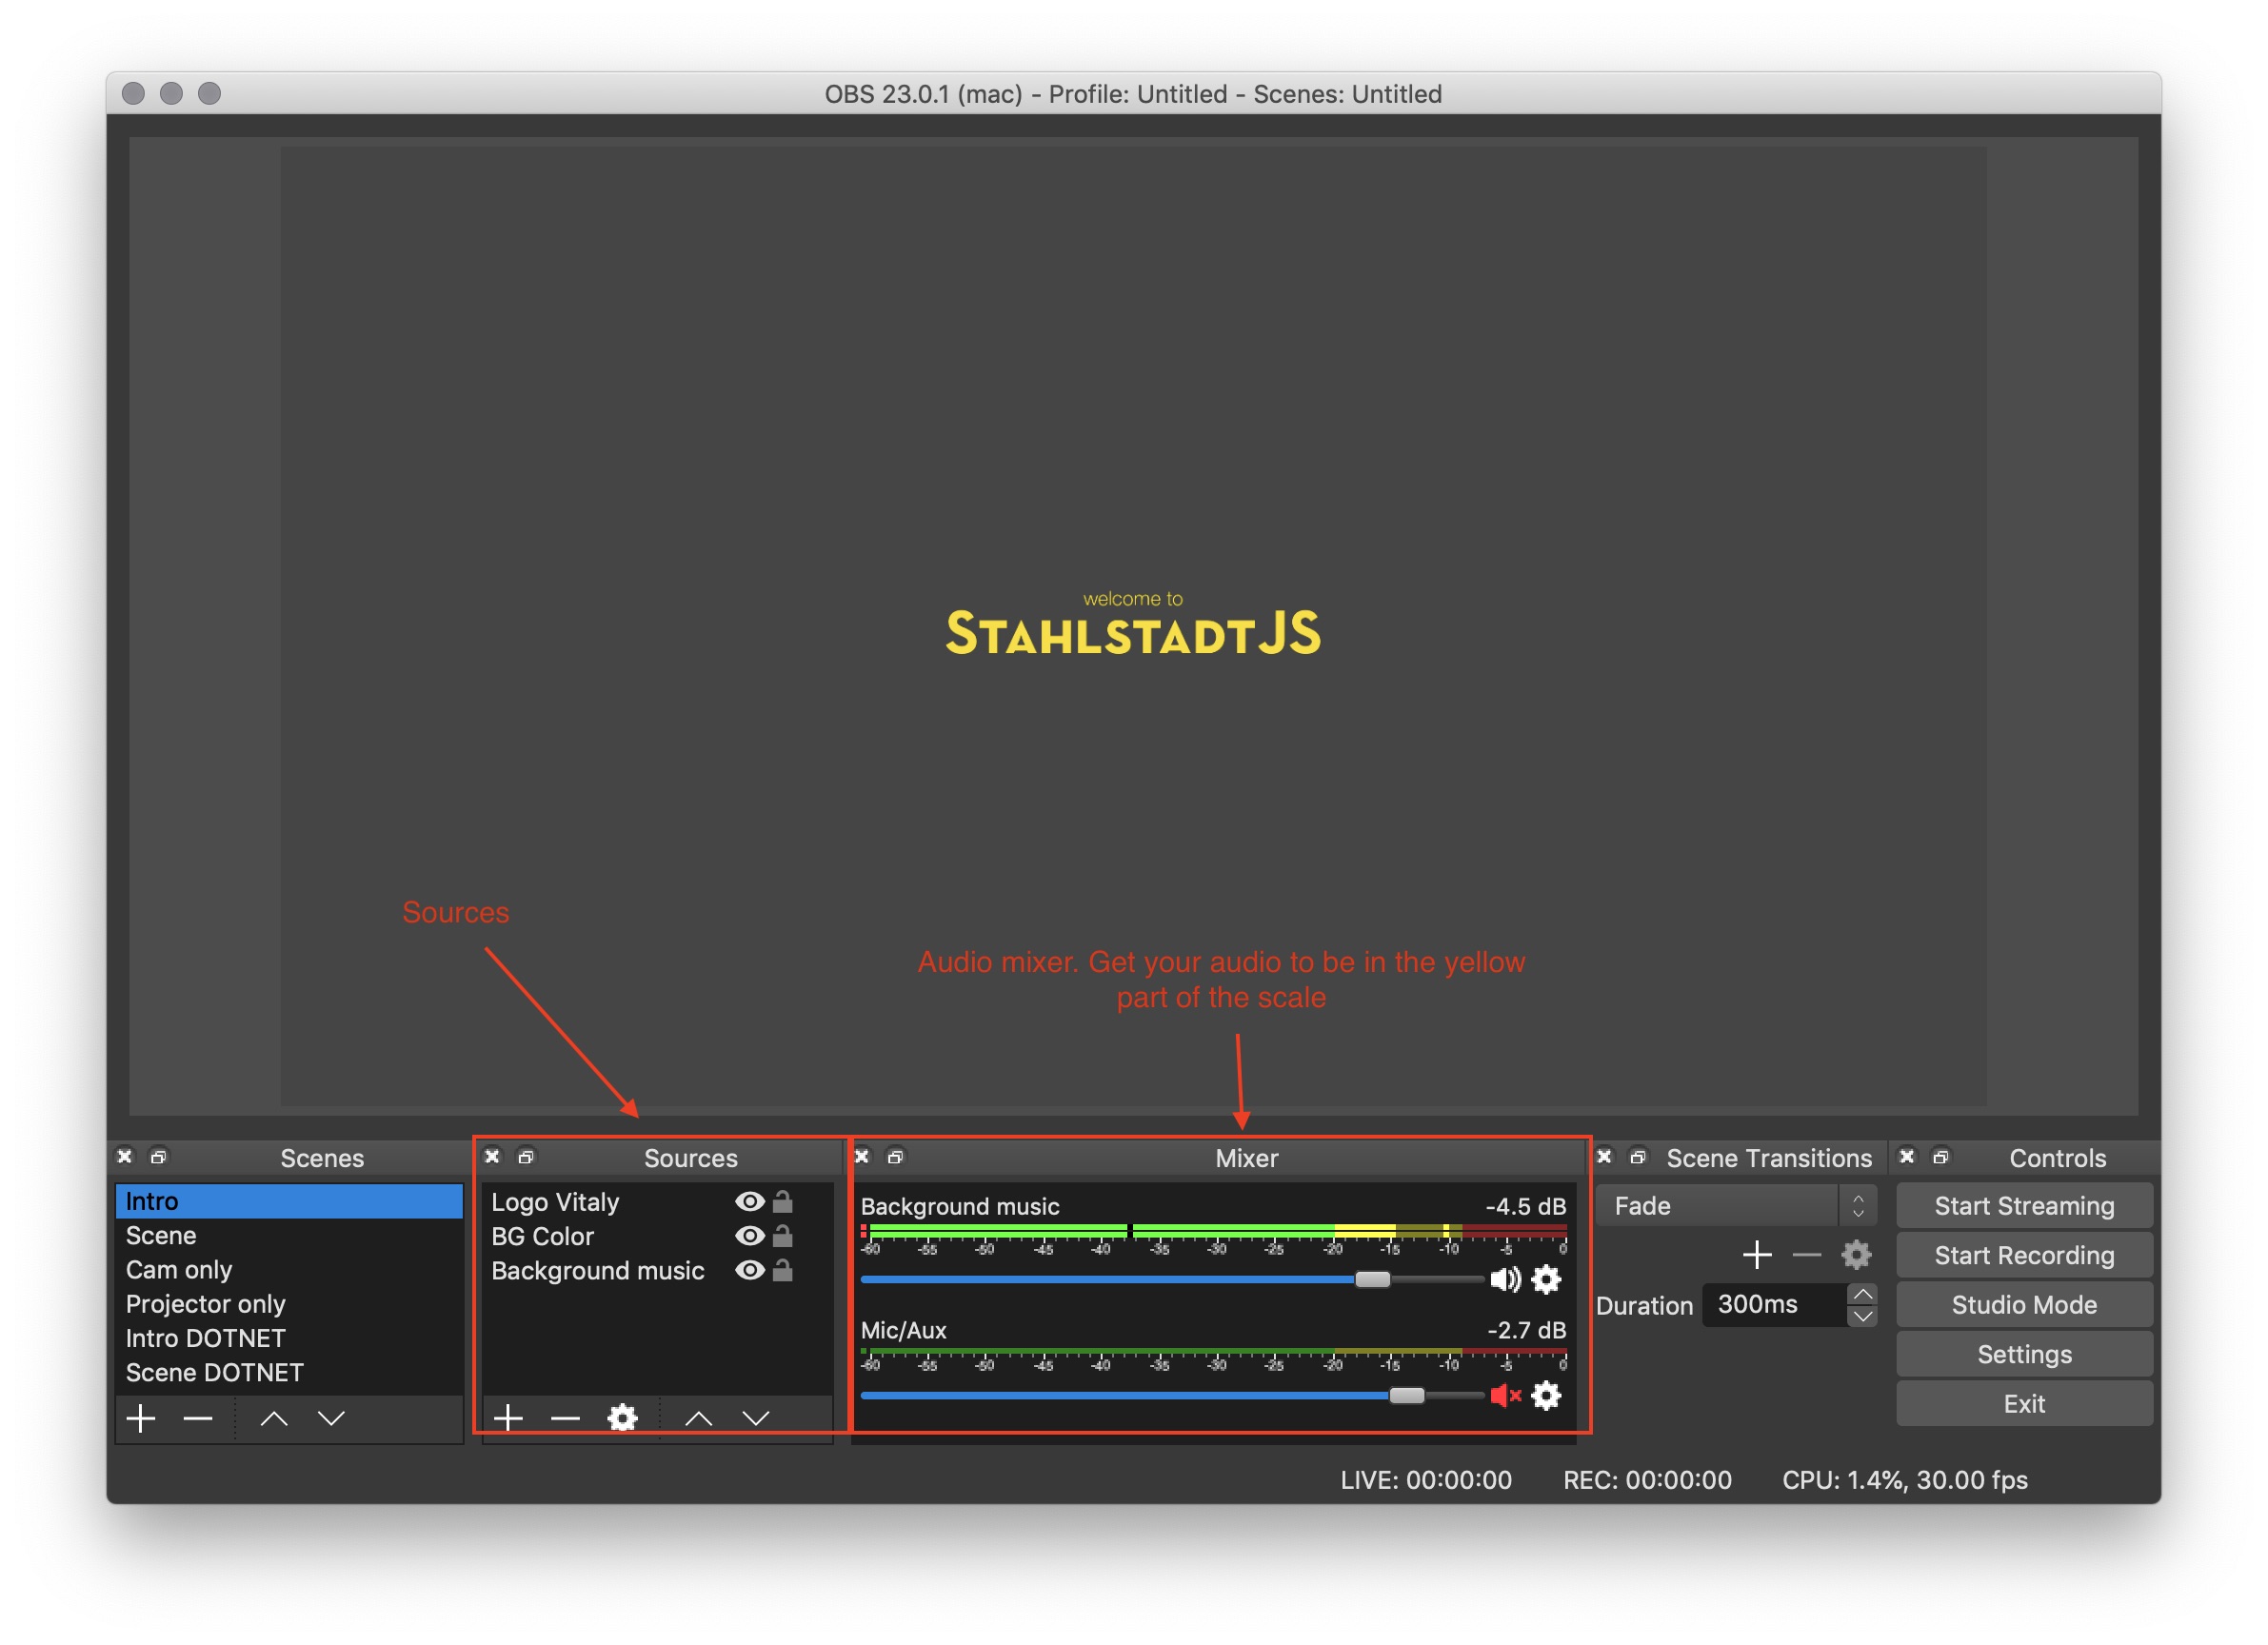
Every source you create is added to the selected scene. You can move them around, change the size and crop it to your liking. This one is actually the tedious part and requires the most work.
Sources are however globally available. This means that you can create a new source at a different scene, or just use the one you already created.
Here’s how I distribute sources along scenes:
Scenes may vary a bit depending on the meetup. But in general this is my setup. Now get it out the public!
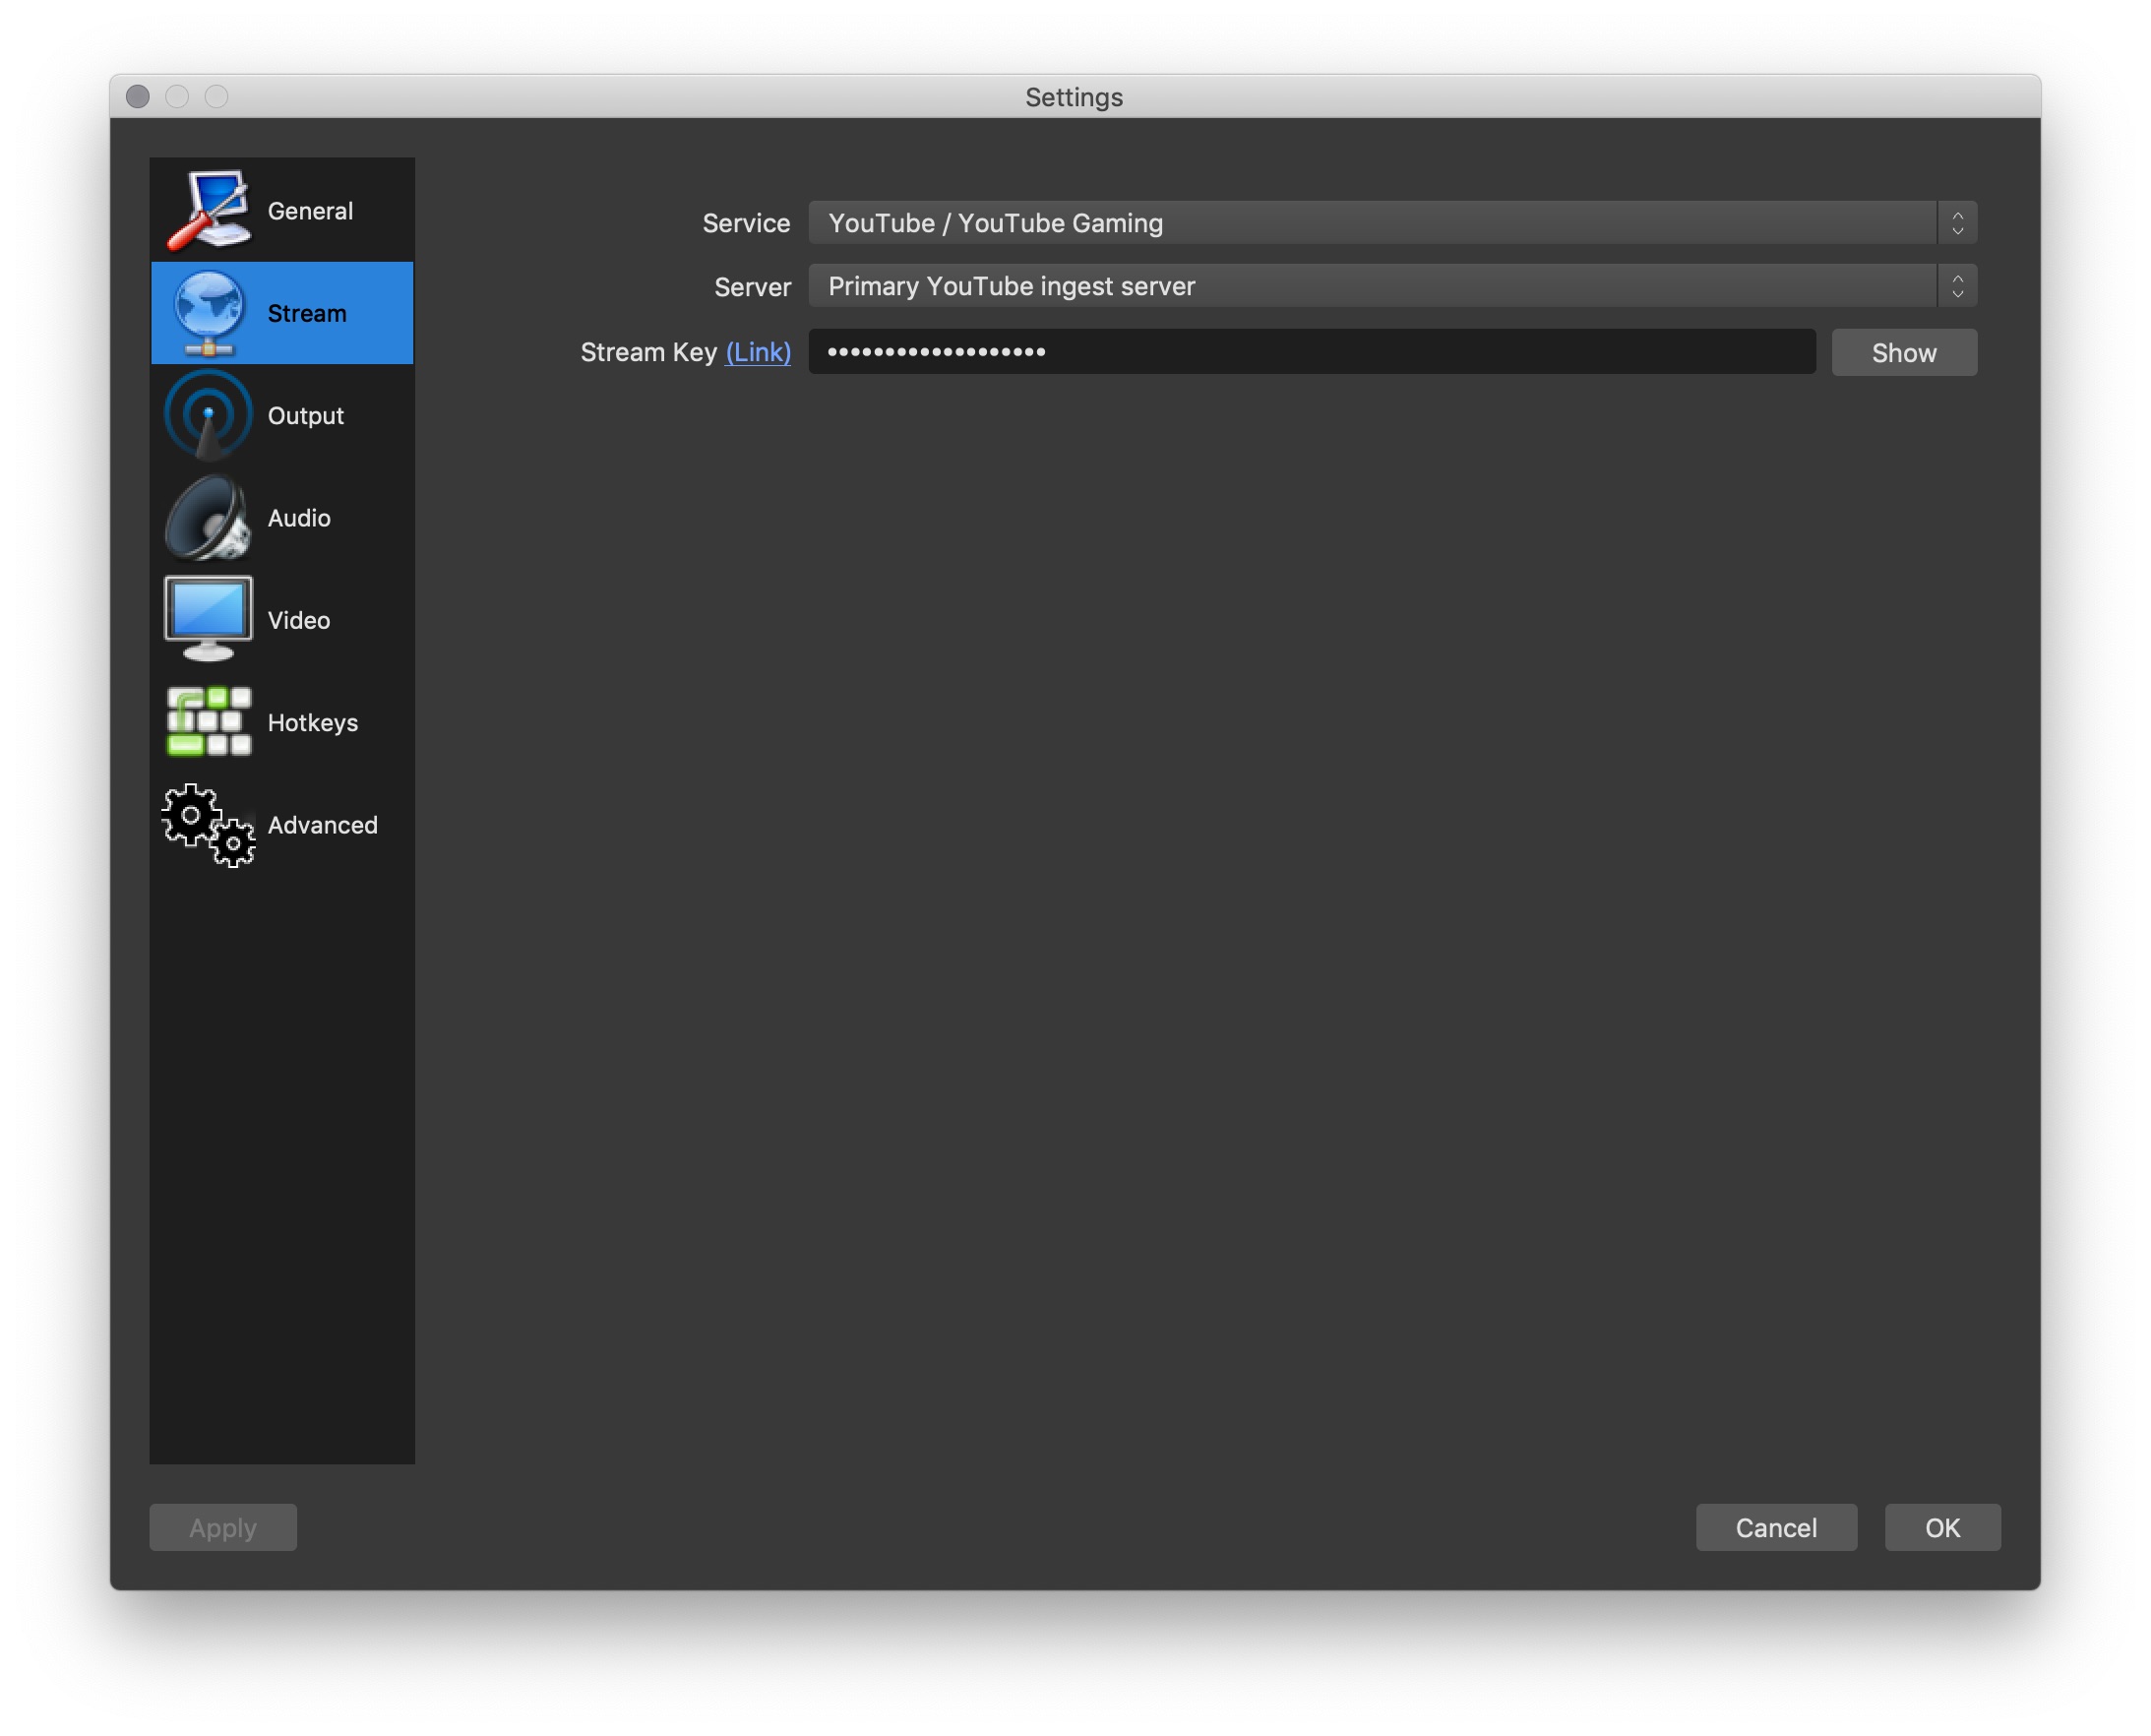
Let’s assume you want to stream it via YouTube. Usually you go to the live stream dashboard to get started. Make sure you try this out way before your first meetup. It can take up to 24hours for YouTube to verify you. Once you are ready and you set up your live stream, look at the live stream page for the Encoder setup. This part shows a streaming server and a key. Copy both to a note or scribble it down. We need it.
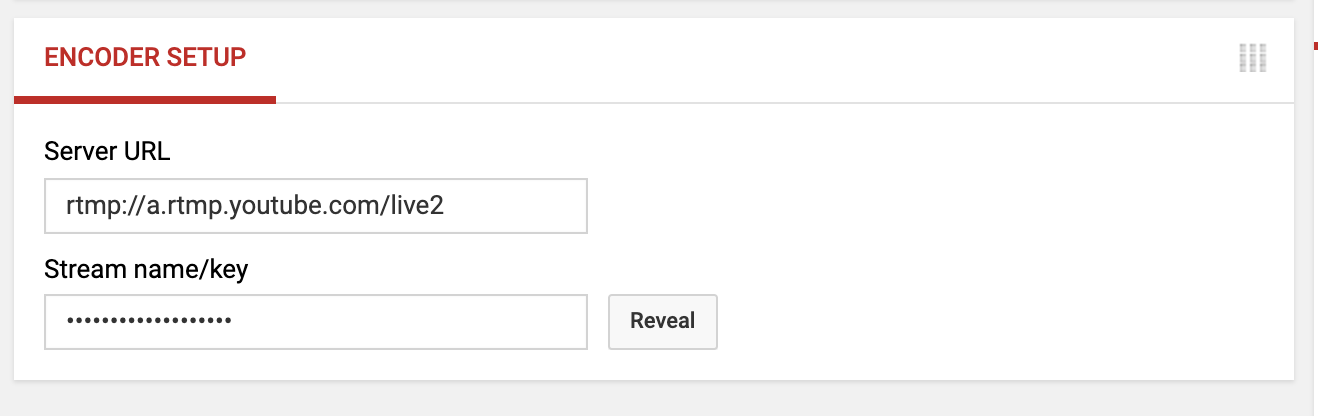
We need this data to set up our streaming environment. In general, OBS needs a streaming server and some form of authentication, no matter which service you use.
Go to Settings → Stream and select your streaming service of choice. Enter your streaming key (in case of YouTube) and you are set.
You have two buttons in your main UI: Start Streaming and Start Recording. Press Start Streaming to get everything out to YouTube. Everytime a talk starts, I also press Start Recording. I stop it after the talk ends. This gives me a nice MKV file I can edit later to have a “clean” version for our YouTube channel.
Don’t record everything in one sitting. Your memory might get filled up and you can’t end recording.
A click on a scene activates the scene. Which means when you stream, this is the scene you are currently streaming.
Congratulations! You are a streamer!
One last tip is Studio Mode. When you activate it, you see two scenes. The scene that is streaming on the right, and any upcoming scene you wish on the left. This gives you some time to prepare the screen (e.g. changing the speaker name or similar), and makes sure you don’t accidentally click on a scene you don’t want to stream. This is however very heavy on your machine, so make good use when you know you can afford it.
This is it! So far, at least. We were able to get a decent streaming setup for 315 EUR, and with the professional, yet free Open Broadcaster Software we are able to stream the whole show over the wire to your meetup members who can’t attend.
We’ve done this a lot with meetups like Technologieplauscherl (where we even have a streamer collective) and Stahlstadt.js.
I’m really curious if you used this guide and how it helped you. Please reach out to me on Twitter and chat with me. I really want to know which setup you have decided on.
And never forget to practice. I’ve recorded a couple of meetups now and everytime I find things that I thought I can do better next time. Having a trial run never is a bad idea.
And with that! Have fun and stream on a budget!
此内容由惯性聚合(RSS阅读器)自动聚合整理,仅供阅读参考。 原文来自 — 版权归原作者所有。