


Last week, in my Virtual EmberConf keynote, I told the story about how I got started as a programmer. To make a long story short, I took a job as a web designer for a large non-profit. I had picked up a little bit of HTML and CSS through Microsoft FrontPage in order to modify my school newspaper's CMS. Before long, I was overwhelmed with requests from a dozen departments, and quickly realized that I was only going to be able to get my job done if I learned how to program.
The punchline: I made it through that frenetic time because I was able to start out with knowledge of HTML and CSS and grow my skills a little at a time without having to take a big pause to re-learn everything.
In this series, I'm going to show you how you can build a simple website in Ember starting just with HTML and CSS skills, and grow that website into a full application a little bit at a time.
So far I have 7 posts planned.
We're going to build the schedule page for a conference like EmberConf. We're going to keep it simple for now, starting with the times for each talk, the titles of the talk and the people giving the talk.
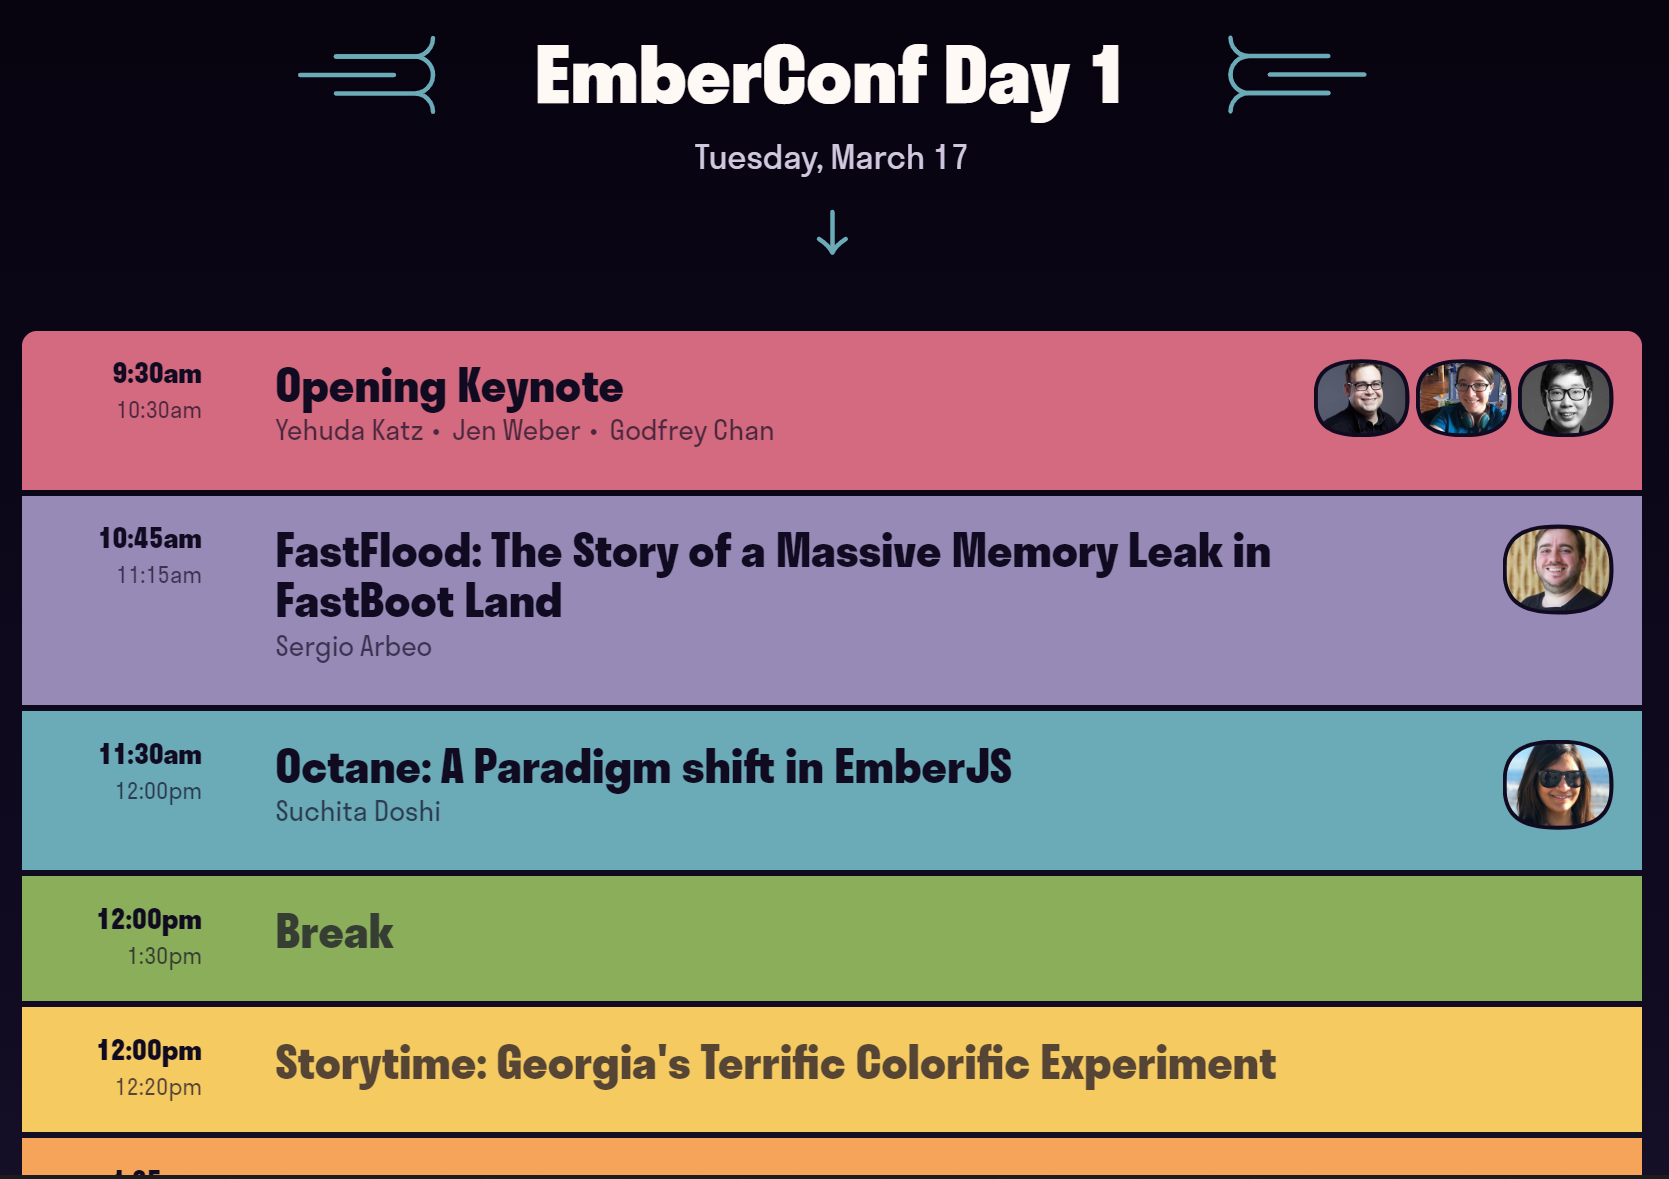
Unlike most JavaScript application tutorials, I'm going to walk through the CSS that I use for this application. When I first started as a web developer, CSS was very important to me, and I personally find it frustrating that "how to do the CSS" is left as an exercise to the reader in a lot of tutorials.
With CSS Grid and Flexbox, it's finally possible to describe layouts easily with CSS. And with CSS variables, it's finally possible to avoid needing to hardcode variables everywhere. Why not take the opportunity to learn those techniques?
The first thing we're going to do is install Node and Ember. We're going to use Volta, a cross-platform, hassle-free way to manage Node command-line tools.
Follow the instructions on the Volta website to get started.
Next, install Ember.
$ volta install ember-cli
Create a new Ember application in whatever directory you use for code projects (I use Code in my home directory). We're going to use yarn as a replacement for the npm package manager
$ ember new conf-schedule --yarn
$ cd conf-schedule
Now, run the Ember server, which will build your application and automatically reload the browser window whenever you make any changes.
$ yarn start
If you go to localhost:4200, you'll see the welcome page.
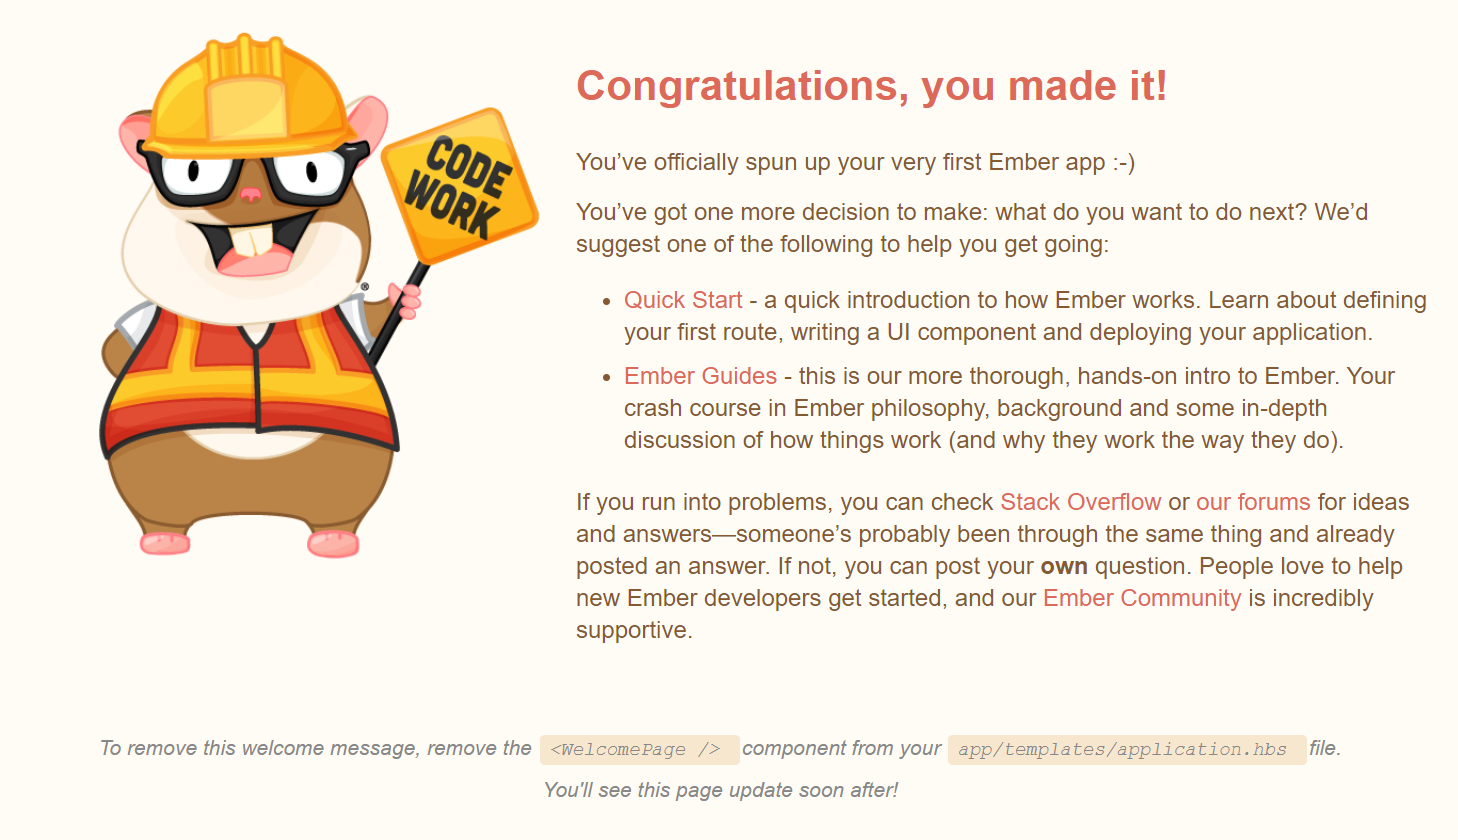
The file app/templates/application.hbs in the conf-schedule directory is where we'll stick our HTML. Let's follow the instructions and delete <WelcomePage /> from application.hbs.
Then let's replace it with this HTML.
<ul class="events">
  <li class="event">
    <div class="time">
      <p>9:30am</p>
      <p>10:30am</p>
    </div>
    <h1>Opening Keynote</h1>
    <h2>
      <ul>
        <li>Yehuda Katz</li>
        <li>Jen Weber</li>
        <li>Godfrey Chan</li>
      </ul>
    </h2>
    <ul class="images">
      <li><img src="https://emberconf.com/assets/images/people/yehuda-katz.jpg"></li>
      <li><img src="https://emberconf.com/assets/images/people/jen-weber.jpg"></li>
      <li><img src="https://emberconf.com/assets/images/people/godfrey-chan.jpg"></li>
    </ul>
  </li>
  <li class="event">
    <div class="time">
      <p>10:45am</p>
      <p>11:15am</p>
    </div>
    <h1>FastFlood: The Story of a Massive Memory Leak in FastBoot Land</h1>
    <h2>
      <ul>
        <li>Sergio Arbeo</li>
      </ul>
    </h2>
    <ul class="images">
      <li><img src="https://emberconf.com/assets/images/people/sergio-arbeo.jpg"></li>
    </ul>
  </li>
  <li class="event">
    <div class="time">
      <p>11:30am</p>
      <p>12:00pm</p>
    </div>
    <h1>Octane: A Paradigm shift in EmberJS</h1>
    <h2>
      <ul>
        <li>Suchita Doshi</li>
      </ul>
    </h2>
    <ul class="images">
      <li><img src="https://emberconf.com/assets/images/people/suchita-doshi.jpg"></li>
    </ul>
  </li>
</ul>
This HTML is really just the same card, repeated three times.
Let's take a look at one iteration of the card:
<li class="event">
  <div class="time">
    <p>11:30am</p>
    <p>12:00pm</p>
  </div>
  <h1>Octane: A Paradigm shift in EmberJS</h1>
  <h2>
    <ul>
      <li>Suchita Doshi</li>
    </ul>
  </h2>
  <ul class="images">
    <li><img src="https://emberconf.com/assets/images/people/suchita-doshi.jpg"></li>
  </ul>
</li>
It's pretty straight-forward semantic HTML.
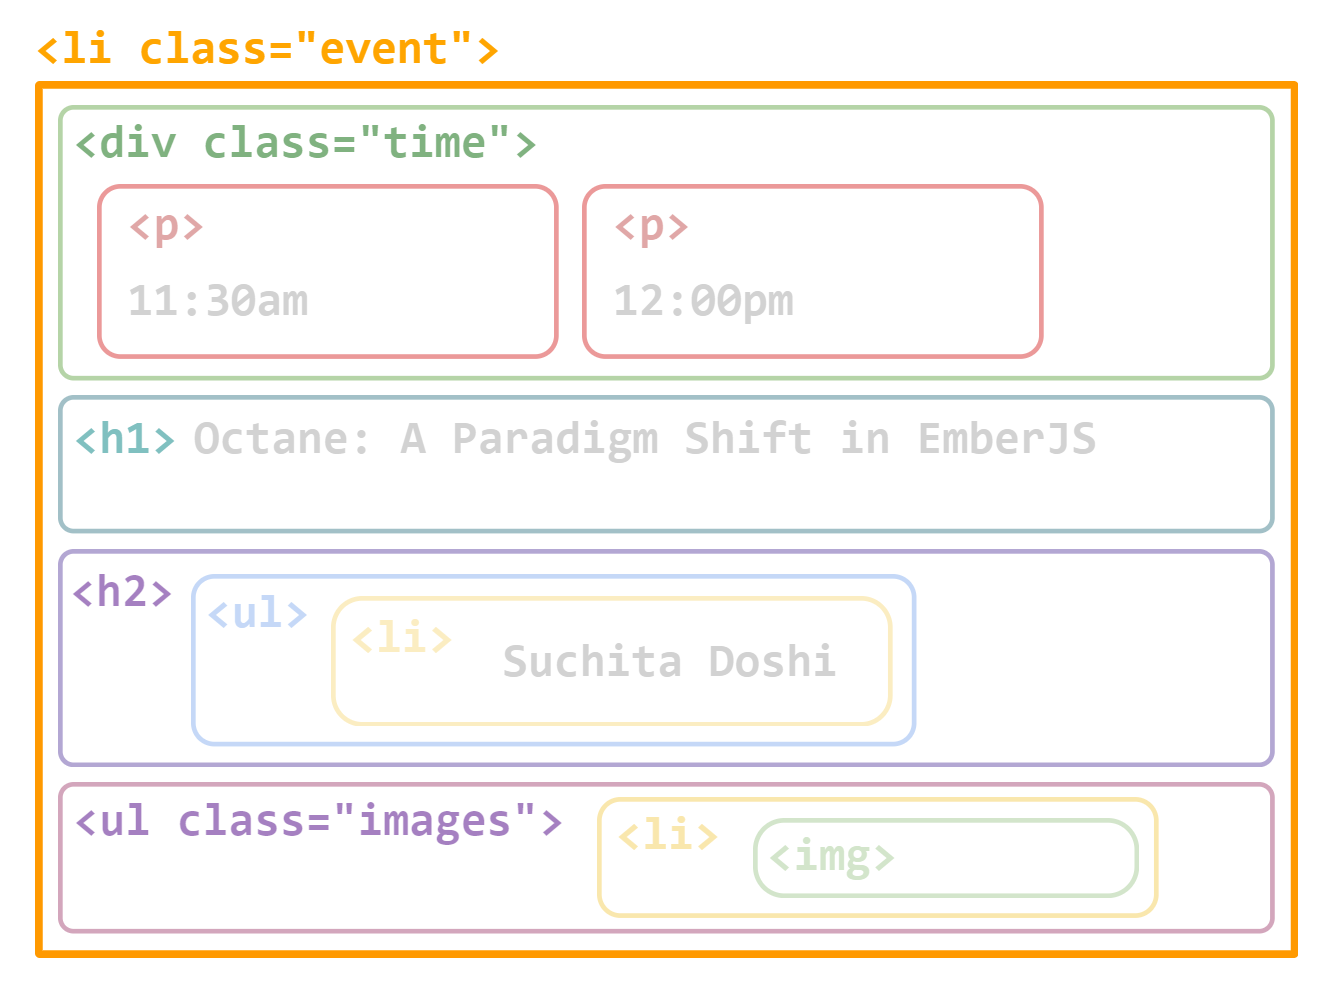
Next, we want to turn the HTML into the design we're trying to build.
Here's what the HTML above will look like once we've applied the CSS we're going to walk through.
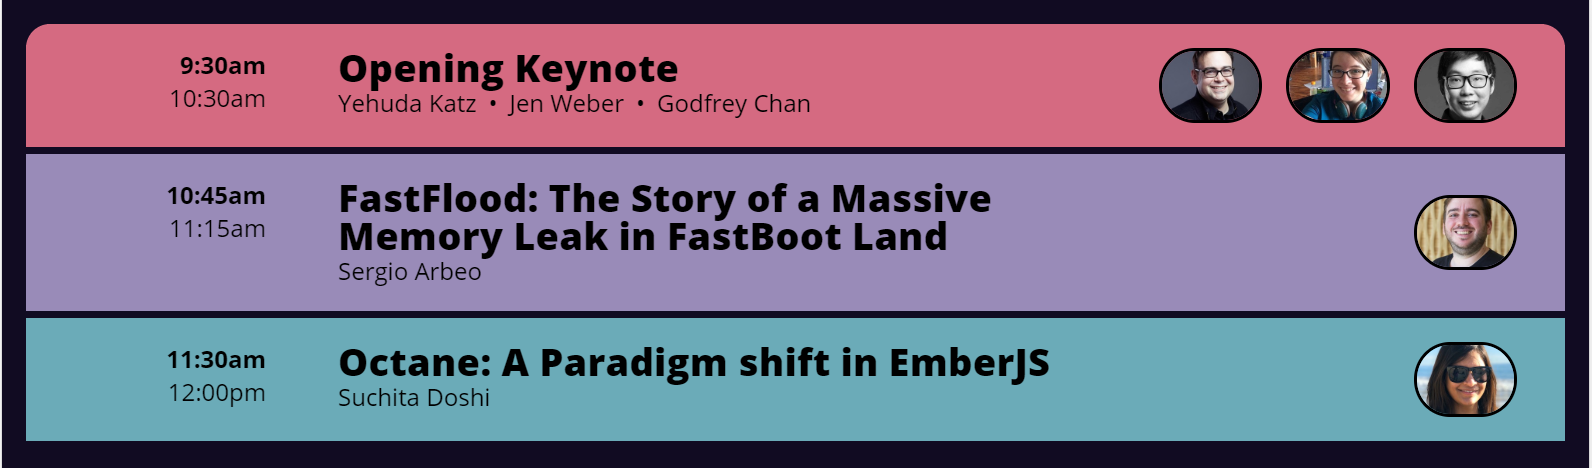
The CSS goes in app/styles/app.css.
First, let's take our HTML diagram and reorient it so that it looks like the finished product screenshot above.
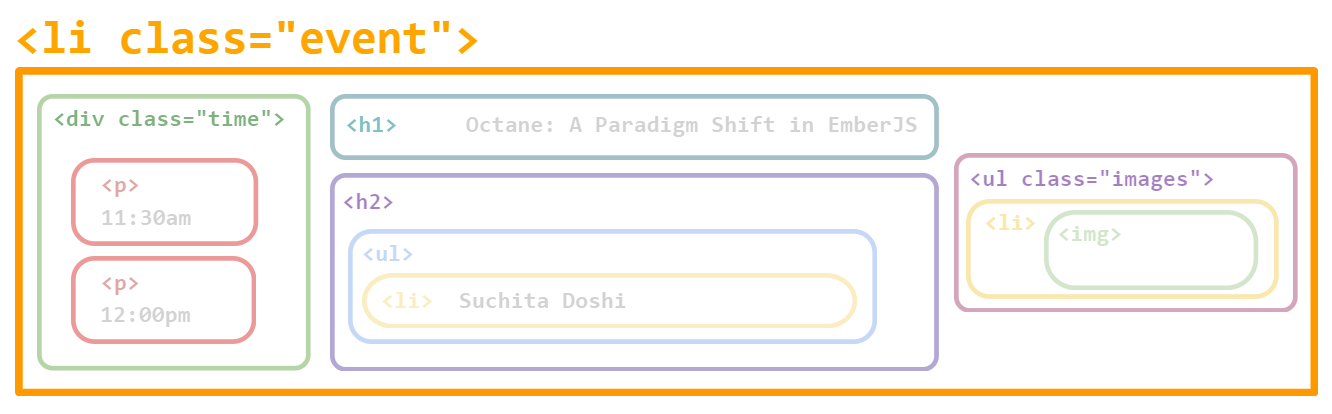
Next, let's draw out the layout that we're going to want.
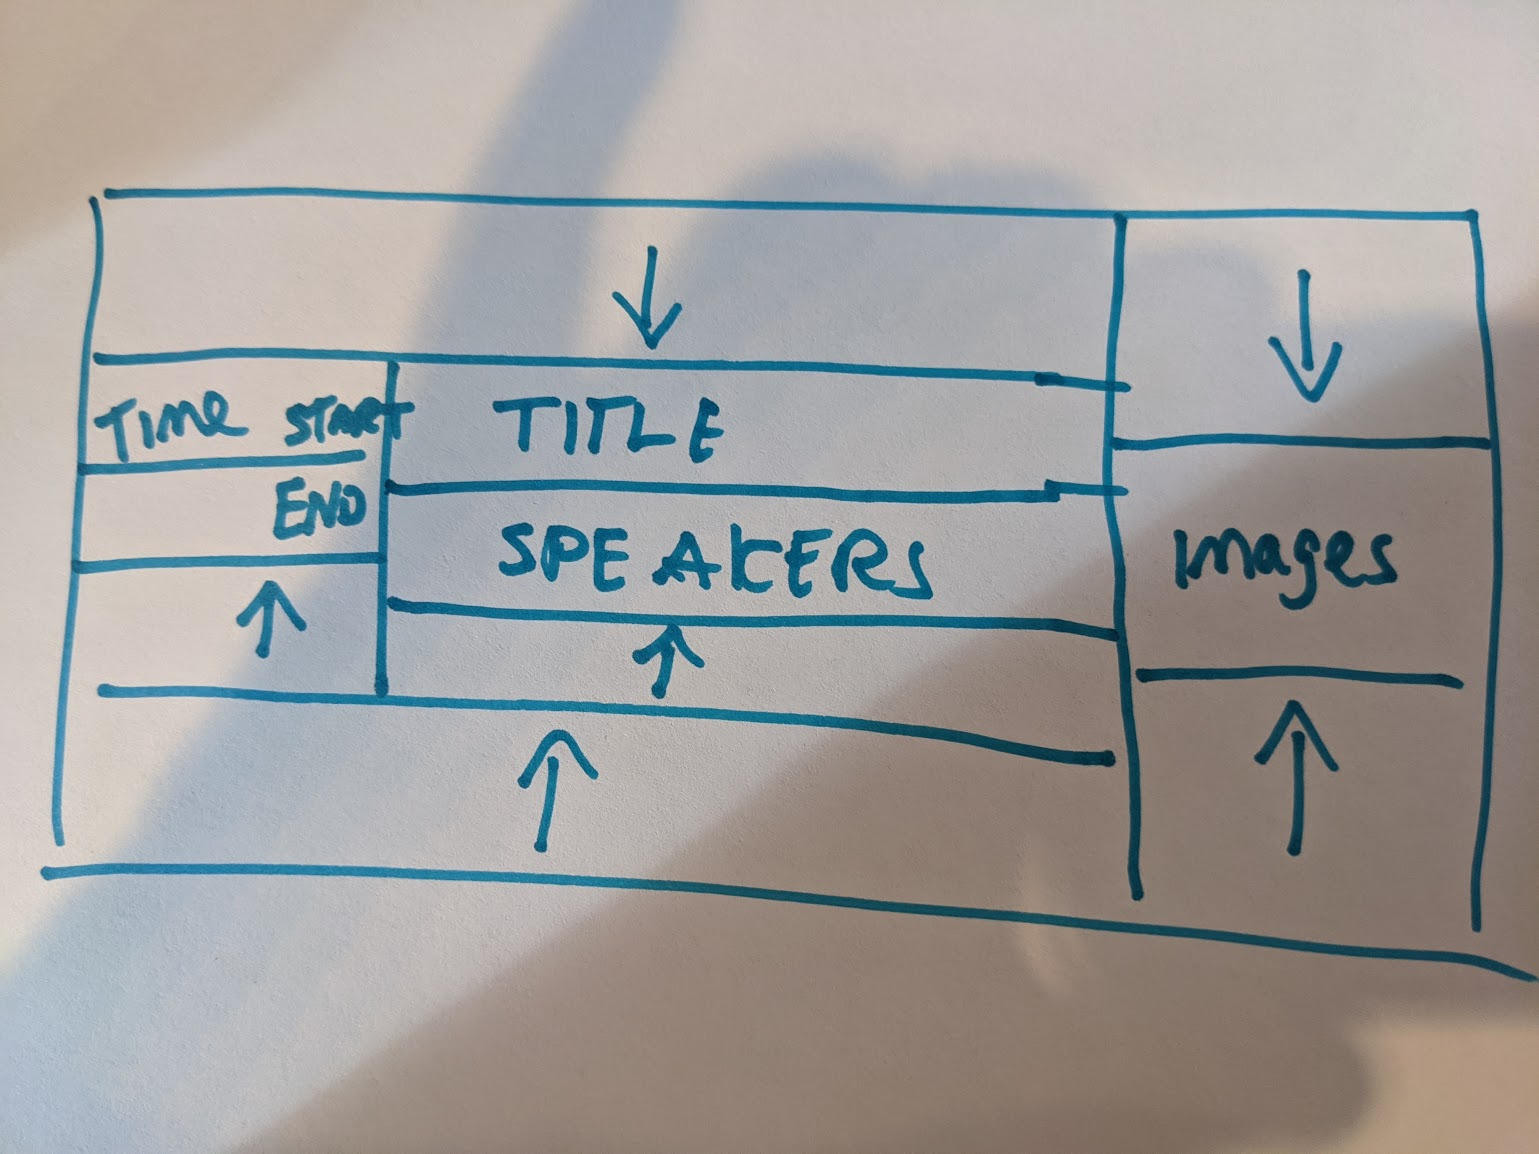
The cool thing about CSS grid is that we can basically transcribe our rough sketch into CSS.
.event {
  display: grid;
  grid-template:
    ".    .        images" auto
    "time title    images" auto
    "time speakers images" auto
    ".    .        images" auto /
    10rem 3fr 300px;
  padding: 0 1rem 0 3rem;
}


.event .time {
  grid-area: time;
}

.event > h1 {
  grid-area: title;
}

.event > h2 {
  grid-area: speakers;
}

.event > .images {
  grid-area: images;
}
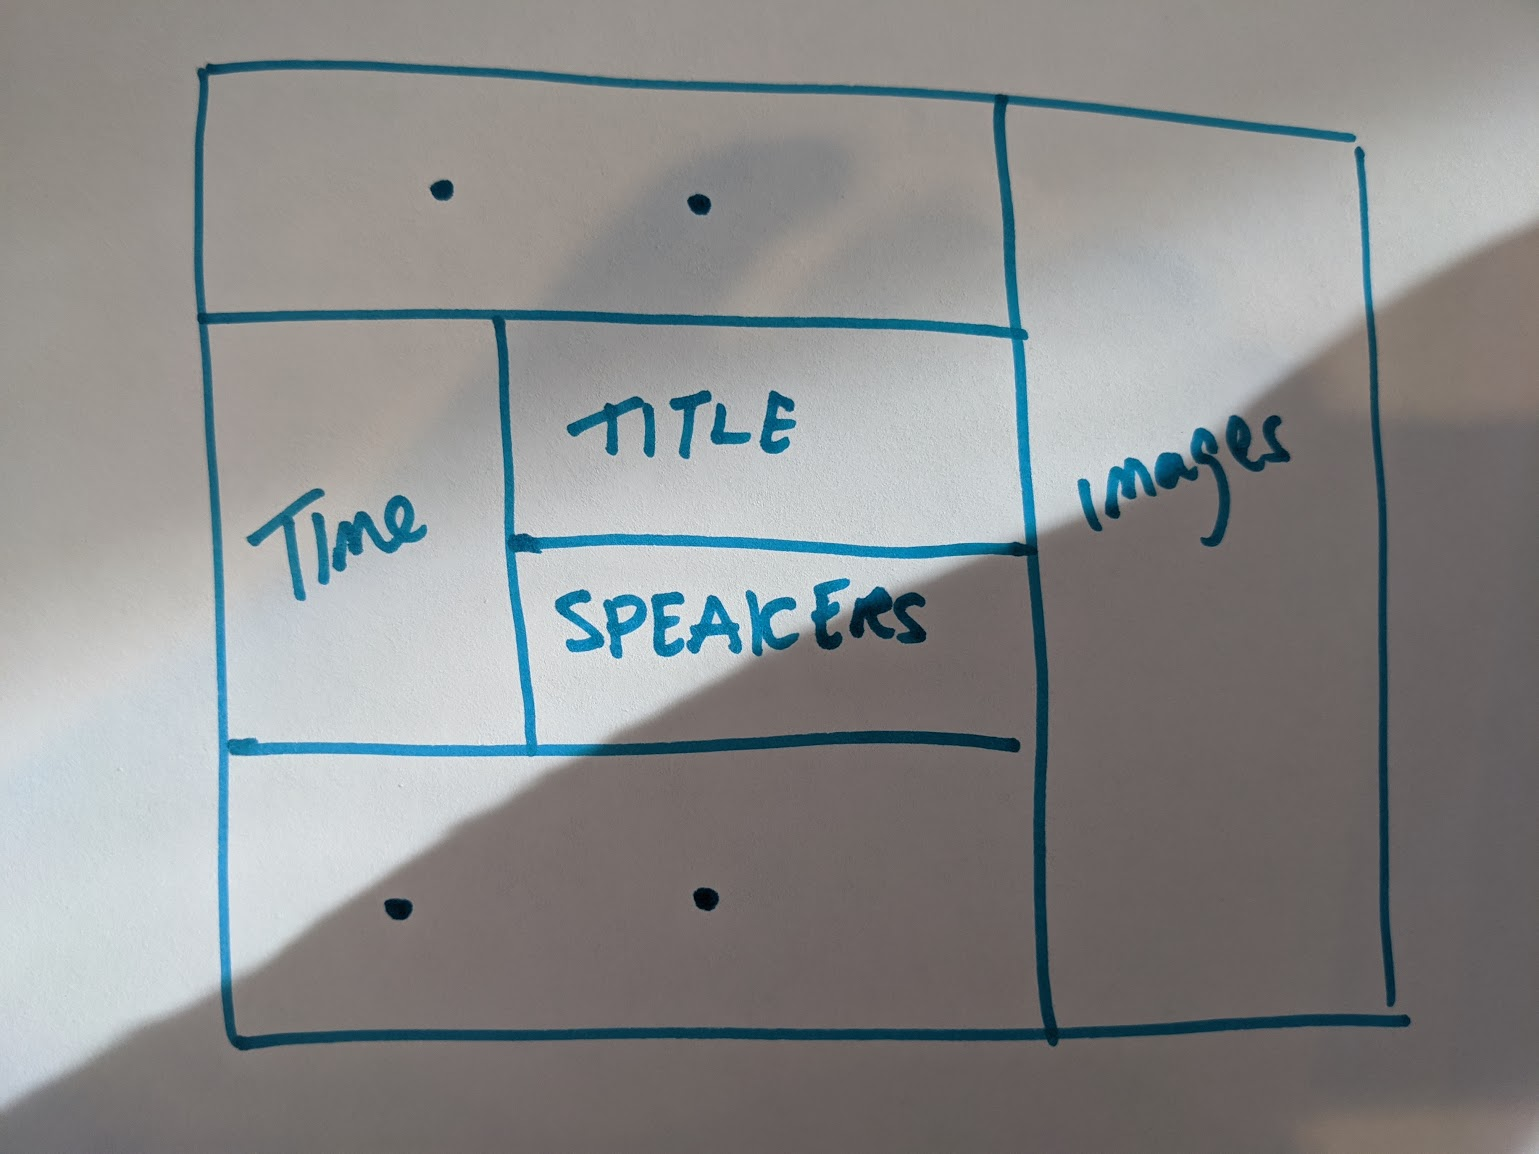
The grid-area property lets us assign names to parts of our HTML, and grid-template lets us sketch out the grid that we want.
The autos to the right side of each grid row tells us that we want the height of the row to be automatically determined. The 10rem 1fr 300px describes the width of each column. You can mess around with the values to see what happens if
You can read up on rems on MDN, but the short story is that 1rem is the font size of the root element.
Here's the part we did so far.
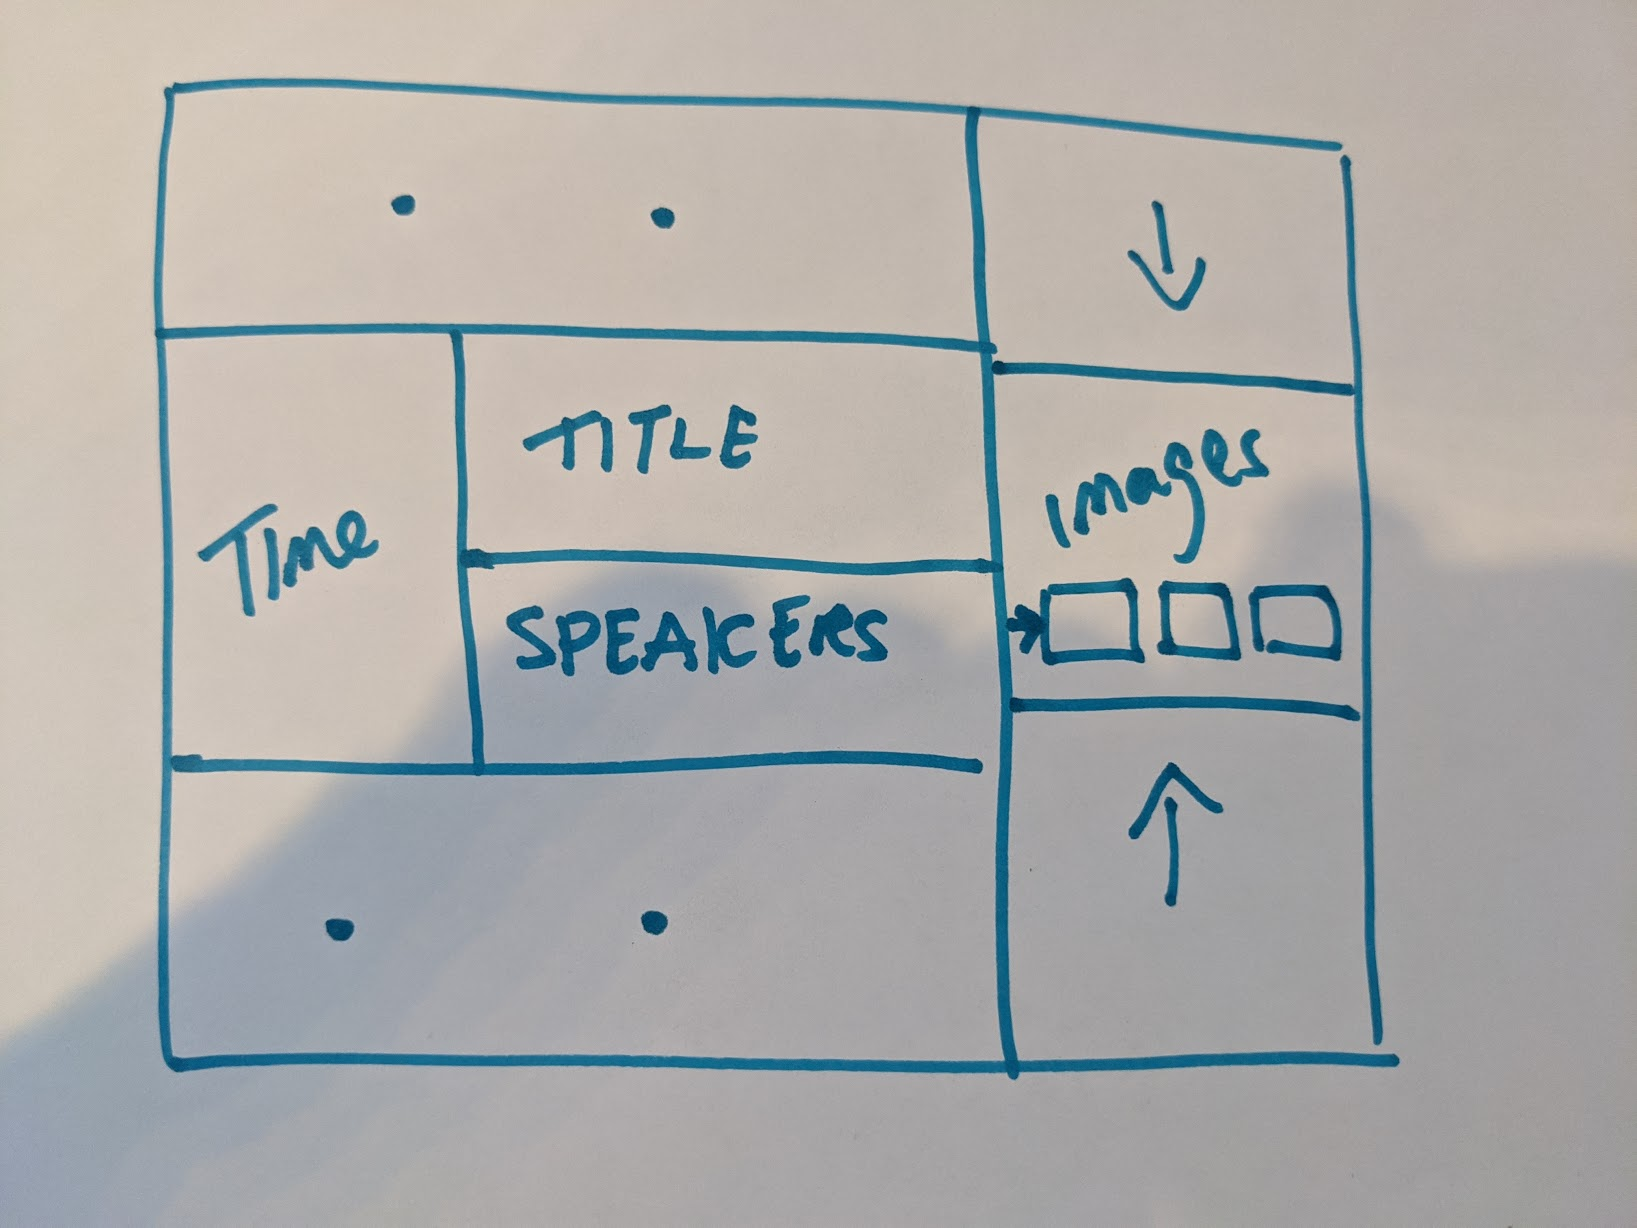
Next, we want to stack our images left to right, and make them right-aligned and vertically centered. Because each row can have a different number of images, the easiest way to align the images the way we want is using display: flex.
.event > .images {
  grid-area: images;
  display: flex;
  align-items: center;
  justify-content: flex-end;
  padding: 0.5rem;
}

.event > .images > li {
  display: flex;
  margin: 0.5rem;
}
Because the images are laid out in a row, the align-items property is the vertical alignment, and the images will be vertically centered. The justify-content property is the horizontal alignment, and flex-end means to pack the images to the right of the box.
Finally, we give the lis display: flex and give them a margin.
Here's where we're at now.
Next, we need to align the start and end times inside the time box to the right and top of the "time" box.
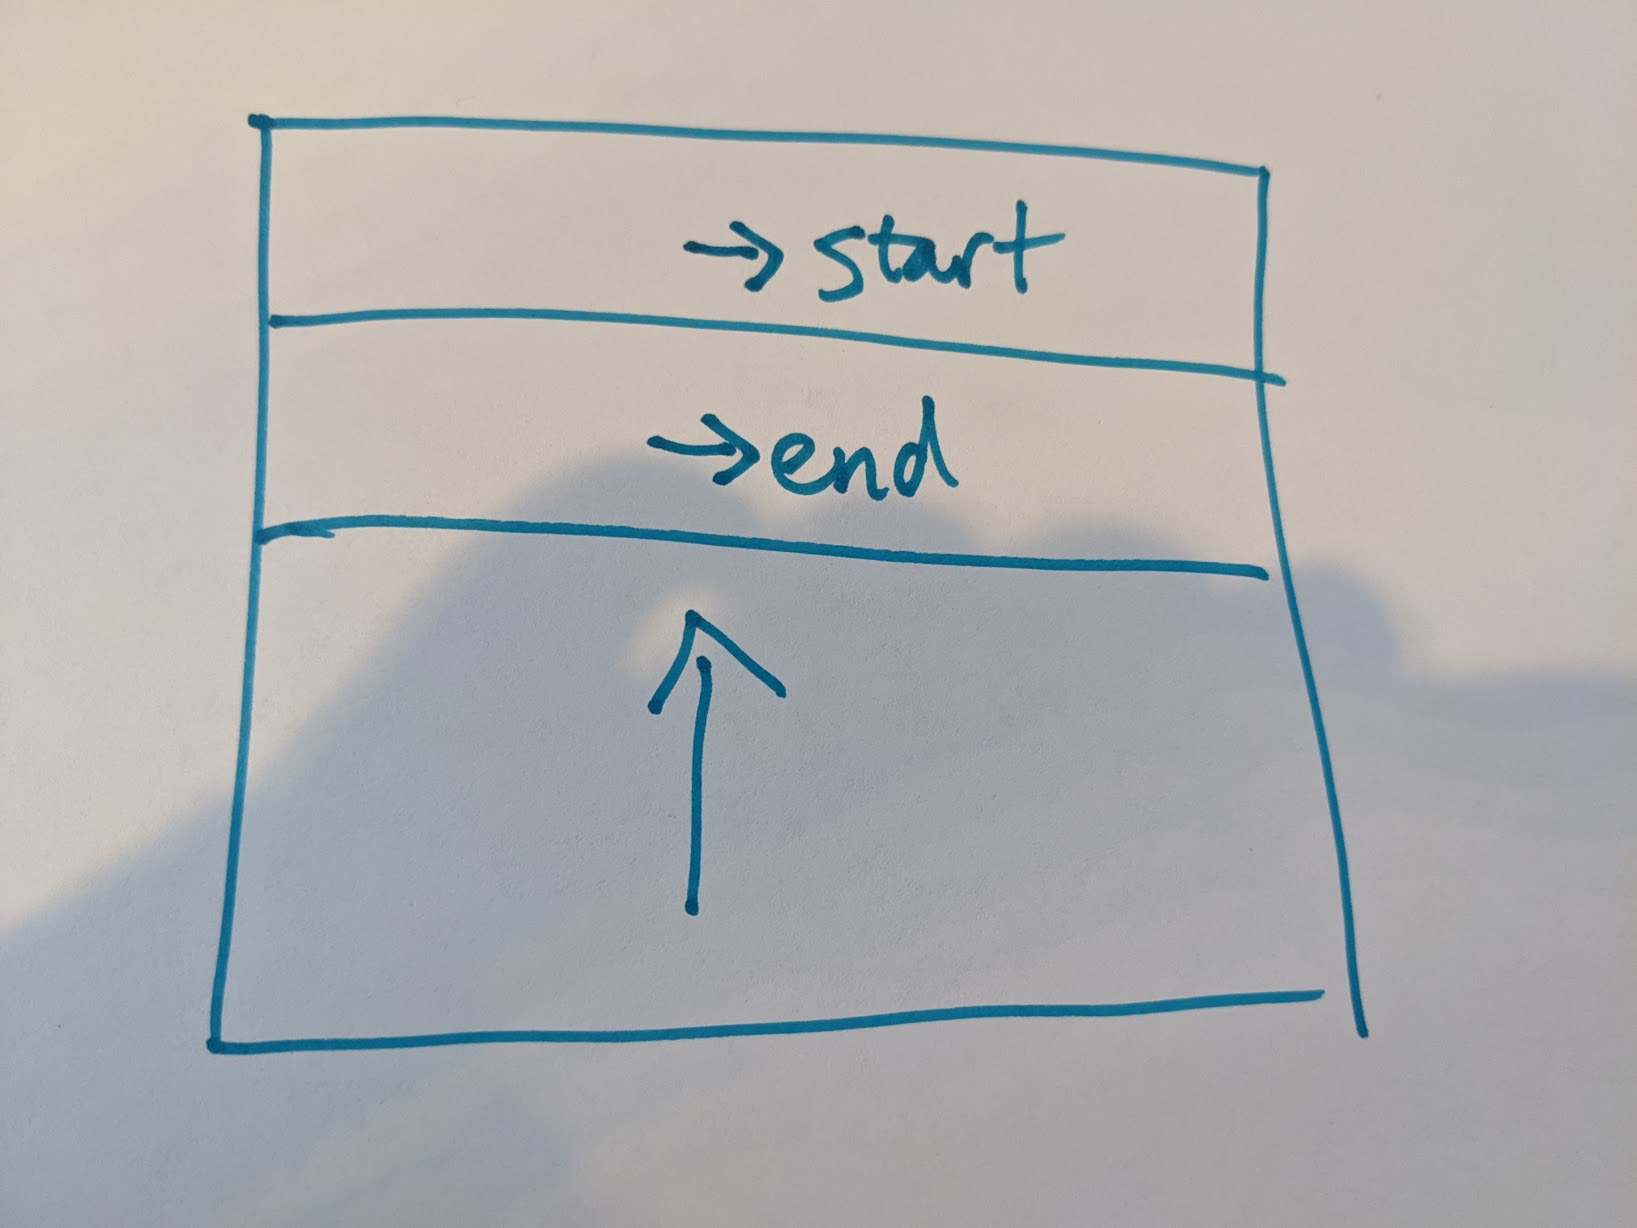
What we want is another grid inside of the time box.
.event .time {
  grid-area: time;
  text-align: right;
  display: grid;
  grid-template:
    "start" auto
    "end"   auto
    "."     1fr;
  /* add some whitespace to the right of the time box */
  padding-right: 3rem;
}
The trick here is that we create three grid boxes, start, end and a placeholder. We tell start and end to be as tall as necessary, and then tell the placeholder to stretch out as much as necessary. We add some whitespace to the right of the time box to match our mockup.
The last thing we're going to do is rotate three background colors across the events. We'll use CSS properties so we don't have to hardcode the values.
:root {
  --c-pink: rgb(213, 106, 129);
  --c-purple: rgb(153, 139, 184);
  --c-blue: rgb(107, 171, 184);
}

.event:nth-child(3n + 1) {
  background-color: var(--c-pink);
}

.event:nth-child(3n + 2) {
  background-color: var(--c-purple);
}

.event:nth-child(3n + 3) {
  background-color: var(--c-blue);
}
There's a few more minor details that we need in order to fully match up the mockup (including a minimal CSS reset and some border radius stuff), but we've covered the key CSS topics that you'll need to understand the whole style sheet.
I posted the whole stylesheet as a gist. Remember, you can just stick your styles in app/styles/app.css.
Finally, let's get our website on the Internet so we can share it with our friends!
First, go back to the console, hit ctrl-c to close down the server. We're going to deploy to Netlify, so we'll install the ember-cli-netlify addon.
$ ember install ember-cli-netlify
We'll tell Netlify that we want Ember to handle all of the URLs for this website by creating a .netlifyredirects file at the root of our project.
/* /index.html 200
Go back to the console, hit ctrl-c to close down the server, and run
$ ember build --prod
Create a new Netlify account, and then drag the dist directory in your application into Netlify.

Your website is now online!
You can also hook up your app to automatically build and deploy to Netlify every time you push to Github, which is probably a good thing to get set up before we continue this project in the next post.
此内容由惯性聚合(RSS阅读器)自动聚合整理,仅供阅读参考。 原文来自 — 版权归原作者所有。