


Netlify has been on a mission to help customers build atomic, composable architectures. Today, we are elated to announce that we are partnering with Zephyr Cloud to re-envision frontend architecture and drive the next generation of composability.
Micro-frontends are part of a powerful and scalable architectural pattern to offer development agility for complex frontend applications by enabling multiple teams to ship features independently.
But as ideal as the theory may sound, it can be incredibly difficult to manage the orchestration of micro-frontends across a complex matrix of applications and environments. Zephyr Cloud cuts through this complexity through its platform, purpose-built to support micro-frontend deployments, as they told us with fiery drive: “We want to build the only sane way to do micro-frontends.”
Managing micro-frontends is a lot of work. It takes extreme diligence to mitigate the risk of breaking a site. Here are a few of the reasons why:
Through CI/CD pipelines, serverless and edge functions, blob storage, and a globally-optimized edge network, Netlify eliminates the need for tedious DevOps tasks.
This makes Netlify a great place to deploy micro-frontends since each module (or component) can be streamed to end-users with edge functions. The assets can then be woven together to deliver a cohesive web application.
Through atomic deployments and instant cache invalidation, rollback deployments on Netlify are a breeze.
Zephyr Cloud can work on top of Netlify to manage the weaving of these services together on your behalf. This is especially helpful when using shared libraries or dependencies, or when your modules may be deployed to multiple providers.
Here are a few ways that Zephyr takes the pain out of managing micro-frontends:
Let’s take a look at how we can use Zephyr Cloud to deploy an application using micro-frontends and module federation to Netlify.
This guide was written against version 0.0.17 of Zephyr Cloud. Please refer to the Zephyr Cloud documentation for the most up-to-date information.
If you experience any issues following this guide, please reach out to the Zephyr Cloud team for support. You’re also welcome to notify Netlify through the feedback form at the bottom of this page.
We’ll use the classic tractor store example, which is a template to experiment with micro-frontends, created by Michael Geers for the book Micro-frontends in Action.
Read more about the tractor store example.
We’re going to follow the process of setting up a new application from scratch. You’ll need the following to get started:
After fulfilling the requirements, create a new site on Netlify. The site can be empty, as it will eventually be taken over by Zephyr Cloud.
The easiest way to do this is to create a site manually. Drop any HTML file in here and work through the setup process.
Once the site is created, we’ll follow a series of steps to properly configure the domain. See the Zephyr Cloud docs for more detailed information on the following steps.
Add your domain name as a custom domain for the site. If you’ve previously registered the domain, follow the presented steps to point your nameservers to Netlify.
www as the primary domainOnce the DNS records have propagated and the SSL certificates have been issued (which may take several minutes), set the www version of your domain as the primary domain for the site.
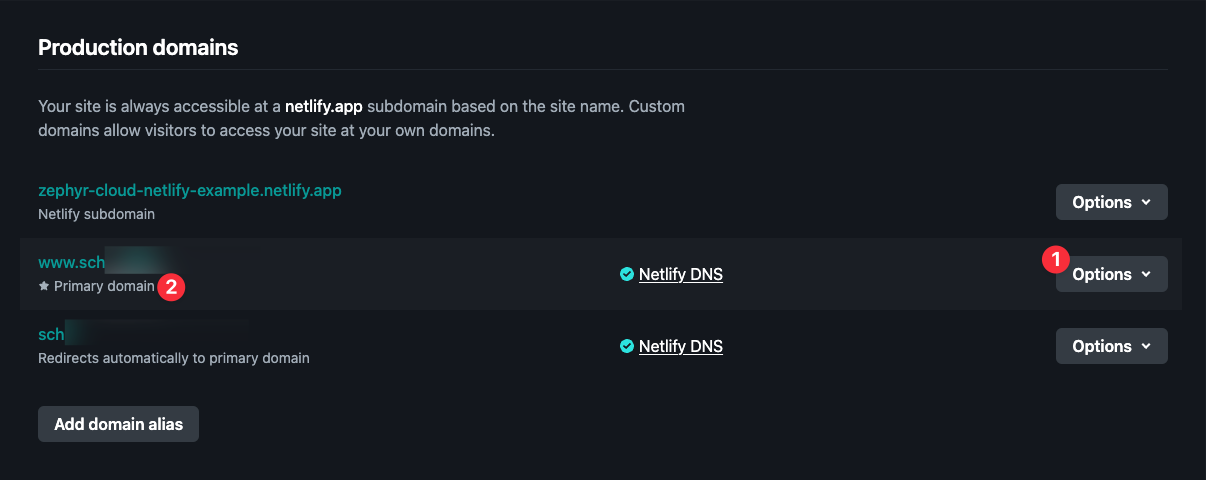
From the domain settings page, use the options next to the www record (1) to set it as the primary domain. After this is complete, you’ll see a note under the domain name (2) indicating that it is the primary domain.
Because Zephyr Cloud handles deployments on your behalf, it needs the ability to create subdomains on your behalf, which means that you need to be able to configure a wildcard CNAME record on your domain, and you can’t use dynamic domain features from Netlify, such as branch deploys or deploy previews.
If you used Netlify Drop to create the site, the necessary settings will already be disabled.
To configure the wildcard domain, you’ll need to do two things:
app.netlify.com/sites/<site-name>/configuration/general).CNAME record to your DNS settings that points to *.<your-domain>.com to <your-site>.netlify.app. You’ll do this in your team’s DNS settings on Netlify.In the end, you should have only three DNS records for the domain, all of which point to the same site.
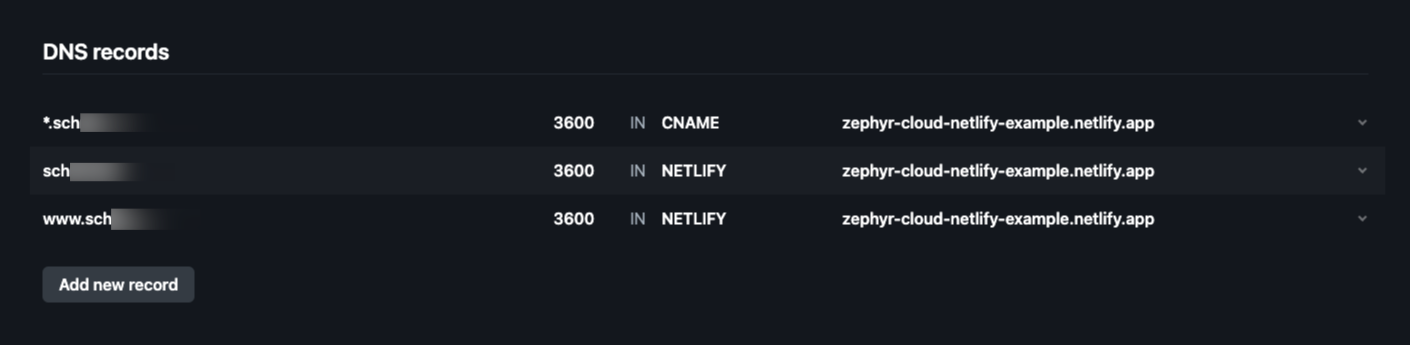
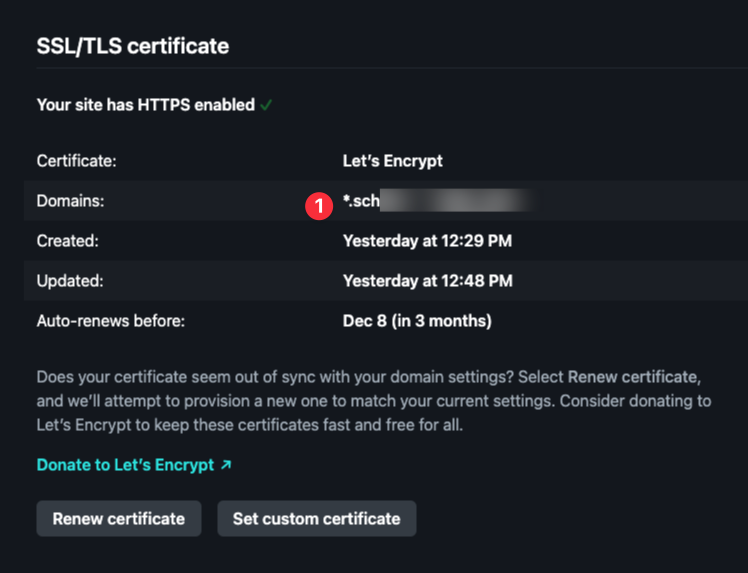
And you should see an SSL certificate issued for the wildcard and root domain in your DNS settings for the site. (1)
Next, you’ll need to enable the Netlify integration on Zephyr Cloud. This will allow Zephyr Cloud to deploy your applications to Netlify on your behalf.
Follow the Zephyr Cloud docs to configure the integration. Be sure to set the integration as your default deployment integration.
Now we can work with some code! First, clone the Zephyr Cloud examples repo.
git clone git@github.com:ZephyrCloudIO/zephyr-examples.git
Copy out the examples/react-rspack-tractor-2.0 into a separate working place on your machine.
cp -r zephyr-examples/examples/react-rspack-tractor-2.0 <path-to-your-working-directory>
After creating a new repository on GitHub on your personal account (this makes permissions easier), initialize a local repository and push to the remote repository.
cd <path-to-your-working-directory>/react-rspack-tractor-2.0
git init
git add .
git commit -m "Initial commit"
git remote add origin <your-repo-url>
git push -u origin main
Running a build locally on your machine can deploy the results to Zephyr Cloud. In our example project, we have a series of modules that are inter-dependent and need to be built in a specific order so that the dependencies are resolved correctly.
Install the dependencies for the project.
We’ll begin with the explore app, which depends on the checkout app. First, comment out the remotes in the module federation configuration for Rspack.
new ModuleFederationPlugin({
name,
filename: "remoteEntry.js",
shared: ["react", "react-dom", "react-router", "react-router-dom"],
// remotes: {
// tractor_v2_checkout: "tractor_v2_checkout@http://localhost:3001/remoteEntry.js",
// },
exposes: {
"./HomePage": path.resolve(__dirname) + "/src/HomePage.tsx",
"./CategoryPage": path.resolve(__dirname) + "/src/CategoryPage.tsx",
"./StoresPage": path.resolve(__dirname) + "/src/StoresPage.tsx",
"./Recommendations": path.resolve(__dirname) + "/src/Recommendations.tsx",
"./StorePicker": path.resolve(__dirname) + "/src/StorePicker.tsx",
"./Header": path.resolve(__dirname) + "/src/Header.tsx",
"./Footer": path.resolve(__dirname) + "/src/Footer.tsx",
},
});
Then run the build:
WITH_ZE=true pnpm --filter tractor_v2_explore run build
Now, uncomment the commented out code. And then we can run all builds in succession. Note that this includes re-running the build for the explore app after the checkout app has been built.
WITH_ZE=true pnpm --filter tractor_v2_checkout run build
WITH_ZE=true pnpm --filter tractor_v2_explore run build
WITH_ZE=true pnpm --filter tractor_v2_decide run build
WITH_ZE=true pnpm --filter tractor_v2_app run build
If the build commands were successful, you’ll see a public URL output in the terminal.
[ Module Federation Manifest Plugin ]: Manifest will use absolute path resolution via its host at runtime, reason: publicPath='auto'
ZEPHYR Hi <user>
ZEPHYR tractor_v2_app.zephyr-cloud-example.<user>#43
ZEPHYR
ZEPHYR Uploaded local snapshot in 336ms
ZEPHYR (3/19 assets uploaded in 562ms, 234.84kb)
ZEPHYR Deployed to Zephyr's edge in 678ms.
ZEPHYR
ZEPHYR https://<unique-subdomain>.<your-domain>.com
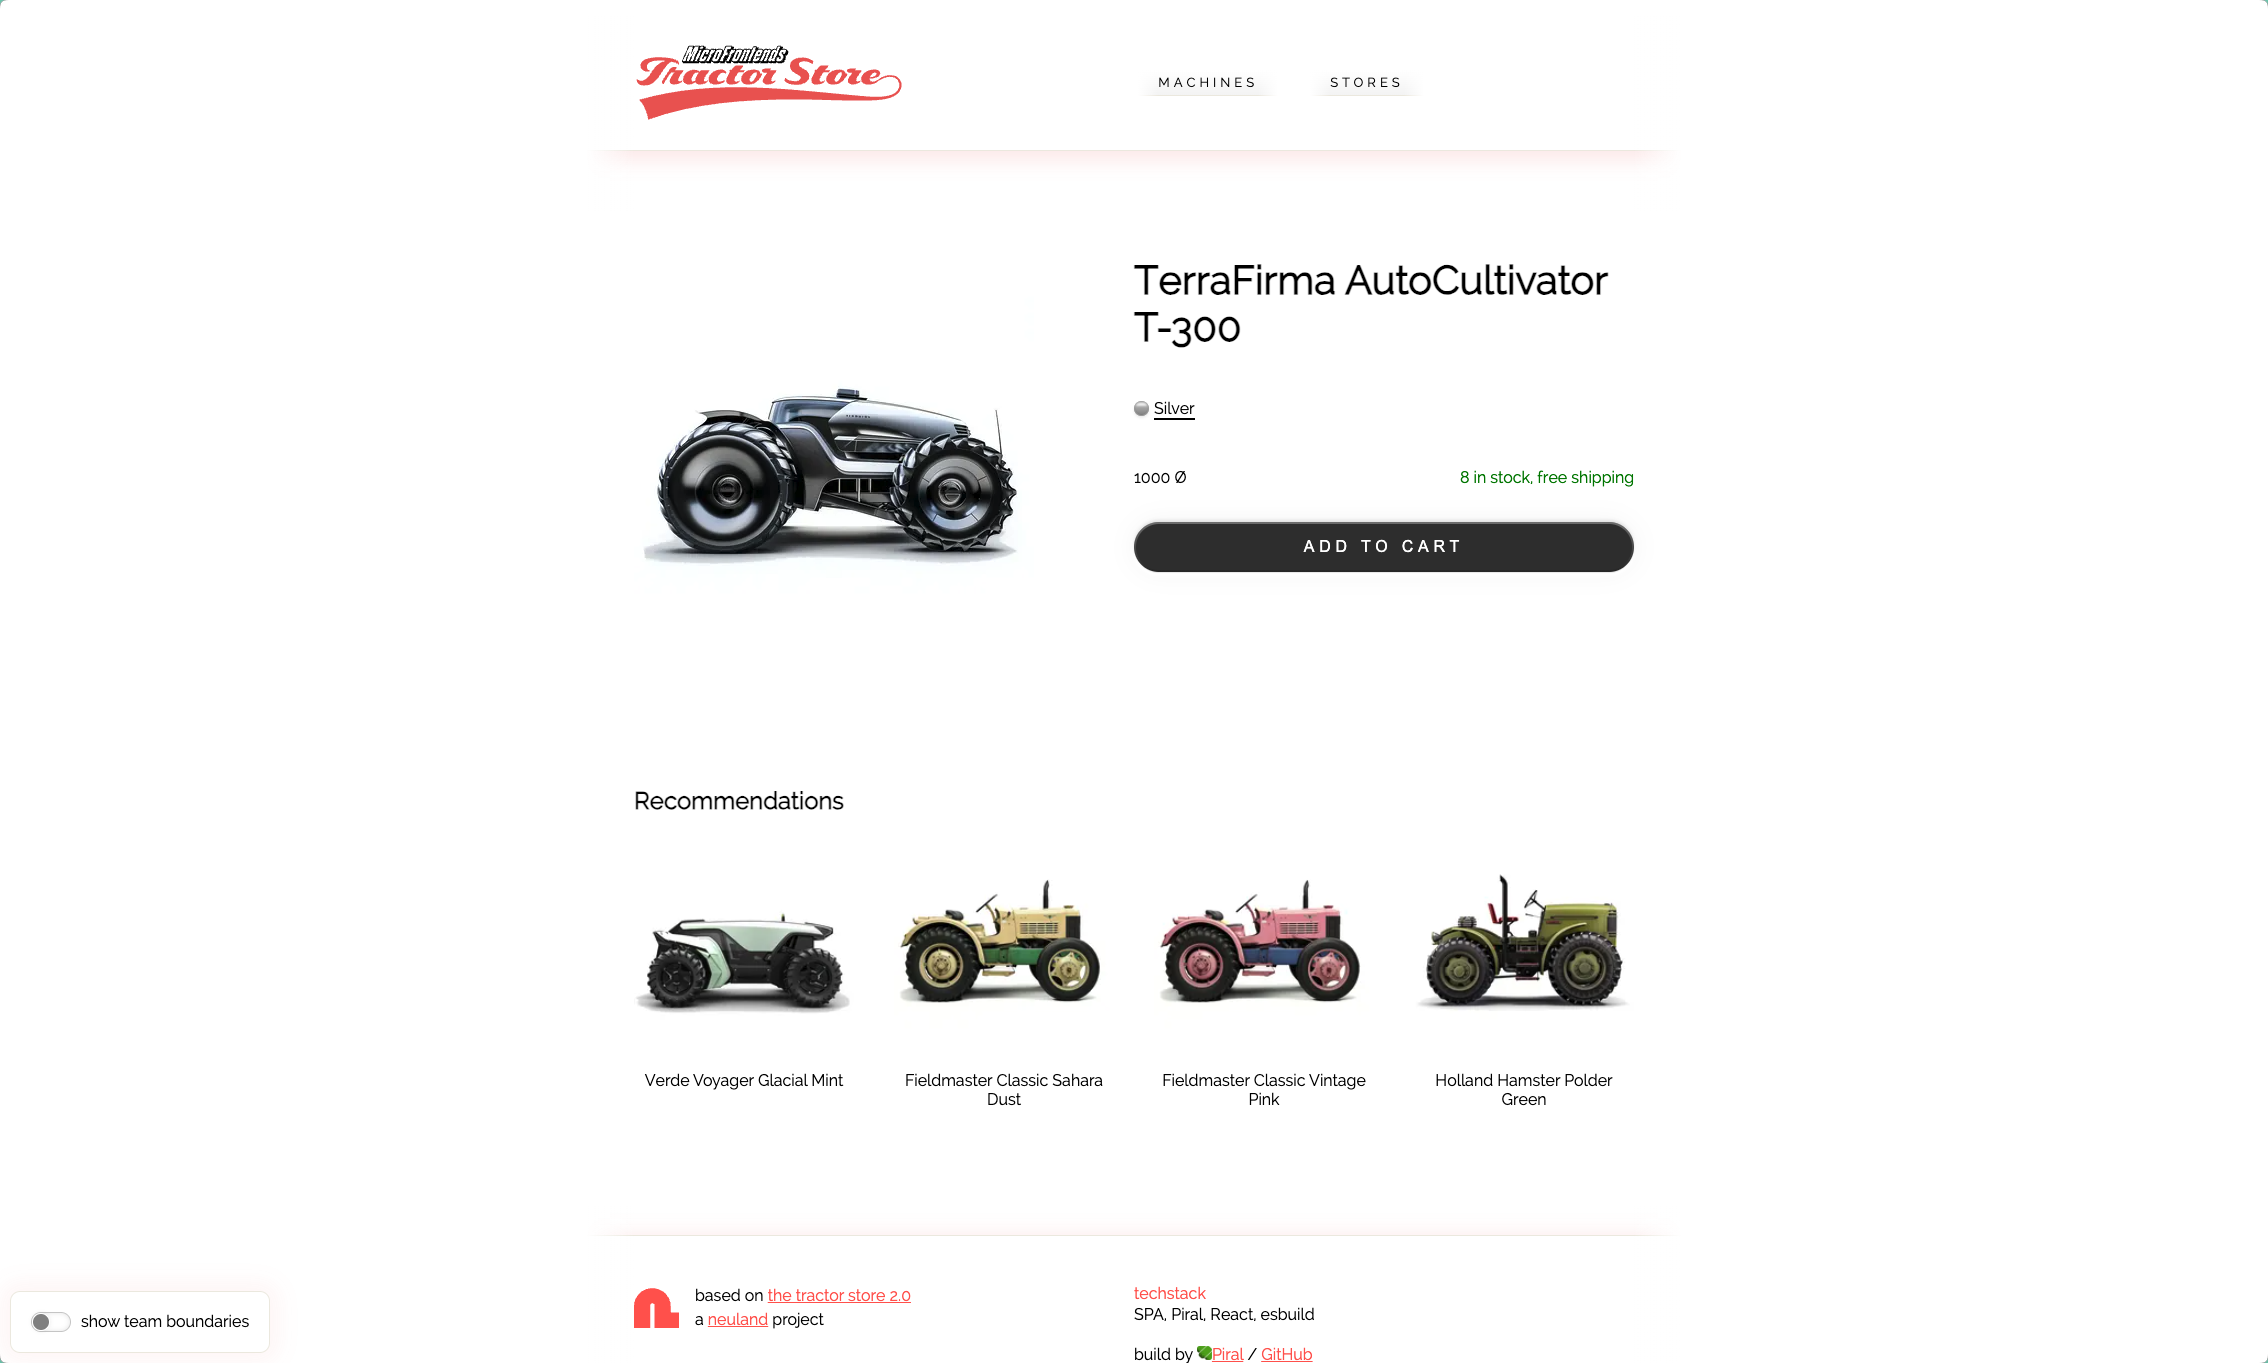
This is the unique URL where your application is deployed on Zephyr Cloud. Open it for the app build and you should see the application in your browser.
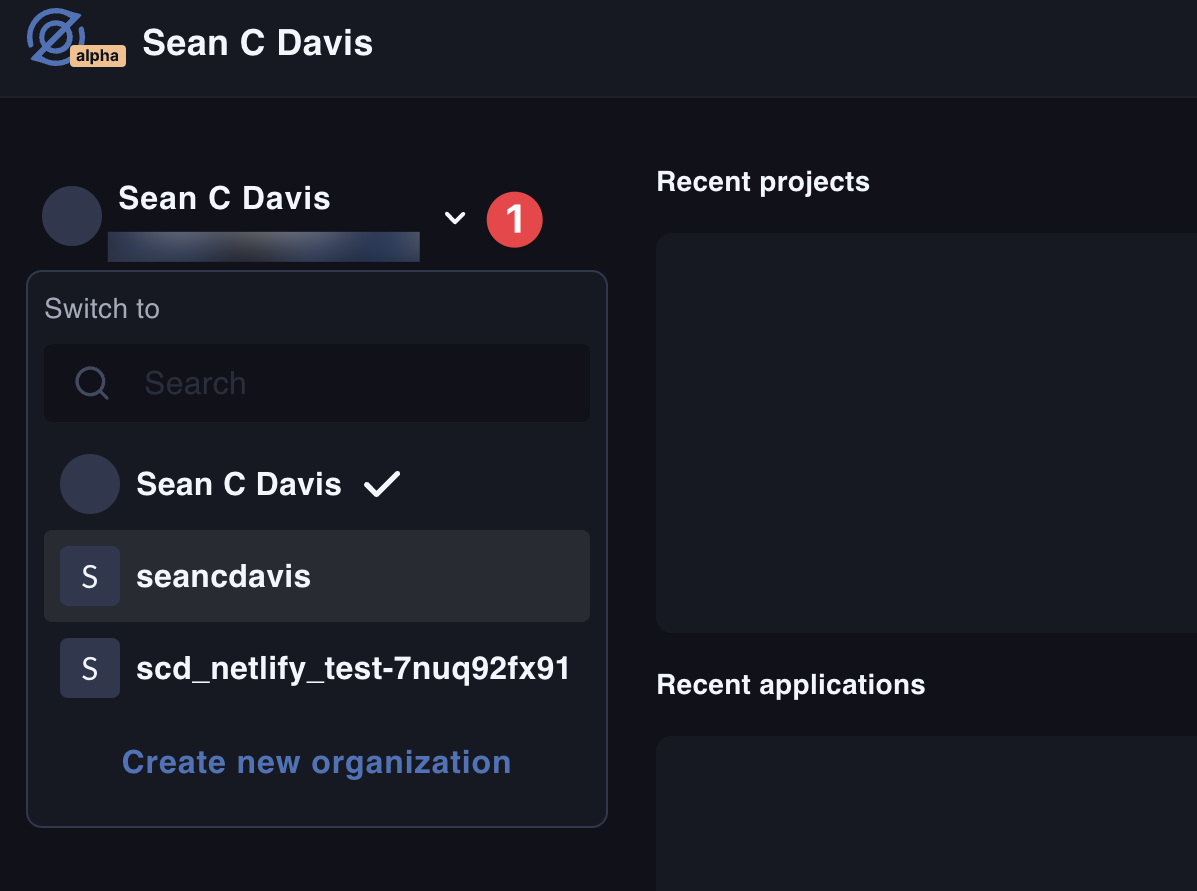
You should also be able to see the project listed in your Zephyr Cloud account now. Note that you may need to use the organization toggle on the dashboard to switch to the correct organization. (1)
Last, create a production environment for the application. This will allow you to have an alias that always points to a specific target.
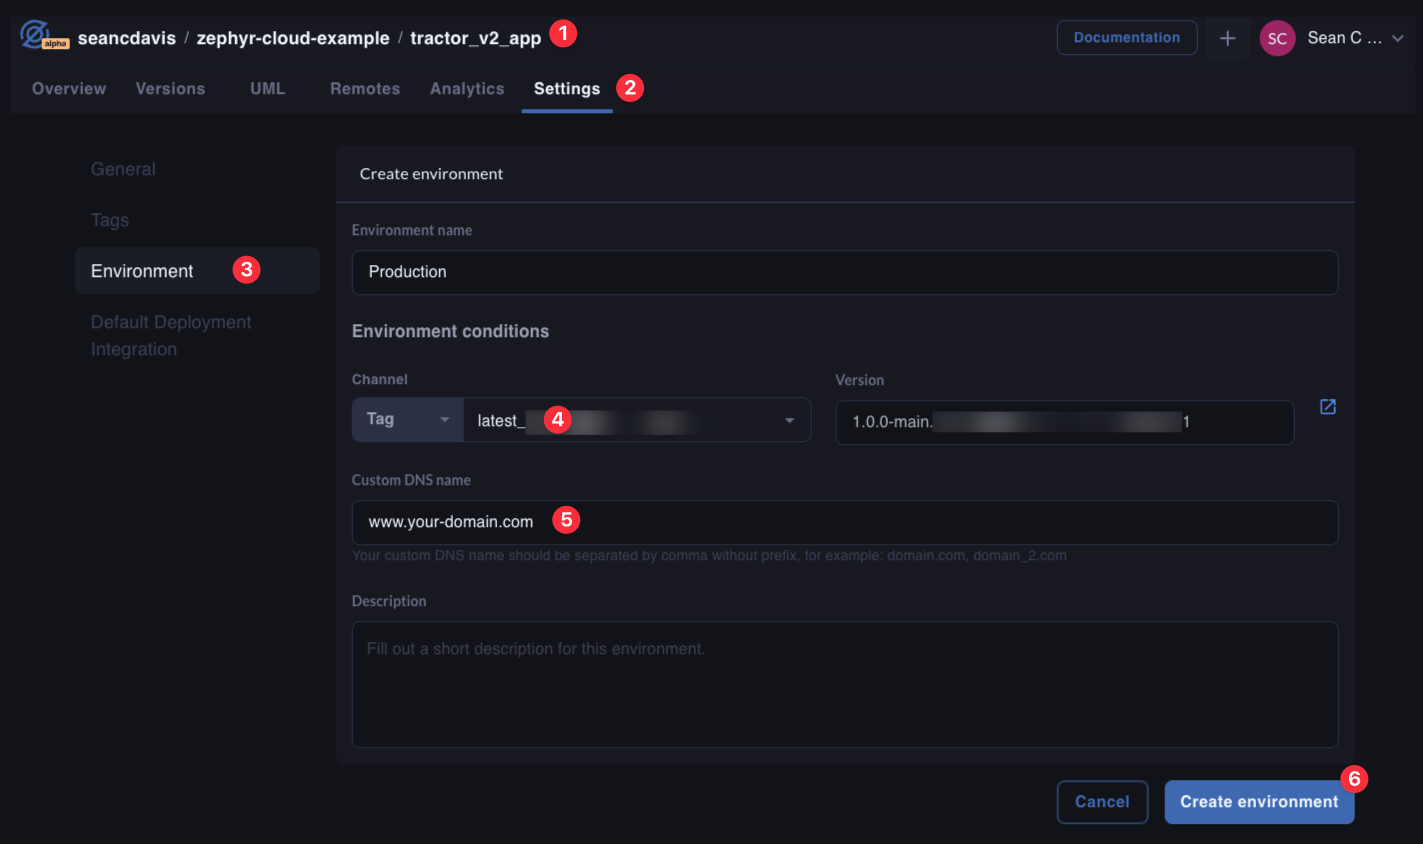
Navigate to the app project (1), then go to Settings (2) > Environments (3) > Create Environment. Fill in the details. Choose a “latest” tag (4). Be sure to use the www subdomain for the production environment (5). Then you can create the new environment (6).
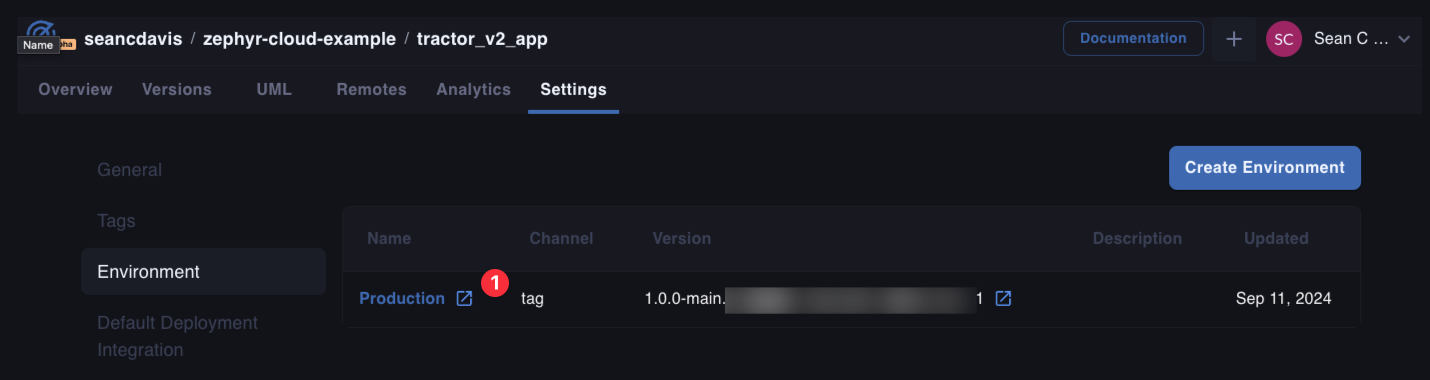
Now you will have a new URL that always points to the latest build of the application. You can find this on the environments list. (1)
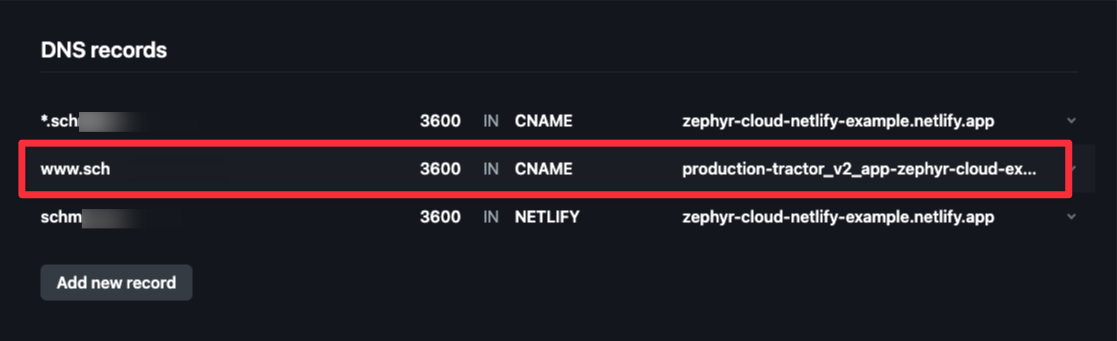
The www subdomain now needs to point to the production environment. Follow these steps:
NETLIFY record for www.CNAME record for www that points to the production environment URL.When complete, you should still have only three DNS records for the domain, but the www record should now point to the production environment.
After adding the production environment, run the app build again to ensure the changes are reflected in the production environment.
WITH_ZE=true pnpm --filter tractor_v2_app run build
Once DNS records have propagated, you should be able to visit the production URL and see the application.
To see the power of Zephyr Cloud, let’s make a change to a module and see how quickly we can get it into production.
While viewing the application, if you enable the “show team boundaries” toggle in the bottom left corner, you’ll see the boundaries between the modules.
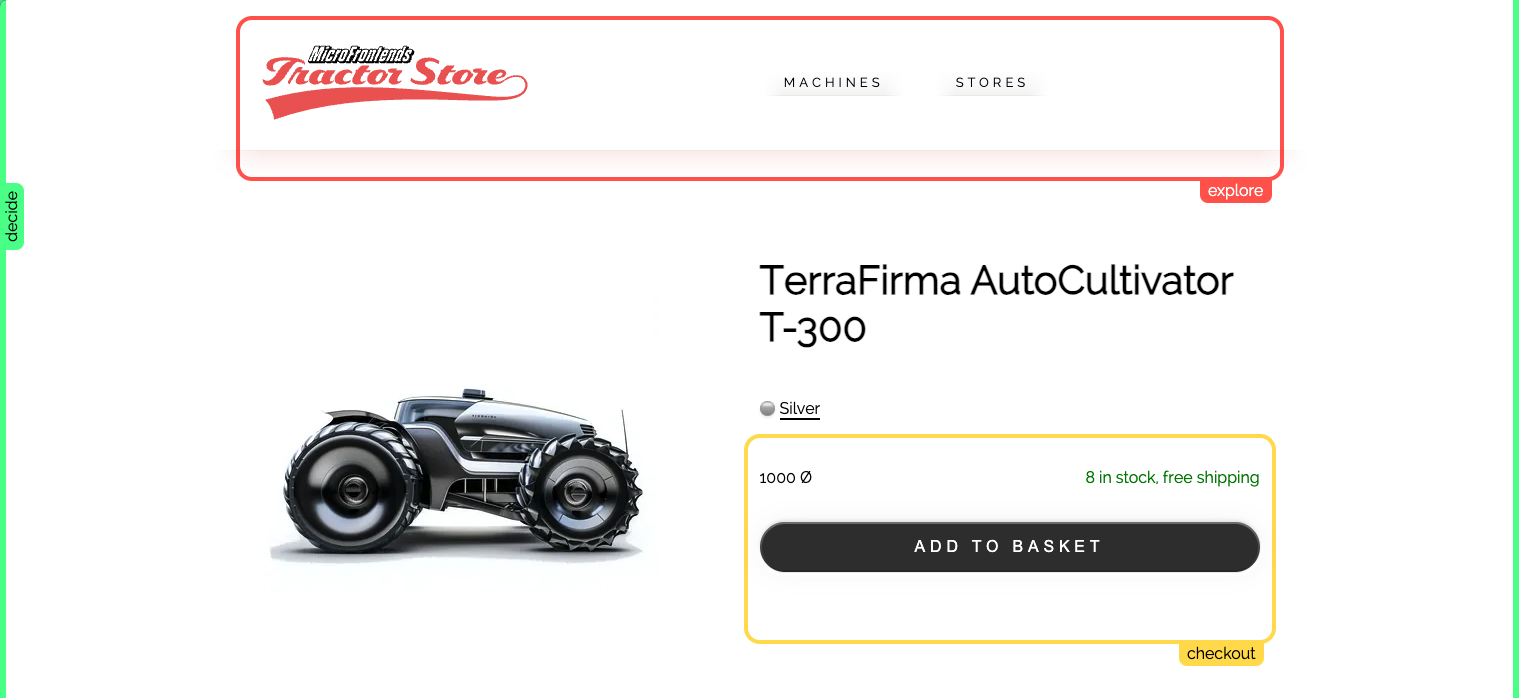
Doing this shows us that on a detail page for a tractor, the “Add to Basket” button is served from the checkout module. Let’s change “Basket” to “Cart” for that button.
// ...
const AddToCart: React.FC<AddToCardProps> = ({ sku }) => {
// ...
return (
<form action="/checkout/cart/add" method="POST" className="c_AddToCart" data-boundary="checkout" onSubmit={submit}>
{/* ... */}
<Button disabled={outOfStock} className="c_AddToCart__button" variant="primary">
add to cart
</Button>
{/* ... */}
</form>
);
};
Then run the build again for checkout:
WITH_ZE=true pnpm --filter tractor_v2_checkout run build
After the build completes and the cache is cleared (give it a minute or two), you should see the change reflected in the application.

This is the real power of micro-fontends. You can make changes to individual modules and deploy them independently. And with Zephyr Cloud serving your assets to production on Netlify, you can do this with ease.
Here are a handful of resources to help you learn more about micro-frontends:
此内容由惯性聚合(RSS阅读器)自动聚合整理,仅供阅读参考。 原文来自 — 版权归原作者所有。