


Very many applications and interactive tools on the web require some sort of user authentication and authorization. Historically, adding such things to a project would greatly expand its complexity and risk. Happily though, these days we can make use of third-party tools and services to provide our authentication and authorization layers for us. Clerk is an excellent tool for this. What does it look like to use it in a project built with React and Vite?
Within this guide, you’ll discover how to develop a React SPA (Single Page Application) using Vite and add Clerk for authentication, as well as the process for deploying it to Netlify.
You can see a preview of the deployed site and the repository for the code on the following links.
These are the things you’ll need to set up before starting this tutorial:
Clerk is more than just a sign-in box, it’s a complete set of embeddable UI components and API’s that allow developers to authenticate, and manage users of their applications.
Whilst there are a number of reasons to use a React meta framework that offers server-side rendering, there are still many valid use cases for React SPAs (Single Page Applications). Clerk integrates equally well with both.
To create a new React app with Vite run the following command in your terminal and select from the prompts.
In our example we’ve chosen to use React with JavaScript.
Creating a new React + Vite app on Netlify is simple. Once logged in to the Netlify UI, click “Add new site” to add a new site, follow the on-screen steps and all the default settings will be completed for you.
For more information about deploying, you can read this guide to Get Started with Netlify in the docs.
It’s a good idea to deploy now as you’ll need to add some environment variables to your Netlify site configuration in a later step.
If you’re new to Clerk you’ll need to sign up and create an account before moving to the next step.
Once you’re logged in, create a new project and give it a name.
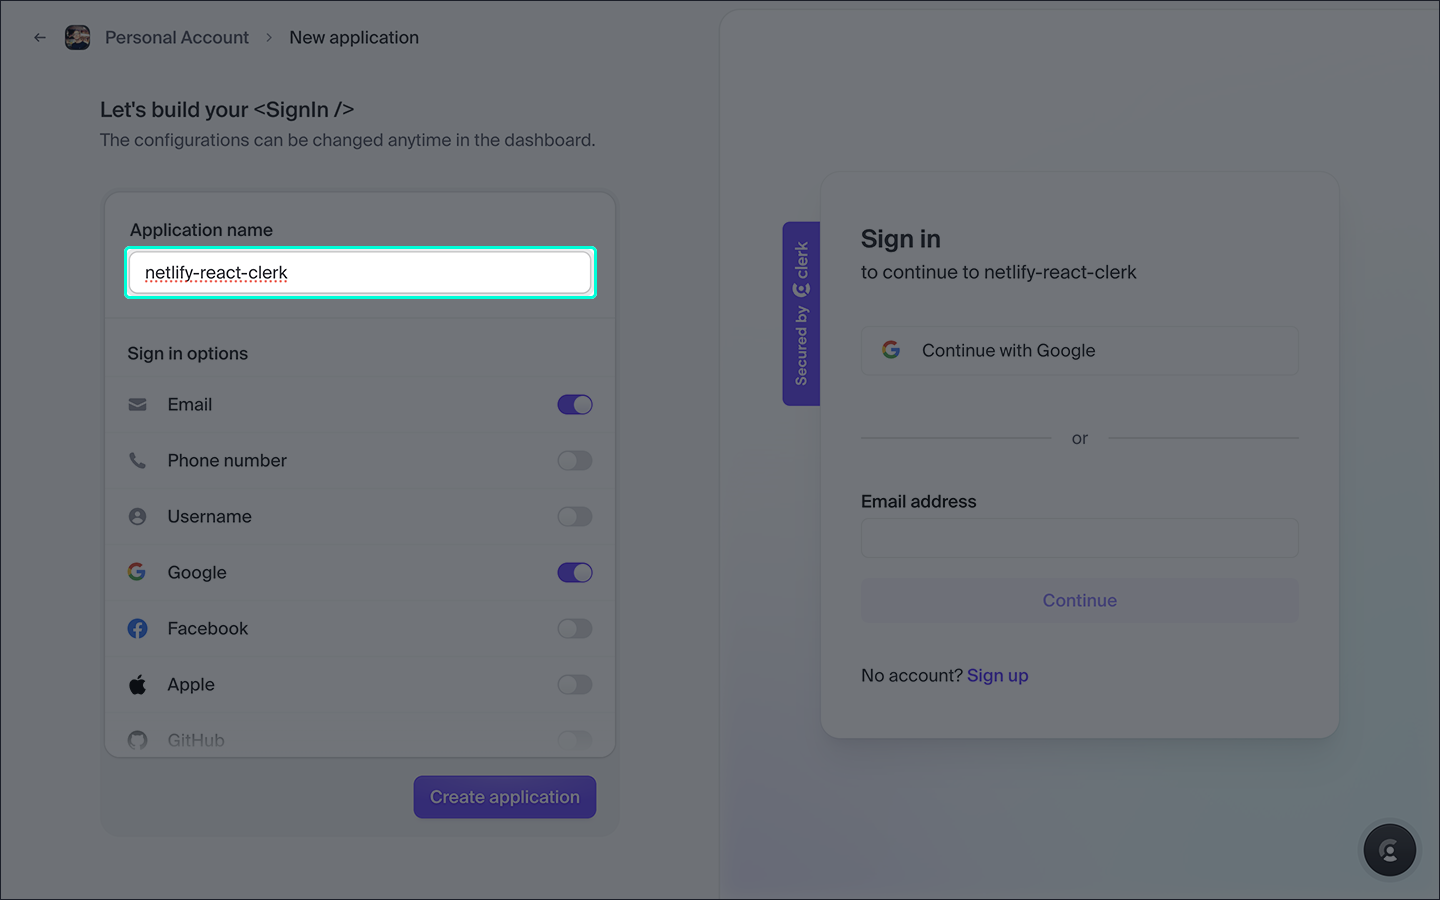
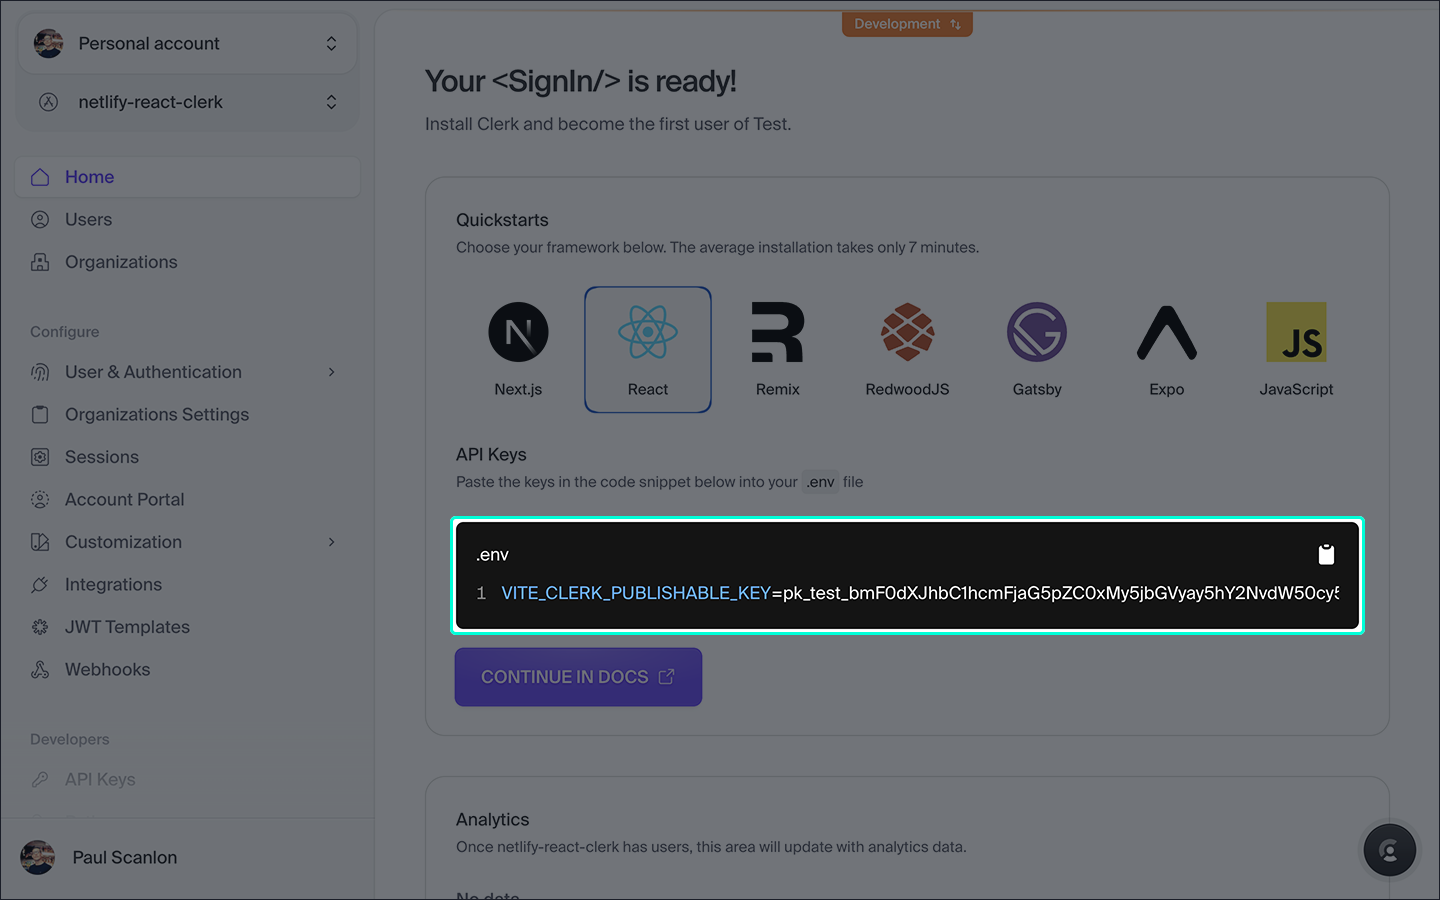
Next, create a .env file at the root of your project and copy the environment variables shown in the Clerk dashboard this is how Clerk communicates with your application.
You may also need to update your .gitignore to include the .env file.
// .env
VITE_CLERK_PUBLISHABLE_KEY=pk_test_bmF0dXJhbC1hcmFjaG5pZC0xMy5jbGVyay5hY2NvdW50cyXXXXX
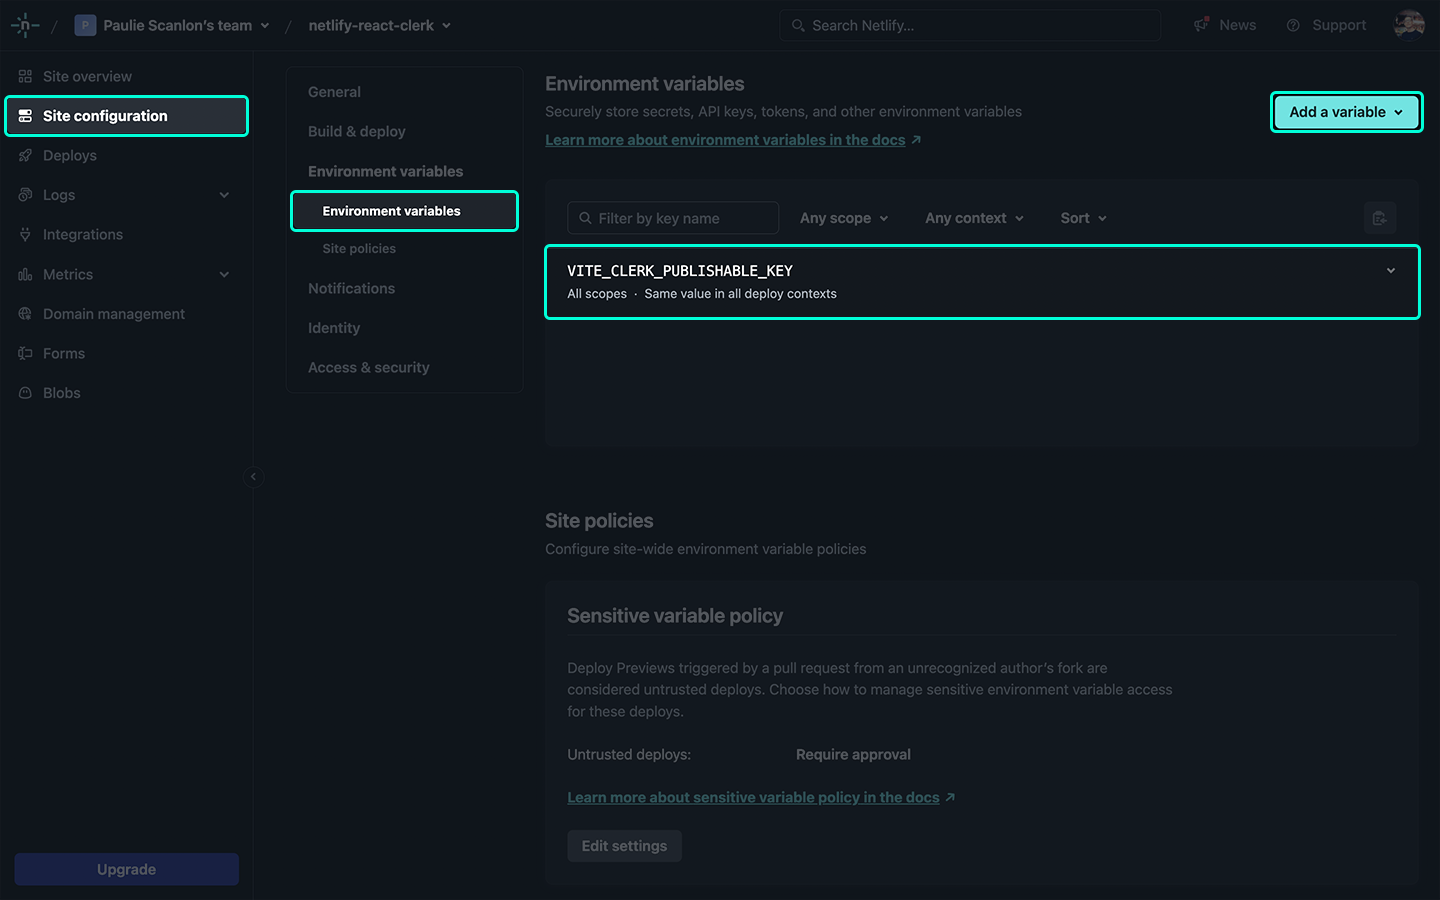
If you’ve already deployed your application, you can now add the same environment variable to your Netlify site configuration. Select Site configuration > Environment variables from the left hand side navigation.
Install the Clerk React SDK using the following command, you’ll need this in an upcoming step.
npm install @clerk/clerk-react
Install React Router DOM using the following command. You’ll need this next when you create the different routes for your application.
npm install react-router-dom
In this application there’ll be a number of routes and two different layouts.
The following routes will use the default layout.
//sign-in/sign-upThere will also be a single, protected route for authenticated users. This route will use both the default layout and a specific dashboard layout. We’ll cover how this is achieved using the router configuration in a later step.
/dashboardCreate a new directory in /src and name it layouts. Then create the following two layouts.
The default layout contains the ClerkProvider which is passed React Router Dom’s navigation methods via the navigate prop which allows the provider to redirect to the various routes in your application upon different user actions.
Next we added a redirect to the /dashboard route after a user signs in, or up, using the afterSignInUrl and afterSignUpUrl props.
And finally we’ve added the environment variable to the publishableKey prop.
We’ve also added both the SignedIn and SignedOut components provided by Clerk.
The SignedIn component accepts a child, and here we’ve used Clerk’s UserButton component and added a redirect to / after a user signs out using the afterSignOutUrl prop.
The remaining elements are Links which will allow you to navigate around your application and the Outlet which renders any child routes of the default layout. Both of these are imported from the react-router-dom package.
// src/layouts/default-layout.jsx
import { Link, Outlet, useNavigate } from "react-router-dom";
import { ClerkProvider, SignedIn, SignedOut, UserButton } from "@clerk/clerk-react";
const Layout = () => {
const navigate = useNavigate();
return (
<ClerkProvider
navigate={navigate}
afterSignInUrl="/dashboard"
afterSignUpUrl="/dashboard"
publishableKey={import.meta.env.VITE_CLERK_PUBLISHABLE_KEY}
>
<header>
<p>netlify-react-clerk</p>
<ul>
<li>
<Link to="/">Home</Link>
</li>
<li>
<Link to="/dashboard">Dashboard</Link>
</li>
<SignedIn>
<li>
<UserButton afterSignOutUrl="/" />
</li>
</SignedIn>
<SignedOut>
<li>
<Link to="/sign-in">Sign In</Link>
</li>
<li>
<Link to="/sign-up">Sign Up</Link>
</li>
</SignedOut>
</ul>
</header>
<main>
<Outlet />
</main>
</ClerkProvider>
);
};
export default Layout;
You can read more about the components we’ve used in the Clerk docs.
Here we’re using Clerk’s useAuth hook to determine if a userId is available. If a user hasn’t been authenticated this value will be null and can be used along with the isLoaded value to determine if a user is redirected to the /sign-in route, or be permitted to view the protected /dashboard route.
// src/layouts/dashboard-layout.jsx
import { useEffect } from "react";
import { useAuth } from "@clerk/clerk-react";
import { Outlet, useNavigate } from "react-router-dom";
const Layout = () => {
const { userId, isLoaded } = useAuth();
const navigate = useNavigate();
useEffect(() => {
if (!userId && isLoaded) {
navigate("/sign-in");
}
}, [userId, isLoaded]);
if (isLoaded) {
return <Outlet />;
}
};
export default Layout;
You can read more about the useAuth hook in the Clerk docs.
Create a new directory in /src and name it routes. Then create the following routes.
The Index route is a simple React component that returns HTML, h1, and p elements.
// src/routes/index.jsx
const Route = () => {
return (
<>
<h1>Index</h1>
<p>This page can be viewed by all users</p>
</>
);
};
export default Route;
The SignIn route returns Clerk’s SignIn component.
// src/routes/sign-in.jsx
import { SignIn } from "@clerk/clerk-react";
const Route = () => {
return <SignIn />;
};
export default Route;
The SignUp route is similar to the sign-in route but uses Clerk’s SignUp component.
// src/routes/sign-up.jsx
import { SignUp } from "@clerk/clerk-react";
const Route = () => {
return <SignUp />;
};
export default Route;
The Dashboard route is a simple React component that returns HTML, h1, and p elements.
// src/routes/dashboard.jsx
const Route = () => {
return (
<>
<h1>Dashboard</h1>
<p>This page can only be viewed by authenticated users</p>
</>
);
};
export default Route;
Update main.jsx with the following changes.
Instead of rendering the App component created by the Vite CLI, we’re rendering the RouterProvider from the react-router-dom package which accepts a route configuration object via the router prop.
All routes are children of the DefaultLayout layout including the DashboardLayout which itself has children. Here the DashboardLayout returns the Dashboard route as a child.
// src/main.jsx
import React from "react";
import ReactDOM from "react-dom/client";
import { RouterProvider, createBrowserRouter } from "react-router-dom";
import DefaultLayout from "./layouts/default-layout";
import Index from "./routes/index";
import SignIn from "./routes/sign-in";
import SignUp from "./routes/sign-up";
import DashboardLayout from "./layouts/dashboard-layout";
import Dashboard from "./routes/dashboard";
const routes = createBrowserRouter([
{
element: <DefaultLayout />,
children: [
{ path: "/", element: <Index /> },
{ path: "/sign-in", element: <SignIn /> },
{ path: "/sign-up", element: <SignUp /> },
{
element: <DashboardLayout />,
path: "dashboard",
children: [{ path: "/dashboard", element: <Dashboard /> }],
},
],
},
]);
import App from "./App.jsx";
import "./index.css";
ReactDOM.createRoot(document.getElementById("root")).render(
<React.StrictMode>
<App />
<RouterProvider router={routes} />
</React.StrictMode>
);
You can now safely delete the App.css, App.tsx|jsx and index.css files.
Whilst your application works great locally, you will need one last file to let Netlify know this is a Single Page Application (SPA). This configuration file will prevent 404 errors from being thrown when users attempt to visit the different routes in your application.
Create a file at the root of your project and name it netlify.toml, then add the following code.
[[redirects]]
from = "/*"
to = "/index.html"
status = 200
You can now commit your changes and push to your remote.
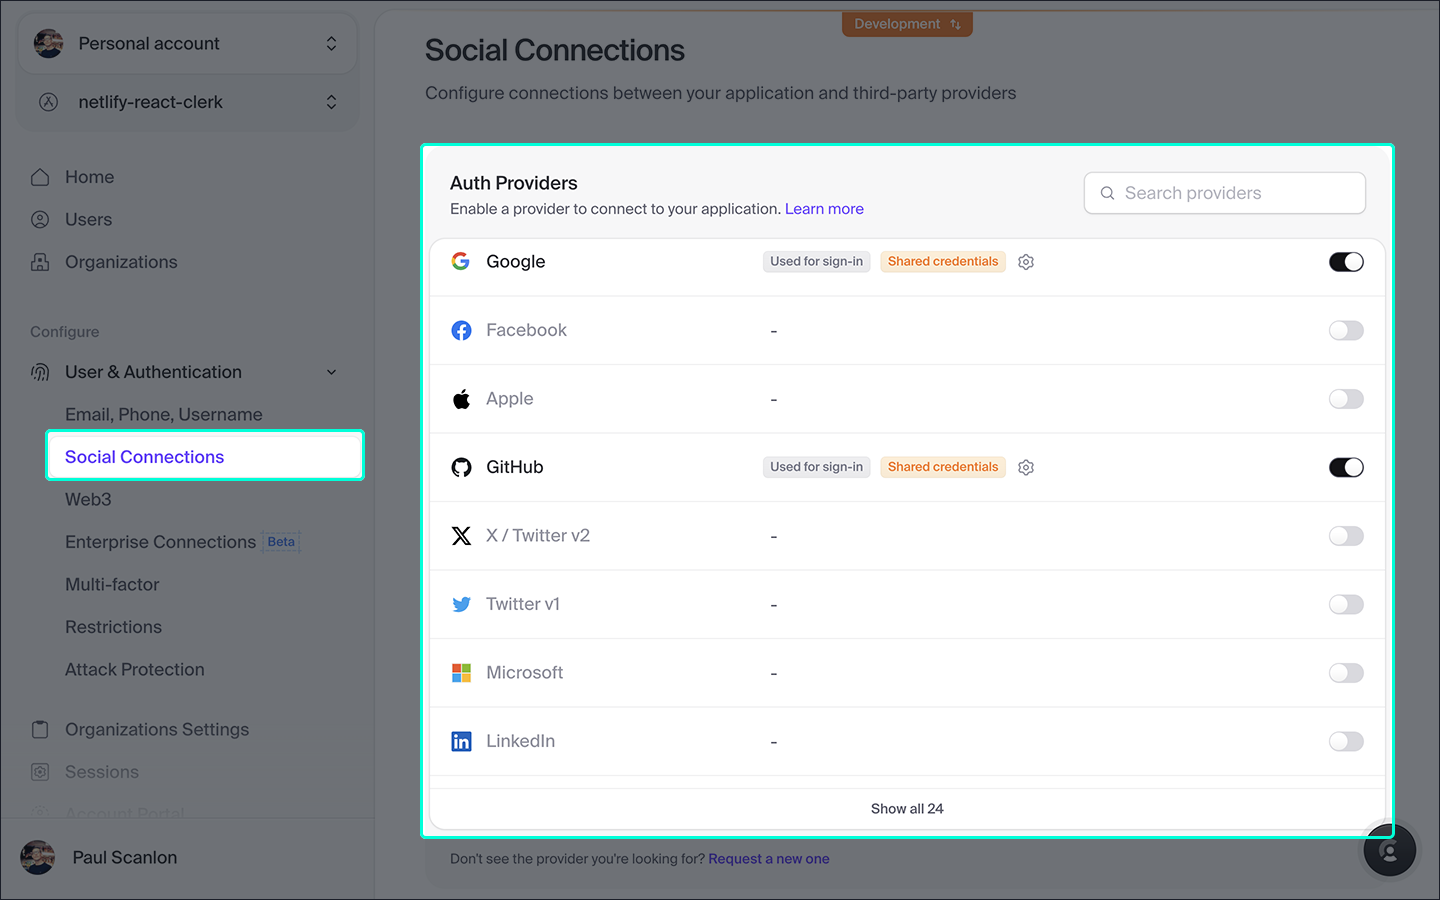
Clerk offers a number of different social connections. In this next section we’ll show you how to add GitHub as a sign in option and disable the default username and password option.
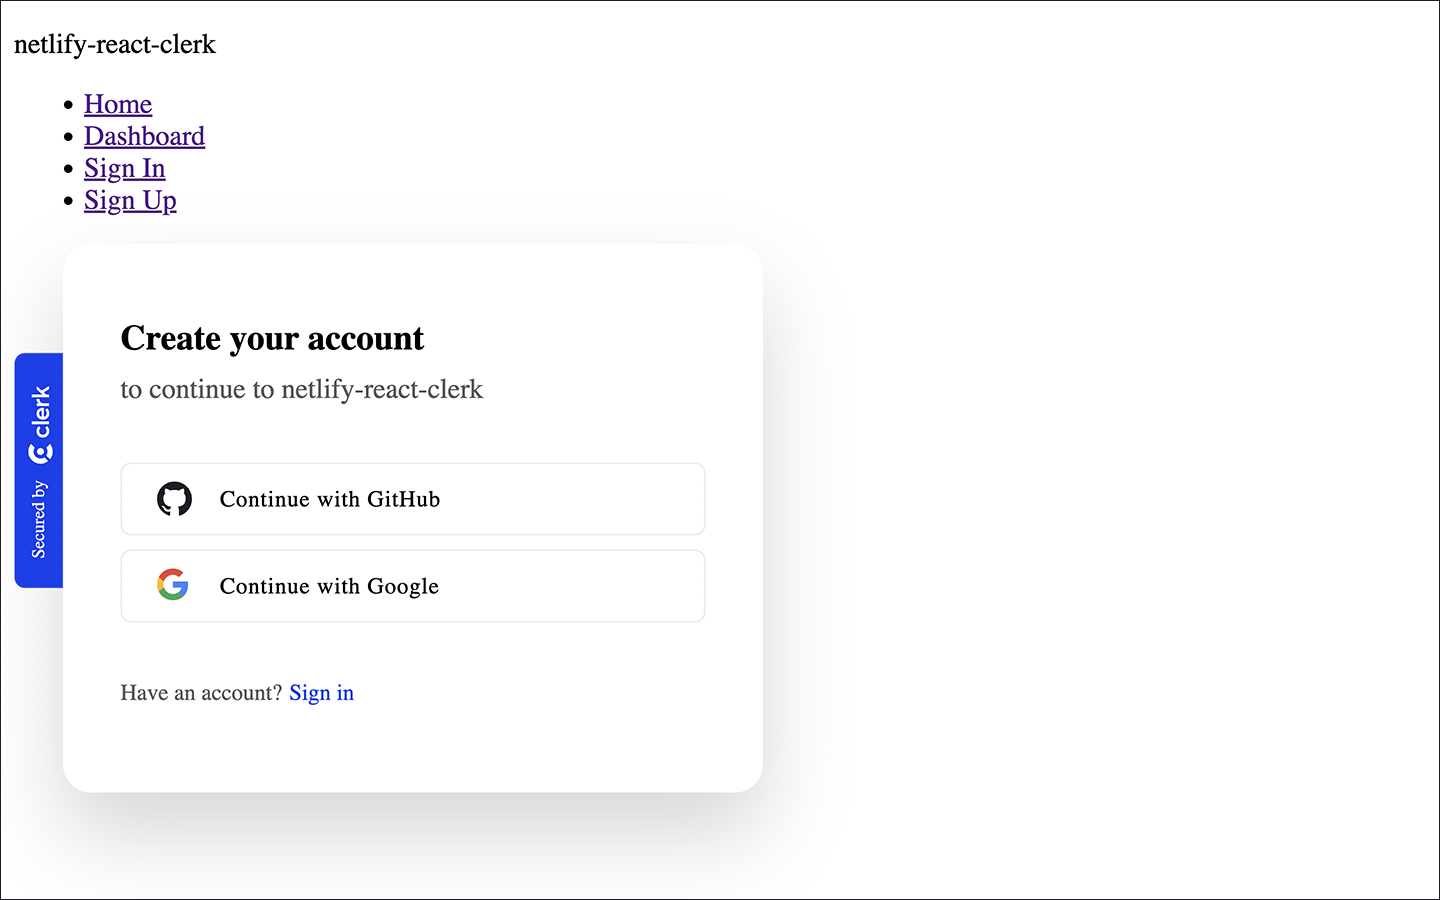
To change the configuration of your application’s sign in, or sign up options. Head over to your Clerk dashboard.
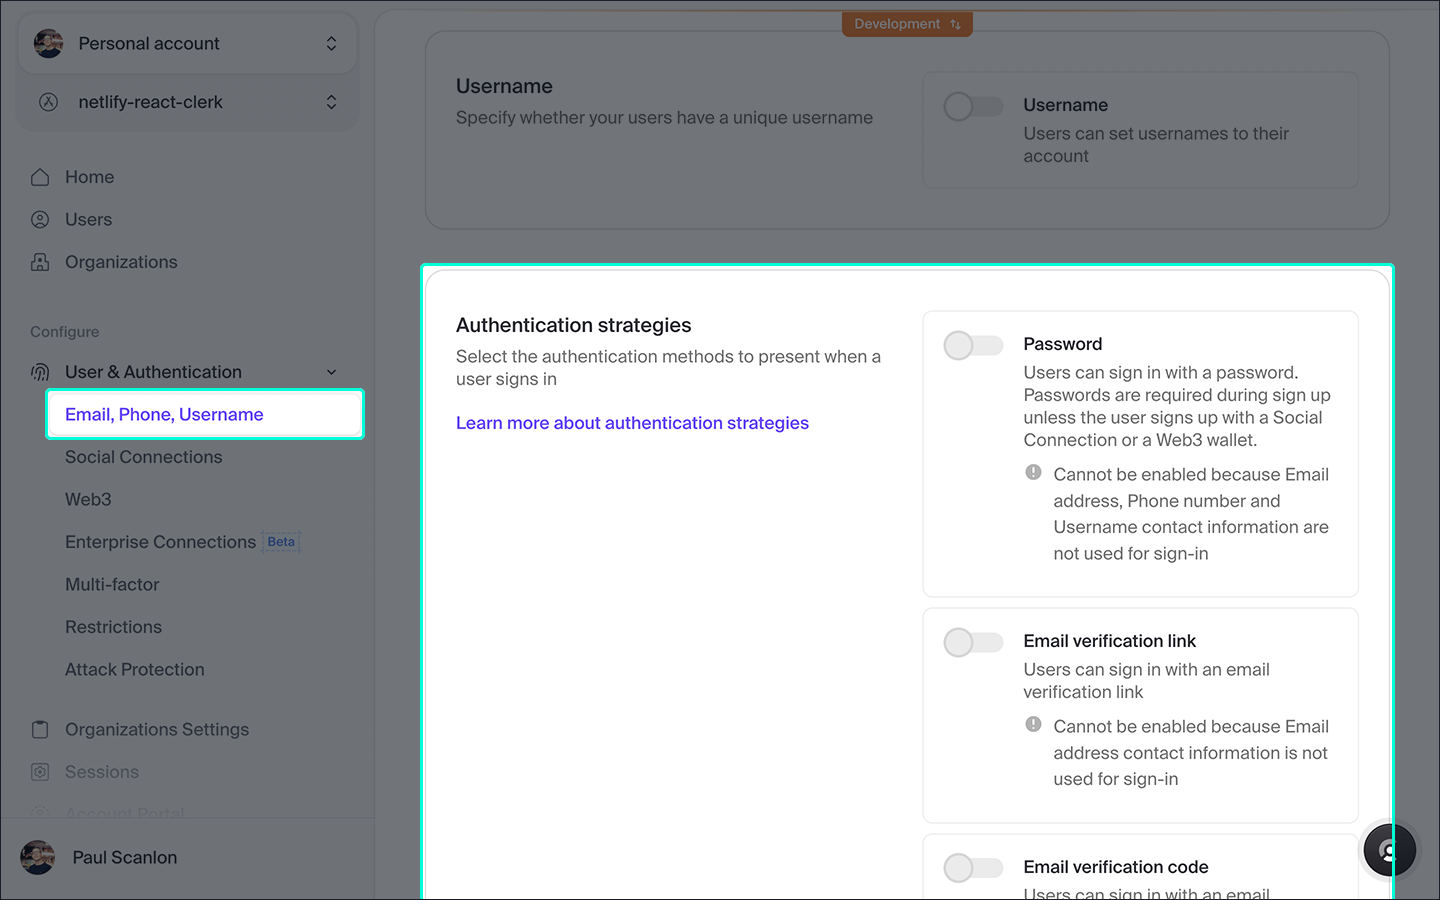
To disable the username and password options select User & Authentication > Email, Phone, Username from the left hand navigation. Toggle each of the switches in the Authentication strategies section. Be sure to save your changes.
To add a new social connection option select User & Authentication > Social connections from the left hand navigation and toggle on each provider you wish to enable in your application.
The steps outlined above relating to Clerk will work while you’re in development mode. If you’re looking to use Clerk in production there are additional steps and requirements. You can read more about these in the Clerk docs: Deploying to production.
And that’s it, you now have a React app with Clerk authentication and two social connections deployed to Netlify. Congrats!
此内容由惯性聚合(RSS阅读器)自动聚合整理,仅供阅读参考。 原文来自 — 版权归原作者所有。