


本文档面向 GCP 平台,旨在帮助工程师快速安装部署 openTelemetry 工具,进行本地或者多云机器的系统日志采集并推送至 GCP cloud logging
说明:若已创建过服务账号并已有JSON密钥文件,此步骤可以略过
在 IAM 和管理 的 服务账号 中创建具有 Logging Admin 和 Monitoring Metric Writer 权限的服务账号

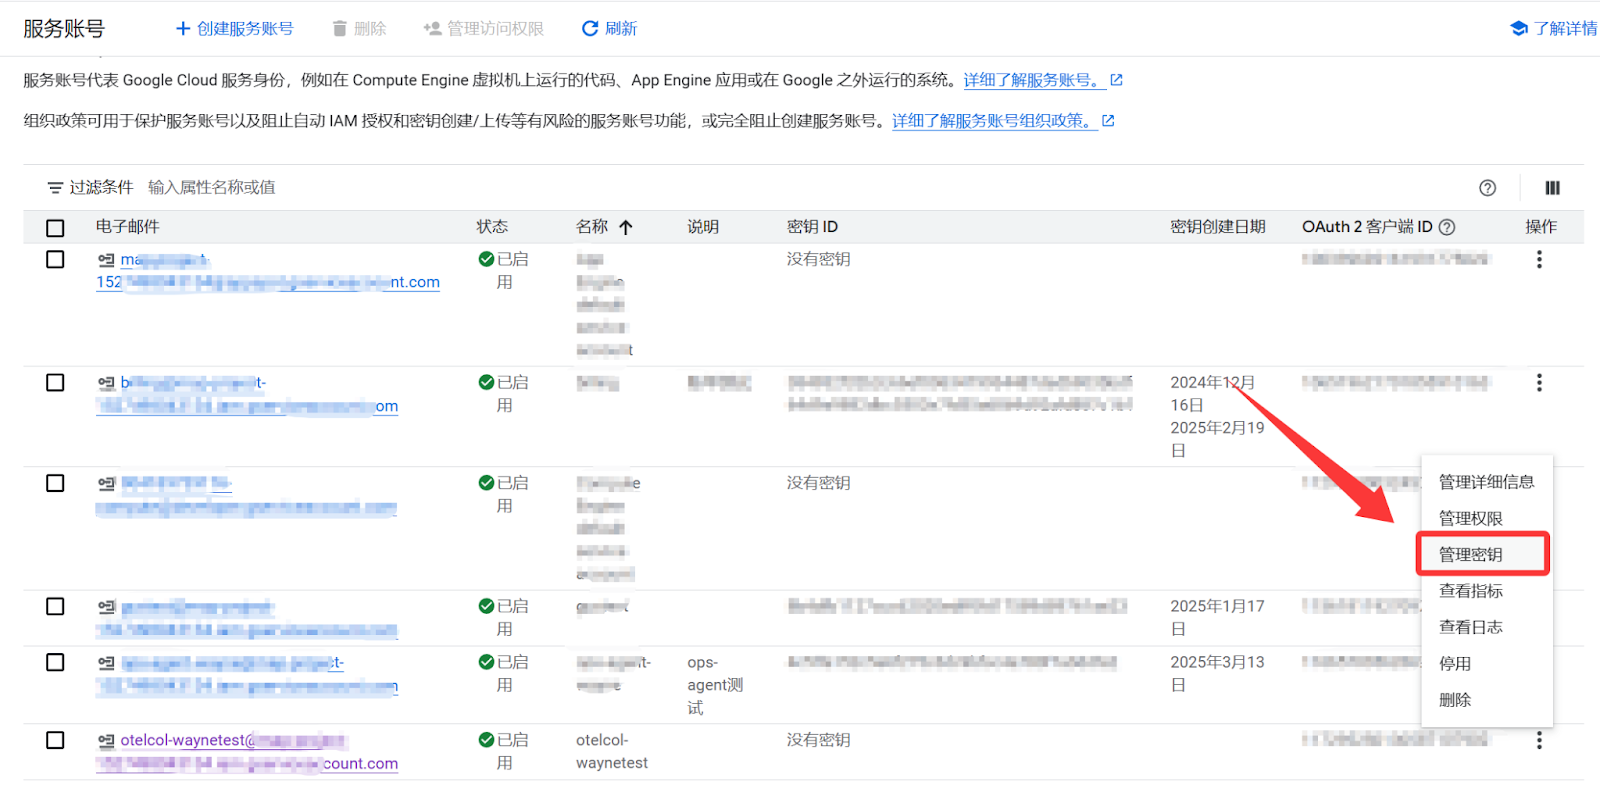
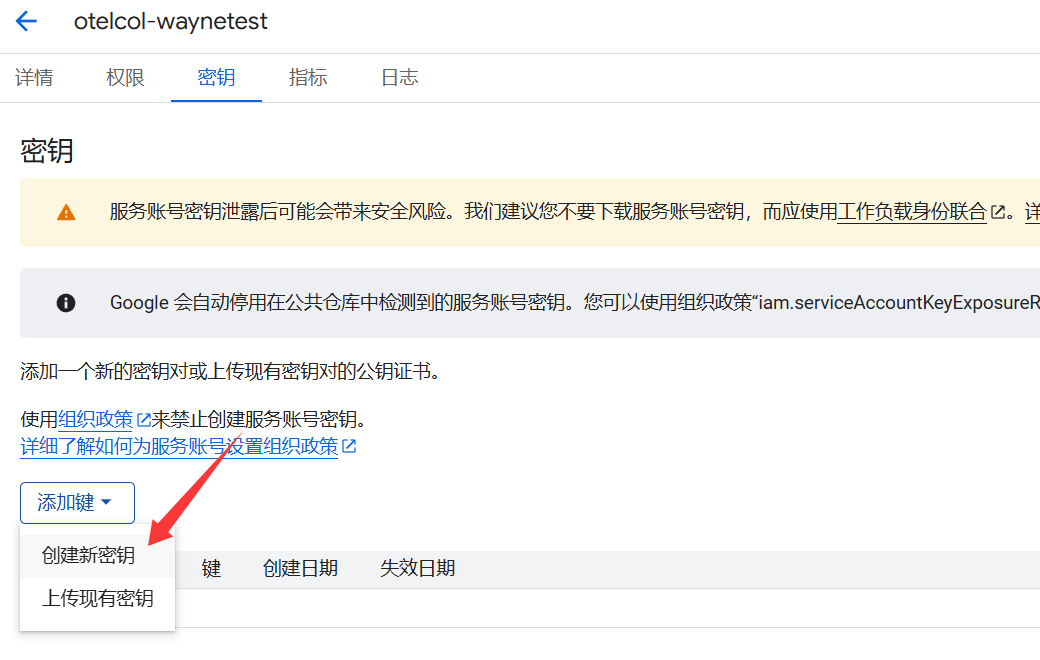
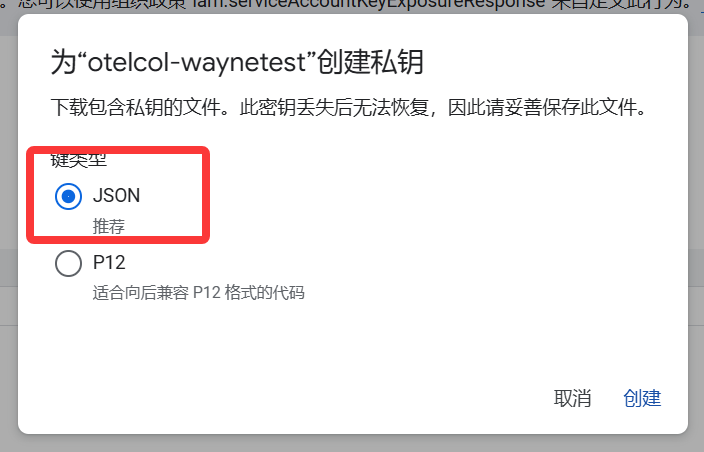
下载对应版本的 otelcol-contrib 并安装。其他版本安装包见 参考 [4]。步骤二、三 建议使用 root 用户操作
Debian/Ubuntu x86_64
wget https://github.com/open-telemetry/opentelemetry-collector-releases/releases/download/v0.121.0/otelcol-contrib_0.121.0_linux_amd64.deb
sudo dpkg -i otelcol-contrib_0.121.0_linux_amd64.deb
REHL/CentOS/Rocky x86_64
wget https://github.com/open-telemetry/opentelemetry-collector-releases/releases/download/v0.121.0/otelcol-contrib_0.121.0_linux_amd64.rpm
rpm -ivh otelcol-contrib_0.121.0_linux_amd64.rpm
配置文件路径
/etc/otelcol-contrib/config.yaml
一个简单的系统日志采集配置文件参考。更多配置项见 参考[1]
receivers:
  filelog:
    include:
      - /var/log/1.log      #指定监听的日志路径,可用通配符
      - /var/log/2.log      #可指定多个日志文件
processors:
  batch:
    send_batch_size: 1000
    timeout: 10s
  resourcedetection:
    detectors: [system, env]
    system:
      hostname_sources: [os]

exporters:
  googlecloud:
    log:
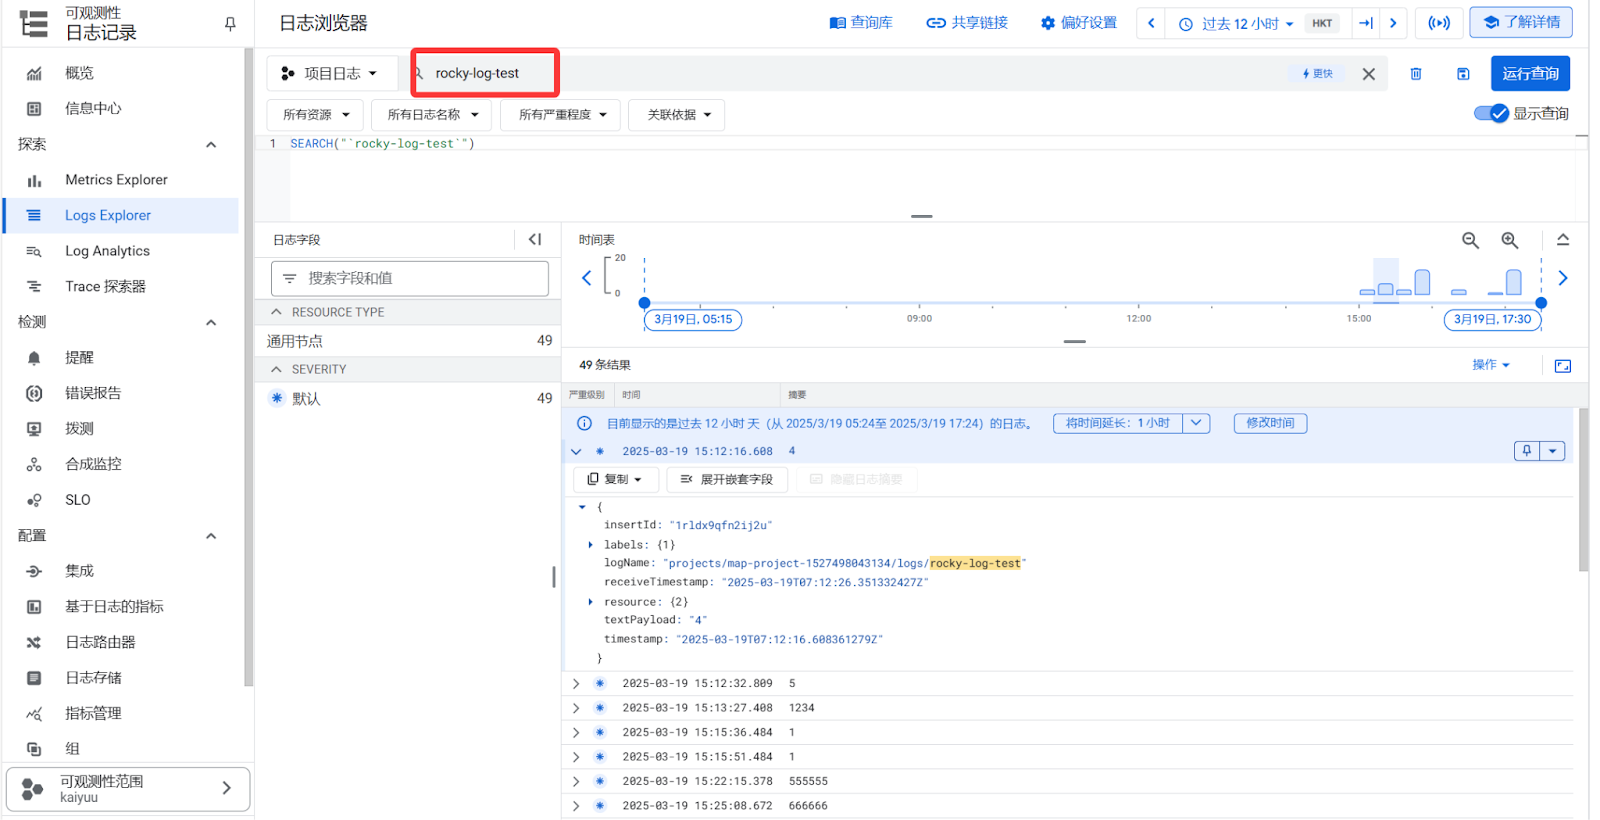
      default_log_name: rocky-log-test  #日志名称可自定义,方便在cloudlogging里查询

service:
  pipelines:
    logs:
      receivers: [filelog]
      processors: [resourcedetection, batch]
      exporters: [googlecloud]
将步骤一里申请的密钥上传至服务器,并设置 otelcol-contrib 服务
vim /usr/lib/systemd/system/otelcol-contrib.service
在 [Service] 下将 User 和 Group 修改为 root ,再添加一行 Environment,指定密钥文件路径,如下所示
[Unit]
Description=OpenTelemetry Collector Contrib
After=network.target

[Service]
EnvironmentFile=/etc/otelcol-contrib/otelcol-contrib.conf
ExecStart=/usr/bin/otelcol-contrib $OTELCOL_OPTIONS
KillMode=mixed
Restart=on-failure
Type=simple
User=root
Group=root
Environment="GOOGLE_APPLICATION_CREDENTIALS=/path/xxxxx.json"

[Install]
WantedBy=multi-user.target
修改完成后重载 systemd
systemctl start otelcol-contrib
在 cloud logging 中可使用设置的 default_log_name 去查询对应机器的日志
[1] opentelemetry-collector-contrib-GoogleCloudExporter:
[2] 为本地或其他云服务提供商设置 ADC:
https://cloud.google.com/docs/authentication/set-up-adc-on-premises?hl=zh-cn
[3] opentelemetry官方文档:
[4] opentelemetry github下载地址:
https://github.com/open-telemetry/opentelemetry-collector-releases/releases
此内容由惯性聚合(RSS阅读器)自动聚合整理,仅供阅读参考。 原文来自 — 版权归原作者所有。