请注意,本文编写于 780 天前,最后修改于 776 天前,其中某些信息可能已经过时。

Termux 是一个在 Android 上模拟 Linux 环境的终端应用程序,它允许用户运行各种 Linux 命令和应用程序。
关于 Termux 杀后台的问题,好像是因为电池优化和节能机制,linux系统占用内存过高,当你安装完ubuntu或者debian等他们的图形化界面,跳转去vnc连接,无论锁后台,无视省电等方法,过不了多久就会卡住,那时候就是被杀后台了。
那我们直接开始吧
环境
安装好termux wifi环境 有无线调试功能(安卓10以上)
开始
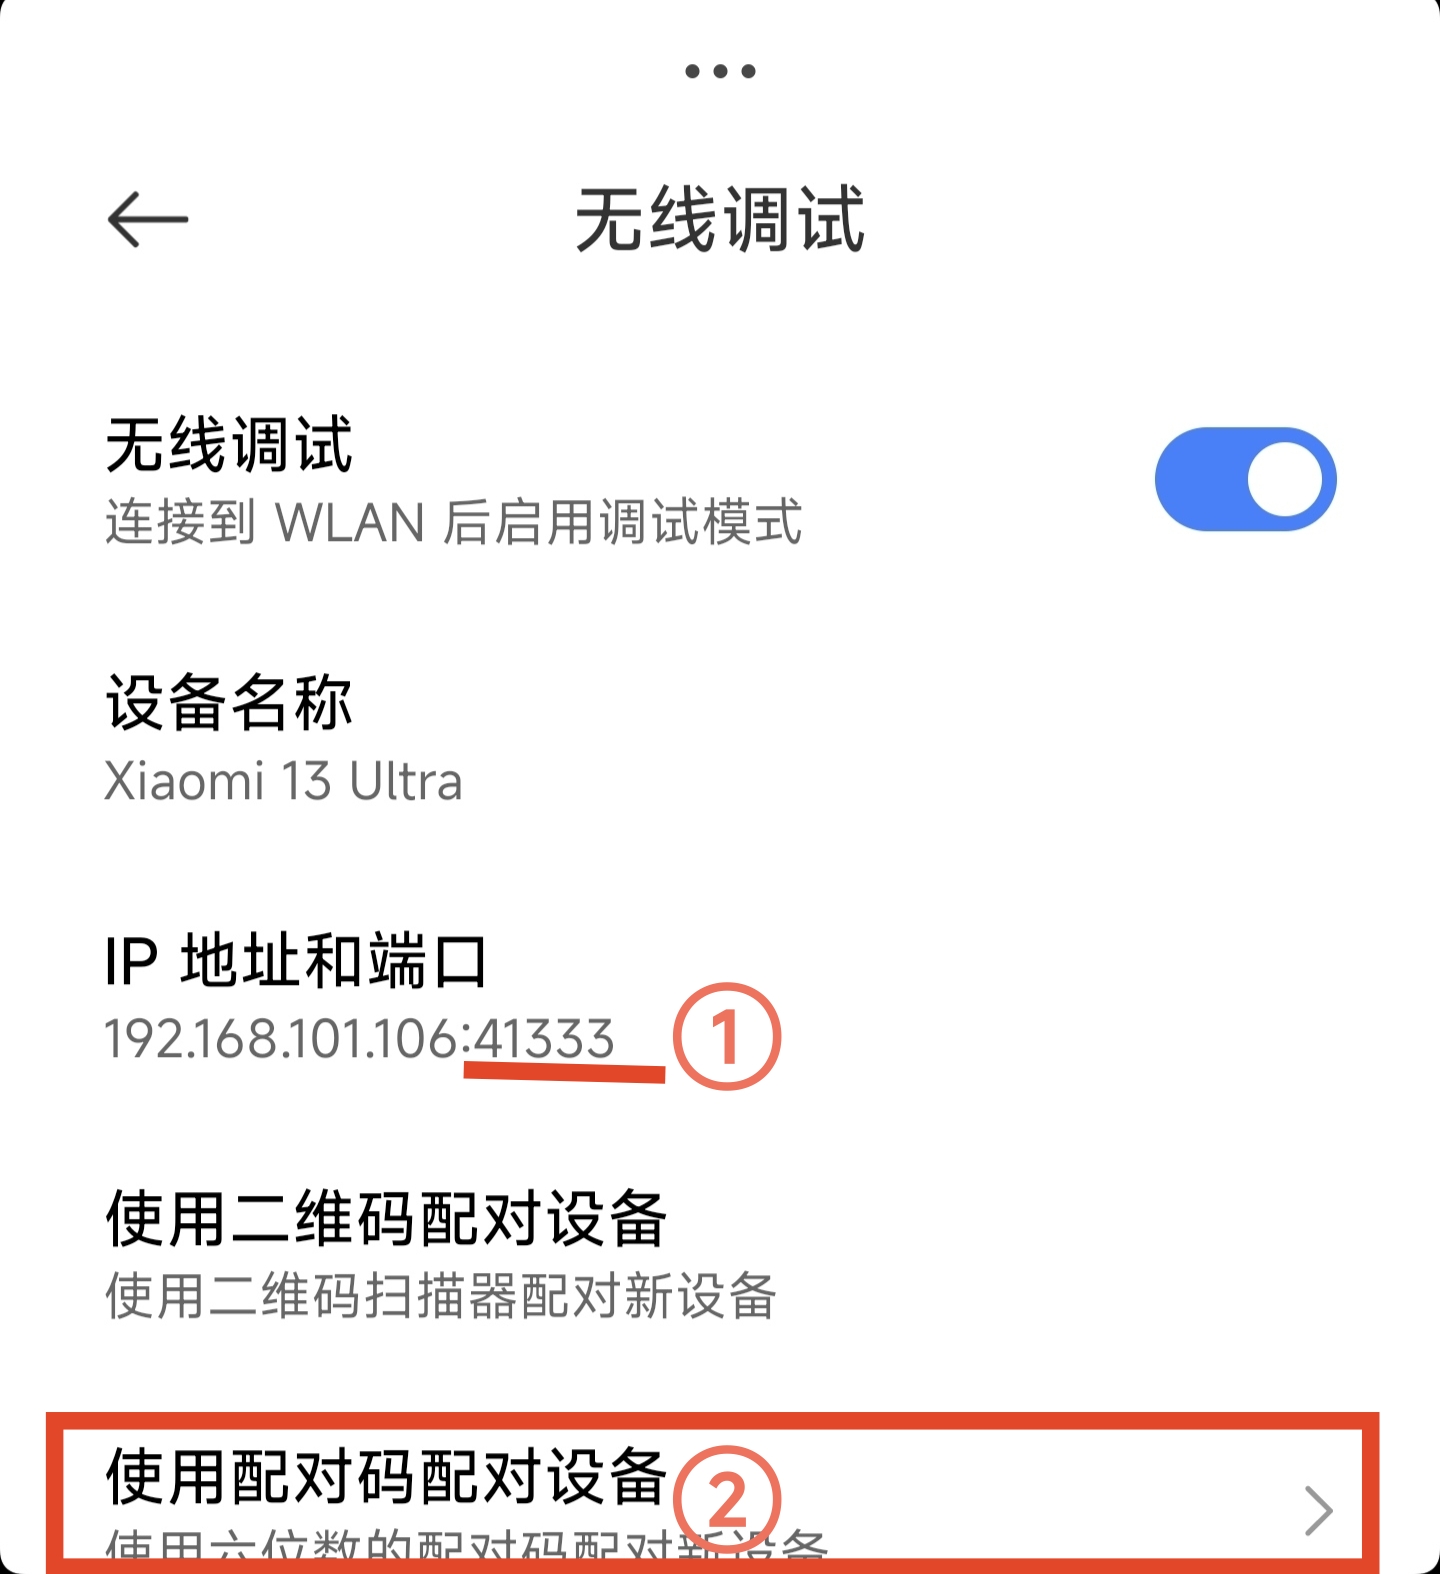
首先得用到分屏,一个开termux,另一个打开设置,打开设置后,打开开发者模式 ,找到无线调试 ,打开它,他就会给你弹窗

点确定就行
然后①记住那个端口,②点击使用配对码配对
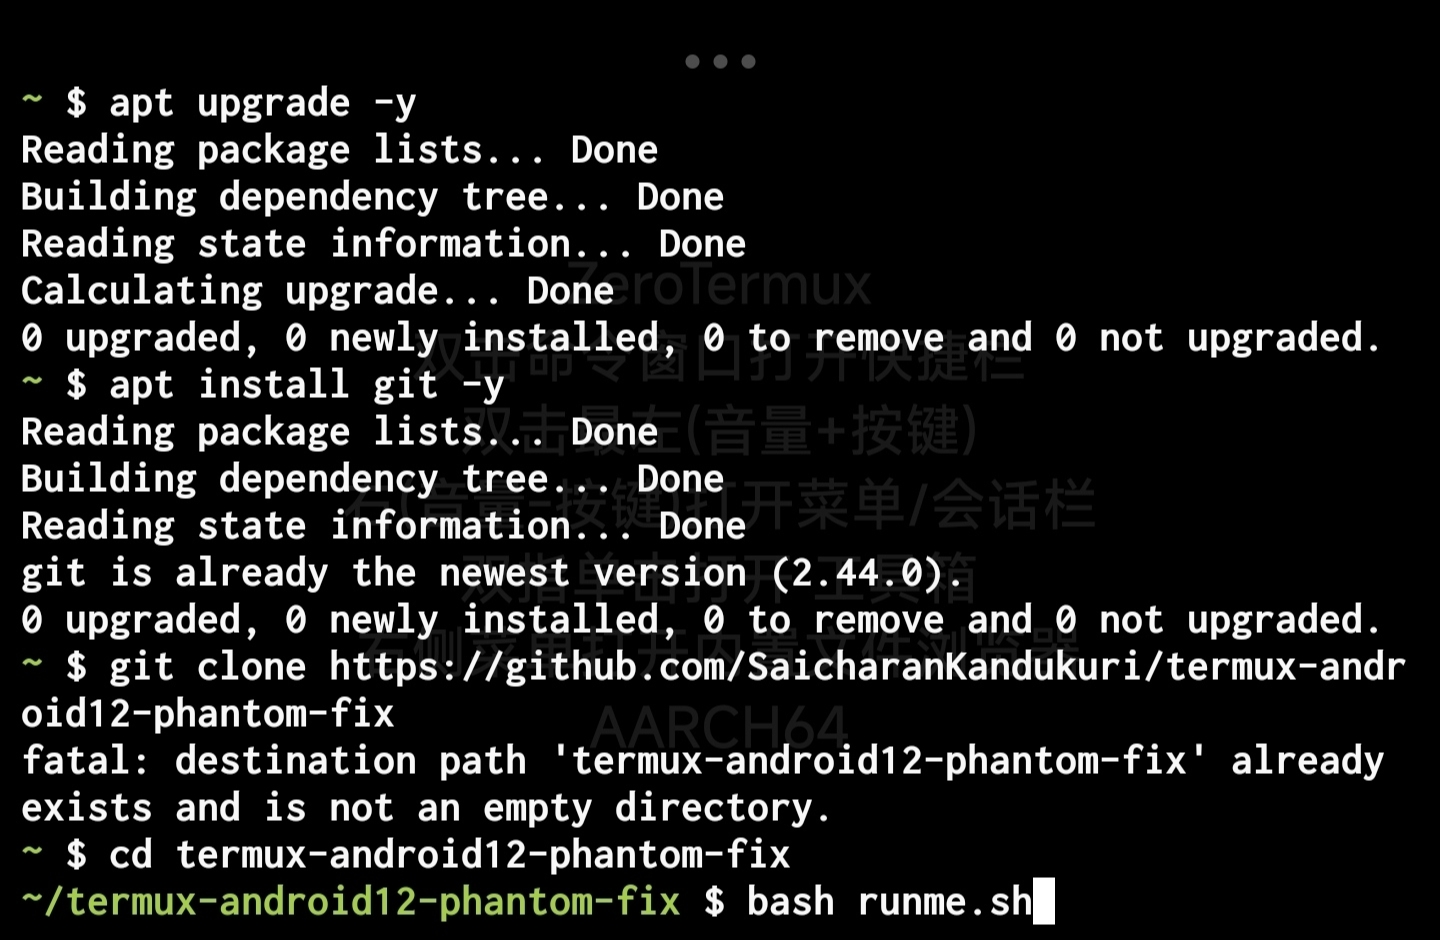
然后在你的Termux端输入以下内容:
apt update
apt upgrade -y
apt install git -y
git clone https://github.com/SaicharanKandukuri/termux-android12-phantom-fix
cd termux-android12-phantom-fix
bash runme.sh
他一般会自动运行,没有的话就回车,中途他会让你回车运行sh,回车即可
运行sh之后就会让你输入端口那些内容了
第一个输入下方与设备配对中的端口
第二个输入下方WLAN配对码
第三个输入刚才让你记住的那个端口
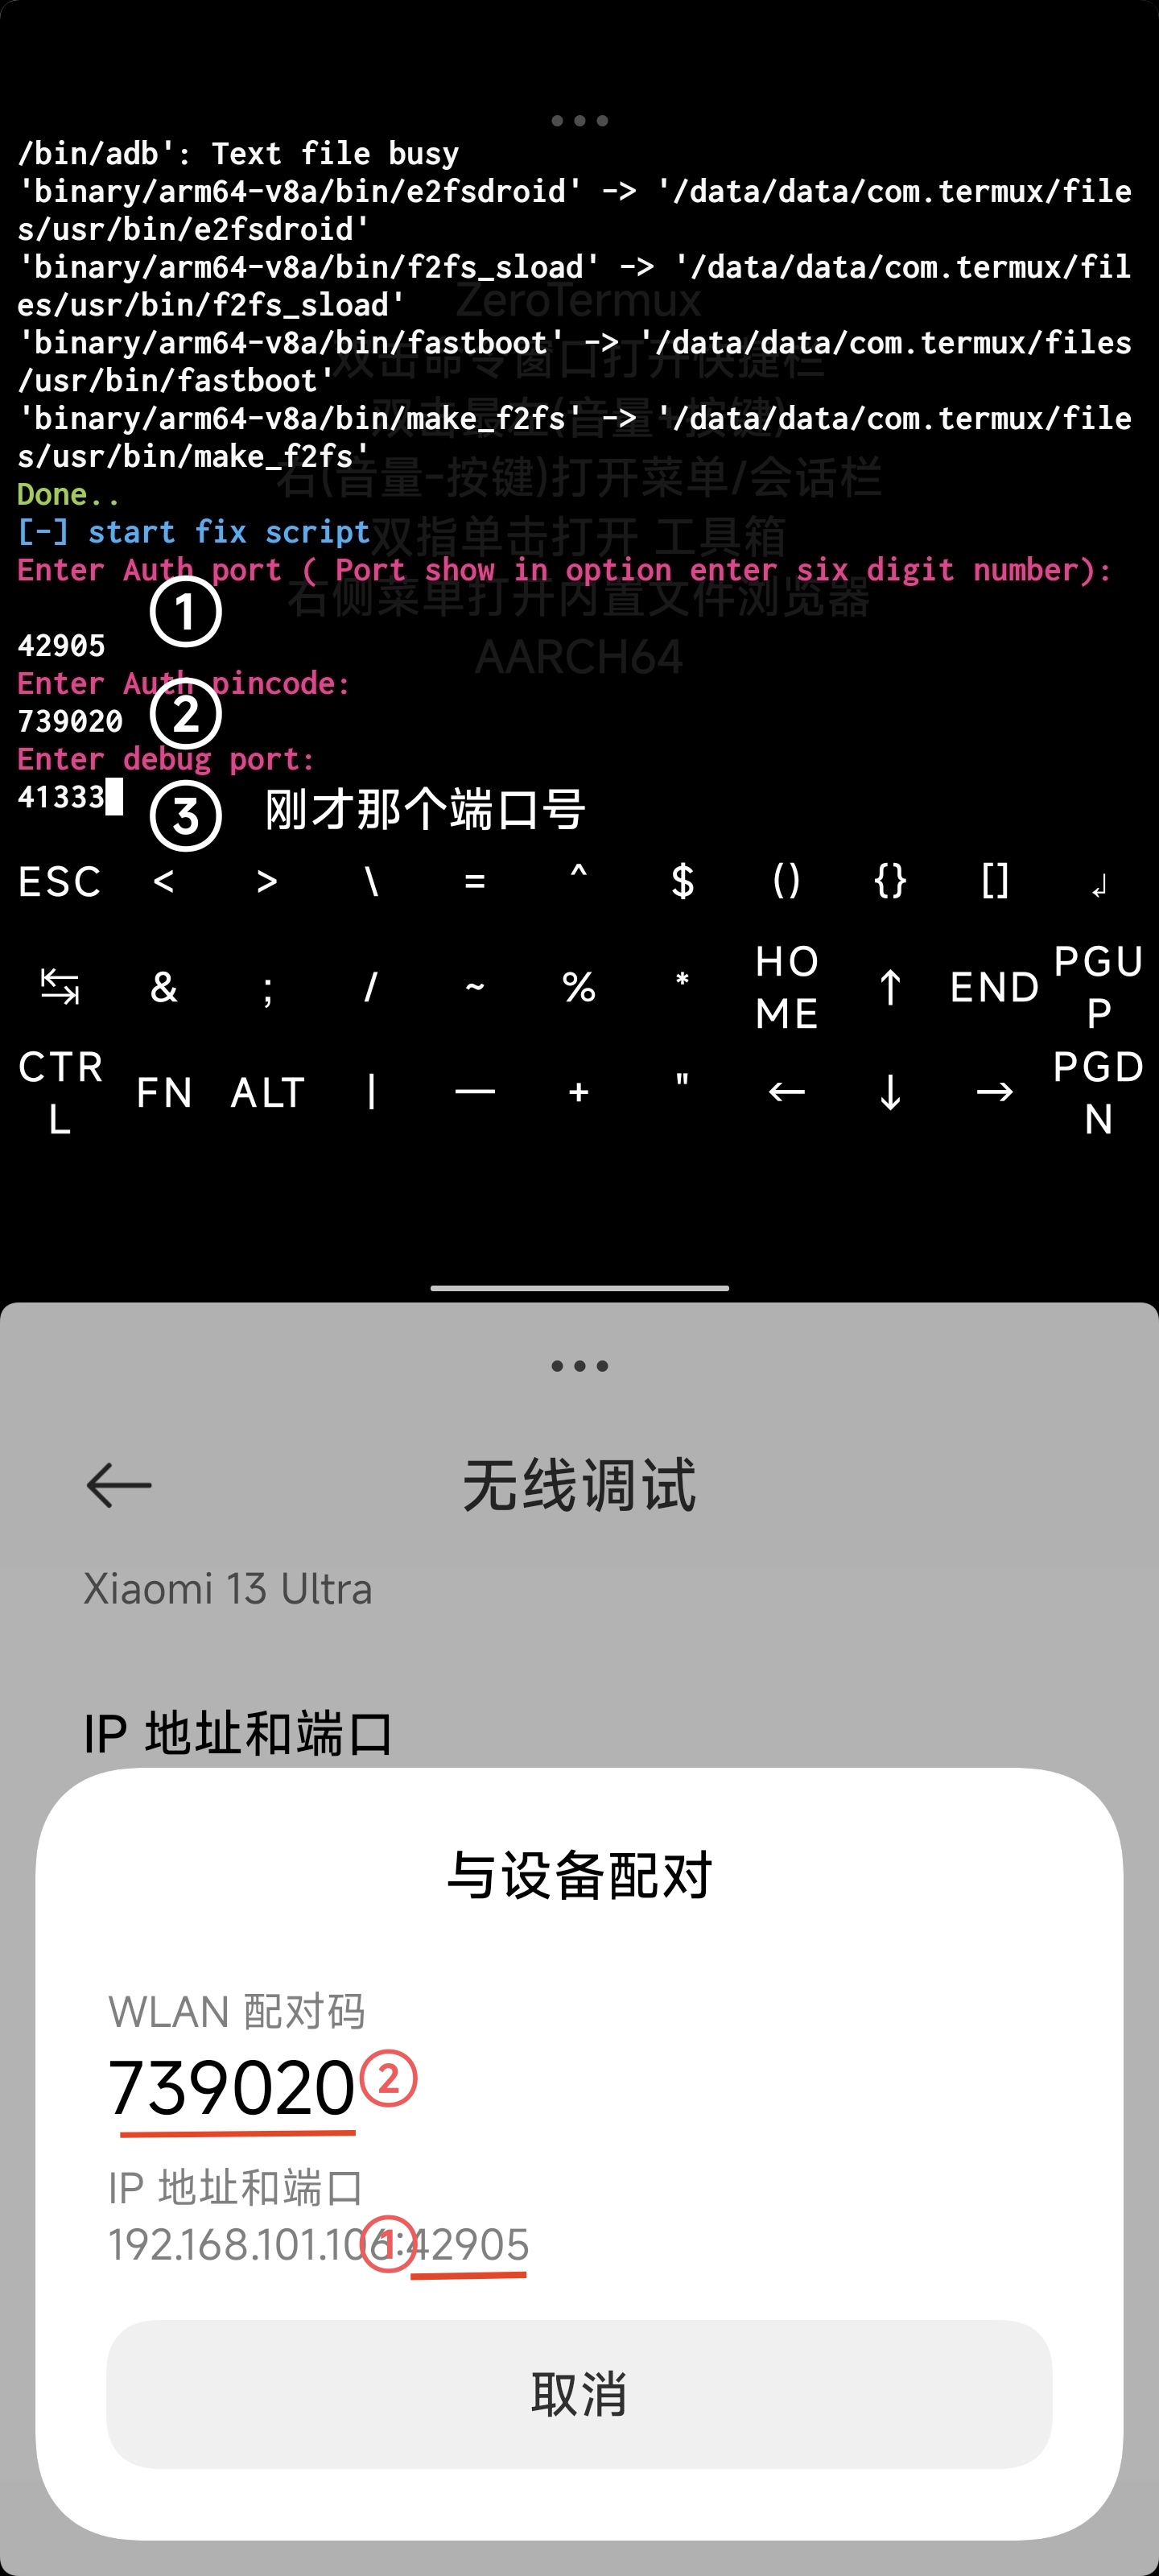
最后回车,就会开启无线调试

这样,他开始无线调试后就不会乱杀后台了