


Automatic1111 is an iconic front end for Stable Diffusion, with a user-friendly setup that has introduced millions to the joy of AI art. Anyone can spin up an A1111 pod and begin to generate images with no prior experience or training. The options are all laid out intuitively, and you just click the Generate button, and away you go.
But what if I told you there was another front end that gave you significantly more flexibility and even let you create your own multi-step workflow? What if you wanted to do a generation of a generation of a generation with a simple button click?
The solution to that is ComfyUI, which could be viewed as a programming method as much as it is a front end. Although it looks intimidating at first blush, all it takes is a little investment in understanding its particulars and you'll be linking together nodes like a pro.
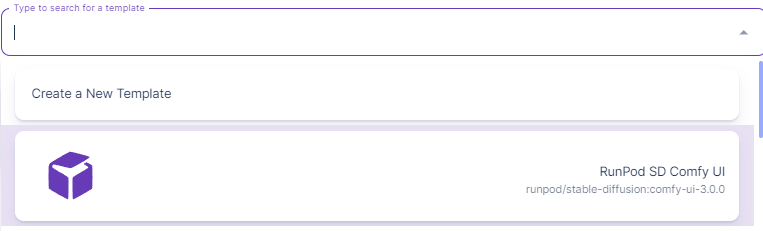
We've already got a ComfyUI template set up for you to use! All you need to do is select this template when spinning up a pod. I would recommend selecting a pod with around 16GB of RAM to experiment. Once you get comfortable and want to generate larger images, it may be worth upping the spec on your pod.
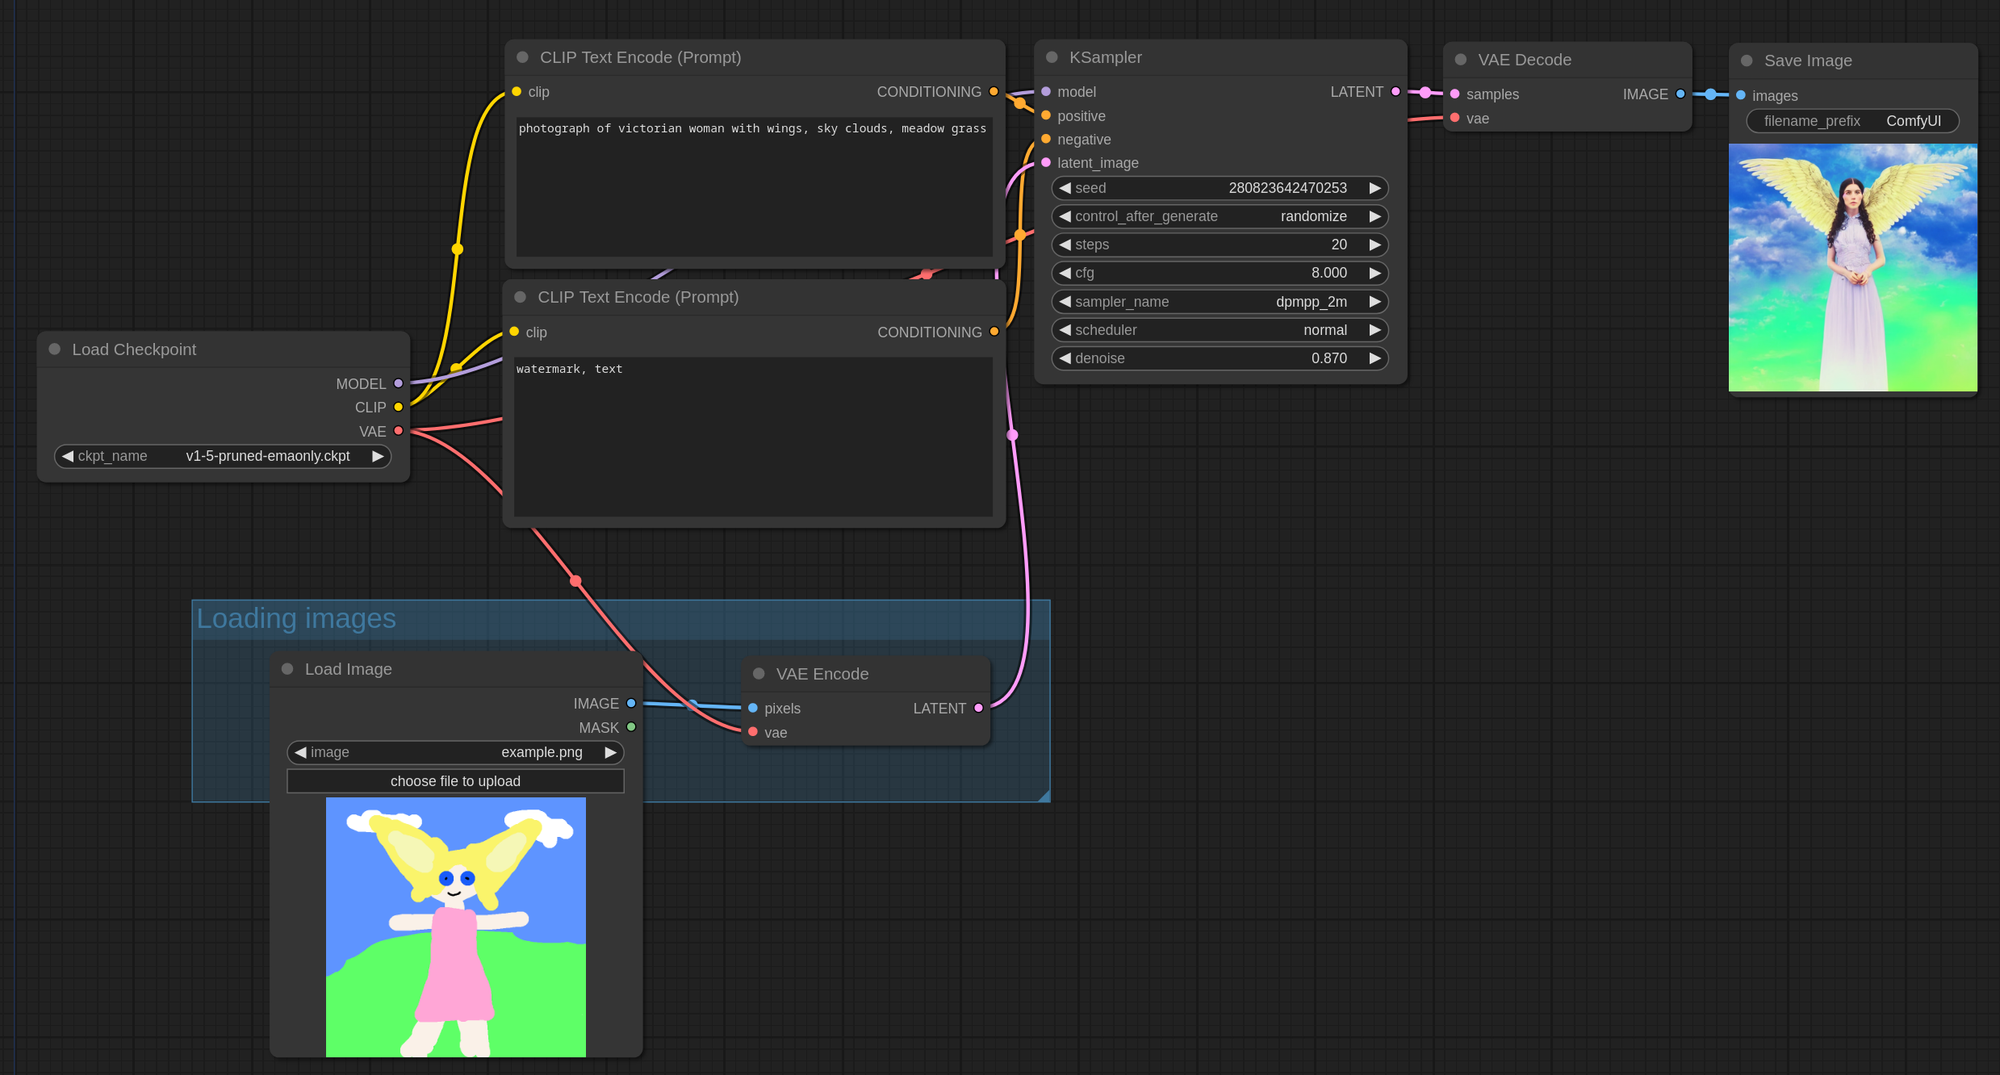
When you first start up the pod, you'll notice something immediately different. Rather than the set in stone nature of A1111, you'll notice that it's a series of nodes connected to each other with spaghetti:
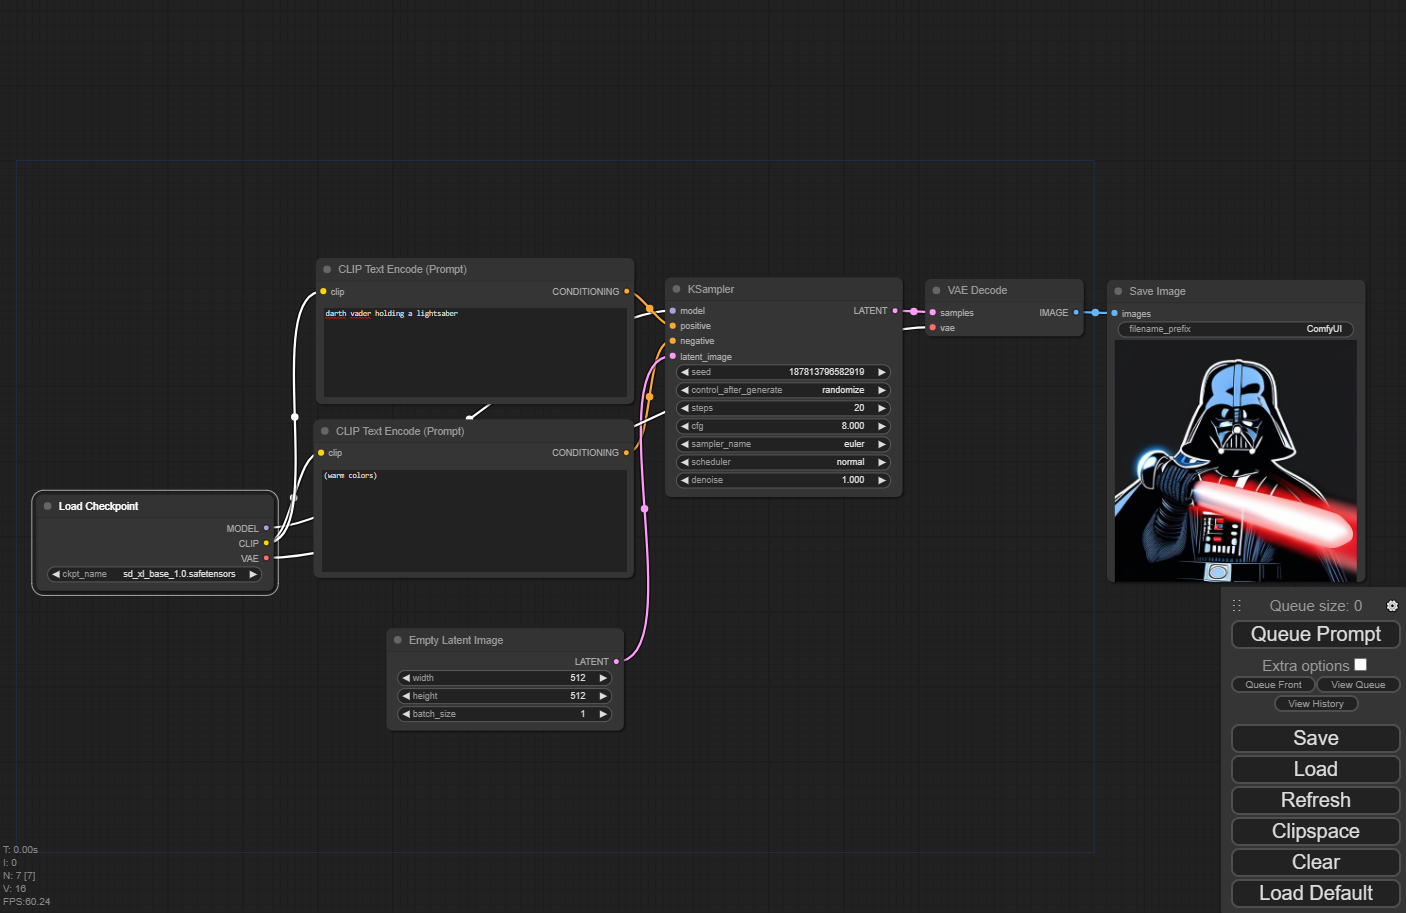
The first thing you'll notice is that despite it looking totally different, you can also use ComfyUI in the same manner as A1111. If you just want to throw a prompt in, and click "Queue Prompt" to get your image, you can totally do that.
Where it differs is being able to create additional nodes and steps to automate the flow in a way that would be very manual in A1111. For example, if you wanted to generate an image and send it to img2img, you'd need to manually copy and send it over, click to the next tab, and re-generate, and who wants to do all that work?
To start, note how the strings connect the nodes. You have a model loader and two prompt boxes - but note that one string connects to the "positive" and the other to the "negative" lead of the KSampler node. This logic forms the basis of ComfyUI's operation. The one sticking point to remember is that if a lead is in all caps, then it can be connected to multiple other nodes at once, whereas lower case leads only accept a one-to-one connection. So you could, for example, have a text prompt going to multiple samplers, but you could not have a sampler accepting more than one positive and negative prompt.
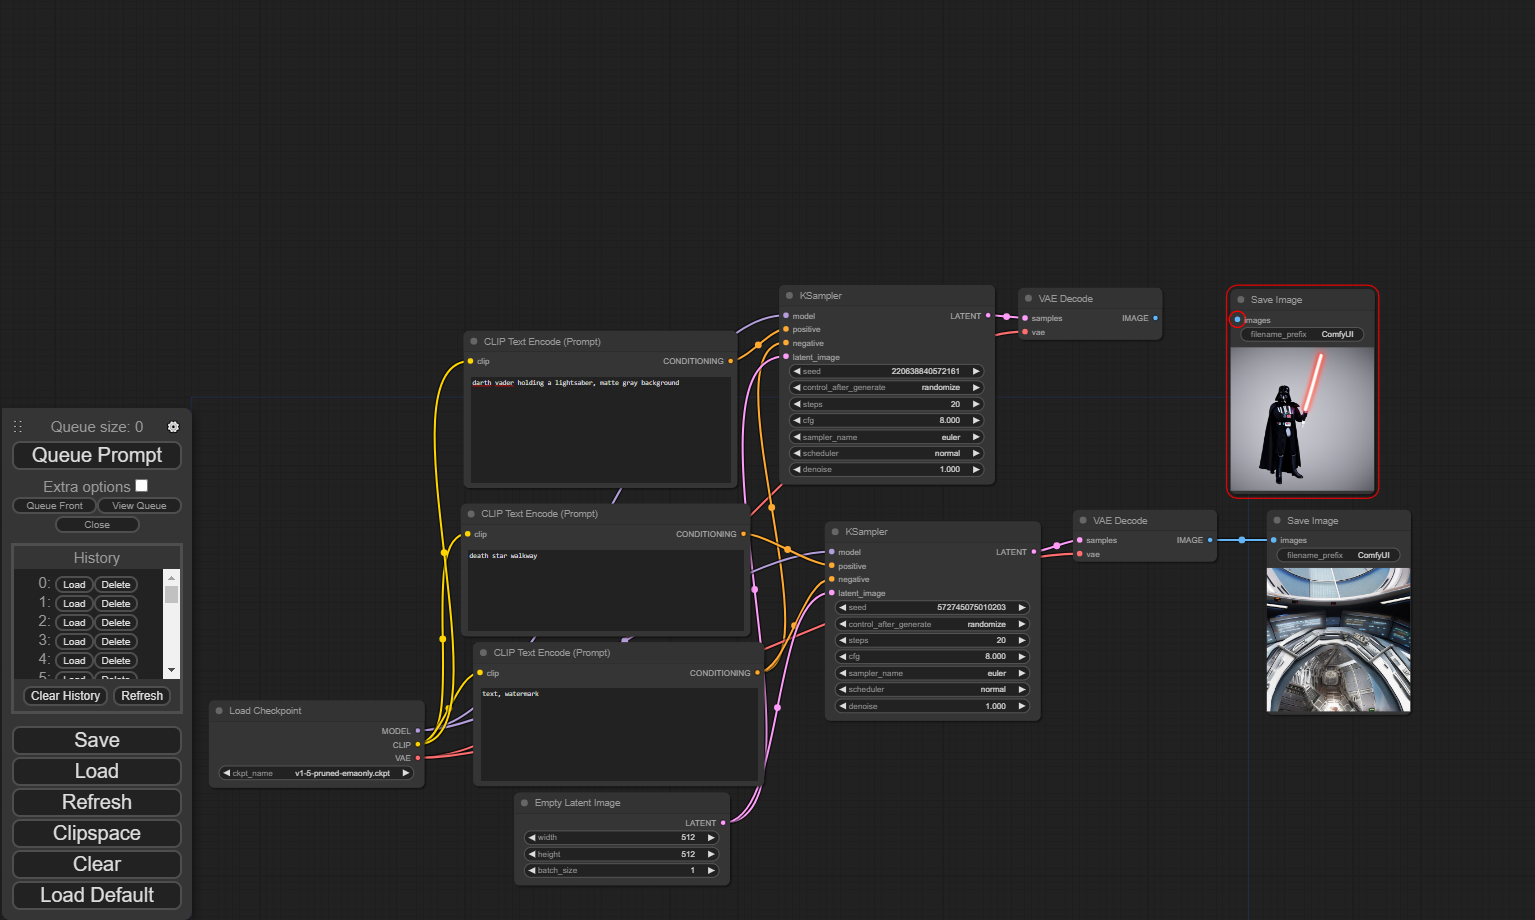
Note that you can potentially have multiple image generation projects going in the same workflow, if you so choose. With multiple prompts and multiple samplers connected to the same model, you could generate multiple images in the same go. Or if you're satisfied with one and want to keep working on the other, you could disconnect the Image lead at the end of the workflow so that it only generates the other image. You could potentially even have multiple model loaders working on different images at the same time.
Well, SDXL has a refiner, I'm sure you're asking right about now - how do we get that implemented? Although SDXL works fine without the refiner (as demonstrated above) you really do need to use the refiner model to get the full use out of the model.
Observe the following workflow (which you can download from comfyanonymous, and implement by simply dragging the image into your Comfy UI workflow.)
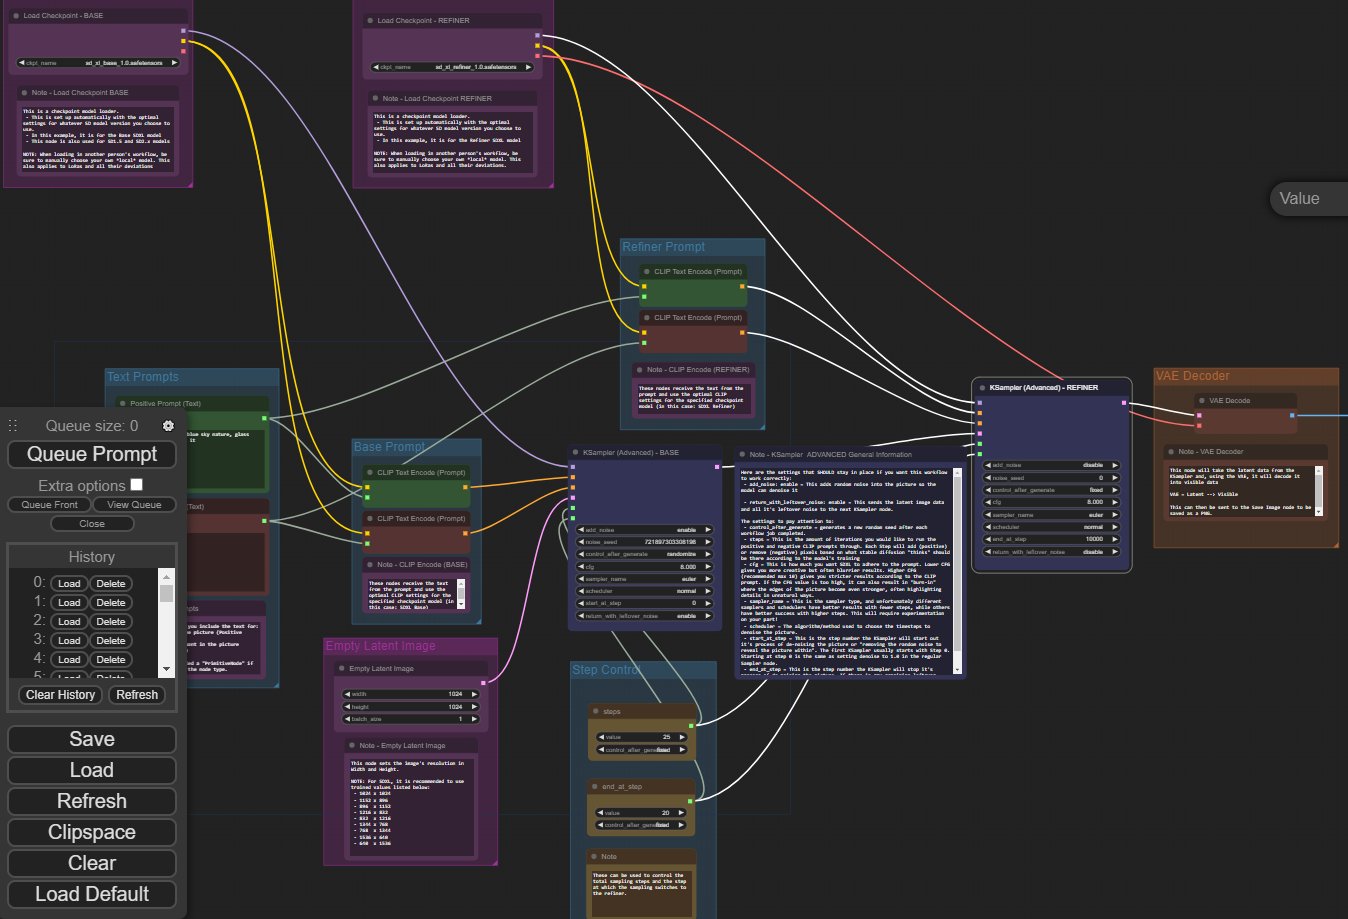
Although this looks a little busier than the base setup (partially due to all the extra commenting), you can see that you can load multiple models at once and route them through two different samplers, into a VAE Autoencoder, and finally to a saved image. This is how you can have a prompt of "evening sunset scenery blue sky nature, glass bottle with a galaxy in it" and end up with an image like this:

Because ComfyUI workspaces are just .json files, they can be easily encoded within a PNG image, similar to TavernAI cards, and you can just drag the image into your workspace and it will construct the workspace for you automatically. If you'd like to try this for yourself, be sure to visit the above link to get the image for yourself. Comfyanonymous also has workflow examples for several other functions found in A1111, such as LoRAs, img2img, and more.
Since this article was written, there have been significant advancements in both Stable Diffusion models and ComfyUI itself. Let's explore what's new and how you can take advantage of these improvements.
ComfyUI released Version 1 in October 2024, offering a cross-platform desktop application with one-click installation, a completely revamped user interface, and numerous feature improvements that significantly enhance the user experience. This is a major milestone for the platform, making it more accessible to newcomers while retaining all the power that experienced users love.
If you'd like to try the new version of ComfyUI, you can try one of our community templates, such as these templates by valryiantech that have the updated version installed:
Flux is a family of text-to-image diffusion models developed by Black Forest Labs that has quickly become the best open-source image model you can run locally on your PC, surpassing the quality of both SDXL and Stable Diffusion 3 Medium in some use cases, most specifically around generating humans and human-like entities.

What makes Flux stand out is its hybrid architecture that combines the strengths of transformers and diffusion models, enabling it to deliver exceptional image quality and processing speed while accurately rendering intricate details like fingers and text in images. Read our up-to-date deep dive into Flux.
Flux offers several significant improvements over previous models:
The model is particularly known for producing highly detailed images with minimal deformities, especially in complex areas like hands, while providing high-quality prompt support, efficient text generation, and seamless workflow customization.
The Flux.1 Dev AI model demonstrates excellent prompt adherence, generates high-quality images with correct anatomy, and excels at generating text within images - a task that has traditionally been challenging for AI image generators.
While Midjourney, ChatGPT, DALL-E, and others are great AI image generators, ComfyUI with Flux offers several advantages: it can be run locally on your own hardware for greater privacy and control, supports multiple AI models for flexibility, can be cost-effective after initial setup, and offers complete transparency due to its open-source nature.
Flux is available in several variants to suit different needs and hardware configurations:
The single-file FP8 version is a reduced-precision model contained in a single checkpoint file, making it easy to use and requiring less VRAM (around 16GB). The Flux Schnell version is a distilled 4-step model that sacrifices some quality for faster sampling times. For those with powerful hardware, the regular FP16 full version offers the highest quality but requires more VRAM (around 24GB).
If you'd like to try Flux, try out the template listed above!
Feel free to drop by our artist community on Discord - we would love to hear from you!
Author profile: Brendan McKeag
此内容由惯性聚合(RSS阅读器)自动聚合整理,仅供阅读参考。 原文来自 — 版权归原作者所有。