


The sidecar container aims to add or augment an existing container's functionality without changing the container. In comparison to the init container, we discussed previously, the sidecar container starts and runs simultaneously as your application container. The sidecar is just a second container you have in your container list, and the startup order is not guaranteed.
Probably one of the most popular implementations of the sidecar container is in Istio service mesh. The sidecar container (an Envoy proxy) is running next to the application container and intercepting inbound and outbound requests. In this scenario, the sidecar adds the functionality to the existing container and allows the operator to do traffic routing, failure injection, and other features.
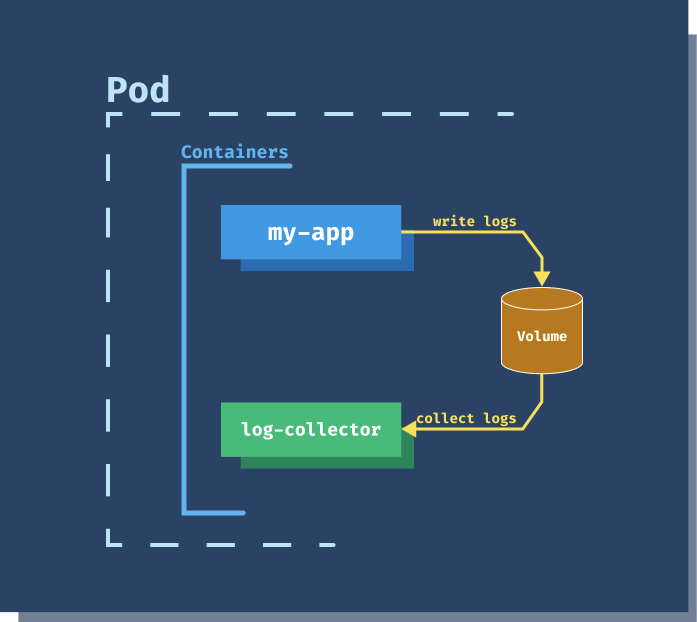
A simpler idea might be having a sidecar container (log-collector) that collects and stores application container's logs. That way, as an application developer, you don't need to worry about collecting and storing logs. You only need to write logs to a location (a volume, shared between the containers) where the sidecar container can collect them and send them to further processing or archive them.
If we continue with the example we used for the init container; we could create a sidecar container that periodically updates runs git pull and updates the repository. For this to work, we will keep the init container to do the initial clone, and a sidecar container that will periodically (every 60 seconds for example) check and pull the repository changes.
apiVersion: v1
kind: Pod
metadata:
  name: website
spec:
  initContainers:
    - name: clone-repo
      image: alpine/git
      command:
        - git
        - clone
        - --progress
        - https://github.com/peterj/simple-http-page.git
        - /usr/share/nginx/html
      volumeMounts:
        - name: web
          mountPath: '/usr/share/nginx/html'
  containers:
    - name: nginx
      image: nginx
      ports:
        - name: http
          containerPort: 80
      volumeMounts:
        - name: web
          mountPath: '/usr/share/nginx/html'
    - name: refresh
      image: alpine/git
      command:
        - sh
        - -c
        - watch -n 60 git pull
      workingDir: /usr/share/nginx/html
      volumeMounts:
        - name: web
          mountPath: '/usr/share/nginx/html'
  volumes:
    - name: web
      emptyDir: {}
We added a container called refresh to the YAML above. It uses the alpine/git image, the same image as the init container, and runs the watch -n 60 git pull command.
Note
The
watchcommand periodically executes a command. In our case, it executesgit pullcommand and updates the local repository every 60 seconds.
Another field we haven't mentioned before is workingDir. This field will set the working directory for the container. We are setting it to /usr/share/nginx/html as that's where we originally cloned the repo to using the init container.
Save the above YAML to sidecar-container.yaml and create the Pod using kubectl apply -f sidecar-container.yaml.
If you run kubectl get pods once the init container has executed, you will notice the READY column now shows 2/2. These numbers tell you right away that this Pod has a total of two containers, and both of them are ready:
$ kubectl get po
NAME      READY   STATUS    RESTARTS   AGE
website   2/2     Running   0          3m39s
If you set up the port forward to the Pod using kubectl port-forward pod/website 8000:80 command and open the browser to http://localhost:8000, you will see the same webpage as before.
We can open a separate terminal window and watch the logs from the refresh container inside the website Pod:
$ kubectl logs website -c refresh -f

Every 60.0s: git pull
Already up to date.
The watch command is running, and the response from the last git pull command was Already up to date. Let's make a change to the index.html in the repository you forked.
I added <div> element and here's how the updated index.html file looks like:
<html>
  <head>
    <title>Hello from Simple-http-page</title>
  </head>
  <body>
    <h1>Welcome to simple-http-page</h1>
    <div>Hello!</div>
  </body>
</html>
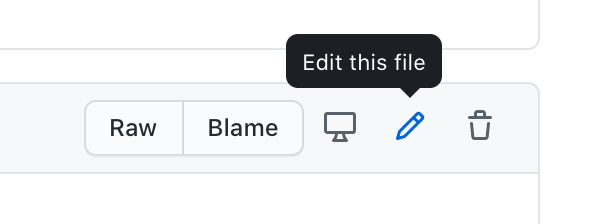
Next, you need to stage this and commit it to the master branch. The easiest way to do that is from the Github's webpage. Open the index.html on Github (I am opening https://github.com/peterj/simple-http-page/blob/master/index.html, but you should replace my username peterj with your username or the organization you forked the repo to) and click the pencil icon to edit the file (see the figure below).
Make the change to the index.html file and click the Commit changes button to commit them to the branch. Next, watch the output from the refresh container, and you should see the output like this:
Every 60.0s: git pull

From https://github.com/peterj/simple-http-page
   f804d4c..ad75286  master     -> origin/master
Updating f804d4c..ad75286
Fast-forward
 index.html | 1 +
 1 file changed, 1 insertion(+)
The above output indicates changes to the repository. Git pulls the updated file to the shared volume. Finally, refresh your browser where you have http://localhost:8000 opened, and you will notice the changes on the page:
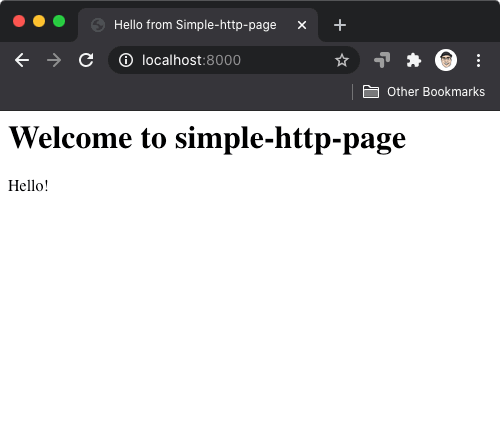
You can make more changes, and each time, the page will get updated within 60 seconds. You can delete the Pod by running kubectl delete po website.
此内容由惯性聚合(RSS阅读器)自动聚合整理,仅供阅读参考。 原文来自 — 版权归原作者所有。