What if you could take your entire homelab with you when you travel? In this project, I designed a portable Pi homelab by shrinking my original 10″ Lab Rax down to a 5″ rack that can still run a router, NAS and Docker server using Raspberry Pi hardware. In this post, I’ll walk through the design, 3D printing, assembly and hardware setup for this tiny but surprisingly capable homelab.
Here’s my video of the build. Read on for the write-up.
Some of the above parts are affiliate links. By purchasing products through the above links, you’ll be supporting this channel, at no additional cost to you.
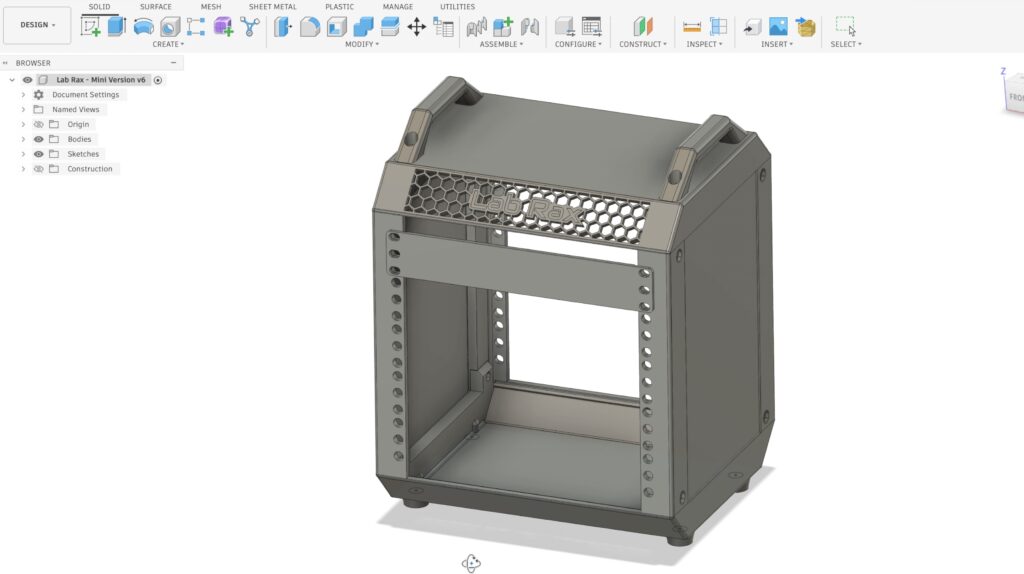
To start out, I opened up the original model for my 10” 3D printable Lab Rax design and then made some changes to scale it down and still keep it easy to print and assemble. This design keeps a lot of the same proportions for the racks too, so a 1U 10” model can be shrunk down to 50% scale and should then fit into this rack.
So let’s get the rack printed out. Because it’s been shrunk down, it’s actually really easy to print. The whole print fits onto a single build plate on the H2D and uses just 220g of filament. So you could get four complete prints out of a single 1kg roll of filament.
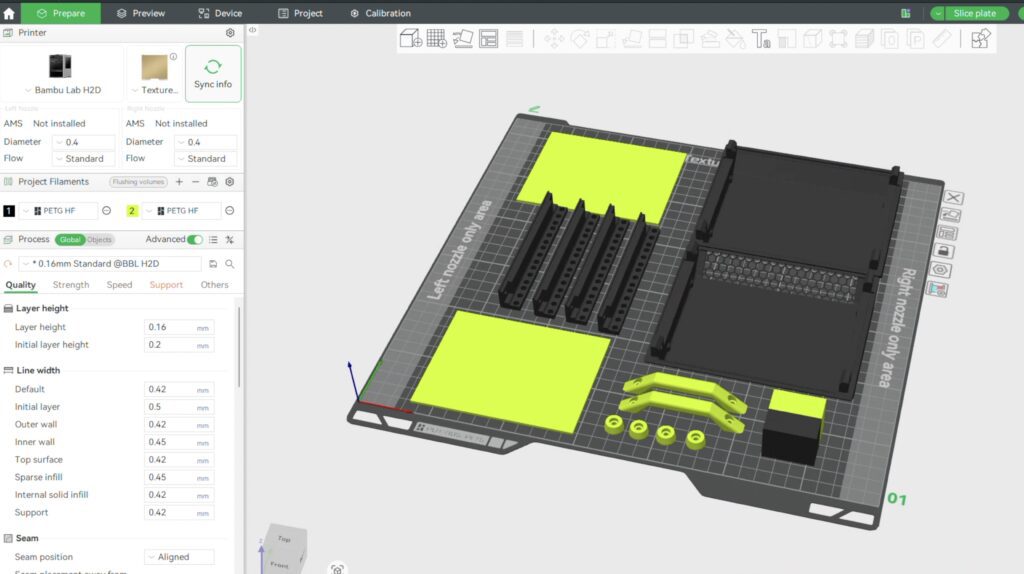
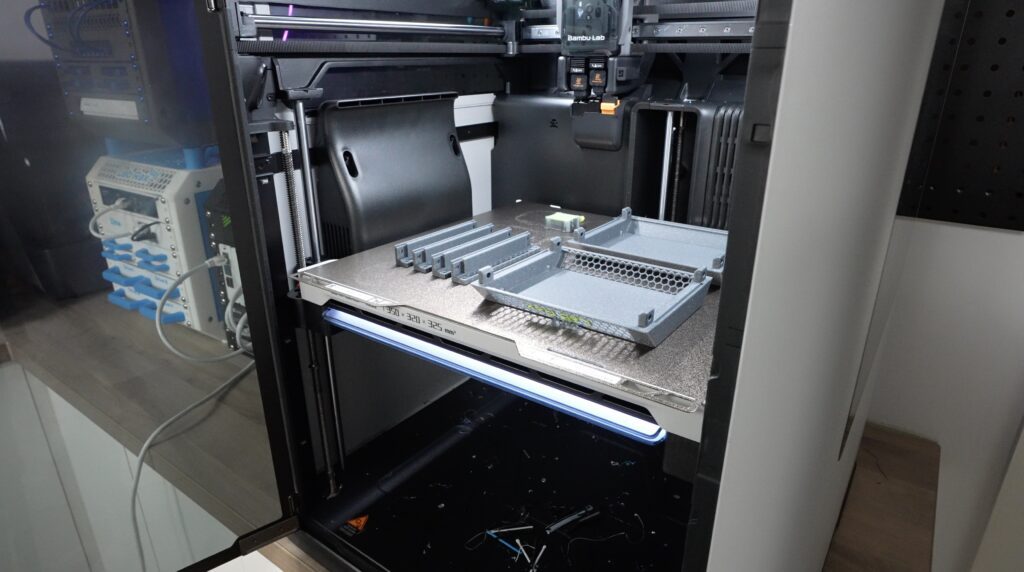
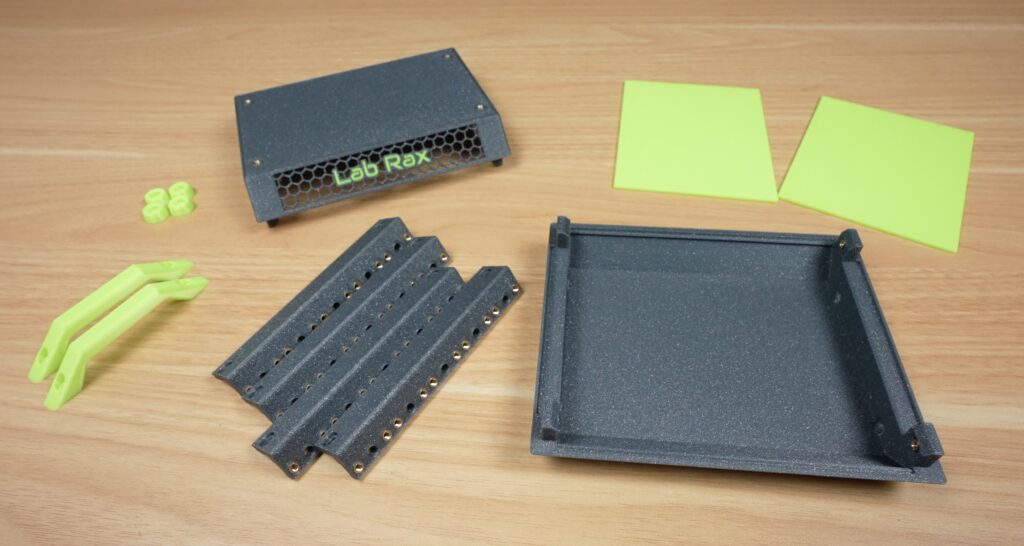
I printed it in a grey sparkle filament with translucent yellowish green accents. I also separated the two main colours over two build plates, which makes printing a bit faster.
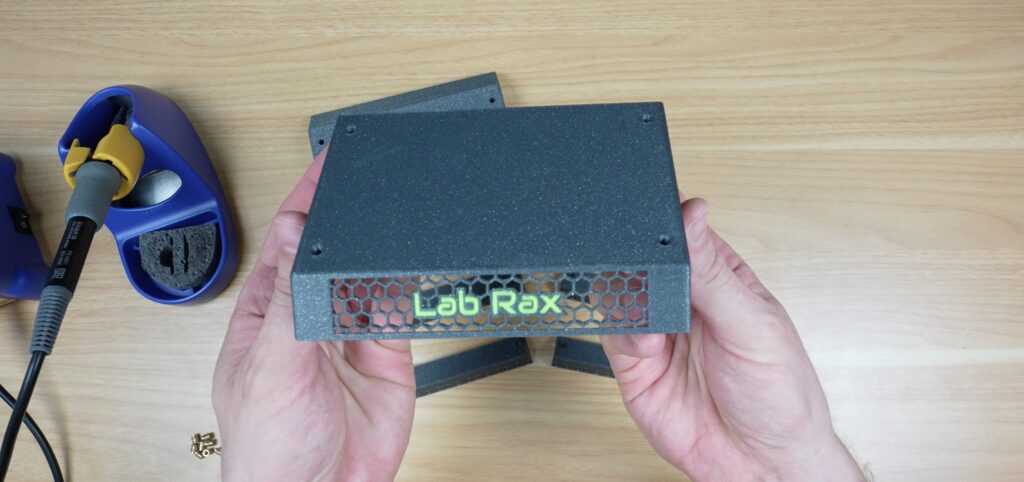
I think the parts have come out really nicely.
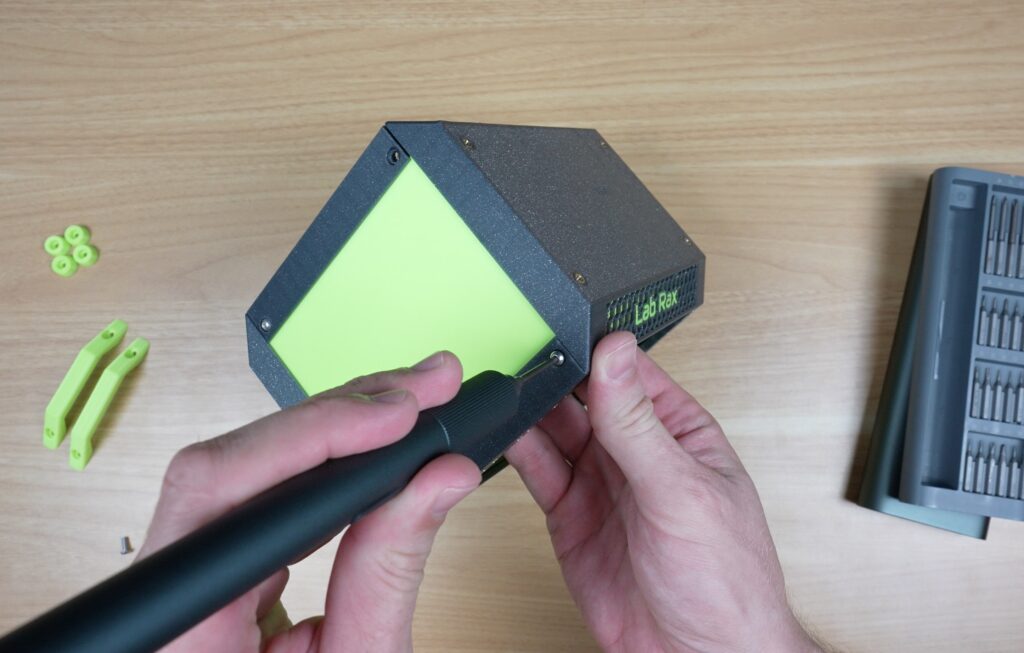
This design uses M3 x 8mm screws to hold everything together. Like with my original Lab Rax design, I’ve stuck with one screw size for all of the components, which makes it easy to buy the hardware for the build. I’m also using M3 brass inserts instead of having to press nuts into pockets. I think these make a stronger and easier-to-assemble build.
The brass inserts are just pressed into place using a soldering iron. Four for the vertical posts and four for the feet or handles, and then the same for the opposite side.
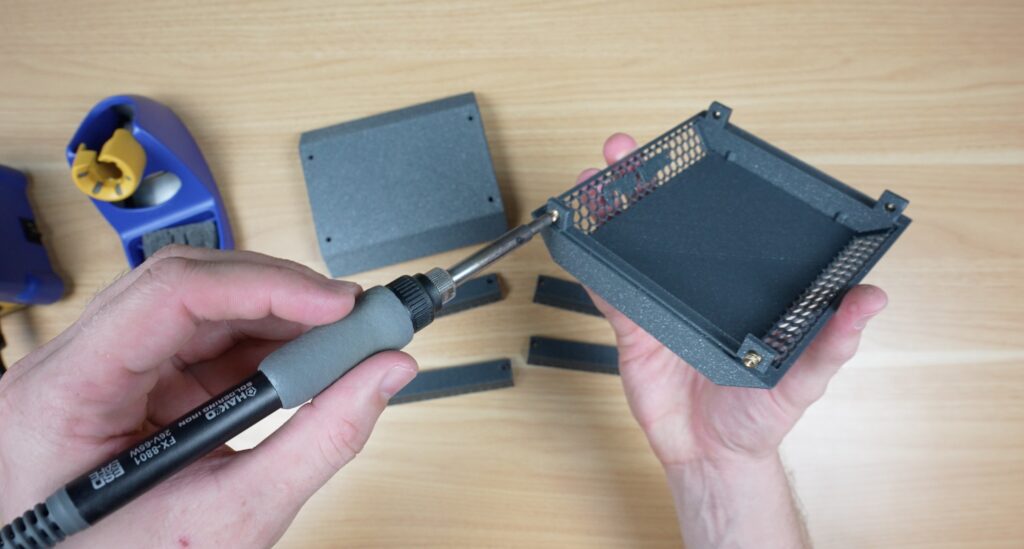
For the vertical posts, to hold the racks in place, I also used M3 brass inserts. I used slightly shorter ones for these because I had a box of them lying around, but they’re the same diameter as the longer ones and both work just fine.
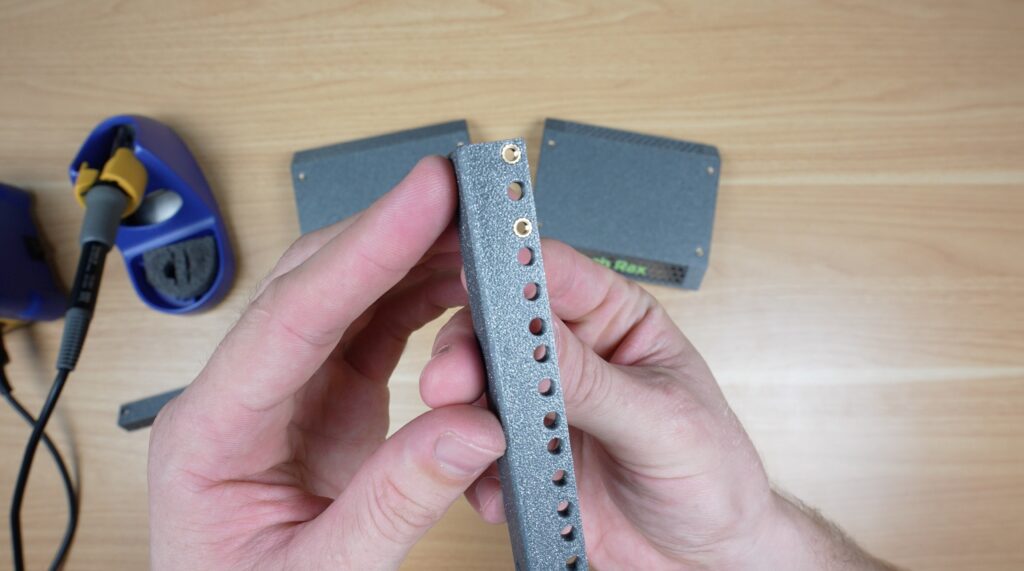
I’m only putting them into the top and bottom hole for each rack unit rather than all three. I usually only secure racks with four screws rather than 6 and I don’t plan on using half units in this rack (although they typically use the same top or bottom holes).
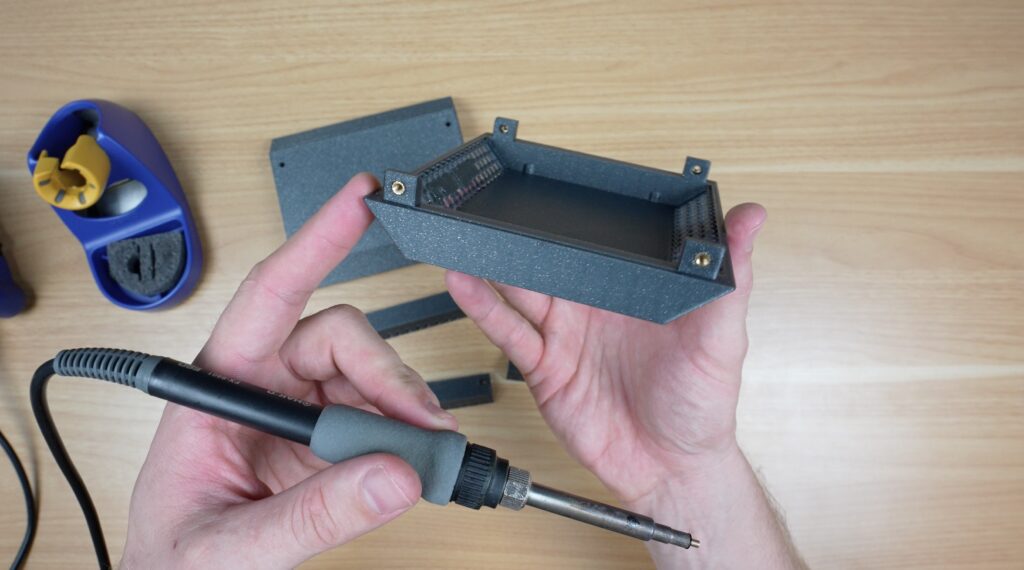
With the inserts installed, assembly only takes a couple of minutes. We start by installing the four posts on the base with a single M3x8mm screw holding each one in place.
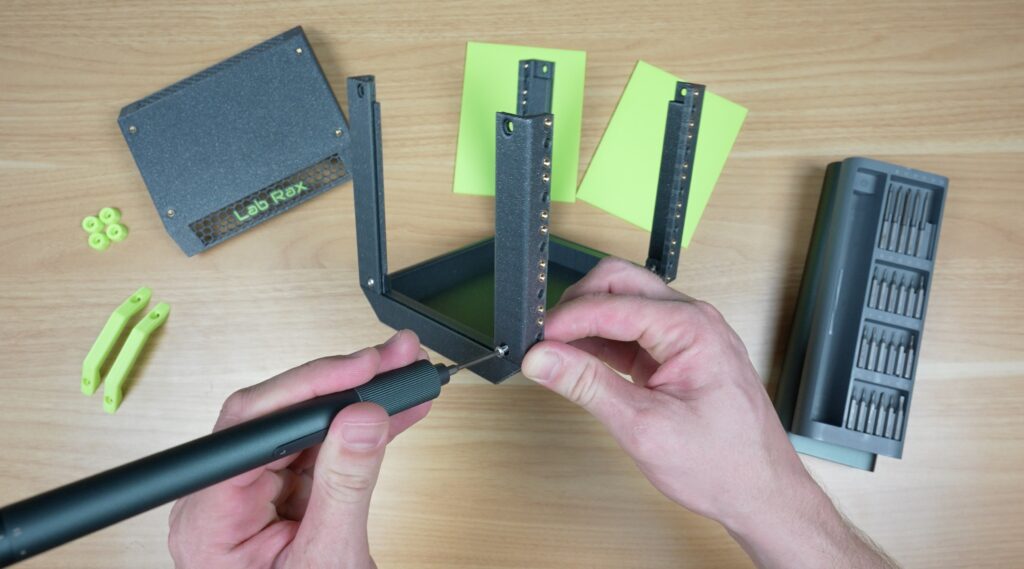
The side panels then slide down into the recess in the posts. I’ve kept this design feature in the 5” rack as it makes it easy to customise with open sides, or add a fan to or even a cable entry cutout.
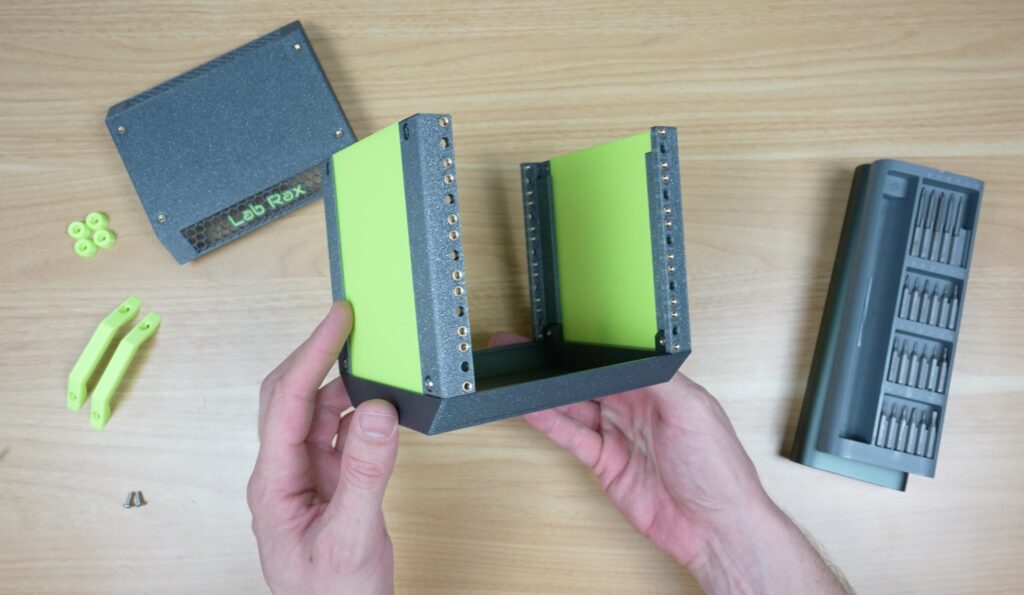
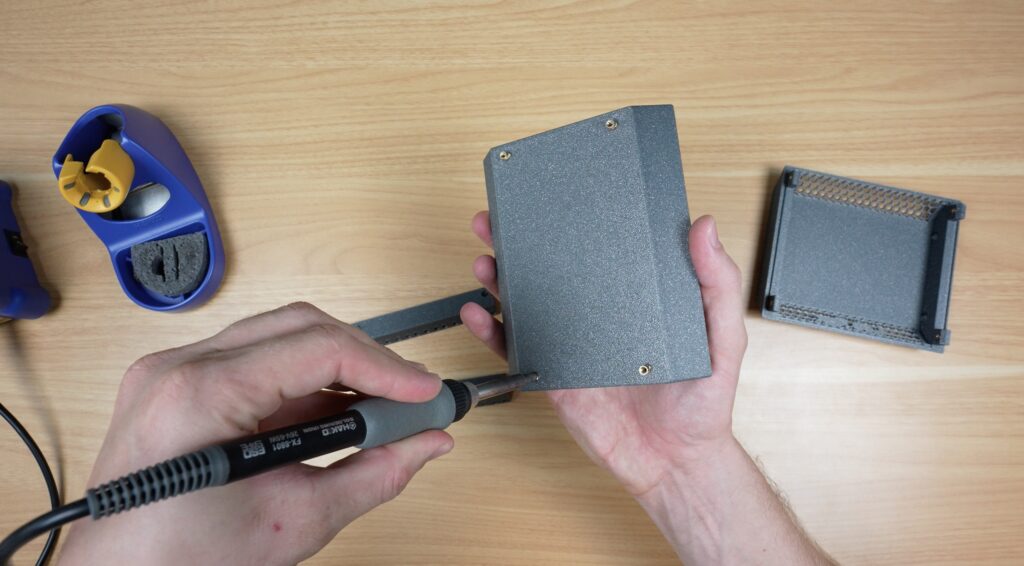
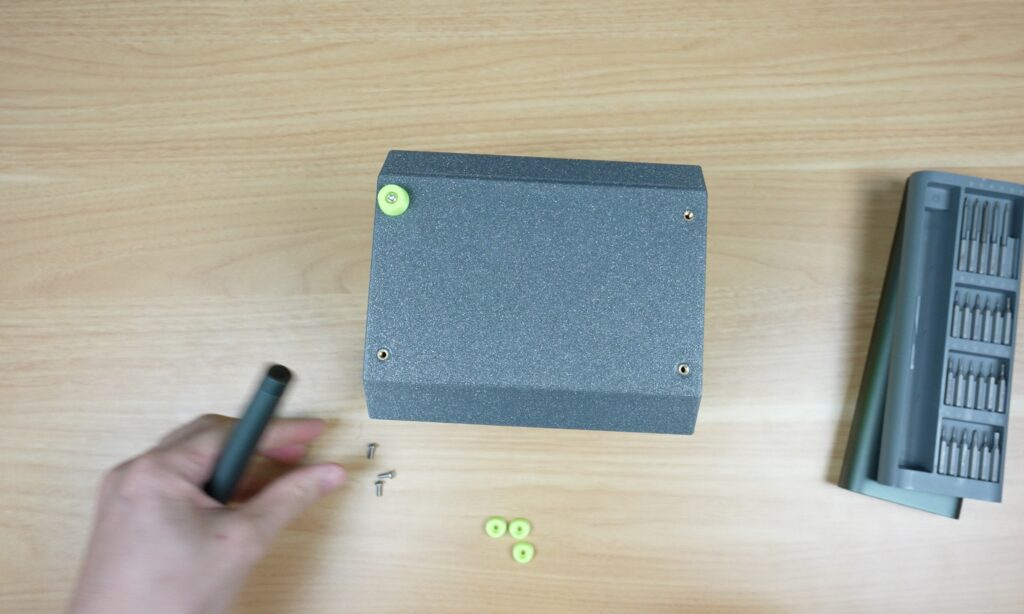
Then the top cover can go on, with four screws holding that onto the top of the posts.
The tiny handles can then each be screwed onto the top, with two M3 screws holding each on in place. At this scale, the handles are more decorative than functional, but I think they serve their purpose.

Lastly, the four feet on the bottom finish it off. These are also held in place with a single M3x8mm screw each.
And that’s the rack complete. Honestly, because it’s been scaled down from the original Lab Rax model, it’s difficult to tell how much smaller it is. But it is quite noticeable alongside the original.
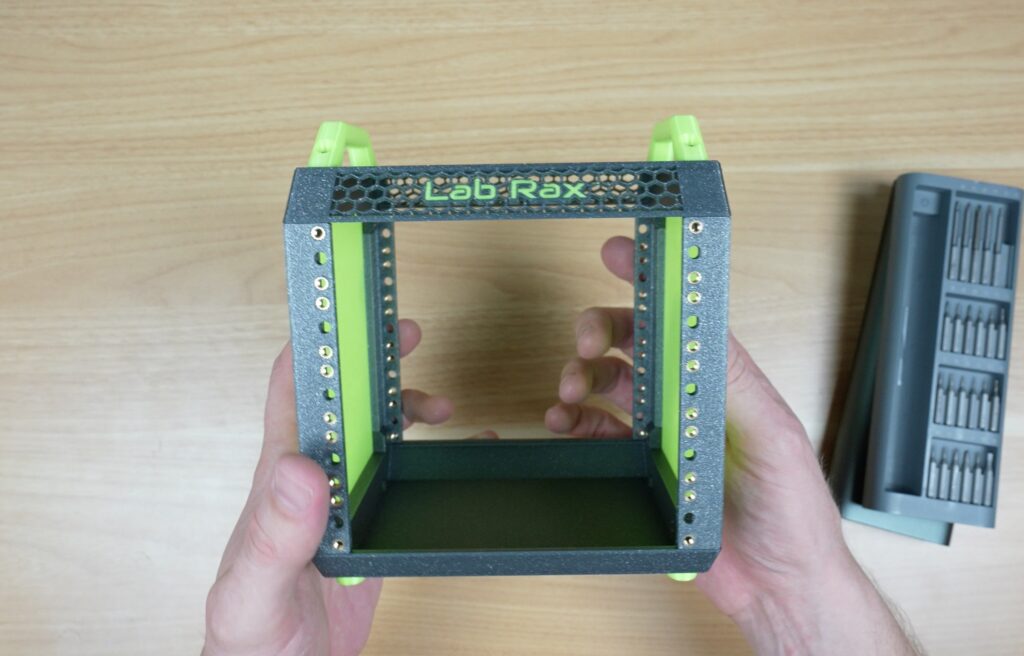
It’s actually about 8 times smaller in volume than the original.
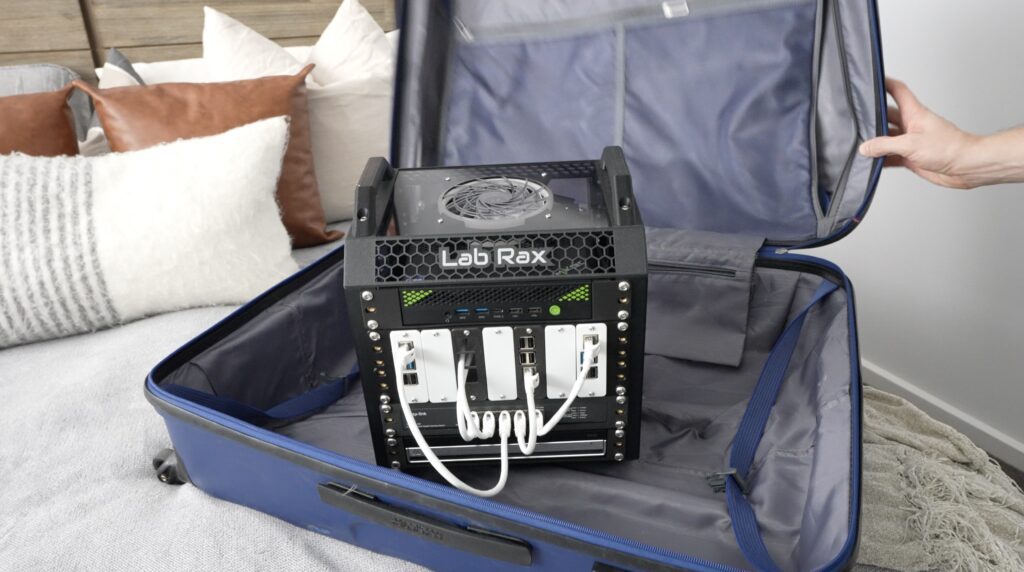
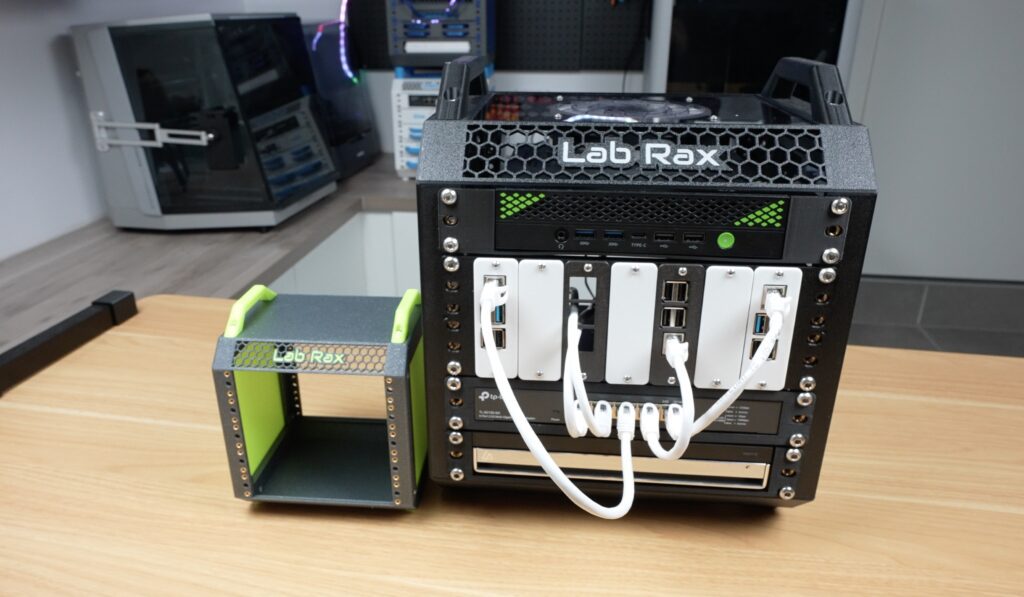
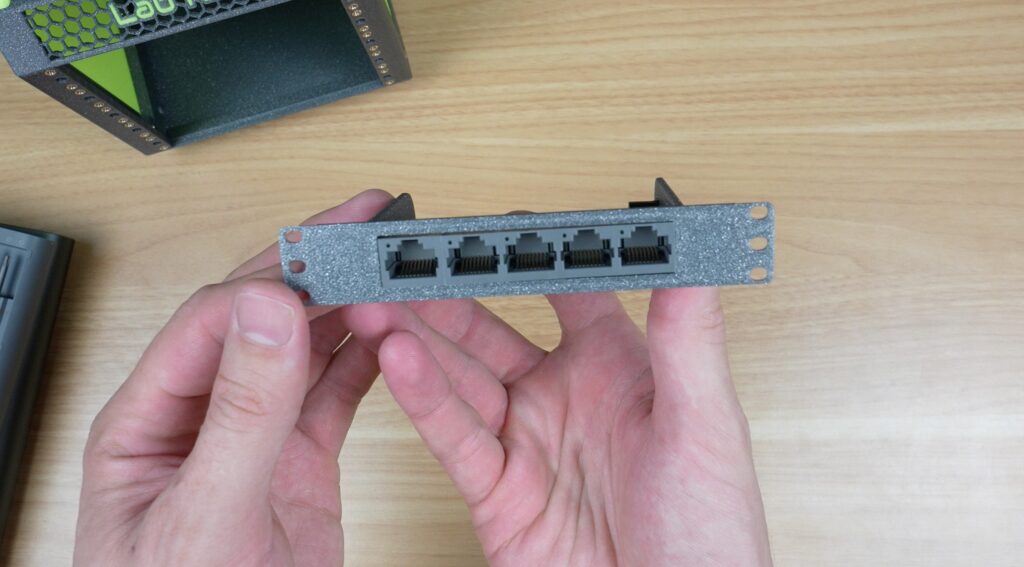
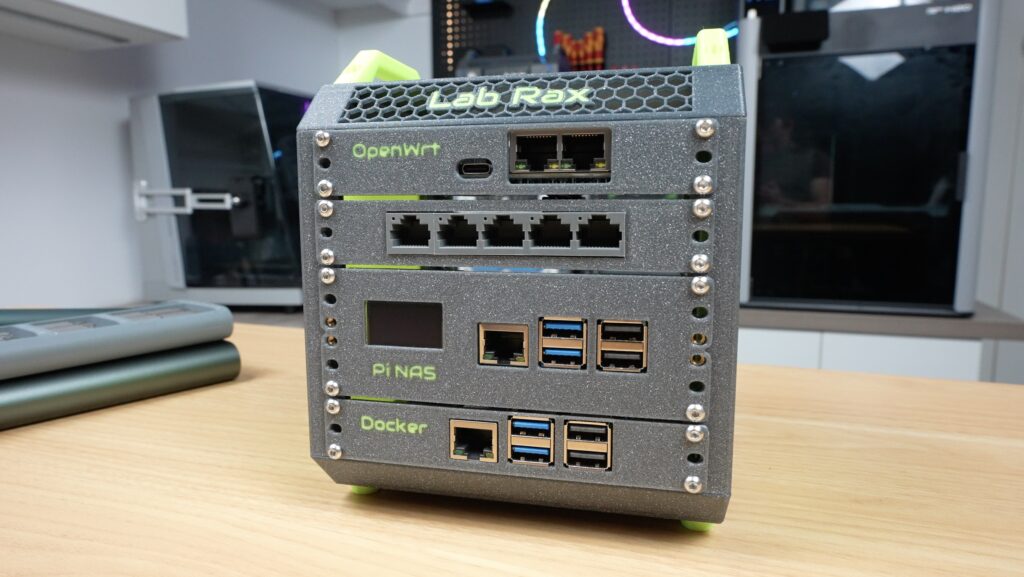
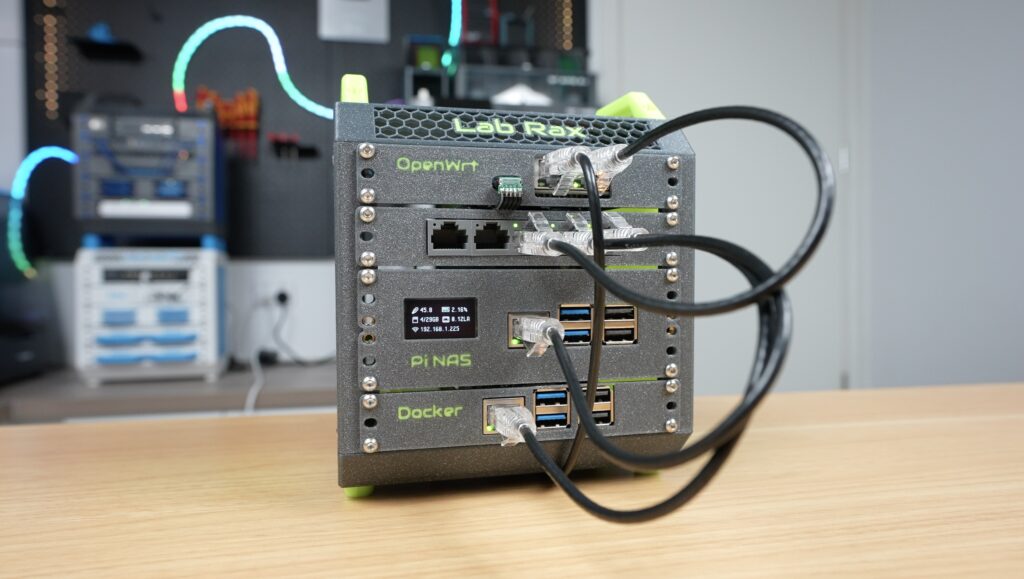
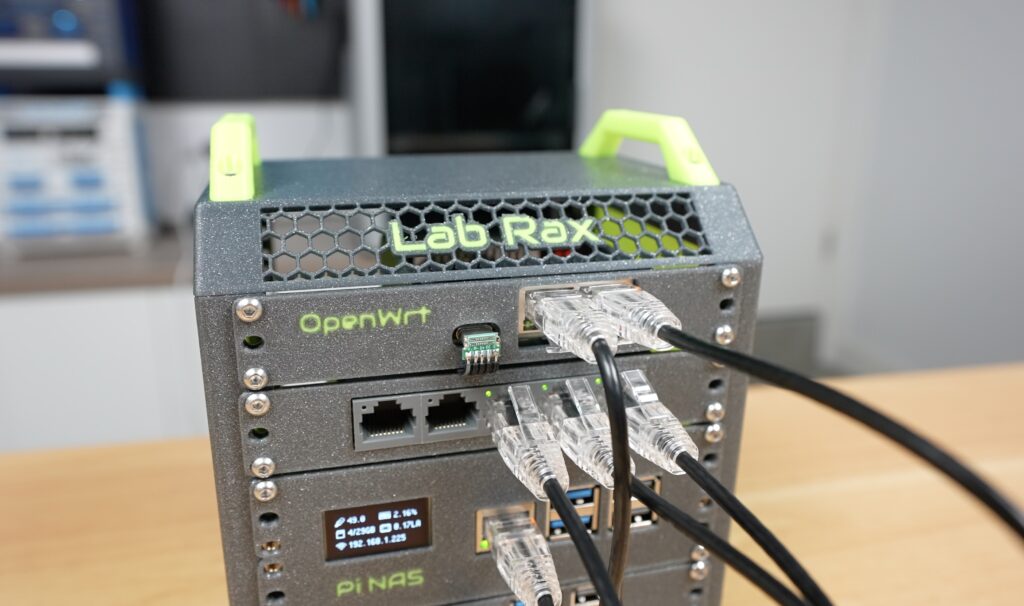
So what does that mean for components that we can fit into it? Well, at 5” we can still comfortably fit a Raspberry Pi into a single rack unit, and by trimming some fat off a 5-port Ethernet switch, we can build one of those in too. So there’s still potential for a decent setup.
So to turn this into a real portable homelab, here’s what I’m installing.
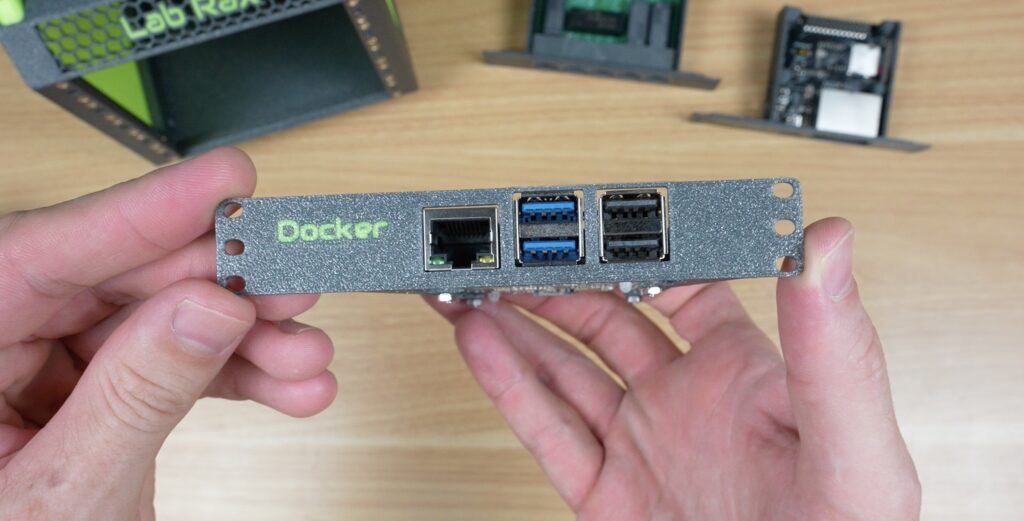
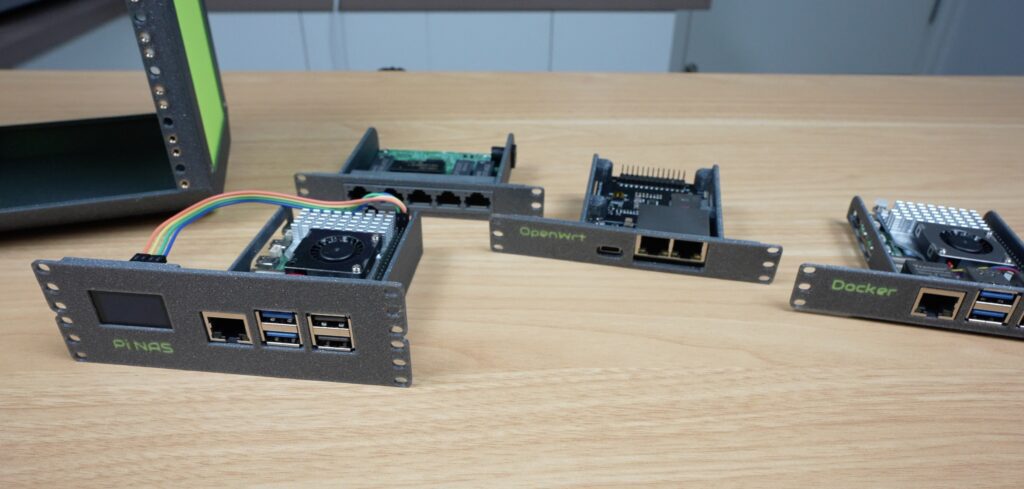
A 5-port gigabit Ethernet switch, which has been stripped of its TP-Link plastic housing to save on space. This now comfortably fits into a single rack unit.
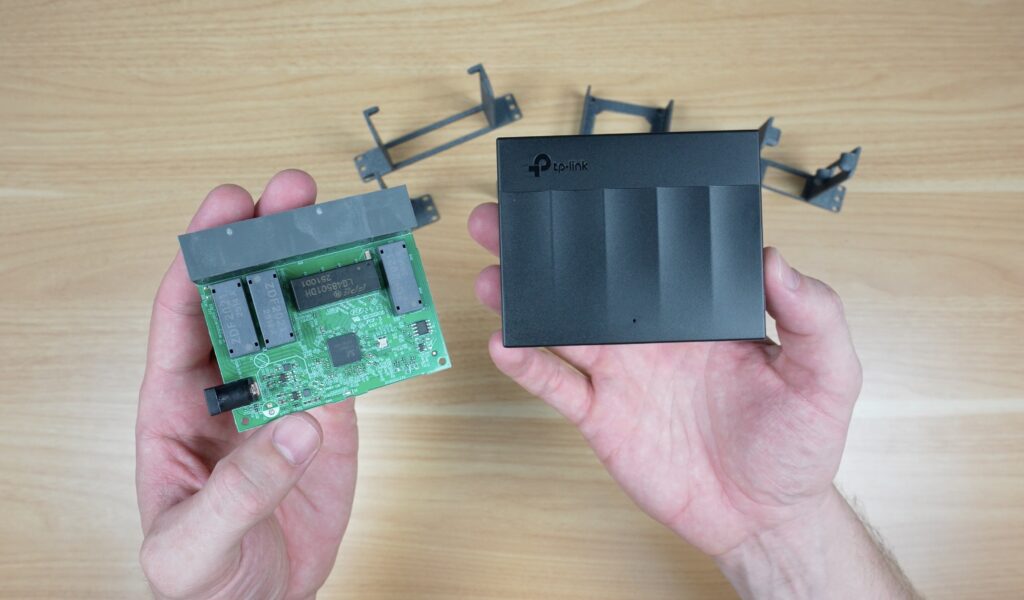
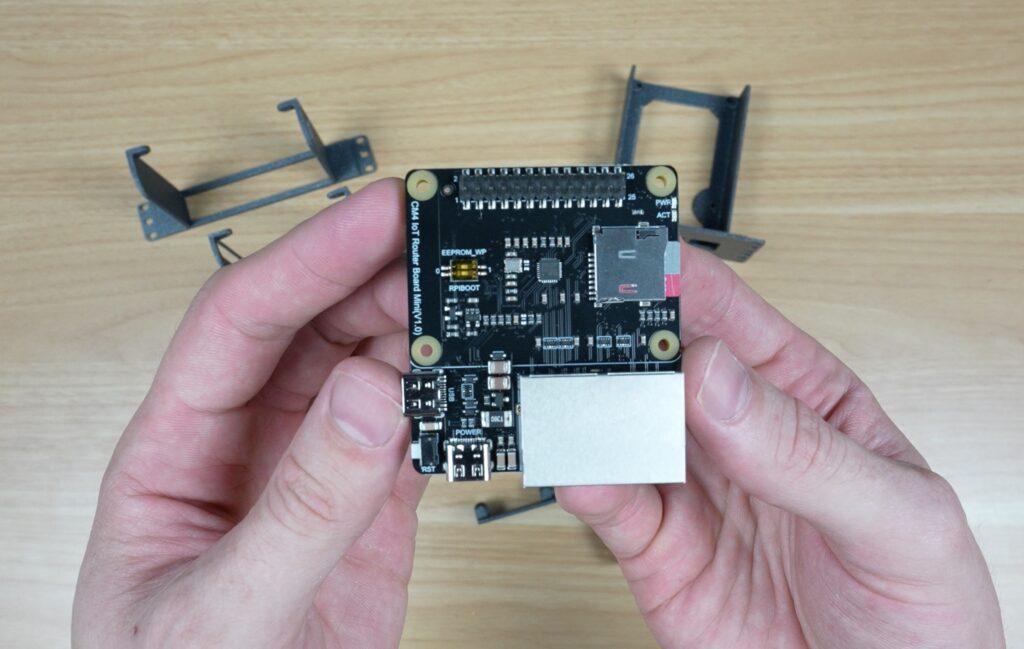
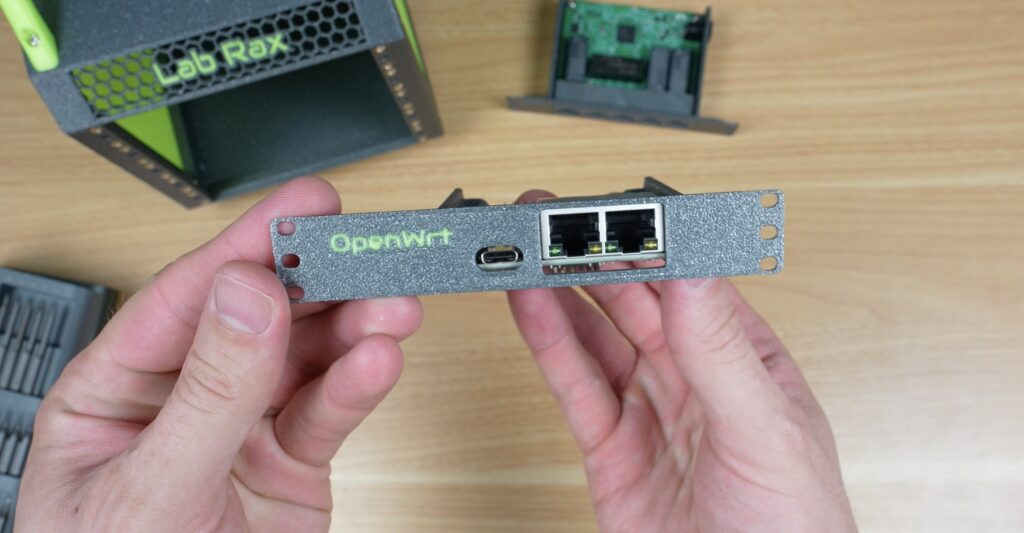
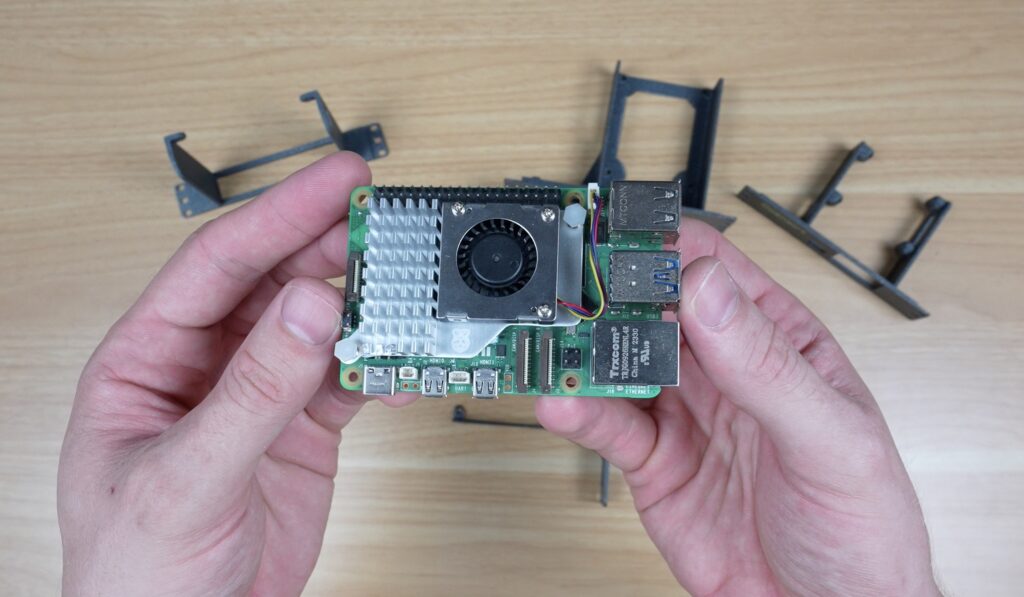
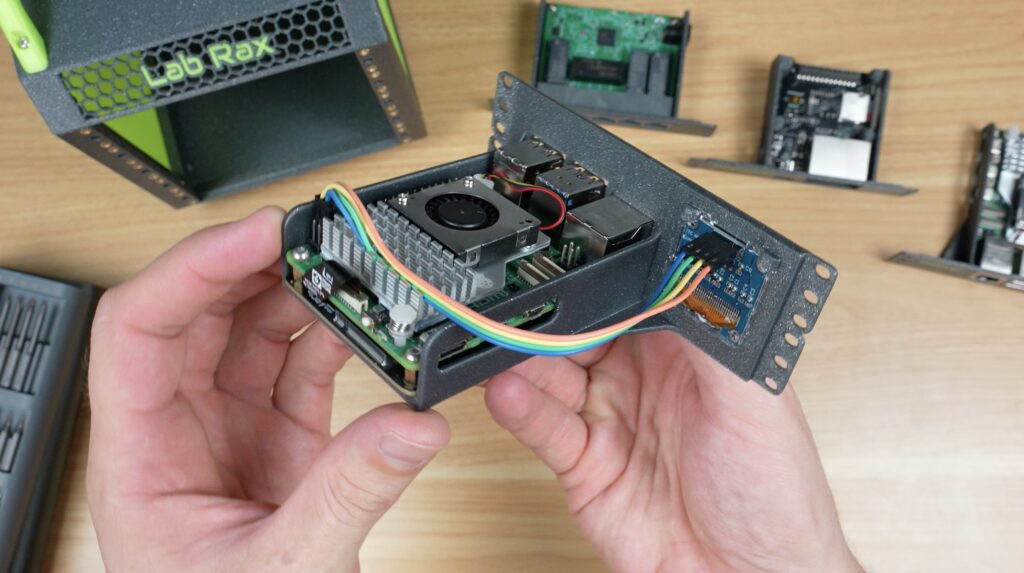
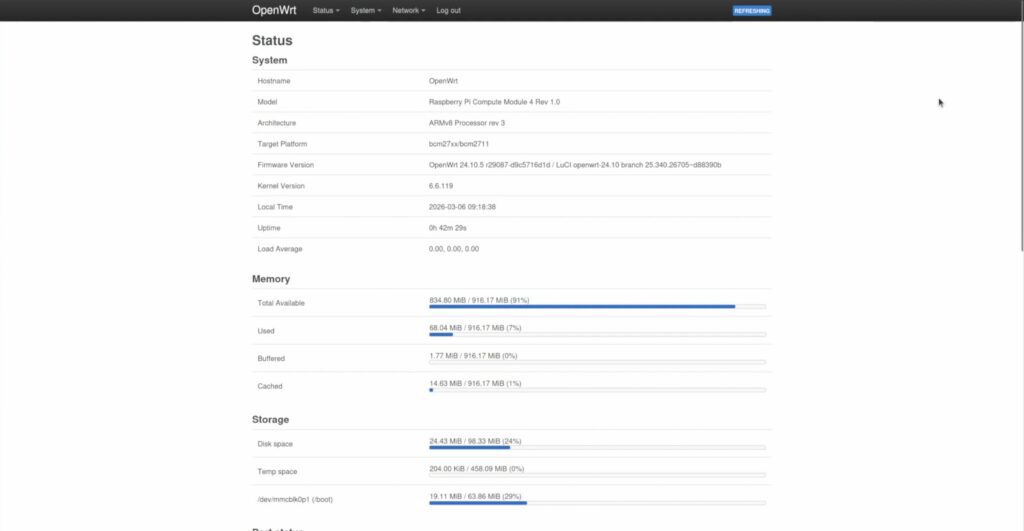
Then I’ve got this little board with dual Ethernet ports and a Raspberry Pi Compute Module 4 (CM4) on the bottom. It’s also got a USB-C port for power on the front and another on the side for peripherals. I’m going to load OpenWRT onto this board as the router for my homelab. I don’t need it at this stage, but WiFi can be added through the USB port too.
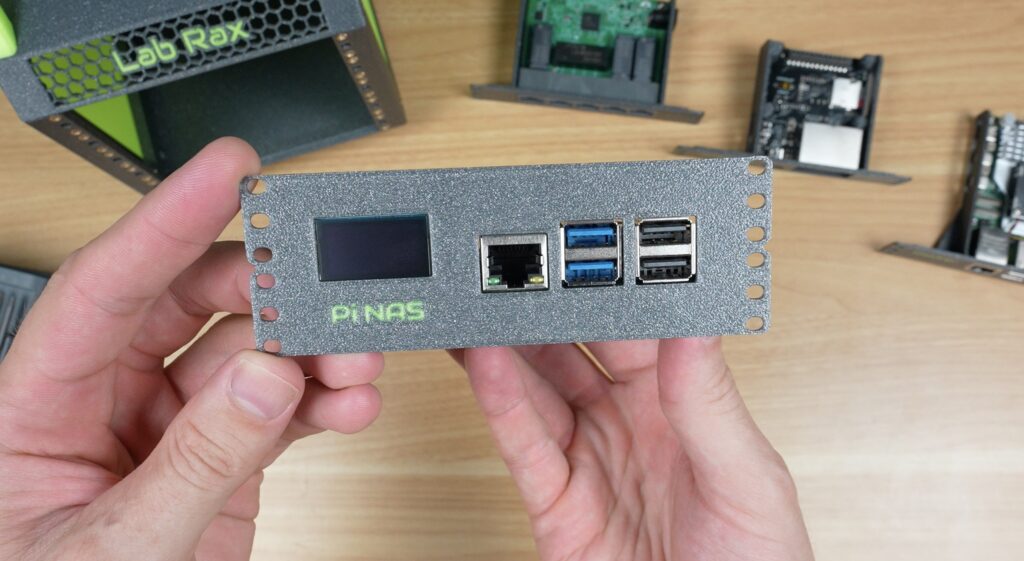
Then I’ve got a single Raspberry Pi 5 with an official active cooler, which I’m going to install Pi OS Lite onto and then run Docker on it for all of my network services and for monitoring.
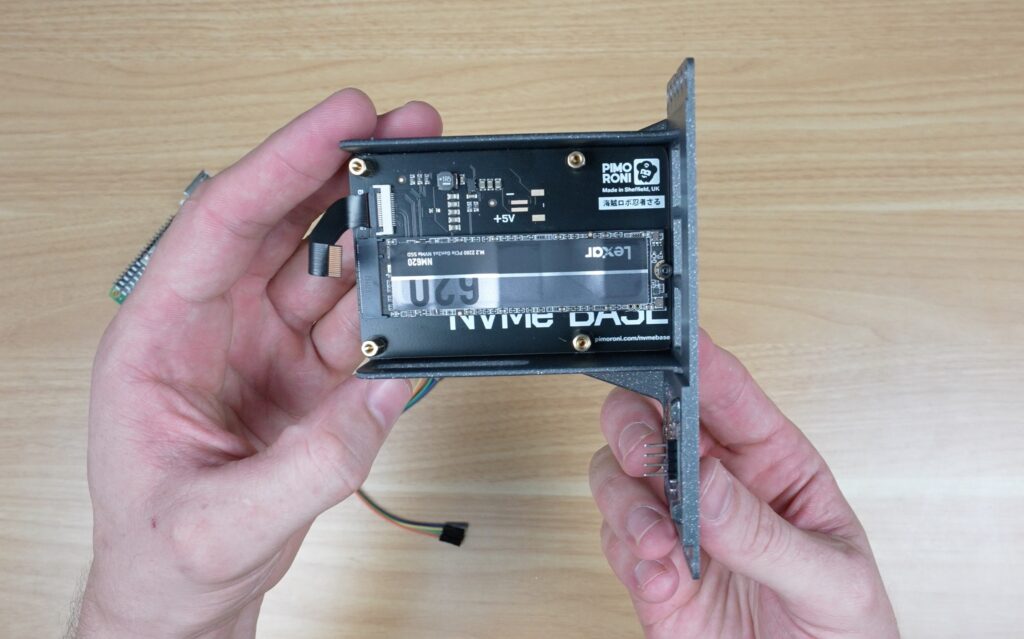
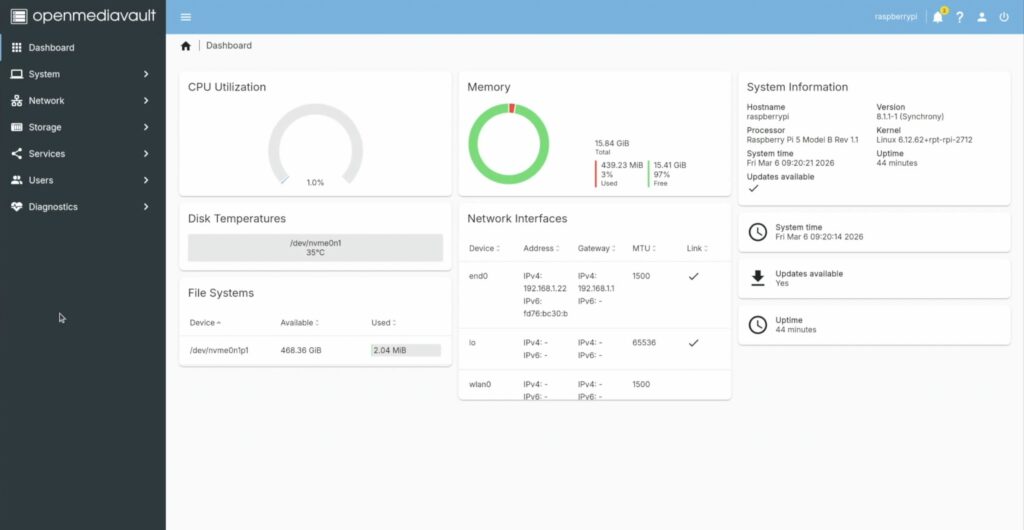
And lastly, my setup wouldn’t be complete without a Raspberry Pi 5-based NAS, which takes up two rack units. So I’ve got a Pimoroni NVMe base with a Lexar NM620 drive for storage. And alongside that is an I2C OLED display, which will display my stats script. You could also use a dual NVMe base for two storage drives. These are then all connected to an 8GB Raspberry Pi 5.
Now let’s get those installed in the rack. From the top down, I’m installing the router, then the switch, then the Pi NAS and lastly the Pi running Docker at the bottom.
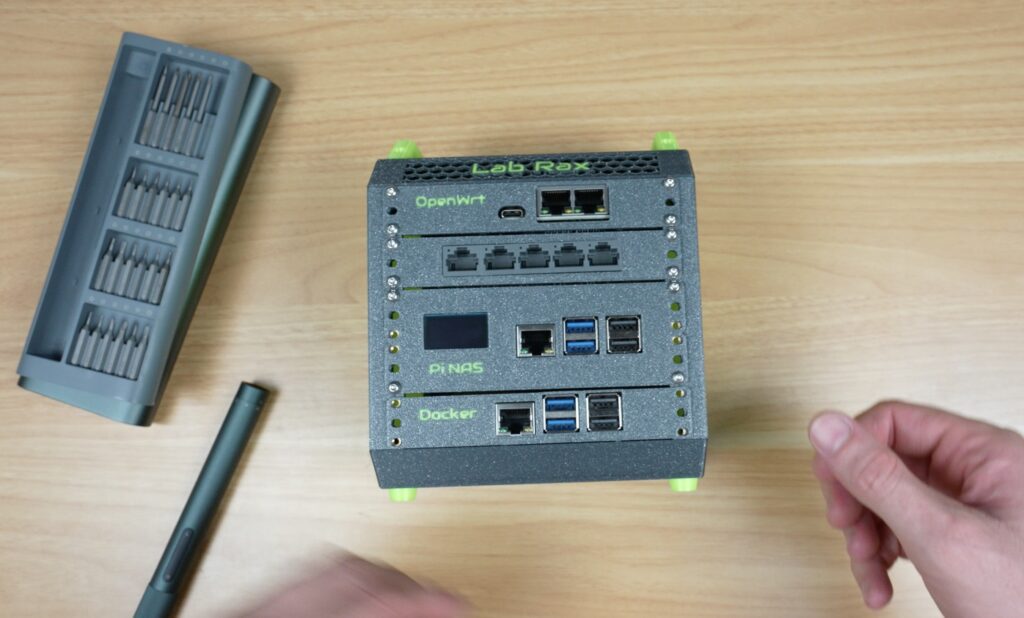
And my mini travel homelab is now complete.
There looks like there is lots of room around components for airflow. I’ll keep an eye on temps, and if they become an issue, it’ll probably be best to install a 60mm fan on the side panel blowing across the racks.

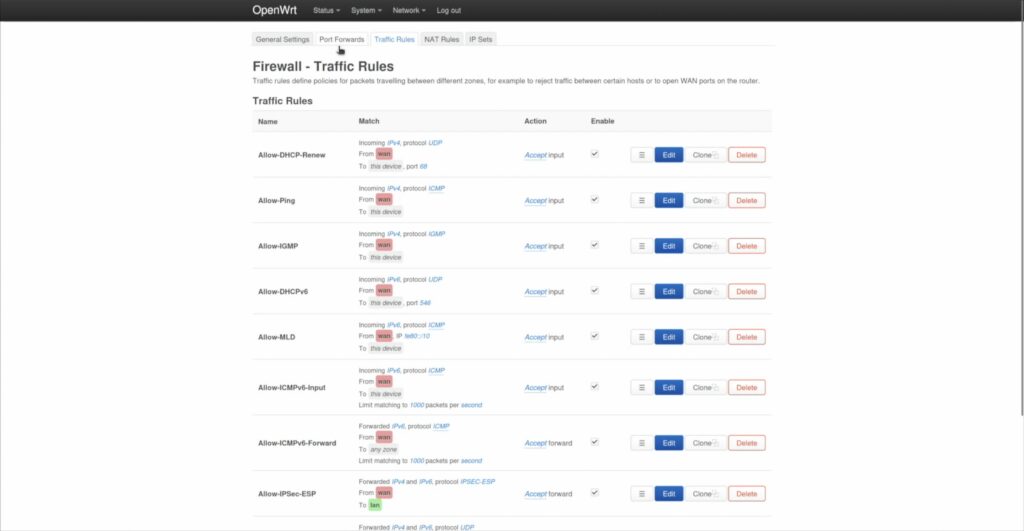
This little portable Pi homelab actually a really powerful stack for its size. Having its own OpenWRT router means that I can do anything I could have done with a travel router, but now automatically applied to my little homelab. I can create advanced firewall rules and have full control over my network’s DHCP and DNS settings.
I’ve also got network-attached storage that allows me to share files and folders across all devices on the network, and can do automated backups and even cloud backups when the router is connected to the internet.
And the Docker Pi is available to run any other services that I need locally when travelling. So I could have a completely offline and portable local network with all of my files, a media server and automated backups.
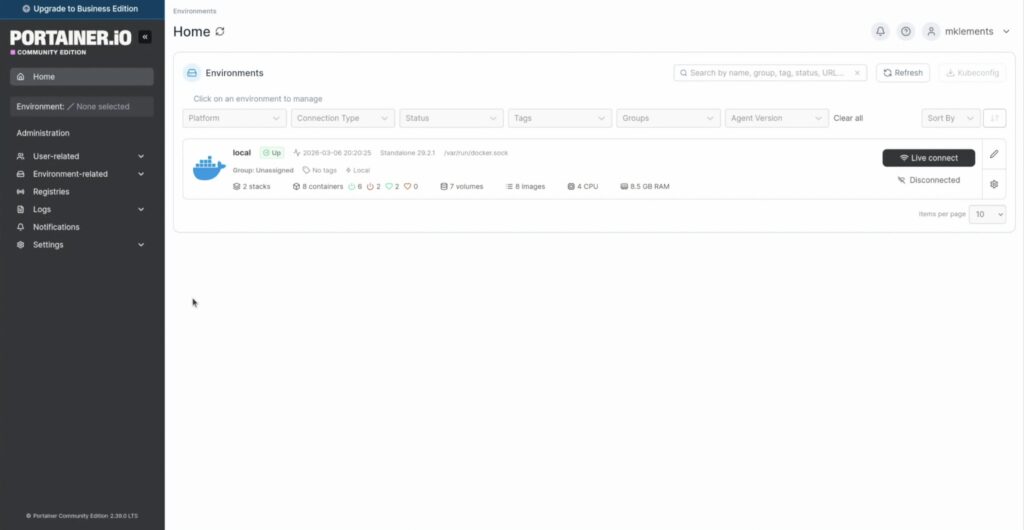
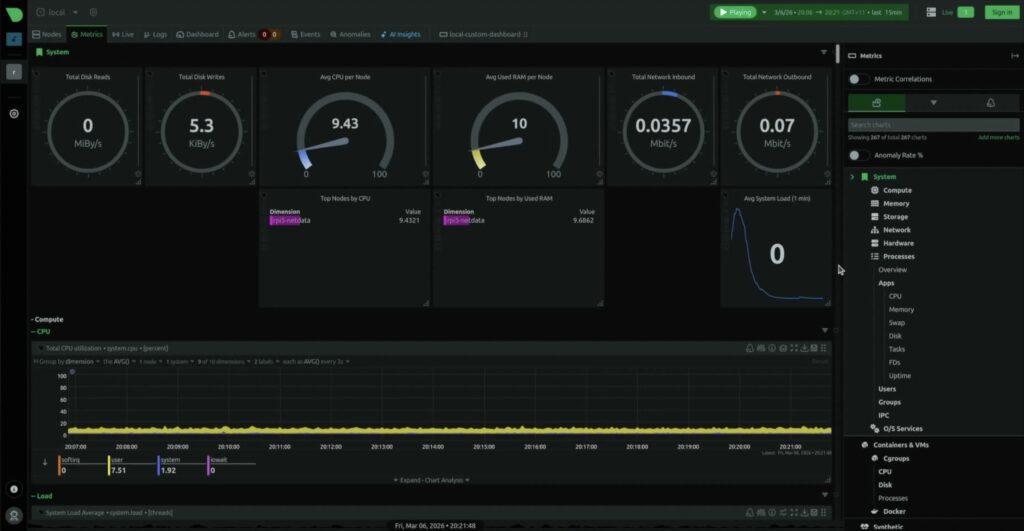
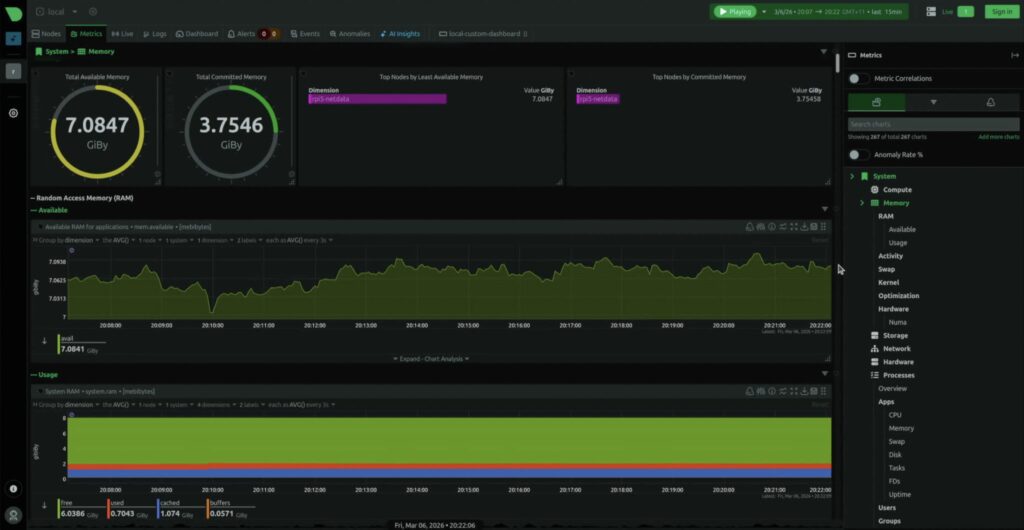
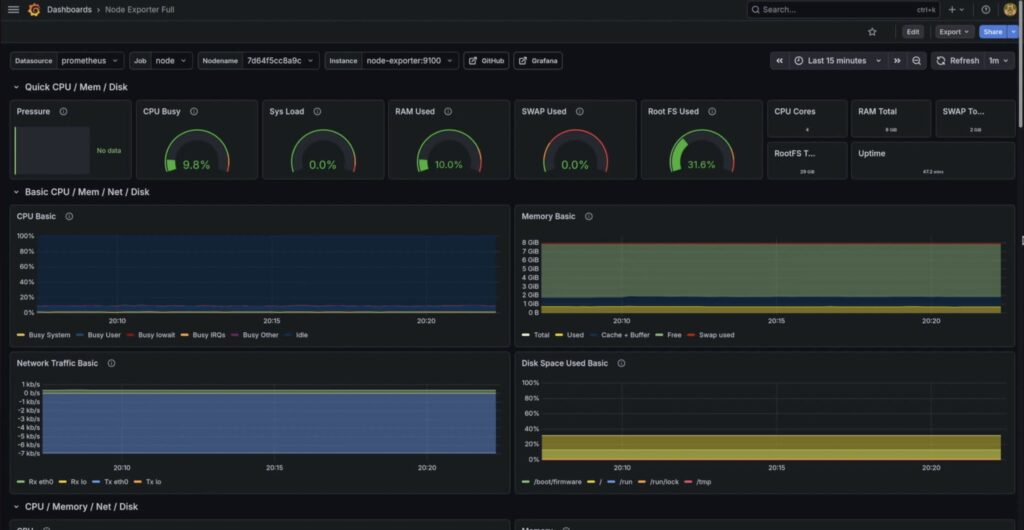
It’s even got some cool monitoring dashboards available through a browser on the local network. There’s one through Netdata, and I’ve got another one running Prometheus and Grafana.
So that’s my new 5” portable homelab rack.
It’s small enough to travel with, but still powerful enough to run a full Pi-based homelab stack.
I’m curious, though, what would you put into a rack this small? Let me know in the comments section below because I’m already thinking about some upgrades for version 2.
Hi, my name is Michael and I started this blog in 2016 to share my DIY journey with you. I love tinkering with electronics, making, fixing, and building - I'm always looking for new projects and exciting DIY ideas. If you do too, grab a cup of coffee and settle in, I'm happy to have you here.
此内容由惯性聚合(RSS阅读器)自动聚合整理,仅供阅读参考。 原文来自 — 版权归原作者所有。
