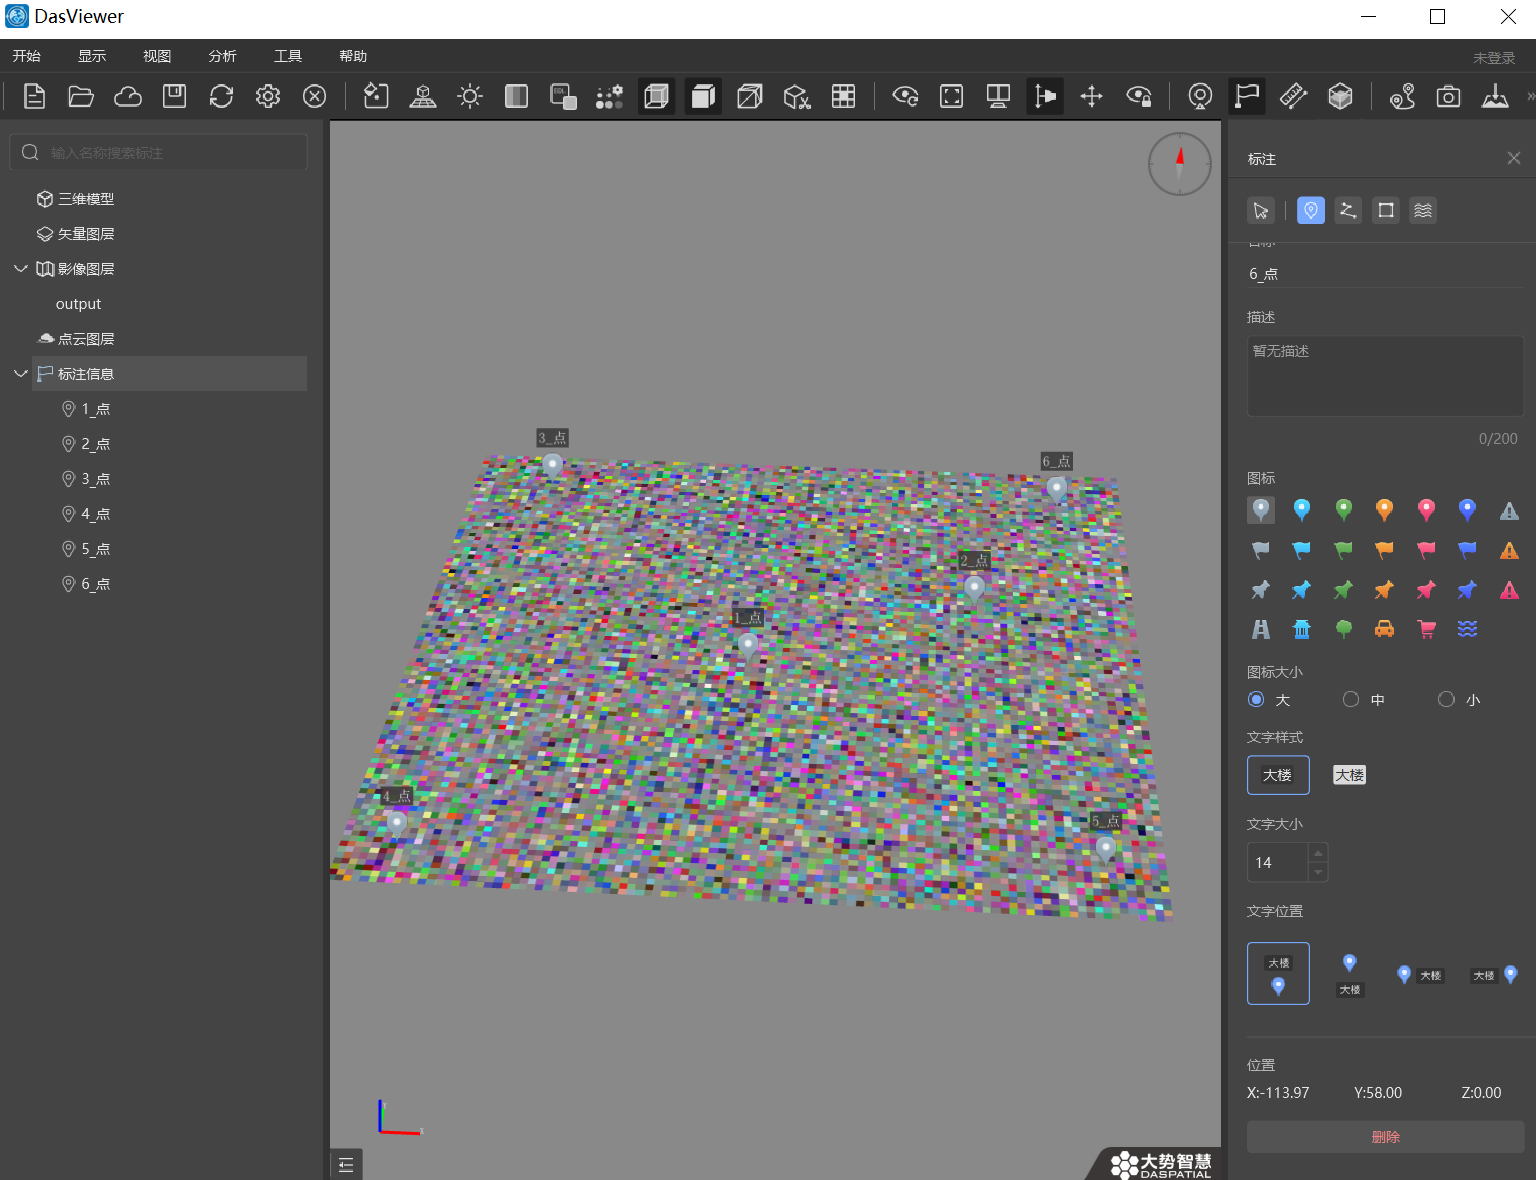
Python 可以使用 rasterio 库创建 TIF 文件,本文记录相关信息。
环境配置
-
python > v3.7
-
rasterio = v1.4.3
-
imagecodecs = 2024.12.30
-
tifffile = 2025.1.10
创建 TIF 图像
1
2
3
4
5
6
7
8
9
10
11
12
13
14
15
16
17
18
19
20
21
22
23
24
25
26
27
28
29
30
31
32
33
| import rasterio
from rasterio.transform import from_origin
import numpy as np# 创建一个100x100的图像数据,包含4个波段
width, height = 100, 100
data = np.random.randint(0, 256, (height, width, 4), dtype=np.uint8) # 定义地理变换参数(左上角坐标、像素大小和旋转)
left, top = -123.0, 49.0 # 左上角坐标(经度,纬度)
pixel_width, pixel_height = 0.1, -0.1 # 像素大小(经度方向,纬度方向) # 创建变换矩阵
transform = from_origin(left, top, pixel_width, pixel_height) # 定义坐标系
crs = rasterio.crs.CRS.from_epsg(4326) # WGS84坐标系 # 创建TIFF文件并写入数据
with rasterio.open(
'output.tif', 'w',
driver='GTiff',
height=height,
width=width,
count=4, # 波段数
dtype=rasterio.uint8,
crs=crs,
transform=transform
) as dst:
# 分别写入每个波段
for i in range(1, 5):
dst.write(data[:, :, i-1], i)
pass
|
压缩算法选择
压缩算法可以有多种选择,枚举内容在 from rasterio.enums import Compression 类中,源码如下:
1
2
3
4
5
6
7
8
9
10
11
12
13
14
15
16
17
18
19
20
21
| class Compression(Enum):
"""Available compression algorithms for GeoTIFFs.
Note that compression options for EXR, MRF, etc are not included
in this enum.
"""
jpeg = 'JPEG'
lzw = 'LZW'
packbits = 'PACKBITS'
deflate = 'DEFLATE'
ccittrle = 'CCITTRLE'
ccittfax3 = 'CCITTFAX3'
ccittfax4 = 'CCITTFAX4'
lzma = 'LZMA'
none = 'NONE'
zstd = 'ZSTD'
lerc = 'LERC'
lerc_deflate = 'LERC_DEFLATE'
lerc_zstd = 'LERC_ZSTD'
webp = 'WEBP'
jpeg2000 = 'JPEG2000'
|
常用的压缩算法,以原始图像文件 23096 x 17713 x 4 的tif图像为例:
| 压缩算法 |
是否无损压缩 |
执行速度 |
压缩后图像大小 |
| LZMA |
是 |
巨慢 |
320m |
| ZSTD |
是 |
26.5s |
414m |
| LZW |
是 |
快 |
511m |
| DEFLATE |
是 |
54s |
410m |
| LERC_DEFLATE |
否 |
中 |
354m |
| LERC_ZSTD |
否 |
中 |
357m |
| JPEG |
否 |
18s |
39m |
| NONE |
是 |
快 |
1600m |
可以选择不同压缩算法写入 tif 图像
1
2
3
4
5
6
7
8
9
10
11
12
13
14
15
16
17
18
19
| from rasterio.enums import Compression
import rasterio# 创建TIFF文件并写入数据
with rasterio.open(
'vvd_output6.tif', 'w',
driver='GTiff',
height=height,
width=width,
count=4, # 波段数
dtype=rasterio.uint8,
crs=mycrs,
transform=transform,
compress=Compression.lzw
) as dst:
# 分别写入每个波段
for i in range(4):
dst.write(tif_image[:, :, i], i+1)
|
用 imageio 读取图像时特殊格式需要安装 python 图像格式包
可能需要安装依赖:
1
| sudo apt-get install build-essential libzstd-dev
|
LERC 错误
有个问题是 LERC 系的算法用 imageio 读取时会报错
1
| tifffile.tifffile.TiffFileError: corrupted strip cannot be reshaped from (69288,) to (1, 1, 23096, 4)
|
综合压缩率和读写速度来看,无损算法ZSTD 算法是最优的。
有损压缩
无损压缩代价有点高,可以采用有损压缩的方式牺牲一点点图像质量换来读写速度和硬盘空间
jpeg 是常用的数据格式,可以用来做有损压缩的算法,默认 rasterio 的质量因子 是 75, 可以通过设置 JPEG_QUALITY 参数调整:
1
2
3
4
5
6
7
8
9
10
11
12
13
14
15
| with rasterio.open(
'vvd_output8.tif', 'w',
driver='GTiff',
height=height,
width=width,
count=4, # 波段数
dtype=rasterio.uint8,
crs=mycrs,
transform=transform,
compress=Compression.jpeg,
JPEG_QUALITY=90,
) as dst:
# 分别写入每个波段
for i in range(4):
dst.write(tif_image[:, :, i], i+1)
|
有损压缩损失自然图像质量是没有办法的事,但是对于第四通道 mask 来说,原始 0 和 255 的 mask,压缩后的结果采用 mask > 128 是与原始 mask 完全相同的,也就是说jpeg 压缩的 mask 可以无损恢复。
示例代码
UTM 坐标系,可以从一张现成的 utm tif 图像以图像和 tif 信息两部分合成一张新的 tif 图为例
1
2
3
4
5
6
7
8
9
10
11
12
13
14
15
16
17
18
19
20
21
22
23
24
25
26
27
28
29
30
31
32
33
34
35
36
37
38
39
40
41
42
43
44
45
46
47
48
49
50
51
52
53
54
55
56
57
58
59
60
61
| import vvdutils as vv
from rasterio.transform import from_origin
from rasterio.enums import Compression
import rasterioif __name__ == '__main__': mycrs = rasterio.crs.CRS.from_epsg("32645")
t = vv.TickTock()
t.begin()
tif_image = vv.huge_image_load('input.tif')
t.step() # 打开GeoTIFF文件
with rasterio.open('input.tif') as src:
t.step()
raster_img = src.read()
t.step()
t.show()
# 显示地图
# show(src, cmap='terrain')
left = src.bounds.left
top = src.bounds.top
pixel_width = src.res[0]
pixel_height = src.res[1]
transform = from_origin(left, top, pixel_width, pixel_height)
width = src.width
height = src.height
# 获取地理信息
print(f"Bounding Box: {src.bounds}")
print(f"Coodinate System: {src.crs}")
print(f"Width and Height: {src.width}, {src.height}")
print(f"Number of bands: {src.count}") t = vv.TickTock()
t.begin()
# 创建TIFF文件并写入数据 with rasterio.open(
'output.tif', 'w',
driver='GTiff',
height=height,
width=width,
count=4, # 波段数
dtype=rasterio.uint8,
crs=mycrs,
transform=transform,
compress=Compression.jpeg,
JPEG_QUALITY=90,
) as dst:
# 分别写入每个波段
for i in range(4):
dst.write(tif_image[:, :, i], i+1) t.step()
t.show() read_image2 = vv.huge_image_load('output.tif')
|
参考资料
文章链接:
https://www.zywvvd.com/notes/study/image-processing/format/tiff/tiff-create/tiff-create/



