教程大全OpenClaw,Windows10,WSL2,龙虾
在Windows10操作系统上,我们可以选择在Windows Docker 或者在 Windows WSL2 上安装Ubuntu来安装OpenClaw。
第二有有点绕对吧,绕就对了,我们就选第二个。如果你用第一个会发现更麻烦,Windows上的Docker更难用。
后续我会写其他操作系统的安装过程。
本文目录
- 1. 安装WSL2
- 1.1. 确认 WSL2 模式
- 2. 安装安装 Node.js 22
- 3. 安装OpenClaw
安装WSL2
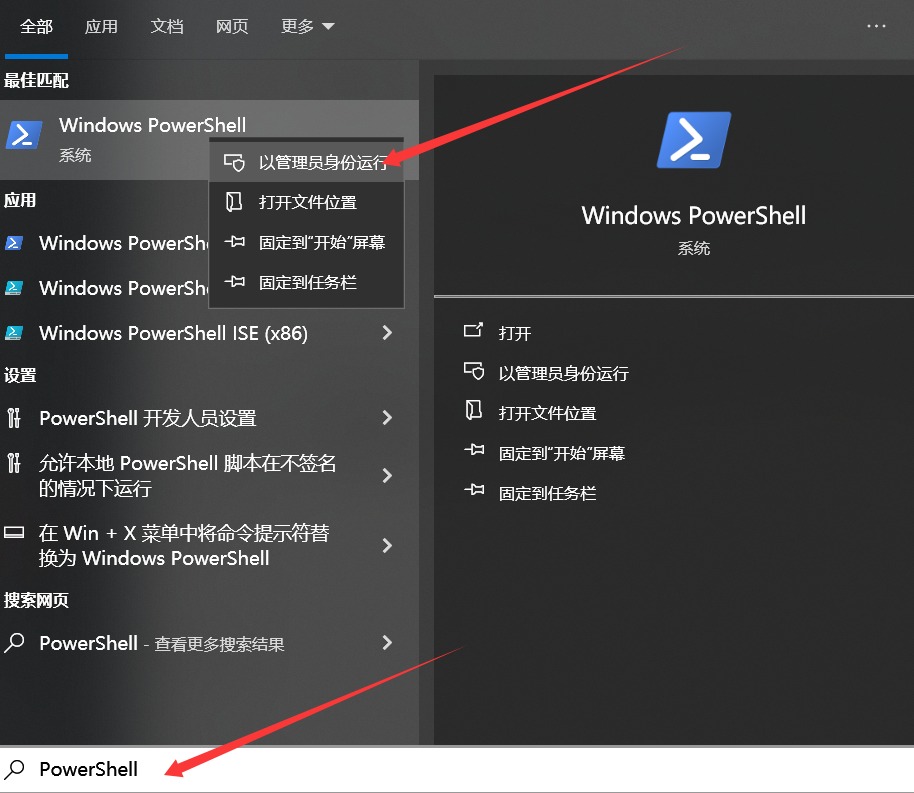
在搜索栏输入PowerShell,右键以管理员权限运行。
输入命令
wsl --install
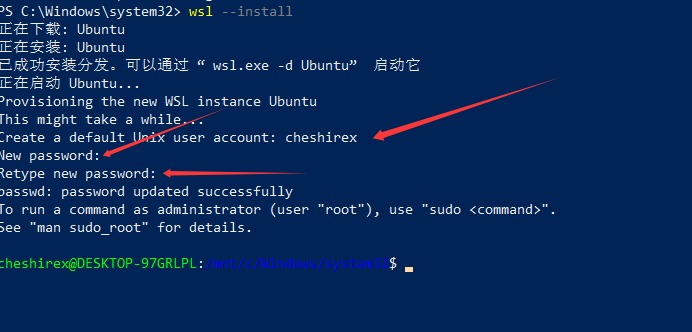
安装过程会让你输入Ubuntu的用户
重启电脑。
确认 WSL2 模式
wsl -l -v
确保VERSION为2
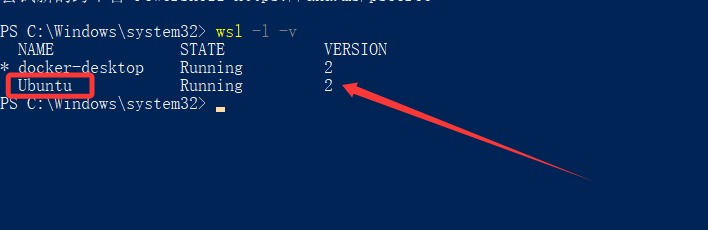
如果不是2就升级下版本。
wsl --set-version Ubuntu 2
安装安装 Node.js 22
开始菜单里找Ubuntu

更新系统包
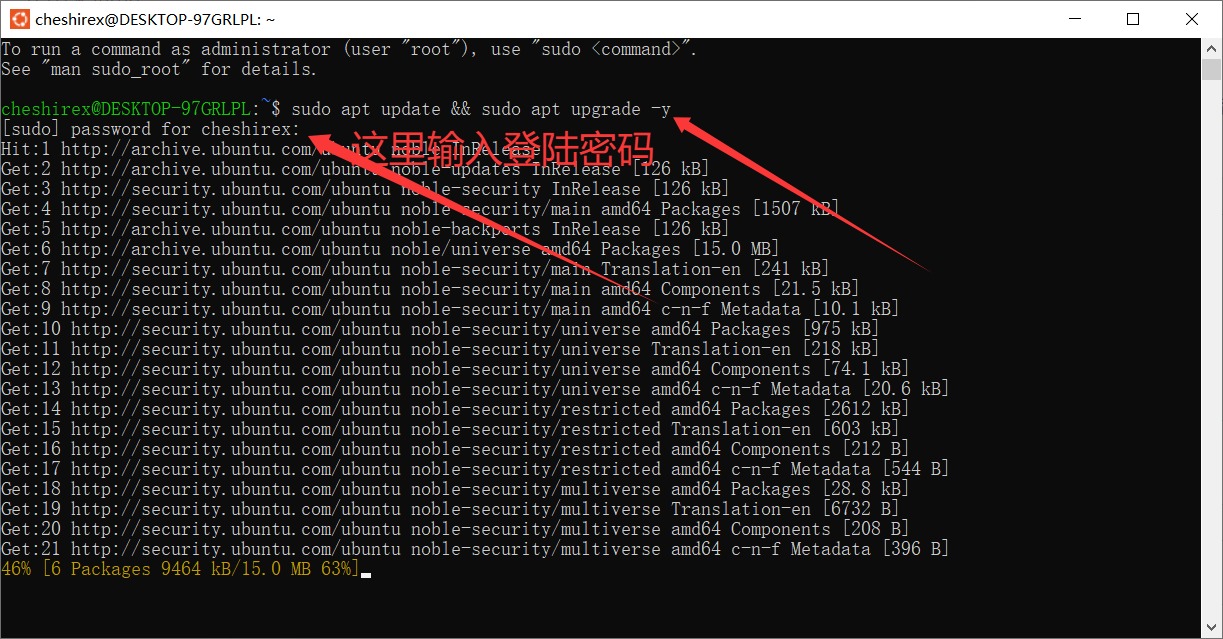
sudo apt update && sudo apt upgrade -y
通过 NodeSource 安装 Node.js 22
curl -fsSL https://deb.nodesource.com/setup_22.x | sudo -E bash -
sudo apt install -y nodejs
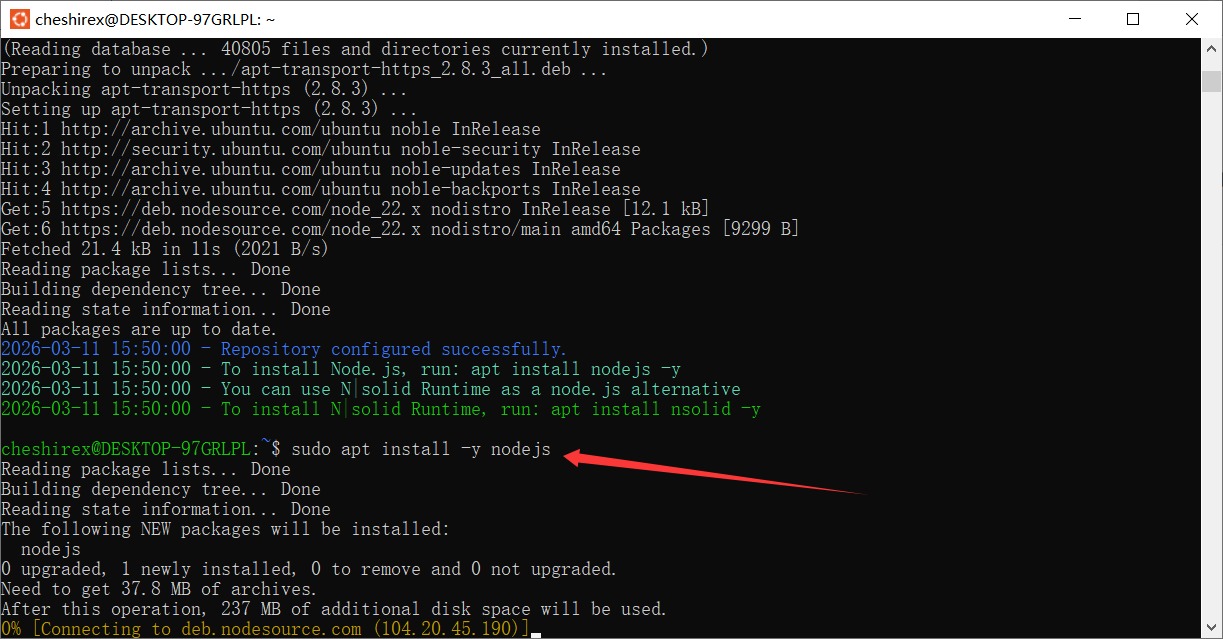
上面两个挨个执行。
验证安装结果
node –version
npm –version

确认能正确显示版本信息。
安装OpenClaw
克隆 OpenClaw 仓库
安装git
sudo apt install -y git

克隆仓库
git clone https://github.com/openclaw/openclaw.git

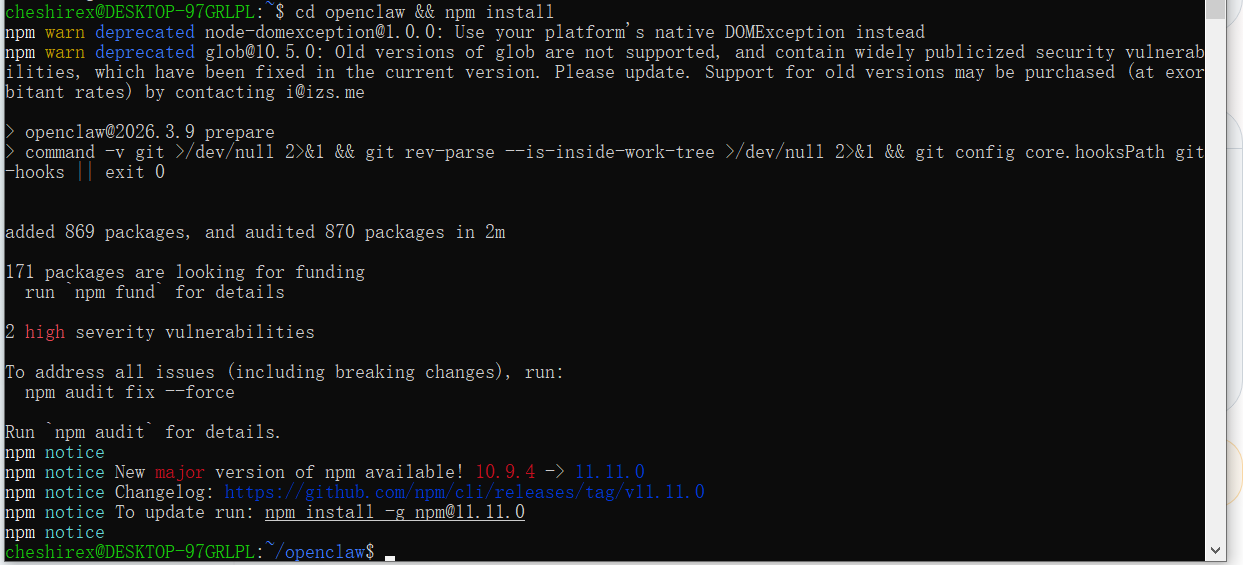
进入项目目录并且安装依赖
cd openclaw && npm install
复制编辑配置
cp .env.example .env
nano .env
# OpenClaw 环境变量配置
OPENAI_API_KEY=改成你的API KEY
# ANTHROPIC_API_KEY=sk-ant-your-key
# DEEPSEEK_API_KEY=your-deepseek-key

DEFAULT_MODEL=gpt-4o
ACCESS_CODE=改成你的访问密码
PORT=3210
安装包到全局
sudo npm install -g .
配置龙虾
openclaw configure
配置过程如果没修改端口号,登陆地址端口会变成默认的18789,而不是上面的3210.
开启网关
npm start -- gateway
启动龙虾
npm start
因为我们现在就在龙虾的程序目录,所以上面命令直接运行就启动了。
下次我们启动要先进入目录,然后运行启动命令。两个命令一起用就是
cd ~/openclaw && npm start
到这里我们的龙虾安装就完成了,目前还只是一个对话功能。后续需要给他安装手脚和嘴巴,请关注后续文章。