



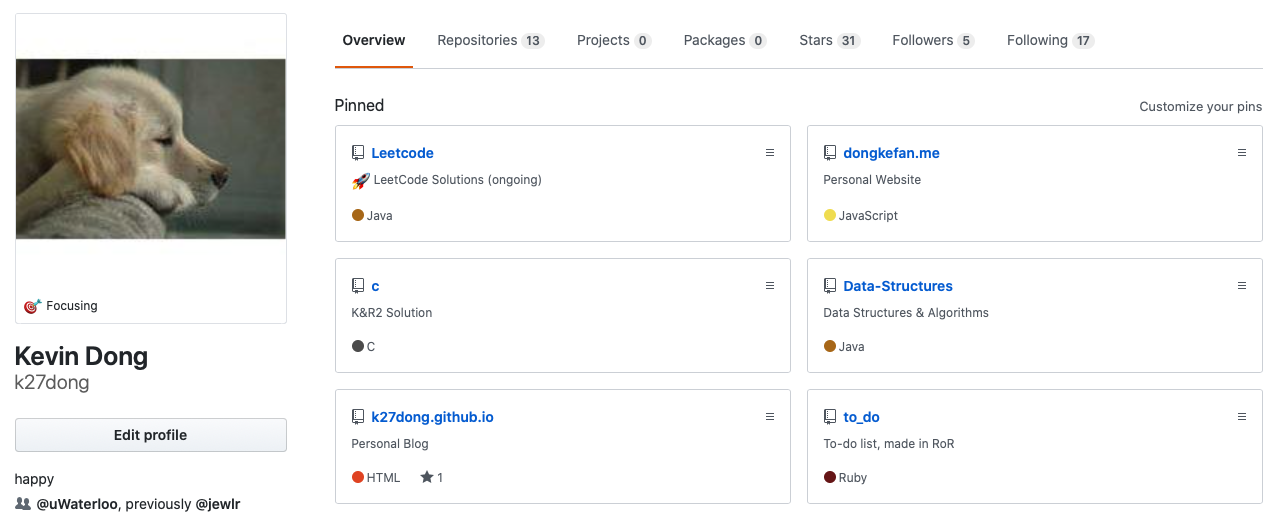
While I was making my personal website dongkefan.me, I wanted to added a section that would display my pinned projects on Github. At first I thought about hardcode all the content in an array and simply render it out, but in that way, I would have to update my code once I made any new project. I wanted to make sure whenever I added/removed my personal profile, my website get updated automatically. Due to this requirement, the data I render had to be actively fetched from Github, rather than locally stored in the repository.
To reach this goal, I had two options: REST and GraphQL. Both API achieves the same target: I send a request to the Github server asking information, and I would be returned with what I need. After some research work, I decided to use the latter option. Not because one is superior to the other - in the end, I’m only using it for retrieving a tiny amount of data once per load, any efficiency difference is negligible - but because it is simpler to use and easier to set up. In this blog I would share my experiences and code that accomplish my needs.
The first thing I need is a personal access token. It is linked to each account that grants the user the access to the server. You can create one from Settings - Developer settings - Personal access tokens - Generate new token. For safety purpose, make sure this token only contains the access for reading repos but not writing.
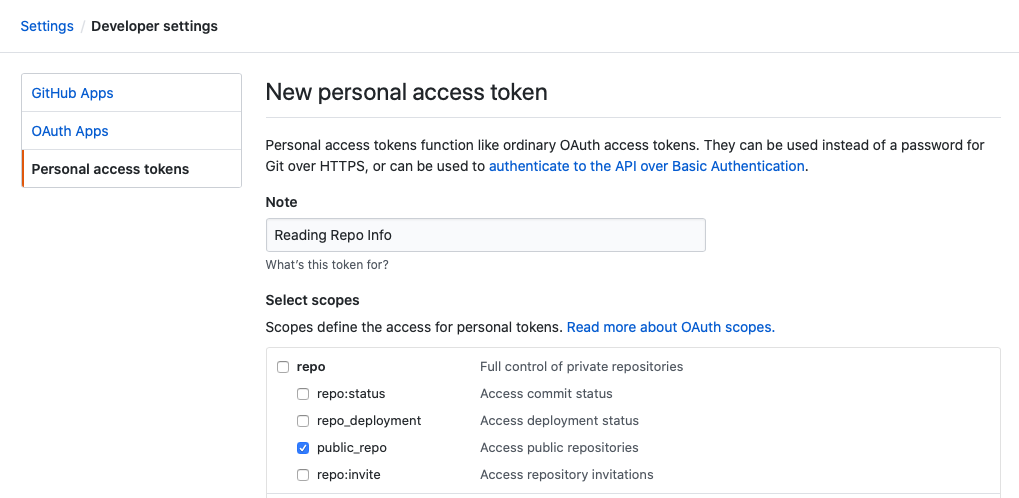
Then I’ll need to use this token in my react project. There are many node packages that contains GraphQL, including the official Javascript implementation made by Facebook themselves, but it is not so user-friendly and requires I didn’t need all the functionalities. Since I’m only using it for Github, I chose @octokit/graphql as my package. It is made my Github and has all the API I want. To install it on your project, simple do npm I @octokit/graphql —save (or yarn add @octokit/graphql if you’re using yarn)
On the React side, we then need to write out the schema. For REST, the response would contain all the available information, and I will choose what to use locally, but for GraphQL, I can specify what to fetch in the forms of a query. Thanks to Github, there’s a live modal that visualizes the data flow, where we can write our code and test it on production data. It even gives us an explorer that has all the available data types. I just needed to check what I wanted and the query forms itself. In this case, I wanted the name, description, url, and the language of the first six pinned repositories on my account. The result looks like this:
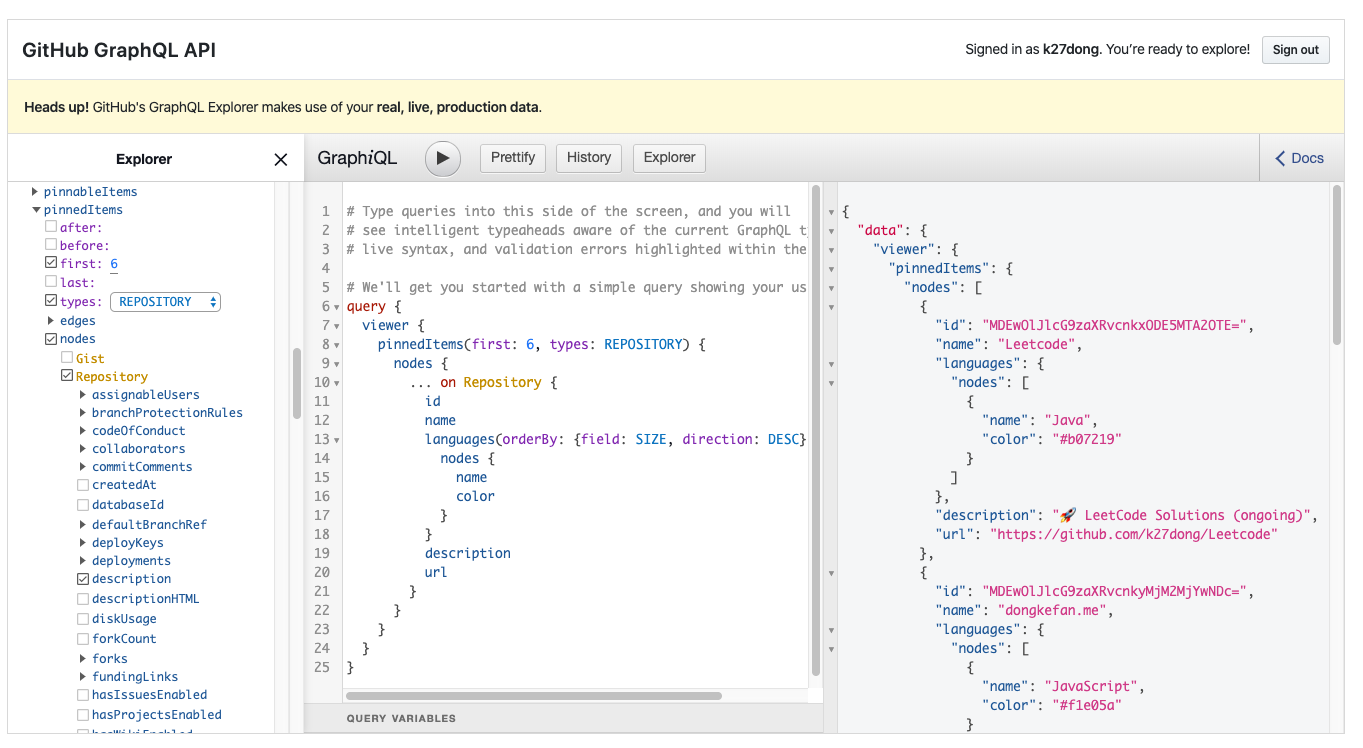
After knowing this query works, I then saved in locally in React.
const PinnedProjects = `
{
  viewer {
    pinnedItems(first: 6, types: REPOSITORY) {
      nodes {
        … on Repository {
          id
          name
          languages(orderBy: {field: SIZE, direction: DESC}, first: 1) {
            nodes {
              name
              color
            }
          }
          description
          url
        }
      }
    }
  }
}
`
At this point, there’s only one thing left to do and that’s to use the GitHub token perviously created and authorize the call. The official documentation written by Github tells me to do this:
const githubGraphRequest = graphql.defaults({
  headers: {
    authorization: `Bearer ${process.env.REACT_APP_GITHUB_GQL_TOKEN}`,
  },
})
In this code snippet, I stored my token as an environment variable in order for it to remain hidden in my Repo.
After all the setup work is finished, I just need to use these two pieces and forms my call. Notice that it takes time for the data to be returned, so I used react hooks and async calls with a loading indicator to make sure the data will only be rendered once the fetching is complete. The full code looks like this:
import React, { useEffect, useState } from "react"
import { graphql } from "@octokit/graphql"

const githubGraphRequest = graphql.defaults({
  headers: {
    authorization: `Bearer ${process.env.REACT_APP_GITHUB_GQL_TOKEN}`
  }
})

export const getPinnedProjects = async () =>
  await githubGraphRequest(PinnedProjects)

const PinnedProjects = `
{
  viewer {
    pinnedItems(first: 6, types: REPOSITORY) {
      nodes {
        ... on Repository {
          id
          name
          languages(orderBy: {field: SIZE, direction: DESC}, first: 1) {
            nodes {
              name
              color
            }
          }
          description
          url
        }
      }
    }
  }
}
`

const Github = () => {
  const [loading, setLoading] = useState(true)
  const [pinned, setPinned] = useState([])

  useEffect(() => {
    setLoading(true)
    Promise.all([getPinnedProjects()])
      .then(([p]) => {
        setPinned(p.viewer.pinnedItems.nodes)
      })
      .finally(() => setLoading(false))
  }, [])

  return (
    !loading && (
      <>
        {console.log(pinned)}
        {/* your code here */}
      </>
    )
}

export default Github
The logged data looks like this:
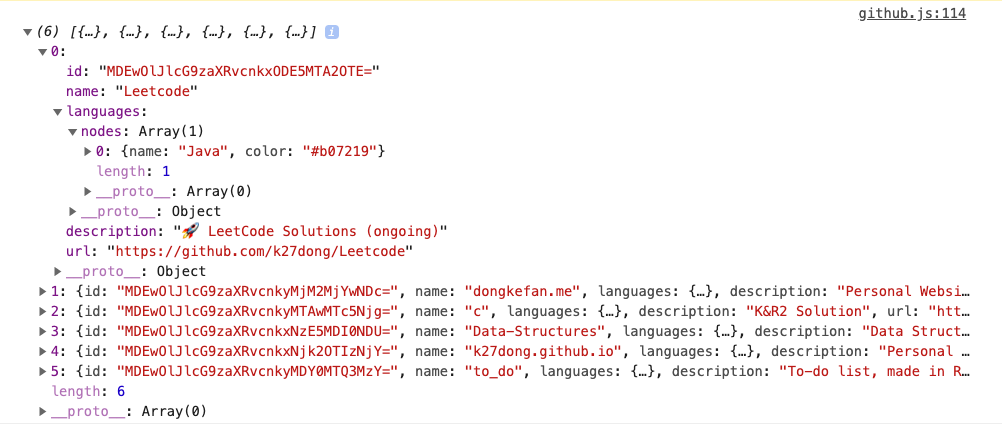
Eventually I was able to implement the feature on my website hehe
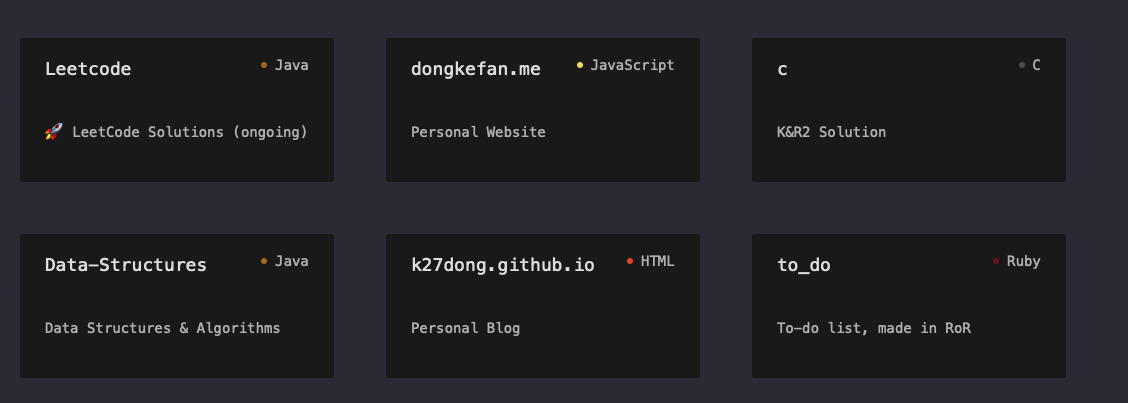
Compared to my Github profile:
I’m not a good writer, so I apologize in advance if any explaination is unclear. Thanks for reading!
:)