




This guide will walk through setting up your first workflow in a SvelteKit app. Along the way, you'll learn more about the concepts that are fundamental to using the Workflow SDK in your own projects.
Start by creating a new SvelteKit project. This command will create a new directory named my-workflow-app with a minimal setup and setup a SvelteKit project inside it.
npx sv create my-workflow-app --template=minimal --types=ts --no-add-onsEnter the newly made directory:
Install workflow
Configure Vite
Add workflowPlugin() to your Vite config. This enables usage of the "use workflow" and "use step" directives.
import { sveltekit } from "@sveltejs/kit/vite";
import { defineConfig } from "vite";
import { workflowPlugin } from "workflow/sveltekit";

export default defineConfig({
  plugins: [sveltekit(), workflowPlugin()],
});
workflowPlugin() accepts an options object:
| Option | Type | Default | Description |
|---|---|---|---|
sourcemap | boolean | 'inline' | 'linked' | 'external' | 'both' | 'inline' | Controls source maps on generated workflow bundles. Accepts the same values as esbuild's sourcemap option. Set to false for smaller function bundles (useful for staying under the Vercel 250MB function size limit) at the cost of stack traces pointing at generated code. Can also be set via the WORKFLOW_SOURCEMAP environment variable. |
Create a new file for our first workflow:
import { sleep } from "workflow";

export async function handleUserSignup(email: string) {
  "use workflow";

  const user = await createUser(email);
  await sendWelcomeEmail(user);

  await sleep("5s"); // Pause for 5s - doesn't consume any resources
  await sendOnboardingEmail(user);

  console.log("Workflow is complete! Run 'npx workflow web' to inspect your run")

  return { userId: user.id, status: "onboarded" };
}
We'll fill in those functions next, but let's take a look at this code:
- We define a workflow function with the directive
"use workflow". Think of the workflow function as the orchestrator of individual steps. - The Workflow SDK's
sleepfunction allows us to suspend execution of the workflow without using up any resources. A sleep can be a few seconds, hours, days, or even months long.
Let's now define those missing functions.
import { FatalError } from "workflow"

// Our workflow function defined earlier

async function createUser(email: string) {
  "use step";

  console.log(`Creating user with email: ${email}`);

  // Full Node.js access - database calls, APIs, etc.
  return { id: crypto.randomUUID(), email };
}

async function sendWelcomeEmail(user: { id: string; email: string; }) {
  "use step";

  console.log(`Sending welcome email to user: ${user.id}`);

  if (Math.random() < 0.3) {
  // By default, steps will be retried for unhandled errors
   throw new Error("Retryable!");
  }
}

async function sendOnboardingEmail(user: { id: string; email: string}) {
  "use step";

  if (!user.email.includes("@")) {
    // To skip retrying, throw a FatalError instead
    throw new FatalError("Invalid Email");
  }

  console.log(`Sending onboarding email to user: ${user.id}`);
}
Taking a look at this code:
- Business logic lives inside steps. When a step is invoked inside a workflow, it gets enqueued to run on a separate request while the workflow is suspended, just like
sleep. - If a step throws an error, like in
sendWelcomeEmail, the step will automatically be retried until it succeeds (or hits the step's max retry count). - Steps can throw a
FatalErrorif an error is intentional and should not be retried.
We'll dive deeper into workflows, steps, and other ways to suspend or handle events in Foundations.
To invoke your new workflow, we'll have to add your workflow to a POST API route handler, src/routes/api/signup/+server.ts with the following code:
import { start } from "workflow/api";
import { handleUserSignup } from "../../../../workflows/user-signup";
import { json, type RequestHandler } from "@sveltejs/kit";

export const POST: RequestHandler = async ({
  request,
}: {
  request: Request;
}) => {
  const { email } = await request.json();

  // Executes asynchronously and doesn't block your app
  await start(handleUserSignup, [email]);

  return json({ message: "User signup workflow started" });
};
This route handler creates a POST request endpoint at /api/signup that will trigger your workflow.
Workflows can be triggered from API routes or any server-side code.
To start your development server, run the following command in your terminal in the SvelteKit root directory:
Once your development server is running, you can trigger your workflow by running this command in the terminal:
curl -X POST --json '{"email":"hello@example.com"}' http://localhost:5173/api/signupCheck the SvelteKit development server logs to see your workflow execute as well as the steps that are being processed.
Additionally, you can use the Workflow SDK CLI or Web UI to inspect your workflow runs and steps in detail.
# Open the observability Web UI
npx workflow web
# or if you prefer a terminal interface, use the CLI inspect command
npx workflow inspect runs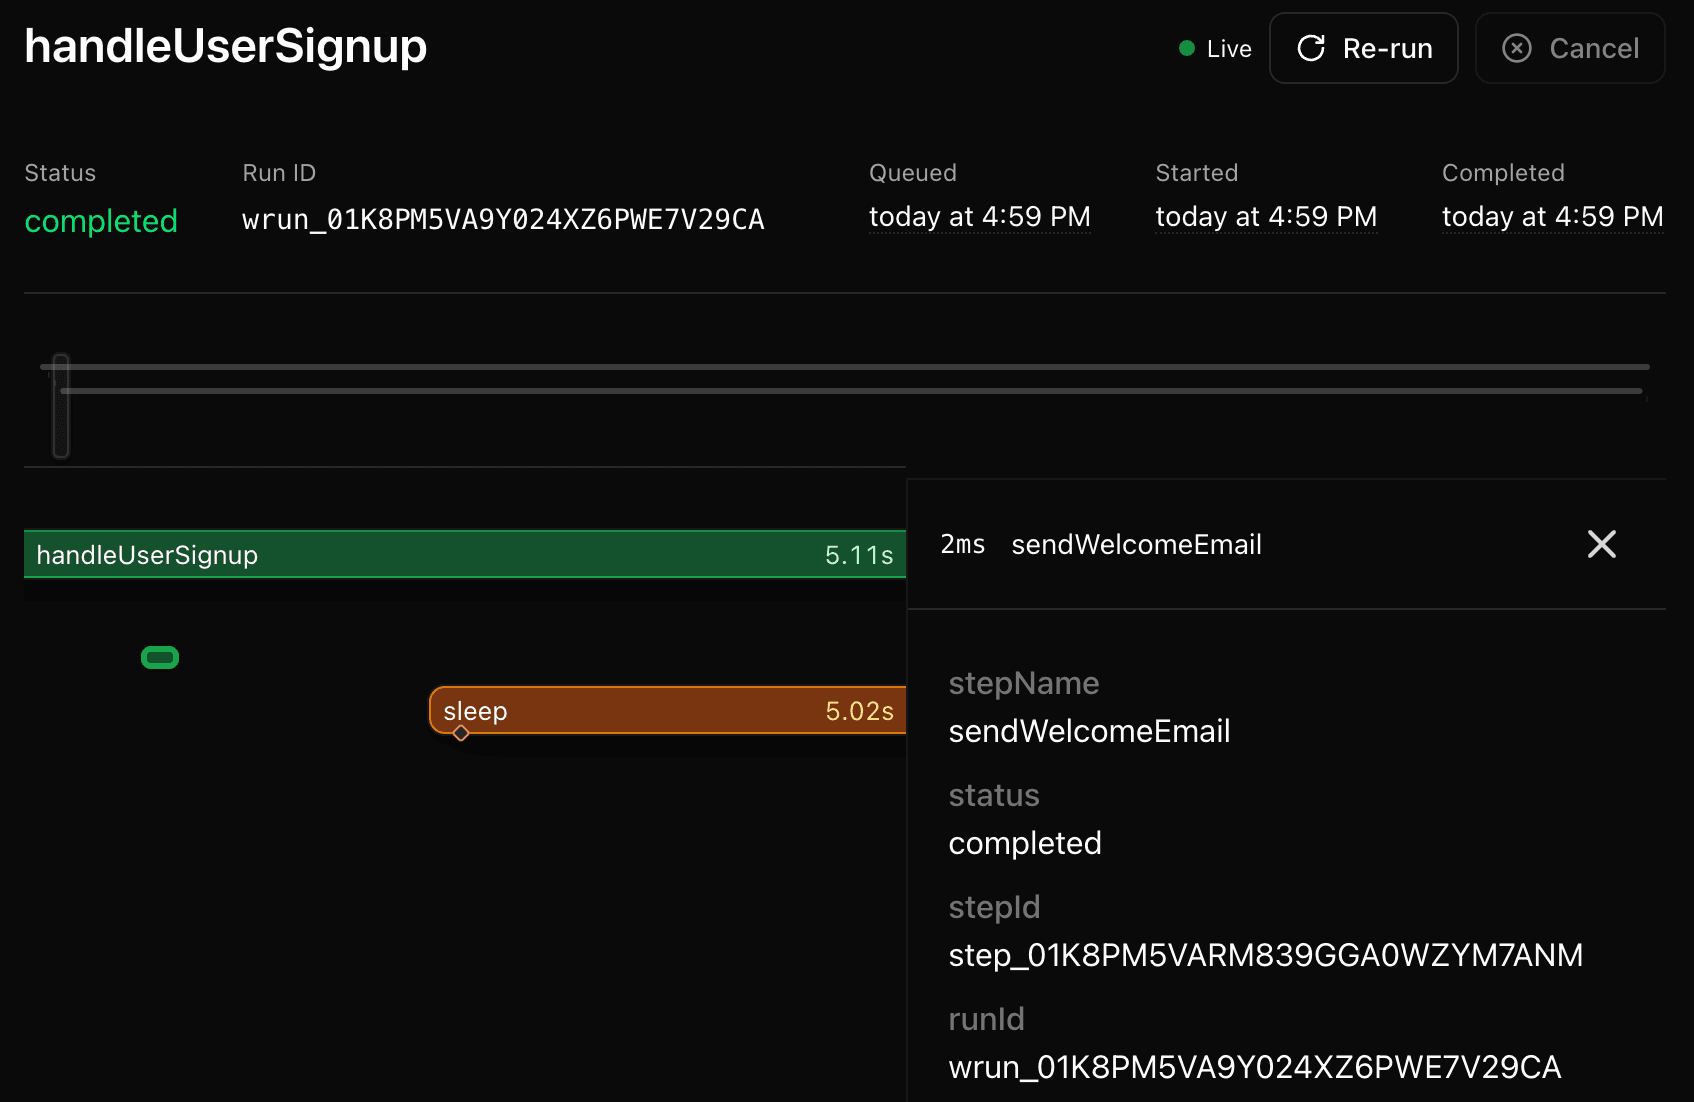
Workflow SDK apps currently work best when deployed to Vercel and needs no special configuration.
Enable Fluid compute before deploying. Workflow is designed to take advantage of Fluid compute for efficient suspension and resumption. Without Fluid compute enabled, each workflow resume incurs a separate function cold start, which can result in significantly higher costs.
Check the Deploying section to learn how your workflows can be deployed elsewhere.
start() says it received an invalid workflow function
If you see this error:
'start' received an invalid workflow function. Ensure the Workflow Development Kit is configured correctly and the function includes a 'use workflow' directive.Check both of these first:
- The workflow function includes
"use workflow". - Your
vite.config.tsincludes theworkflow/sveltekitplugin.
See start-invalid-workflow-function for full examples and fixes.
- Learn more about the Foundations.
- Check Errors if you encounter issues.
- Explore the API Reference.