


在 vue 中有一个组件叫 keep-alive,它的作用其实很简单,主要是缓存:对包裹在其中的动态切换组件进行缓存。但是,它提高性能的效果到底怎样呢?基于这样的思考,在项目中,我们在一个页面分别加 keep-alive 与不加进行了一个对比。
秉着严谨求真的精神,我们采用单一变量法,在相同的触发条件、执行环境中,触发相同次数后做对比,对比结果如下:
使用 keep-alive

不使用 keep-alive
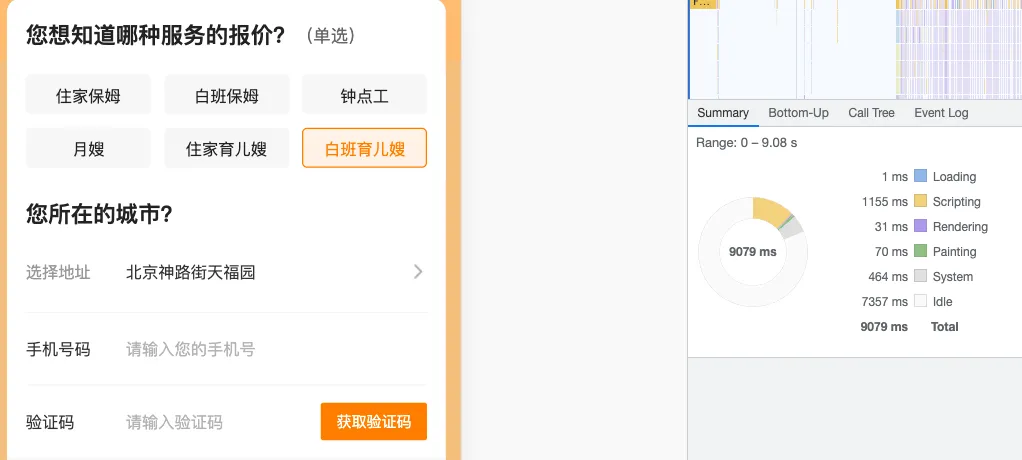
当相同组件一个使用 keep-alive,一个未使用,在反复切换路由次数相同的情况下,能够发现,除去空闲时间,使用 keep-alive 的组件在页面的渲染、加载时间上,是要略微优于未使用的组件的。当页面内容并不复杂时,这个时间感受并不强烈,然而当组件和页面越来越复杂时,使用 keep-alive 带来的性能优化也就愈发明显了。
接下来,我们就一起了解下,keep-alive 的具体用法和运行机制到底是怎样的。
先放官方文档介绍,文档地址:keep-alive API
<!-- 基本 -->
<keep-alive>
    <component :is="view"></component>
</keep-alive>
<!-- 多个条件判断的子组件 -->
<keep-alive>
    <comp-a v-if="a > 1"></comp-a>
    <comp-b v-else></comp-b>
</keep-alive>
<!-- 和 `<transition>` 一起使用 -->
<transition>
   <keep-alive>
        <component :is="view"></component>
   </keep-alive>
</transition>
<keep-alive> 包裹动态组件时,会缓存不活动的组件实例,而不是销毁他们。<keep-alive> 内被切换, 它的 activated 和 deactivated 两个生命周期钩子函数将会被执行。简单理解就是说,我们可以把一些不常变动的组件或者需要缓存的组件用 <keep-alive> 包裹起来,这样 <keep-alive> 就会帮我们把组件保存在内存中,而不是直接的销毁,这样做可以保留组件的状态,以提高页面性能。
了解了 <keep-alive> 的用法,接下来我们一起具体分析下源码中它是如何进行性能优化、组件缓存和缓存优化处理的。
a. 首次渲染
vue 其中一个特点就是 vdom,vue 普通组件模板编译的过程为:模板 -> AST -> render() -> vnode -> 真实Dom,此时会进入 patch 阶段,在函数中会将 vnode 转化为真实 dom。
而 <keep-alive> 组件在初次渲染时,<keep-alive> 的 vnode 会视为普通组件 vnode,因此一开始也会调用 createComponent() 函数, createComponent() 会执行组件初始化函数 init(), 对组件进行初始化和实例化,具体代码逻辑如下,以下代码为 vue 2.6.14 版本 vdom 中 patch.js:
function createComponent (vnode, insertedVnodeQueue, parentElm, refElm) {
    var i = vnode.data;
    if (isDef(i)) {
      // isReactivated 用来判断组件是否缓存
      var isReactivated = isDef(vnode.componentInstance) && i.keepAlive;
      if (isDef(i = i.hook) && isDef(i = i.init)) {
        // 执行组件初始化的内部钩子 init()
        i(vnode, false /* hydrating */);
      }
      // after calling the init hook, if the vnode is a child component
      // it should've created a child instance and mounted it.
      // the child component also has set the placeholder vnode's elm.
      // in that case we can just return the element and be done.
      if (isDef(vnode.componentInstance)) {
        initComponent(vnode, insertedVnodeQueue);
        // 将真实 dom 添加到父节点,insert 操作 dom api
        insert(parentElm, vnode.elm, refElm);
        if (isTrue(isReactivated)) {
          reactivateComponent(vnode, insertedVnodeQueue, parentElm, refElm);
        }
        return true
      }
    }
  }
首次渲染时,组件 vnode 没有 componentInstance 属性,vnode.data.keepAlive 也没有值,所以会调用 createComponentInstanceForVnode() 将组件进行实例化并将组件实例赋值给 vnode 的 componentInstance 属性,其中 createComponentInstanceForVnode() 是组件实例化的过程,一系列选项合并、初始化事件、生命周期等初始化操作,最后执行组件实例的 $mount 方法进行实例挂载。具体代码逻辑如下,代码参考地址 create-component.js:
// inline hooks to be invoked on component VNodes during patch
var componentVNodeHooks = {
  // 组件 vnode 初始化
  init (vnode: VNodeWithData, hydrating: boolean): ?boolean {
    if (
      vnode.componentInstance &&
      !vnode.componentInstance._isDestroyed &&
      vnode.data.keepAlive
    ) {
      // kept-alive components, treat as a patch
      const mountedNode: any = vnode // work around flow
      componentVNodeHooks.prepatch(mountedNode, mountedNode)
    } else {
      // 第一次运行时,vnode.componentInstance 不存在 ,vnode.data.keepAlive 不存在。
      // 将组件实例化,并赋值给 vnode 的 componentInstance 属性。
      // createComponentInstanceForVnode() 是组件实例化的过程,一系列选项合并,初始化事件,生命周期等初始化操作。
      const child = vnode.componentInstance = createComponentInstanceForVnode(
        vnode,
        activeInstance
      )
      // 进行挂载
      child.$mount(hydrating ? vnode.elm : undefined, hydrating)
    }
  },
  // prepatch 是 patch 过程的核心步骤
  prepatch: function prepatch (oldVnode, vnode) { ... },
  insert: function insert (vnode) { ... },
  destroy: function destroy (vnode) { ... }
};
缓存 vnode
挂载 $mount 阶段会调用 vm._render() 函数,最终会调用组件选项中的 render() 函数进行渲染。由于 <keep-alive> 是一个内置组件,因此也拥有自己的 render() 函数、 created 及 mounted 方法。组件的定义位于源码的 src/core/components/keep-alive.js 文件中,以下代码则为 <keep-alive> 组件的核心代码,代码参考地址: keep-alive.js
我们先从 created 钩子开始进行分析:
created () {
    // 缓存对象 cache 及 key 值数组初始化
    this.cache = Object.create(null)
    this.keys = []
},
this.cache 是一个对象,用来存储需要缓存的组件,对象的 key 值则为对应缓存组件的 key。这个 key 值是一个唯一的拼接字符串,value 为包含组件名称、组件 tag、组件实例的一个对象。this.keys 是一个数组,用来存储每个需要缓存的组件的 key ,即对应 this.cache 对象中的键值。
<keep-alive> 缓存组件较核心的代码, render() 大致做了以下几项处理:// 在渲染阶段,进行缓存的存/取
render () {
// 首先拿到 keep-alive 下插槽的默认值 (keep-alive 包裹的组件)
const slot = this.$slots.default
// 获取第一个 vnode 节点
const vnode: VNode = getFirstComponentChild(slot)
// 拿到第一个子组件实例
const componentOptions: ?VNodeComponentOptions = vnode && vnode.componentOptions
if (componentOptions) {
// check pattern
const name: ?string = getComponentName(componentOptions)
const { include, exclude } = this
if (
// not included
// 配置 include 且不匹配 或 配置了 exclude 且匹配,直接返回;否则,走下面的缓存逻辑
(include && (!name || !matches(include, name))) ||
// excluded
(exclude && name && matches(exclude, name))
) {
return vnode
}
const { cache, keys } = this
const key: ?string = vnode.key == null
// same constructor may get registered as different local components
// so cid alone is not enough (#3269)
// 获取本地组件唯一key
? componentOptions.Ctor.cid + (componentOptions.tag ? `::${componentOptions.tag}` : '')
: vnode.key
if (cache[key]) {
// 缓存过的组件直接进行读取,且前置当前读取组件 key 顺序
vnode.componentInstance = cache[key].componentInstance
// make current key freshest
// 使用 LRU 最近最少缓存策略,将命中的 key 从缓存数组中删除,并将当前最新 key 存入缓存数组的末尾
remove(keys, key)
// 将当前组件名重新存入数组最末端
keys.push(key)
} else {
// delay setting the cache until update
// 用于 mounted/updated 阶段组件的首次缓存
this.vnodeToCache = vnode
this.keyToCache = key
}
// 为缓存组件打上标记
vnode.data.keepAlive = true
}
return vnode || (slot && slot[0])
}
// updated
methods: {
    cacheVNode() {
      const { cache, keys, vnodeToCache, keyToCache } = this
      if (vnodeToCache) {
        // 如果 vnodeToCache 存在,则将该组件缓存到 cache 对象中,以 key 值为键,以 cid 和 tag 组成的唯一标识作为
        // 该组件的 key,以包含组件名称、组件 tag、组件实例的对象为 value 值
        const { tag, componentInstance, componentOptions } = vnodeToCache
        cache[keyToCache] = {
          name: getComponentName(componentOptions),
          tag,
          componentInstance,
        }
        keys.push(keyToCache)
        // prune oldest entry
        // 与 max 进行对比,超过则删除最少使用即下标最前的那个组件
        if (this.max && keys.length > parseInt(this.max)) {
          pruneCacheEntry(cache, keys[0], keys, this._vnode)
        }
        this.vnodeToCache = null
      }
    }
},
...
updated () {
    this.cacheVNode()
},
// mounted
mounted () {
    this.cacheVNode()
    this.$watch('include', val => {
      pruneCache(this, name => matches(val, name))
    })
    this.$watch('exclude', val => {
      pruneCache(this, name => !matches(val, name))
    })
},
...
// 对不符合 include 规则和符合 exclude 规则的组件,进行移除 cache 缓存对象中对应组件的操作
function pruneCache (keepAliveInstance: any, filter: Function) {
  const { cache, keys, _vnode } = keepAliveInstance
  for (const key in cache) {
    const entry: ?CacheEntry = cache[key]
    if (entry) {
      const name: ?string = entry.name
      if (name && !filter(name)) {
        pruneCacheEntry(cache, key, keys, _vnode)
      }
    }
  }
}
<keep-alive> 组件被销毁时,此时会调用 destroyed 钩子函数,在该钩子函数里会遍历 this.cache 对象,然后将那些被缓存的并且当前没有处于被渲染状态的组件都销毁掉并将其从 this.cache 对象中删除。// 销毁组件,且移除缓存数组和 key 数组中对应的数据
function pruneCacheEntry (
cache: CacheEntryMap,
key: string,
keys: Array<string>,
current?: VNode
) {
const entry: ?CacheEntry = cache[key]
if (entry && (!current || entry.tag !== current.tag)) {
entry.componentInstance.$destroy()
}
cache[key] = null
remove(keys, key)
}
...
destroyed () {
for (const key in this.cache) {
pruneCacheEntry(this.cache, key, this.keys)
}
},
缓存真实 dom
以上渲染过程为调用 createComponent() 函数执行组件的初始化等操作(即 init())的过程,当初始化完成后,则会执行 initComponent(),将真实 dom 添加到父节点,同时将真实的 dom 保存在 vnode 中,代码参考地址: patch.js,具体代码如下:
function initComponent (vnode, insertedVnodeQueue) {
    if (isDef(vnode.data.pendingInsert)) {
      insertedVnodeQueue.push.apply(insertedVnodeQueue, vnode.data.pendingInsert);
      vnode.data.pendingInsert = null;
    }
    // 保存真实 dom 节点到 vnode
    vnode.elm = vnode.componentInstance.$el
    ...
}
b.缓存渲染
当数据发送变化,在 patch 的过程中会执行 patchVnode 的逻辑,它会对比新旧 vnode 节点,甚至对比它们的子节点去做更新逻辑,但是对于组件 vnode 而言,是没有 children 的,而对于 <keep-alive> 组件而言,patchVnode 在做各种 diff 之前,会先执行 prepatch 的钩子函数,prepatch 核心逻辑就是执行 updateChildComponent 方法,代码参考地址: patch.js。
export function updateChildComponent (
  vm: Component,
  propsData: ?Object,
  listeners: ?Object,
  parentVnode: MountedComponentVNode,
  renderChildren: ?Array<VNode>
) {
  const hasChildren = !!(
    renderChildren ||
    vm.$options._renderChildren ||
    parentVnode.data.scopedSlots ||
    vm.$scopedSlots !== emptyObject
  )

  // ...
  if (hasChildren) {
    vm.$slots = resolveSlots(renderChildren, parentVnode.context)
    vm.$forceUpdate()
  }
}
updateChildComponent 方法主要是去更新组件实例的一些属性,这里我们重点关注一下 slot 部分,由于 <keep-alive> 组件本质上支持了 slot,所以它执行 prepatch 的时候,需要对自己的 children,也就是这些 slots 做重新解析,并触发 <keep-alive> 组件实例 $forceUpdate 逻辑,也就是重新执行 <keep-alive> 的 render 方法,这个时候如果它包裹的第一个组件 vnode 命中缓存,则直接返回缓存中的 vnode.componentInstance,接着又会执行 patch 过程,再次执行到 createComponent 方法。但这个时候 isReactivated 为 true,并且在执行 init 钩子函数的时候不会再执行组件的 mount 过程,这也就是被 <keep-alive> 包裹的组件在有缓存的时候就不会在执行组件的 created、mounted 等钩子函数的原因了。同时,变化的 dom 也会被更新至页面中。
最开始设置的 abstract 属性值为 true,代表 <keep-alive> 是一个抽象组件。vue 官方文档中说:<keep-alive> 是一个抽象组件:它自身不会渲染一个 DOM 元素,也不会出现在父组件链中。
export default {
  name: 'keep-alive',
  abstract: true,
  props: {
  ...
}
组件一旦被 <keep-alive> 缓存,那么再次渲染时就不会执行 created、mounted 等钩子函数。但是有些业务场景需要在被缓存的组件重新渲染时做一些事情,vue 则提供了 activated 和 deactivated 钩子函数。
vue 在初始化生命周期的时候,为组件实例建立父子关系时会根据 abstract 属性决定是否忽略某个组件,<keep-alive> 组件中设置了 abstract: true,vue 会跳过该组件实例。代码参考地址: lifecycle.js,具体代码如下:
export function initLifecycle (vm: Component) {
  const options = vm.$options

  // locate first non-abstract parent
  let parent = options.parent
  // 只有 abstract 不存在或为 false 时才会走生命周期中的逻辑
  if (parent && !options.abstract) {
    while (parent.$options.abstract && parent.$parent) {
      parent = parent.$parent
    }
    parent.$children.push(vm)
  }
  ...
}
上面介绍了 <keep-alive> 实现的具体原理,由于 <keep-alive> 中的缓存优化遵循 LRU 原则,所以我们也了解下缓存淘汰策略的相关介绍。
由于缓存空间是有限的,不能无限制的进行数据存储,当存储容量达到一个阀值时,就会造成内存溢出,因此在进行数据缓存时,就要根据情况对缓存进行优化,清除一些可能不会再用到的数据。根据缓存淘汰机制的不同,常用的有以下三种:
1.FIFO(fisrt-in-fisrt-out)- 先进先出策略。我们通过记录数据使用的时间,当缓存大小即将溢出时,优先清除离当前时间最远的数据。
2.LRU (least-recently-used)- 最近最少使用策略。以时间作为参考,如果数据最近被访问过,那么将来被访问的几率会更高,如果以一个数组去记录数据,当有一数据被访问时,该数据会被移动到数组的末尾,表明最近被使用过,当缓存溢出时,会删除数组的头部数据,即将最不频繁使用的数据移除。(keep-alive 采用的处理方式)
3.LFU (least-frequently-used)- 计数最少策略。以次数作为参考,用次数去标记数据使用频率,次数最少的会在缓存溢出时被淘汰。
对于我们平时业务场景中,作为提高性能最常用的方式-缓存,根据不同场景选择相应的缓存策略,也会大大提高系统的性能。
<keep-alive> 缓存组件。通过在 <keep-alive> 中包裹路由组件,实现在路由来回切换时,页面通过走缓存而提高性能。<!-- 在需要缓存的router-view组件上包裹keep-alive组件 -->
<keep-alive>
<router-view></router-view>
</keep-alive>
<keep-alive> 将多个类似组件进行缓存,来提高性能。<!-- 多个组件之间的来回切换,使用 keep-alive 组件进行包裹缓存 -->
<keep-alive>
<component :is="view"></component>
</keep-alive>
本文首先简单介绍了 <keep-alive> 的概念和用法。
其次从 <keep-alive> 的渲染开始,到组件内部 mounted、render 函数的缓存核心逻辑的解读,再到与普通组件生命周期的区别对比,再通过对 <keep-alive> 缓存策略的解读延伸到目前常见的缓存策略,使我们更深入的了解 keep-alive 组件,同时更合理的应用到对应的业务场景中。
<keep-alive> 组件是抽象组件,在对应父子关系时会跳过抽象组件,它只对包裹的子组件做处理。Vue 内部将 DOM 节点抽象为一个个的 VNode 节点,<keep-alive> 组件的缓存也是基于 VNode 节点而不是直接存储 DOM 结构。
根据 LRU 策略缓存组件 VNode,最后在 render 时返回子组件的 VNode。缓存渲染过程会更新 <keep-alive> 插槽,重新再 render 一次,从缓存中读取之前的组件 VNode 实现状态缓存。它将满足条件( include 与 exclude )的组件在 cache 对象中缓存起来,在需要重新渲染的时候再将 vnode 节点从 cache 对象中取出并渲染。
了解了 <keep-alive> 的实现原理,我们也应该注意到,<keep-alive> 虽然可以通过缓存的方式提高页面加载性能,但这也是建立在消耗内存的基础上,当缓存数量达到一定量时,效果也可能适得其反,所以对于 keep-alive 的使用,也是要注意使用时机和方式的。
最后我们又简单介绍了下缓存策略,以及 <keep-alive> 在真实项目中的应用场景。至此,<keep-alive> 的介绍就告一段落了。
keep-alive 官方文档:https://v2.cn.vuejs.org/v2/api/?#keep-alive
github vue代码:https://github.com/vuejs/vue/tree/v2.6.14
keep-alive:https://ustbhuangyi.github.io/vue-analysis/v2/extend/keep-alive.html#%E7%94%9F%E5%91%BD%E5%91%A8%E6%9C%9F
记一次 keep-alive 缓存及其缓存优化原理:https://segmentfault.com/a/1190000022252873?utm_source=tag-newest
此内容由惯性聚合(RSS阅读器)自动聚合整理,仅供阅读参考。 原文来自 — 版权归原作者所有。