一、安装编译工具及库文件
yum -y install make zlib zlib-devel gcc-c++ libtool openssl openssl-devel
二、首先要安装 PCRE
PCRE 作用是让 Nginx 支持 Rewrite 功能。
1、下载 PCRE 安装包
下载地址: http://downloads.sourceforge.net/project/pcre/pcre/8.35/pcre-8.35.tar.gz

如果没有wget , 则需要安装wget   yum -y install wget
wget http://downloads.sourceforge.net/project/pcre/pcre/8.35/pcre-8.35.tar.gz
2、解压安装包:
tar zxvf pcre-8.35.tar.gz
3、进入安装包目录
4、编译安装
 ./configure

make && make install
5、查看pcre版本
第一步,在/etc/yum.repos.d/目录下创建一个源配置文件nginx.repo:
cd /etc/yum.repos.d/
vim nginx.repo 直接用vim编写文件 会自己创建
填写如下内容:

[nginx]

name=nginx repo

baseurl=http://nginx.org/packages/centos/7/$basearch/

gpgcheck=0

enabled=1
保存,则会产生一个/etc/yum.repos.d/nginx.repo文件。
下面直接执行如下指令即可自动安装好Nginx:
yum install nginx -ysystemctl start nginx //记得启动nginx

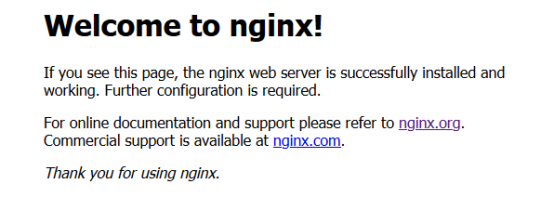
现在Nginx已经启动了,直接访问服务器就能看到Nginx欢迎页面了的。
nginx.conf文件结构
...              #全局块

events {         #events块
   ...}

http      #http块{
    ...   #http全局块
    server        #server块
    {
        ...       #server全局块
        location [PATTERN]   #location块
        {
            ...
        }
        location [PATTERN]
        {
            ...
        }
    }
    server
    {
      ...
    }
    ...     #http全局块}
1、全局块:配置影响nginx全局的指令。一般有运行nginx服务器的用户组,nginx进程pid存放路径,日志存放路径,配置文件引入,允许生成worker process数等。
2、events块:配置影响nginx服务器或与用户的网络连接。有每个进程的最大连接数,选取哪种事件驱动模型处理连接请求,是否允许同时接受多个网路连接,开启多个网络连接序列化等。
3、http块:可以嵌套多个server,配置代理,缓存,日志定义等绝大多数功能和第三方模块的配置。如文件引入,mime-type定义,日志自定义,是否使用sendfile传输文件,连接超时时间,单连接请求数等。
4、server块:配置虚拟主机的相关参数,一个http中可以有多个server。
5、location块:配置请求的路由,以及各种页面的处理情况。
进入配置文件
[root@localhost ~]# vi /etc/nginx/nginx.conf
      2 user  nginx;
      3 worker_processes  1;
      4
      5 error_log  /var/log/nginx/error.log warn;
      6 pid        /var/run/nginx.pid;
      7
      8
      9 events {
     10     worker_connections  1024;
     11 }
     12
     13
     14 http {
     15     include       /etc/nginx/mime.types;
     16     default_type  application/octet-stream;
     17
     18     log_format  main  '$remote_addr - $remote_user [$time_local] "$request" '
     19                       '$status $body_bytes_sent "$http_referer" '
     20                       '"$http_user_agent" "$http_x_forwarded_for"';
     21
     22     access_log  /var/log/nginx/access.log  main;
     23
     24     sendfile        on;
     25     #tcp_nopush     on;
     26
     27     keepalive_timeout  65;
     28
     29     #gzip  on;
     30      server {
     31          listen 80;
     32          server_name 192.168.65.10;   //改成自己的IP
     33          location / {
     34          root /home/web/html;         //自身加载的目录
     35          index choose.html;     //显示的主页 , 且每个指令都必须要有  ;  结束
     36 }
     37 }
     38     include /etc/nginx/conf.d/*.conf;
修改好配置文件之后,可以使用nginx -t 校验文件是否语法合法。然后重启!

1) nginx -t :测试配置文件是否有语法错误
2) nginx -s reopen:重启Nginx
3) nginx -s reload:重新加载Nginx配置文件,然后以优雅的方式重启Nginx
4) nginx -s stop:强制停止Nginx服务
5) nginx -s quit:优雅地停止Nginx服务(即处理完所有请求后再停止服务)
注如果出现403则要以下操作:
[root@localhost ~]# cat /etc/selinux/config

# This file controls the state of SELinux on the system.
# SELINUX= can take one of these three values:
#     enforcing - SELinux security policy is enforced.
#     permissive - SELinux prints warnings instead of enforcing.
#     disabled - No SELinux policy is loaded.
SELINUX=disabled     //关闭selinux重新启动系统    然后查看nginx的状态,如果关闭则重新启动nginx 即systemctl start nginx,并重新加载配置文件,即nginx -s reload
# SELINUXTYPE= can take one of three values:
#     targeted - Targeted processes are protected,
#     minimum - Modification of targeted policy. Only selected processes are protected.
#     mls - Multi Level Security protection.
SELINUXTYPE=targeted
在浏览器的地址栏上打上配置文件的IP进入首页

此内容由惯性聚合(RSS阅读器)自动聚合整理,仅供阅读参考。 原文来自 — 版权归原作者所有。