



VKProxy 是使用c#开发的基于 Kestrel 实现 L4/L7的代理
经过6个月业余时间偶尔缝缝补补,已经达到能跑的地步了 (感兴趣的同学烦请点个github小赞赞呢)
相关使用写了一些简单的文档说明
这里列举一下新增的安装使用方式
提供简单的命令行工具,可以在本地进行相关测试
dotnet tool install --global VKProxy.Cli
不过目前只支持 net9.0 (net10 正式发布后会切换制net10)
安装后可以使用如下命令
vkproxy -h
// it will output
--config (-c)       json file config, like /xx/app.json
--socks5            use simple socks5 support
--etcd              etcd address, like http://127.0.0.1:2379
--etcd-prefix       default is /ReverseProxy/
--etcd-delay        delay change config when etcd change, default is 00:00:01
--help (-h)         show all options
View more at https://fs7744.github.io/VKProxy.Doc/docs/introduction.html
配置项很多,可参考后续具体配置项说明
这里举个例子
创建json文件
{
  "ReverseProxy": {
    "Listen": {
      "http": {
        "Protocols": [
          "Http1"
        ],
        "Address": [
          "127.0.0.1:5001"
        ]
      }
    },
    "Routes": {
      "HTTPTEST": {
        "Match": {
          "Hosts": [
            "*com"
          ],
          "Paths": [
            "/ws*"
          ],
          "Statement": "Method = 'GET'"
        },
        "ClusterId": "apidemo",
        "Timeout": "00:10:11"
      }
    },
    "Clusters": {
      "apidemo": {
        "LoadBalancingPolicy": "RoundRobin",
        "HealthCheck": {
          "Active": {
            "Enable": true,
            "Policy": "Http",
            "Path": "/test",
            "Query": "?a=d",
            "Method": "post"
          }
        },
        "Destinations": [
          {
            "Address": "http://127.0.0.1:1104"
          },
          {
            "Address": "https://google.com"
          }
        ]
      }
    }
  }
}
然后启动
vkproxy -c D:\code\test\proxy\config.json

// 启动后会看到类似如下的内容
info: VKProxy.Server.ReverseProxy[3]
      Listening on: [Key: http,Protocols: HTTP1,EndPoint: 127.0.0.1:5001]
info: Microsoft.Hosting.Lifetime[0]
      Application started. Press Ctrl+C to shut down.
info: Microsoft.Hosting.Lifetime[0]
      Hosting environment: Production
info: Microsoft.Hosting.Lifetime[0]
      Content root path: D:\code\test\proxy
warn: VKProxy.Server.ReverseProxy[5]
      Active health failed, can not connect socket 127.0.0.1:1104 No connection could be made because the target machine actively refused it. (127.0.0.1:1104).
在多实例的情况,同一份配置分发就比较麻烦, 这里提供 ui 可以配置etcd + agent 从etcd读取配置 方便大家使用
ui使用可以参考 UI配置站点
用tool 启动 agent 可以这样使用
vkproxy --etcd http://127.0.0.1:2379 --etcd-prefix /ReverseProxy/

// 启动后会看到类似如下的内容
info: VKProxy.Server.ReverseProxy[3]
      Listening on: [Key: http,Protocols: HTTP1,EndPoint: 127.0.0.1:5001]
info: Microsoft.Hosting.Lifetime[0]
      Application started. Press Ctrl+C to shut down.
info: Microsoft.Hosting.Lifetime[0]
      Hosting environment: Production
info: Microsoft.Hosting.Lifetime[0]
      Content root path: D:\code\test\proxy
warn: VKProxy.Server.ReverseProxy[5]
      Active health failed, can not connect socket 127.0.0.1:1104 No connection could be made because the target machine actively refused it. (127.0.0.1:1104).
当大家基本代理功能足够时,简化大家使用成本/快速构建的默认已构建镜像
所有的镜像可以在 docker hub vkproxy agent 找到
提供如下环境变量
VKPROXY_CONFIG
json file config, like /xx/app.json
example VKPROXY_CONFIG=/xx/app.json
VKPROXY_SOCKS5
use simple socks5 support
example VKPROXY_SOCKS5=true
ETCD_CONNECTION_STRING
etcd address, like http://127.0.0.1:2379
example ETCD_CONNECTION_STRING=http://127.0.0.1:2379
ETCD_PREFIX
default is /ReverseProxy/
example ETCD_PREFIX=/ReverseProxy/
ETCD_DELAY
delay change config when etcd change, default is 00:00:01
example ETCD_DELAY=00:00:01
配置项很多,可参考后续具体配置项说明
这里举个例子
创建json文件
{
  "ReverseProxy": {
    "Listen": {
      "http": {
        "Protocols": [
          "Http1"
        ],
        "Address": [
          "127.0.0.1:5001"
        ]
      }
    },
    "Routes": {
      "HTTPTEST": {
        "Match": {
          "Hosts": [
            "*com"
          ],
          "Paths": [
            "/ws*"
          ],
          "Statement": "Method = 'GET'"
        },
        "ClusterId": "apidemo",
        "Timeout": "00:10:11"
      }
    },
    "Clusters": {
      "apidemo": {
        "LoadBalancingPolicy": "RoundRobin",
        "HealthCheck": {
          "Active": {
            "Enable": true,
            "Policy": "Http",
            "Path": "/test",
            "Query": "?a=d",
            "Method": "post"
          }
        },
        "Destinations": [
          {
            "Address": "http://127.0.0.1:1104"
          },
          {
            "Address": "https://google.com"
          }
        ]
      }
    }
  }
}
然后启动
docker run --rm -v /mnt/d/code/test/proxy:/config -e VKPROXY_CONFIG=/config/config
.json -e ETCD_CONNECTION_STRING= --network host a.newegg.org/docker-hub-remote/vkproxy/agent:0.0.0.6

// 启动后会看到类似如下的内容
info: VKProxy.Server.ReverseProxy[3]
      Listening on: [Key: http,Protocols: HTTP1,EndPoint: 127.0.0.1:5001]
info: Microsoft.Hosting.Lifetime[0]
      Application started. Press Ctrl+C to shut down.
info: Microsoft.Hosting.Lifetime[0]
      Hosting environment: Production
info: Microsoft.Hosting.Lifetime[0]
      Content root path: /app
warn: VKProxy.Server.ReverseProxy[5]
      Active health failed, can not connect socket [2404:6800:4012:7::200e]:443 Network is unreachable ([2404:6800:4012:7::200e]:443).
warn: VKProxy.Server.ReverseProxy[5]
      Active health failed, can not connect socket 127.0.0.1:1104 Connection refused (127.0.0.1:1104).
在多实例的情况,同一份配置分发就比较麻烦, 这里提供 ui 可以配置etcd + agent 从etcd读取配置 方便大家使用
ui使用可以参考 UI配置站点
用 docker 启动 agent 可以这样使用
docker run --rm -e ETCD_CONNECTION_STRING=http://127.0.0.1:2379 --network host vkproxy/agent:0.0.0.6

// 启动后会看到类似如下的内容
info: VKProxy.Server.ReverseProxy[3]
      Listening on: [Key: http,Protocols: HTTP1,EndPoint: 127.0.0.1:5001]
info: Microsoft.Hosting.Lifetime[0]
      Application started. Press Ctrl+C to shut down.
info: Microsoft.Hosting.Lifetime[0]
      Hosting environment: Production
info: Microsoft.Hosting.Lifetime[0]
      Content root path: D:\code\test\proxy
warn: VKProxy.Server.ReverseProxy[5]
      Active health failed, can not connect socket 127.0.0.1:1104 No connection could be made because the target machine actively refused it. (127.0.0.1:1104).
由于文件配置存在一定使用难度,所以也有提供简单的 ui配置站点VKProxy.Web
[!WARNING]
由于文件分发会导致大家部署多实例的难度,所以 ui 站点目前只支持 etcd 作为配置源, 同时服务器参数相关无法通过ui站点配置, 请使用文件会程序配置 参见服务器参数
首先启动一个 etcd (可参考 Run etcd clusters inside containers)
export NODE1=127.0.0.1

ETCD_VERSION=v3.4.37
REGISTRY=quay.io/coreos/etcd
# available from v3.2.5
REGISTRY=gcr.io/etcd-development/etcd

docker run \
  -p 2379:2379 \
  -p 2380:2380 \
  --volume=${DATA_DIR}:/etcd-data \
  --name etcd ${REGISTRY}:${ETCD_VERSION} \
  /usr/local/bin/etcd \
  --data-dir=/etcd-data --name node1 \
  --initial-advertise-peer-urls http://${NODE1}:2380 --listen-peer-urls http://0.0.0.0:2380 \
  --advertise-client-urls http://${NODE1}:2379 --listen-client-urls http://0.0.0.0:2379 \
  --initial-cluster node1=http://${NODE1}:2380
VKProxy agent 启动参考 安装
UI 所有的镜像可以在 docker hub vkproxy ui 找到
UI docker 部署
参数可以使用如下
ETCD_CONNECTION_STRING
etcd address, like http://127.0.0.1:2379
example ETCD_CONNECTION_STRING=http://127.0.0.1:2379
ETCD_PREFIX
default is /ReverseProxy/
example ETCD_PREFIX=/ReverseProxy/
ASPNETCORE_URLS
example ASPNETCORE_URLS=http://*:80
举例:
docker run --rm -e ETCD_CONNECTION_STRING=http://127.0.0.1:2379 -e ASPNETCORE_URLS=http://*:8770 --network host vkproxy/ui:0.0.0.7

// 启动后会看到类似输出
warn: Microsoft.AspNetCore.Hosting.Diagnostics[15]
      Overriding HTTP_PORTS '8080' and HTTPS_PORTS ''. Binding to values defined by URLS instead 'http://*:8770'.
info: Microsoft.Hosting.Lifetime[14]
      Now listening on: http://[::]:8770
info: Microsoft.Hosting.Lifetime[0]
      Application started. Press Ctrl+C to shut down.
info: Microsoft.Hosting.Lifetime[0]
      Hosting environment: Production
info: Microsoft.Hosting.Lifetime[0]
      Content root path: /app
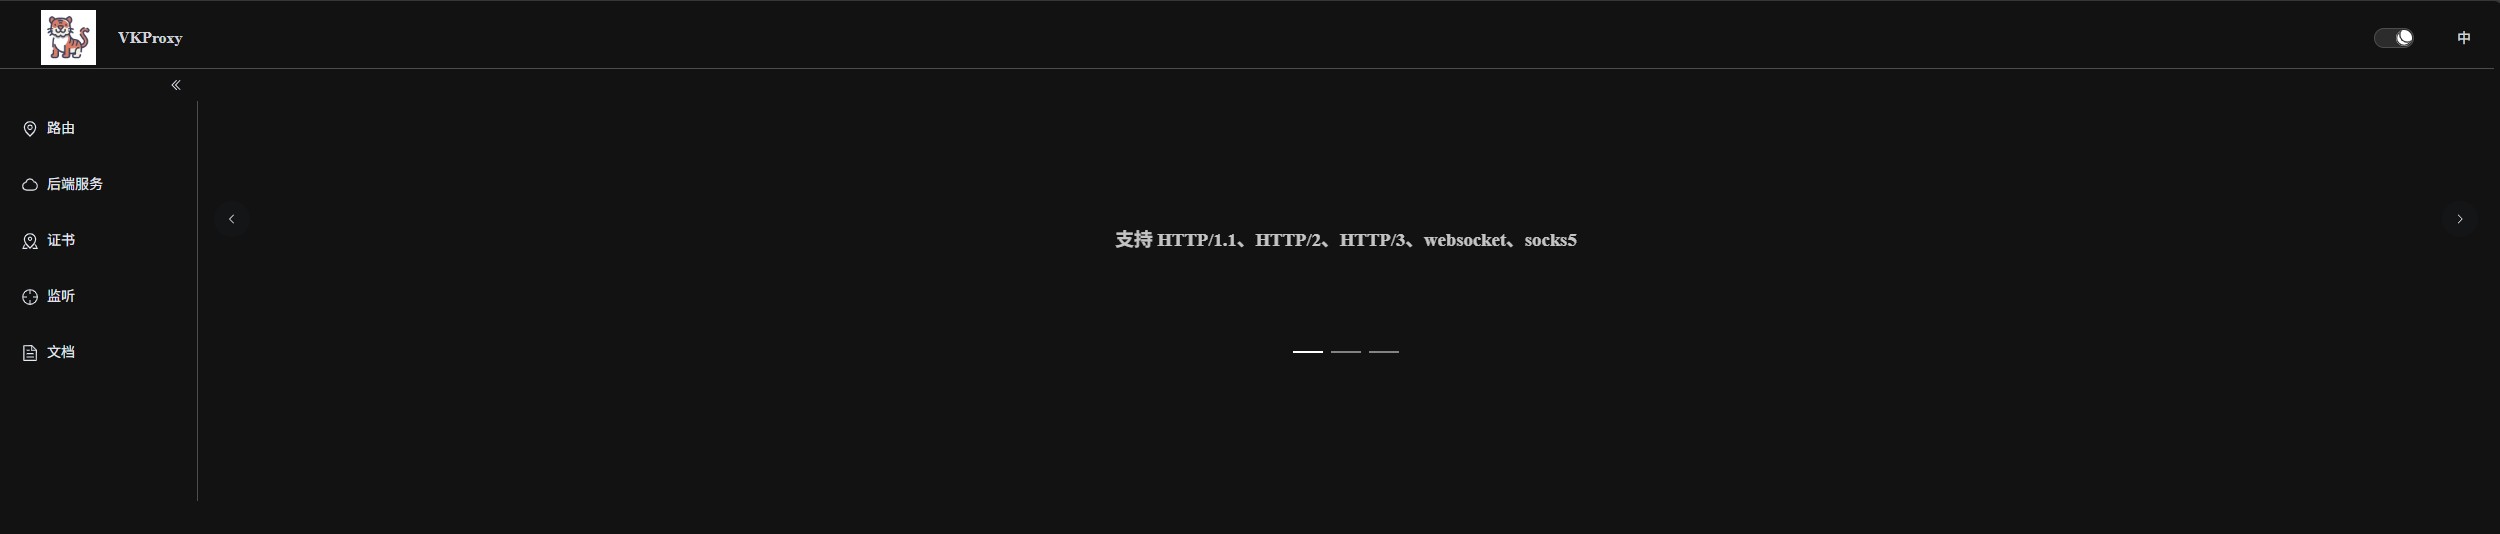
然后你就可以在浏览器 访问 http://127.0.0.1:8770 使用 UI 了
为了方便大家使用 KVProxy 在一些场景,默认功能无法满足时,可以通过自定义扩展实现自己的需求。
同时也是遵照 asp.net core 设计理念,提供了两种扩展方式
中间件是一种装配到应用管道以处理请求和响应的软件。 每个组件:
请求委托用于生成请求管道。 请求委托处理每个 HTTP/tcp/udp 请求。
具体概念可参考ASP.NET Core 中间件

KVProxy 添加了 udp 和 tcp 的特殊中间件
具体参见如何通过中间件定制化功能
还有一个socks5的示例以供大家参考如何利用中间件扩展实现socks5
有些特定功能策略比较难以直接使用中间件扩展,这里列举主要部分
(其实由于基于依赖注入,天生解耦,所以内部实现基本都可以覆盖或者添加新实现)
除了两大扩展方式之外,还有一个接口数据在运行时有表明当前路由匹配情况
public interface IReverseProxyFeature  // http 路由会使用该接口
{
    public RouteConfig Route { get; set; } // 匹配上的路由,如为 null 则未匹配任何路由
    public DestinationState? SelectedDestination { get; set; } // 在选中健康的目标地址后,对应配置会设置在这里
}

public interface IL4ReverseProxyFeature : IReverseProxyFeature // tcp / udp 路由会使用该接口
{
    public bool IsDone { get; set; }  // 表明是否已经处理,当为 true 时,KVProxy 内置L4代理将不会进行代理
    public bool IsSni { get; set; }   // 表明是否为 tcp sni 代理模式
    public SniConfig? SelectedSni { get; set; }  // 为 tcp sni 代理模式时的配置
}
运行时可通过 feature 获取, 比如
// http
internal class EchoHttpMiddleware : IMiddleware
{
    public async Task InvokeAsync(HttpContext context, RequestDelegate next)
    {
        var f = context.Features.Get<IReverseProxyFeature>();
    }
}

//tcp
internal class EchoTcpProxyMiddleware : ITcpProxyMiddleware
{
    public Task InitAsync(ConnectionContext context, CancellationToken token, TcpDelegate next)
    {
        var f = context.Features.Get<IL4ReverseProxyFeature>();
    }

    public Task<ReadOnlyMemory<byte>> OnRequestAsync(ConnectionContext context, ReadOnlyMemory<byte> source, CancellationToken token, TcpProxyDelegate next)
    {
        var f = context.Features.Get<IL4ReverseProxyFeature>();
    }

    public Task<ReadOnlyMemory<byte>> OnResponseAsync(ConnectionContext context, ReadOnlyMemory<byte> source, CancellationToken token, TcpProxyDelegate next)
    {
        logger.LogInformation($"tcp {DateTime.Now} {context.Features.Get<IL4ReverseProxyFeature>()?.SelectedDestination?.EndPoint.ToString()} reponse size: {source.Length}");
    }
}

//udp
internal class EchoUdpProxyMiddleware : IUdpProxyMiddleware
{
    public Task InitAsync(UdpConnectionContext context, CancellationToken token, UdpDelegate next)
    {
        var f = context.Features.Get<IL4ReverseProxyFeature>();
    }

    public Task<ReadOnlyMemory<byte>> OnRequestAsync(UdpConnectionContext context, ReadOnlyMemory<byte> source, CancellationToken token, UdpProxyDelegate next)
    {
        var f = context.Features.Get<IL4ReverseProxyFeature>();
    }

    public Task<ReadOnlyMemory<byte>> OnResponseAsync(UdpConnectionContext context, ReadOnlyMemory<byte> source, CancellationToken token, UdpProxyDelegate next)
    {
        logger.LogInformation($"udp {DateTime.Now} {context.Features.Get<IL4ReverseProxyFeature>()?.SelectedDestination?.EndPoint.ToString()} reponse size: {source.Length}");
    }
}
不建议大家直接修改 IReverseProxyFeature 的值,可能会破坏路由
除了代理功能外,由于通过反射释放了Kestrel的能力,你也可以把 VKProxy 当成可扩展套接字应用程序框架使用
使用它轻松构建始终连接的套接字应用程序,而无需考虑如何使用套接字,如何维护套接字连接以及套接字如何工作。
(在Kestrel基础上开发,理论可以帮大家节省一些比如直接socket要自己管理 socket之类的事情)
具体可以参考可扩展套接字应用程序框架
2025年后续大概就继续添加限流 追踪啊之类功能吧
此内容由惯性聚合(RSS阅读器)自动聚合整理,仅供阅读参考。 原文来自 — 版权归原作者所有。