








最近在导入某站数据(正经需求),看到他们的登录需要验证码,
本来并不想折腾的,然而Cookie有效期只有一天。

已经收到了几次夜间报警推送之后,实在忍不住。
得嘞,还是得研究下模拟登录。
于是,秃头了两个小时gang出来了。
如果都了解这些东西,这文章就不用看了,直接跳到参考文献咯。
代码地址:https://github.com/liguobao/python-verify-code-ocr
批量下载验证码图片
import shutil
import requests
from loguru import logger

for i in range(100):
    url = 'http://xxxx/create/validate/image'
    response = requests.get(url, stream=True)
    with open(f'./imgs/{i}.png', 'wb') as out_file:
        response.raw.decode_content = True
        shutil.copyfileobj(response.raw, out_file)
        logger.info(f"download {i}.png successfully.")
    del response
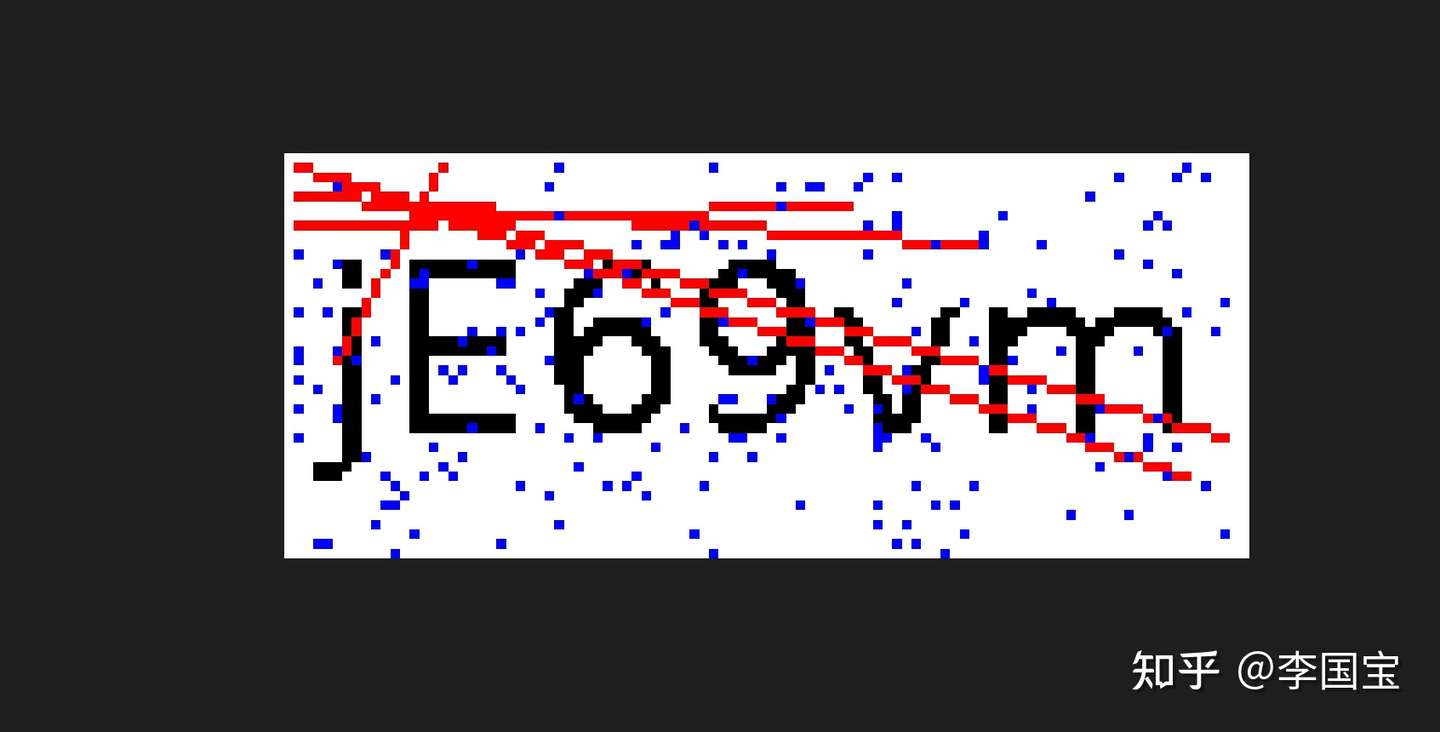
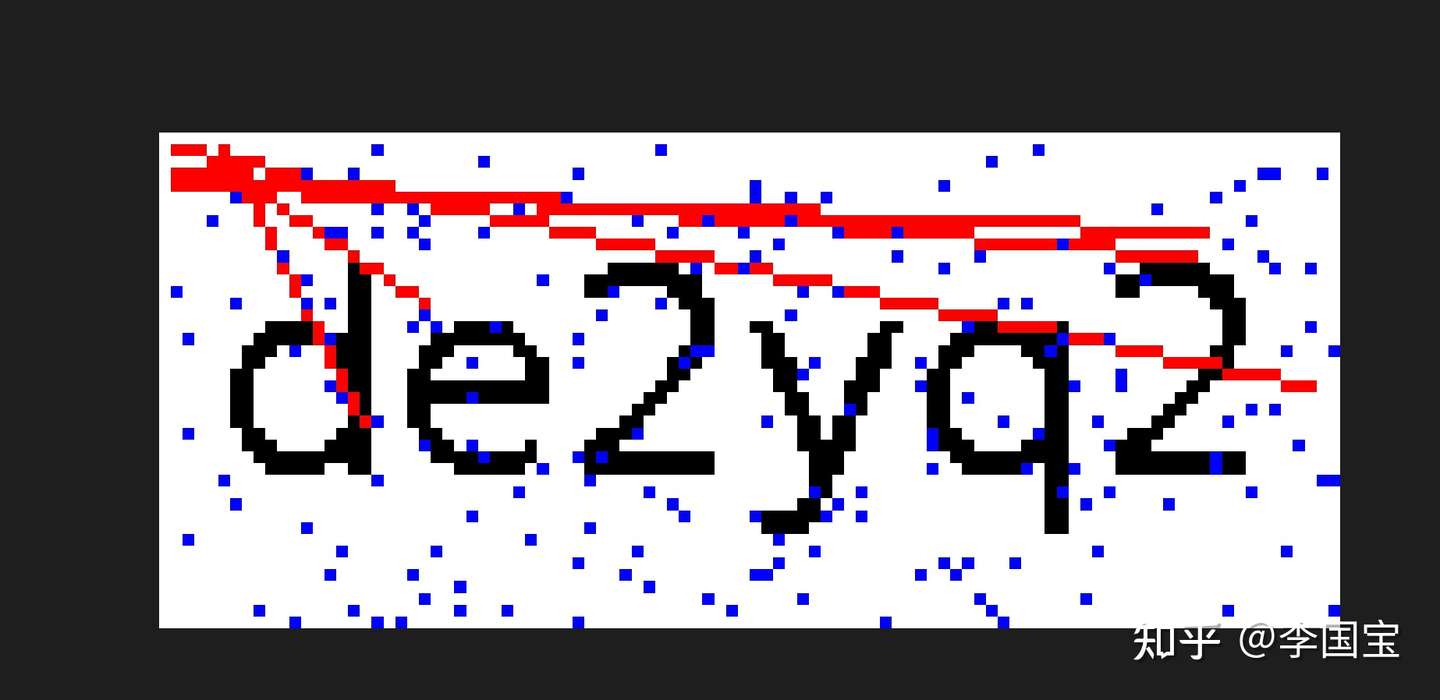
第一步,直接上识别代码看看效果。
from PIL import Image
import tesserocr
img = Image.open("./imgs/98.png")
img.show()
img_l = img.convert("L")# 灰阶图
img_l.show()
verify_code1 = tesserocr.image_to_text(img)
verify_code2 = tesserocr.image_to_text(img_l)
print(f"verify_code1:{verify_code1}")
print(f"verify_code2:{verify_code2}")
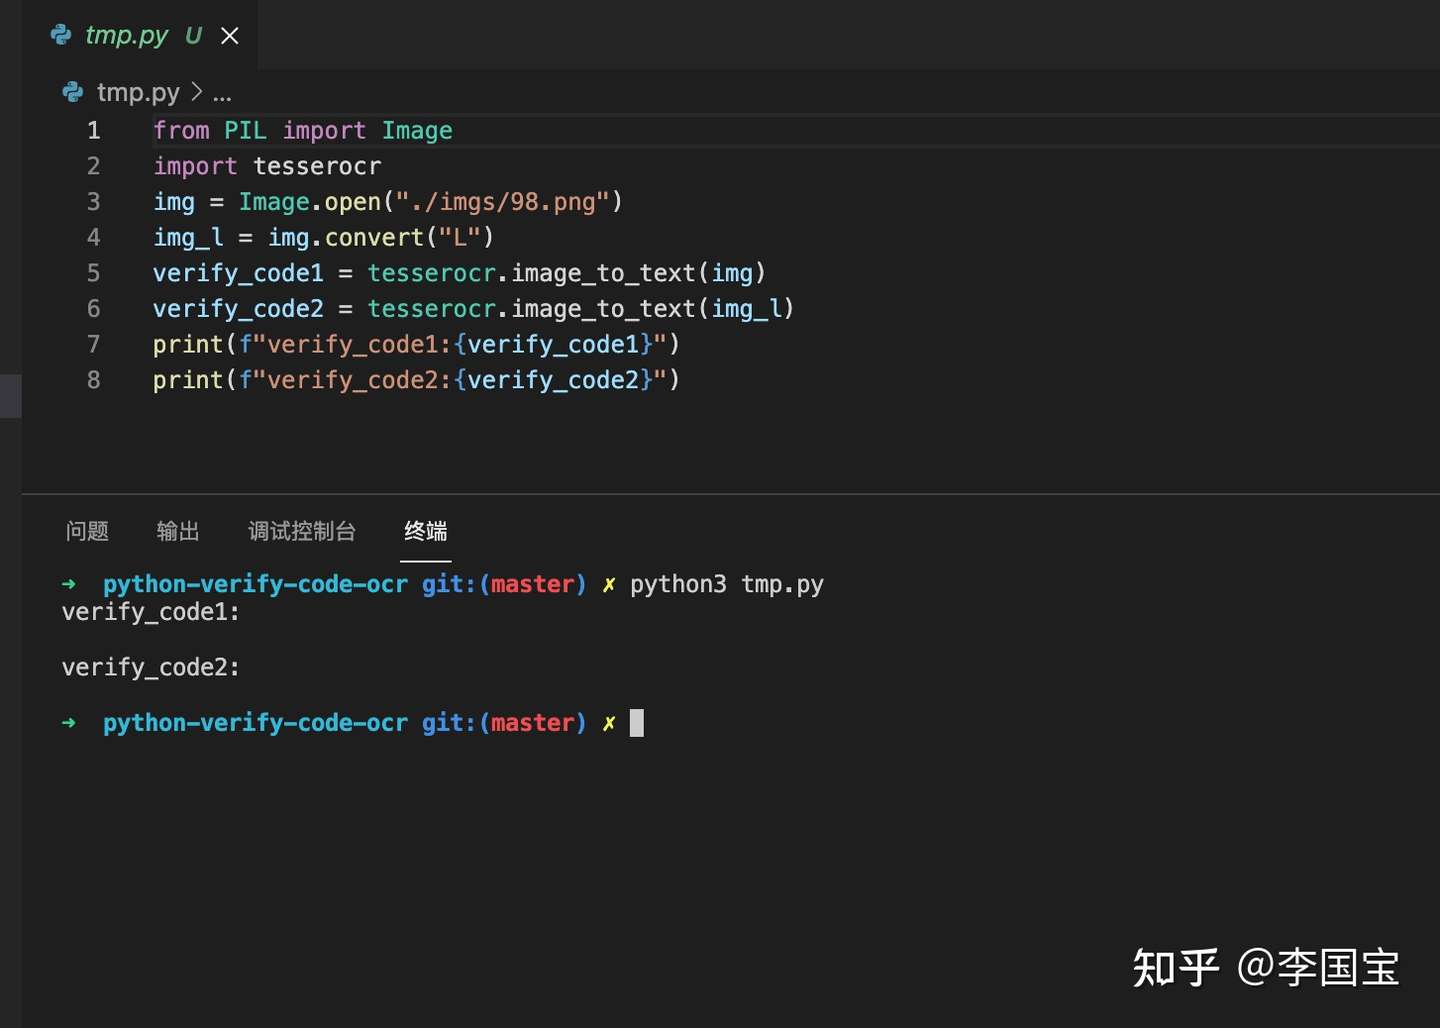
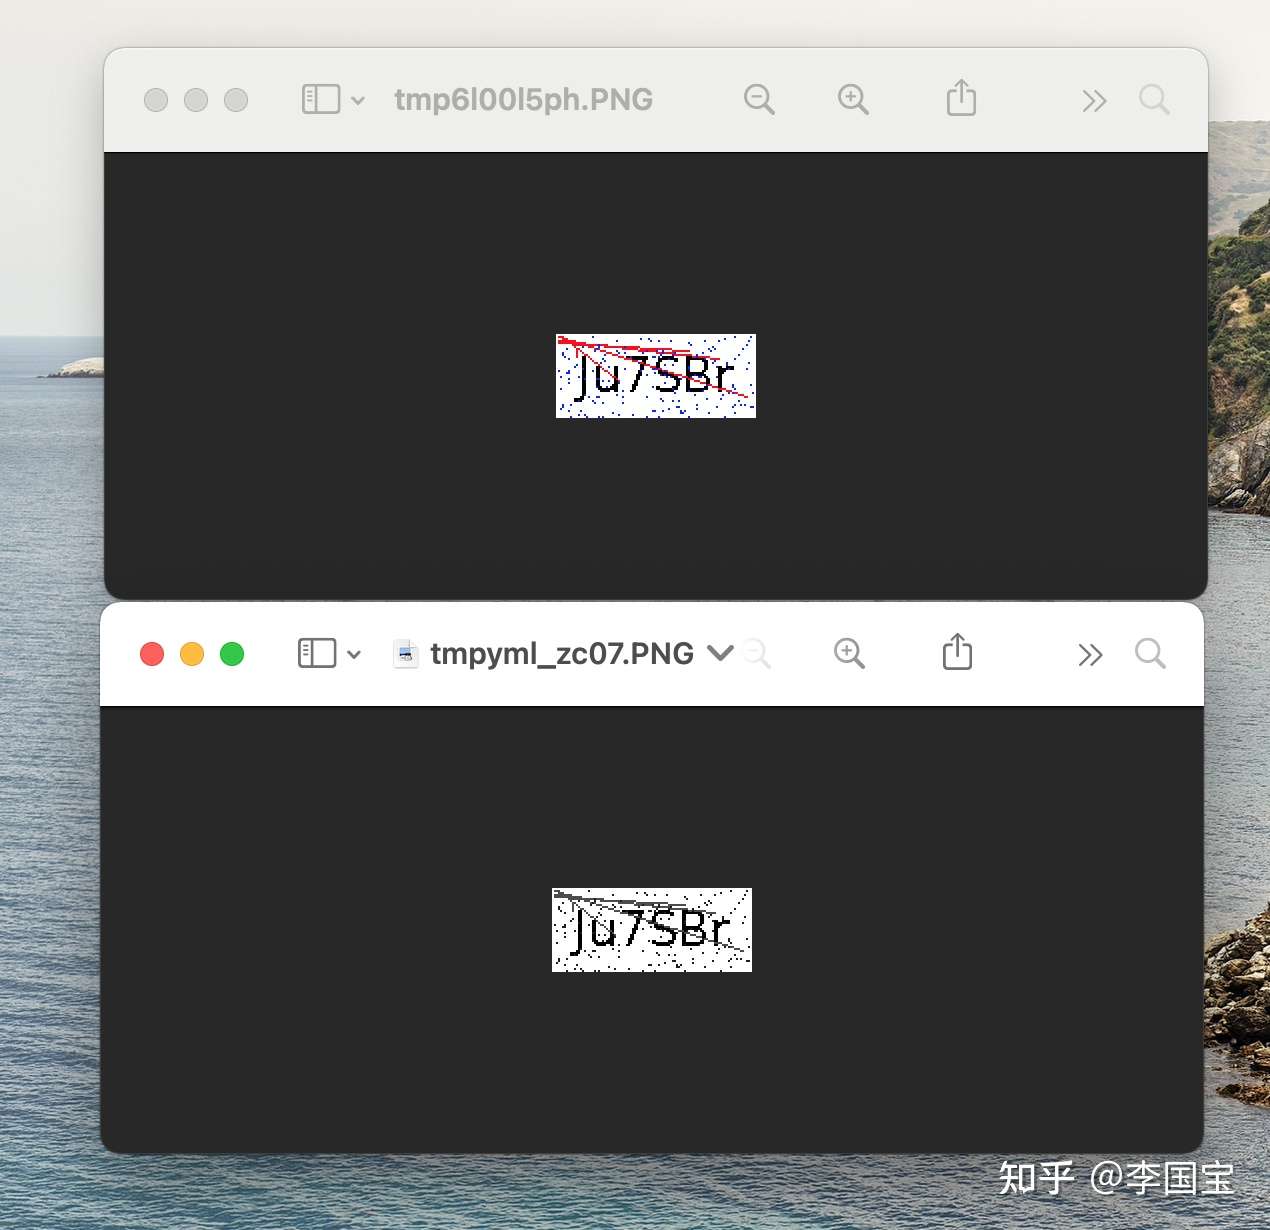
毫无疑问,无论是原图还是灰阶图,一无所有。
第一个找到有用的文章是这个,没记错的话几年前也看到过。
from PIL import Image
# https://www.cnblogs.com/jhao/p/10345853.html Python图片验证码降噪 — 8邻域降噪

def noise_remove_pil(image_name, k):
    """
    8邻域降噪
    Args:
        image_name: 图片文件命名
        k: 判断阈值
    Returns:
    """

    def calculate_noise_count(img_obj, w, h):
        """
        计算邻域非白色的个数
        Args:
            img_obj: img obj
            w: width
            h: height
        Returns:
            count (int)
        """
        count = 0
        width, height = img_obj.size
        for _w_ in [w - 1, w, w + 1]:
            for _h_ in [h - 1, h, h + 1]:
                if _w_ > width - 1:
                    continue
                if _h_ > height - 1:
                    continue
                if _w_ == w and _h_ == h:
                    continue
                if img_obj.getpixel((_w_, _h_)) < 230:  # 这里因为是灰度图像,设置小于230为非白色
                    count += 1
        return count

    img = Image.open(image_name)
    # 灰度
    gray_img = img.convert('L')

    w, h = gray_img.size
    for _w in range(w):
        for _h in range(h):
            if _w == 0 or _h == 0:
                gray_img.putpixel((_w, _h), 255)
                continue
            # 计算邻域非白色的个数
            pixel = gray_img.getpixel((_w, _h))
            if pixel == 255:
                continue

            if calculate_noise_count(gray_img, _w, _h) < k:
                gray_img.putpixel((_w, _h), 255)
    return gray_img


if __name__ == '__main__':
    image = noise_remove_pil("./imgs/1.png", 4)
    image.show()
跑起来看下效果。
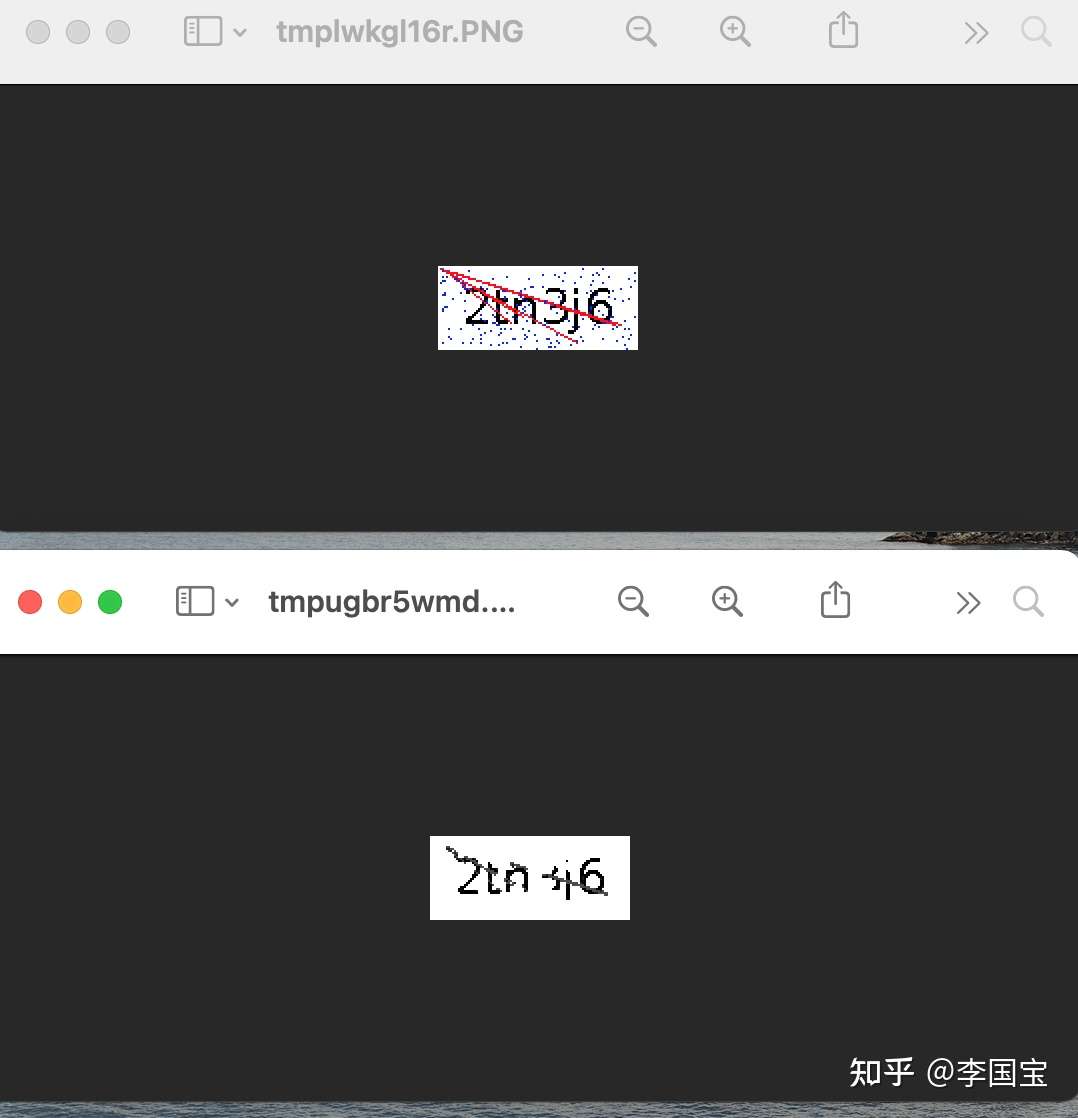
啧啧啧,很是可以。
不过扔过去识别...
依旧不太行。
研读了一下代码,有了思路。
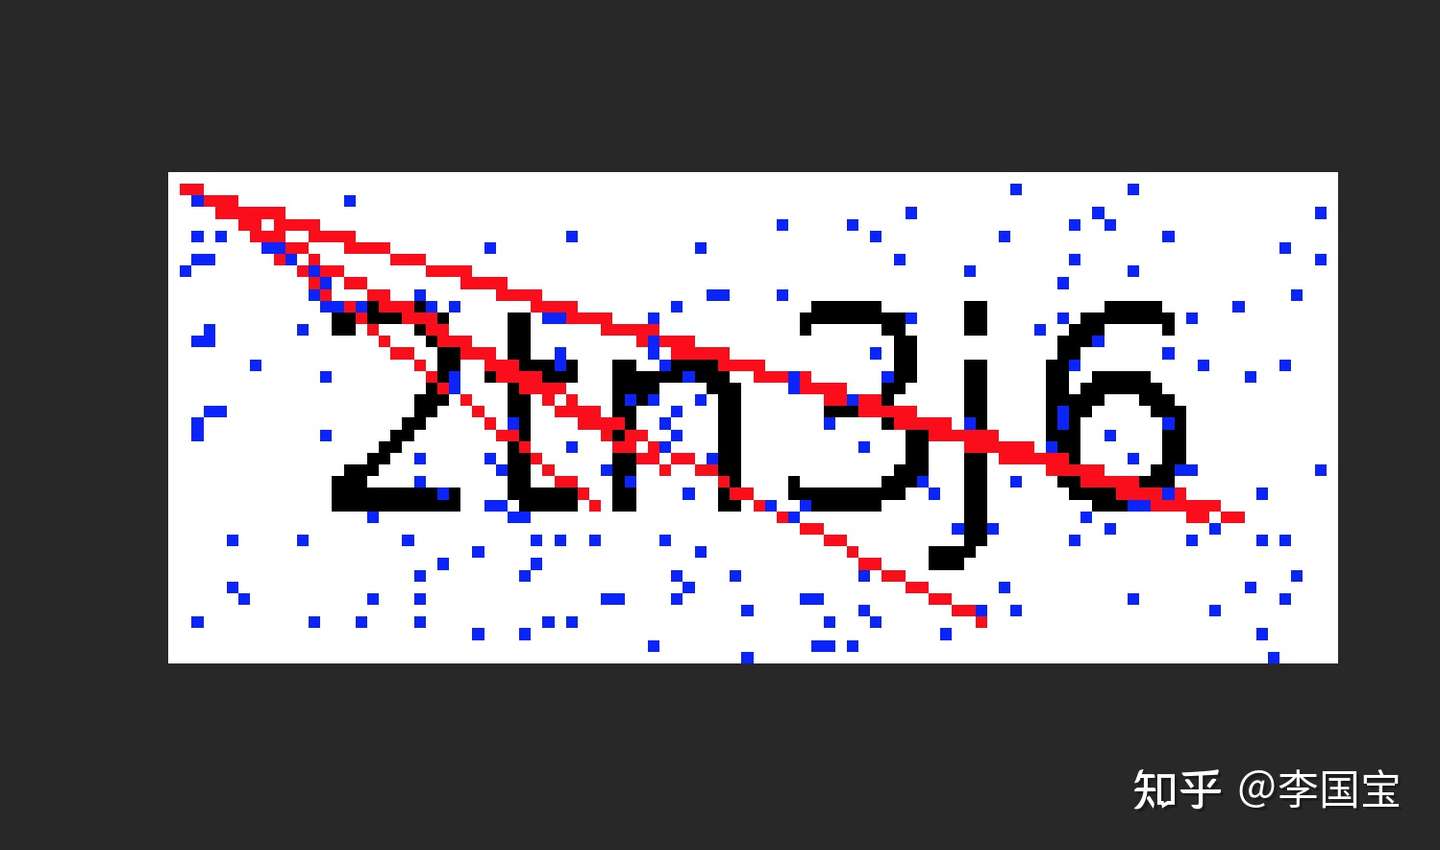
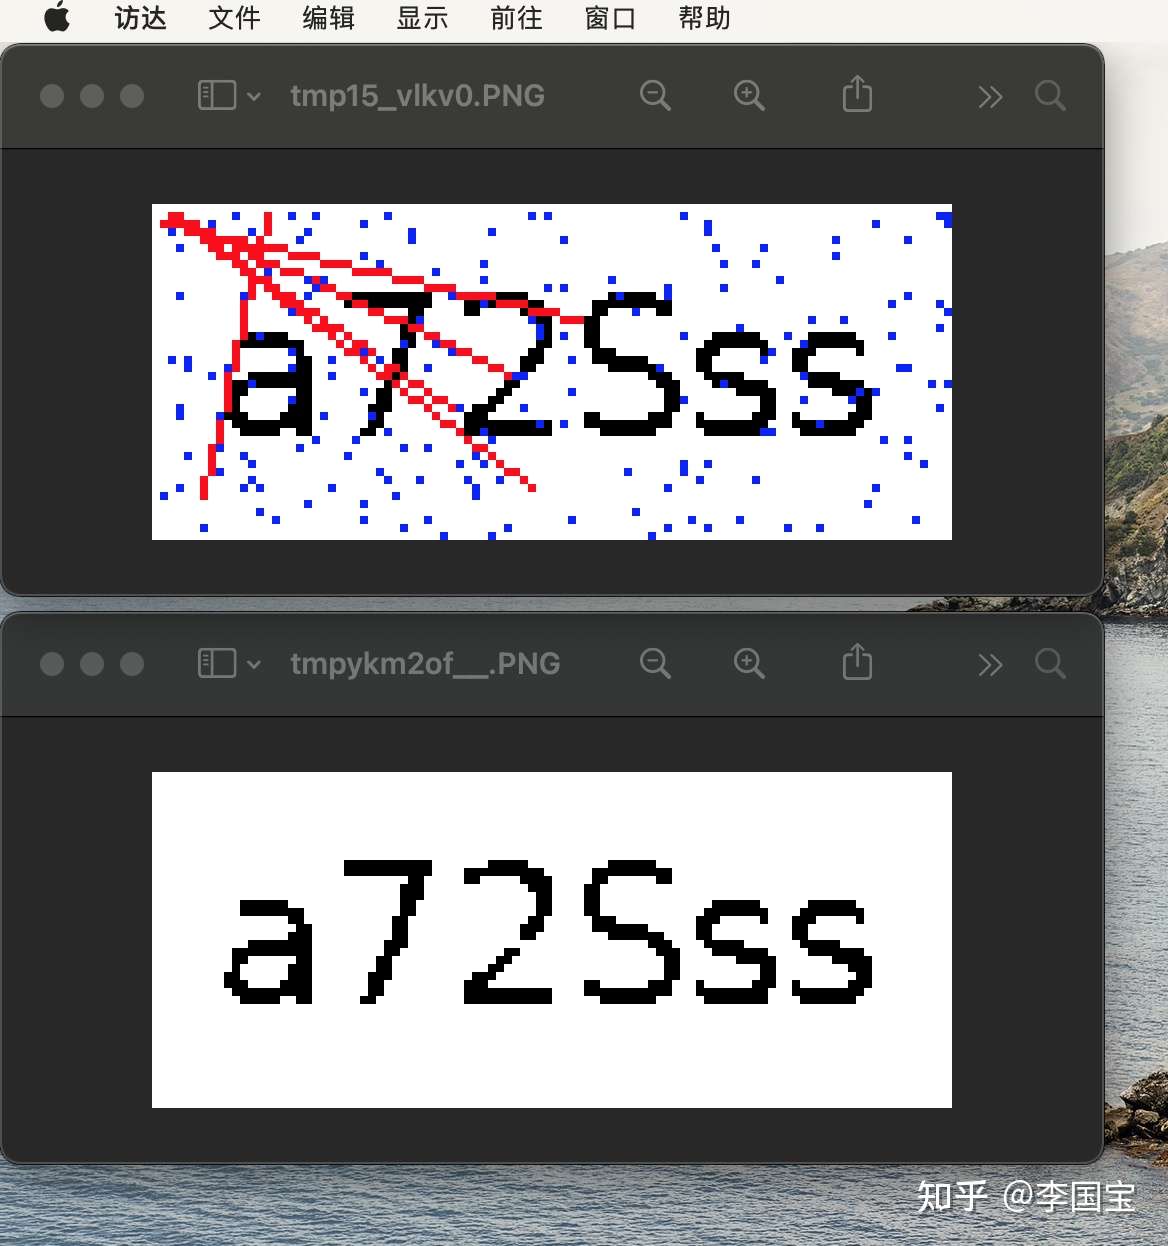
这边的干扰线是从某个点发出来的红色线条,
其实我只需要把红色的像素点都干掉,这个线条也会被去掉。
from PIL import Image
import tesserocr
img = Image.open("./imgs/98.png")
img.show()

# 尝试去掉红像素点
w, h = img.size
for _w in range(w):
    for _h in range(h):
        o_pixel = img.getpixel((_w, _h))
        if o_pixel == (255, 0, 0):
            img.putpixel((_w, _h), (255, 255, 255))
img.show()

img_l = img.convert("L")
# img_l.show()
verify_code1 = tesserocr.image_to_text(img)
verify_code2 = tesserocr.image_to_text(img_l)
print(f"verify_code1:{verify_code1}")
print(f"verify_code2:{verify_code2}")
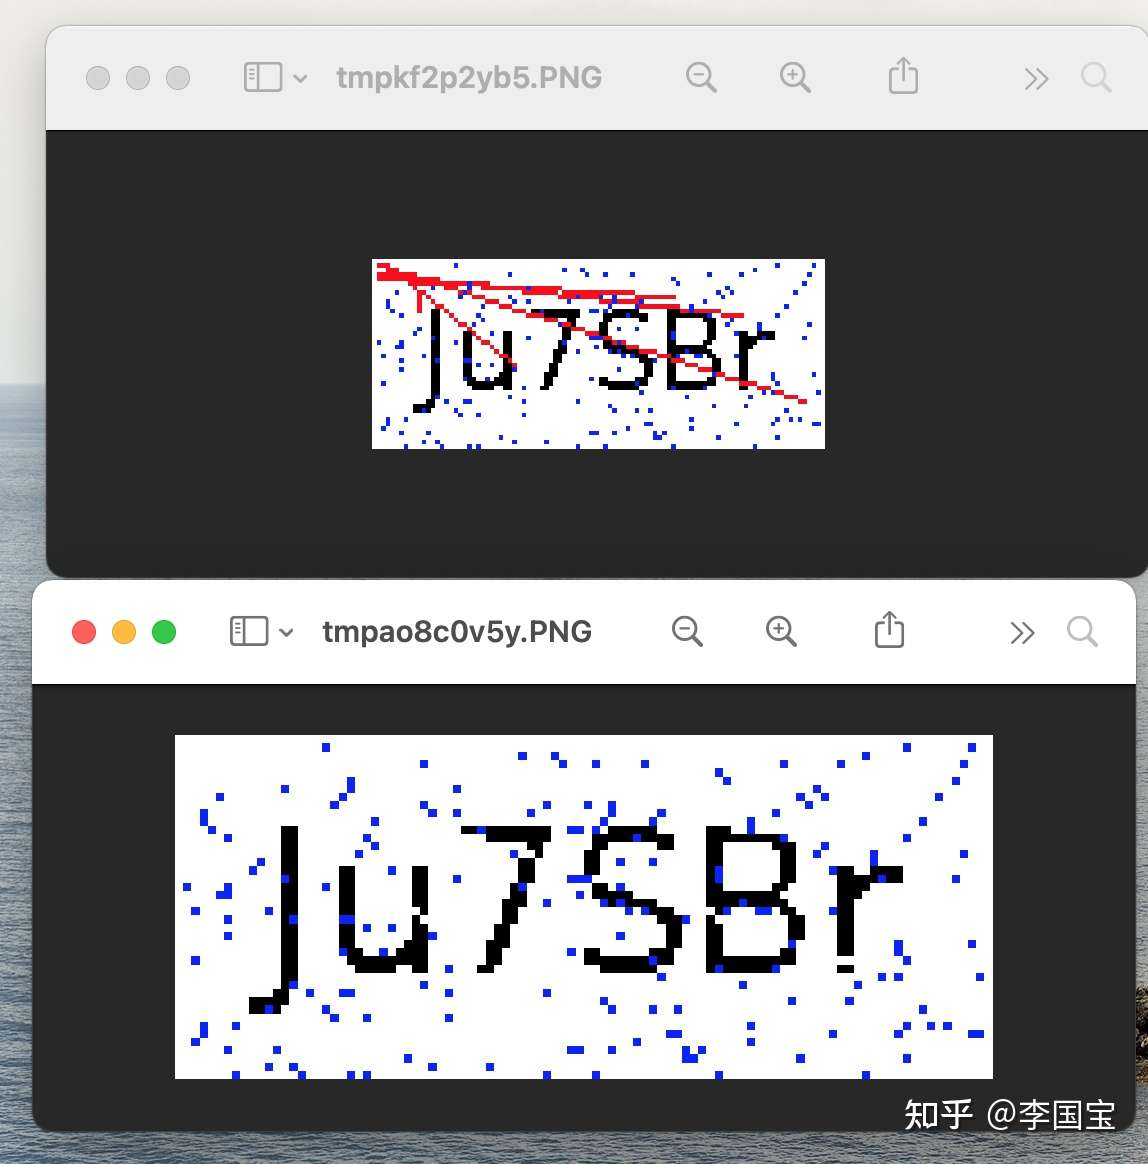
看起来OK,上面还有零星的蓝色像素掉,也可以用同样的方法一起去掉。
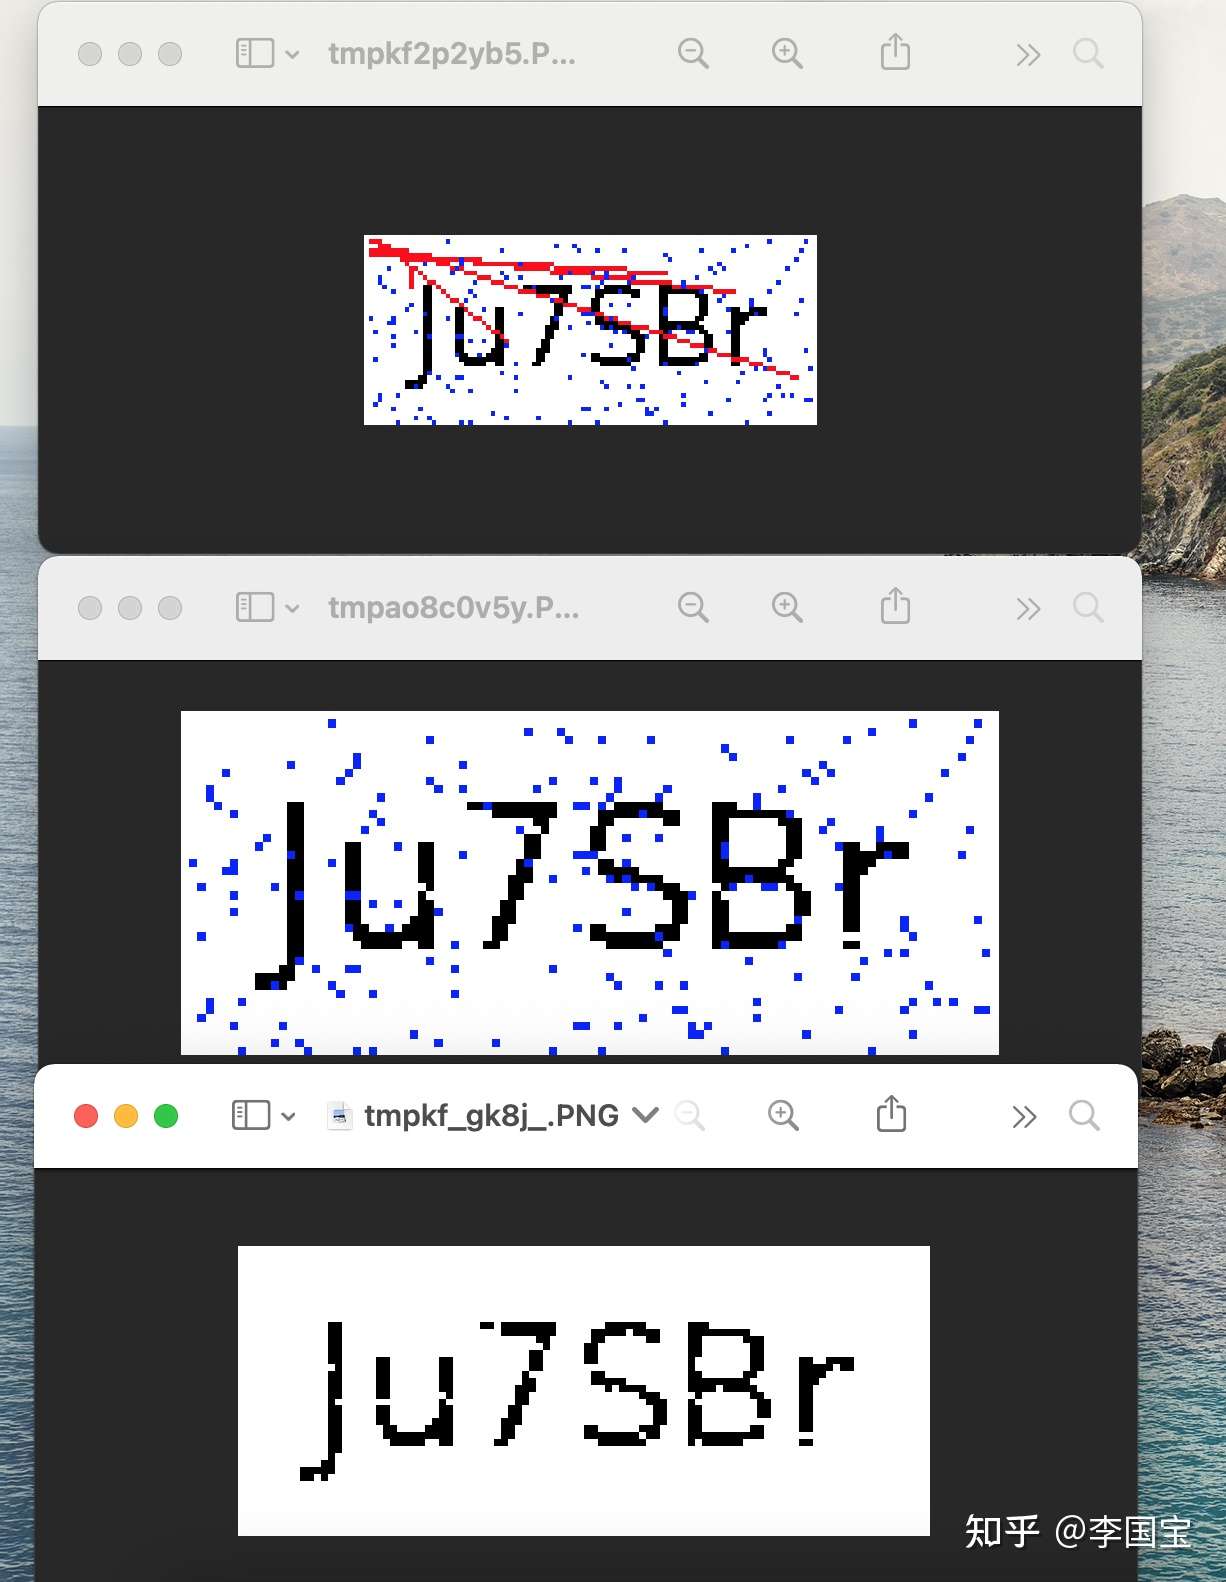
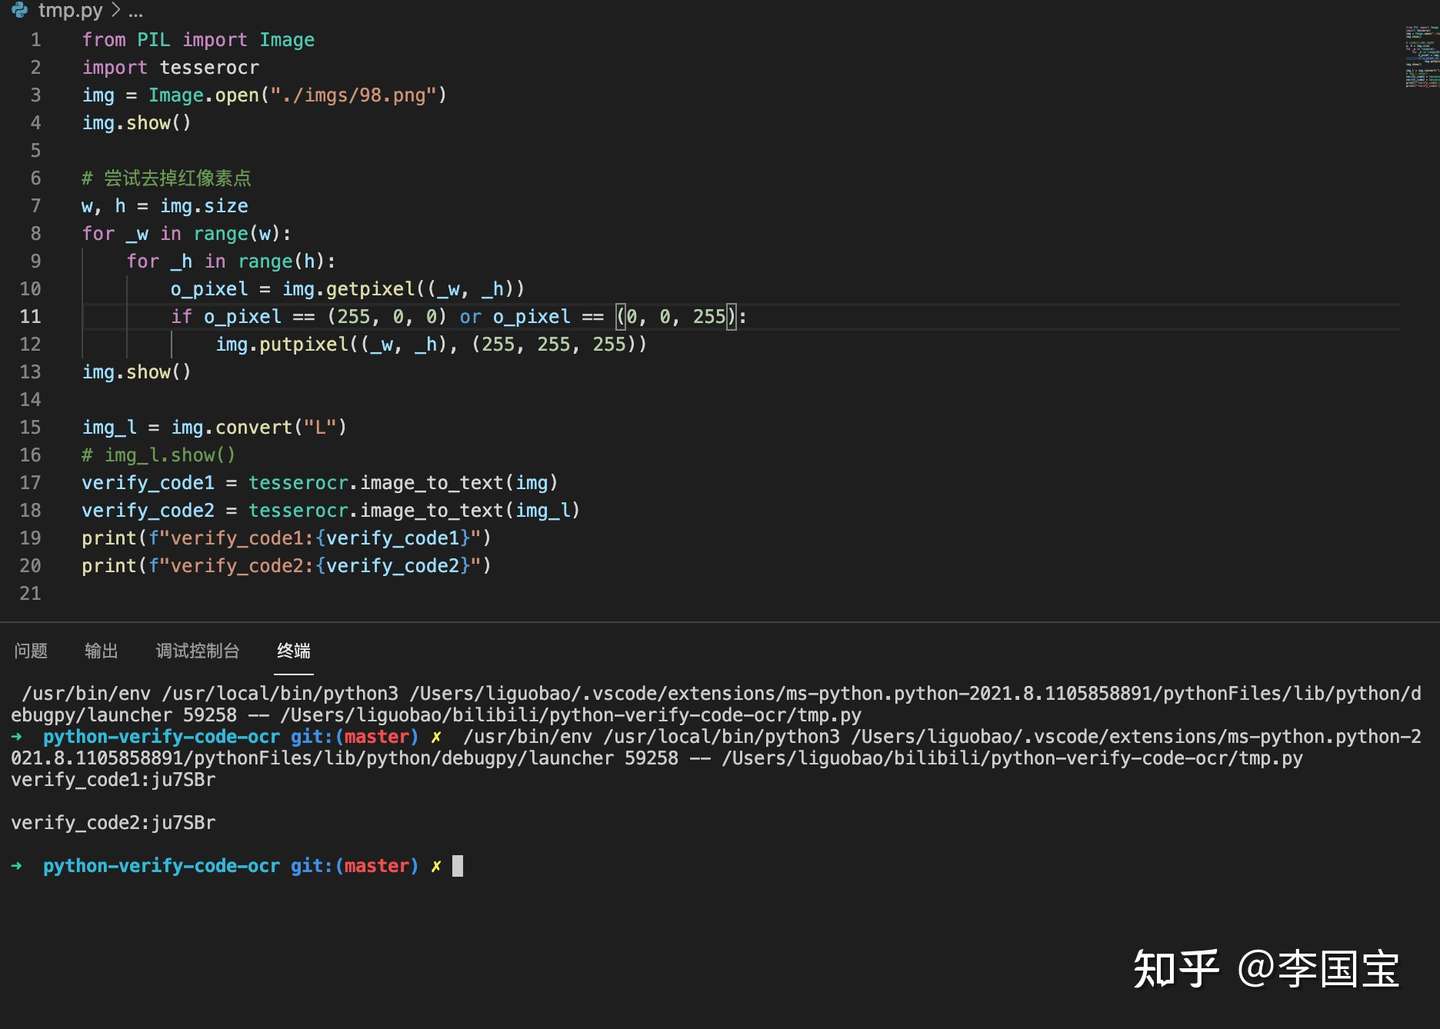
甚至OCR都直接出效果了。
好了,完结撒花。
不过,后面发现,有些红色线段和蓝色点,是和验证码重合的。
这个时候,如果直接填成白色,就容易把字母切开,导致识别效果变差。
想起这个文章的做法,所以改进了一下:
当前点是红色或者蓝色,判断周围点是不是超过两个像素点是黑色。
是,填充为黑色。
否,填充成白色。
最终完整代码:
from PIL import Image
import tesserocr
from loguru import logger


class VerfyCodeOCR():
    def __init__(self) -> None:
        pass

    def ocr(self, img):
        """ 验证码OCR

        Args:
            img (img): imgObject/imgPath

        Returns:
            [string]: 识别结果
        """
        img_obj = Image.open(img) if type(img) == str else img
        self._remove_pil(img_obj)
        verify_code = tesserocr.image_to_text(img_obj)
        return verify_code.replace("\n", "").strip()

    def _get_p_black_count(self, img: Image, _w: int, _h: int):
        """ 获取当前位置周围像素点中黑色元素的个数

        Args:
            img (img): 图像信息
            _w (int): w坐标
            _h (int): h坐标

        Returns:
            int: 个数
        """
        w, h = img.size
        p_round_items = []
        # 超过了横纵坐标
        if _w == 0 or _w == w-1 or 0 == _h or _h == h-1:
            return 0
        p_round_items = [img.getpixel(
            (_w, _h-1)), img.getpixel((_w, _h+1)), img.getpixel((_w-1, _h)), img.getpixel((_w+1, _h))]
        p_black_count = 0
        for p_item in p_round_items:
            if p_item == (0, 0, 0):
                p_black_count = p_black_count+1
        return p_black_count

    def _remove_pil(self, img: Image):
        """清理干扰识别的线条和噪点

        Args:
            img (img): 图像对象

        Returns:
            [img]: 被清理过的图像对象
        """
        w, h = img.size
        for _w in range(w):
            for _h in range(h):
                o_pixel = img.getpixel((_w, _h))
                # 当前像素点是红色(线段) 或者 绿色(噪点)
                if o_pixel == (255, 0, 0) or o_pixel == (0, 0, 255):
                    # 周围黑色数量大于2,则把当前像素点填成黑色;否则用白色覆盖
                    p_black_count = self._get_p_black_count(img, _w, _h)
                    if p_black_count >= 2:
                        img.putpixel((_w, _h), (0, 0, 0))
                    else:
                        img.putpixel((_w, _h), (255, 255, 255))

        logger.info(f"_remove_pil finish.")
        # img.show()
        return img


if __name__ == '__main__':
    verfyCodeOCR = VerfyCodeOCR()
    img_path = "./imgs/51.png"
    img= Image.open(img_path)
    img.show()
    ocr_result = verfyCodeOCR.ocr(img)
    img.show()
    logger.info(ocr_result)
代码地址:https://github.com/liguobao/python-verify-code-ocr
参考文章:
发布于刚刚
此内容由惯性聚合(RSS阅读器)自动聚合整理,仅供阅读参考。 原文来自 — 版权归原作者所有。