








本文转自:Tutorial: Write and register a plug-in (Microsoft Dataverse) - Power Apps | Microsoft Learn
This tutorial guides you through writing a plug-in and registering it with Microsoft Dataverse. You should first read the Write a plug-in article to familiarize yourself with writing a plug-in.
You can find the complete plug-in solution files for this tutorial here: Sample: Create a basic plug-in.
Create an asynchronous plug-in registered on the "Create" message of the account table. The plug-in creates a task activity that reminds the creator of the account to follow up one week later.
Note
This goal can be easily achieved using a workflow without writing code. We are using this simple example so that we can focus on the process of creating and deploying a plug-in.
This article demonstrates using Visual Studio to write the plug-in and build the assembly. However, you could use your favorite editor for coding and use MSBuild to build the assembly. In either case, you must use the Plug-in Registration tool to register the plug-in with Dataverse.
Alternately, you can use Power Platform CLI to quickly create a new project with boilerplate plug-in code using the command pac plugin init. You would still use the Plug-in Registration tool to register the plug-in with Dataverse.
Another alternative is to use the Power Platform Tools extension as described here: Create and register a plug-in package using Visual Studio. In this case, the extension can create and register the plug-in so the Plug-in Registration Tool isn't needed.
Open Visual Studio and open a new Class Library (.NET Framework) project using .NET Framework 4.6.2
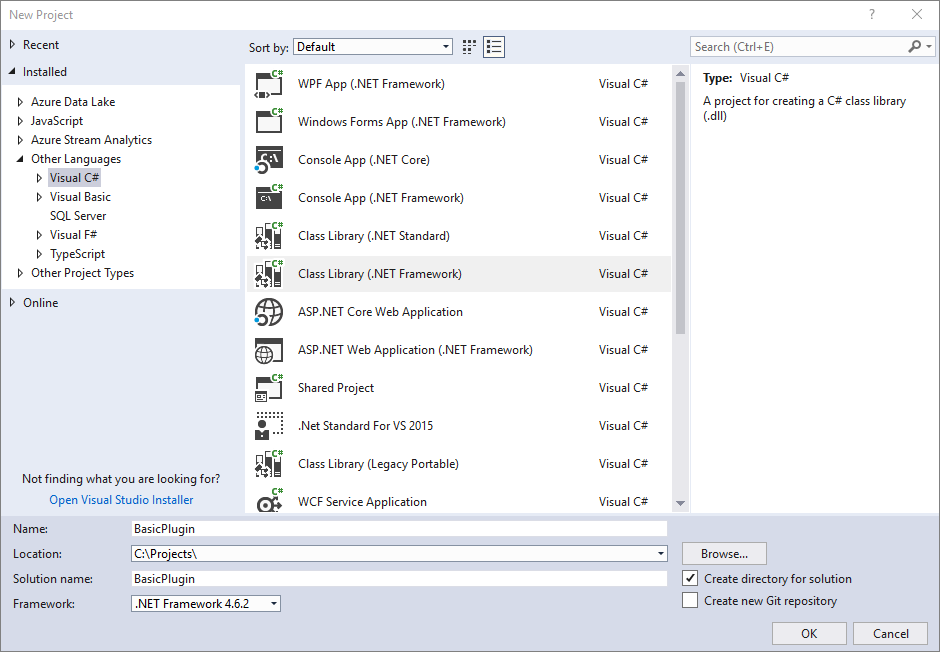
The name used for the project is also the name of the assembly. This tutorial uses the name BasicPlugin.
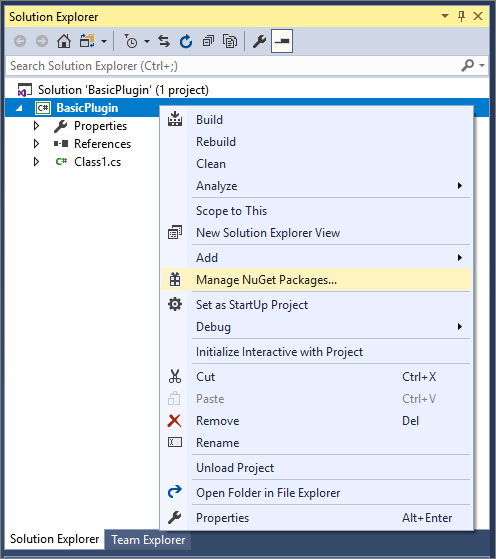
In Solution Explorer, right-click the project and select Manage NuGet Packages… from the context menu.
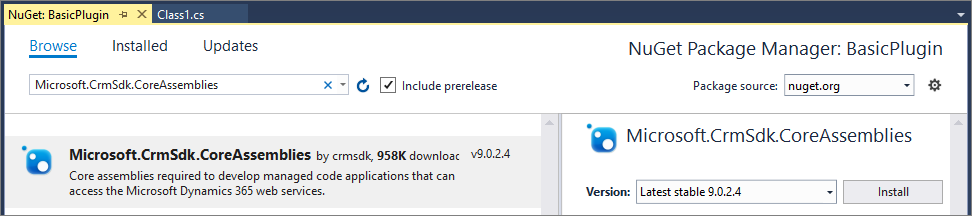
Select Browse and search for Microsoft.CrmSdk.CoreAssemblies and install the latest version.
You must select I Accept in the License Acceptance dialog.
Note
Adding the Microsoft.CrmSdk.CoreAssemblies NuGet package will include these assemblies in the build folder for your assembly, but you will not upload these assemblies with the assembly that includes your logic. These assemblies are already present in the sandbox runtime.
Ensure only assemblies referenced directly by your project or through NuGet dependency chains are located in your build folder. You cannot include other assemblies when you register the assembly with your logic. You cannot assume that the assemblies other than those included in the Microsoft.CrmSdk.CoreAssemblies NuGet package will be present on the server and compatible with your code.
In Solution Explorer, right-click the Class1.cs file and choose Rename in the context menu.
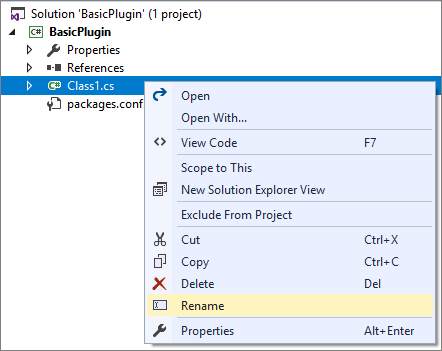
Rename the Class1.cs file to FollowupPlugin.cs.
When prompted, allow Visual Studio to rename the class to match the file name.
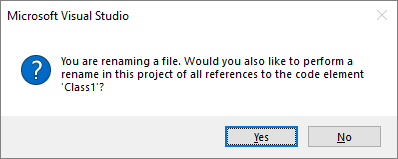
Add the following using statements to the top of the FollowupPlugin.cs file.
using System.ServiceModel;
using Microsoft.Xrm.Sdk;
Implement the IPlugin interface by editing the class.
Note
If you just type : IPlugin after the class name, Visual Studio will auto-suggest implementing a stub for the Execute Method.
public class FollowupPlugin : IPlugin
{
    public void Execute(IServiceProvider serviceProvider)
    {
        throw new NotImplementedException();
    }
}
Replace the contents of the Execute method with the following code.
// Obtain the tracing service
ITracingService tracingService =
(ITracingService)serviceProvider.GetService(typeof(ITracingService));

// Obtain the execution context from the service provider.
IPluginExecutionContext context = (IPluginExecutionContext)
    serviceProvider.GetService(typeof(IPluginExecutionContext));
The plug-in creates a task activity that reminds the creator of the account to follow up one week later.
Add the following code to the try block. Replace the comment // Plug-in business logic goes here with the following code.
// Create a task activity to follow up with the account customer in 7 days.
Entity followup = new Entity("task");

followup["subject"] = "Send e-mail to the new customer.";
followup["description"] =
    "Follow up with the customer. Check if there are any new issues that need resolution.";
followup["scheduledstart"] = DateTime.Now.AddDays(7);
followup["scheduledend"] = DateTime.Now.AddDays(7);
followup["category"] = context.PrimaryEntityName;
regardingobjectid lookup column for the task.
In Visual Studio, press F6 to build the assembly. Verify that it compiles without error.
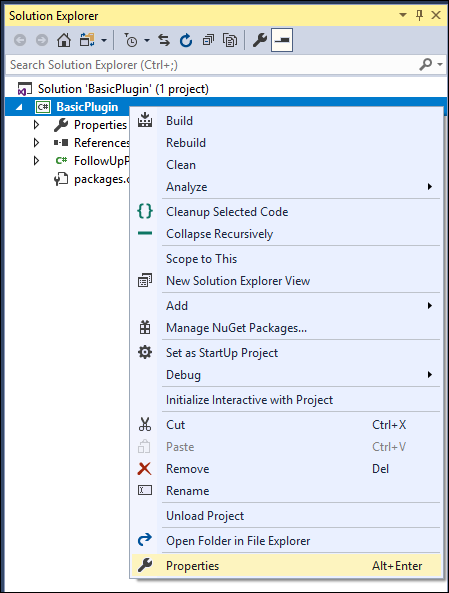
In Solution Explorer, right-click the BasicPlugin project and in the context menu select Properties.
In the project properties, select the Signing tab and select the Sign the assembly checkbox.
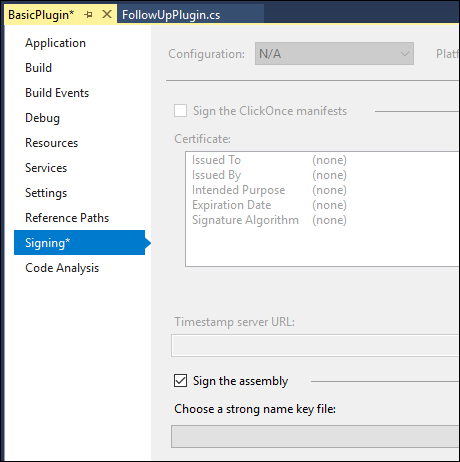
In the Choose a strong name key file: dropdown, select <New…>.
In the Create Strong Name Key dialog, enter a key file name, and deselect the Protect my key file with a password checkbox.
Select OK to close the Create Strong Name Key dialog.
In the project properties Build tab, verify that the Configuration is set to Debug.
Press F6 to build the plug-in again.
Using windows explorer, find the built plug-in at: \bin\Debug\BasicPlugin.dll.
Note
Build the assembly using Debug configuration because you will use the Plug-in Profiler to debug it in a later tutorial. Before you include a plug-in with your solution, you should build it using the release configuration.
To register a plug-in, you'll need the Plug-in Registration tool.
Open the Plug-in Registration tool by executing the PAC CLI pac tool prt command.
Select +Create new connection to connect to your Dataverse environment.
Make sure Office 365 is checked.
If you are connecting using a Microsoft account other than one you are currently using, select Show Advanced and enter your credentials. Otherwise, leave Sign-in as current user selected.
Note
If your user account employs multifactor authentication (MFA), make sure the Show Advanced checkbox isn't checked.
If your Microsoft Account provides access to multiple environments, select Display list of available organizations.
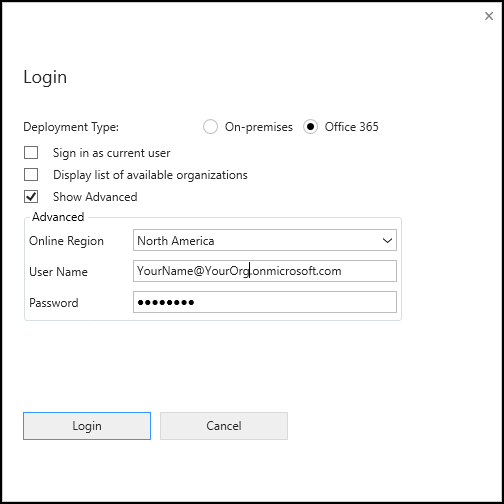
Select Login.
If you selected Display list of available organizations, select the organization you would like to connect to and select Login.
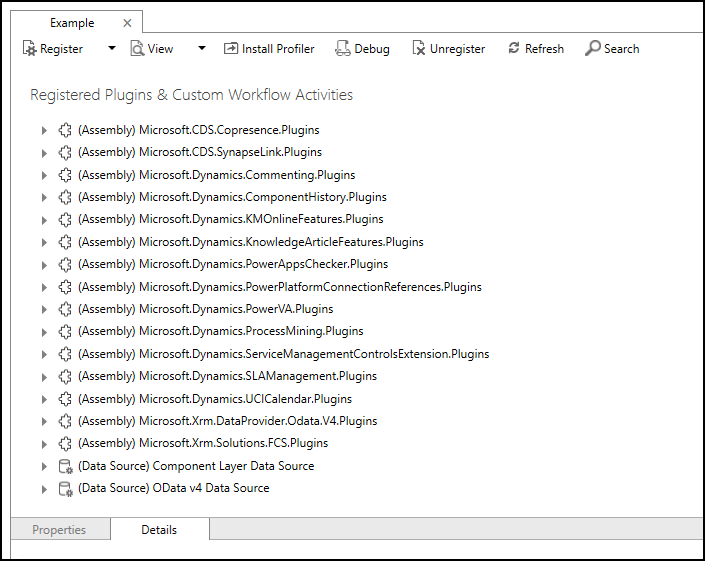
After you're connected, you'll see any existing registered plug-ins, custom workflow activities, and data providers.
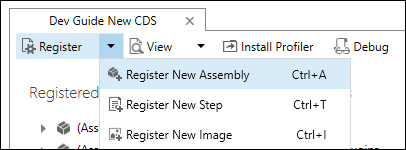
In the Register drop-down, select New Assembly.
In the Register New Assembly dialog, select the ellipses (…) button and browse to the assembly you built in the previous step.
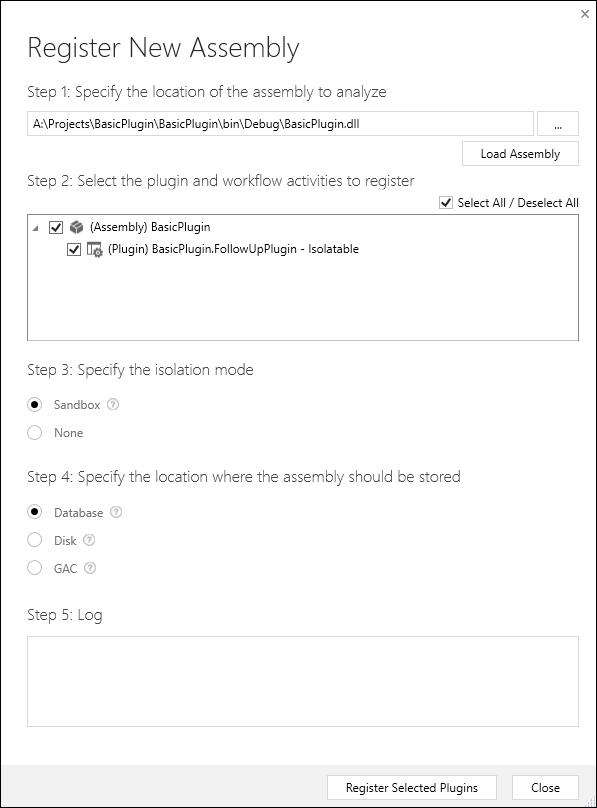
For Microsoft 365 users, verify that the isolation mode is set to sandbox and the location to store the assembly is Database.
Note
Other options for isolation mode and location apply to on-premises Dynamics 365 deployments. For the location, you can specify the D365 server's database, the server's local storage (disk), or the server's Global Assembly Cache. For more information, see Plug-in storage.
Click Register Selected Plug-ins.
You'll see a Registered Plug-ins confirmation dialog.
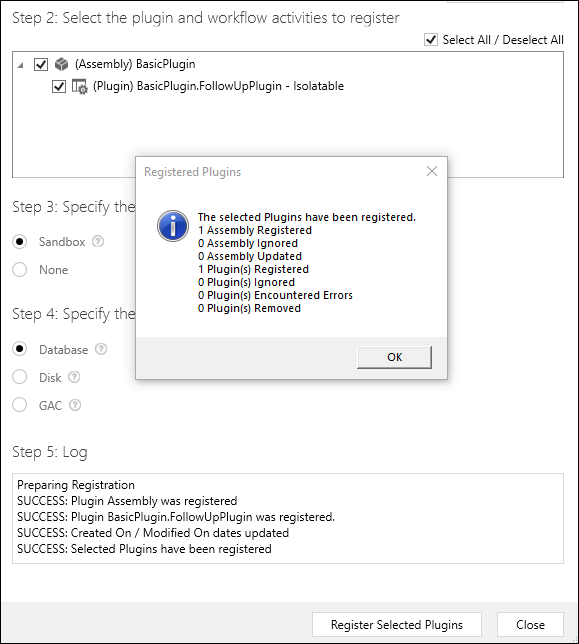
Select OK to close the dialog and close the Register New Assembly dialog.
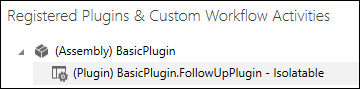
You should now see the (Assembly) BasicPlugin assembly, which you can expand to view the (Plugin) BasicPlugin.FollowUpPlugin plugin.
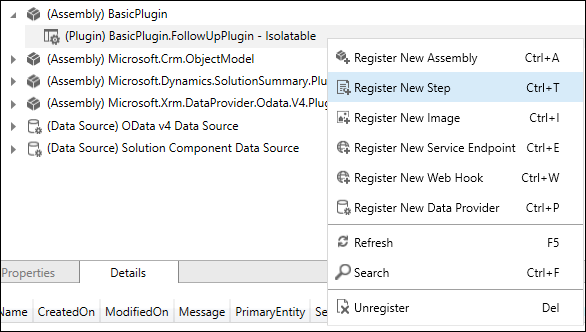
Right-click the (Plugin) BasicPlugin.FollowUpPlugin and select Register New Step.
In the Register New Step dialog, set the following fields.
| Setting | Value |
|---|---|
| Message | Create |
| Primary Entity | account |
| Event Pipeline Stage of Execution | PostOperation |
| Execution Mode | Asynchronous |
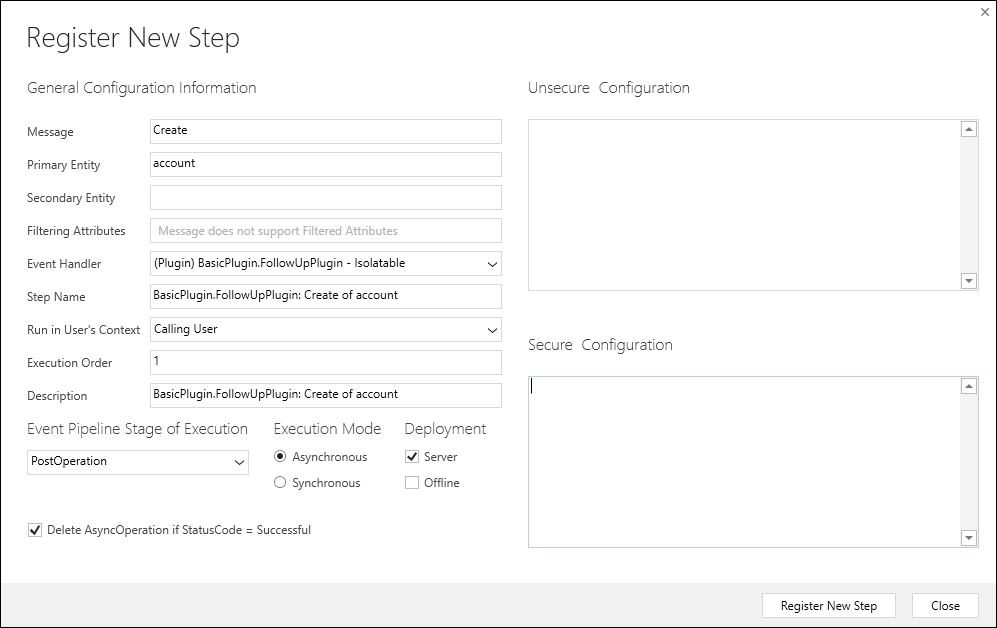
Select Register New Step to complete the registration and close the Register New Step dialog.
You can now see the registered step.

Note
At this point the assembly and steps are part of the system Default Solution. When creating a production plug-in, you would add them to the unmanaged solution that you will distribute. These steps are not included in this tutorial. For more information, see Add your assembly to a solution and Add step to solution .
Open a model-driven app and create an account table.
Within a short time, open the account and you can verify the creation of the task.
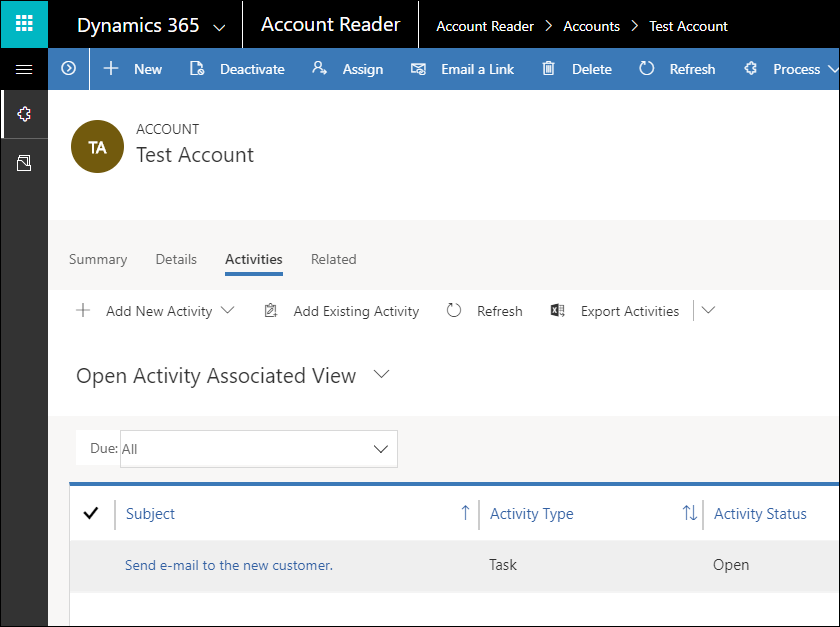
Because we are working with an asynchronous plug-in, the operation to create the task occurs after the account is created. Usually, the task creation happens immediately, but if it doesn't you may still be able to view the system job in the queue waiting to be applied. This step registration used the Delete AsyncOperation if StatusCode = Successful option, which is a best practice. This means as soon as the system job completes successfully, you'll not be able to view the system job data unless you re-register the plug-in with the Delete AsyncOperation if StatusCode = Successful option unselected.
However, if there was an error, you can view the system job to see the error message.
Use the Dynamics 365 --custom app to view system jobs.
In your model-driven app, navigate to the app.
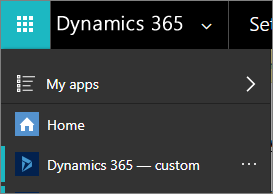
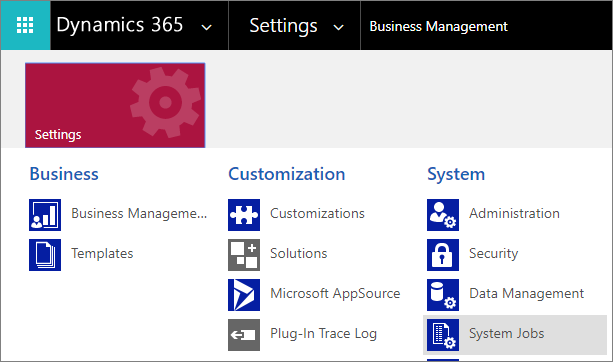
In the Dynamics 365 --custom app, navigate to Settings > System > System Jobs.
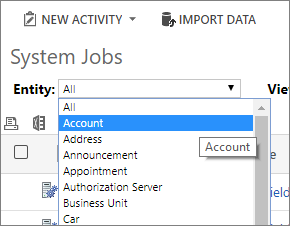
When viewing system jobs, you can filter by Table (Entity). Select Account.
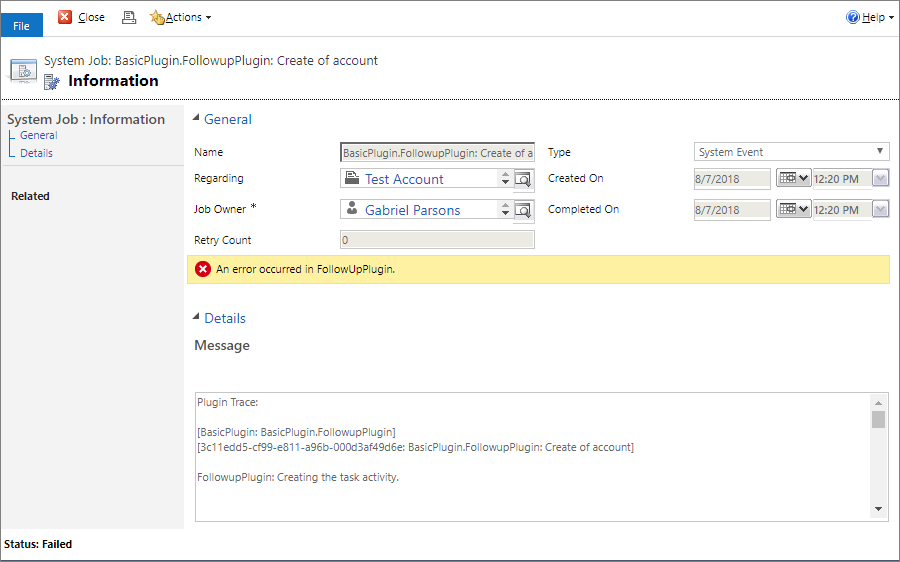
If the job failed, you should see a record with the name BasicPlugin.FollowupPlugin: Create of account.

If you open the system job, you can expand the Details section to view the information written to the trace and details about the error.
You can use the following Web API query to return failed system jobs for asynchronous plug-ins.
GET <your org uri>/api/data/v9.0/asyncoperations?$filter=operationtype eq 1 and statuscode eq 31&$select=name,message
More information: Query data using the Web API
Or use the following FetchXml:
<fetch top='50' >
  <entity name='asyncoperation' >
    <attribute name='message' />
    <attribute name='name' />
    <filter type='and' >
      <condition attribute='operationtype' operator='eq' value='1' />
      <condition attribute='statuscode' operator='eq' value='31' />
    </filter>
  </entity>
</fetch>
More information: Use FetchXML with FetchExpression
The sample code wrote a message to the trace log. These next steps describe how to view the logs.
By default, plug-in trace logs aren't enabled.
Use the following steps to enable them in a model-driven app.
Open the Dynamics 365 - custom app.
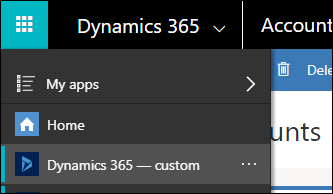
Navigate to Settings > System > Administration.
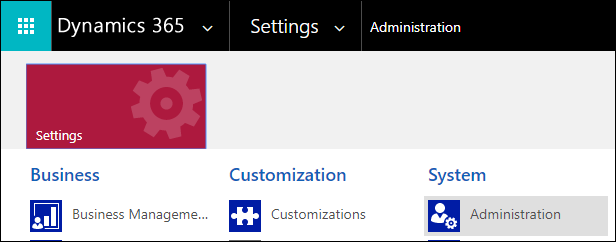
In Administration, select System Settings.
In the System Settings dialog, in the customization tab, set Enable logging to plug-in trace log to All.
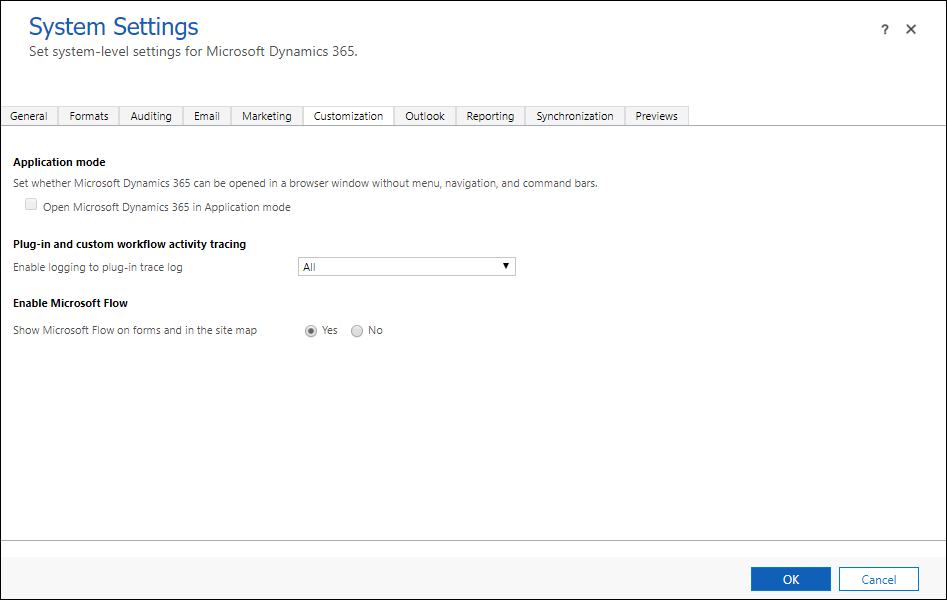
Note
You should disable logging after you are finished testing your plug-in, or at least set it to Exception rather than All.
Select OK to close the System Settings dialog.
Repeat the steps to test your plug-in by creating a new account.
In the Dynamics 365 -- custom app, navigate to Settings > Customization > Plug-In Trace Log.
You should find that a new plug-in trace Log record is created.
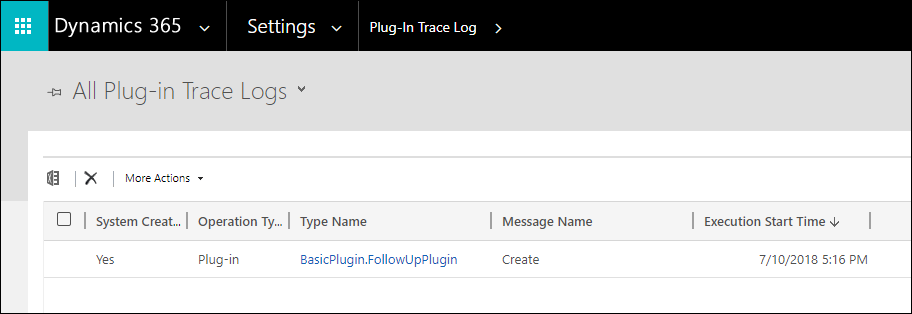
If you open the record you might expect that it would include the information you set in your trace, but it doesn't. It only verifies that the trace occurred.
To see the details, it's easier to query this data using the Web API in your browser using the following query with the plugintracelog EntityType, using the typename property to filter results in the messageblock property based on the name of the plug-in class.
GET <your org uri>/api/data/v9.0/plugintracelogs?$select=messageblock&$filter=typename eq 'BasicPlugin.FollowUpPlugin'
You can expect to see this JSON formatted information returned with the Web API query.
{
    "@odata.context": "<your org uri>/api/data/v9.0/$metadata#plugintracelogs(messageblock)",
    "value": [{
        "messageblock": "FollowupPlugin: Creating the task activity.",
        "plugintracelogid": "f0c221d1-7f84-4f89-acdb-bbf8f7ce9f6c"
    }]
}
In this tutorial, you created a simple plug-in and registered it. Complete Tutorial: Debug a plug-in to learn how to debug this plug-in.
Tutorial: Update a plug-in
Write a plug-in
Register a plug-in
Debug Plug-ins.
Documentation
Tutorial: Debug a plug-in (Microsoft Dataverse) - Power Apps
The second of three tutorials that will show you how to work with plug-ins.
Register a plug-in (Microsoft Dataverse) - Power Apps
Learn how to register a plug-in assembly and step with the Microsoft Dataverse event framework pipeline.
Sample: Create a basic plug-in (Microsoft Dataverse) - Power Apps
Learn how to write a simple plug-in that creates a follow-up activity.
Training
此内容由惯性聚合(RSS阅读器)自动聚合整理,仅供阅读参考。 原文来自 — 版权归原作者所有。