





Hannah Cartier //
Social engineering, especially phishing, is becoming increasingly prevalent in red team engagements as well as real-world attacks. As security awareness improves and systems become more locked down, it is unsurprising that the human element of security is becoming a more appealing attack vector. In addition, phishing campaigns can be used to test the controls surrounding a company’s employees. Scoring one valid login to a target’s resources can save a tester hours or even days of vulnerability scanning and exploitation.
In this blog, we are going to walk through setting up a simple yet effective landing page for your phishing campaigns. We will be using an open-source tool developed by BHIS that requires minimal installation and does not use any paid or third-party components.
A while back, I was asked to set up a landing page for a phishing engagement. And that was the extent of the instructions I received. To build this page, I first attempted to create a simple registration form using WordPress. It turned out that either WordPress was more complicated than I had anticipated, or I wasn’t as tech-savvy as I liked to believe. (In hindsight, it was probably a bit of both.) After fighting the interface for a few hours with my patience diminishing and the test date soon approaching, I decided it might be time to jump ship. However, I am also a rather mediocre web developer, and setting up everything from scratch each time clearly was not a sustainable solution.
Ultimately, I set the thing up from scratch. I designed the landing page using open-source HTML templates, served them up with NGINX, and forwarded the form submissions through the NGINX reverse proxy to a flask server where the client IP, user-agent, and form data are written to a log. Then I developed a tool called Sinker to automate this entire process so I would never have to do it again.
The remainder of this blog walks through an example of how one would use this tool to set up a phishing campaign.
Target: Black Hills Information Security
Domain: blackhills.phishingdomain.com
Phishing Email:
RE: New Health and Safety Measures. Complete before ARBITRARY_DATE
Black Hills Infosec understands that the health and wellbeing of our employees is of upmost importance. Amid the current Covid-19 climate, along with recent CDC amendments to health and safety measures, it is important to take precautions and respect each others concerns. Our insurance partners are working with PCHC to bring you the most up to date information on risks and information including covid-19 booster information, internal case counts, etc. Please follow the link below to set up your account on our health and safety portal. This must be completed in order to stay enrolled in any of our insurance plans. (Note: For your convenience, please use your Black Hills Infosec email and password for registering)
Bam. Now, all we need is for there to actually be something at that “link below” through which we can capture credentials. This is precisely what our tool, Sinker, assists in building and deploying.
Clone the GitHub repository located here: https://github.com/Hannnah1/Sinker
Open the inventory file and replace the IP address with the public IP of your server. If you wish to deploy the phish on more than one, add another line for each additional IP.
If you do not have Ansible installed on your local machine, run runme_first.sh (Note: For Windows users, you will have to install Ansible manually or run the program through WSL).
Next, open vars.yml and change the following configuration variables:
Example:
#--------------------------------------------------------------------------#
# Config variables. Do change these #
#--------------------------------------------------------------------------#
site: covidruse

Target_Name: Black Hills # Spaces are OK, no quotes please
ssh_key: $HOME/.ssh/id_rsa
domain_name: blackhills.phishingdomain.com
certbot_mail_address: [email protected]

# CSS For landing page NO SEMICOLONS
background_color: white
primary_color: rgba(156, 191, 191, 1)
secondary_color: black
The code snippet above has been edited for attacking Black Hills Information Security. In addition to the company name, we have also customized the primary and secondary color values for the CSS. Using the colors of our target company will help with the believability of our page due to the element of familiarity.
That’s it for configuration, now it’s time to run the playbook. This can be done by entering the following command in your terminal:
ansible-playbook main.yml
This next step is the most important:
Take your hands off the keyboard, stand up, and go make a nice hot cup of coffee while the program does the following on your behalf.
If all goes well you should see the following output:
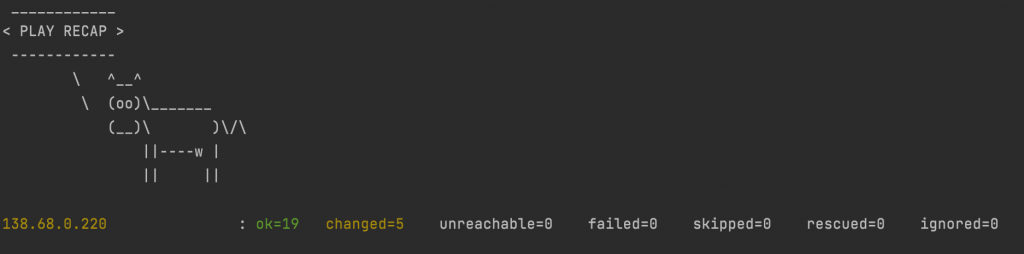
If you do not have Cowsay installed, the output will be formatted a bit differently, and you will be seen by your coworkers as much less cool. As long as no failed or unreachable errors are produced, you’re good to go.
Browsing blackhills.phishingdomain.com demonstrates that our landing page is displayed as expected.
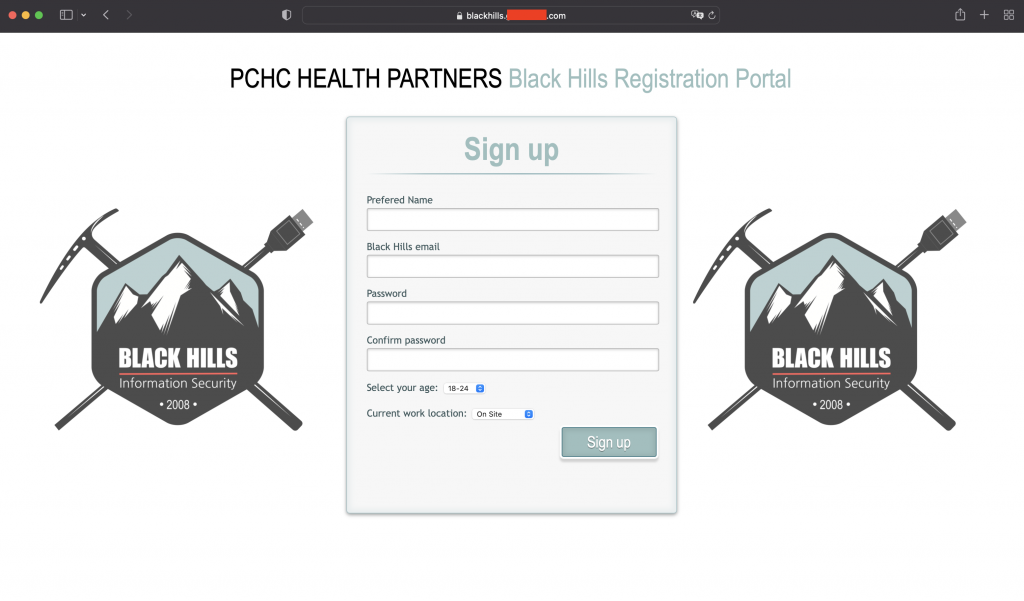
Upon submitting the form, the target received the following acknowledgment that their submission was received. The objective of this confirmation is to not raise suspicion.

The server logs the IP address of the client, the name, email, and password they entered, as well as the user agent. If we log into our server console and look at forms.txt, we will see the following:

There are hundreds of free HTML templates that can be quickly edited to fit your needs.
For example, in this blog, we adapted the template found here: https://tympanus.net/Tutorials/LoginRegistrationForm/index3.html#toregister
To be compatible with these automated setup scripts, you will need to make the following changes:
{{ Target_Name }}id="name", id="email" and id="password"<button type="submit">Complete Registration</button>
<script src="send.js"></script>target.html.j2 following the template format.Congrats! You now have a landing page that can be quickly spun up for multiple engagements.
Phishing is easy but can be time-consuming. Hopefully this program can help make it a little simpler and faster. The author recommends NOT including the names and emails of people who fell for the phish in the report for the client. Knowing exactly whose credentials you gained does not help in remediation and could potentially get that person in trouble.
Ready to learn more?
Level up your skills with affordable classes from Antisyphon!
Available live/virtual and on-demand
此内容由惯性聚合(RSS阅读器)自动聚合整理,仅供阅读参考。 原文来自 — 版权归原作者所有。