






Niccolo Arboleda is a cybersecurity enthusiast and student at the University of Toronto. He is usually found in his home lab studying different cybersecurity tools and working on projects. He is passionate about defending critical infrastructure from cyber-attacks.
There are always new and evolving threats that target our environments. It is essential to detect these threats before they cause actual harm to people and their livelihoods.
In this blog, we will cover how to build a simple Security Information and Event Management (SIEM) environment to simulate attacks and give us an understanding of how vital detection is in identifying threats and creating defenses against them. Links to all the software used and relevant documentation will be in the references section at the end of the blog.
*If you get stuck at one point or another, please refer to the documentation. You will find solutions to your issues there.
We will need the host machine (your computer), a hypervisor, a manager server, and an endpoint to build the environment.
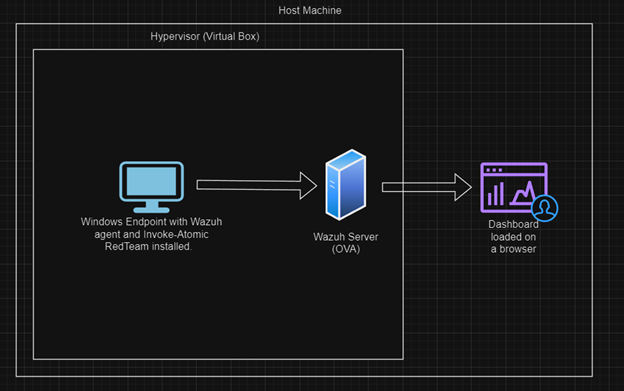
The Hypervisor:
The first thing we need to do is pick a hypervisor on which to build our environment. A hypervisor is software that allows us to create virtual machines using our host machine. It is useful in this kind of scenario because we won’t need multiple physical computers to create the environment. There are many hypervisors, but in terms of accessibility and ease of use, the free versions of VMware Workstation or VirtualBox will do just fine. The hypervisor I used for this project is VirtualBox.
The Manager Server:
We will use Wazuh as our manager server, as it is open-source and well supported. Wazuh is a platform used for threat detection and incident response. There are other open-source SIEM solutions, such as The ELK Stack or OSSEC , if you would like to explore other options.
In this instance, I recommend using the OVA version to simplify your installation process. The OVA version is a standalone Linux (Amazon Linux 2) virtual machine image with the Wazuh server already installed. I hosted the server inside VirtualBox.
While the documentation section of the Wazuh website will have instructions on installation, there is a high level overview in the below section.
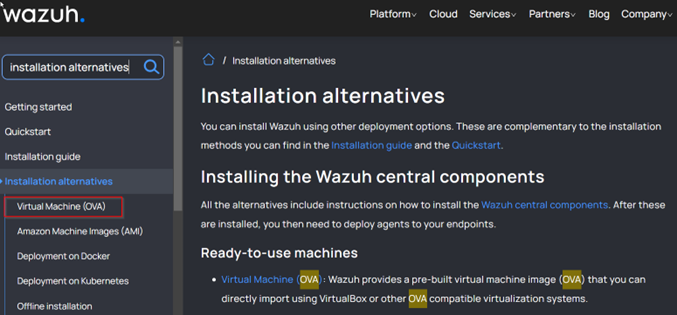
Search installation alternatives and click on the Virtual Machine (OVA) link.
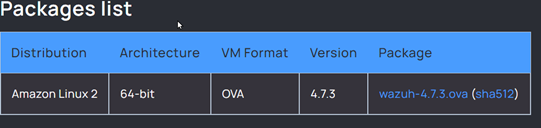
Download the image by clicking on the wazuh-4.7.3.ova (sha512) link (please note the version may have changed).
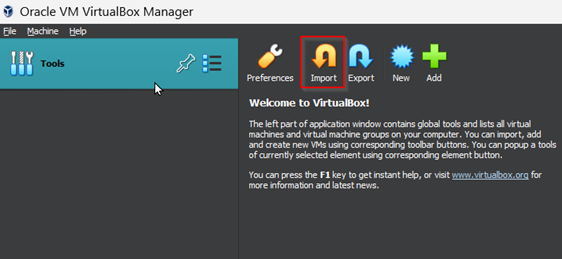
Once the image is downloaded, click the import button on VirtualBox and load the file.
Before starting the virtual machine, we will need to go to settings and change the display setting to VMSVGA to prevent the virtual machine from crashing, as outlined in the Wazuh documentation.
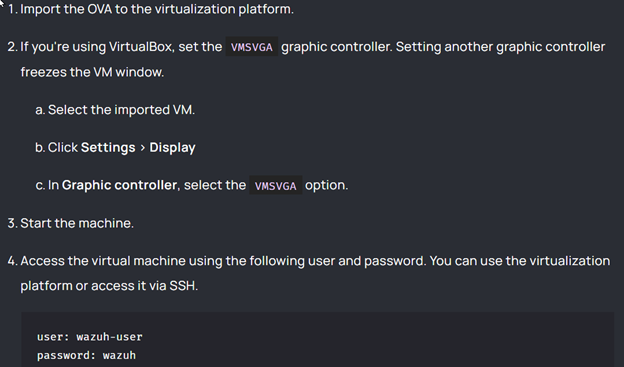
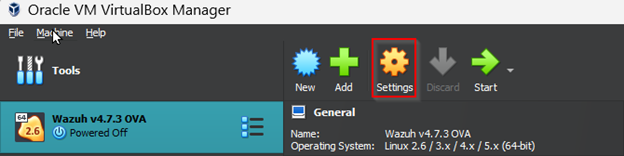
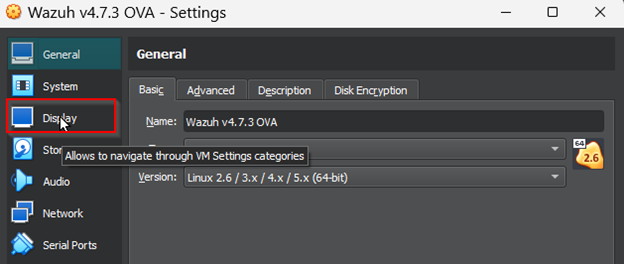
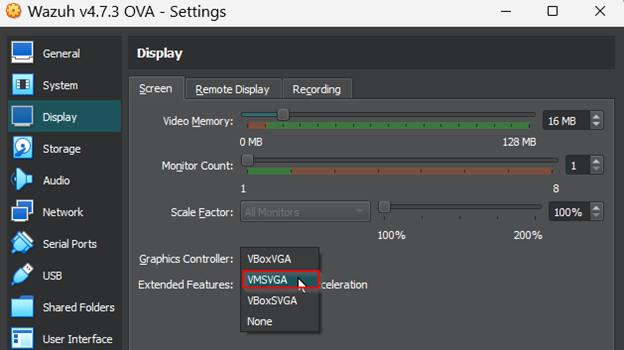
Once we have the manager server up and running, we will need to take note of its IP address using the ipconfig command so we can load the dashboard later.

The Endpoint:
The endpoint will have three main parts, which are: the operating system, the agent, and the attack-simulation framework. Note: the agent and framework will be installed on the endpoint virtual machine, not the host machine.
Operating System:
Windows will be used as the operating system for the endpoint virtual machine. The first step is to go to the Windows developer environment webpage and get a virtual machine that aligns with our hypervisor.
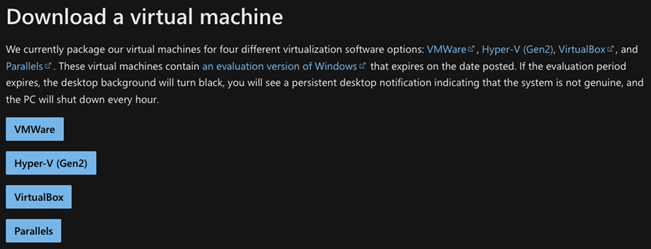
Once the image is downloaded, it needs to be imported into VirtualBox like the Wazuh server manager. We will select Import and select the Windows VirtualBox instance.
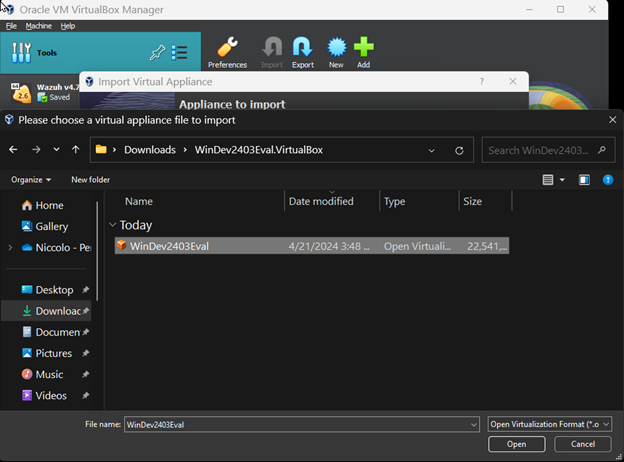
Next, the virtual machine needs to be started.
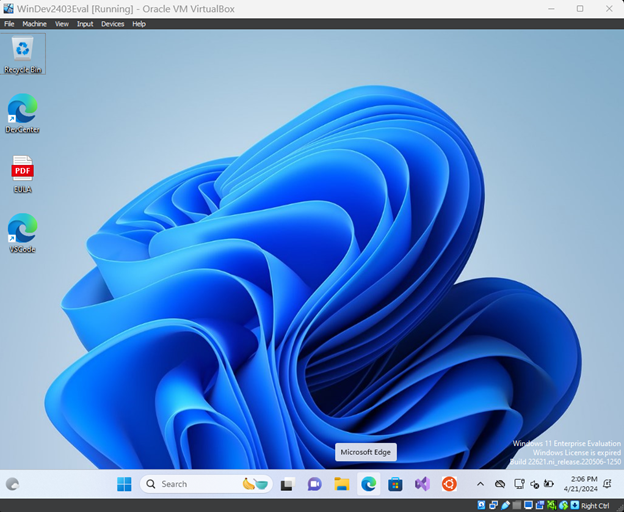
You do not need a license in order to have a functional Windows virtual machine.
The Agent:
The installation instructions can be found in the Wazuh documentation.
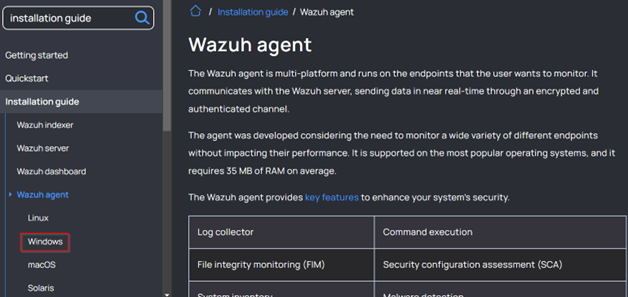
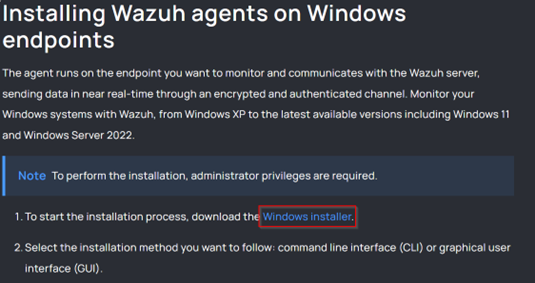
Once downloaded, install the Agent and run the manager.
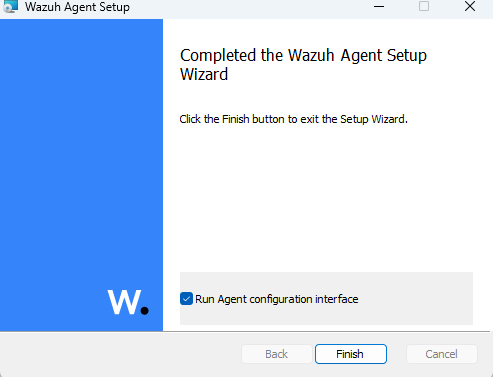
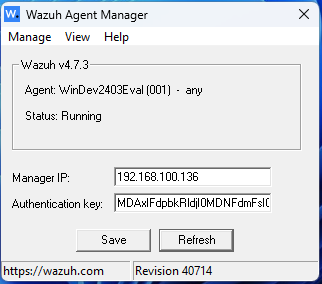
Use the IP address of the manager server to configure the Wazuh agent and save the setting.
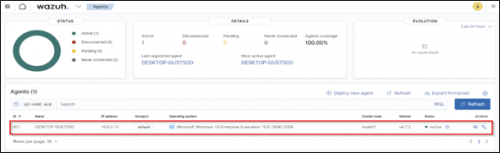
To check that everything is in order, go back to your host machine and open a browser. Input https:// and it should let you access the dashboard. Your endpoint machine should show under agents outlined in the image below.
In order to complete a detection lab, we need a framework to reference cyber attacks to our specific environment. In this case, we will be using the MITRE ATT&CK framework.
The MITRE ATT&CK framework is a knowledge base of adversary techniques and tactics that are observed in the real world.
To simulate attacks on the endpoint, we will be using Invoke-Atomic. Atomic Red Team has a repository of detection tests based on the MITRE ATT&CK framework. Invoke-Atomic is the PowerShell module of Atomic Red Team. This tool helps to aid cybersecurity professionals in understanding, as well as simulating, relevant threats in their environment.
To install Invoke-Atomic, we will need to bypass PowerShell execution policies that might prevent the installation. In this case, I ran a PowerShell command under Administrator that disables the execution policy by replacing the “Authorization Manager.”
function Disable-ExecutionPolicy {($ctx = $executioncontext.gettype().getfield("_context","nonpublic,instance").getvalue( $executioncontext)).gettype().getfield("_authorizationManager","nonpublic,instance").setvalue($ctx, (new-object System.Management.Automation.AuthorizationManager "Microsoft.PowerShell"))}

Disable-ExecutionPolicy  .runme.ps1
Then, I ran the installation command for both Invoke Atomic and its framework.
IEX (IWR 'https://raw.githubusercontent.com/redcanaryco/invoke-atomicredteam/master/install-atomicredteam.ps1' -UseBasicParsing);
Install-AtomicRedTeam –getAtomics
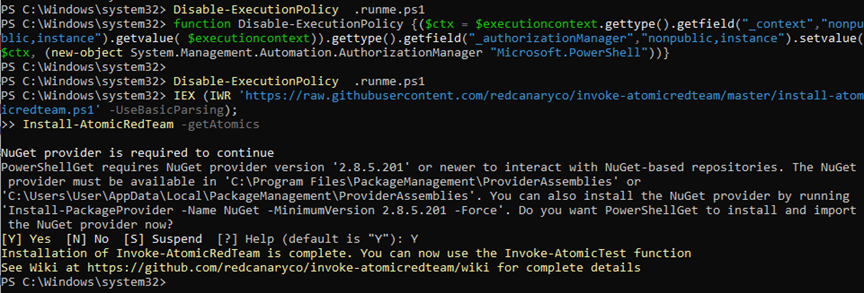
The screenshot below shows a successful installation:
Once all the components are in place and running. We can start simulating attacks on the endpoint to see what alerts will be triggered by the attack simulations.
A simulation can be run through PowerShell. The command I used is:
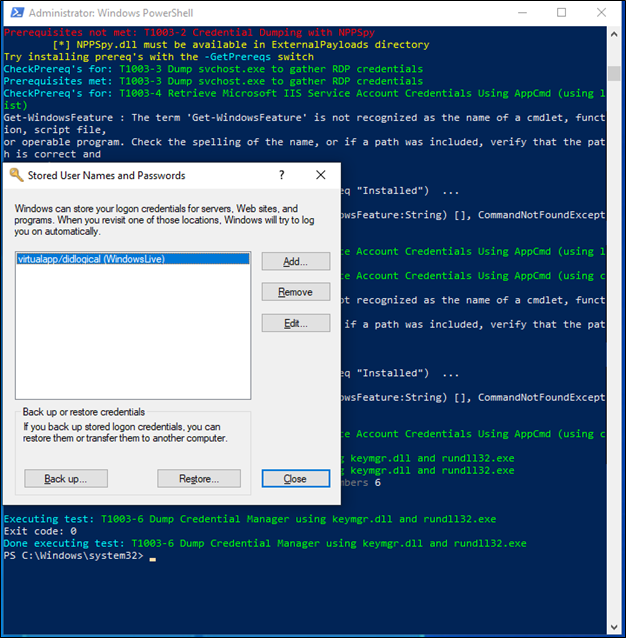
Invoke-AtomicTest T1003 -TestNumbers 6In this specific example, I used the attack reference T1003 – 6, as shown below, which is a credential dumping attack utilizing kmgr.dll and rund1132.exe.

Credential Dumping is an online attack that steals credentials, typically from random access memory (RAM).
Upon starting the simulation, the following application (Stored User Names and Passwords) is triggered.
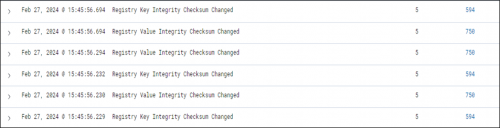
The Wazuh dashboard also registered activity from the attack, stating changes in the registry values and key integrity. The rules 750 (Registry Value Integrity Checksum Changed) and 594 (Registry Key Integrity Changed) were recorded for further analysis. They can be found on the Security Event tab in the Wazuh dashboard.
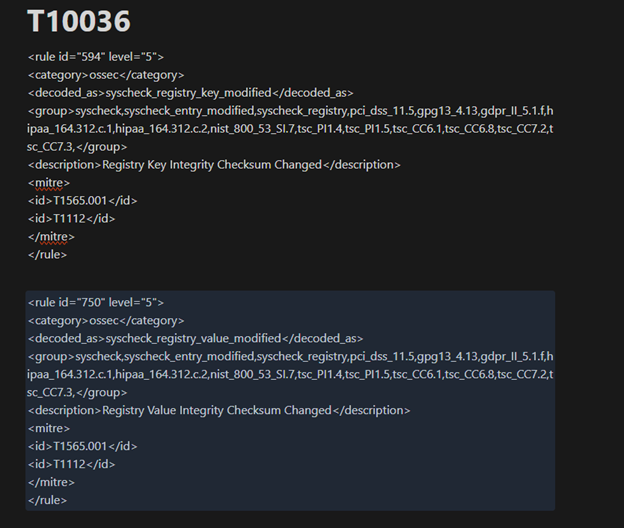
It is important to note that not all attack simulations will yield an alert. This is not necessarily a bad thing, since it identifies a gap that can be filled in the detection system. You can also consider combining alerts that do appear to make your own custom detections.
Building our environment, executing attack simulations, and seeing if any alerts appear on the dashboard can help us begin identifying gaps in our detections and tuning our SIEM to lower the noise and bring the relevant alerts to a higher level in the system. This is where your detection engineering adventure begins.
As a final note, I want to say that the field of cybersecurity is vast, and many disciplines are involved. Don’t be discouraged if you are new to the industry and genuinely passionate about defending people from ever-increasing technological threats. We’re on this journey together, and I am rooting for you.
Ready to learn more?
Level up your skills with affordable classes from Antisyphon!
Available live/virtual and on-demand
此内容由惯性聚合(RSS阅读器)自动聚合整理,仅供阅读参考。 原文来自 — 版权归原作者所有。