









by William Oldert // BHIS Intern

BHIS had a problem.
We needed an environment for students to learn WiFi hacking safely. Our original solution used interconnected physical network gear and computers to create the needed signals. The requirement for multiple such setups to properly run a class with was costly, however, and transport was a concern as well.
We discovered a program called Mininet, which creates an interactive virtual network, and began looking for ways to utilize it in labs and teaching material. Wondering if this might be the solution we were in sore need of, a project was started, and a team of interns was hired to research and test the limits.
The product of that project is WifiForge.

WifiForge is a program built on the foundation of the open-source Mininet-Wifi, itself being a branch from Mininet that includes support for wireless networking. It automatically sets up the network and tools needed to perform a variety of exploits, all packed neatly into a Docker container. WifiForge eliminates the need for physical hardware, requiring only a docker install and the execution of a couple commands.
You can find a link to the project’s GitHub page HERE.
WifiForge should work on any Linux operating system using Docker. The following operating systems have been tested and are confirmed to work.
Kali Linux

Parrot OS
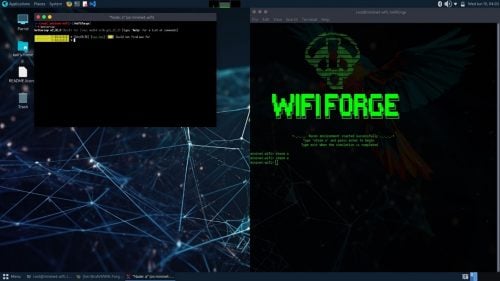
Ubuntu
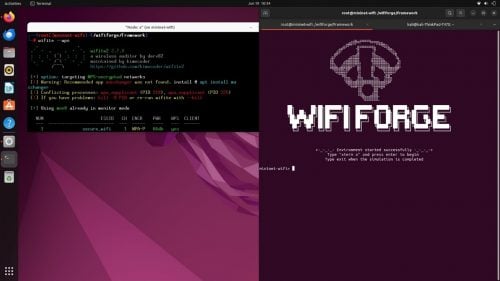
Below is the guide to setting up a Docker container with all the required pieces and parts. We have guides for installing to a bare OS or from a Docker image. These instructions can be found on the project’s GitHub. The best and easiest option, however, is laid out below.
Note: Dockerfile will fail if Mininet-Wifi is already installed locally
Install from release
sudo docker run --privileged=true -it --env="DISPLAY" --env="QT_X11_NO_MITSHM=1" -v /tmp/.X11-unix:/tmp/.X11-unix:rw -v /sys/:/sys -v /lib/modules/:/lib/modules/ --name mininet-wifi --network=host --hostname mininet-wifi redblackbird/wififorge:v1.0.0 /bin/bashWithin the container, initiate the controller to simulate APs
service openvswitch-switch startRun WifiForge.py
sudo python3 Framework/WifiForge.pyWifiForge provides pre-built labs that cover a variety of topics and tools including, but not limited, to:
Today, however, we would like to give you a taste of what this program can do through our WEP key-cracking lab.
To begin, select “WEP Network” from the WifiForge menu and allow up to 30 seconds for initialization of the network.

Once it has started, use the following command to open an xterm session on the attacker, host1, and host2.
xterm a host1 host2 On the attacking machine, switch the interface to monitor mode using the following command.
airmon-ng start a-wlan0 Successful output of the above command will appear as below.

Use airodump-ng to begin looking for nearby networks.
airodump-ng a-wlan0mon Wait for traffic to appear on the console as seen below.

Note the BSSID and channel before killing the process with ‘Ctrl + c’. Use this BSSID and channel in the next command.
airodump-ng –c <CHANNEL> -–bssid <BSSID> a-wlan0mon –w attack_capture As the above command runs, information regarding hosts connected to the target network will appear as seen below.

On host1, note the IP address associated with host1-wlan0 after running the following command.
ifconfigThe IP address can be seen highlighted in red in the screenshot below.

The WEP key will be cracked by collecting [JD1] regular user traffic. To simulate this traffic, use the following command on host1.
iperf –sThe above command will begin listening on port 5001 for traffic, as seen below.

Switch over to host2’s terminal. Run the following command.
iperf -c <HOST1 IP ADDRESS> -u -b 100M -t 60The above command will begin sending traffic to host1. The output will be similar to the image below.

Wait until about 25,000 packets have been sent (see the Frames column in the airmon console). When this number is reached, kill the airmon-ng session on the attacker machine using ‘Ctrl + c’ and run the following command.
aircrack-ng ./attack_capture-01.capThe above command will begin attempting to crack the WEP key. Successful decryption will be similar to the screenshot below.

Hopefully, this lab helped to demonstrate the usefulness of WifiForge to the reader and showcase what it can be used to accomplish. Being able to spin up an environment for a class, without having to deal with the set up or any of the behind-the-scenes work, is why we built this program. Not having to dink around with hardware is a big plus too. All this in a compact Docker container means portability and scaling are not a problem either.
And, of course, WifiForge, as intended, solves BHIS’s problem quite handily.
Ready to learn more?
Level up your skills with affordable classes from Antisyphon!
Available live/virtual and on-demand
此内容由惯性聚合(RSS阅读器)自动聚合整理,仅供阅读参考。 原文来自 — 版权归原作者所有。