


Process Manager 2 (PM2) is an application that enables you to create persistent services for various applications, such as HTTP servers and task queue workers. PM2's cluster mode takes this functionality further by allowing you to create multiple instances of the same application for efficient resource usage. Additionally, PM2 provides a simple CLI interface for managing, scaling, and monitoring the running services.
In this article, we'll demonstrate the steps to deploy a Node.js application on a Vultr Cloud Compute server. We'll guide you through deploying a server on Vultr for your Node.js application. You'll learn to install the necessary dependencies to run your application and how to create persistent services with PM2, ensuring your application restarts automatically after a server reboot. Additionally, we'll cover setting up Nginx as a reverse proxy for efficient load balancing and securing your application with a Secure Sockets Layer (SSL) certificate to enable HTTPS.
Sign up and log in to the Vultr Customer Portal.
Navigate to the Products page.
From the side menu, select Compute.
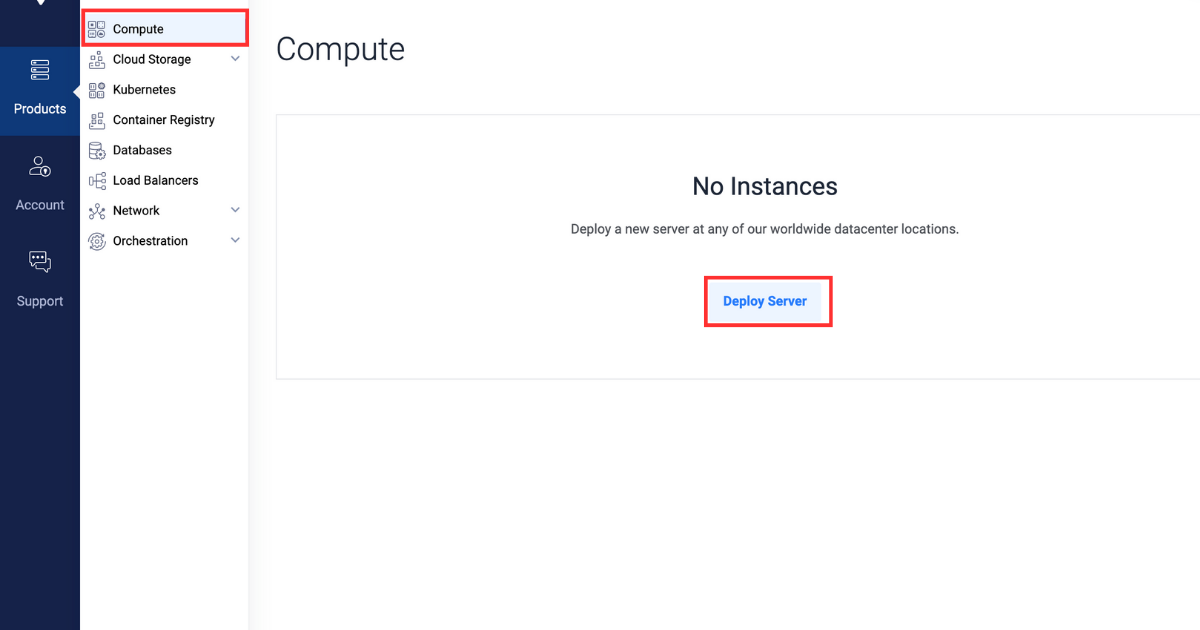
Click the Deploy Server button in the center.
Select Cloud Compute as the server type.
In the "Server Location" section, select the region of your choice.
In the "Server Image" section, click the Marketplace Apps tab and select the NodeJS image.
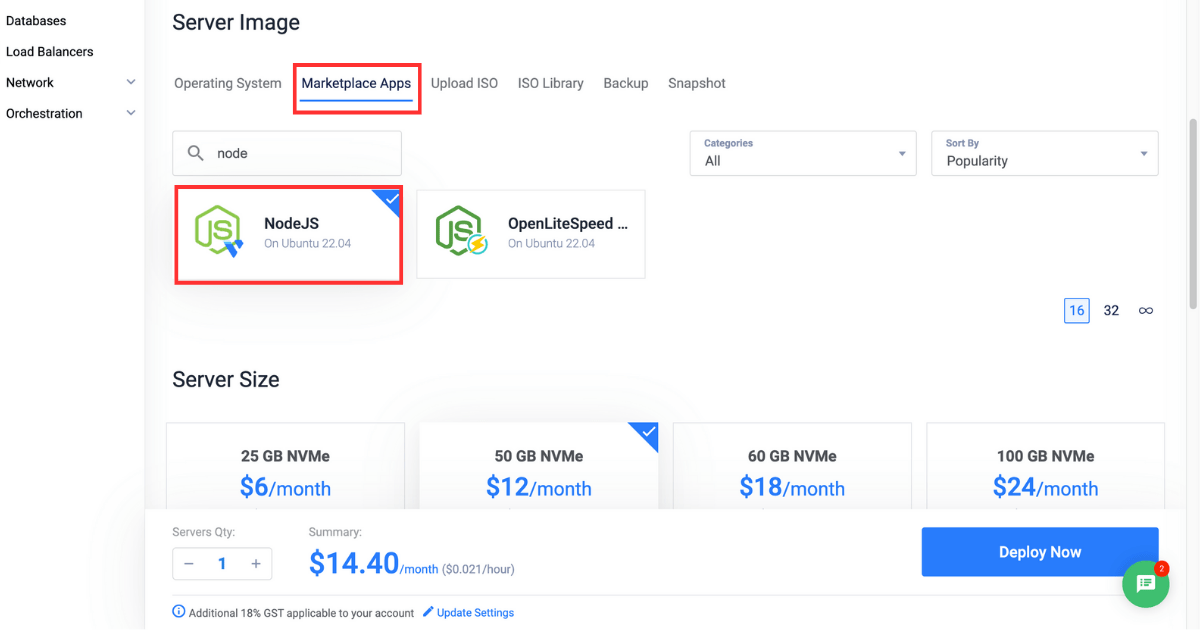
The NodeJS Marketplace App comes pre-installed with the latest Node.js and Node Package Manager (npm) binaries, allowing you to save setup time.
In the "Server Size" section, select the server size as per requirement.
Select any more features as required in the "Additional Features" section.
Click the Deploy Now button on the bottom right corner.
Having created a Vultr server as described previously, this section will guide you through creating a sample Node.js application using Express. We will walk you through initializing a Node.js project, installing Express, and creating a basic endpoint. If you already have an existing Node.js application, feel free to skip this part, clone your Git repository, and continue from the next section.
Create a folder to store the project files, and navigate into it.
mkdir ~/express-demo
cd ~/express-demo
Initialize a Node.js project.
Install the express library.
Create a file named index.js.
Paste the following content into the index.js file.
const express = require("express");
const app = express();

app.get("/", (req, res) => {
  res.send("<h1>Hello World, greetings from Vultr</h1>");
});

app.listen(3000, () => {
  console.log("Server listening on port 3000");
});
The code block above defines a basic Express-based application that displays the "Hello World, greetings from Vultr" message when you visit the home page.
Save the file, and exit the editor.
Allow port 3000 to listen for incoming connections.
Start the application.
In a web browser, navigate to the URL as shown below.
http://SERVER_IP:3000
After you confirm access, you may stop the server.
PM2 provides an an easy-to-use CLI interface to ensure that your services are persistent, reliable, and restart automatically. In this section, you'll learn how to install the PM2 package, start your application in cluster mode, and set up a persistent service to ensure that your application starts automatically when the server boots up.
Install PM2 globally. The -g flag specifies that the PM2 package should be installed globally, making it accessible to all system users.
Start your Node.js application in cluster mode. Make sure to replace the path with your application's actual location. The -i flag specifies that the Node.js application should run with four instances in cluster mode.
pm2 start ~/express-demo -i 4 --name express-demo
Set up a persistent service.
Save the configuration to apply the changes.
Nginx acts as a reverse proxy between your web server and clients. It directs incoming requests based on your request configuration settings. In this section, you'll learn how to configure your example application for efficient request handling and load balancing using Nginx. You'll also learn how to configure your apps for reverse proxy.
Log in to the Vultr Customer Portal.
Navigate to the Products page.
From the side menu, expand the Network dropdown, and select DNS.
Click the Add Domain button in the center.
Follow the setup procedure to add your domain name by selecting the IP address of your server.
Set the following hostnames as your domain's primary and secondary nameservers with your the domain registrar:
ns1.vultr.comns2.vultr.comInstall Nginx.
Create a file named express-demo.conf in the sites-available directory.
sudo nano /etc/nginx/sites-available/express-demo.conf
Paste the following content into the express-demo.conf file. Make sure to replace example.com with your actual domain name.
server {
     listen 80;
     listen [::]:80;
     server_name example.com www.example.com;

     location / {
         proxy_pass http://127.0.0.1:3000/;
     }
}
The following directives are used in the above virtual host configuration:
server defines a block of settings for your domain.listen instructs the server to listen on port 80 for incoming requests.server_name specifies the domain names to which this server block will respond.location defines what the server should do with each incoming request.proxy_pass instructs the server to forward requests to another location, in this case to http://127.0.0.1:3000/.Save the file, and exit the editor.
To activate the virtual host configuration, create a soft link in the sites-enabled directory.
sudo ln -s /etc/nginx/sites-available/express-demo.conf /etc/nginx/sites-enabled/
Test the configuration to identify the errors.
If the configuration has no errors, your output should look like:
nginx: the configuration file /etc/nginx/nginx.conf syntax is ok
nginx: configuration file /etc/nginx/nginx.conf test is successful
Restart the Nginx server.
sudo systemctl reload nginx
Allow incoming connections on port 80.
In a web browser, navigate to the URL as shown below.
http://example.com
Deny incoming connections on port 3000.
Certbot allows you to acquire SSL certificates from "Let's Encrypt", a free certificate authority. These SSL certificates serve as cryptographic keys that enable secure communication between a user and a web server. In this section, you'll learn how to request a free SSL certification from "Let's Encrypt" for your domain and implement HTTPS for your application. You'll also learn how to set the certificate to auto-renew before it expires in 90 days.
Allow incoming connections on port 443 for HTTPS.
Install the certbot package using the snap package manager.
sudo snap install --classic certbot
Request a new SSL certificate for your domain. Make sure to replace example.com with your actual domain name.
sudo certbot --nginx -d example.com -d www.example.com
In a web browser, navigate to the URL as shown below
https://example.com
Test that the SSL certificate auto-renews upon expiry.
sudo certbot renew --dry-run
In this section, you'll learn how to scale your PM2 services both up and down. Additionally, you'll explore various other PM2 commands for monitoring your application processes.
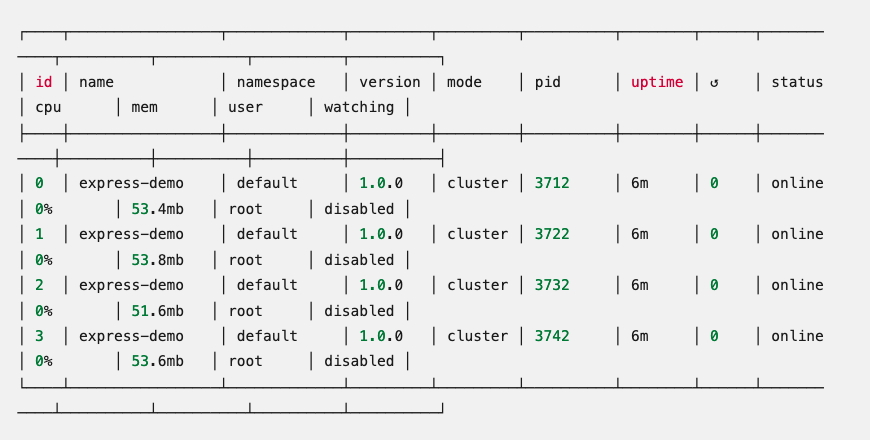
List all the PM2 processes.
Example output:
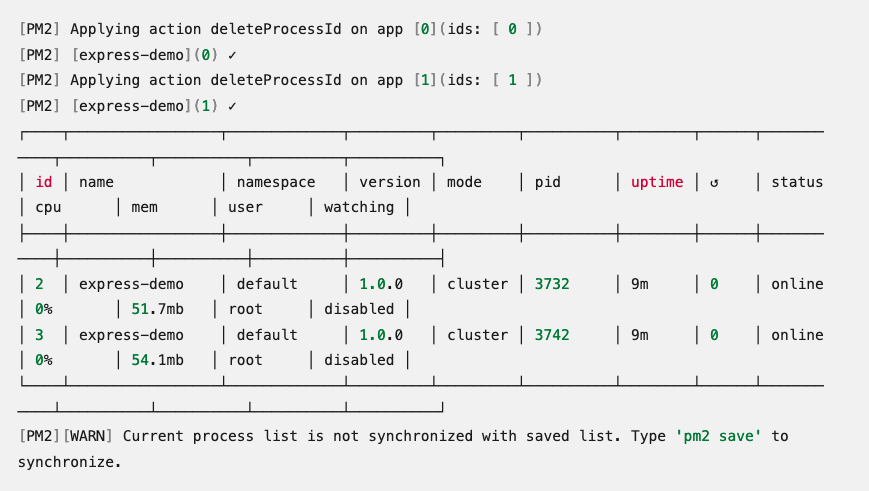
To scale down your Node.js application, run the pm2 scale command as shown below. Make sure to replace express-demo with your actual service name.
The above command reduces the instance count from the four instances running initially to two.
Example output:
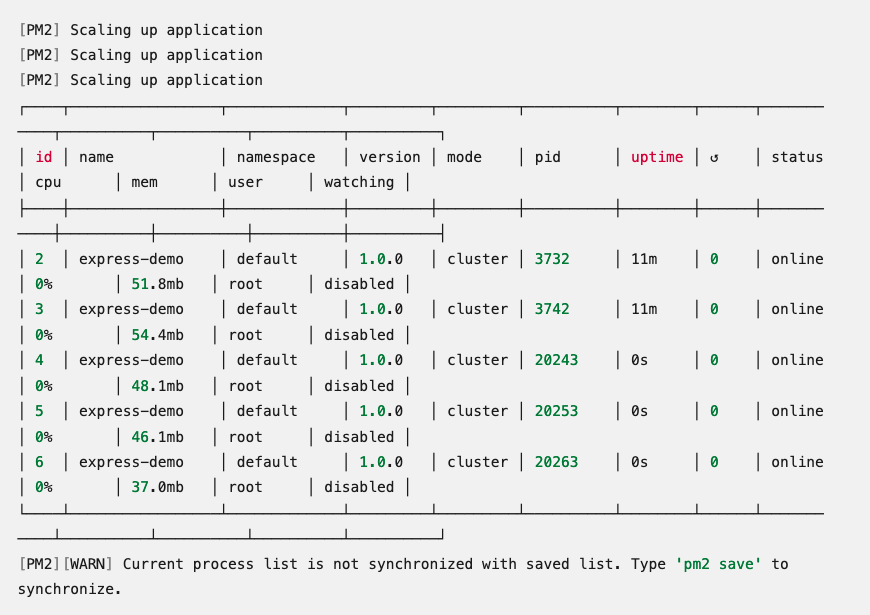
To scale up your Node.js/Express application, run the pm2 scale command as shown below. Make sure to replace express-demo with your actual service name.
The above command increases the instance count from the two instances running to five.
Example output:
To stop all PM2 processes:
To restart all PM2 processes:
To soft-reload all PM2 processes:
Soft reloading helps to minimize downtime for your Node.js/Express application by reloading instances one by one.
To monitor all PM2 processes:
To examine the logs generated by PM2:
In this article, you learned how to deploy a Node.js application using PM2 on a Vultr Cloud Compute server. The tutorial guided you through the steps to create, scale, and monitor a PM2 service. You also learned how to set up Nginx as a reverse proxy server for your PM2 service and secure it with an SSL certificate.
As an extension of your Node.js deployment, consider using a Vultr Managed Database to host the database associated with your application. It provides a secure, highly available, and easily scalable database cluster that works right out of the box.
This is a sponsored article by Vultr. Vultr is the world's largest privately-held cloud computing platform. A favorite with developers, Vultr has served over 1.5 million customers across 185 countries with flexible, scalable, global Cloud Compute, Cloud GPU, Bare Metal, and Cloud Storage solutions. Learn more about Vultr.
此内容由惯性聚合(RSS阅读器)自动聚合整理,仅供阅读参考。 原文来自 — 版权归原作者所有。