In this blog post, you will learn step-by-step how to handle file uploads in a PHP application.
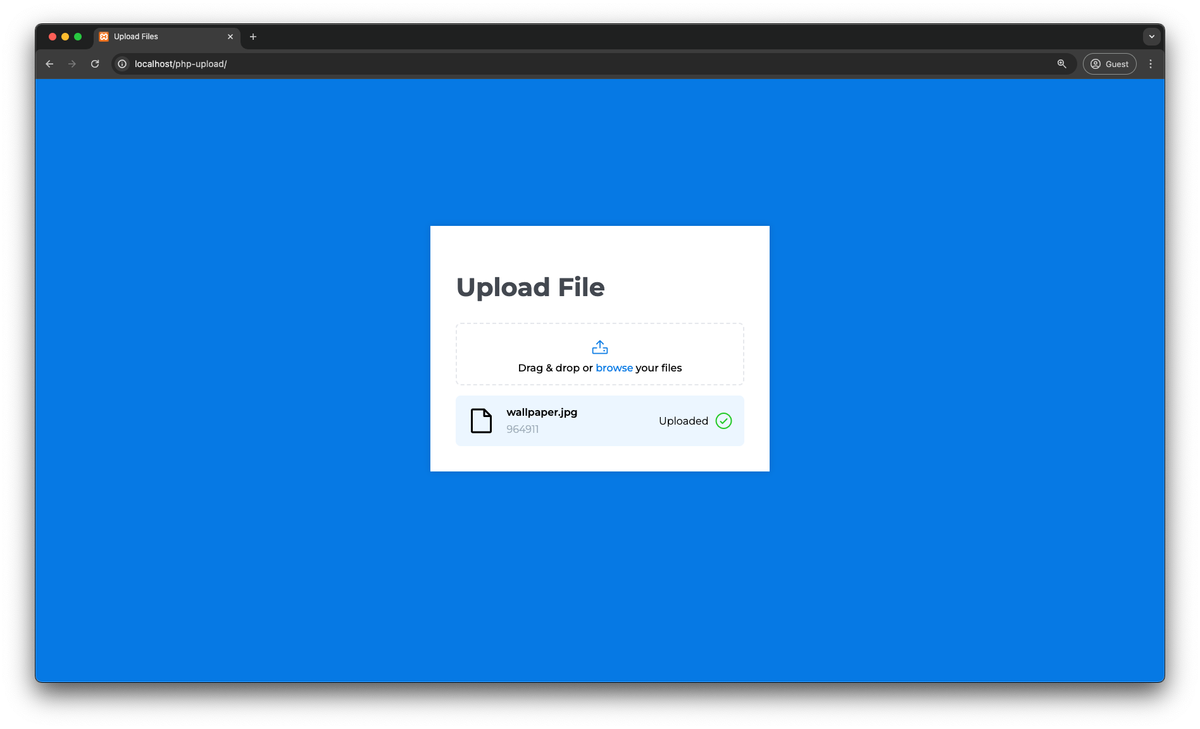
Once we are done, you will have an application that looks like this:
Here’s a summary of what you’ll learn in this tutorial:
- Setting up the application in PHP.
- Creating a customized user interface for uploads.
- Implementing an upload progress bar.
- Adding basic validation into the flow.
- Things you should consider when designing a file upload system e.g. security, scalability, and flexibility.
Sounds fun, doesn’t it? Let’s dive in 🚀🚀
You can check out the live demo on CodeSandbox and explore the code on Github.
What do you need to continue?
PHP development environment:
There are various ways to set your local machine for PHP development
- Install the required software - Apache / Nginx (Web Server), PHP & Database (MySQL / MariaDB)
- You can also use a pre-packaged distribution for LAMP stack like XAMPP, WampServer, and BitNami
Basic Knowledge of
- HTML / CSS
- PHP: Functions, Includes, Arrays
- Database
- Code editor like VS Code or Sublime Text
You're good to go if you’ve checked all these listed above.
Setting up the development environment
ℹ️
You can skip directly to the next step if you already have a development environment.
For the scope of this tutorial, we will use XAMPP. Setting up XAMPP is as simple as downloading it from the ApacheFriends website and running it.
Once installed in the XAMPP Control Panel, make sure the “Apache Web Server” is in a “Running” state. If not, you can click on the “Start” button.

To ensure the server is running, open localhost in your web browser.

Setting up the project
Let's start by creating the files we will use for our project. First, we need to navigate to the webroot directory of your local server environment. The location of this directory can vary depending on your operating system and the server software you're using. For those utilizing XAMPP, the default installation directories are as follows:
- For Windows:
C:\xampp\htdocs - For Mac:
/Applications/XAMPP/htdocs - For Linux:
/opt/lampp/htdocs
Navigate to the appropriate directory on your system. Once there, create the following directories and files for our project:
\-- php-upload
    |-- index.php
    |-- upload.php
    |-- style.css
    |-- uploads/
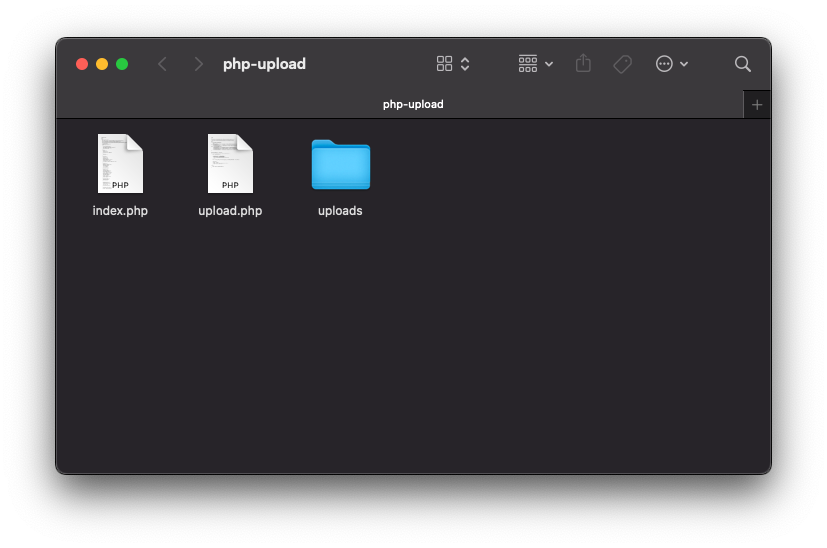
These files consist of the following:
index.php: This file will act as our entry point into the application, which contains the upload interface and AJAX code to process the formupload.php: This file will handle the uploaded files and designate them to a particular directory.style.css: This file contains the styles associated with the UI
Setting up the upload form
To upload files, users need a way to select or drag and drop their files. A basic HTML form can do this.
<!DOCTYPE html>
<html>
  <head>
    <meta charset="utf-8">
    <meta name="viewport" content="width=device-width,minimum-scale=1">
    <link rel="preconnect" href="https://fonts.googleapis.com">
    <link rel="preconnect" href="https://fonts.gstatic.com" crossorigin>
    <link href="https://fonts.googleapis.com/css2?family=Montserrat:ital,wght@0,100..900;1,100..900&display=swap" rel="stylesheet">
    <title>Upload Files</title>
    <style>
      /* Add styles here */
    </style>
  </head>
  <body>
    <form class="upload-form" action="upload.php" method="post" enctype="multipart/form-data">
      <h1>Upload File</h1>
      <label for="file">
        <i class="ph ph-upload"></i>
        <span> Drag & drop or <span style="color: #0c7ce5; display: inline-block; margin: 0px 2px;">browse</span> your files </span>
      </label>
      <input id="file" type="file" name="file">
      <div class="result" style="display: none;">
        <i class="ph ph-file"></i>
        <div class="file-details">
          <span class="file-name"></span>
          <span class="file-size"></span>
        </div>
        <div class="upload-result"></div>
      </div>
    </form>
    <script src="https://unpkg.com/@phosphor-icons/web"></script>
    <script type="text/javascript">
      /* Add JavaScript here */
    </script>
  </body>
</html>

Now, let’s change the appearance of this form to make it look awesome. Add the CSS code from the provided file to the style tag at the end of the head.
https://github.com/imagekit-samples/tutorials/blob/php/native/index.php
This is what we have with the CSS applied.

Time to add some functionality to the form; in the script tag at the end of the body, add the following Javascript
const form = document.querySelector('.upload-form');
const fileInput = form.querySelector('input[type="file"]');
const outputBox = form.querySelector('.result');

function uploadFile(file) {
  outputBox.querySelector('.file-name').textContent = file.name;
  outputBox.querySelector('.file-size').textContent = `${(
    file.size / 1024
  ).toFixed(2)} KB`;

  outputBox.querySelector('.upload-result').innerHTML = `
        <i class="ph ph-circle-notch"></i>
      `;

  outputBox.style.display = 'flex';

  const formData = new FormData();
  formData.append('file', file);

  const xhr = new XMLHttpRequest();
  xhr.open('POST', form.action);

  xhr.onreadystatechange = () => {
    if (xhr.readyState === XMLHttpRequest.DONE) {
      if (xhr.status === 200) {
        outputBox.querySelector('.upload-result').innerHTML = `
              <span>${xhr.responseText}</span>
              <i class="ph ph-check-circle"></i>
            `;
      } else {
        outputBox.querySelector('.upload-result').innerHTML = `
              <span>${xhr.responseText}</span>
              <i class="ph ph-x-circle"></i>
            `;
      }
    }
  };

  xhr.send(formData);
}

form.addEventListener('dragover', function (event) {
  event.preventDefault();
});

form.addEventListener('drop', function (event) {
  event.preventDefault();
  if (event.dataTransfer.files.length) {
    uploadFile(event.dataTransfer.files[0]);
  }
});

fileInput.addEventListener('change', function (e) {
  const file = fileInput.files?.[0];

  if (file) {
    uploadFile(file);
  } else {
    outputBox.textContent = 'No file selected';
  }

  form.reset();
});
In the above code, we are performing the following tasks:
- It selects the necessary DOM elements from the HTML document using document.querySelector().
- We bind various events using addEventListener() to perform their respective operations. During the dragover event, it's essential to call
event.preventDefault()to enable proper drop functionality. - When a file is selected via the file picker, it triggers the change event, the file is obtained as
HTMLInputElement.files, which is essentially a fileList. We select a single file by accessingevent.target.files[0]and then pass the file touploadFilefunction. - In the case of a drop event, the file is obtained from the dataTransfer property of the event, which contains a list of files. We access a single file using
event.dataTransfer.files[0]. - The
uploadFilefunction updates theoutputBoxwith file information, such as the file name and size. It then appends the file as form data and initiates anXMLHttpRequest. ThisXMLHttpRequestis configured to send a POST request to the server using the form's action URL - which is ourupload.php. - The selected file is sent to
upload.phpusing a POST Method, and the response is shown in the UI.
If you try to upload a file in this state, you will get a false state that says that the upload was successful; this is because the upload.php has no code to handle the incoming file.
Setting up the upload backend
Let’s switch gears to the server-side implementation. For now, we will save the the file in local filesystem and respond with appropriate status.
In the upload.php file, add the following code, which handles that are uploaded to the server and saves them in the $UPLOAD_DESTINATION folder i.e. ./uploads/
<?php

/**
 * PHP returns an appropriate error code along with the file array.
 * This array is used to map the error code to a human-readable message.
 * @see https://www.php.net/manual/en/features.file-upload.errors.php
 */
define(
    'PHP_UPLOAD_ERROR_MESSAGES',
    array(
        UPLOAD_ERR_OK => 'There is no error, the file uploaded with success', // UPLOAD_ERR_OK = 0
        UPLOAD_ERR_INI_SIZE => 'The uploaded file exceeds the upload_max_filesize directive in php.ini', // UPLOAD_ERR_INI_SIZE = 1
        UPLOAD_ERR_FORM_SIZE => 'The uploaded file exceeds the MAX_FILE_SIZE directive that was specified in the HTML form', // UPLOAD_ERR_FORM_SIZE = 2
        UPLOAD_ERR_PARTIAL => 'The uploaded file was only partially uploaded', // UPLOAD_ERR_PARTIAL = 3
        UPLOAD_ERR_NO_FILE => 'No file was uploaded', // UPLOAD_ERR_NO_FILE = 4
        UPLOAD_ERR_NO_TMP_DIR => 'Missing a temporary folder', // UPLOAD_ERR_NO_TMP_DIR = 6
        UPLOAD_ERR_CANT_WRITE => 'Failed to write file to disk.', // UPLOAD_ERR_CANT_WRITE = 7
        UPLOAD_ERR_EXTENSION => 'A PHP extension stopped the file upload.', // UPLOAD_ERR_EXTENSION = 8
    )
);

$UPLOAD_DESTINATION = './uploads/';

if (isset ($_FILES["file"]) && !empty ($_FILES["file"])) {

    $file = $_FILES["file"];

    if ($file["error"] !== UPLOAD_ERR_OK) {
        header('HTTP/1.1 400 Bad Request');
        echo PHP_UPLOAD_ERROR_MESSAGES[$file["error"]];
        exit;
    }

    $error = move_uploaded_file($file["tmp_name"], $UPLOAD_DESTINATION . $file["name"]);

    if ($error) {
        echo 'Uploaded';
    } else {
        header('HTTP/1.1 500 Internal Server Error');
        echo 'Failed to move file';
    }

} else {
    header('HTTP/1.1 400 Bad Request');
}
Let's understand what is happening in the code above:
Defining Error Messages:
- The
definefunction is used to create a constant associative array calledPHP_UPLOAD_ERROR_MESSAGES. This array maps PHP file upload error codes to human-readable messages. These error codes are defined constants in PHP, each representing a different type of upload error (e.g., file size exceeds limits, file partially uploaded, no file uploaded, etc.). - The purpose of defining these messages is to provide clear, understandable feedback to the user instead of cryptic error codes.
- To learn more about these error codes, you can refer to the official PHP documentation
- The
Upload Destination:
$UPLOAD_DESTINATIONis a variable that specifies the directory where uploaded files should be stored.- It's set to
'./uploads/', indicating a directory nameduploadsat the same level as the script.
Handling file uploads:
- The existence of the
filefield is checked in the$_FILESSuperglobal array, and that it’s not empty. This is crucial because it indicates that a file has indeed been submitted for upload. - The file information from
$_FILES["file"]is then stored in a variable called$file. This includes metadata such as the file name, type, size, temporary storage path, and any error code associated with the upload.
- The existence of the
Error handling:
- Before proceeding with the file move operation, we first check if any errors were encountered during the upload operation by examining
$file["error"]. - If an error is present (i.e., the error code is not
UPLOAD_ERR_OK), we send a400 Bad RequestHTTP header and output the corresponding error message fromPHP_UPLOAD_ERROR_MESSAGEarray. - It is crucial to terminate the execution of the code at this point in time by calling the
exitconstruct; otherwise the code will continue to execute further.
- Before proceeding with the file move operation, we first check if any errors were encountered during the upload operation by examining
Moving the uploaded File:
- If no errors were encountered during the file upload, we attempt to move the file from its temporary location to
$UPLOAD_DESTINATION, preserving the original name - This is done using the
move_uploaded_fileFunction, which also performs a security check to ensure that the file is indeed an uploaded file and not a system file being moved maliciously. - This function returns a boolean value to report success or failure.
During a failure state, no action occurs. The reasons for failure can be either of the following:- If the file being moved is not a valid upload file.
- If the file is a valid upload file but can’t be moved for some reason. A warning will be issued with an error message
- If no errors were encountered during the file upload, we attempt to move the file from its temporary location to
Success or failure feedback:
- If the
move_uploaded_fileFunction returnstrue, it indicates that the file has been successfully moved, and the script outputs 'Uploaded'. - If the function returns
false, the script sends a500 Internal Server ErrorHTTP header and outputs 'Failed to move file' indicate a problem with the server's ability to write the file to its destination.
- If the
Request without file:
- If the initial condition checks for the presence of the
filein$_FILESfails (meaning no file was submitted for upload), the script sends a400 Bad RequestHTTP header. This branch doesn't output a specific message but could be modified to do so for clearer user feedback.
- If the initial condition checks for the presence of the
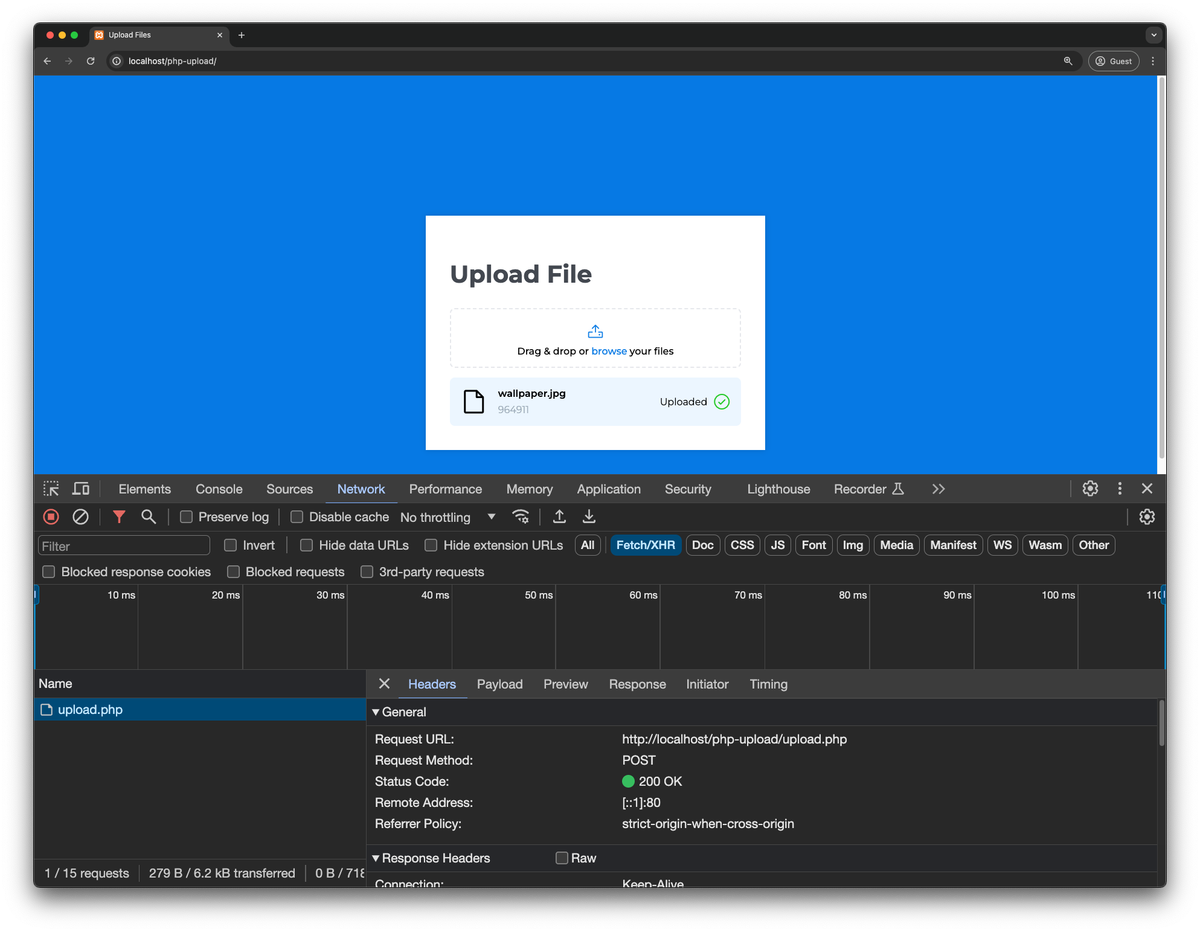
Let’s test it out
With the backend and front end working, we seem to have completed the upload function, so now it’s time to test it out once.
If things go well, you should be able to see a green tick with an “Uploaded” message right next to the file's name.
⚠️
However, on Unix-based systems, you might encounter a 500 Internal Server error when trying to move the file.
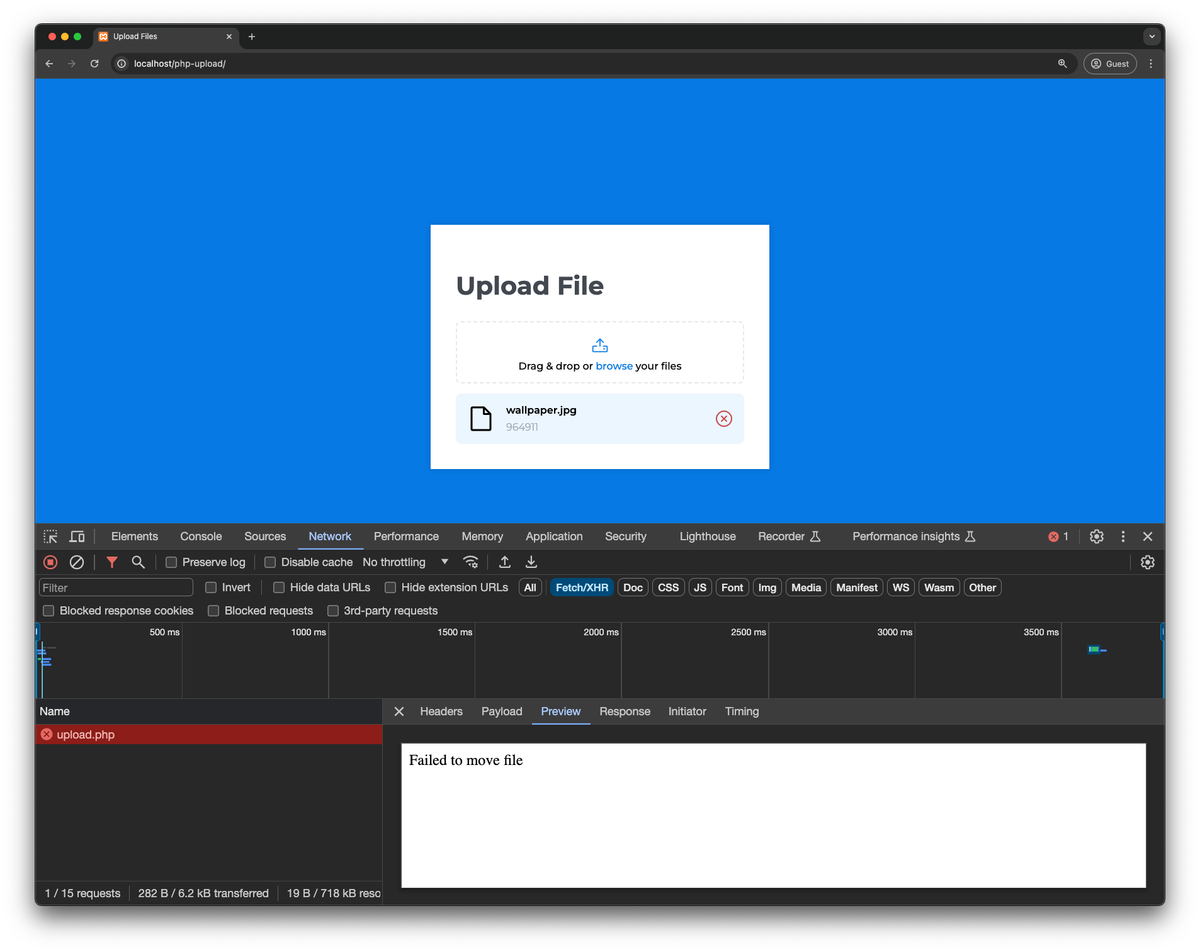
This can happen because of two reasons:
uploadsFolder is missing.- PHP does not have the required permission to write to the
uploadsfolder. This can be fixed by running the commandchmod 777 ./uploads.
Implementing upload progress bar
Now that we have a working file upload in place let's add a progress bar for better user experience.
In index.php, replace the div with the class result with the following code.
<div class="result" style="display: none;">
  <i class="ph ph-file"></i>
  <div class="file-details">
    <span class="file-name"></span>
    <div class="progress-bar">
      <div class="progress" style="width: 0%"></div>
    </div>
    <span class="file-size"></span>
  </div>

  <div class="upload-result"></div>
</div>
After that, add the CSS styles related to the progress bar in the <style> tag.
.upload-form .result .progress-bar {
  width: 100%;
  height: 0.25rem;
  background-color: #e3e5ea;
  border-radius: 0.25rem;
  overflow: hidden;
}

.upload-form .result .progress-bar .progress {
  height: 100%;
  background-color: #0c7ce5;
}
It's time to add the javascript to update the progress bar. This can be achieved by using the progress event fired on the XMLHttpRequest.upload object. The event gives us 3 read-only properties with which we can calculate the percentage of the upload, but we are more interested in the following
total: The total size of the file being uploadedloaded: The size of the file that has already been uploaded
So, let’s bind the event to the XHR request to update the progress bar. In the script tag, add the following javascript.
xhr.open('POST', form.action);

xhr.upload.onprogress = (event) => {
  const progress = (event.loaded / event.total) * 100;
  outputBox.querySelector('.progress').style.width = `${progress}%`;
}
Voila!! You should now have a working progress bar for your file uploads.
Upload Validations
Finally, to make this production-ready, the upload flow should include at least basic file validations to prevent abuse of the API. These validations may be changed to suit business requirements.
- Blocking all request methods except POST on the upload.php
if ($_SERVER['REQUEST_METHOD'] !== 'POST') {
    header('HTTP/1.1 405 Method Not Allowed');
    exit;
}
- Restricting files based on type metadata, for example, to allow only video files to upload
if (!preg_match('/video\/*/', $file['type'])) {
    header('HTTP/1.1 400 Bad Request');
    echo "Unsupported format! Please upload a video file!"
	exit;
}
To restrict the file size, we have multiple safeguards
You can configure
upload_max_filesizein php.ini file to implement a hard limit to upload files. This limit will prevent any files greater than the specified value from being uploaded.You can implement a file size check to restrict files larger than that
// $file['size'] is in bytes
if ($file['size'] > 200000) {
  header('HTTP/1.1 400 Bad Request');
  echo "Please upload a file less than 200KB!";
  exit;
}
- To prevent overwriting any existing upload, it’s recommended to always call move_uploaded_file with a file name that’s not already used in the destination folder
One of the simplest ways to achieve this would be to create an MD5 of uniqid() function in PHP and change the file name to the generated hash
$filename = md5(uniqid()).'.'.end(explode('.', $file['name']));
In case you want to allow upload for larger files, you should be aware of two server-side settings available in the php.ini file
post_max_size: This setting determines the maximum size of a POST request. The default value of this parameter is 8MB.
upload_max_filesize: This setting determines the maximum file size that can be uploaded. The default value of this parameter is 2MB. This value should not exceed
post_max_size.
Kudos! We have a fully functional file upload widget ready for PHP. You can see a functional application on CodeSandbox
What's wrong with this approach?
Creating an upload system from scratch is completely doable and great for small-scale projects, but what if the application goes viral? Is it built to handle a large number of users trying to upload large files? Will the users be able to upload files at full speed? These are some of the questions you should ask yourself when designing the upload functionality in your application.
The DIY approach is good for learning, but it is not suitable for real-world applications. ImageKit.io is a third-party service that can handle all your file upload and storage needs.
Let’s discuss some of these hurdles you might encounter
Limited File Storage on Servers
The files that are uploaded in the above example are stored on a file system that is limited by the disk attached to your servers, which means that as you scale up, you are going to need larger and larger disks.
One more problem with using disks is that they can be attached to one server only, which will prevent you from running multiple instances of the application.
ImageKit helps you to handle globally distributed uploads of billions of files, terabytes of data, and hundreds of requests per second.
High latency with large file upload
Files like videos take longer to upload, which requires a faster backend, and if your users are in different parts of the world, they might experience high latencies when trying to upload to your application geolocated in one region.
One of the ways to overcome this issue would be to deploy and run the backend of your application in multiple regions
ImageKit offers a global endpoint for upload API that intelligently routes your upload request to the nearest seven regions strategically located around the globe to minimize upload latencies.
Security
File uploads serve as an entry point for hackers to inject malicious files onto the server, which could compromise your entire cloud infrastructure.
Offloading the handling of files to an external service safeguards your server from various types of attacks.
File Delivery
Once you have successfully uploaded the files, you might have a use case to deliver those files to your users. This requires creating another layer in your application.
ImageKit provides a very powerful delivery API that allows you to deliver files at a high request rate. It also offers a boatload of features like intelligent image optimization, image resizing, cropping, watermarking, file format conversion, video optimization, video streaming and much more.
Uploading files to ImageKit directly from the browser
Uploading directly from the browser saves us from handling the file upload on the PHP backend and reduces server load and bandwidth usage. To achieve this, we will need to perform the following steps
- Setup Javascript SDK
Instead of directly using the upload API, we'll be using the .upload() method provided by the JavaScript SDK to upload files to the ImageKit Media Library. - Generate authentication parameters
If we want to implement client-side file upload, we will need atoken,expirytimestamp, and a validsignaturefor that upload.
Setup Javascript SDK
We’ll start by using the same frontend we created above. However, instead of calling the ImageKit API ourselves in Javascript, we’ll use ImageKit Javascript SDK, which provides a wrapper around the upload API to simplify the process.
Get the Developer Credentials from the ImageKit Dashboard
From the Developer settings in the ImageKit Dashboard, find and save your public key and private key to be used later.

Import and Initialise the Javascript SDK
Adding the JavaScript SDK is simple. Just insert the following script tag into the body of your HTML document. Alternatively, if you have Node set up, you can also install the JavaScript SDK using npm.
<script type="text/javascript" src="https://unpkg.com/imagekit-javascript/dist/imagekit.min.js"></script>
Update the script tag with the form handling to the code below. Make sure to replace your public key and url endpoint copied in the previous step in the snippet
const imagekit = new ImageKit({
  publicKey: 'YOUR_PUBLIC_KEY',
  urlEndpoint: 'YOUR_IMAGEKIT_URL_ENDPOINT',
});

const form = document.querySelector('.upload-form');
const fileInput = form.querySelector('input[type="file"]');
const outputBox = form.querySelector('.result');

form.addEventListener('dragover', function (event) {
  event.preventDefault();
});

form.addEventListener('drop', function (event) {
  event.preventDefault();
  if (event.dataTransfer.files.length) {
    uploadFile(event.dataTransfer.files[0]);
  }
});

function getToken(cb) {
  const xhr = new XMLHttpRequest();
  xhr.responseType = 'json';

  xhr.onload = function () {
    if (this.status === 200) {
      cb(null, this.response);
    } else {
      cb(new Error('Failed to get token'));
    }
  };

  xhr.onerror = function () {
    cb(new Error('Failed to get token'));
  };

  xhr.open('GET', 'http://localhost/php-upload/imagekit-token.php?token=123');

  xhr.send();
}

// Upload file using ImageKit
function uploadFile(file) {
  outputBox.querySelector('.file-name').textContent = file.name;
  outputBox.querySelector('.file-size').textContent = `${(
    file.size / 1024
  ).toFixed(2)} KB`;

  outputBox.querySelector('.upload-result').innerHTML = `
          <i class="ph ph-circle-notch"></i>
        `;

  outputBox.style.display = 'flex';

  getToken(function (err, token) {
    if (err) {
      console.log(err);
      outputBox.querySelector('.upload-result').innerHTML = `
                  <i class="ph ph-x-circle"></i>
              `;
      return;
    }

    const xhr = new XMLHttpRequest();

    xhr.upload.addEventListener('progress', function (event) {
      const progress = (event.loaded / event.total) * 100;
      outputBox.querySelector('.progress').style.width = `${progress}%`;
    });

    imagekit.upload(
      {
        xhr,
        file: file,
        fileName: file.name,
        token: token.token,
        signature: token.signature,
        expire: token.expire,
        useUniqueFileName: false,
        folder: '/php-upload',
      },
      function (err, result) {
        if (err) {
          console.log(err);
          outputBox.querySelector('.upload-result').innerHTML = `
                      <i class="ph ph-x-circle"></i>
                  `;
        } else {
          console.log(result);
          outputBox.querySelector('.upload-result').innerHTML = `
                  <i class="ph ph-check-circle"></i>
                  `;
        }
      }
    );
  });
}

fileInput.addEventListener('change', function () {
  const file = fileInput.files?.[0];

  if (file) {
    uploadFile(file);
  } else {
    outputBox.textContent = 'No file selected';
  }

  form.reset();
});
Let’s understand what this code does
- Initialization of ImageKit Instance: The
ImageKitSDK is initialized with a public key and a URL endpoint. - getToken Function: This function makes a GET request to a server-side script (
imagekit-token.php) to retrieve an authentication token necessary for uploading files. The token, along with a signature and expiry time, is returned from the server. This approach is used for security reasons, ensuring that the private key is not exposed in the client-side code. - uploadFile Function:
- Calls
getTokento get the authentication token required for uploading. - The
imagekit.uploadmethod is called with the file details and the token information received from the server. - This method handles the actual upload of the file to ImageKit and allows a couple of different parameters to manipulate the upload request to get the desired result; for example,
useUniqueFileNameis set totruewhich prevents overwriting files in the Media Library by modifying the file name before saving it on the server. You can find all the related documentation to the upload API here - The
imagekit.uploadmethod also includes a parameter calledxhr, which allows us to pass a customXMLHttpRequestobject to bindprogressor any other events for a customized implementation, similar to how we discussed above
- Calls
Generate authentication parameters
Now that we have done the front end, you might have observed that we have called a server-side script called imagekit-token.php in the above code. This script returns the authentication parameters required for browser-side upload.
We will use the ImageKit PHP SDK in this file to create the authentication parameters. Learn more about how to create the authentication parameters here
So, to achieve this, we need to install Composer to add the SDK.
- Installing Composer
You can install Composer by simply following the instructions on their website
or
You can download the composer binary into the project folder using curl
curl "https://getcomposer.org/download/latest-stable/composer.phar" -o composer
chmod +x composer
- Installing the SDK
You can install the SDK by simply running the following command
composer require imagekit/imagekit
Once successfully installed, you shall see a couple of new files and folders being created in your project
\-- php-upload
    ....
    |-- vendor/
    |-- composer.json
    |-- composer.lock
- Now, we create a file called
imagekit-token.phpand add the following code. Make sure to replace the Public Key, Private Key, and URL endpoint in the initialization of the ImageKit class
<?php

require_once('vendor/autoload.php');

use ImageKit\ImageKit;

$imageKit = new ImageKit(
    "YOUR_PUBLIC_KEY",
    "YOUR_PRIVATE_KEY",
    "URL_ENDPOINT"
);

header('Content-Type: application/json');
echo json_encode($imageKit->getAuthenticationParameters($token="", $expire = time() + 60));
And we are done; we should have a completely functional application that uploads your files to ImageKit.
To fetch the uploaded file, you can find the url of the file in the console.log as shown in the video above
Upload Validations in the front end
To enforce limits related to file size and file type, we can add checks before calling the upload API in Javascript itself to improve user experience.
- Restrict uploads for a specific file type
In the javascript we added in Step 5, we can check if the file that’s being uploaded is indeed a specific type of file, for instance, a video file.
....
if (file) {
    outputBox.querySelector('.file-name').textContent = file.name;
    outputBox.querySelector('.file-size').textContent = `${(file.size / 1024).toFixed(2)} KB`;

    outputBox.querySelector('.upload-result').innerHTML = `
      <i class="ph ph-circle-notch"></i>
    `;

    outputBox.style.display = 'flex';

    if (!file.type.startsWith("video/")) {
        outputBox.querySelector('.upload-result').innerHTML = `
            <i class="ph ph-x-circle"></i>
        `;
    } else {
        uploadFile(....)
    }
} else {
....
- Restrict uploads depending on file size
In the javascript we added in Step 5, we can check if the file that’s being uploaded is less than a specified size.
....
if (file) {
    outputBox.querySelector('.file-name').textContent = file.name;
	outputBox.querySelector('.file-size').textContent = `${(file.size / 1024).toFixed(2)} KB`;

	outputBox.querySelector('.upload-result').innerHTML = `
      <i class="ph ph-circle-notch"></i>
    `;

	outputBox.style.display = 'flex';

	// File size less than 10 MB
	if (!(file.size < 10 * 1024 * 1024)) {
		outputBox.querySelector('.upload-result').innerHTML = `
            <i class="ph ph-x-circle"></i>
        `;
	} else {
		uploadFile(....)
	}
} else {
....
What more does ImageKit have to offer?
Once we are done with the upload, we require a scalable solution to optimize and deliver these assets with various transformations. ImageKit.io is a powerful platform that offers a comprehensive solution for end-to-end media management, optimization, and delivery.
Image and Video optimization
ImageKit.io offers multiple features, including automatic best format selection, quality optimization, and metadata manipulation out of the box, to reduce the final size of the output image.ImageKit.io also offers multiple video optimization features.Image and Video transformation
You can apply transformations to images and videos by modifying the URL parameters. It can be as basic as manipulating the height and width of the image or as complex as watermarking or smart cropping or object-aware cropping of your images. Similarly, for videos, you can use them for generating thumbnails, converting GIFs to MP4, and streaming videos using ABS for optimal viewing experience.Collaboration & Sharing
ImageKit's Digital Asset Management solution allows you to organize, share, and control user access with various permission levels for users and user groups.
Conclusion
In this tutorial, we've covered:
- Building a file upload application in PHP from scratch.
- Implementing file type and size validations for secure uploads.
- Transitioning to ImageKit.io for direct uploads from the browser, making our application more efficient and scalable.
- Utilizing ImageKit's free upload API and PHP SDK for a streamlined experience with minimal code.
You can check out the live demo on CodeSandbox and explore the code on Github.