Introduction
This article will explore how to play different video formats like MP4, WebM, and Adaptive Bitrate Streaming(ABS) protocols like HLS and DASH across all the major browsers in Next.js. We will cover the features and limitations of HTML <video> tag and the need for external video players like video.js.
For this tutorial, a stable version of Node 18.17.0 or above is needed.
You can find the complete code on GitHub.
Creating a Next.js project
To create a new project, run the below command in the code terminal; it contains all the required flags to avoid user interactivity.
npx create-next-app@14.1.3 video-player --ts --eslint --app --no-src-dir --use-npm --no-tailwind --import-alias '@/*'💡
Note that we are using a specific version of Next.js, i.e., 14.1.3, because later, we will integrate the video.js library and some of its plugins, which have reported compatibility issues with the latest version of Next.js at the time of this writing. Sticking to the versions mentioned in this tutorial will help you avoid compatibility issues.
Here's how the boilerplate code appears in the Visual Studio Code editor:

To run the project, use the below command:
npm run devAfter running this command, the web server can be accessed at http://localhost:3000/. Whenever we edit and save any page in the project, it will hot reload itself.

Using HTML video element
HTML5 provides us with a standard video tag that can be directly used in Next.js to play videos. It comes with various attributes like autoPlay, controls, playsInline, etc., which cover most of the use cases and give us appropriate control over video.
Let's begin by playing our first video. We will use this video, which is publicly hosted on ImageKit.
Replace the app/page.module.css code with the below code:
.container {
  display: flex;
  flex-direction: column;
  justify-content: space-between;
  align-items: center;
  padding: 6rem;
  min-height: 100vh;
}
Replace the app/page.tsx code with the below code:
import styles from "./page.module.css";

export default function Home() {
  return (
    <main >
      <div className={styles.container}>
        <video height="452" width="768" >
          <source src="https://ik.imagekit.io/ikmedia/example_video.mp4" />
          Your browser does not support the video tag...
        </video>
      </div>
    </main>
  );
}
We should have something like this:

At this point, the video player didn't render user controls. To provide controls, we can add a controls attribute in the video element that will allow the user to control video playback, including volume, seeking, and pause/resume playback.
import styles from "./page.module.css";

export default function Home() {
  return (
    <main >
      <div className={styles.container}>
        <video height="452" width="768" controls >
          <source src="https://ik.imagekit.io/ikmedia/example_video.mp4" />
          Your browser does not support the video tag...
        </video>
      </div>
    </main>
  );
}

The video content downloaded by the browser, as seen in the network tab:

Resizing video
Resizing video can easily be achieved by editing height and width attributes. Let's resize the video to 200 x 200 px, as shown below.
<video height="200" width="200" controls>
  <source src="https://ik.imagekit.io/ikmedia/example_video.mp4" />
  Your browser does not support the video tag...
</video>
There are two issues with the above way of resizing:
- Despite reducing the dimensions of the video, the browser will still need to download the original large video. We can verify this in the network tab, as
Content-Lengthin both cases remains the same:

2. We don't have any control over the cropping mode. By default, it maintains the aspect ratio and leaves extra space blank, as shown below.

To overcome these challenges, we need to encode the video on the server side so that the browser downloads the resized video. It will result in faster downloads because of the smaller file size. Also, on the server side, you can control the cropping behavior.
For this tutorial, we will use ImageKit.io video API, which provides URL-based transformation parameters to control resizing, cropping and a lot more.
Let's add tr=w-200,h-200 query parameter in the video URL to resize the video using ImageKit.
<video height="200" width="200" controls>
  <source src="https://ik.imagekit.io/ikmedia/example_video.mp4?tr=w-200,h-200" />
  Your browser does not support the video tag...
</video>
There is a significant file size reduction. This will save valuable bandwidth and ensure that video plays smoothly, even on slow network connections.

Due to the default cropping mode of ImageKit.io, we also see that the video covers a complete 200 * 200 px box above.
Multiple source tag
The <video> tag contains one or more <source> tags with different video sources. The browser will choose the first source it supports.
For example, the MOV format is not supported in Chrome, but Safari can play it. So, based on the browser, Chrome vs Safari picks and plays different sources.
<video height="200" width="200" controls >
  <source src="https://ik.imagekit.io/ikmedia/file_example_MOV_640_800kB.mov?tr=orig-true" type="video/quicktime" />
  <source src="https://ik.imagekit.io/ikmedia/sample-5s.webm?tr=f-mp4" type="video/webm" />
  Your browser does not support the video tag...
</video>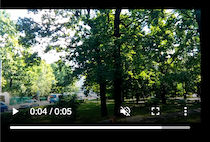

Video thumbnail
A video thumbnail is a still image that acts as the preview image for our video. A great video thumbnail can be the difference between getting a few views and a few thousand views. By default, the first frame of the video is shown as a thumbnail, but only after the browser loads the video.
💡
There is preload attribute in the video element that decides whether the video can be preloaded by the browser before playing it or not; if you set its value as preload=none then no thumbnail will be shown by default.
Hence, to ensure the thumbnail of our choice is visible across browsers, irrespective of whether the video is downloaded or not, we should use the poster attribute. It takes the image path as a value.
Let's add the image below to our repository in the public folder.

Now, we will provide its path as value to the poster attribute as shown below
<video height="200" width="200" controls
  poster="../thumbnail.png">
  <source src="https://ik.imagekit.io/ikmedia/example_video.mp4" />
  Your browser does not support the video tag...
</video>
💡
Notice that the path given is poster="../thumbnail.png" and not poster="../public/thumbnail.png" because assets hosted in the public folder is available on the root directory path.
Now, our video with a custom thumbnail looks like the below:

There are a few challenges, as mentioned below:
- If we want to use a particular frame from the video apart from the first frame, such as at a precise timestamp of 7.5 seconds, then we will need third-party tools to extract the requisite frame.
- After extracting the thumbnail, we need to store it somewhere like we did above, creating an overhead that leads to extra storage, too.
To solve the above problems, we can use ImageKit. For example, if we want an image at the 7.5-second mark with dimensions of 200x200 pixels from the video mentioned above, we can utilize ImageKit's video thumbnail feature. The URL would appear as follows:
https://ik.imagekit.io/ikmedia/example_video.mp4/ik-thumbnail.jpg?tr=so-7.5,w-200,h-200The video will have a thumbnail as depicted below:
 <video height="200" width="200"
    poster="https://ik.imagekit.io/ikmedia/example_video.mp4/ik-thumbnail.jpg?tr=so-7.5,w-200,h-200"
    controls>
    <source src="https://ik.imagekit.io/ikmedia/example_video.mp4?tr=w-200,h-200,c-maintain_ratio" />
    Your browser does not support the video tag...
</video>
Playing inline video
When playing a video on an iOS mobile device, by default, it opens in full-screen mode, as shown in the video attached:
To prevent this, the video element provides the playsInline attribute that determines whether the video plays inline or in full-screen mode.
The code snippet with playsInline attribute looks like the following, and the behavior is demonstrated in the accompanying video:
<video height="200" width="200"
    playsInline
    controls
    poster="https://ik.imagekit.io/ikmedia/example_video.mp4/ik-thumbnail.jpg?tr=so-7.5,w-200,h-200" >
    <source src="https://ik.imagekit.io/ikmedia/example_video.mp4?tr=w-200,h-200,c-maintain_ratio" />
    Your browser does not support the video tag...
</video>💡
It's important to note that the absence of the playsInline attribute doesn't imply that the video will always play in full-screen mode. The behavior may vary depending on the browser and device. However, to ensure that the video consistently plays inline across browsers and devices, using the playsInline attribute is recommended.
Automatically playing videos
You might want to auto-play the video on a typical marketing website to demonstrate a feature or product.
To do this, the video element provides the autoPlay attribute. To ensure that a video autoplays across most browsers, it's essential to pair the autoPlay attribute with the muted attribute. Additionally, incorporating the playsInline attribute is crucial for ensuring compatibility with iOS devices.
The final code snippet looks like the following:
<video height="200" width="200"
    autoPlay
    muted
    playsInline
    controls
    poster="https://ik.imagekit.io/ikmedia/example_video.mp4/ik-thumbnail.jpg?tr=so-7.5,w-200,h-200" >
    <source src="https://ik.imagekit.io/ikmedia/example_video.mp4?tr=w-200,h-200,c-maintain_ratio" />
    Your browser does not support the video tag...
</video>
Limitation of HTML video element
The video element excels at playing common video formats across major browsers, but what if we want Adaptive bitrate streaming (ABS)?
Unfortunately, the standard HTML video element does not support ABS out of the box. Custom video players like video.js come in handy here. video.js provides us with a unified cross-browser API.
Adaptive Bitrate Streaming
Before proceeding further, let's understand ABS a bit. ABS dynamically adjusts the quality of video content based on the viewer’s network conditions. The video is encoded at different bitrates, resulting in different qualities.
Subsequently, a manifest file, similar to a text file, is prepared and contains information about segments of the video at varying bit rates. During playback, the video player uses this manifest file to determine the optimal bitrate based on the viewer’s network conditions, thereby delivering the best possible viewing experience. This process is known as Adaptive Bitrate Streaming (ABS).
Currently, there are two major protocols for ABS, which lead to two different types of manifest files.
- HTTP Live Streaming (HLS) - The manifest file is denoted with
m3u8extension. - Dynamic Adaptive Streaming over HTTP (MPEG-DASH) - The manifest file is denoted with
mpdextension.
Creating these manifest files yourself can be tricky. To streamline this, you can utilize a video API platform like ImageKit. ImageKit offers a straightforward URL-based parameter for generating a manifest file in the protocol of your choice.
Why video.js?
As discussed above, we need video libraries to implement Adaptive Bitrate Streaming(ABS). There are several video libraries recommended by Next.js documentation, of which we will choose video.js. Below are the reasons for this choice:
- ABS support - The library has been supporting ABS protocols out of the box since version 7.0, making implementation straightforward and hassle-free.
- Accessibility Feature - The library offers advanced keyboard navigation and screen reader compatibility, democratizing usability and broadening accessibility for all users. More information is available here.
- Cross-Browser Compatibility - The library ensures that users experience consistent behavior for various video formats across different browsers, enhancing user convenience and providing a seamless viewing experience. For example, it can play
movvideo files in Chrome browser out of the box. - Various plugins - The library supports various 3rd party plugins for easy customization and various support. In the upcoming video.js demo, we will use the httpSourceSelector plugin to offer a manual quality-level selection of videos.
How to use video.js
In this section, we will provide a step-by-step guide to implementing video.js in Next.js.
First, let's copy the code of app/page.tsx into a new folder video-element at path app/video-element/page.tsx
Now, our existing page will also be available on the new route http://localhost:3000/video-element
Then, install the npm dependencies below with specific versions to avoid incompatibility issues.
npm install video.js@7.18.1 videojs-contrib-quality-levels@2.1.0 videojs-http-source-selector@1.1.6💡
Using the specific version 7.18.1 of video.js instead of the latest release is essential. This choice ensures compatibility with the plugins we'll utilize later in the tutorial. Maintaining consistency with this version is crucial to preventing compatibility issues.
After this, install the dev dependency by running the following command.
npm install --save-dev @types/video.js@7.3.57Creating VideoJS component
Now, create a video player component in the new file VideoPlayer.tsx at app/components/VideoPlayer.tsx.
import { useEffect, useRef } from "react";
import videojs from "video.js";
import "video.js/dist/video-js.css";

//to provide quality control option in ABS Video
import "videojs-contrib-quality-levels";
import "videojs-http-source-selector";

export const VideoJS = (props: { options: any; onReady?: any; }) => {
    const placeholderRef = useRef<any>(null);
    const playerRef = useRef<any>(null)
    const { options, onReady } = props;

    useEffect(() => {
        // Make sure Video.js player is only initialized once
        if (!playerRef.current) {
         // The Video.js player needs to be inside the component element for React 18 Strict Mode.
            const placeholderEl = placeholderRef.current;
            const videoElement = placeholderEl.appendChild(
                document.createElement("video-js")
            );

            const player: any = videojs(videoElement, options, () => {
                player.log("player is ready");
                onReady && onReady(player);
            });

            playerRef.current = player

            // Binding to the source selector plugin in Video.js
            player.httpSourceSelector();

            // You can update player in the `else` block here, for example:
        } else {
            const player = playerRef.current;
            player.autoplay(options.autoplay);
            player.src(options.sources);
        }

    }, [options, onReady]);

    // Dispose the Video.js player when the functional component unmounts
    useEffect(() => {

        const player = playerRef.current;

        return () => {
            if (player) {
                player.dispose();
                playerRef.current = null;
            }
        };
    }, [playerRef]);

    return <div ref={placeholderRef}></div>;
};

export default VideoJS;
Here, we have used two plugins videojs-http-source-selector and videojs-contrib-quality-levels to provide functionality for choosing different video quality.
ℹ️
Compatibility with React 18 StrictMode
Note that we are utilizing a placeholder element placeholderEl to append our Video.js element.
This approach is necessary because React 18 StrictMode introduces additional behaviors that aim to prepare for a reusable state in dev mode. Specifically, during a component's initial mounting, React simulates mounting, unmounting, and then mounting again.
When React simulates unmount, the video.js dispose removes the video element from the DOM, which invalidates the ref that React held, leading to an error. Hence, by wrapping it in the parent element, we can get rid of this error.
Using VideoJS component with HLS protocol
To configure video.js an options object is passed, the complete list can be found here. The options passed are similar to the props value in the HTML video element. In addition, it also accepts a plugin object, which contains a list of plugins.
The following URL will generate an HLS manifest and four variants at different resolutions i.e., 240p, 360p, 480p, and 720p using ImageKit ABS capabilities.
https://ik.imagekit.io/ikmedia/sample-video.mp4/ik-master.m3u8?tr=sr-240_360_480_720Now replace the code at app/page.tsx with the code below. Notice that the we are using use client; on the top because we are using client-side hooks like useEffect and useRef.
"use strict";
"use client"; // to ensure client side execution as we are using client-side hooks like useRef
import styles from "./page.module.css";
import { useRef } from "react";
import videojs from "video.js";
import VideoJS from "./components/VideoPlayer";


export default function Home() {
  const playerRef = useRef(null);

  const videoJsOptionsM3u8 = {
    controls: true,
    autoplay: false,
    width: 400,
    sources: [
      {
        src: 'https://ik.imagekit.io/ikmedia/sample-video.mp4/ik-master.m3u8?tr=sr-240_360_480_720',
        type: 'application/x-mpegURL'
      },
    ],
    plugins: {
      httpSourceSelector:
      {
        default: 'auto'
      }
    }
  };

  const handlePlayerReady = (player: any) => {
    playerRef.current = player;

    console.log(player.qualityLevels())

    // You can handle player events here, for example:
    player.on('waiting', () => {
      videojs.log('player is waiting');
    });

    player.on('dispose', () => {
      videojs.log('player will dispose');
    });
  };
  return (

    <main >
      <div className={styles.container}>
        <VideoJS options={videoJsOptionsM3u8} onReady={handlePlayerReady} />
      </div>
    </main>
  );
}
Now you should be able to see and select the quality levels from the player. See the live demo hosted on CodeSandbox here:
Playing DASH protocol
Now, to run the DASH protocol video, we just need to replace the source with the correct URL and content type. Let's create a new object for the DASH protocol and pass it as options in the video component.
....
   const videoJsOptionsMpd = {
    controls: true,
    autoplay: false,
    width: 400,
    sources: [
      {
        src: 'https://ik.imagekit.io/demo/sample-video.mp4/ik-master.mpd?tr=sr-240_360_480_720_1080',
        type: 'application/dash+xml'
      },
    ],
    plugins: {
      httpSourceSelector:
      {
        default: 'auto'
      }
    }
  };
....
  return (

    <main >
      <div className={styles.container}>
        <VideoJS options={videoJsOptionsMpd} onReady={handlePlayerReady} />
      </div>
    </main>
  );
}
Conclusion
The article begins by exploring the fundamentals of the HTML video element and its seamless integration with Next.js. It then delves into the intricacies of various attributes of the video element and offers best practices for their usage.
We also learned how ImageKit video API can simplify various use cases, such as video resizing or creating thumbnails for better engagement. We explore the necessity of a video library like Video.js and how it simplifies the playback of various Adaptive Bitrate Streaming Protocols like HLS and DASH.
You can find the complete code on GitHub and see the live demo of ABS hosted on CodeSandbox.