





In the highly competitive eCommerce landscape of 2025, online video as a content strategy is no longer the hip and upstart new trend but essential for success. 91% of businesses say putting video front and center has helped them boost traffic. What about those who adopted video as a content and marketing tool? A staggering 92% reported that it helped them see an increase in their ROI (1).
The verdict is clear: video is the ultimate storyteller’s tool. Static content is no longer enough to grab the modern customer's attention and can only get you so far.
The money, now, is in product showcase reels, explainer videos, live product launch streams, and influencer reviews. The equation has changed where there are less expectations from the consumer to make blind purchases, and instead, providing more data for the consumer to make an informed decision.
In such a scenario, it’s not surprising that high-quality product videos that provide a better first impression of the product generate more engagement than traditional marketing campaigns.
But working with online video can be challenging on all levels. You need technical expertise even to have a basic implementation up and running. Then, there are pitfalls around browser/device compatibility, buffering, managing playback errors, and maintaining optimal video quality. Also, what about CDNs and caching?
This is where video upload APIs come in, streamlining the process of uploading and optimizing videos, no matter your use case.
What is a Video Upload API?
A video upload API is an interface that enables developers to upload videos programmatically to an application, platform, or website.
They provide a set of functions that can be called from within an application, handling many of the technical aspects of video upload (video transcoding, format conversion, and video quality optimization, among others).
Using these APIs, you could just POST your video somewhere and GET it back, optimized for playback on any device, via a public URL you could embed anywhere you needed.
In this blog post, we’ll examine how to implement exactly such a process, with a focus on both:
- Server-side implementations (the most common use-case for your assets) and
- Client-side implementations (whether that’s an intranet app for your org, or if you’re handling user-generated content)
But first, let’s answer the most common question.
What benefits does Video Upload APIs provide?
Even if you are a niche eCommerce offering running out of your own garage, you would have image/video asset storage needs for your products that’ll range in the gigabytes. Starting from scratch, how would you handle uploads this big?
Rack-based physical storage has a massive barrier to entry (cost and technical expertise), and so cloud offerings like AWS S3, Azure Blob Storage etc. could be a solution…but now you’ll be faced with other questions.
Are you just supposed to upload assets one at a time to your cloud provider and pray for the best?
What if some uploads were time-sensitive?
What if one or more uploads failed?
How is this approach even supposed to scale as you grow bigger?
If your business uses videos at scale and needs to upload them without much hassle, you should instead leverage purpose-built video upload APIs like ImageKit. Here's why.
1. Faster time to market
Building and maintaining a custom video upload and processing infrastructure can be costly and time-consuming, particularly for small or new eCommerce businesses that may not be able to afford the table stakes of infrastructure and technical expertise.
Video Upload APIs can help these businesses save on development and maintenance costs by providing a ready-made, RESTful solution in the cloud that offers pay-as-you-go pricing models and is easy to integrate and scale as needed.
2. Reliable uploads
When you’re dealing with a large volume of video files of diverse formats and genres, uploading them directly to a server like S3 could be a slow, error-prone process and may even result in timeouts leading to hours of lost progress (StackOverflow is full of cries for help with these). Such unforced downtimes of your product pages can and will hinder your conversion rates.
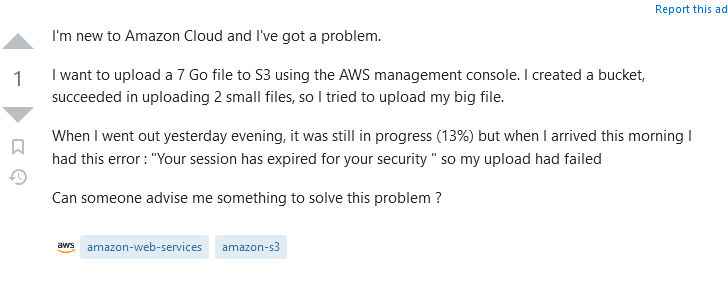
Using a video upload API like ImageKit ameliorates these issues because, unlike a general-purpose object storage solution, it is designed from the ground up to handle large volumes of videos and can easily scale to accommodate changes in demand without the risk of timeouts or similar issues.
Using a video upload API like ImageKit ameliorates these issues because, unlike a general-purpose object storage solution, it is designed from the ground up to handle large volumes of videos and can easily scale to accommodate changes in demand without the risk of timeouts or similar issues.
3. A streamlined, scalable workflow
Automation leads to efficiency. This facet shines if your content strategy involves uploading videos in bulk, say, product showcases, demo videos, influencer reviews, etc.
Using Video Upload APIs that can be accessed programmatically and scale to demand opens up the possibility of automating the upload and the pre-configured encoding and delivery settings. This batching saves you the time and effort required to configure and upload each video manually.
4. Heightened security
Any Video Upload API worth its salt offers enhanced security features that help protect your assets from unauthorized access. These APIs provide secure authentication mechanisms, such as OAuth, or a set of public and private API keys combined with a hashing algorithm, to ensure that only authorized users can upload or access videos.
For instance, ImageKit uses HMAC-SHA1 digests for authenticating client-side file upload requests. Further, you’d also have tertiary security features like watermarking to protect your videos from misattribution and/or piracy.
How To Use ImageKit’s Upload API
ImageKit provides SDKs that streamline video uploads from both the Server (NodeJS, Python, PHP, Go, etc.) as well as the Client (React, Angular, Vue.js, Vanilla JS and more).
Using NodeJS (server-side) and React (client-side) examples, let’s see how you could use ImageKit to tackle a scenario that you’ll encounter countless times while managing your eCommerce store – uploading short (<30 seconds) showcase videos that play on PDP’s (Product Detail Pages).
A. Server-side Uploads
Server-side uploads are a controlled environment, and the best-case scenario as far as you (as a developer) are concerned. You have full control over what you upload, and since you’re not shipping any JavaScript to the browser, you’ll have a much lighter client.
Step 1: Setup
Ensure you have Node.js and NPM installed on your machine.
Sign up for ImageKit and get your API Keys (public and private) from the Dashboard here. Put them in your .env file. You’ll want something like
.envinstalled for reading ENV files.
npm install dotenv --save
- Then, install ImageKit’s Node.js SDK.
npm install imagekit --save
Step 2: The Code
const ImageKit = require("imagekit");
const fs = require("fs");

// Step 1 : SDK initialization
const imagekit = new ImageKit({
  publicKey: process.env.IMAGEKIT_PUBLIC_KEY,
  privateKey: process.env.IMAGEKIT_PRIVATE_KEY,
  urlEndpoint: process.env.IMAGEKIT_URL_ENDPOINT,
});

// Step 2 : Provide path to video
const filePath = "path/to/your/video.mp4";

// Step 3 : Read video file
fs.readFile(filePath, function (err, data) {
  if (err) throw err; // Fail if the file can't be read.

  // Step 4 : Add filename and tags
  const fileName = filePath.split("/").pop(); // just remove the extension
  const tags = ["tag1", "tag2"]; // add your own tags

  // Step 5 : Upload to ImageKit!
  imagekit.upload(
    {
      file: data,         //required
      fileName: fileName, //required
      tags: tags,         // optional
    },
    function (error, result) {
      if (error) console.log("Error uploading file: " + error);
      else console.log("File uploaded successfully: " + result); // you'll probably just want result.url
    }
  );
});
We’re using a JSON-encoded response body to send a POST request to ImageKit’s file upload endpoint at https://upload.imagekit.io/api/v1/files/upload and using our public + private API keys for authentication.
If the above-mentioned steps are followed correctly, you'll get an HTTP 200 OK response, and the response body will contain your video’s publicly accessible URL as the url property. You simply take this, persist it somewhere, embed it in your site or app, and you’re good to go!
👉 Read the technical documentation for ImageKit’s Server side file upload
B. Client-side Uploads
The endpoint remains the same for file uploads from the Client, but the authentication methods change – you can no longer use your private key when a browser is involved.
This goes beyond ImageKit, but you should never expose private keys client-side. No matter your use case, never trust the client; always validate requests on the server. And that’s exactly what we’ll do here.
Step 1: Setting up signature-based authentication on the server
First off, you’ll need a server to validate requests using signature-based authentication. For this, we’ll create a very simple API using Express.js.
GET requests from the Client to a specified endpoint on our Server (let’s keep it simple and make it /auth) should calculate and return an HMAC-SHA1 digest using the concatenation of two string inputs:
token– This is a unique value generated by the client, which the ImageKit.io server will use to recognize and prevent subsequent retries for the same request. If you send a token that has been used before, you’ll get a validation error. To be safe, stick to using V4 UUIDs for this.expire– The epoch time, in seconds, until your signature is valid. This must be less than 1 hour into the future.
However, we won’t need to worry about generating this signature ourselves, as we’re using the ImageKit SDK for Node.js which makes this much easier. How? Let’s look at our server code to find out.
var express = require("express");
var app = express();
var PORT = 3001;
require('dotenv').config()

/* ImageKit SDK initialization */
var ImageKit = require("imagekit");
var imagekit = new ImageKit({
  publicKey: process.env.IMAGEKIT_PUBLIC_KEY,
  privateKey: process.env.IMAGEKIT_PRIVATE_KEY,
  urlEndpoint: process.env.IMAGEKIT_URL_ENDPOINT,
});

/* Express Middleware */
// CORS
app.use(function(req, res, next) {
    res.header("Access-Control-Allow-Origin", "*");
    res.header("Access-Control-Allow-Headers",
      "Origin, X-Requested-With, Content-Type, Accept");
    next();
  });

/* Routes */
app.get("/auth", (req, res, next) => {
  res.send(imagekit.getAuthenticationParameters());
});

/* Listen */
app.listen(PORT, function (err) {
  if (err) console.log(err);
  console.log("Server listening on PORT", PORT);
});
imagekit.getAuthenticationParameters() does the heavy lifting for us, calculating the signature we need out of auto-generated (using built-in V4 UUID) token and expire values, and then our Express API returns a response in this format.
{
    token: "1bab386f-45ea-49e1-9f0d-6afe49a5b250",
    expire: 1580372696,
    signature: "0f9d5a45e97c24fa9200a9d5543c9af1e2c45a54"
}
Which is exactly what our client will look for on upload requests.
All done here – on to React land!
Step 2: Installing the ImageKit SDK for React
Installing the ImageKit library for React is pretty simple.
npm install --save imagekitio-react
But before we get to our frontend code, let’s talk about the Environment Variables you’ll need to set up in your .env file.
IMAGEKIT_URL_ENDPOINT– you’ll find this in the URL-endpoint entry in Developer Options on your ImageKit dashboard. This is in the format https://ik.imagekit.io/XXXXXXXXX.IMAGEKIT_PUBLIC_KEY– Self-explanatory. You just used this in the server section.
AUTHENTICATION_ENDPOINT – This is just the path to the auth endpoint on the server you coded in the previous section. For dev, this would be http://localhost:3001/auth
💡
If you’re using a metaframework like NextJS, don’t forget that these Environment Variables need to be prepended with a NEXT_PUBLIC_ to be available on the browser! (e.g. NEXT_PUBLIC_IMAGEKIT_PUBLIC_KEY instead of IMAGEKIT_PUBLIC_KEY)
Step 3: Coding the client
The ImageKit SDK for React offers some awesome prebuilt components that provide all the functionality you’ll need for coding a React client to upload, deliver, and optimize images and videos with ImageKit. You can read about them here and see which fits your use case the best. For our app, we’ll be using these:
IKContextfor passing options like urlEndpoint, publicKey orauthenticationEndpointto all children elements. This component does not render anything. Instead, you use it to wrap other components from the SDK.IKUploadfor client-side file uploading. This renders a<input type="file">tag, using the device’s native file browser to upload files to the ImageKit Media Library.
Let’s see how we can build a simple video upload UI using these.
import React, { useState, useRef } from "react";
import { IKContext, IKUpload } from "imagekitio-react";
export default function App() {
/* State Variables */
const [isUploading, setIsUploading] = useState<boolean>(false);
const [message, setMessage] = useState<string>();
const inputRef = useRef<HTMLInputElement>(null);
const ikUploadRef = useRef<IKUpload>(null);
/* Environment Variables */
const urlEndpoint = process.env.IMAGEKIT_URL_ENDPOINT;
const publicKey = process.env.IMAGEKIT_PUBLIC_KEY;
const authenticationEndpoint = process.env.AUTHENTICATION_ENDPOINT;
/* ImageKit responses */
const onError = (err: any) => {
setMessage("ERROR: \n" + err.message);
setIsUploading(false);
};
const onSuccess = (res: any) => {
setMessage("SUCCESS! Public URL: \n" + res.url);
setIsUploading(false);
};
const onUploadStart = (evt: any) => {
setIsUploading(true);
};
return (
<div>
<IKContext
urlEndpoint={urlEndpoint}
publicKey={publicKey}
authenticationEndpoint={authenticationEndpoint}
>
<div>
<p>Hi!</p>
<p>Upload your video here.</p>
</div>
/* To show result of upload operation */
{message && (
<div>
<p>Upload Complete!</p>
<p>{message}</p>
</div>
)}
<IKUpload
onError={onError}
onSuccess={onSuccess}
onUploadStart={onUploadStart}
style={{ display: "none" }} // hide original upload btn
inputRef={inputRef}
ref={ikUploadRef}
/>
<div>
<div>
{inputRef && (
<button
onClick={() => inputRef.current?.click()}
disabled={isUploading}
>
Upload
</button>
)}
{ikUploadRef && (
<button
disabled={!isUploading}
onClick={() => {
ikUploadRef.current?.abort();
setIsUploading(false);
}}
>
Abort
</button>
)}
</div>
{isUploading && (
<h2>
Uploading...
</h2>
)}
</div>
</IKContext>
</div>
</div>
);
}
Lots of things going on here, but let’s break this down.
- We extract the ImageKit
urlEndpoint,publicKey, andauthenticationEndpointfrom our.envso we can reuse them. - The
IKContextcomponent is a wrapper that automatically provides theurlEndpoint,publicKeyorauthenticationEndpointvariables to all child components, saving you the trouble of manually specifying these props for eachIKImage,IKVideo, orIKUploadcomponent you render. - IKUpload renders a <
input type="file"> HTML tag with default styling, but using a combination of a React ref attached to the original <input> tag, and astyle = {{ display: ‘none’ }}to hide the same, we can provide our own, custom-styled input instead – essentially, a button that acts as a proxy for our real input tag, programmatically clicking the original. - Same with the Abort button (and its corresponding ref for the
IKUpload componentitself.) - The function for the
onUploadStartprop is called when the file upload starts. We’re using it to programmatically show/hide a ‘Loading…’ text, but this can easily be used to show a spinner, progress bar, etc. - Similarly,
onSuccessandonErrorare self-explanatory. We’re using those to set success/error messages that can be rendered in the UI after upload.
💡
For an exhaustive list of props from IKUpload that you can use, check the full API reference here.
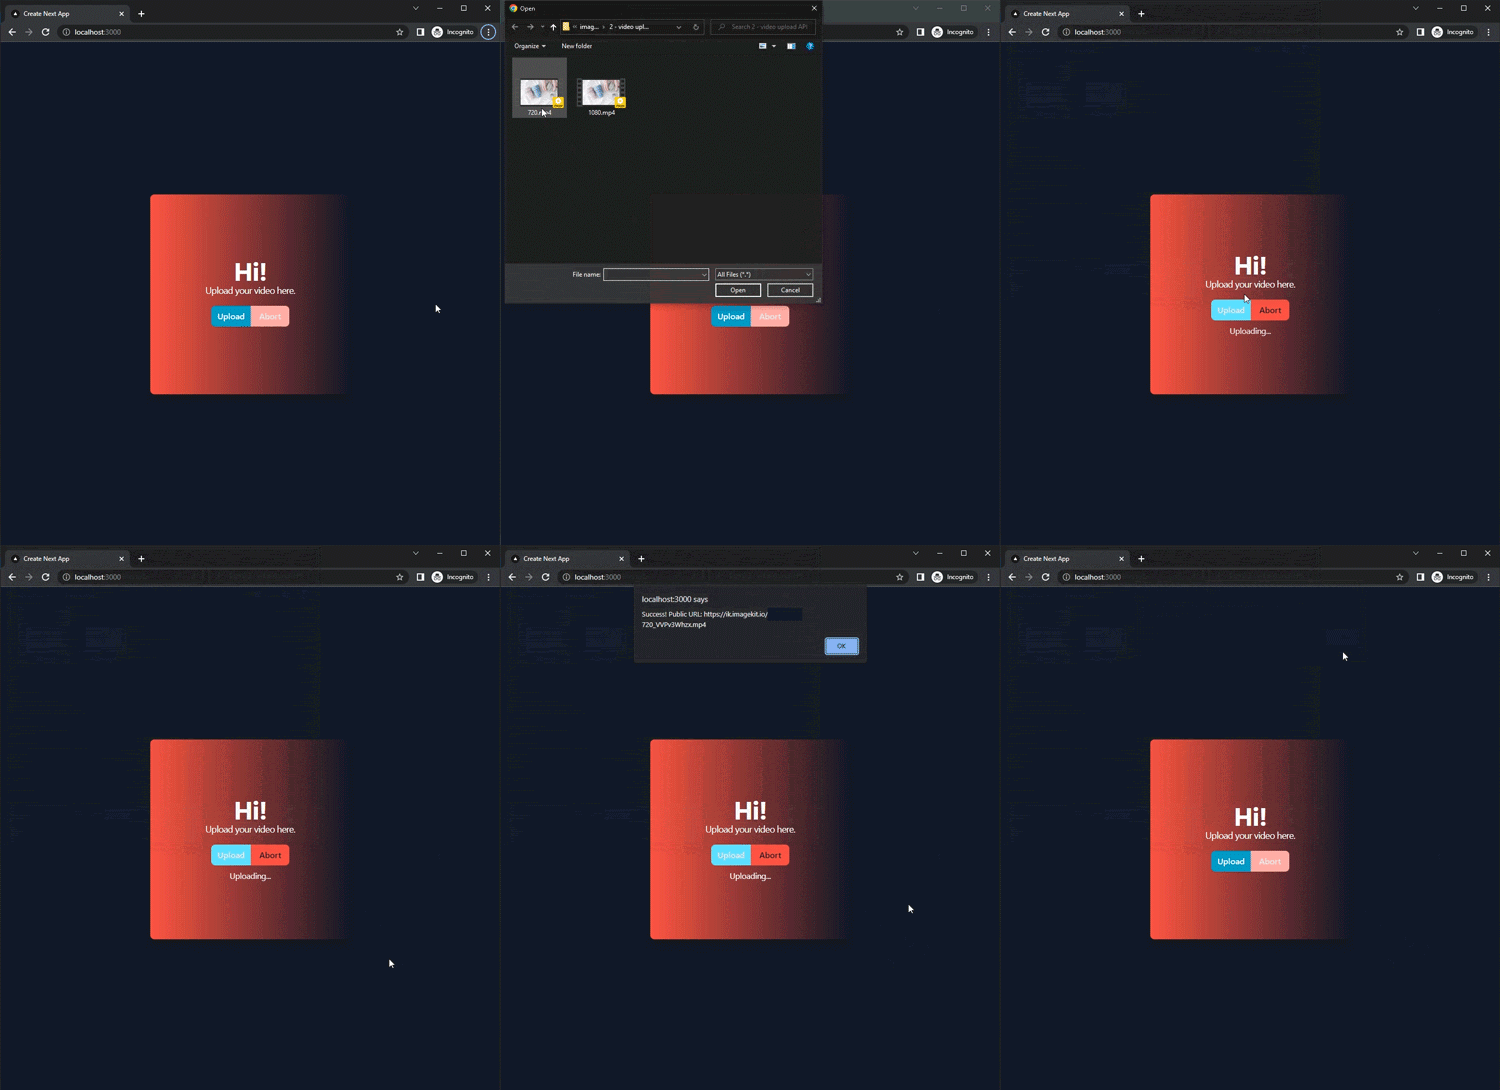
Putting it all together with a dash of Tailwind CSS for styling, and we have this nifty little widget!
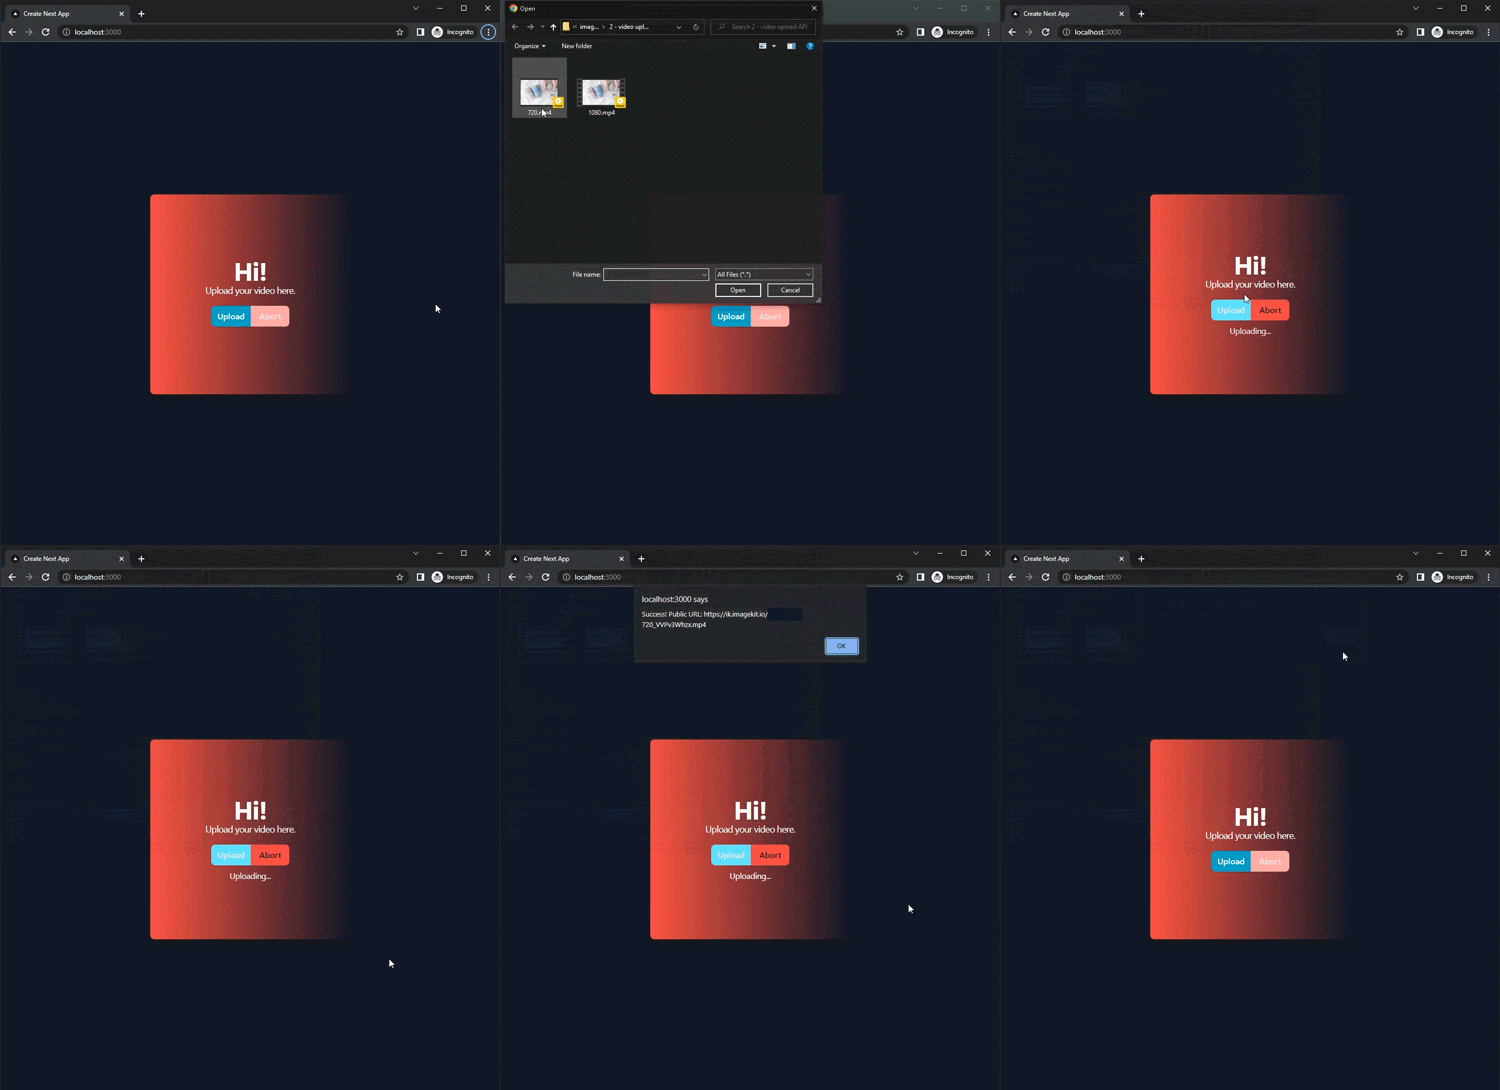
We’ve now covered uploads, on both the server and the client…but you can do more with video APIs than just upload your media.
Let’s take a quick look at how you can further use ImageKit to deliver optimized versions of what you just uploaded, and manipulate and process video on-the-fly.
👉 Read the technical documentation for ImageKit’s client-side file upload
C. Delivering optimized versions of what you just uploaded
To actually render our video, we’re going to use another component from the ImageKit SDK here, IKVideo. We’re wrapping it in IKContext, meaning it will automatically have access to urlEndpoint, and publicKey. We won’t have to specify them explicitly anymore.
import React from "react";
import { IKContext, IKVideo } from "imagekitio-react";
const urlEndpoint = process.env.IMAGEKIT_URL_ENDPOINT;
const productDescription = "YOUR_PRODUCT_DESCRIPTION_HERE";
export default function App() {
return (
<IKContext urlEndpoint={urlEndpoint}>
<div style={{ display: "flex" }}>
<div style={{ flex: 1 }}>
<IKVideo
path={"/relative/path/to/video.mp4"}
controls={true}
/>
</div>
<div style={{ flex: 1 }}>
<h1>ReCup™</h1>
<h2>The Reusable & Portable To-Go Beverage Cup</h2>
<p>{productDescription}</p>
<div style={{ display: "flex" }}>
<div style={{ flex: 1 }}>
<p>Price:</p>
<p>$19.99</p>
</div>
<div style={{ flex: 1 }}>
<p>In stock:</p>
<p>Yes</p>
</div>
</div>
<button>
<span>🛒</span>
Add to cart
</button>
</div>
</div>
</IKContext>
);
}
Pass in the public URL to your video, and this will render an HTML5 <video> tag with necessary optimizations applied. If you’re using IKVideo within IKContext as we are here, all you’d need in the path prop is the relative path to your video.
An additional benefit to ImageKit is that it lets you perform advanced video processing and transformation tasks via its SDK without needing in-house infrastructure or, indeed, any manual editing. You can pass in any of these transformations as array elements via the transformation prop. This lets you chain transformations, and specify the exact order you want for them.
For example, if your use case needs you to render a video that is first cropped to 400x400 pixels at 50% of source quality and then rotated by 90 degrees, this is what your <IKVideo> component would look like:
<IKContext urlEndpoint={urlEndpoint}>
<div style={{ display: "flex" }}>
<div style={{ flex: 1 }}>
<IKVideo
path={"/relative/path/to/video.mp4"}
transformation={[
{ height: "400", width: "400", q: “50” },
{ rt: "90" }
]}
controls={true}
/>
</div>
</div>
</IKContext>
As you can see, using the transformations array via the SDK makes your code much more readable and maintainable than using raw ImageKit URL params to specify transformations.
Check out the full range of ImageKit’s video transformation and optimization pipeline here. Even if you’re not using the SDK, and are instead rolling your own JavaScript, all of these transforms are available to you to use as you see fit. They can help you optimize video quality, format, and delivery and enable editing features like trimming, cropping, and adding overlays or captions.
For example, if you want to add a watermark in light gray over your video, here’s how you could generate that variant on-the-fly, and automatically have it be served from the cache on subsequent fetches.
https://ik.imagekit.io/your_imagekit_id/your_video.mp4?tr=l-text,i-Your Text Here,fs-20,co-CCCCCC,l-end
Covering everything you could do with ImageKit’s API after the actual upload, is beyond the scope of this article. Look into features like thumbnail generation, adaptive bitrate streaming, and webhooks. These will help you to set up an end-to-end encoding and delivery pipeline, with zero in-house infrastructure.
Bringing it all together
ImageKit streamlines the upload-optimization-delivery pipeline for your video assets with a robust, developer-friendly upload API that can be used both in its URL-based form, as well as via SDKs, and on both the Server and the Client. It can also easily integrate with popular web and mobile frameworks, including Vue, React/React Native, Next.js, and PHP.
If you want to deliver blazingly fast, responsive, and secure experiences for your users around the concept of the video, rather than getting caught up in low-level technical details and busywork, ImageKit has you covered no matter your platform of choice.
If that sounds good to you, sign up for a forever-free plan here. With unlimited requests and transforms, you’ll get 20 GB of media storage and 20GB of bandwidth every month.