




High-quality images go a long way in impressing your website visitors. However, they can slow down your website and hamper your user experience. So, it helps compress these images in file size to remain appealing to the users without hindering UX.
Image compression can be done in two ways — lossy or lossless.
What is lossy image compression?
Lossy compression is where the original image file is removed and replaced with the compressed image file. Since the original image cannot be restored, it is also referred to as irreversible compression. However, if done correctly, the data loss is not usually noticeable.
What is lossless image compression?
On the other hand, lossless compression does not lose data in the process. Instead, it “packs” the data into smaller sizes. Imagine writing a logo para in shorthand that a system can read and understand. Lossless compression is akin to that.
Lossless compression is favored for archiving purposes because it can retain the original asset without resulting in data loss. It is often used in medical imaging, technical drawings, clip art, comics, etc.
In addition to these techniques, you can compress images using JavaScript and dedicated tools.
This tutorial will look at compressing images using canvas, browser-image-compression JavaScript library, and ImageKit.
Why do you need image compression?
Image compression delivers several benefits, including:
✅ Reduced file size
The most fundamental benefit of image compression is that it reduces file size. You can keep compressing the image until it's the size you want, depending on the sort of file you're squeezing.
✅ SEO-friendliness
Google search engines use the loading speeds of online pages to rank web pages. As a result, the lower the image weight, the higher the web's score and the chances of scoring higher SERPs.
✅ Faster website loading speed
Using images that are less in weight will help the web load faster on mobile phones. Google does more weightage to websites that perform well on mobile devices.
Also, some web hosting firms also require compressed images to develop websites that load faster than their competitors.
Now that we know the need for image compression let’s get cut to the chase on how to do it using Canvas.
Image compression and demo using Canvas
To get started, we'll need to set up our project.
We will run the code command to start Visual Studio Code from the terminal.
Note: If you don't have Visual Studio Code installed, you won't be able to use code command.
Using the command below, we'll create the script.js and index.html files.
touch index.html script.js
We'll put the following snippet inside index.html to make a simple HTML structure referencing the script.js file we created earlier.
<!DOCTYPE html>
<html lang="en">

<head>
    <title>
        Image compression and demo using Canvas
    </title>
</head>
<body>
   <div id="container">
      <h3>  Image compression and demo using Canvas</h3>
      <input id="imgId" type="file" accept="image/*"/>
  </div>
  <script src="script.js"></script>
</body>
</html>
We'll add the code snippet below into script.js to declare max_width and max_height , which we'll use to compute the image size uploaded later in the tutorial.
const MAX_WIDTH = 320;
const MAX_HEIGHT = 180;

const INPUT = document.getElementById("imgId");
We can now read the file, utilize the onload callback to process and also create a helper image object using the blob URL as the image source, as shown below:
//...

INPUT.onchange = function (event) {
  const file = event.target.files[0]; // get the file
  const blobURL = URL.createObjectURL(file);
  const img = new Image();
  img.src = blobURL;

  img.onload = function () {
    // Calculate image size and Create canvas
  }:
};
We need to create a function to handle image size calculation and read image bytes before calculating image size and creating a canvas for image compression.
Let us add the snippet below to create the calculateSize function.
function calculateSize(img, maxWidth, maxHeight) {
  let width = img.width;
  let height = img.height;

  // calculate the width and height, constraining the proportions
  if (width > height) {
    if (width > maxWidth) {
      height = Math.round((height * maxWidth) / width);
      width = maxWidth;
    }
  } else {
    if (height > maxHeight) {
      width = Math.round((width * maxHeight) / height);
      height = maxHeight;
    }
  }
  return [width, height];
}
We will also create a readableBytes function with the snippet below:
function readableBytes(bytes) {
  const i = Math.floor(Math.log(bytes) / Math.log(1024)),
    sizes = ['B', 'KB', 'MB', 'GB', 'TB', 'PB', 'EB', 'ZB', 'YB'];

  return (bytes / Math.pow(1024, i)).toFixed(2) + ' ' + sizes[i];
}
We can now update the img.onload callback similar to the snippet shown below:
const MAX_WIDTH = 320;
const MAX_HEIGHT = 180;

const INPUT = document.getElementById("imgId");


INPUT.onchange = function (event) {
  const file = event.target.files[0]; // get the file
  const blobURL = URL.createObjectURL(file);
  const img = new Image();
  img.src = blobURL;

  img.onload = function () {
    const [newWidth, newHeight] = calculateSize(img, MAX_WIDTH, MAX_HEIGHT);
    const canvas = document.createElement("canvas");
    canvas.width = newWidth;
    canvas.height = newHeight;
    const ctx = canvas.getContext("2d");
    ctx.drawImage(img, 0, 0, newWidth, newHeight);
    canvas.toBlob(
      (blob) => {
        // Handle the compressed image.
        const displayTag = document.createElement('h1');
        displayTag.innerText = `Original Image - ${readableBytes(file.size)} :::::: Compressed Image - ${readableBytes(blob.size)}`;
         document.getElementById('container').append(displayTag);
      },
    );
  };
};

function calculateSize(img, maxWidth, maxHeight) {
  let width = img.width;
  let height = img.height;

  // calculate the width and height, constraining the proportions
  if (width > height) {
    if (width > maxWidth) {
      height = Math.round((height * maxWidth) / width);
      width = maxWidth;
    }
  } else {
    if (height > maxHeight) {
      width = Math.round((width * maxHeight) / height);
      height = maxHeight;
    }
  }
  return [width, height];
}

function readableBytes(bytes) {
  const i = Math.floor(Math.log(bytes) / Math.log(1024)),
    sizes = ['B', 'KB', 'MB', 'GB', 'TB', 'PB', 'EB', 'ZB', 'YB'];

  return (bytes / Math.pow(1024, i)).toFixed(2) + ' ' + sizes[i];
}
Now, let’s head over to our browser to test the application. If everything is done right, we should have something similar to the screen below:
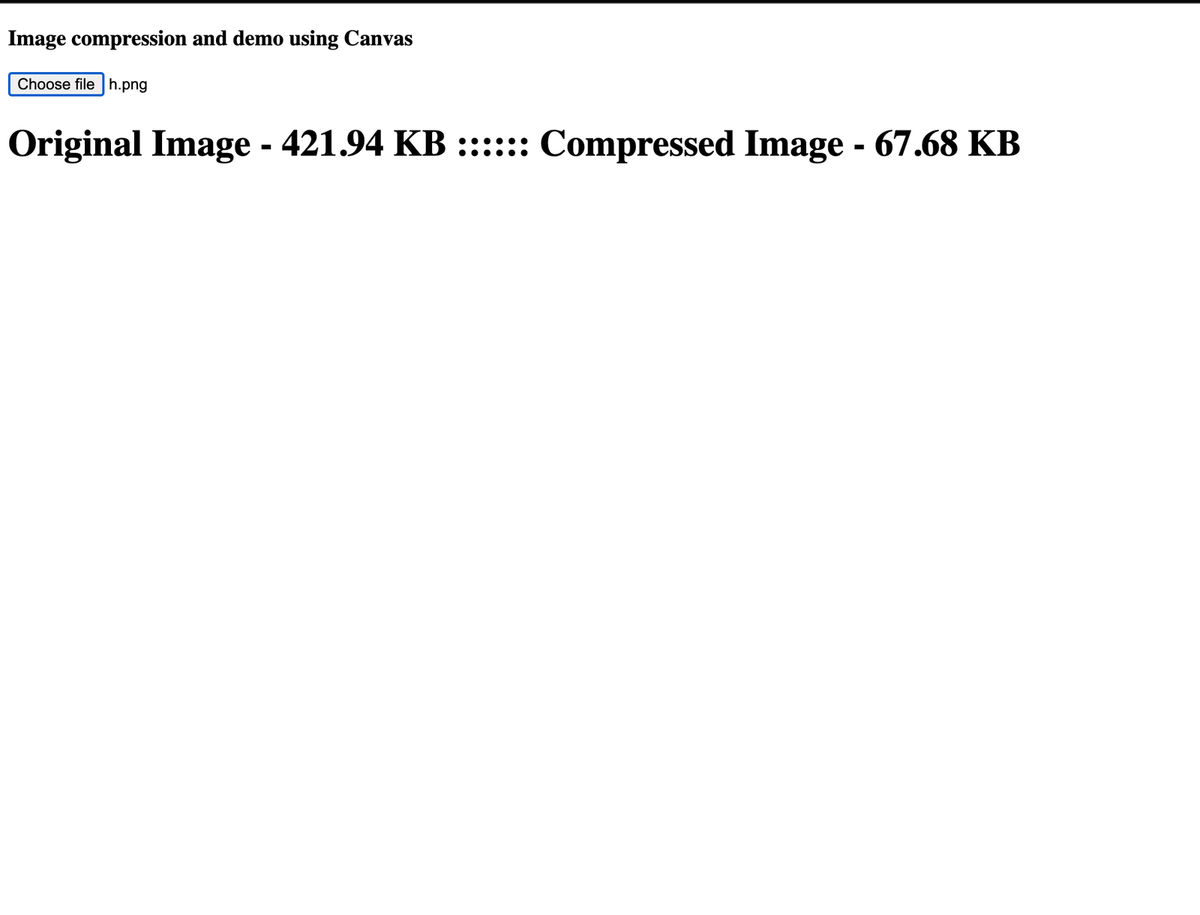
As shown above, we have the original image size on the left-hand side while the compressed image size is on the right-hand side. We have successfully compressed the image using the Canvas approach. You can test the same direction using this codepen link.
Image compression using browser-image-compression JS library
Browser-image-compression is a JS module used for image compression in web browsers. They aid in compressing jpeg and png images by reducing their resolution or file size before uploading them, which results in lesser bandwidth consumption.
To create a new project, we use the npx create-react-app command to scaffold a new project in a directory of our choice.
To install the dependencies, we will be using the command below:
cd <project name>
npm install browser-image-compression
We'll get a message with instructions for browsing our site and running it locally once the app has been created and the dependencies have been installed. This is done using the command.
npm startReact.js will start a hot-reloading development environment accessible by default at http://localhost:3000.
To get started, we will update App.js with the snippet below:
//...
import "./styles.css";

export default function App() {

  return (
    <div>
      <h1>Image compression with "browser-image-compression" dependency</h1>
      <div className="container">
        <input type="file" />
      </div>
      <br />
      <button>Compress</button>
      <div className="container">
        <h3>Original Image Size: </h3>
        <h3>Compressed Image size: </h3>
      </div>
    </div>
  );
}
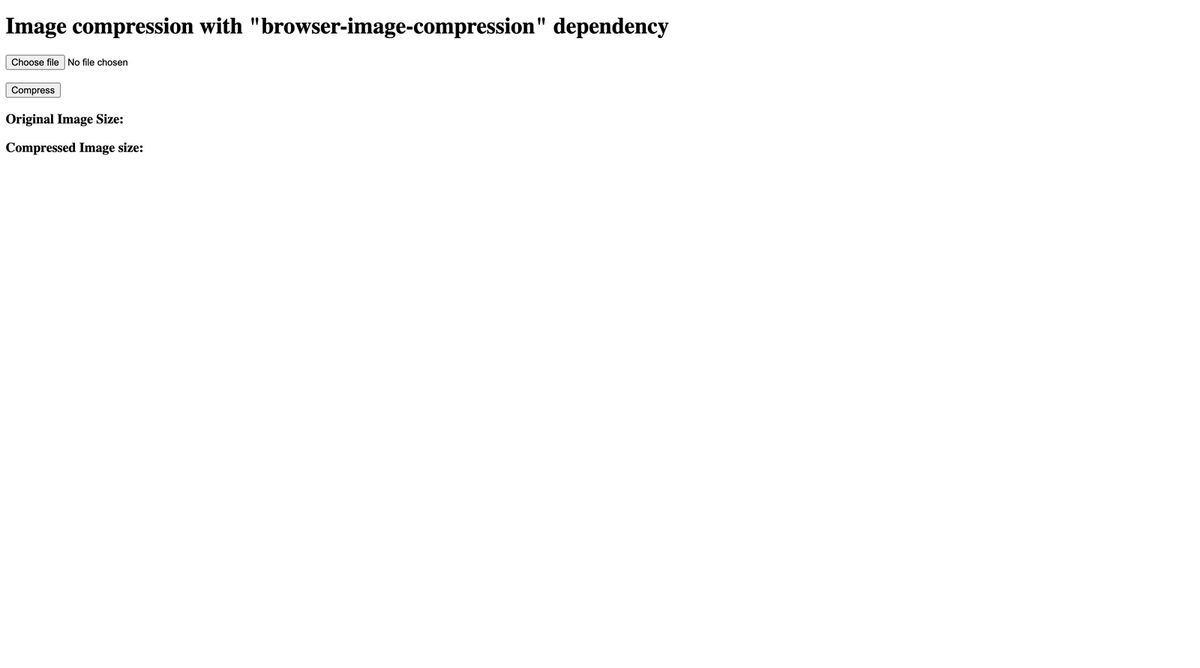
We should have something similar to what is shown below:
Let us now implement the image compression process using the browser-image-compression.
Using the snippet below, we will create different state variables and functions to handle image compression and file upload.
import React, { useState } from "react";
import imageCompression from "browser-image-compression";
import "./styles.css";

export default function App() {

  const [uploaded, setUploaded] = useState(0);
  const [originalImage, setOriginalImage] = useState("");
  const [compressedImage, setCompressedImage] = useState("");

  // File Upload
  const handleFileUpload = (e) => {
    setOriginalImage(e.target.files[0]);
    setUploaded(1);
  };

  // File Compression
  const handleCompression = (e) => {
    if (uploaded) {
      const options = {
        maxSizeMB: 2,
        maxWidthOrHeight: 500,
        useWebWorker: true
      };
      imageCompression(originalImage, options).then((img) => {
        setCompressedImage(img);
      });
    }
  };
  return (
    <div>
      {...}
    </div>
  );
}
In the snippet above, we utilize the browser-image-compression library to handle the compression and update our compressedImage variable with the result. At the same time, we also set originalImage using the handleFileUpload method.
Let us update the App.js component with the snippet below:
import React, { useState } from "react";
import imageCompression from "browser-image-compression";
import "./styles.css";

export default function App() {

    //...

  return (
    <div>
      <h1>Image compression with "browser-image-compression" dependency</h1>
      <div className="container">
        <input type="file" onChange={handleFileUpload} />
      </div>
      <br />
      <button onClick={handleCompression}>Compress</button>
      <div className="container">
        <h3>Original Image Size: {originalImage.size}</h3>
        <h3>Compressed Image size: {compressedImage.size}</h3>
      </div>
    </div>
  );
}
We called the handleFileUpload method in the onChange attribute of the input tag and the handleCompression method in the onClick attribute of the Compress button in the snippet above.
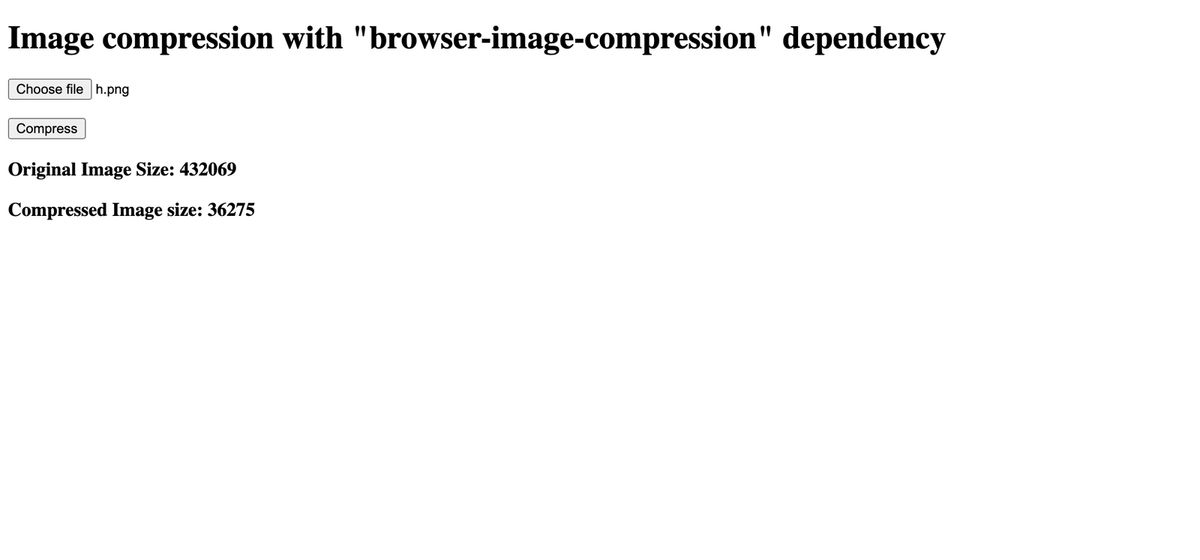
With all these settings in place, we can now test our application, and we should have something similar to what we have below.
We can also try out the demo via this code sandbox link.
We compressed the image using the Canvas method and the JavaScript library in the previous steps; however, using this strategy, the image was compressed at the expense of image quality, effect, and other criteria.
To compress our image flawlessly, we'll use ImageKit compression with its URL-based image transformations.
Image compression made easier with ImageKit
ImageKit is a cloud-based image compression and optimization tool. It can perform 50+ real-time image transformations that will help deliver a superior user experience to end users on the web and mobile apps.
Also, ImageKit’s image compression is not browser or canvas based but instead based on a no-code cloud-hosted solution far superior in performance and capabilities than browser-based image compression tools.
In other words, non-technical users like designers and marketers can transform images easily without writing a single line of code.
Further, ImageKit can perform lossy compression compared to Canvas API without image resizing and automatic file format conversions. In other words, ImageKit is a powerful image transformation tool that does not require prior technical knowledge or new learning.
Let’s understand how image transformations in ImageKit work with the help of an image. In the following sections, you will see how the original image can be transformed in several ways.
The expression below shows how the transformation works using the ImageKit URL.
URL-endpoint transformation image path
┌──────────────────────┐┌────────┐┌───────┐
[https://ik.imagekit.io/](https://ik.imagekit.io/demo/tr:w-300,h-300/medium_cafe_B1iTdD0C.jpg)[dpkl6lhc7vk](https://ik.imagekit.io/dpkl6lhc7vk/tr:ar-4-3,w-400/h_7HHOax6CU.png)[/tr:w-300,h-300/](https://ik.imagekit.io/demo/tr:w-300,h-300/medium_cafe_B1iTdD0C.jpg)[h_7HHOax6CU.png](https://ik.imagekit.io/dpkl6lhc7vk/tr:ar-4-3,w-400/h_7HHOax6CU.png)
In the following sections, we will demonstrate how ImageKit's image transformation capabilities can be used for specific business use cases using the below sample image.

https://ik.imagekit.io/dpkl6lhc7vk/girl_zsxRhmgBV.jpeg?updatedAt=1641684782272
URL-based resizing
One of the common transformations that developers require while using images on their website is the manipulation of the height and width of an image.
However, exchanging images between designers and end-users (like marketers) is extremely difficult. Most often, files get replaced resulting in the wrong file being worked upon. This probability for confusion and errors can be avoided with the help of URL-based resizing.
URL-based resizing allows you to change the size of the image by simply altering the height/width of the URL.
As shown below, we can scale the image width to any desired size by changing the URL's input. We will adjust the image's width to 200px from the URL in this example.
- Resizing width to 200px
Some of the CMS platforms or social media media channels require the image to have a specific width. If your raw image is not of the stipulated width, you can resize it easily using ImageKit's URL-based resizing. No designer required. No coding required.

https://ik.imagekit.io/dpkl6lhc7vk/tr:w-200/girl_zsxRhmgBV.jpeg
Similarly, in addition to the width, the height of the image can also be altered. It i spossible to alter only the width or height alone depending on the requirement.
- Resizing height to 200px

https://ik.imagekit.io/dpkl6lhc7vk/tr:h-200/girl_zsxRhmgBV.jpeg
- Resizing the image using the Aspect ratio
In addition to height and width, you can also change the image's aspect ratio. Aspect ratio of an image can be defined as the ratio of its width to its height, and is denoted like a mathematical ratio, two numberals separated by a coloon. For example: 4:3 is a popular aspect ratio for images.
This is typically useful when the image has to be resized across several social media platforms with varying image size requirements.

https://ik.imagekit.io/dpkl6lhc7vk/tr:ar-4-3,w-400/girl_zsxRhmgBV.jpeg
As illustrated in the steps above, we could adequately resize the image to our desired size. Check out ImageKit docs to know more aboutImageKit’s image transformation features.
Dynamic Resizing
Dynamic resizing refers to performing basix the image resizing as well as some additional transformations like cropping & preserving the aspect ration, adding a text overlay or watermark, adding a padding using a specific color, etc.
Let's see how to use URL parameters to resize and modify images to fit the website layout dynamically.
For adding a padding to our image with the color FF0000 without cropping the image, we add a simple URl parameter to insert a padding with a width of 400px and a height of 300px.

https://ik.imagekit.io/dpkl6lhc7vk/girl_zsxRhmgBV.jpeg?tr=w-400,h-300,cm-pad_resize,bg-FF0000
- Adding watermark text - “Beach Time”
There could be times when you want to convey textual information on top of the image to educate the user or to provide context. Alternatively, you may want to add a watermark text to protect the asset from unauthorized usage. This could be a logo, your business name, or even generic text like 'copyright protected' or 'confidential'.
You can dynamically put text overlay on images to display any text on the image to achieve the above-mentioned purposes.
https://ik.imagekit.io/dpkl6lhc7vk/girl_zsxRhmgBV.jpeg?tr=l-text,i-Beach Time,pa-10,fs-50,co-FF0000,lx-N0,ly-30,l-end

Image Quality control
The perceived visual quality of an image is referred to as image quality. ImageKit rates image quality on a scale of one to ten, with ten being the highest and one being the worst. This section will show how we can easily control image quality.
There are two methods for controlling image quality: utilizing the URL parameter and using Image Quality from the dashboard.
- Image quality control using the URL parameter
There are some default quality settings in ImageKit which you mightant to change change to better suit your needs.
Using the q parameter to override the default quality setting specified within the ImageKit dashboard.

https://ik.imagekit.io/dpkl6lhc7vk/girl_zsxRhmgBV.jpeg?tr=q-70
These are some use cases of image compression/optimization in ImageKit. There are still more variants that you may try to suit your purpose.
What makes ImageKit ideal for image optimization?
ImageKit is a one-stop facility for all your image processing requirements. As we've seen so far in this tutorial, there are several ways to compress an image, including utilizing the canvas method and the JavaScript library, both of which are inefficient and inconvenient compared to the ImageKit transformation approach. This section will go through some of the other cool features we get out of the box when using the ImageKIt transformation approach.
- Automatic Image compression
- A ready-to-use media storage system
- Real-time image transformation (URL-based scaling and cropping)
Bringing it all together
While JavaScript is fast, flexible, and simple, it requires some technical expertise to perform the transformation. If your business deals with many images regularly, you will have to deal with image compression from time to time. However, most free online image compression tools do not meet your requirements. When compressing images without losing quality, an image CDN like ImageKit.io is necessary.
Want to see how ImageKit works?
Sign up for a free trial. It is free until you are ready to upgrade.