



A vast majority of people with a smartphone are, by default, uploading their most personal pictures to Google, Apple, Amazon, whoever. Personally, I firmly believe companies like this don't need my photos. You can keep that data yourself, and Immich makes it genuinely easy to do so.
We're going through the entire Docker Compose stack using Portainer, enabling hardware acceleration for machine learning, configuring all the settings I actually recommend changing, and setting up secure remote access so you can back up photos from anywhere.
Two things make Immich stand out from other self-hosted photo solutions. First is the feature set, it's remarkably close to what you get from the big cloud providers. You've got a world map with photo locations, a timeline view, face recognition that actually works, albums, sharing capabilities, video transcoding, and smart search. It's incredibly feature-rich software.
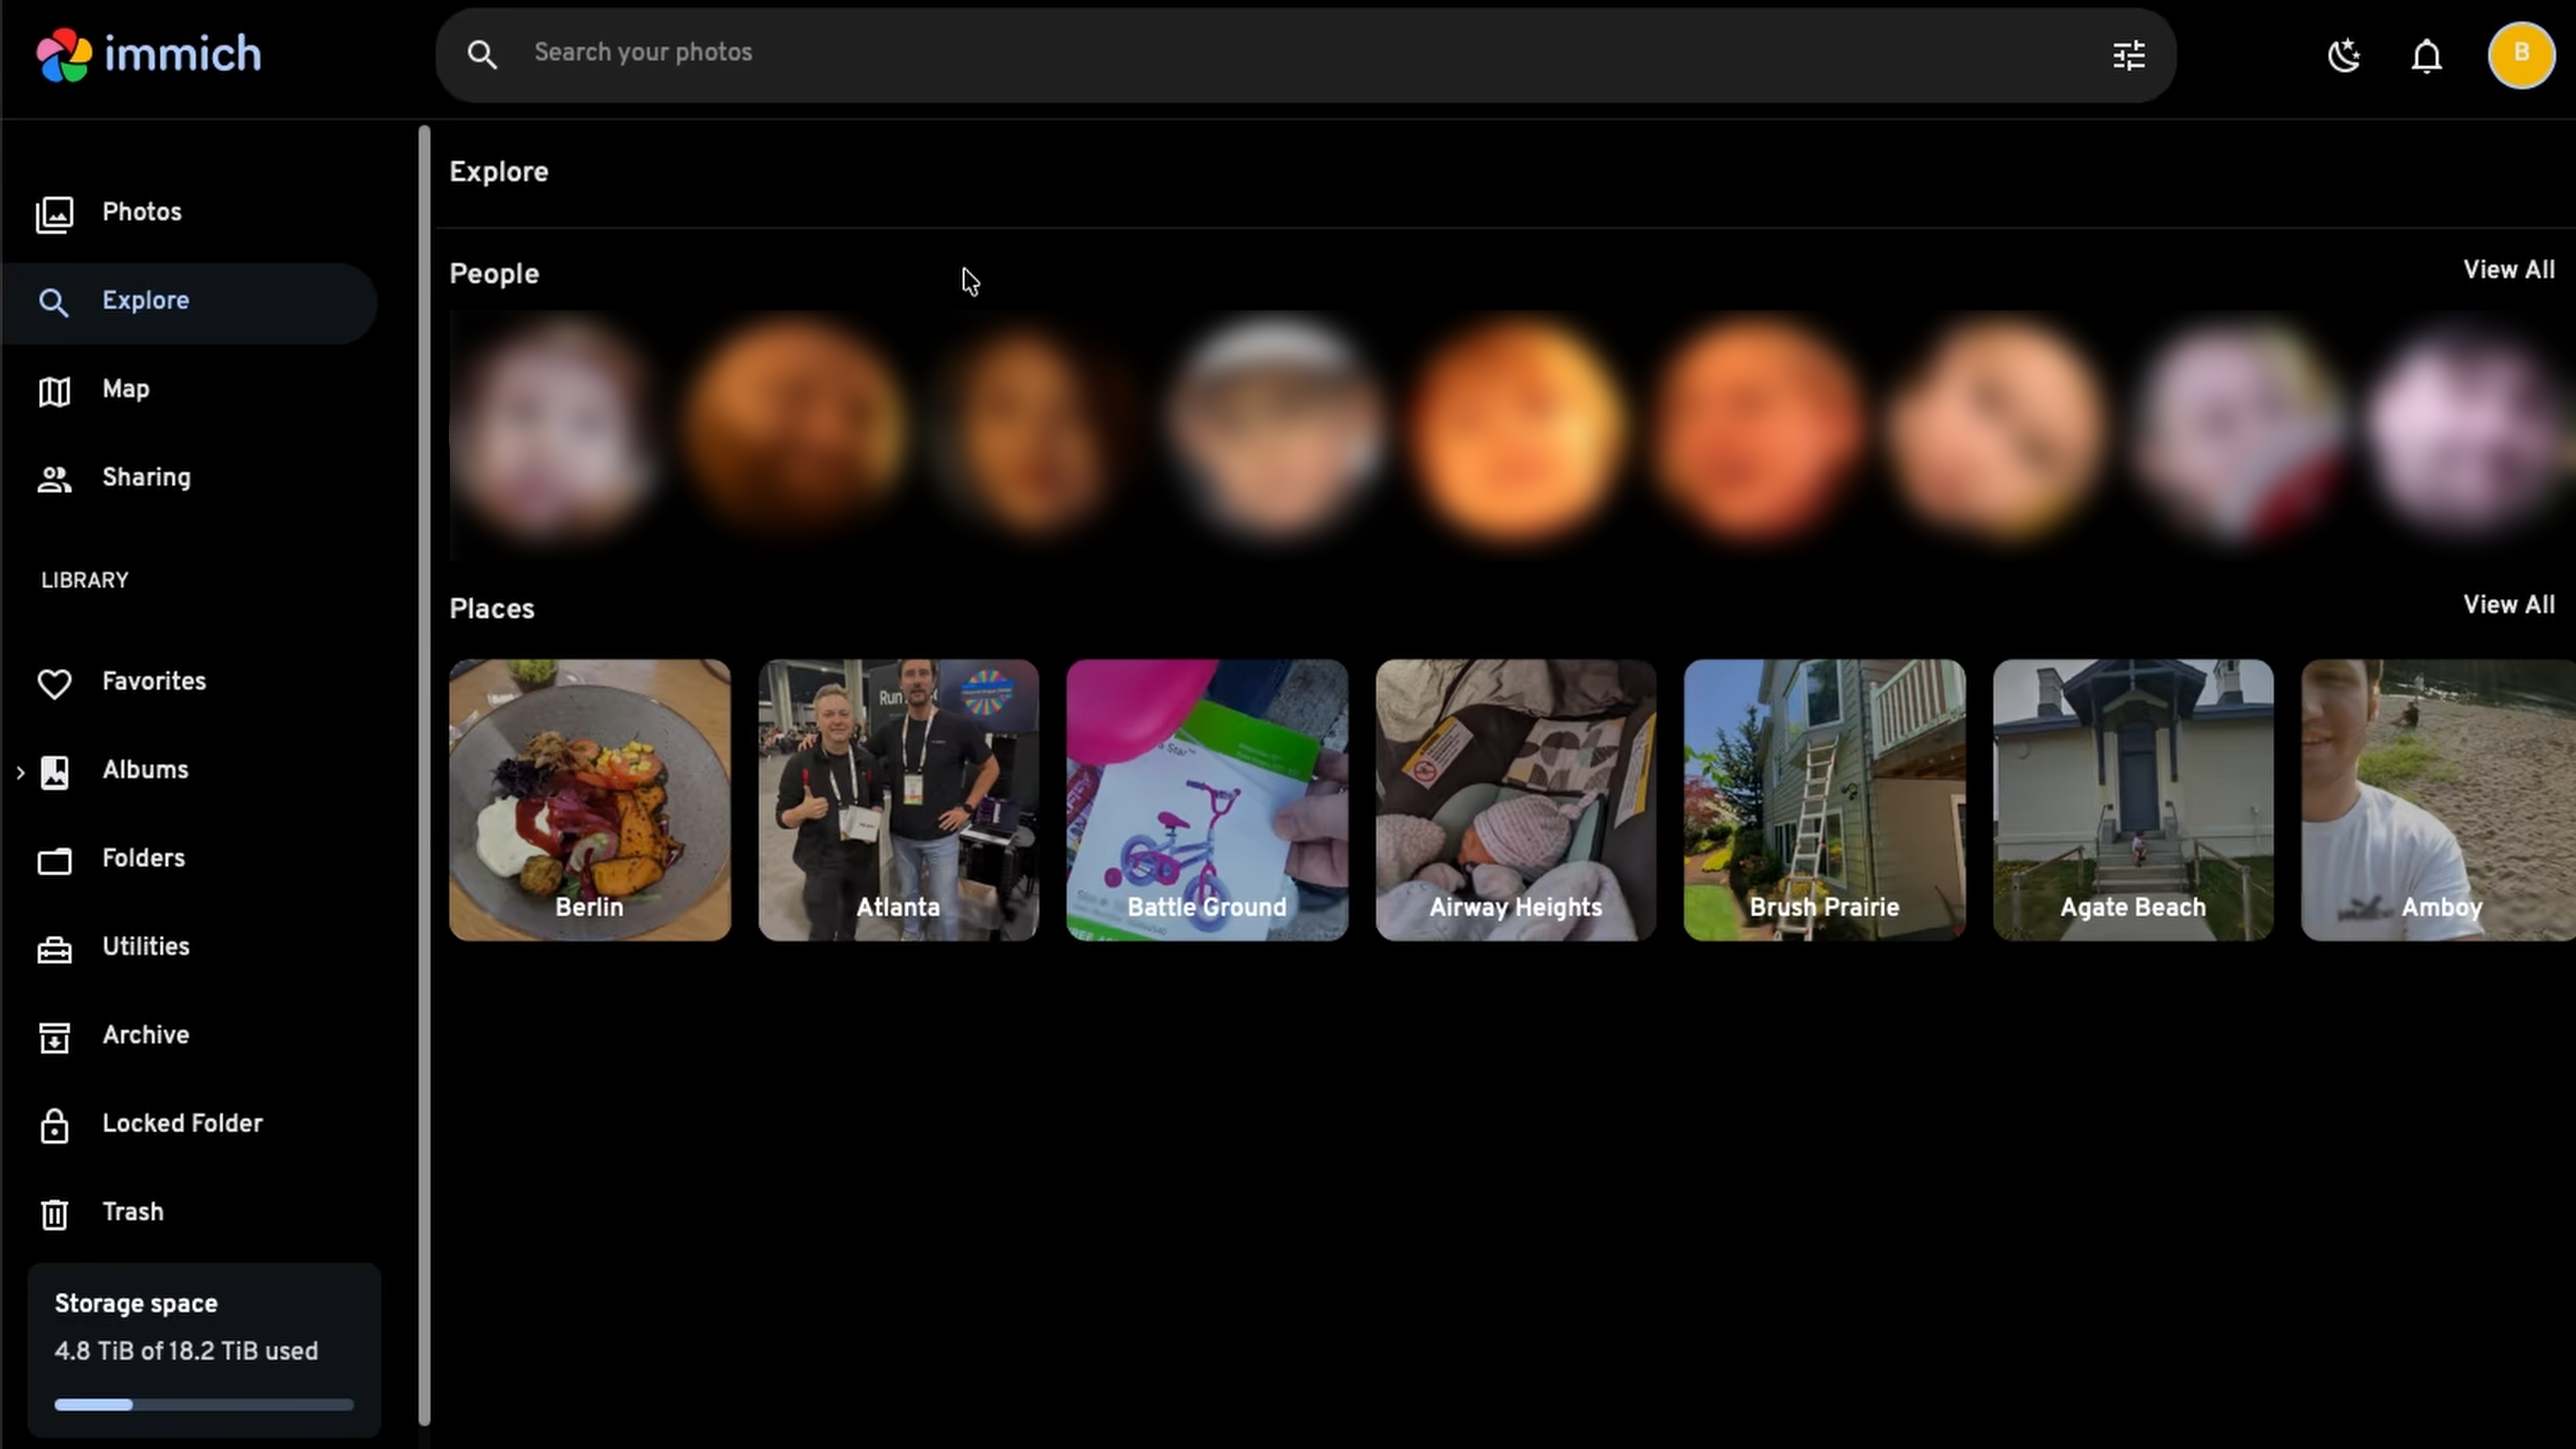
Second is the mobile app. Most of those features are accessible right from your phone, and the automatic backup from your camera roll works great. Combining it with NetBird makes backing up your images quick and secure with WireGuard working for us in the background.
Immich hit stable v2.0 back in October 2025, so the days of "it's still in beta" warnings are behind us. The development pace remains aggressive with updates rolling out regularly, but the core is solid.
I'm not going to spend too much time on hardware specifics because setups vary wildly. For some of the machine learning features, you might want a GPU or at least an Intel processor with Quick Sync. But honestly, those features aren't strictly necessary. For most of us CPU transcoding will be fine.
The main consideration is storage. How much media are you actually going to put on this thing? In my setup, all my personal media sits around 300GB, but with additional family members on the server, everything totals just about a terabyte. And with that we need room to grow so plan accordingly.
For reference, my VM runs with 4 cores and 8GB of RAM. The database needs to live on an SSD, this isn't optional. Network shares for the PostgreSQL database will cause corruption and data loss. Your actual photos can live on spinning rust or a NAS share, but keep that database on local SSD storage.
I'm doing this on Ubuntu Server running as a VM on Unraid . You don't have to use Unraid, as TrueNAS , Proxmox , and other solutions work great, or you can install Ubuntu directly on hardware. The process is close to the same regardless.
If you're installing fresh, grab the Ubuntu Server ISO and flash it with Etcher or Rufus depending on your OS. During installation, I typically skip the LVM group option and go with standard partition schemes. There's documentation on LVM if you want to read more about it, but I've never found it necessary for this use case.
The one thing you absolutely want to enable during setup is the OpenSSH server. Skip all the snap packages, we don't need them.
Once you're booted in, set a static IP through your router. Check your current IP with:
Then navigate to your router's admin panel and assign a fixed IP to this machine or VM. How you do this varies by router, so check your manual if needed. I set mine to for convenience.
First order of business on any fresh Linux install is to update everything:
Docker's official documentation has a convenience script that handles everything. SSH into your server and run:
This installs Docker, Docker Compose, and all the dependencies. Next, add your user to the docker group so you don't need sudo for every command:
Note: Using Portainer is optional, it's a nice GUI that helps manage Docker containers. If you prefer using Docker Compose from the command line or other installation methods, check out the Immich docs for alternative approaches.
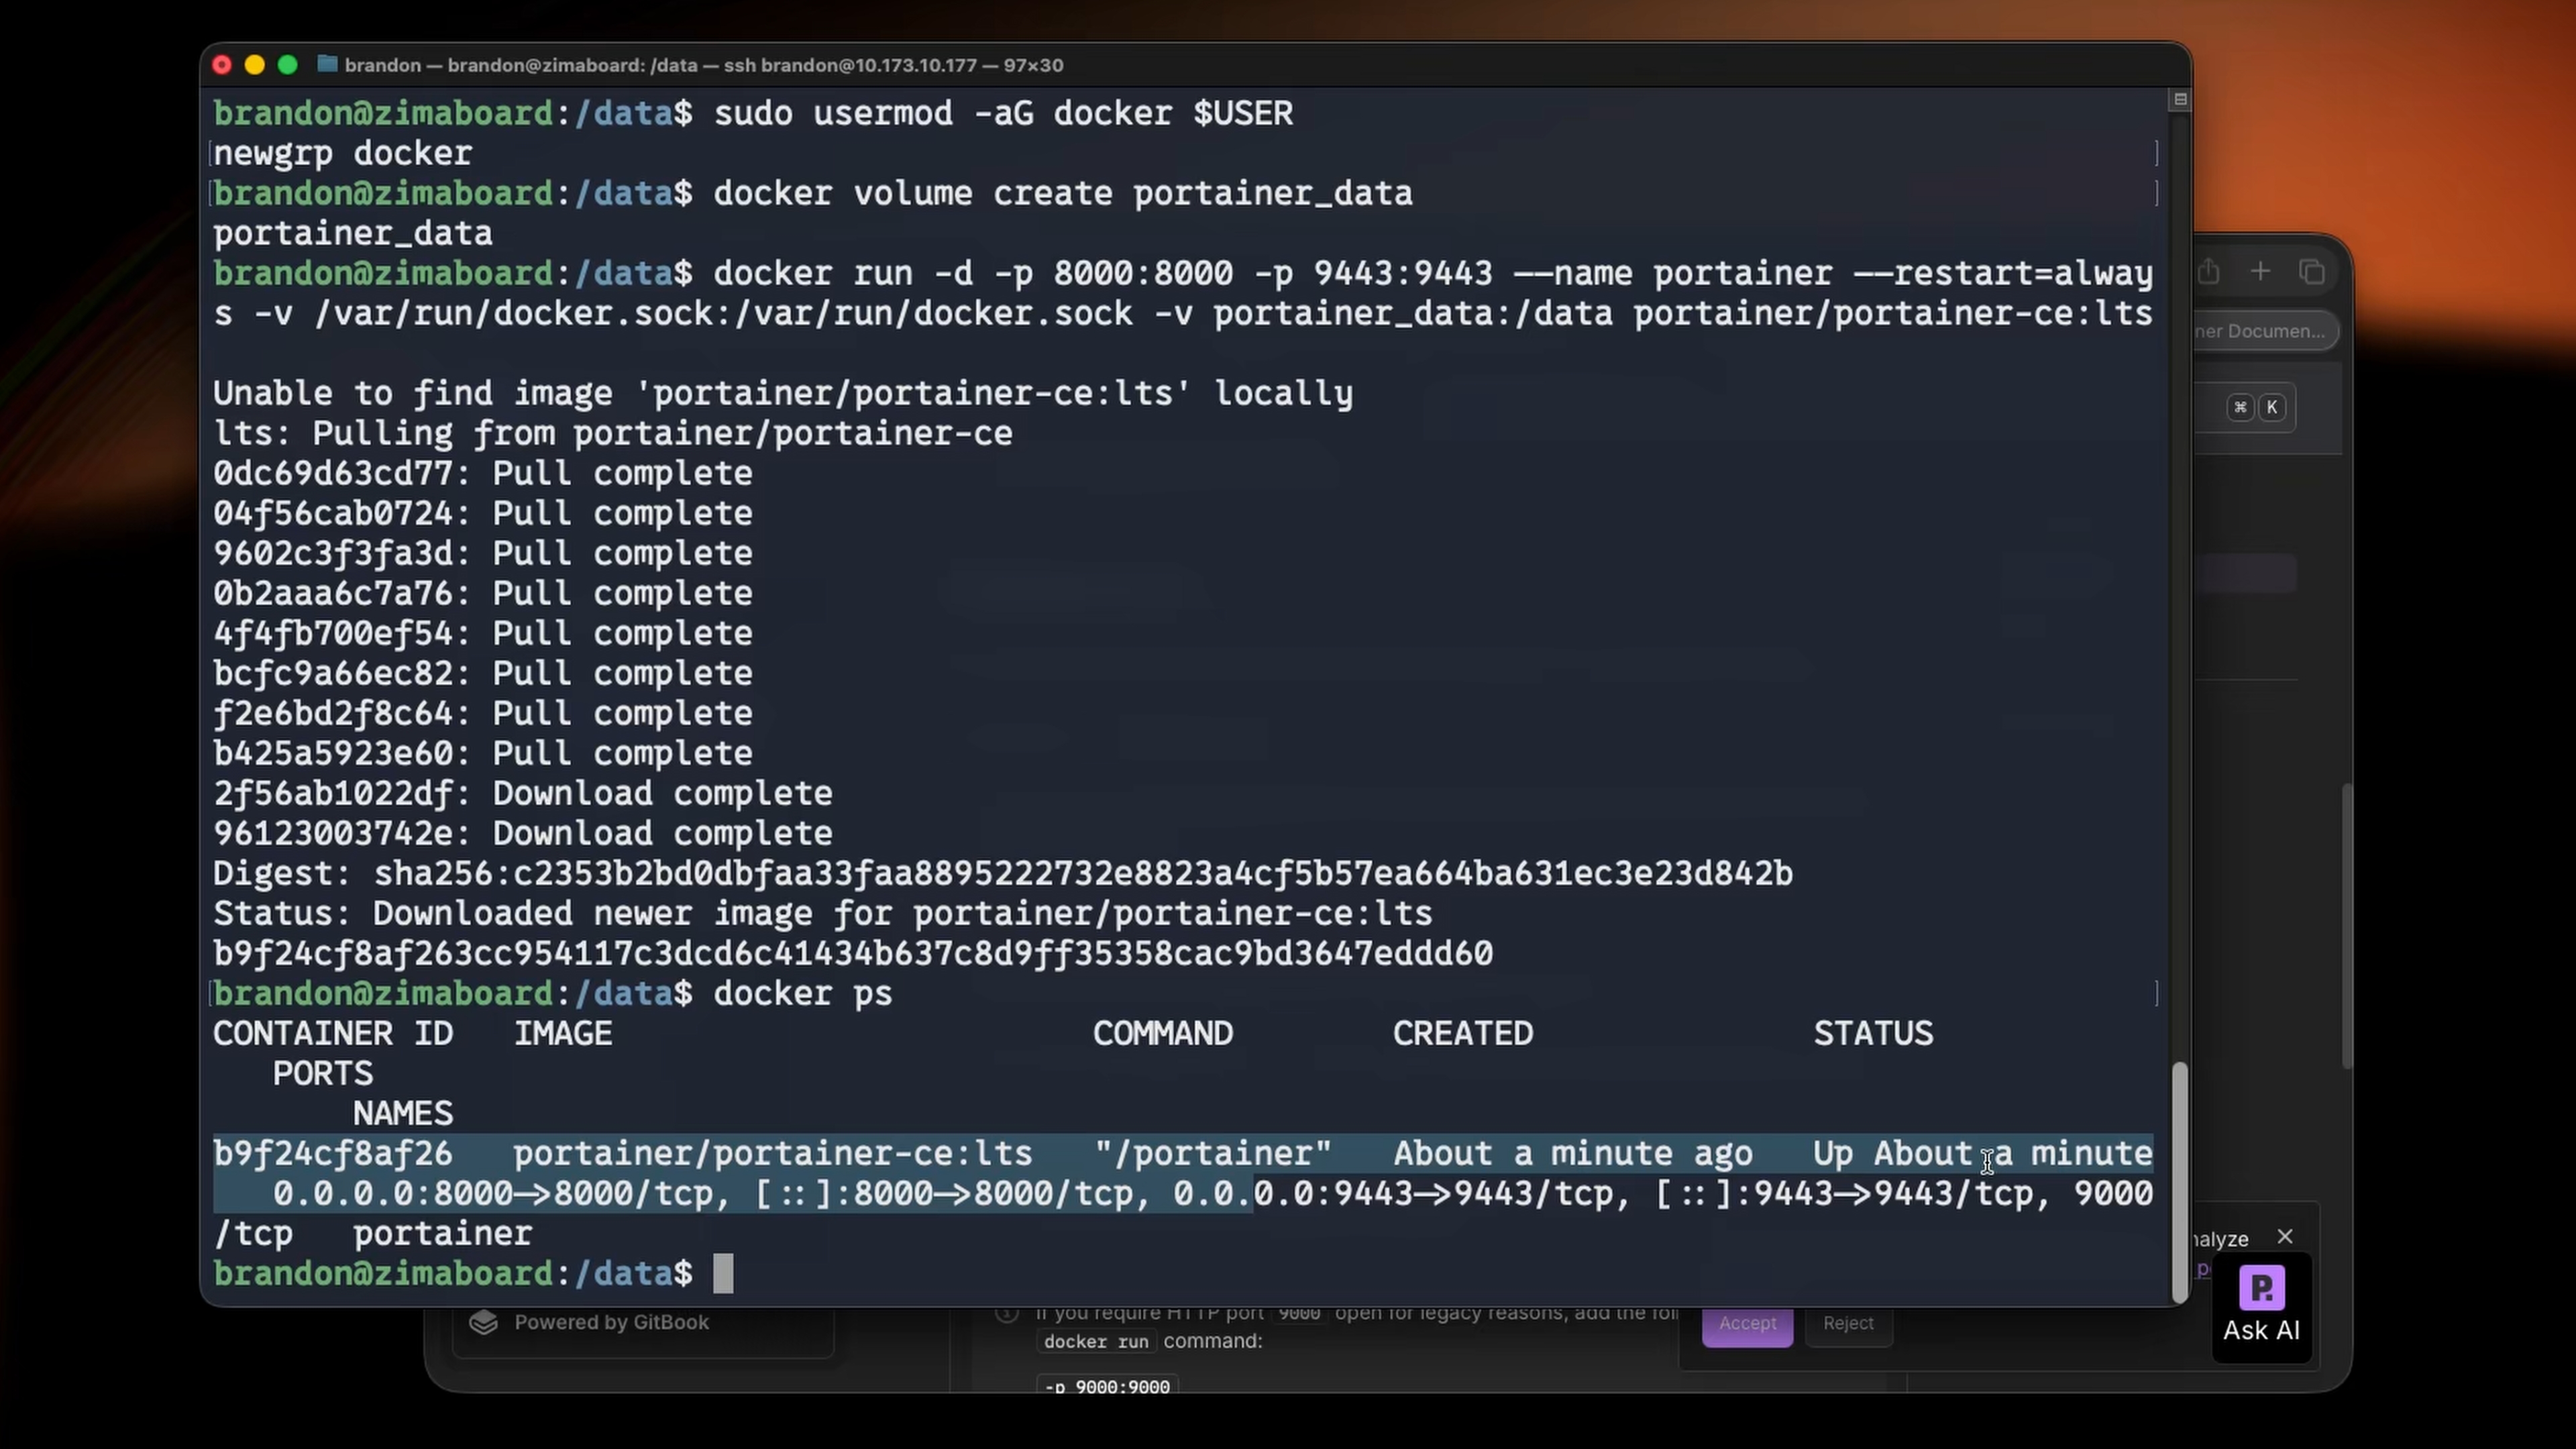
Portainer provides a web-based interface for managing Docker containers, which makes setting up and managing Immich much easier. First let's create our volume for the Portainer data.
Spin up Portainer Community Edition:
Once Portainer is running, access the web interface at . You'll be prompted to create an admin account on first login. The self-signed certificate warning is normal, just proceed.
That's the bulk of the prerequisites handled.
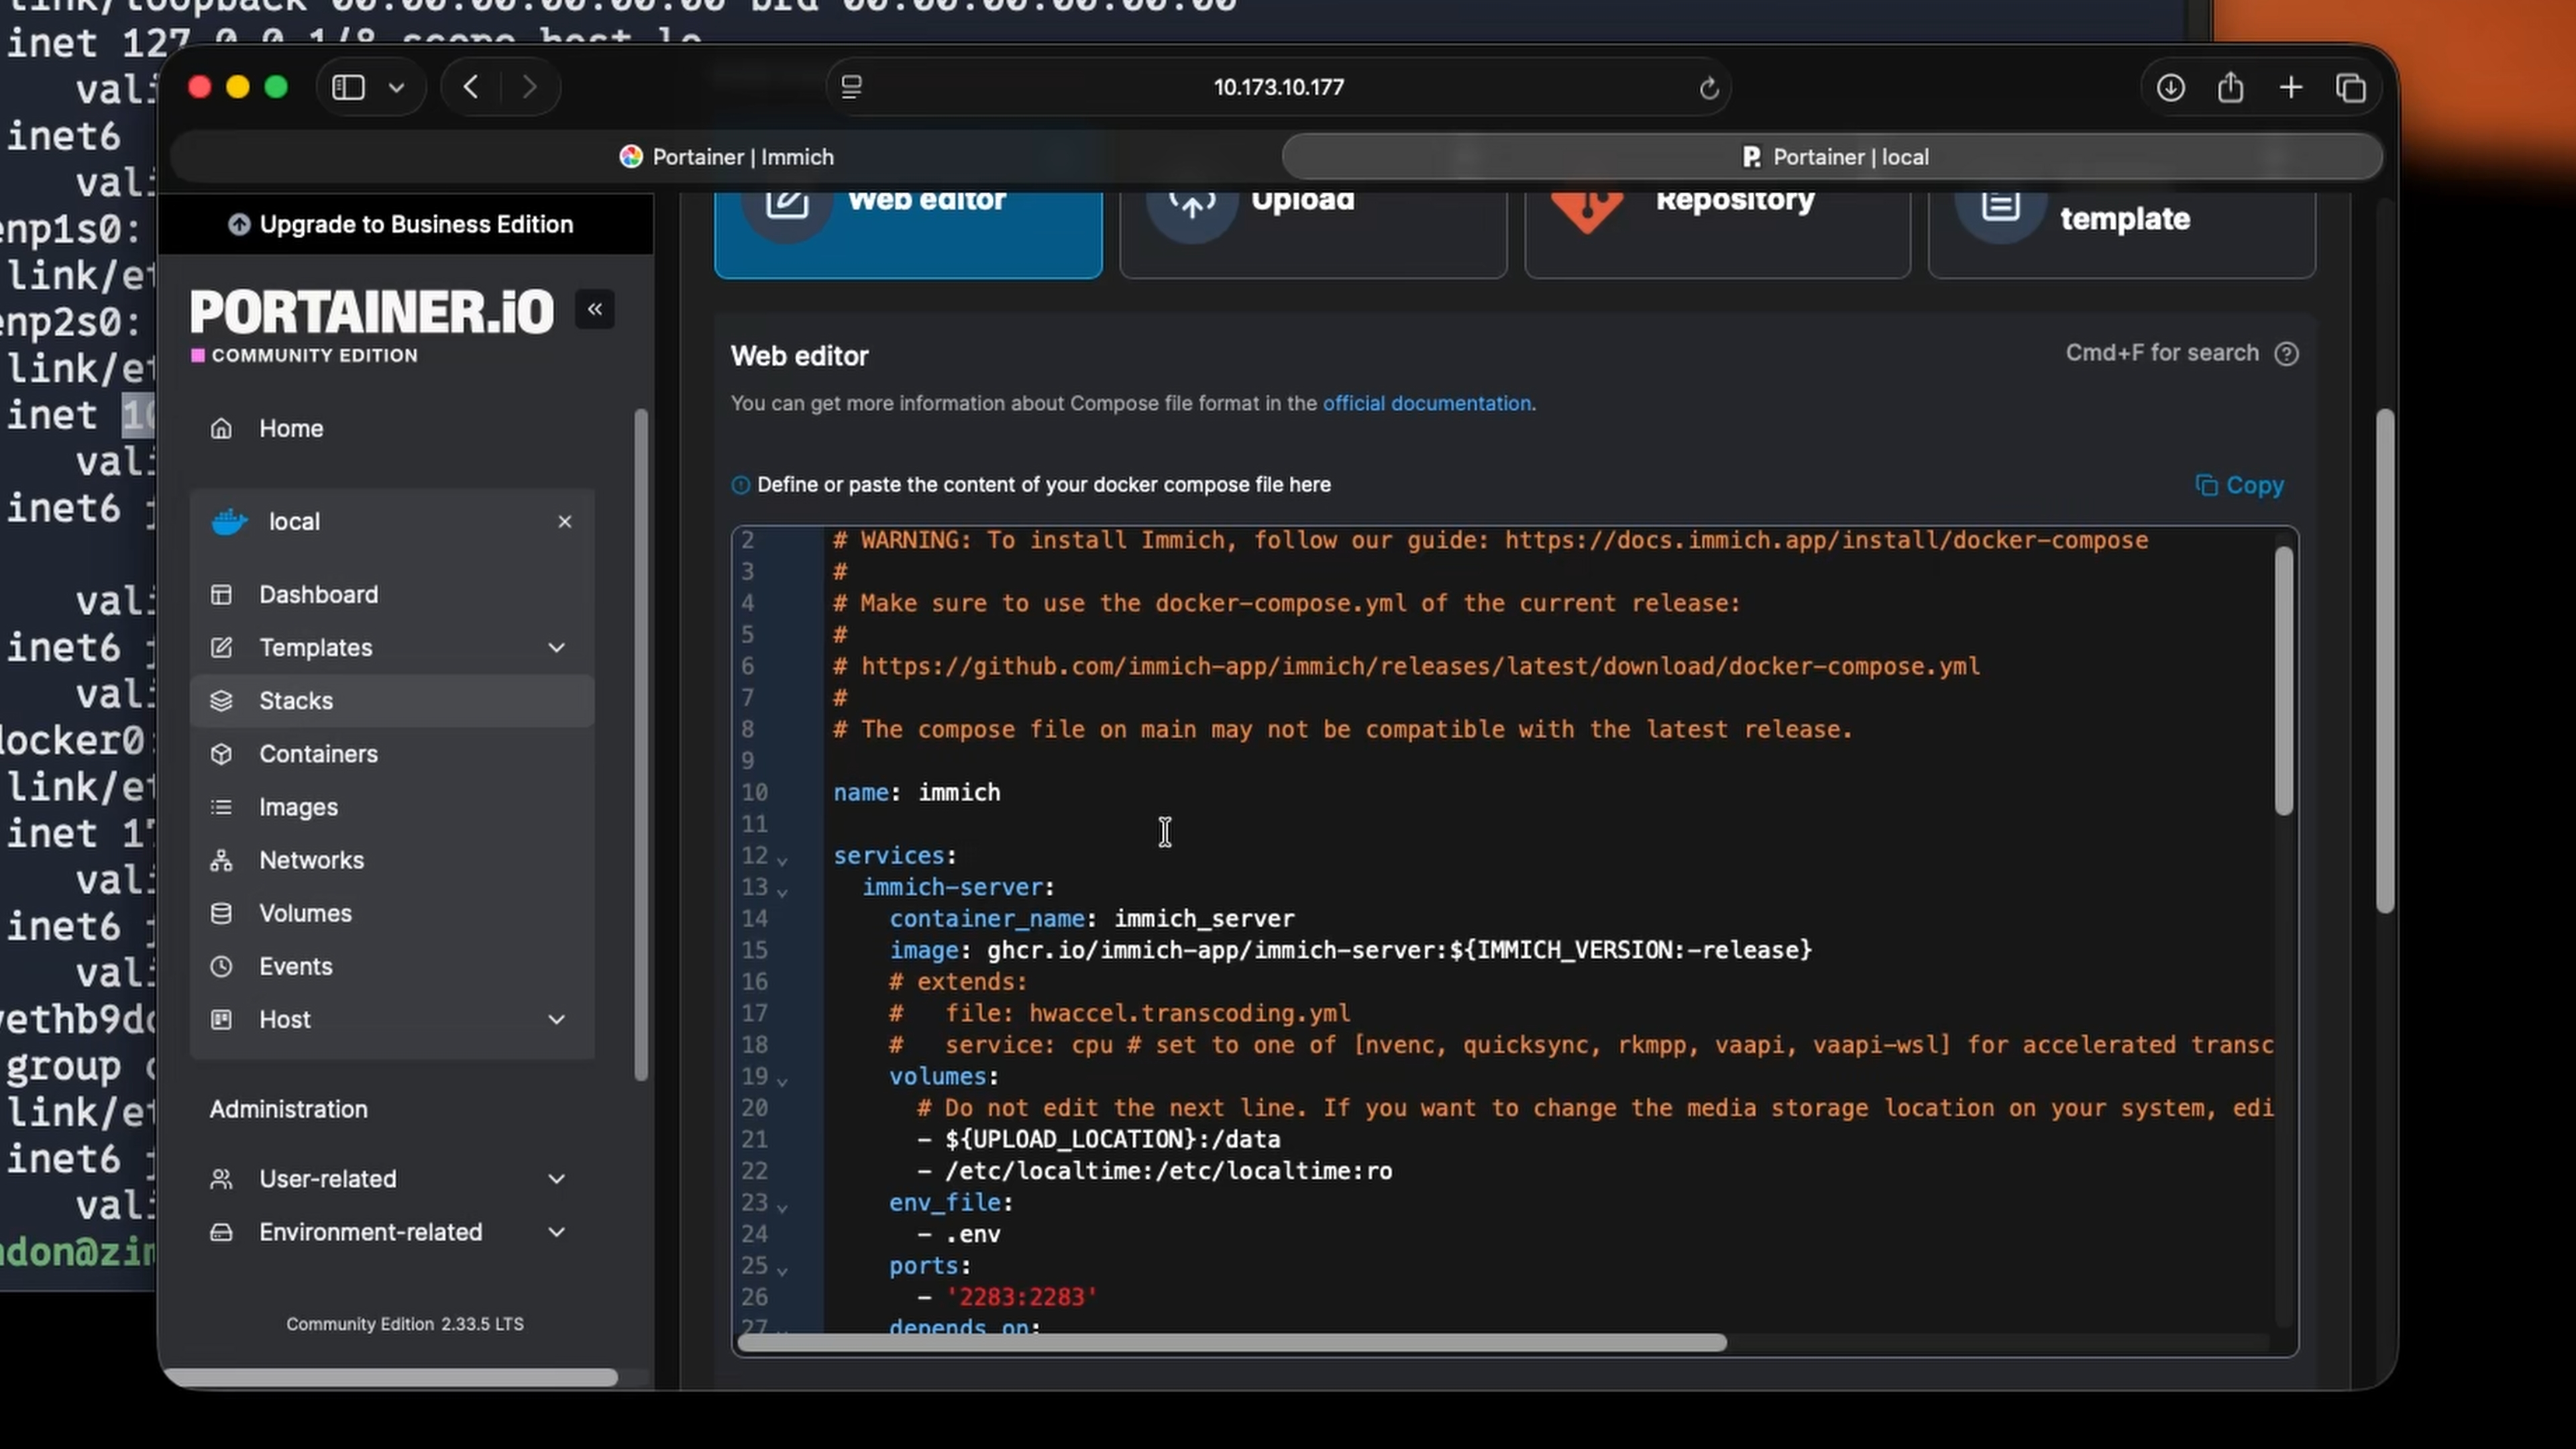
Immich recommends Docker Compose as the installation method, and I agree. We'll use Portainer's Stack feature to deploy Immich, which makes the process much more visual and easier to manage.
Copy the entire contents of the file and paste it into Portainer's Web Editor.
Important: In Portainer, you need to replace with for all containers that reference environment variables. Search for in the editor and replace it with .
Now we need to set up the environment variables. Click on Advanced Mode in the Environment Variables section.
Download the example environment file from the Immich releases page :
Copy the entire contents of the file and paste it into Portainer's environment variables editor or upload it directly.
Switch back to Simple Mode and update the key variables:
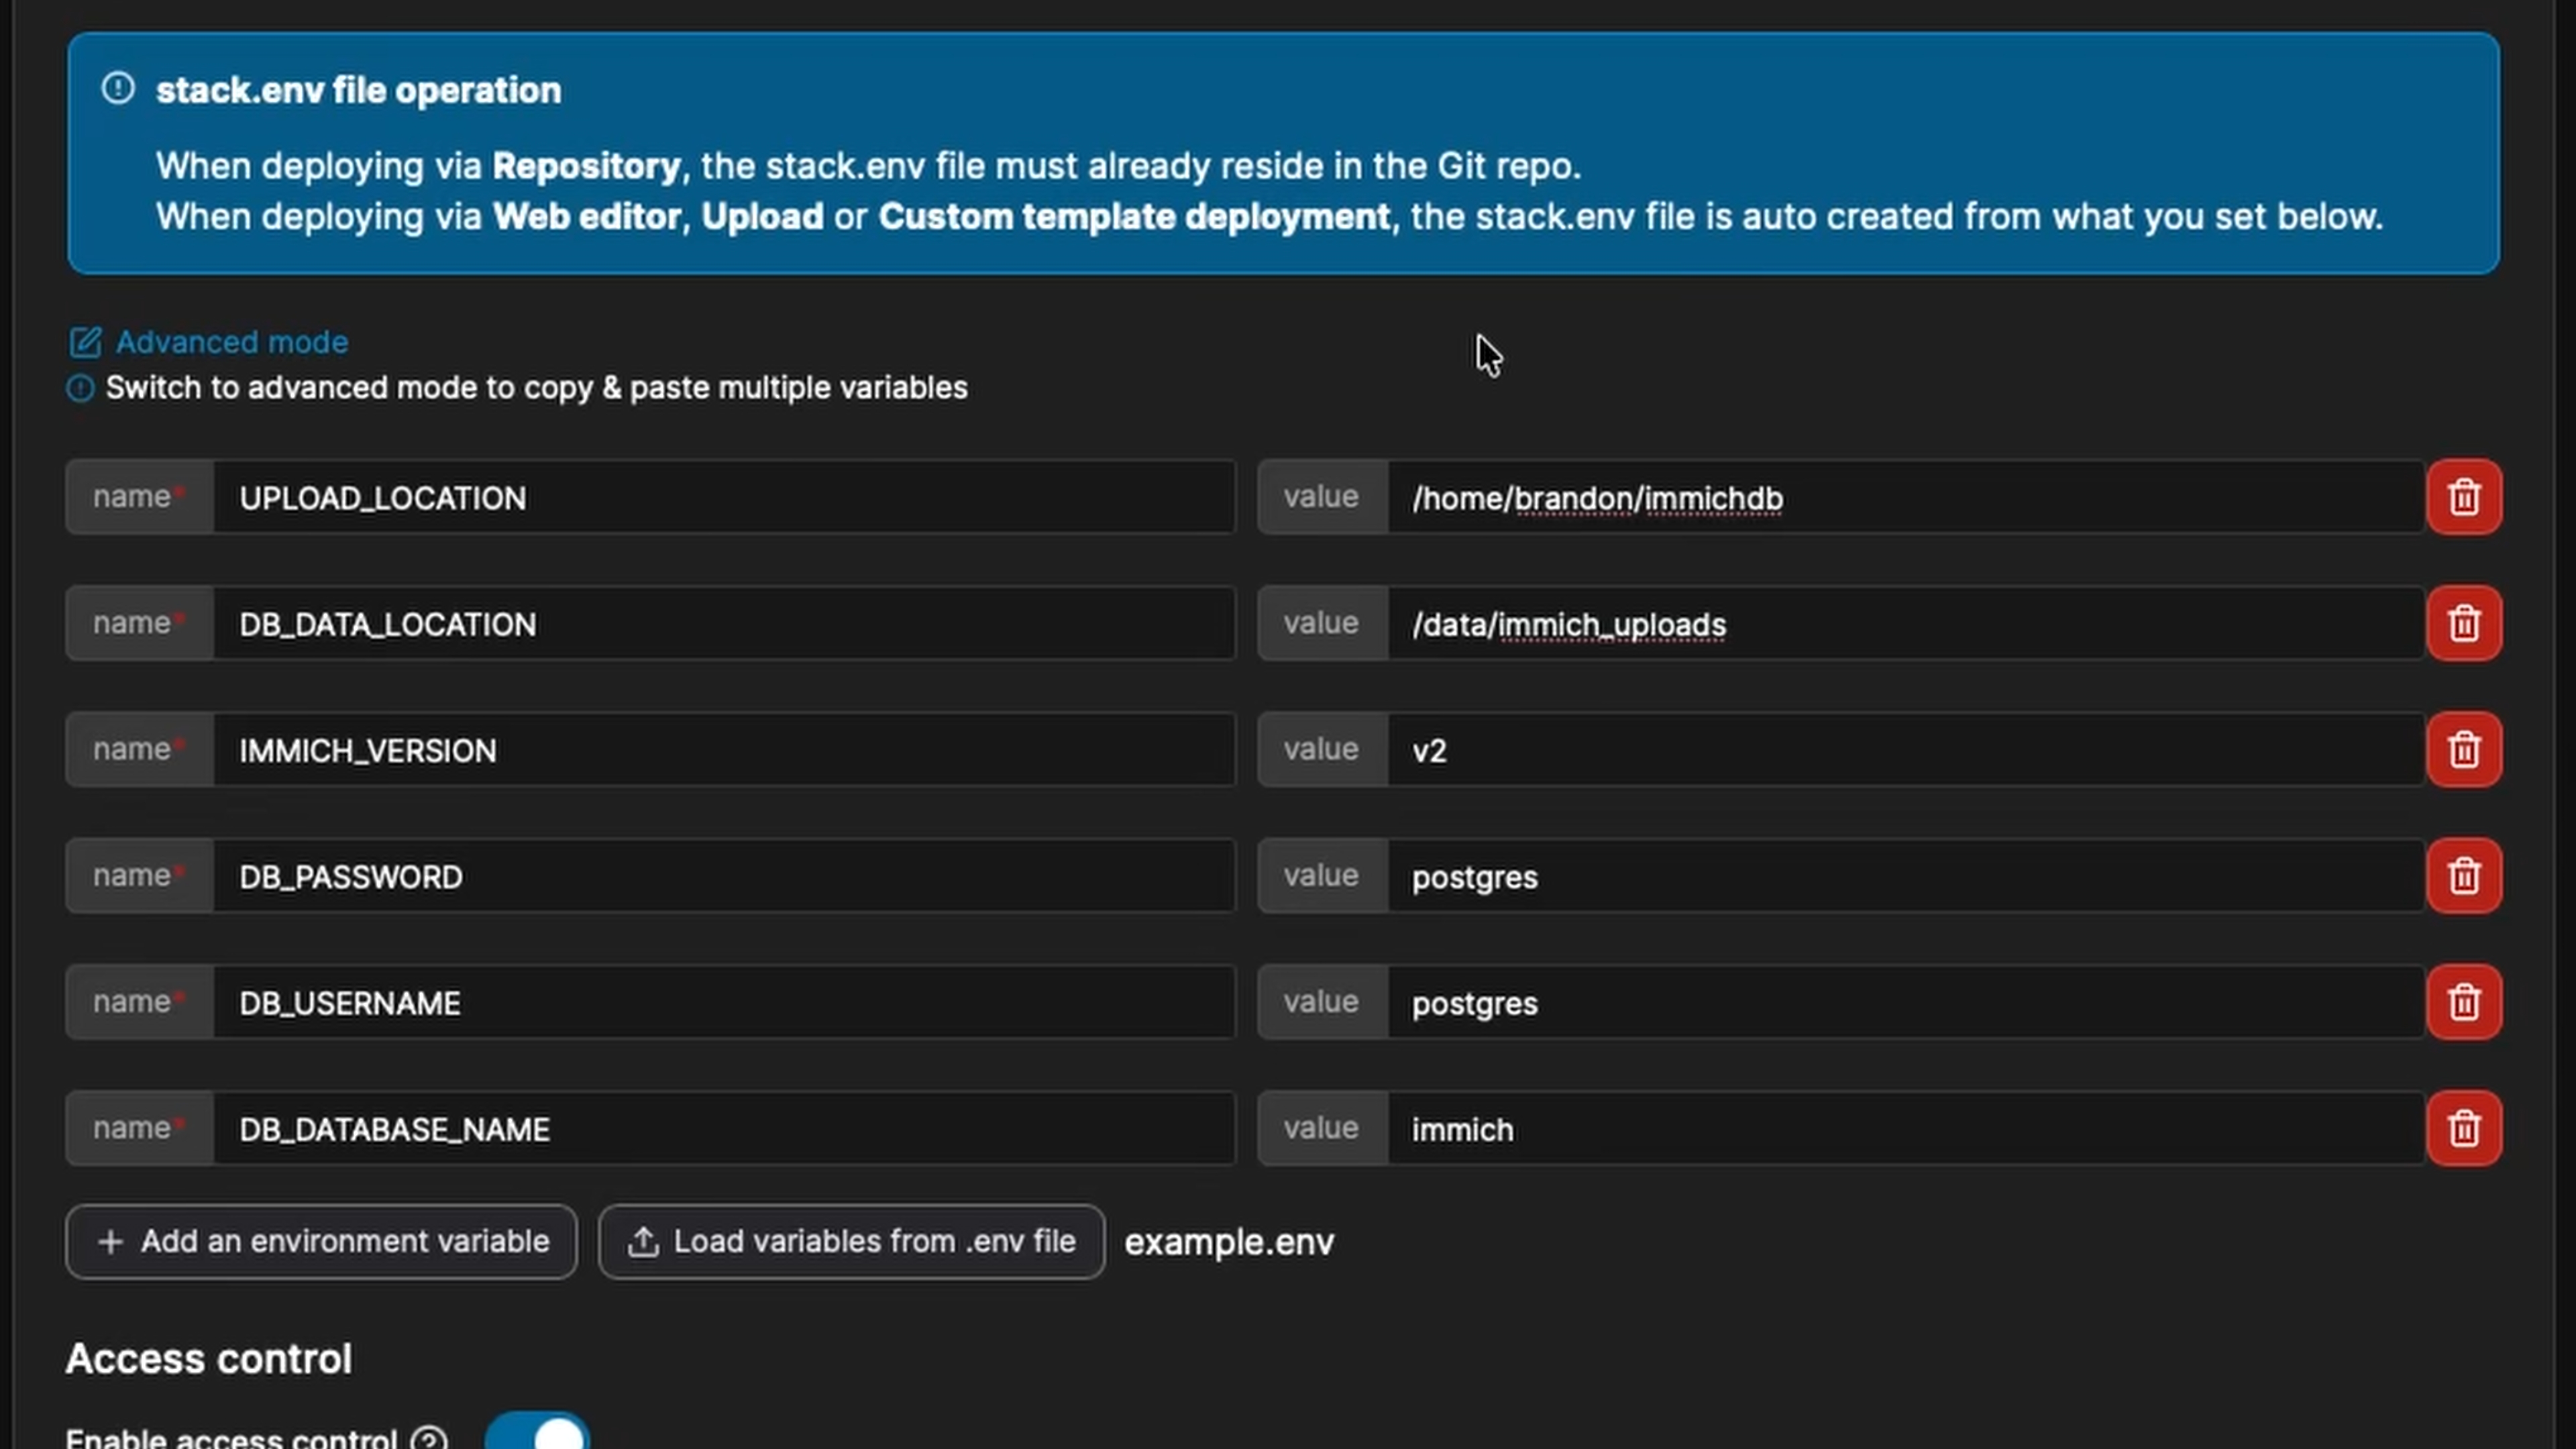
The key variables to change:
For my setup, the upload location points to an Unraid share where my storage array lives. The database stays on local SSD storage. Adjust these paths for your environment.
If you have Intel Quick Sync, an NVIDIA GPU, or AMD graphics, you can offload transcoding from the CPU. You'll need to download the hardware acceleration configs and merge them into your Portainer stack.
First, download the hardware acceleration files:
For transcoding acceleration, you'll need to edit the section in your Portainer stack. Find the service and add the extends block. For Intel Quick Sync:
However, since Portainer uses a single compose file, you'll need to either:
For machine learning acceleration with Intel, update the service image to use the OpenVINO variant:
And add the device mappings from for the service directly into the stack.
If you're on Proxmox, make sure Quick Sync is passed through in your VM's hardware options. You can verify the device is available with:
After making these changes in Portainer, click Update the stack to apply them.
Once you've configured all the environment variables in Portainer, click Deploy the stack. The first run pulls several gigabytes of container images, so give it time. You can monitor the progress in Portainer's Stacks view.
Once all containers show as "Running" in Portainer, access the web interface at .
The first user to register becomes the administrator, so create your account immediately. You'll run through an initial setup wizard covering theme preferences, privacy settings, and storage templates.
This is actually important. The storage template determines how Immich organizes files on disk. I use a custom template that creates year, month, and day folders:
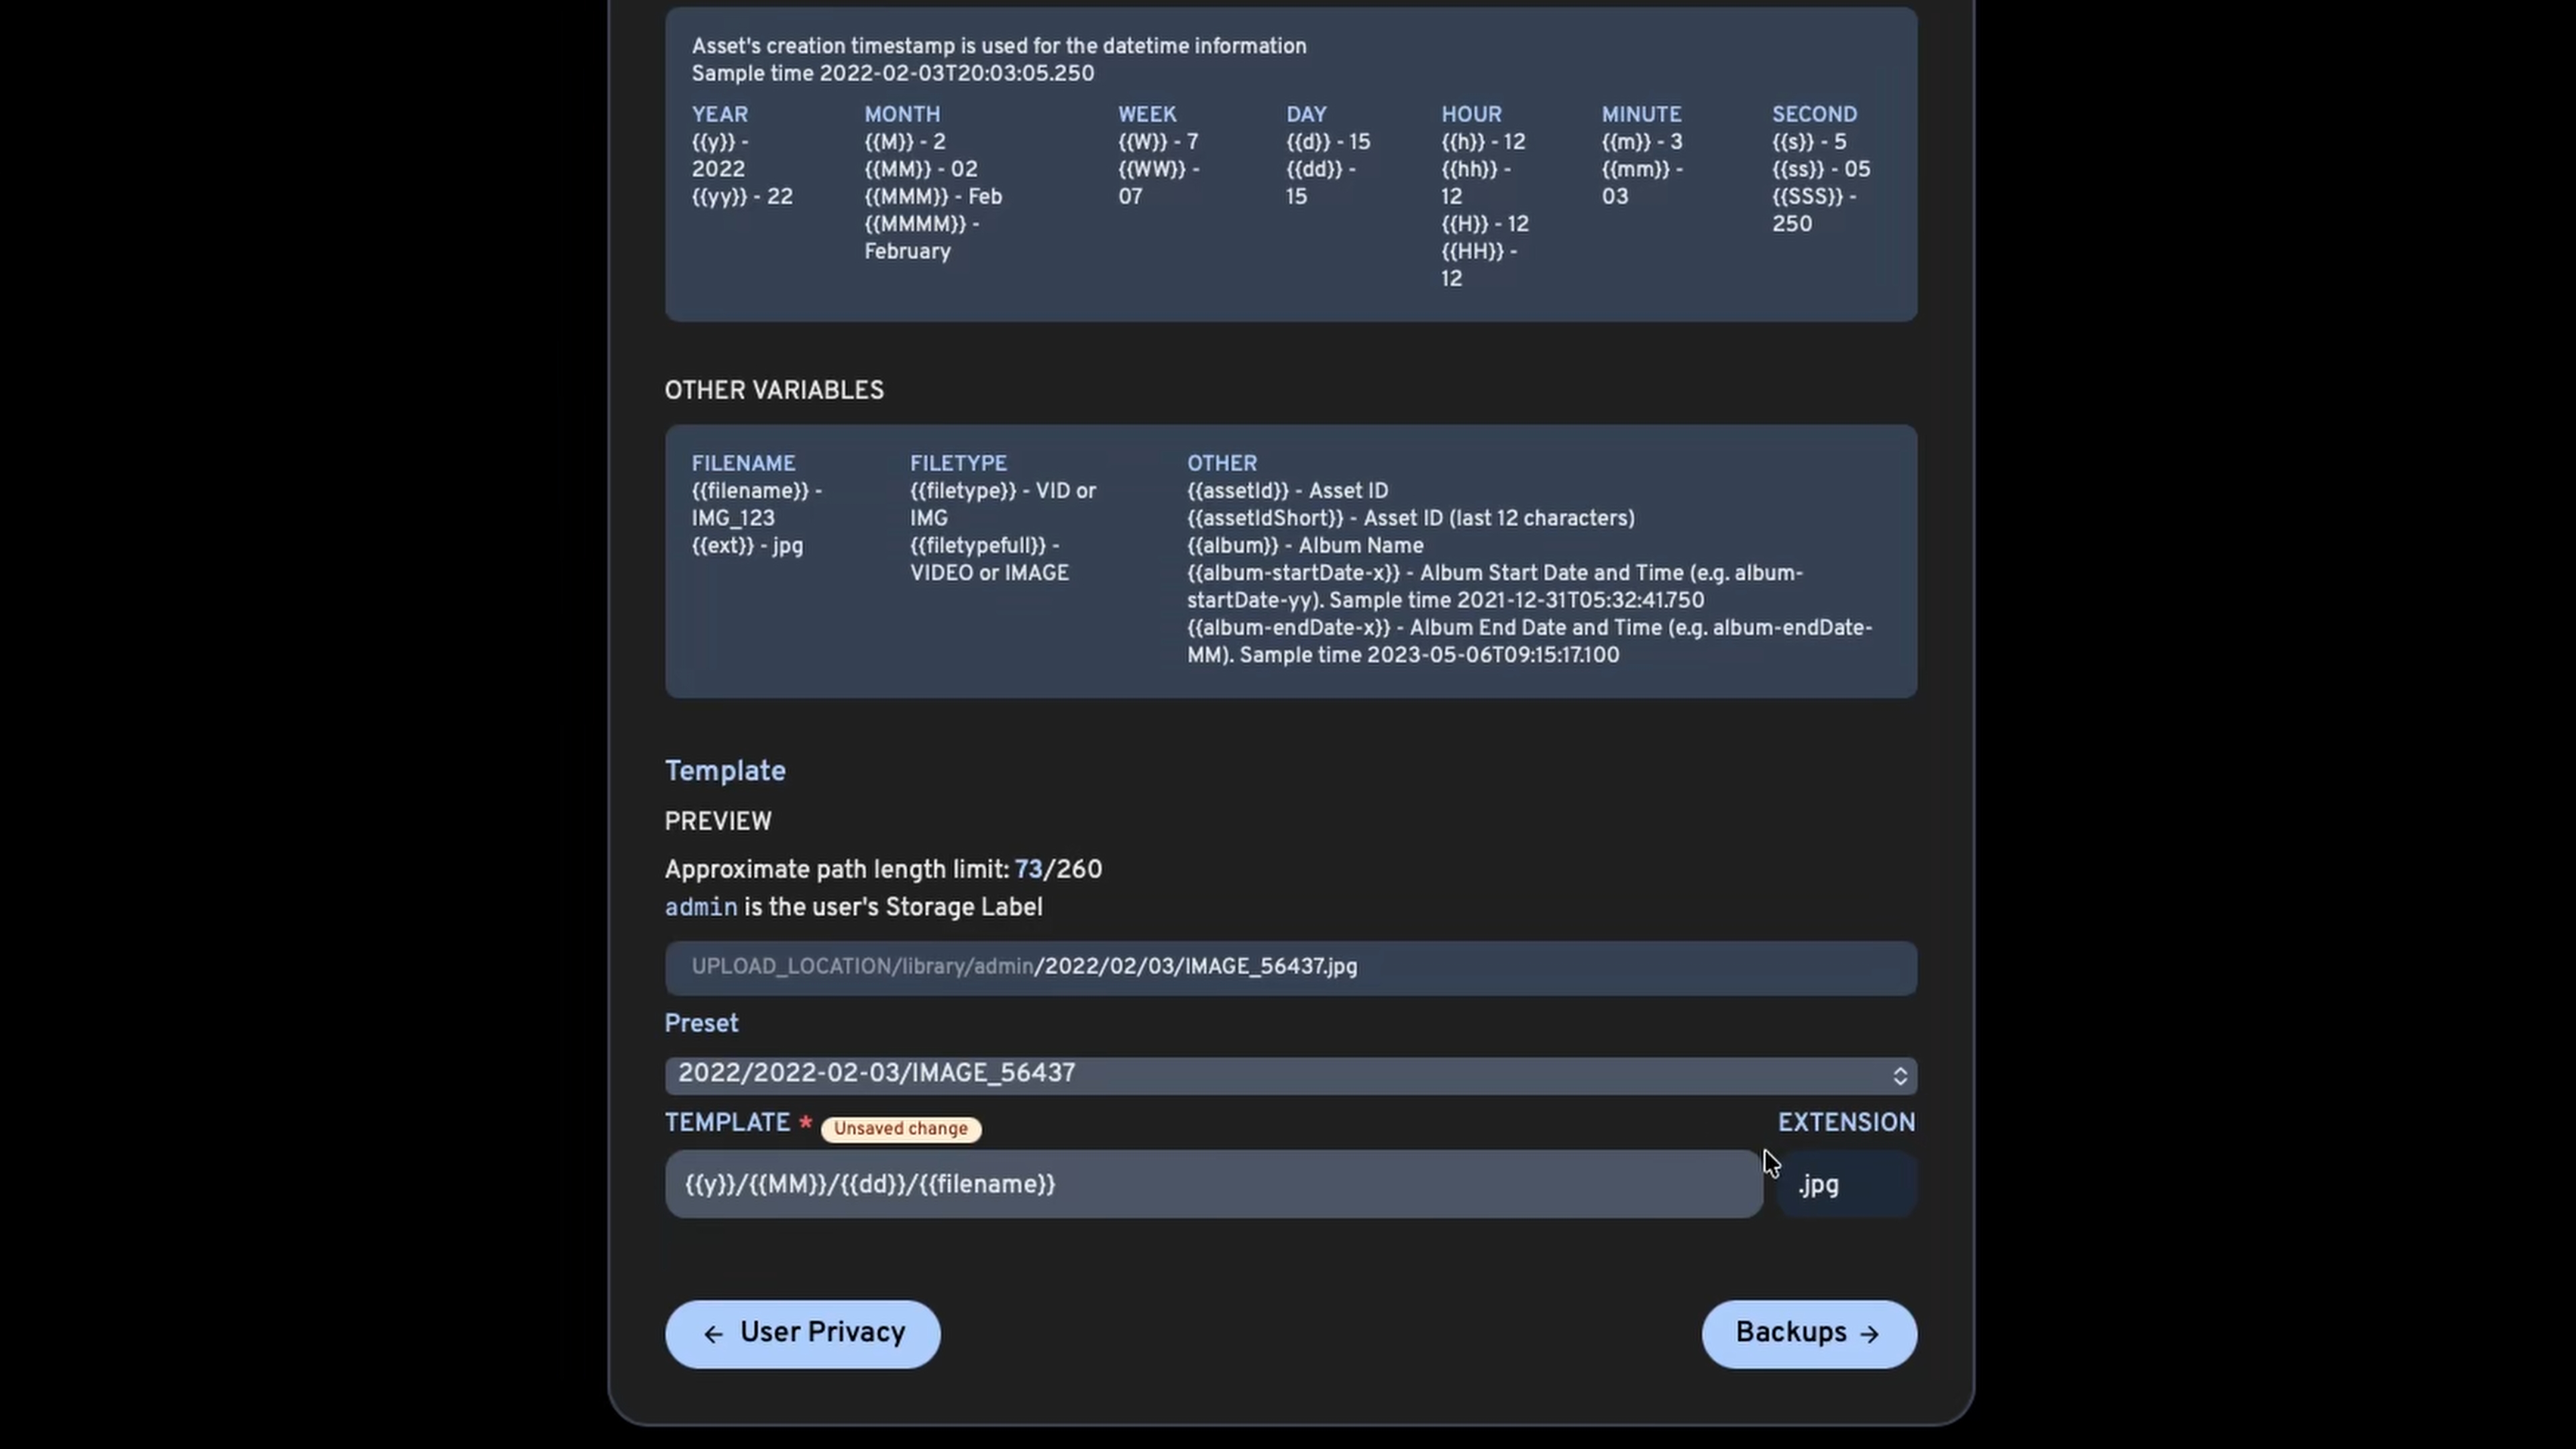
This gives me a folder structure like . I don't take a crazy amount of pictures, so daily folders work fine. Adjust this to your preferences, but think about it now-changing it later requires running a migration job.
Under Administration → Settings, there are a few things I always adjust or recommend taking a look at:
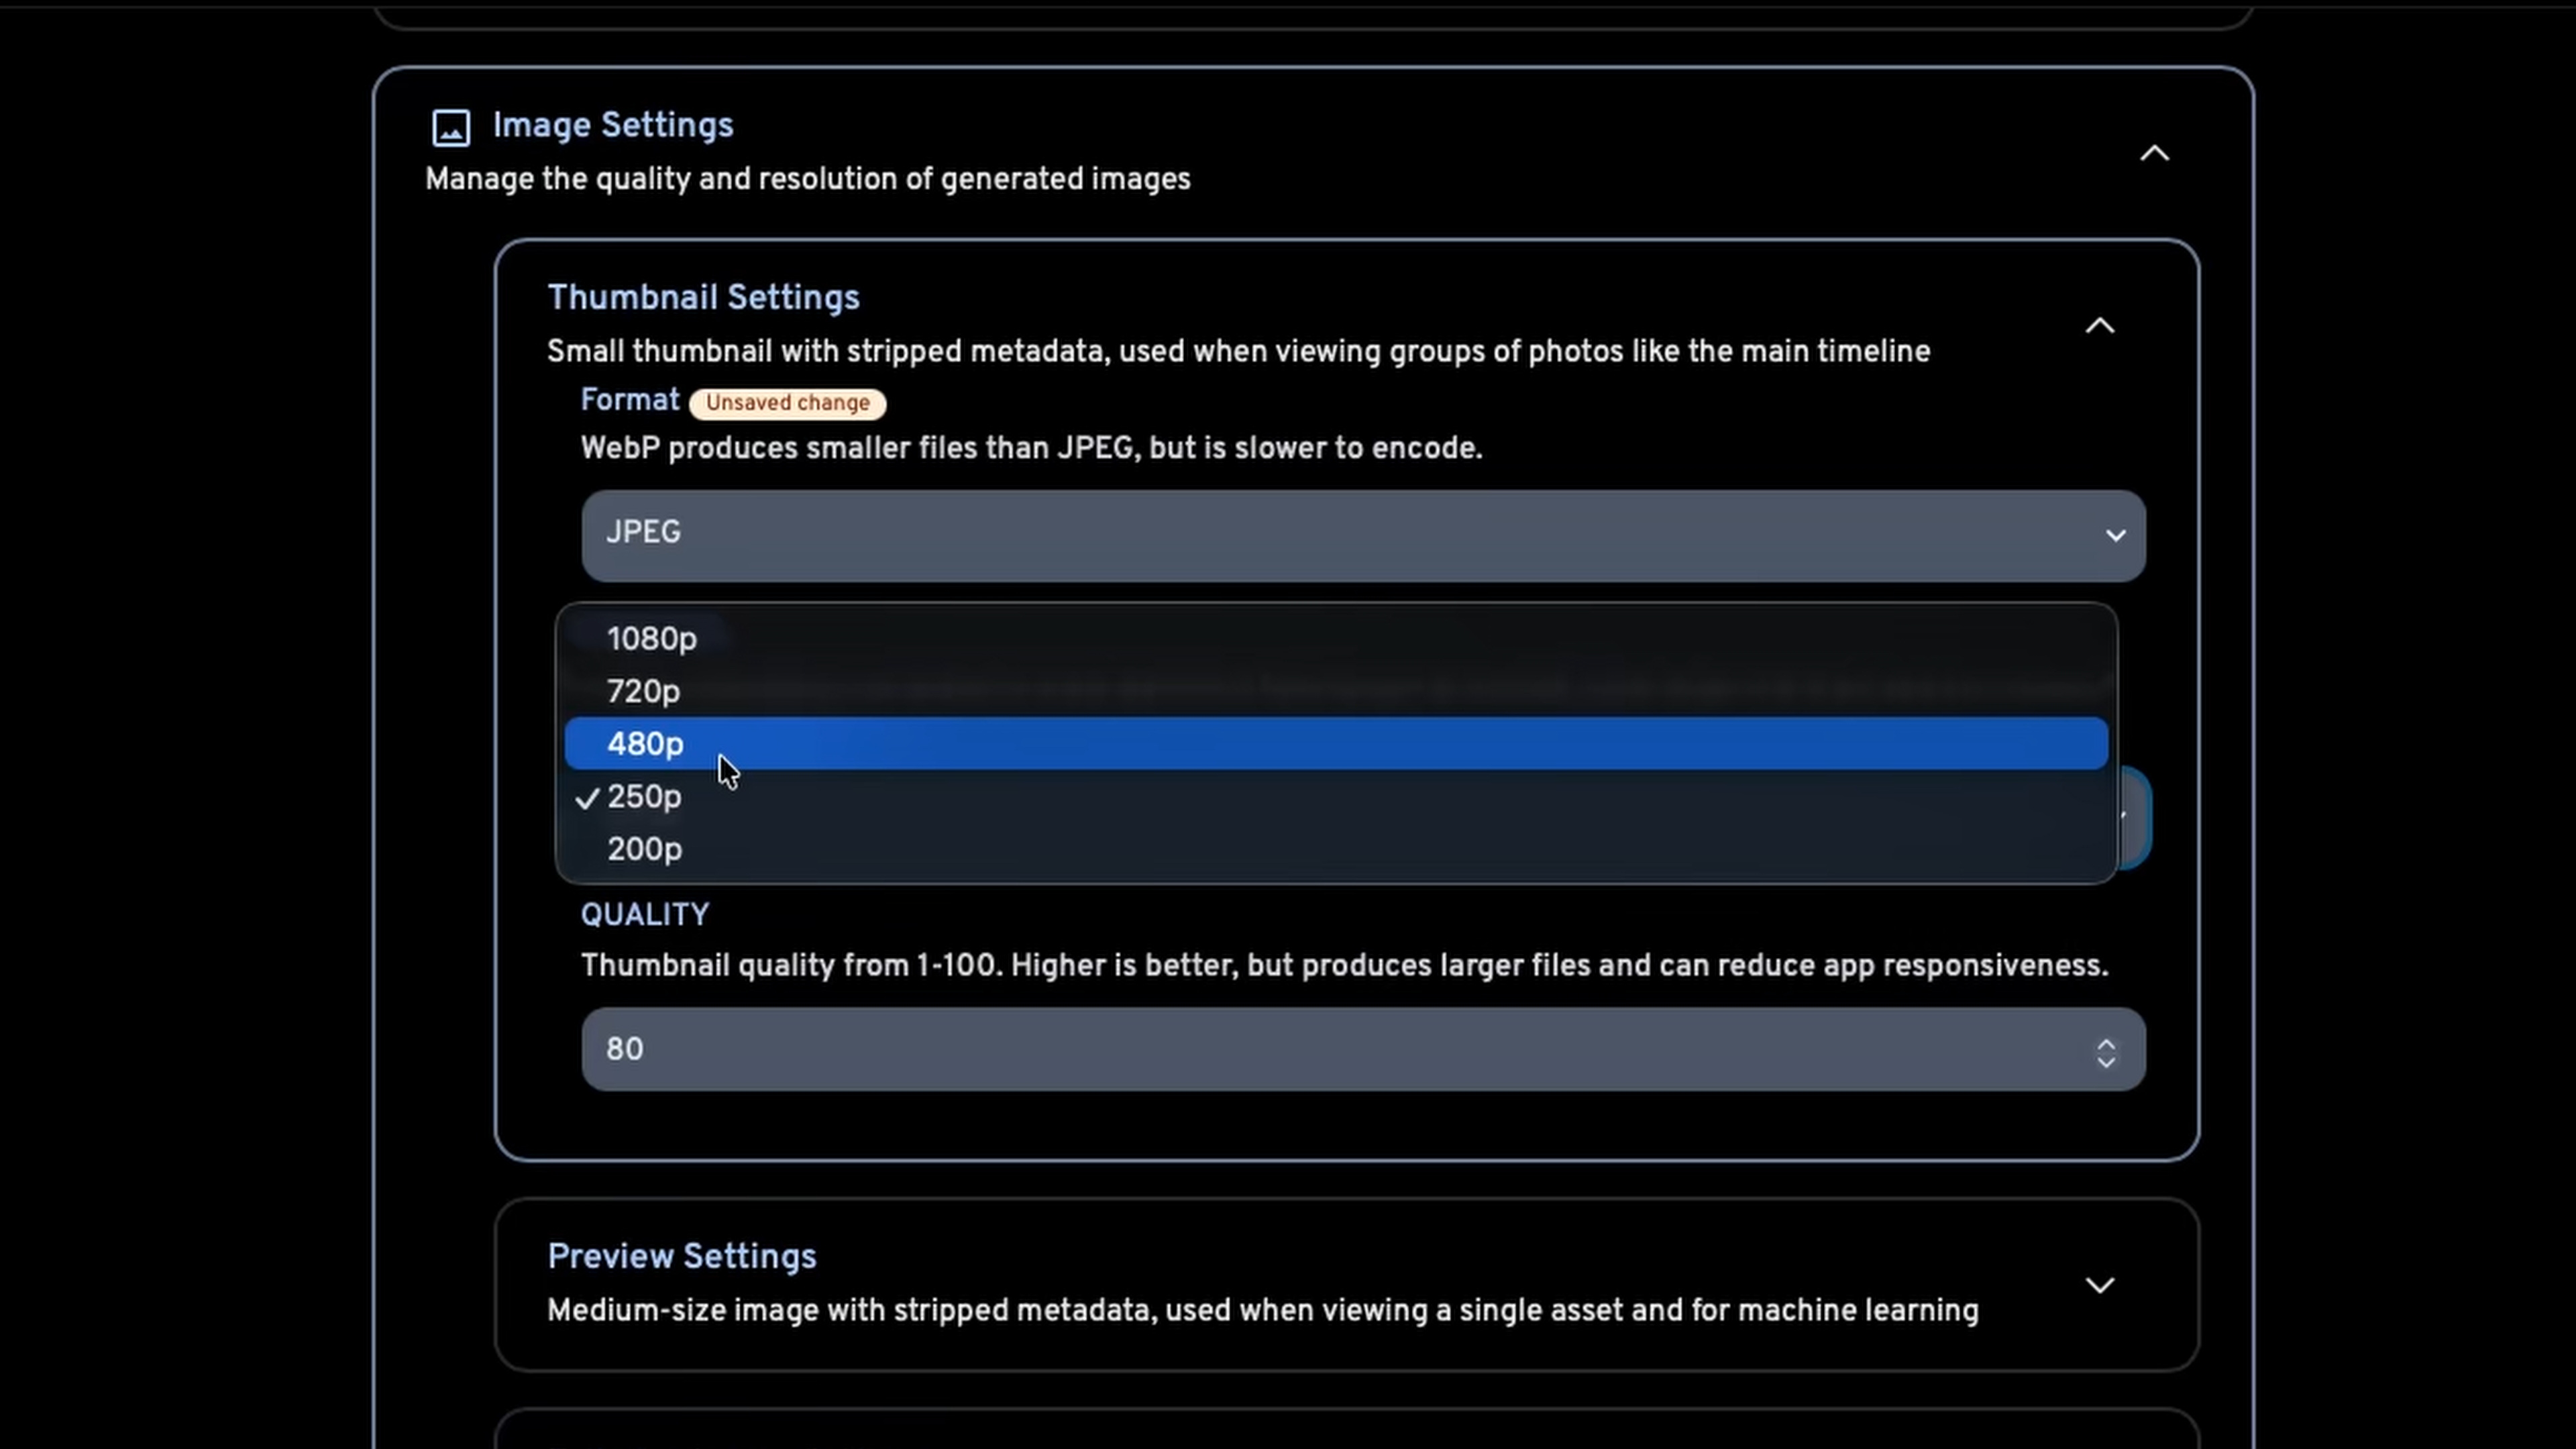
Image Settings: The default thumbnail format is WEBP. I change this to JPEG because I don't like WEBP for basically any situation as it's much harder to work with outside of the web browser.
Job Settings: These control background tasks like thumbnail generation and face detection. If you notice a specific job hammering your system, you can reduce its concurrency here.
Machine Learning: The default models work well. I've never changed them and haven't had problems. If you want to run the ML container on separate, beefier hardware, you can point to a different URL here.
Video Transcoding: This uses FFmpeg on the backend. The defaults are reasonable, but you can customize encoding options if you have specific preferences.
For accessing Immich outside your home network, you have options. You can set up a traditional reverse proxy with something like Nginx or Caddy , but I use NetBird. No exposing ports or needing to setup a proxy.
You can add your Immich server as a peer:
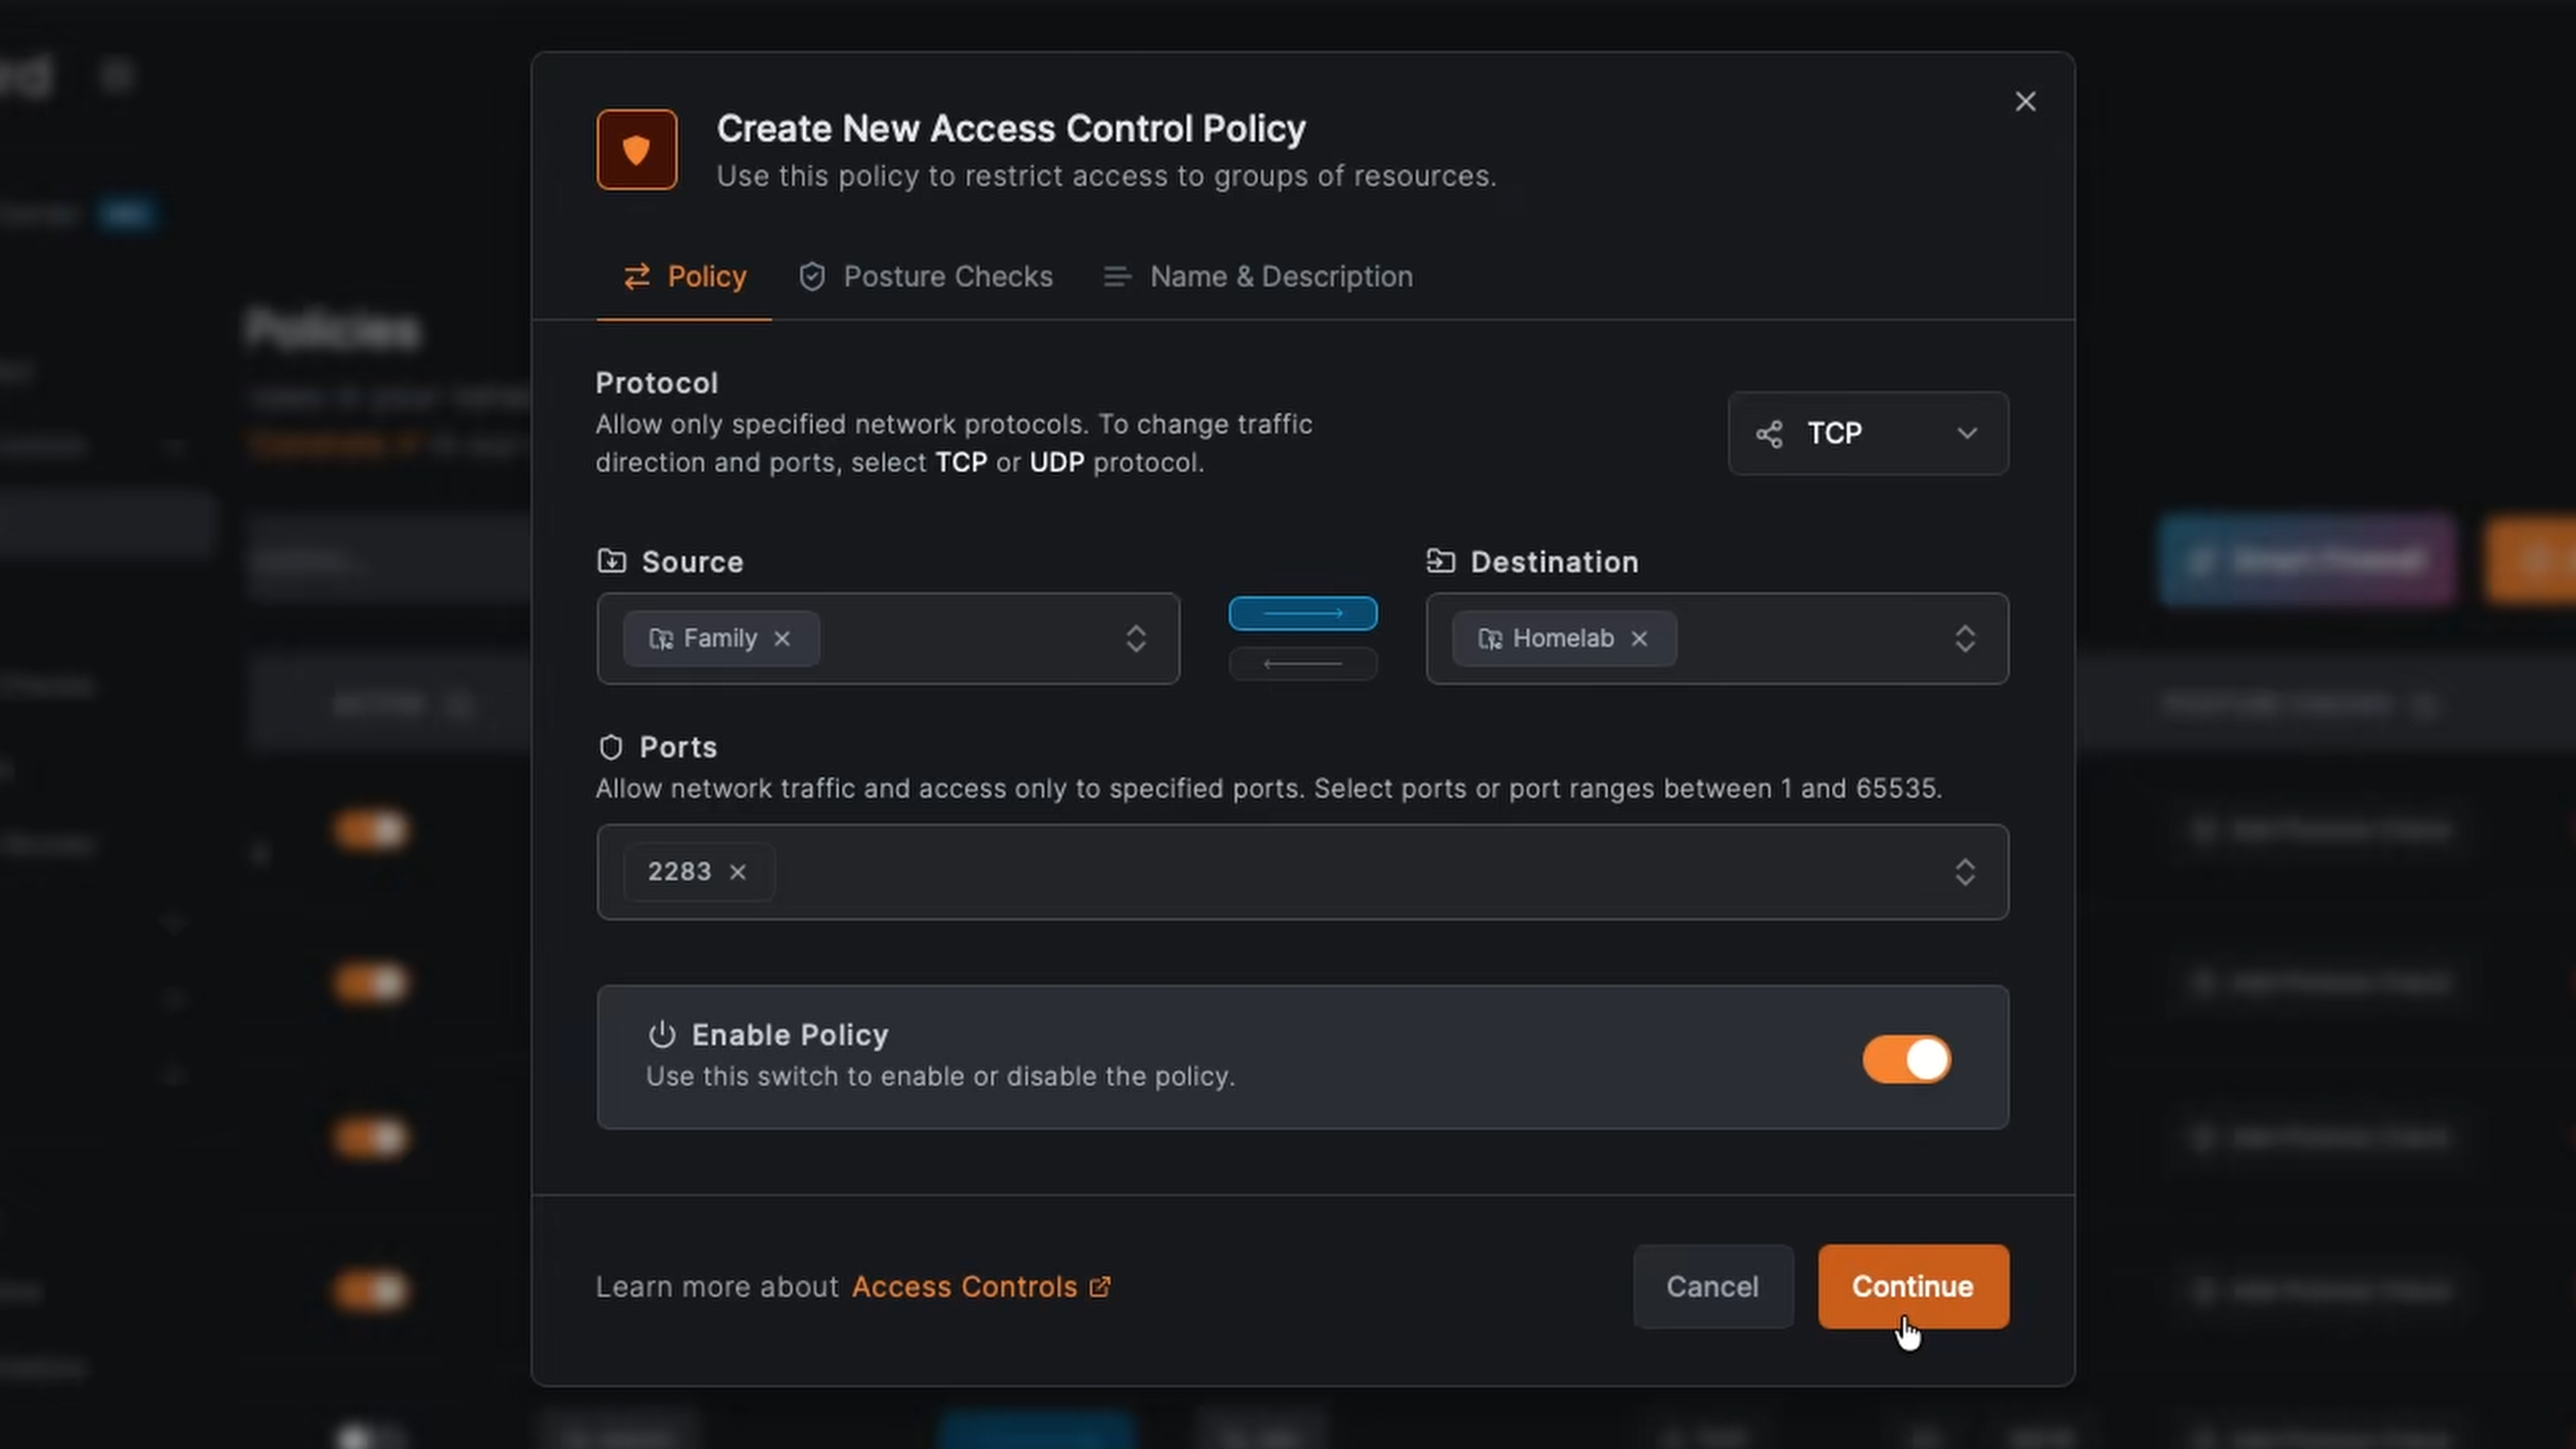
Then in the NetBird dashboard, create an access policy that allows your devices to reach port 2283 on the Immich peer. Now you can access your instance from anywhere using the NetBird DNS name or peer IP.
Dragging and dropping files through the web UI works, but it's tedious for large libraries. Immich-Go handles bulk uploads much better.
First, generate an API key in Immich. Go to your profile → Account Settings → API Keys → New API Key. Give it full permissions and save the key somewhere.
Download Immich-Go for your system from the releases page, then run:
If you're migrating from Google Photos via Takeout, Immich-Go handles the metadata mess Google creates. For some reason, Takeout extracts metadata to separate JSON files instead of keeping it embedded in the images. Immich-Go reassociates everything properly:
Always do a dry run first with to see what it's going to do before committing.
Grab the Immich app from the App Store , Play Store , or F-Droid . Enter your server URL and login credentials. For remote access, use either your NetBird address or DNS name with the port.
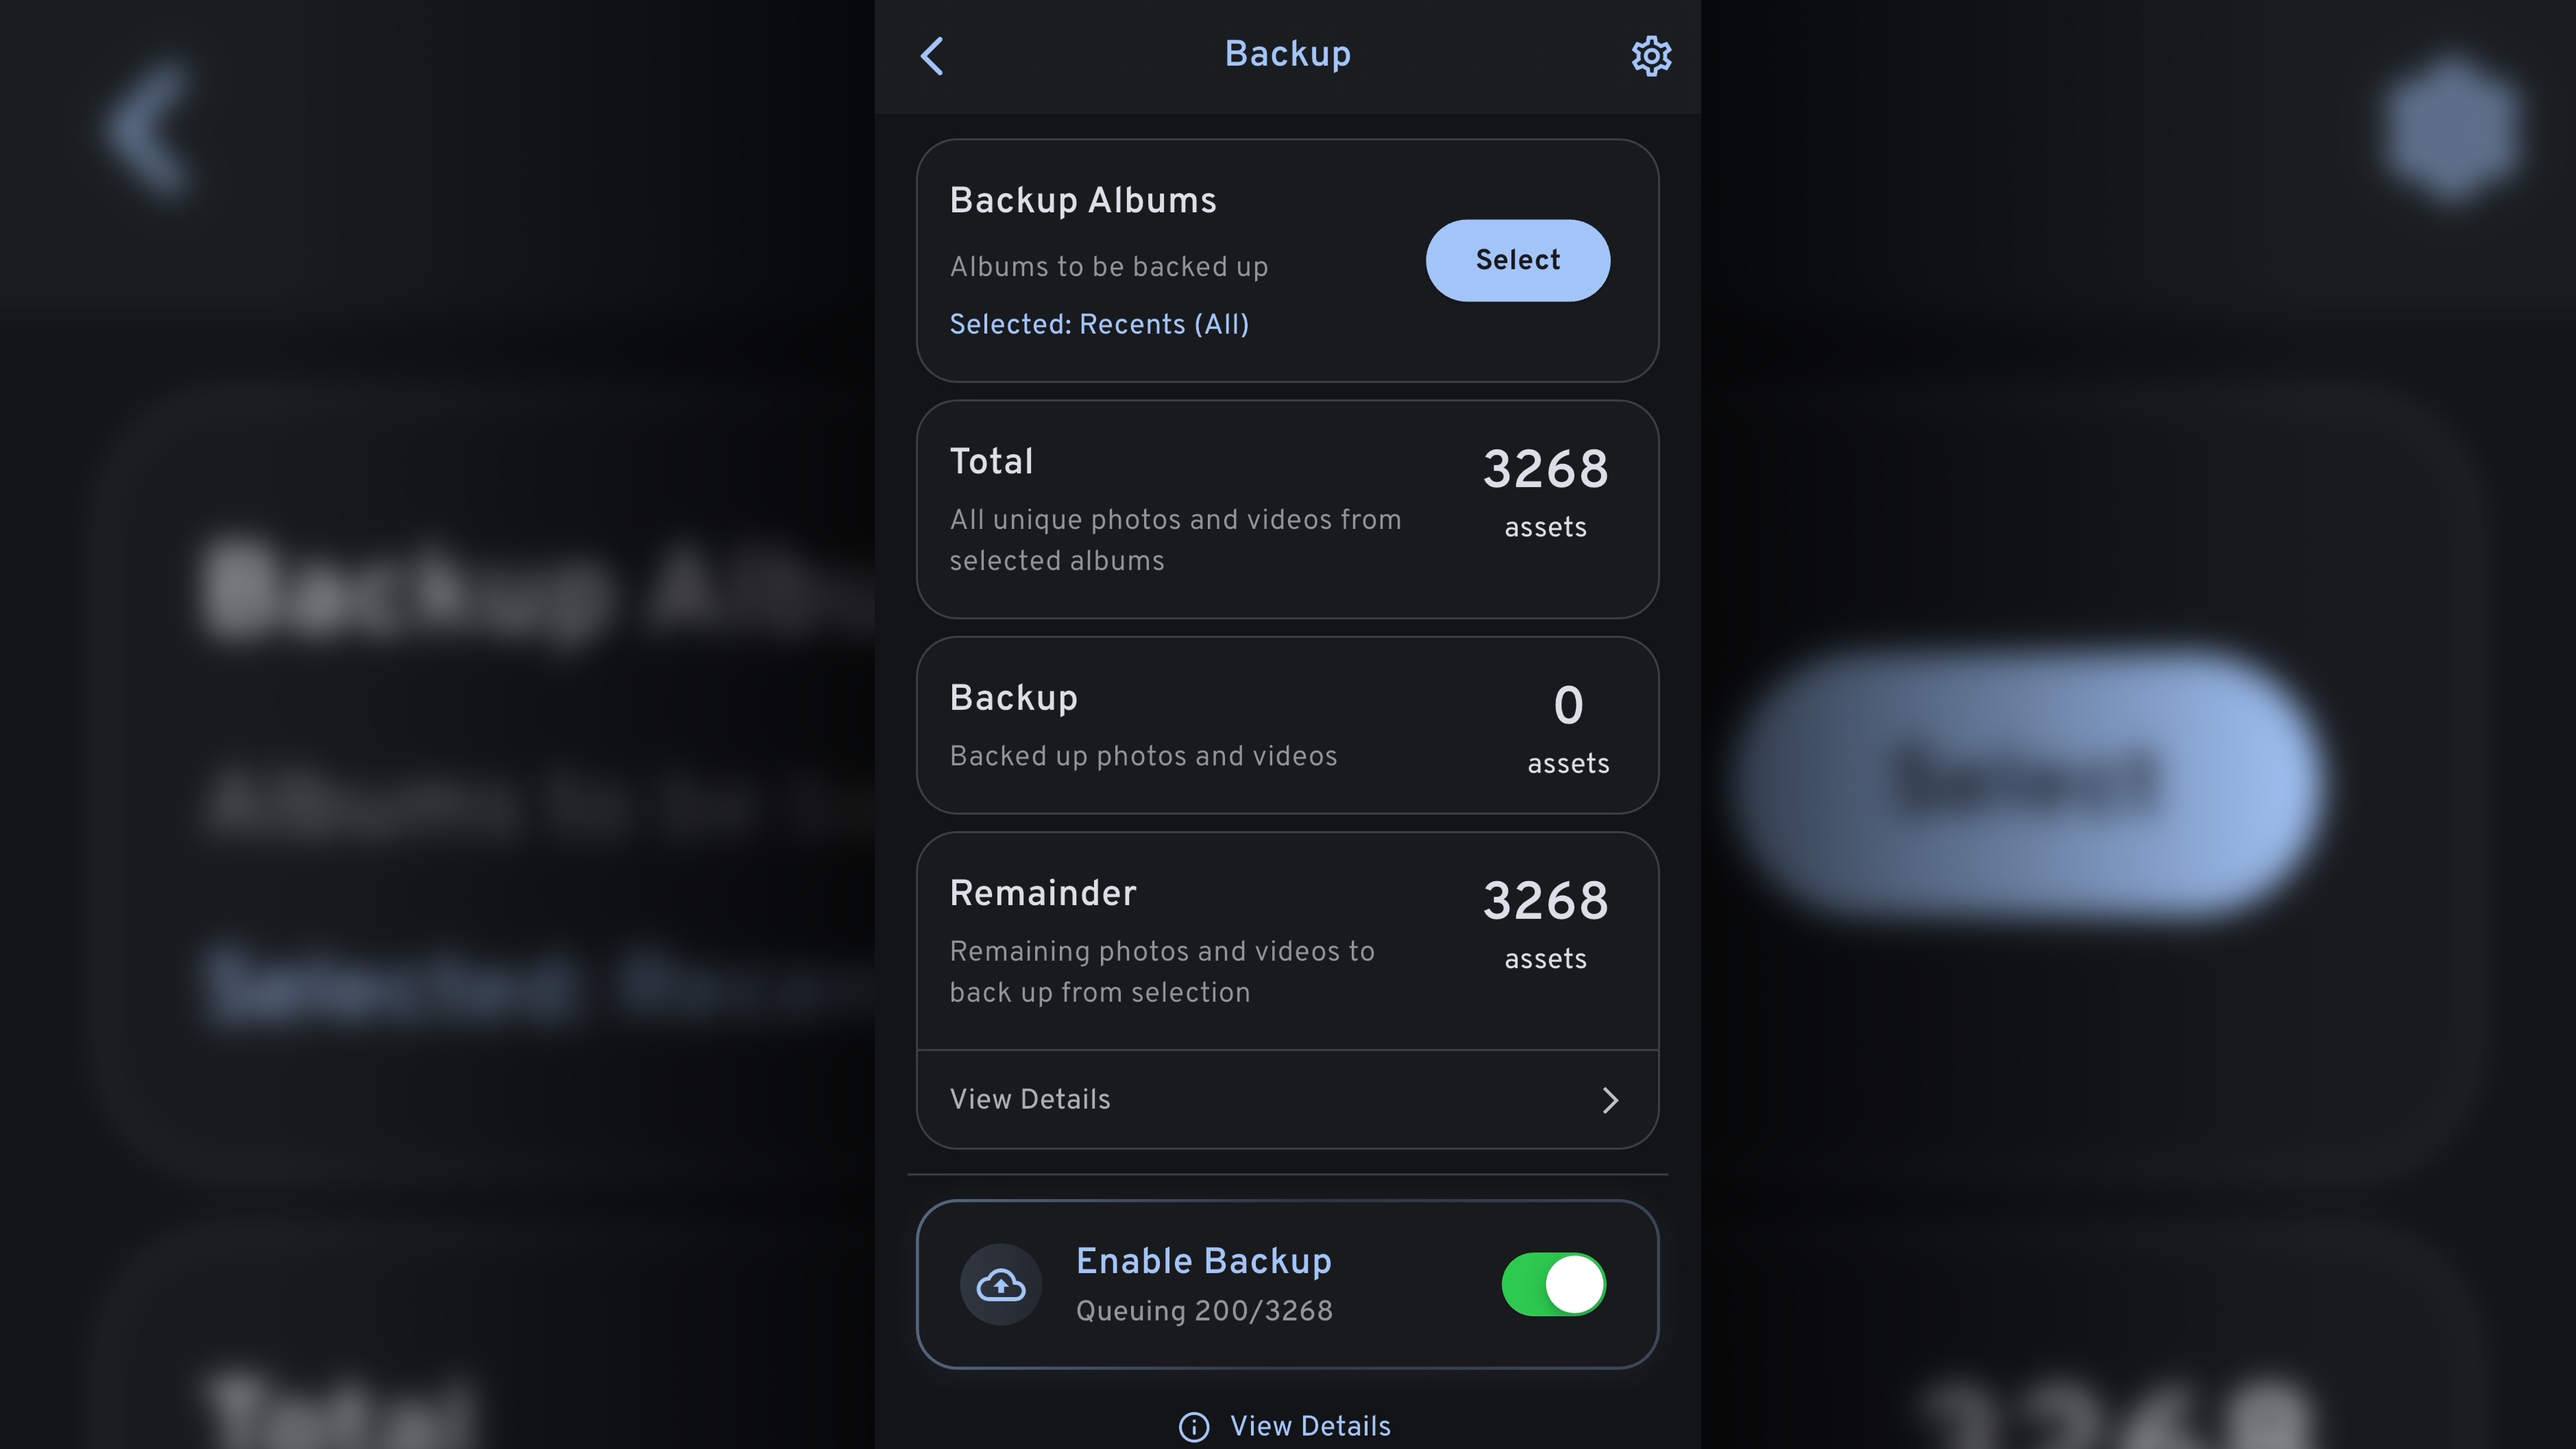
To enable automatic backup, tap the cloud icon and select which albums to sync. Under settings, you can configure WiFi-only backup and charging-only backup to preserve battery and cellular data. The storage indicator feature shows a cloud icon on photos that have been synced, which helps you know what's backed up.
iOS users should enable Background App Refresh and keep Low Power Mode disabled for reliable background uploads. Android handles this better out of the box but might need battery optimization disabled for the Immich app.
Immich stores your photos as files but tracks all the metadata, faces, albums, and relationships in PostgreSQL. You need to back up both components, losing either means losing your library.
The database dumps automatically to daily at 2 AM. For manual backups:
Back up your database dumps and the and directories. You can skip and since Immich regenerates those.
For a proper 3-2-1 strategy, you want three copies of your data on two different media types with one copy offsite. I'll be doing a dedicated video on backup strategies, so subscribe if you want to catch that.
This covers the core setup, but Immich has more depth worth exploring. External libraries let you index existing photo directories without copying files into Immich's storage. The machine learning models can be swapped for different accuracy/performance tradeoffs. Partner sharing lets family members see each other's photos without full account access.
The official documentation covers all of this in detail. For issues or questions, the community on Reddit and GitHub discussions is genuinely helpful.
Once you've got everything running, you can finally delete those cloud storage subscriptions. Your photos stay on hardware you control, no monthly fees, no storage limits, no training someone else's AI models with your personal memories.
此内容由惯性聚合(RSS阅读器)自动聚合整理,仅供阅读参考。 原文来自 — 版权归原作者所有。