








Secure Shell (or SSH for short) is probably one of the most ubiquitous remote access protocols used in modern computing. Almost all Mac and Linux operating systems (OSs) come with an SSH client and/or server installed by default.
When SSH was first developed in 1995 , its goal was to replace earlier protocols, like telnet and the File Transfer Protocol (FTP), because they didn't provide strong enough authentication mechanisms. Today, the SSH protocol is used for more than just remote access or remote logins. It also supports port forwarding and secure file transfers, as well as many others.
While SSH does make it easier to access your computing infrastructure, the widespread use of SSH as a remote access solution also makes it a juicy target for threat actors to try and exploit.
In this guide, you'll learn more about the SSH protocol and how to employ best-practice security configurations to access your computing infrastructure remotely. You'll also explore some alternative methods for accessing your servers.
Whether you have a single personal server or you're managing a large fleet of servers for an organization, the security of your SSH server(s) is very important.
Threat actors are constantly scanning for open SSH ports (traditionally, Transmission Control Protocol (TCP) port 22, ) and should they find your SSH server answering connections, they can try brute-force attacks or test for vulnerabilities in older versions of the SSH server (if you haven't updated the server software).
Threat actors could be trying to gain access to your servers for a multitude of reasons:
When you're setting up your SSH server, you need to make a few choices concerning your SSH security. Some of these choices depend on factors like whether your server is already behind a firewall. If that's the case, you might not need to restrict access to a specific network range.
In the next few sections, you'll explore some of the options you have for securing your SSH server, depending on your needs.
Most of the following code examples assume that you're using the default OpenSSH server that's packaged with macOS and most Linux distributions.
Your SSH server is controlled via a configuration file. Typically, the main file is called , and the file is located in , although you can specify a different location for this file if you want to.
Depending on your or your organization's needs, configuring some of these options might be unnecessary, like enabling access only from specified network ranges. However, you need to understand all the options as they offer you a way to enhance the security posture of your SSH-enabled servers.
Depending on the distribution and version of your OS, some systems have the setting set to by default:
This setting allows the root user to log in via SSH directly. However, it's recommended to update this setting to .
The proper method for gaining root privileges on a server is to log in as a nonprivileged user and use the command to gain elevated privileges.
In many cases, the SSH server is configured to start listening for incoming connections on all interfaces by default. The line in the config file looks like this:
On some Linux distributions, this line can also be commented out with a . This means that, while it isn't explicitly set, it's a default setting, and you need to override the default either by removing the and changing the value or by creating a new line with the correct value underneath that line.
Depending on your network configuration, your values might look different than the example here, but in a typical Class C network range , your code might look like this:
In this example, your server has an IP address of , and the server listens specifically on the interface that has that IP address configured.
You've already learned how to disable the root user from logging on, but you can also specify exactly which users or groups are allowed to log into your server. All you need to do is add a space-separated list of users or groups with one or both of the following lines in your file:
By default, you can log into a server using SSH with a username and a password. However, there are more secure authentication methods available. SSH public key authentication is likely the most secure and widely used authentication method for remote access via SSH.
You could also configure your SSH server to use a second factor for authentication, like Google Authenticator .
Most users create an SSH key pair for themselves. If you want to learn how to do that, check out this tutorial .
When you generate a new key pair, you end up with two cryptographically signed keys:
All public keys that are allowed to authenticate to the server are, by default, stored in your home directory in a file called . The full path looks like this: .
Copy the contents of your public key into this file and then enable public key authentication in the file by making sure it contains this line:
Then test your SSH connection using your key, like this:
If you don't have a passphrase setup on your public key, you should be able to log in directly to the server. Once you've confirmed that public key authentication is working, you can disable password authentication completely:
Now that you've enabled public key authentication for yourself, it's easy to see why it would be challenging to manage a large group of computers or even a large group of users that need access to these computers. If a dozen users need to access the server, all those users would need their public key to be added to the file. And should a user leave the organization, you need to revoke their key manually as well.
You can modify your SSH server to enable multifactor authentication (MFA); for example, by asking for a time-based one-time password (TOTP) ) when you log in.
There are many ways to achieve this, but one popular way is to simply install the Google Authenticator Pluggable Authentication Module (PAM) and enable it on the SSH server to integrate MFA into the SSH login process.
The process for doing this is quite detailed and can be different depending on which version of Linux or Mac you're running, but the main points are as follows:
While the steps for this are beyond the scope of this guide, you can use this tutorial to install Google PAM on your SSH server if you need to.
You could also consider replacing your standard OpenSSH server with an SSH server that automatically incorporates many of the features discussed earlier.
NetBird is a company that offers an open source VPN platform that utilizes the WireGuard protocol to create a peer-to-peer mesh network of all your devices that have the NetBird agent installed.
NetBird features an embedded SSH server that can be enabled, leveraging an access control list to selectively retrieve public keys from authorized SSH agents across the network, ensuring that only authorized keys are obtained via the control plane of the mesh network. Take a look at how it works.
In their free tier, NetBird lets you connect up to 100 devices. All you have to do is sign up . They also offer a self-hosted version if you prefer to use that.
Once you've signed up and signed in, you'll be greeted by a screen offering you the download links for the NetBird agents of different OSs:
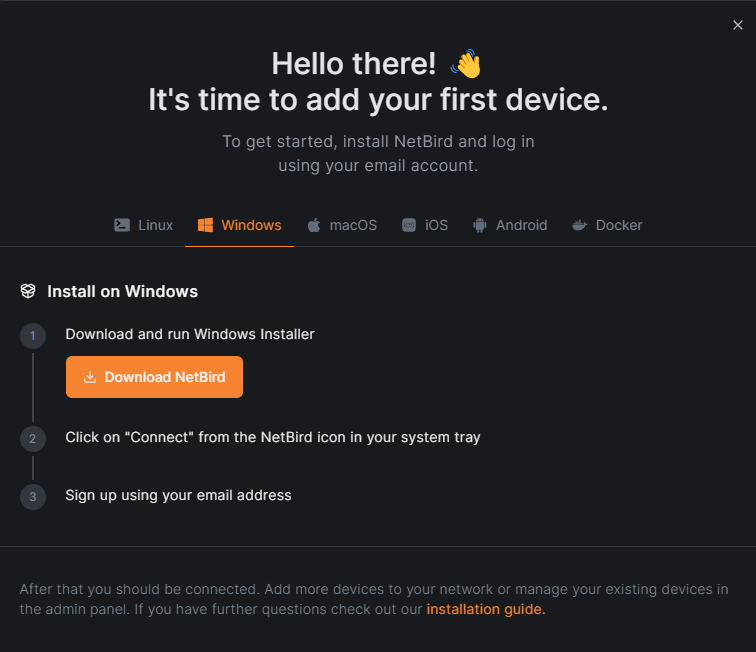
This guide uses a Windows machine and a Linux machine, and you need to follow the instructions for installing the agent on two of the machines you want to connect.
NetBird supports many different OSs, but it's beyond the scope of this guide to show you how to install the agent on each OS. If you need any help, NetBird has an excellent installation guide .
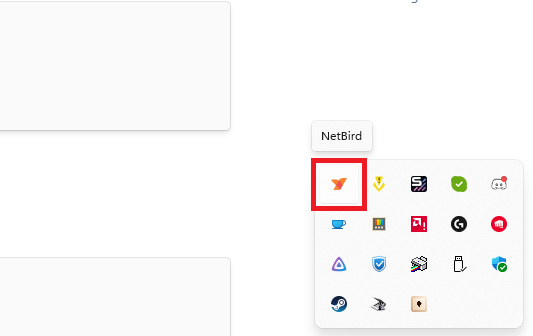
On a Windows machine, once you're finished installing the agent, the installation wizard will ask whether you want to start the user interface. Select Yes, and the NetBird agent starts running in the system tray:
On a Linux machine, you have the option of installing either a command line interface (CLI) version of NetBird or the full graphical user interface (GUI) version if you're running a Linux desktop system. Here, you'll just install the CLI version.
Once the installation is done, it's time to connect the two machines.
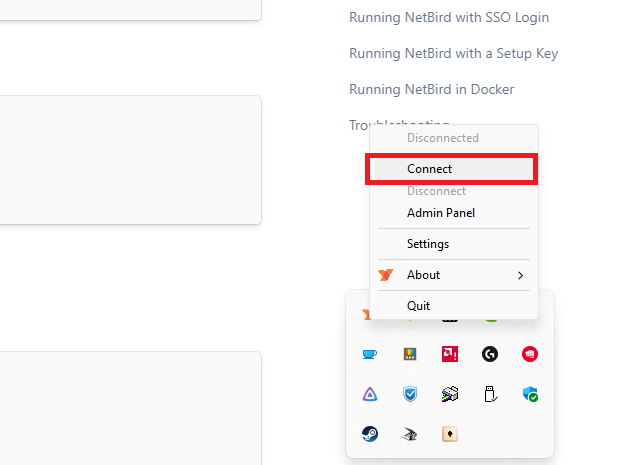
On the Windows PC, right-click the NetBird agent icon running in the system tray and select Connect:
If you're already logged into your NetBird console, you should get a browser window that opens up and asks whether you want to authorize this device to your network:
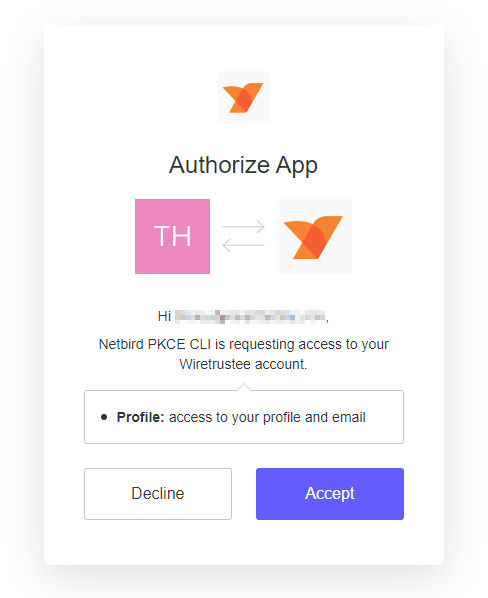
Once you click Accept, your device will register with the NetBird service and become the first peer connected to your mesh network:
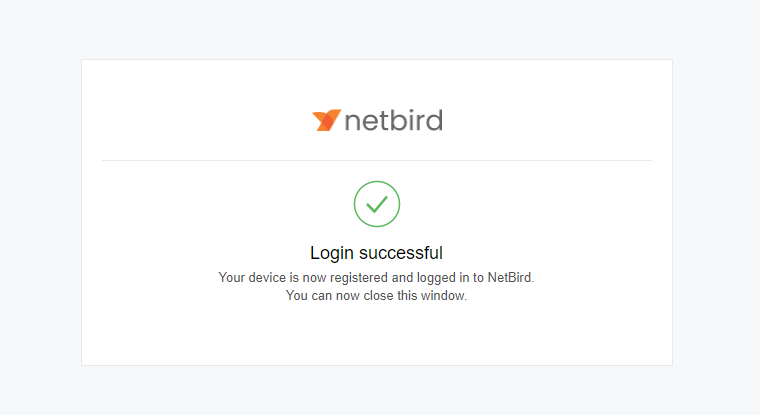
On the Linux side, you can join that same mesh network using the CLI version.
Run the command to open a browser window. This window asks you to log in and verify that you want this device to join the mesh network.
Once you've verified you want to join the network, you can see them listed under the Peers panel on your NetBird dashboard:
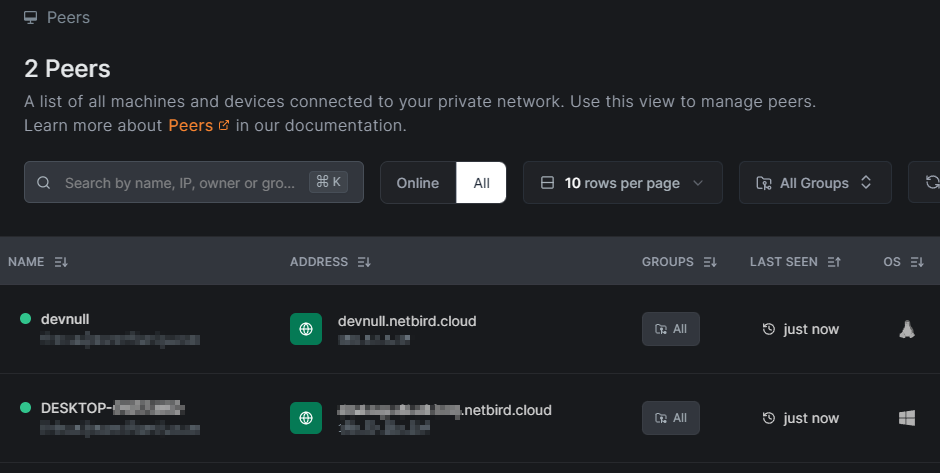
Once the peers are all connected, you need to enable the NetBird SSH Access feature from the dashboard. Simply click on the peer that you want to access via SSH and then toggle the SSH Access option.
You will receive a warning that this is an experimental feature, but it's perfectly fine to enable it for this tutorial:
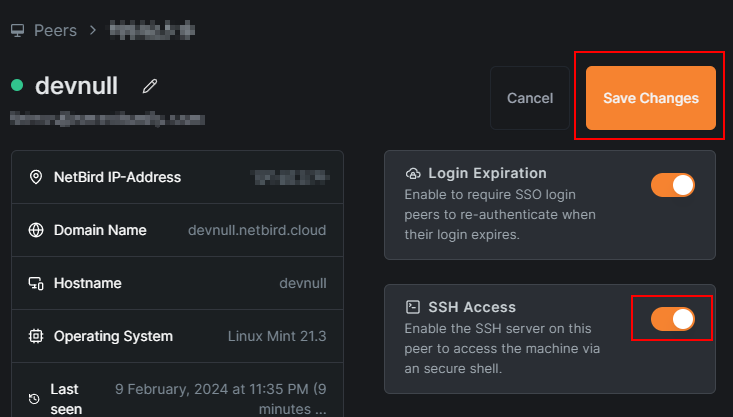
NetBird will now run an SSH server that is accessible only from other computers on the peer-to-peer mesh network.
Now, from your other machine, you can SSH into the computer that has SSH access enabled simply by running the following command in a command prompt: .
In this case, the Linux box that has SSH access enabled is called . NetBird automatically creates a DNS server and DNS entries for all peer-connected devices, so the command for this tutorial is as follows:
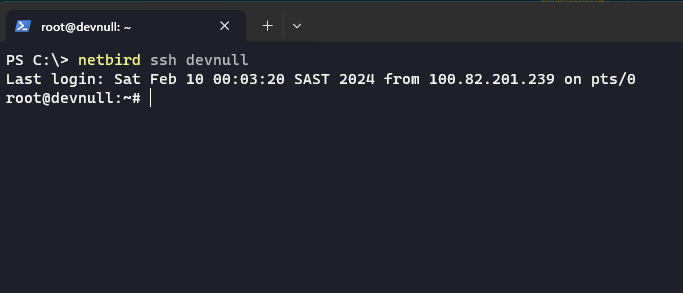
And that's it! You've made an SSH connection to the other machine without having to distribute anything. The connection is also secure as it's accessible only via other machines connected to the mesh network and it's not internet-facing.
If you have options like MFA configured on your NetBird peers, they are automatically enabled for the NetBird SSH connection, too.
NetBird is compatible with large identity providers, so you and your colleagues can use your Microsoft or Google credentials to gain access to all SSH-enabled servers connected to the peer network. There's no need to set up each individual user on each individual server.
In this guide, you learned a little about the history of SSH and why keeping it secure is so important. You also learned how to implement some security configurations to help protect against common attacks targeted at your server.
Finally, you learned about NetBird, which offers an alternative, secure way to set up your SSH server without having to manually distribute or rotate public keys.
此内容由惯性聚合(RSS阅读器)自动聚合整理,仅供阅读参考。 原文来自 — 版权归原作者所有。