


NetBird's Network Routes is a feature that enables administrators to route traffic to external private networks such as VPCs, LANs, or remote branch networks. This feature is essential for organizations looking to create a unified, secure network environment across various infrastructure components, enhancing overall network efficiency and security.
In this guide, you'll explore the powerful networking capabilities of NetBird through a series of practical scenarios:
Each section will provide step-by-step instructions and practical insights, equipping you with the knowledge to implement these features in your own network infrastructure. Let's dive in and unlock the full potential of NetBird's Network Routes.
This scenario represents the simplest network route configuration: connecting to an external private network using a single routing peer . Using a standard network route is ideal for non-critical networks or environments where potential downtime is acceptable, as it relies on a single point of connectivity.
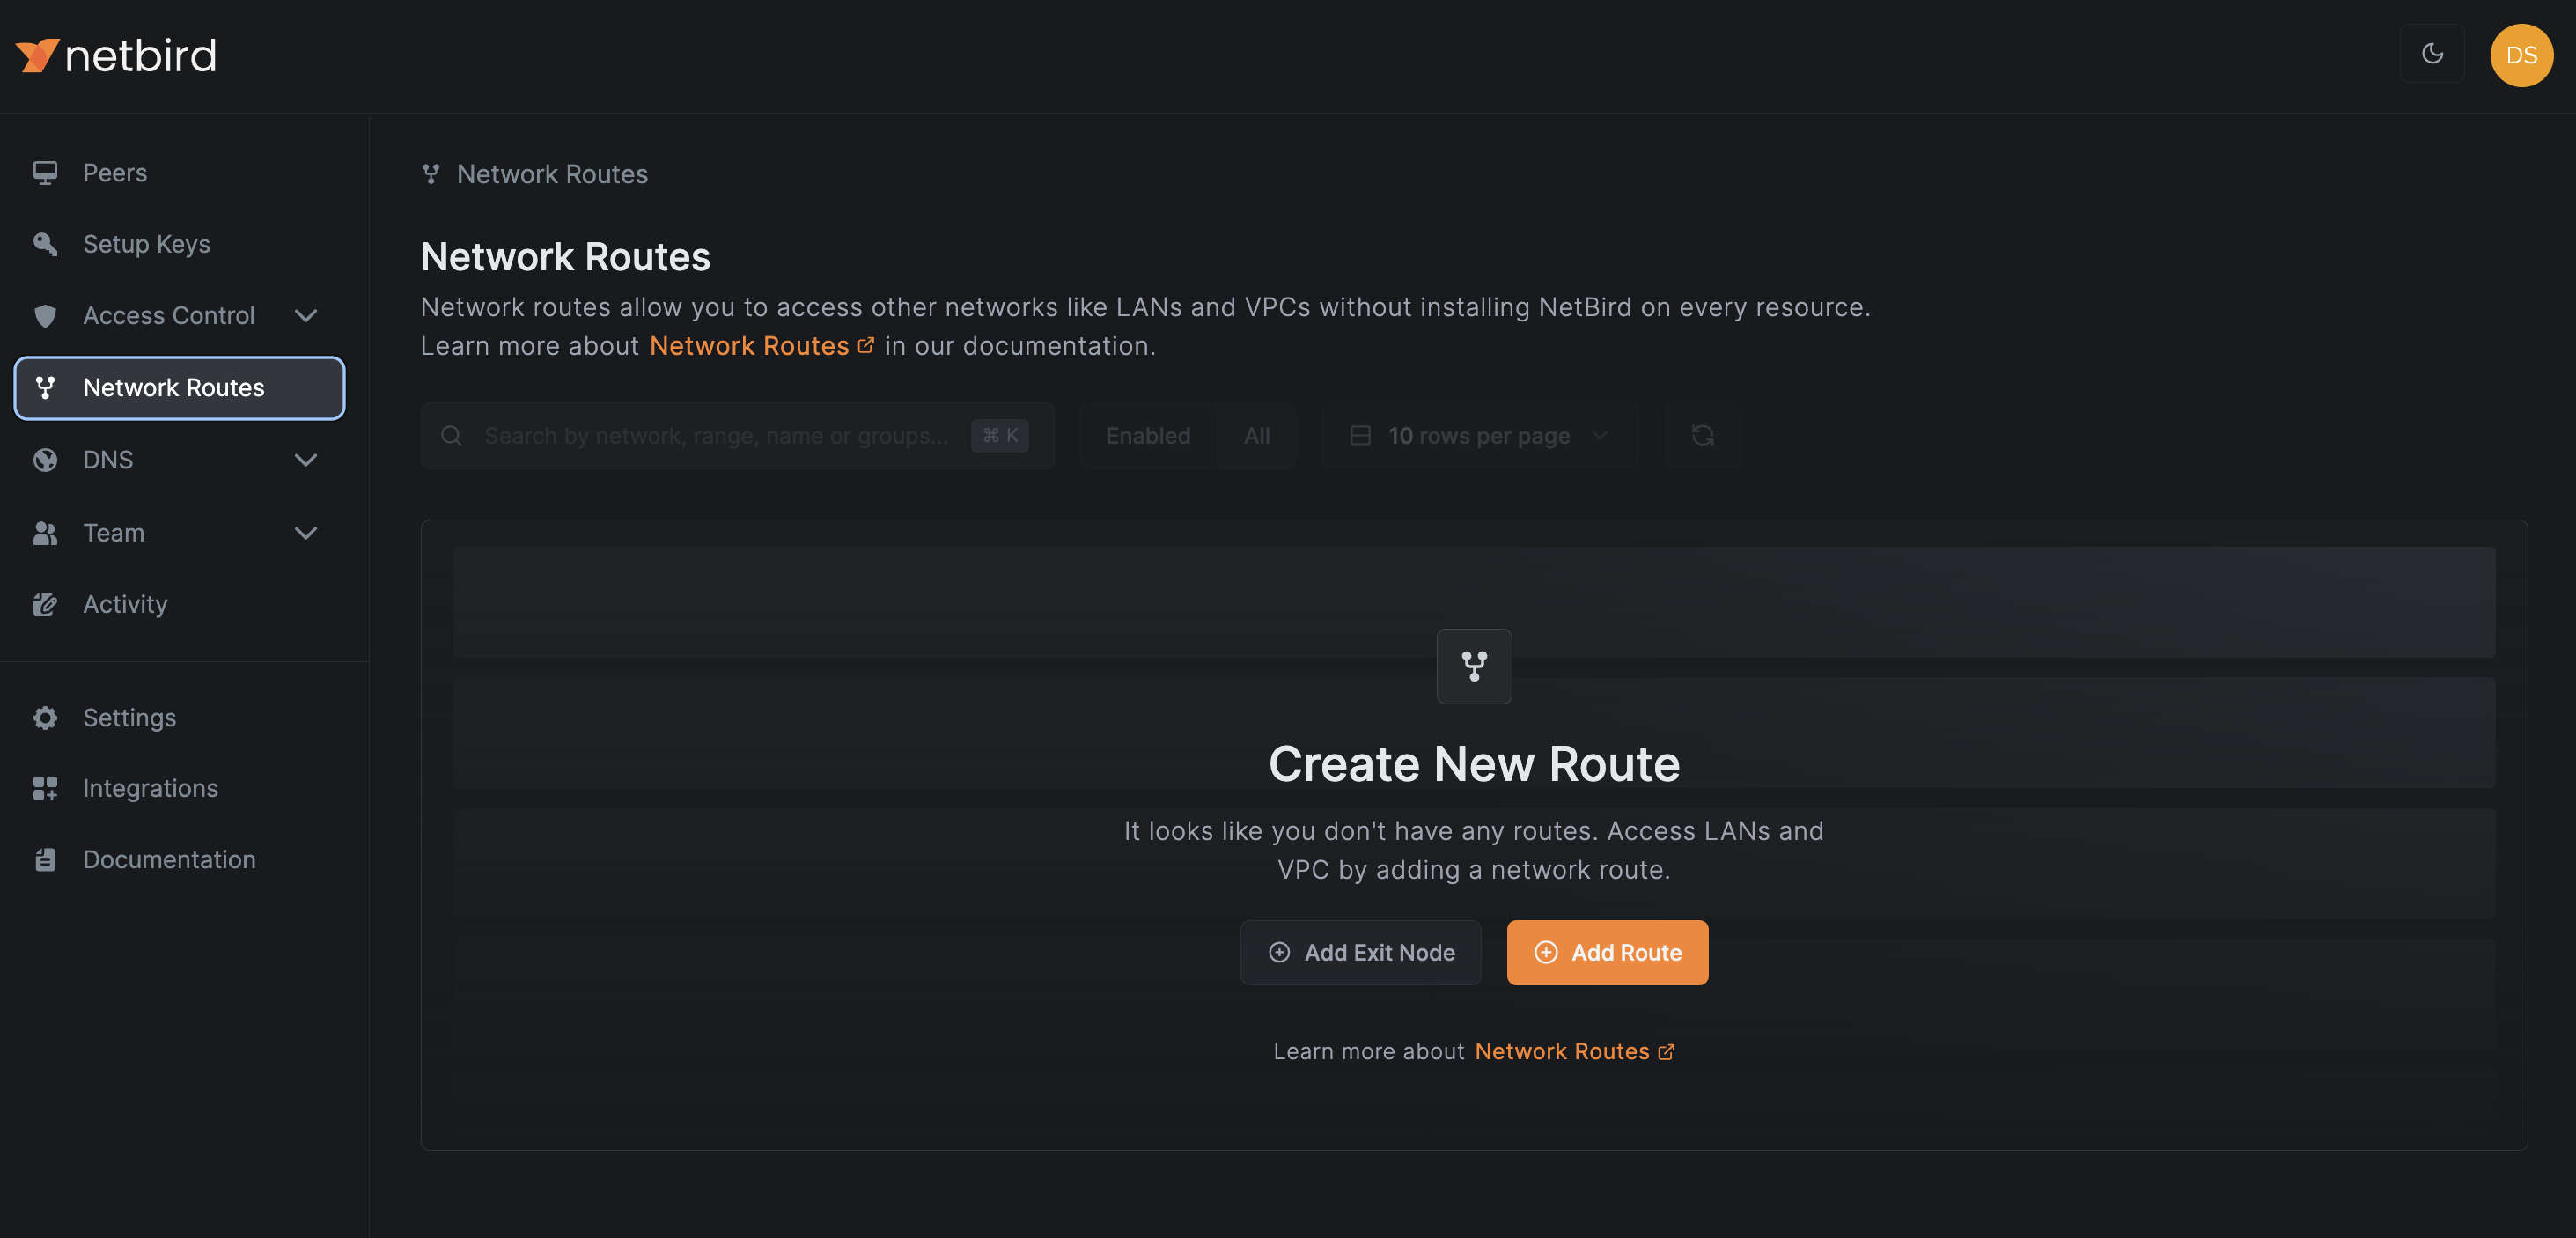
To create a network route, navigate to in the left menu and click .
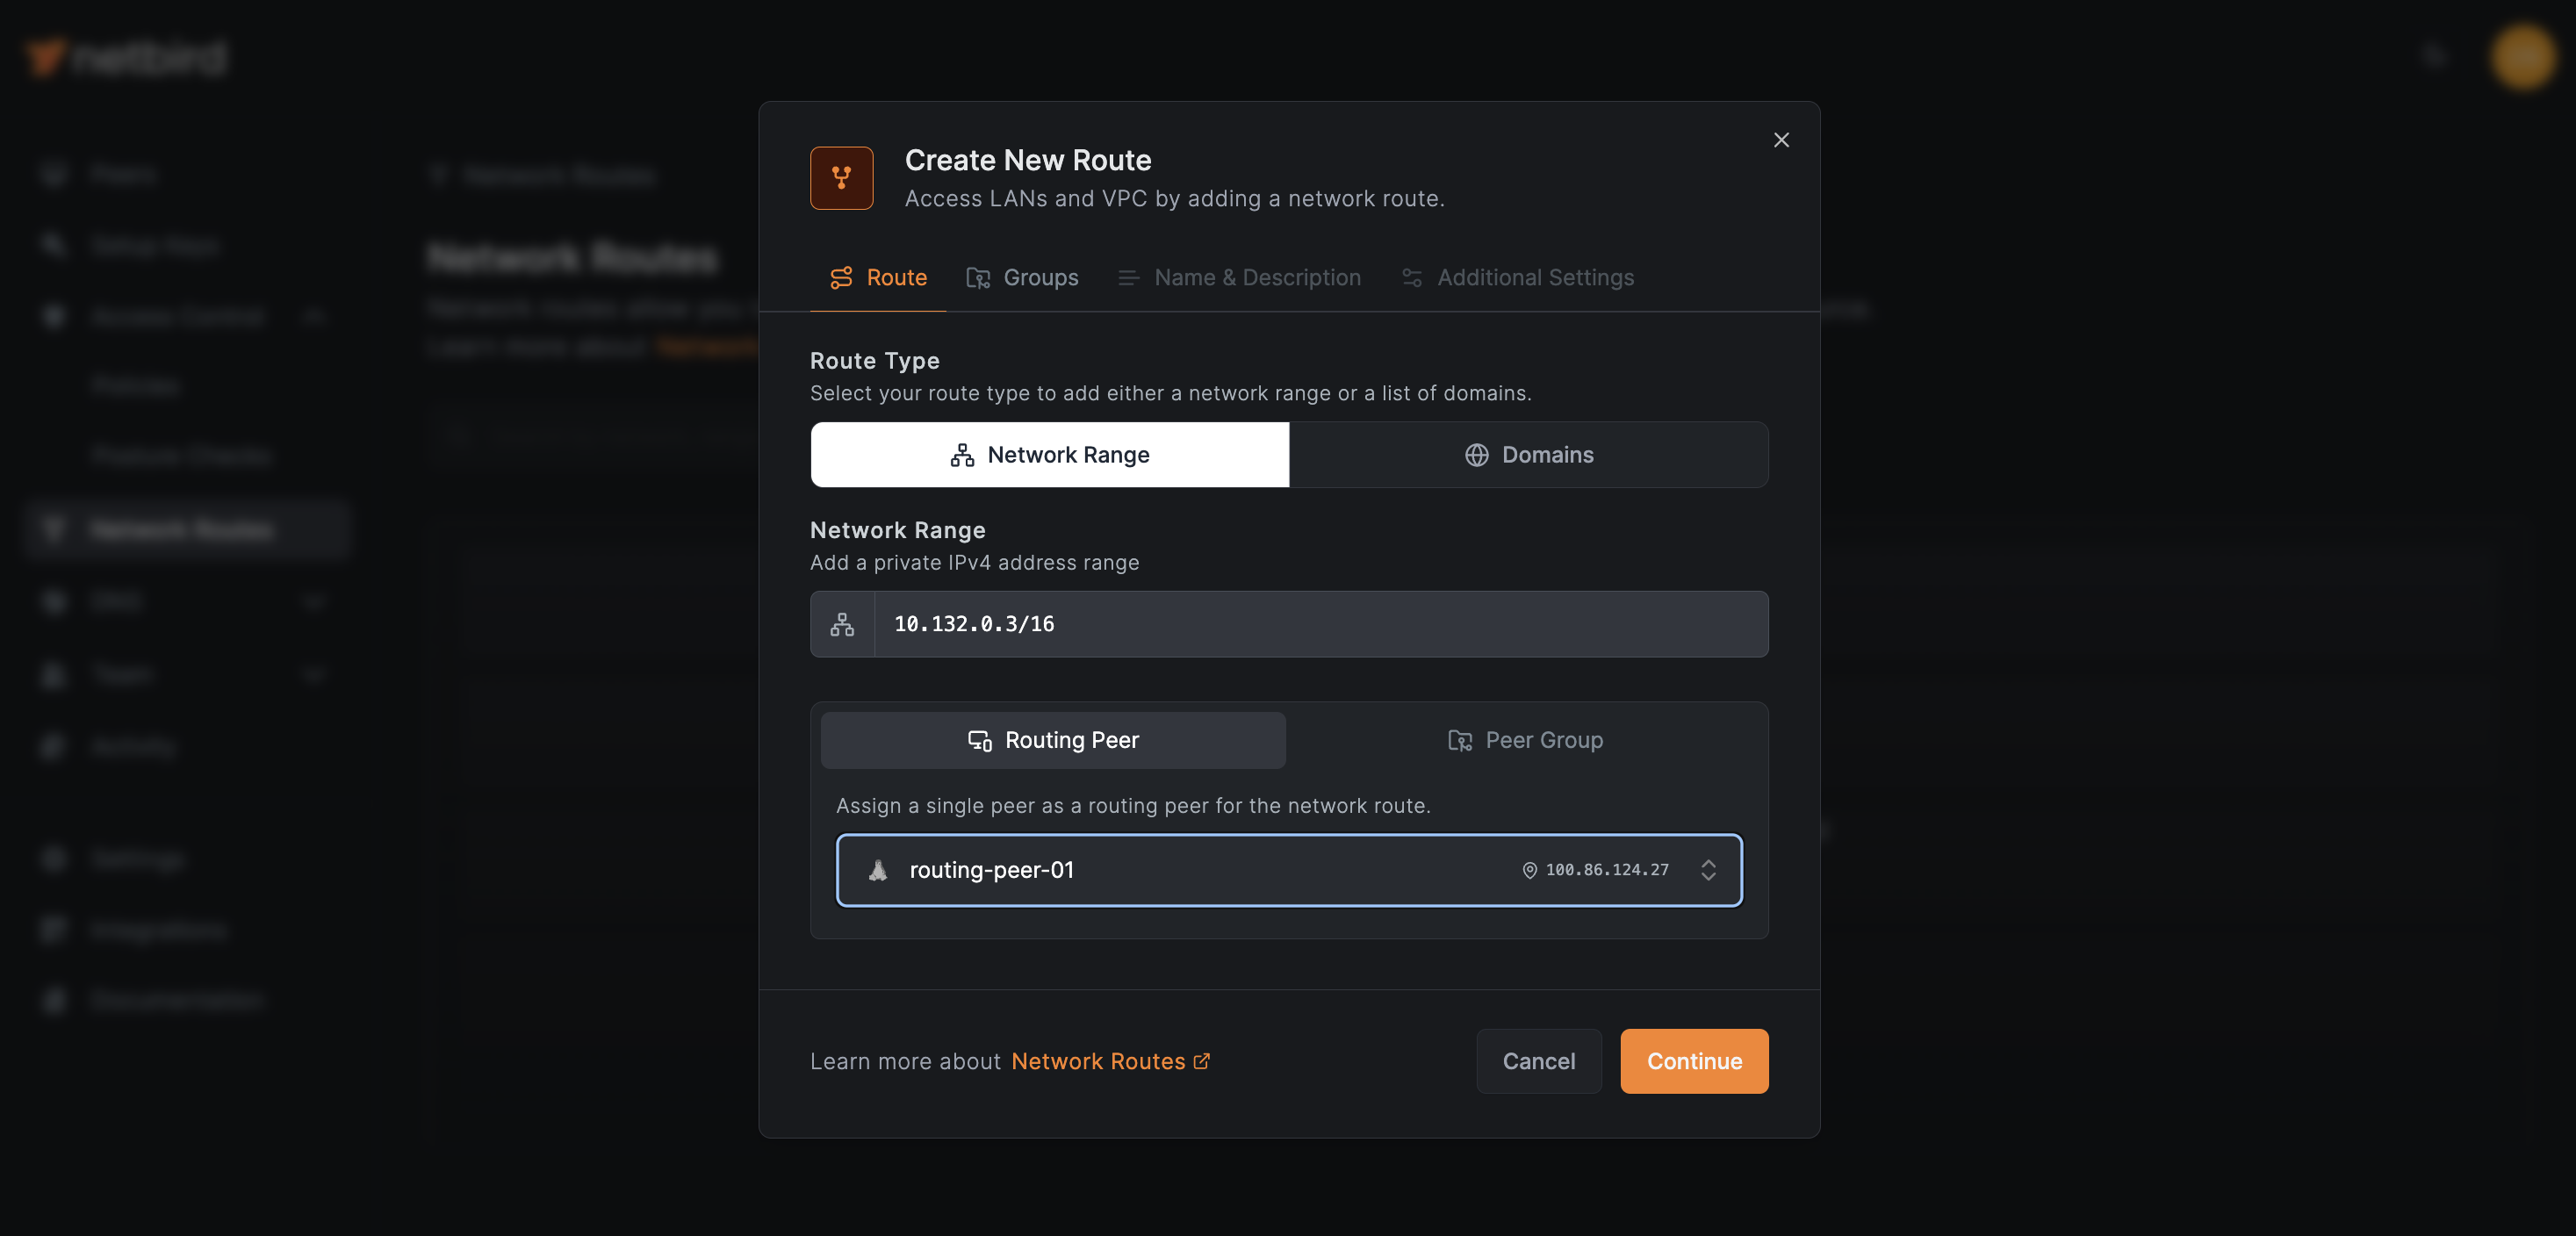
In the tab, choose between two route types:
Next, select an existing peer as the for this network route. Keep in mind that only Linux peers can become routing peers in NetBird. Click when ready.
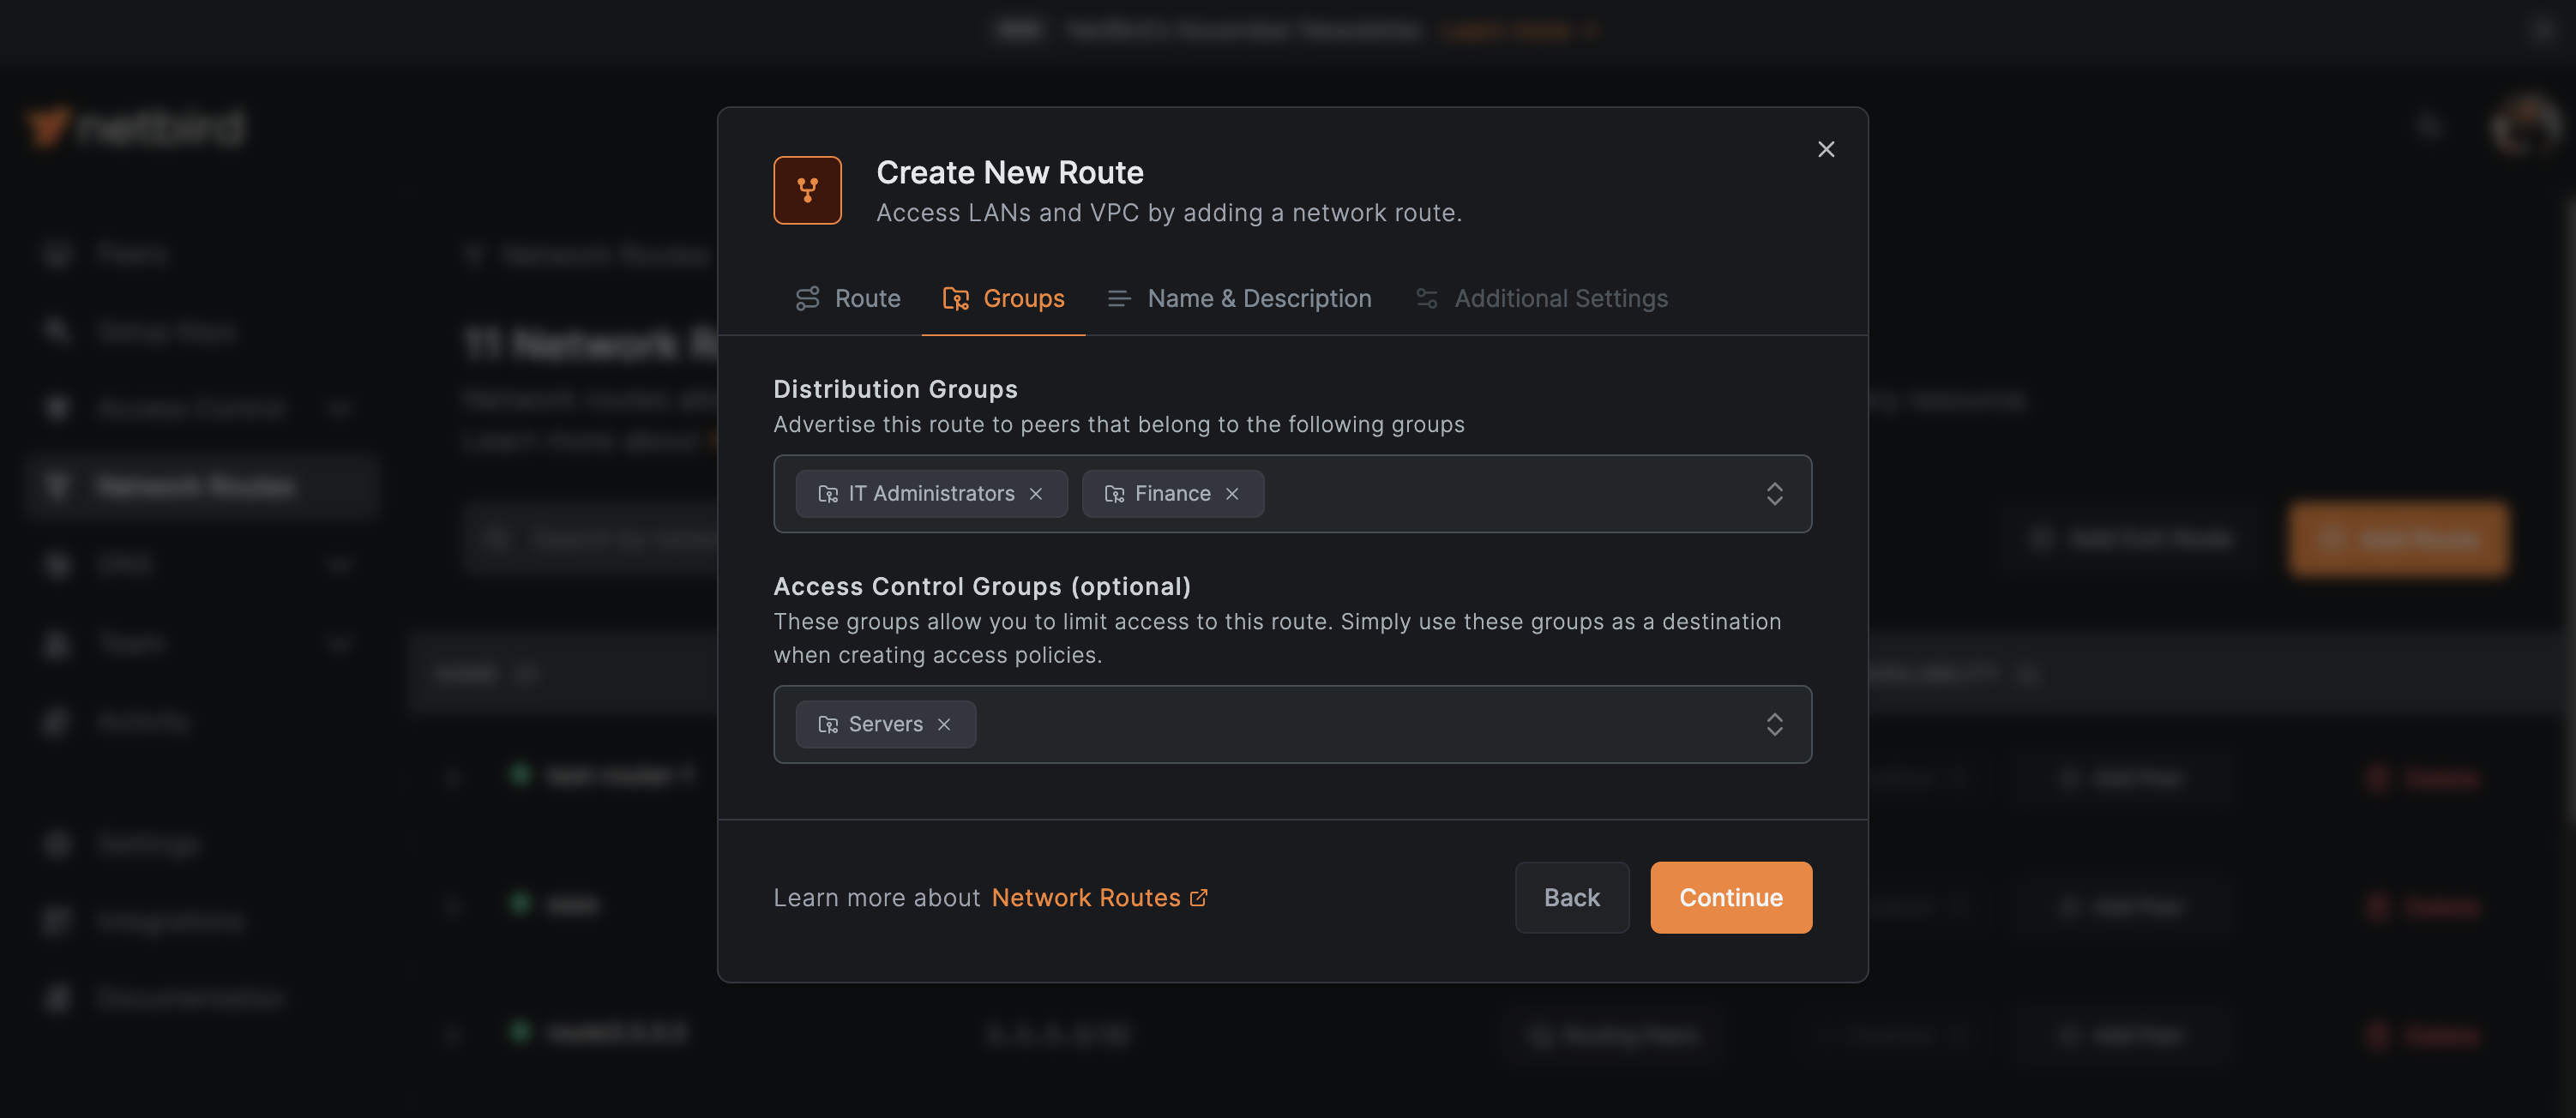
In the tab, you can use NetBird to advertise the route to specific groups. While optional, under you can leverage NetBird's access control policies to limit which peer groups are allowed to use the route, ensuring proper security and granular access management within your network. In the example below, the route will be a part of the group that you can use as a destination when creating access policies. Use as sources of the connection.
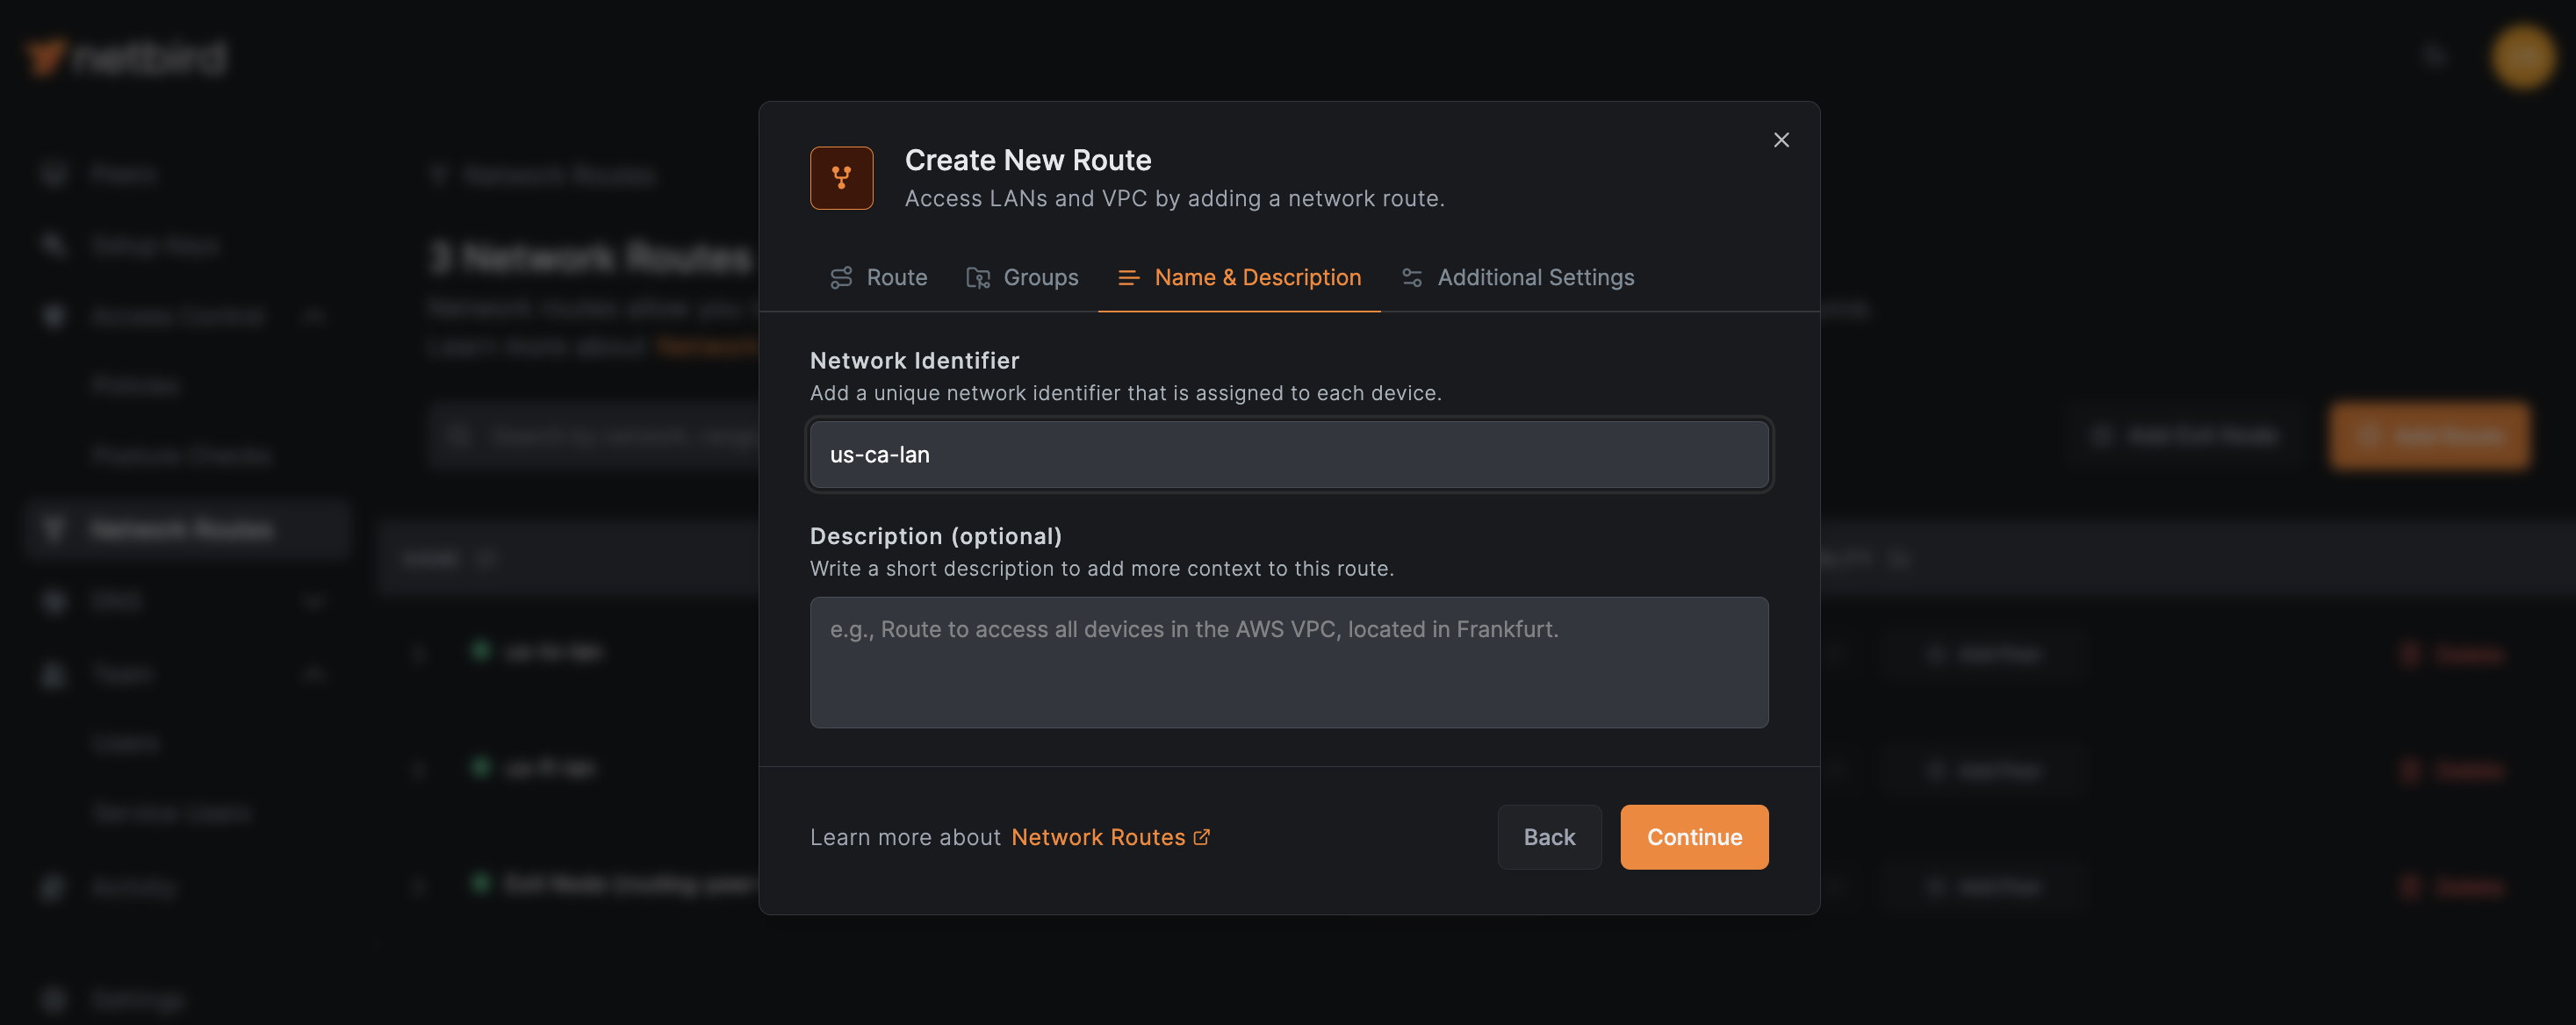
In the tab, enter a descriptive name for your route under .
Next, in the tab, you can disable if you want to preserve the original source IP of the traffic or keep it enabled for NAT-like behavior. Also, you can set the setting to adjust route priority. A lower metric indicates higher priority.
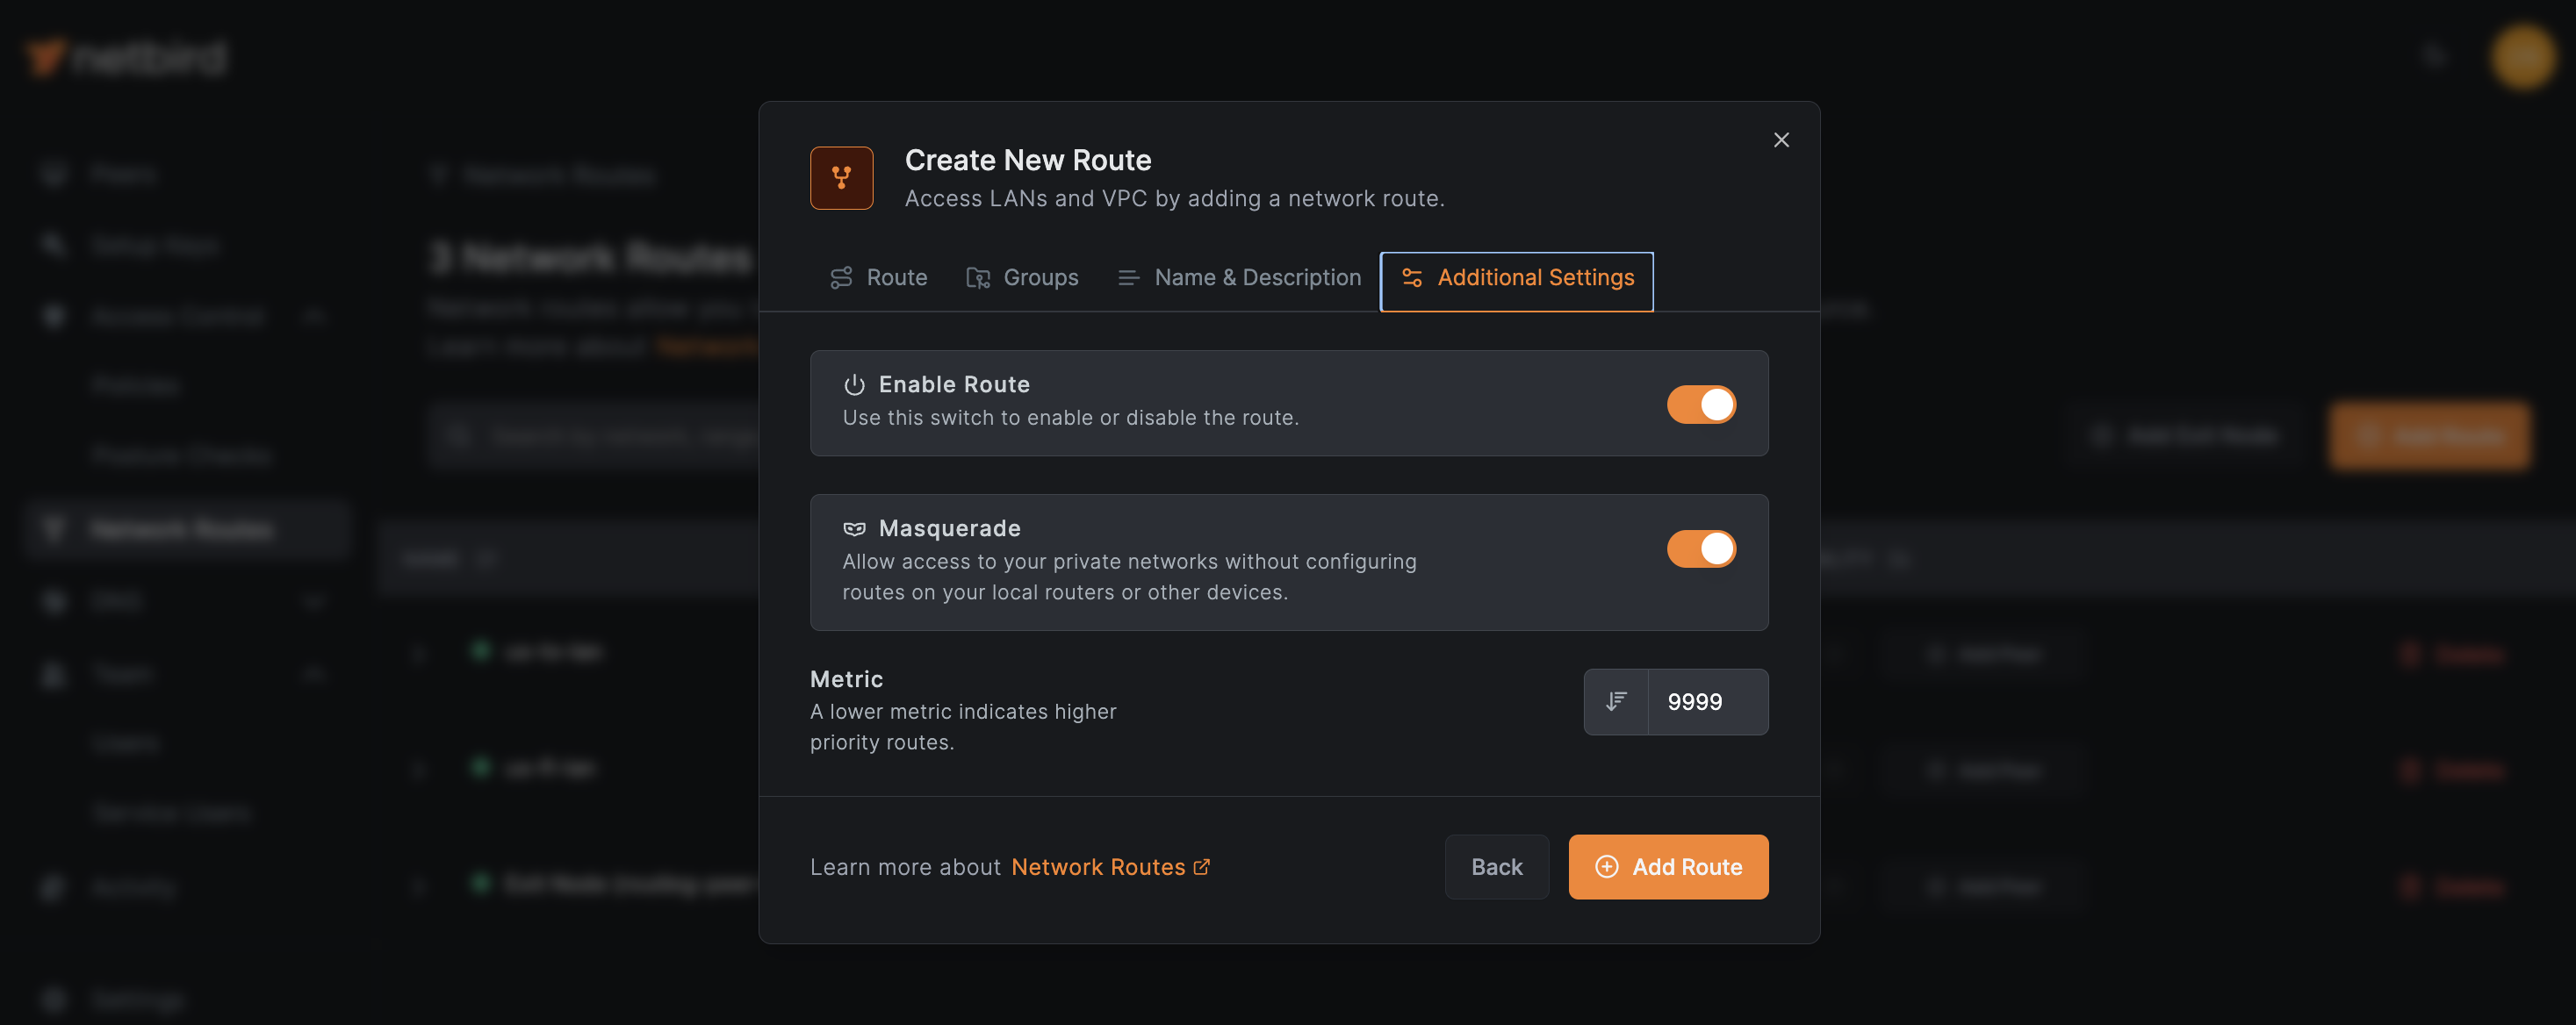
Review your settings and click to create the network route.
Since we set up an access control group in the tab, a pop-up window will appear after clicking . Please note if you leave the field empty, this window won't pop up. However, as explained, using access control policies is a best practice because allows you to limit access to the route, enhancing your network's security. Without access policies in place, all peers in the distribution group would gain access to the route.

Clicking on will take you to the access control policy creation window, where you can allow access to this route to specified Source groups and limit access only to specified ports. In the example below, only and groups can access resources in the network behind the route on port 443.
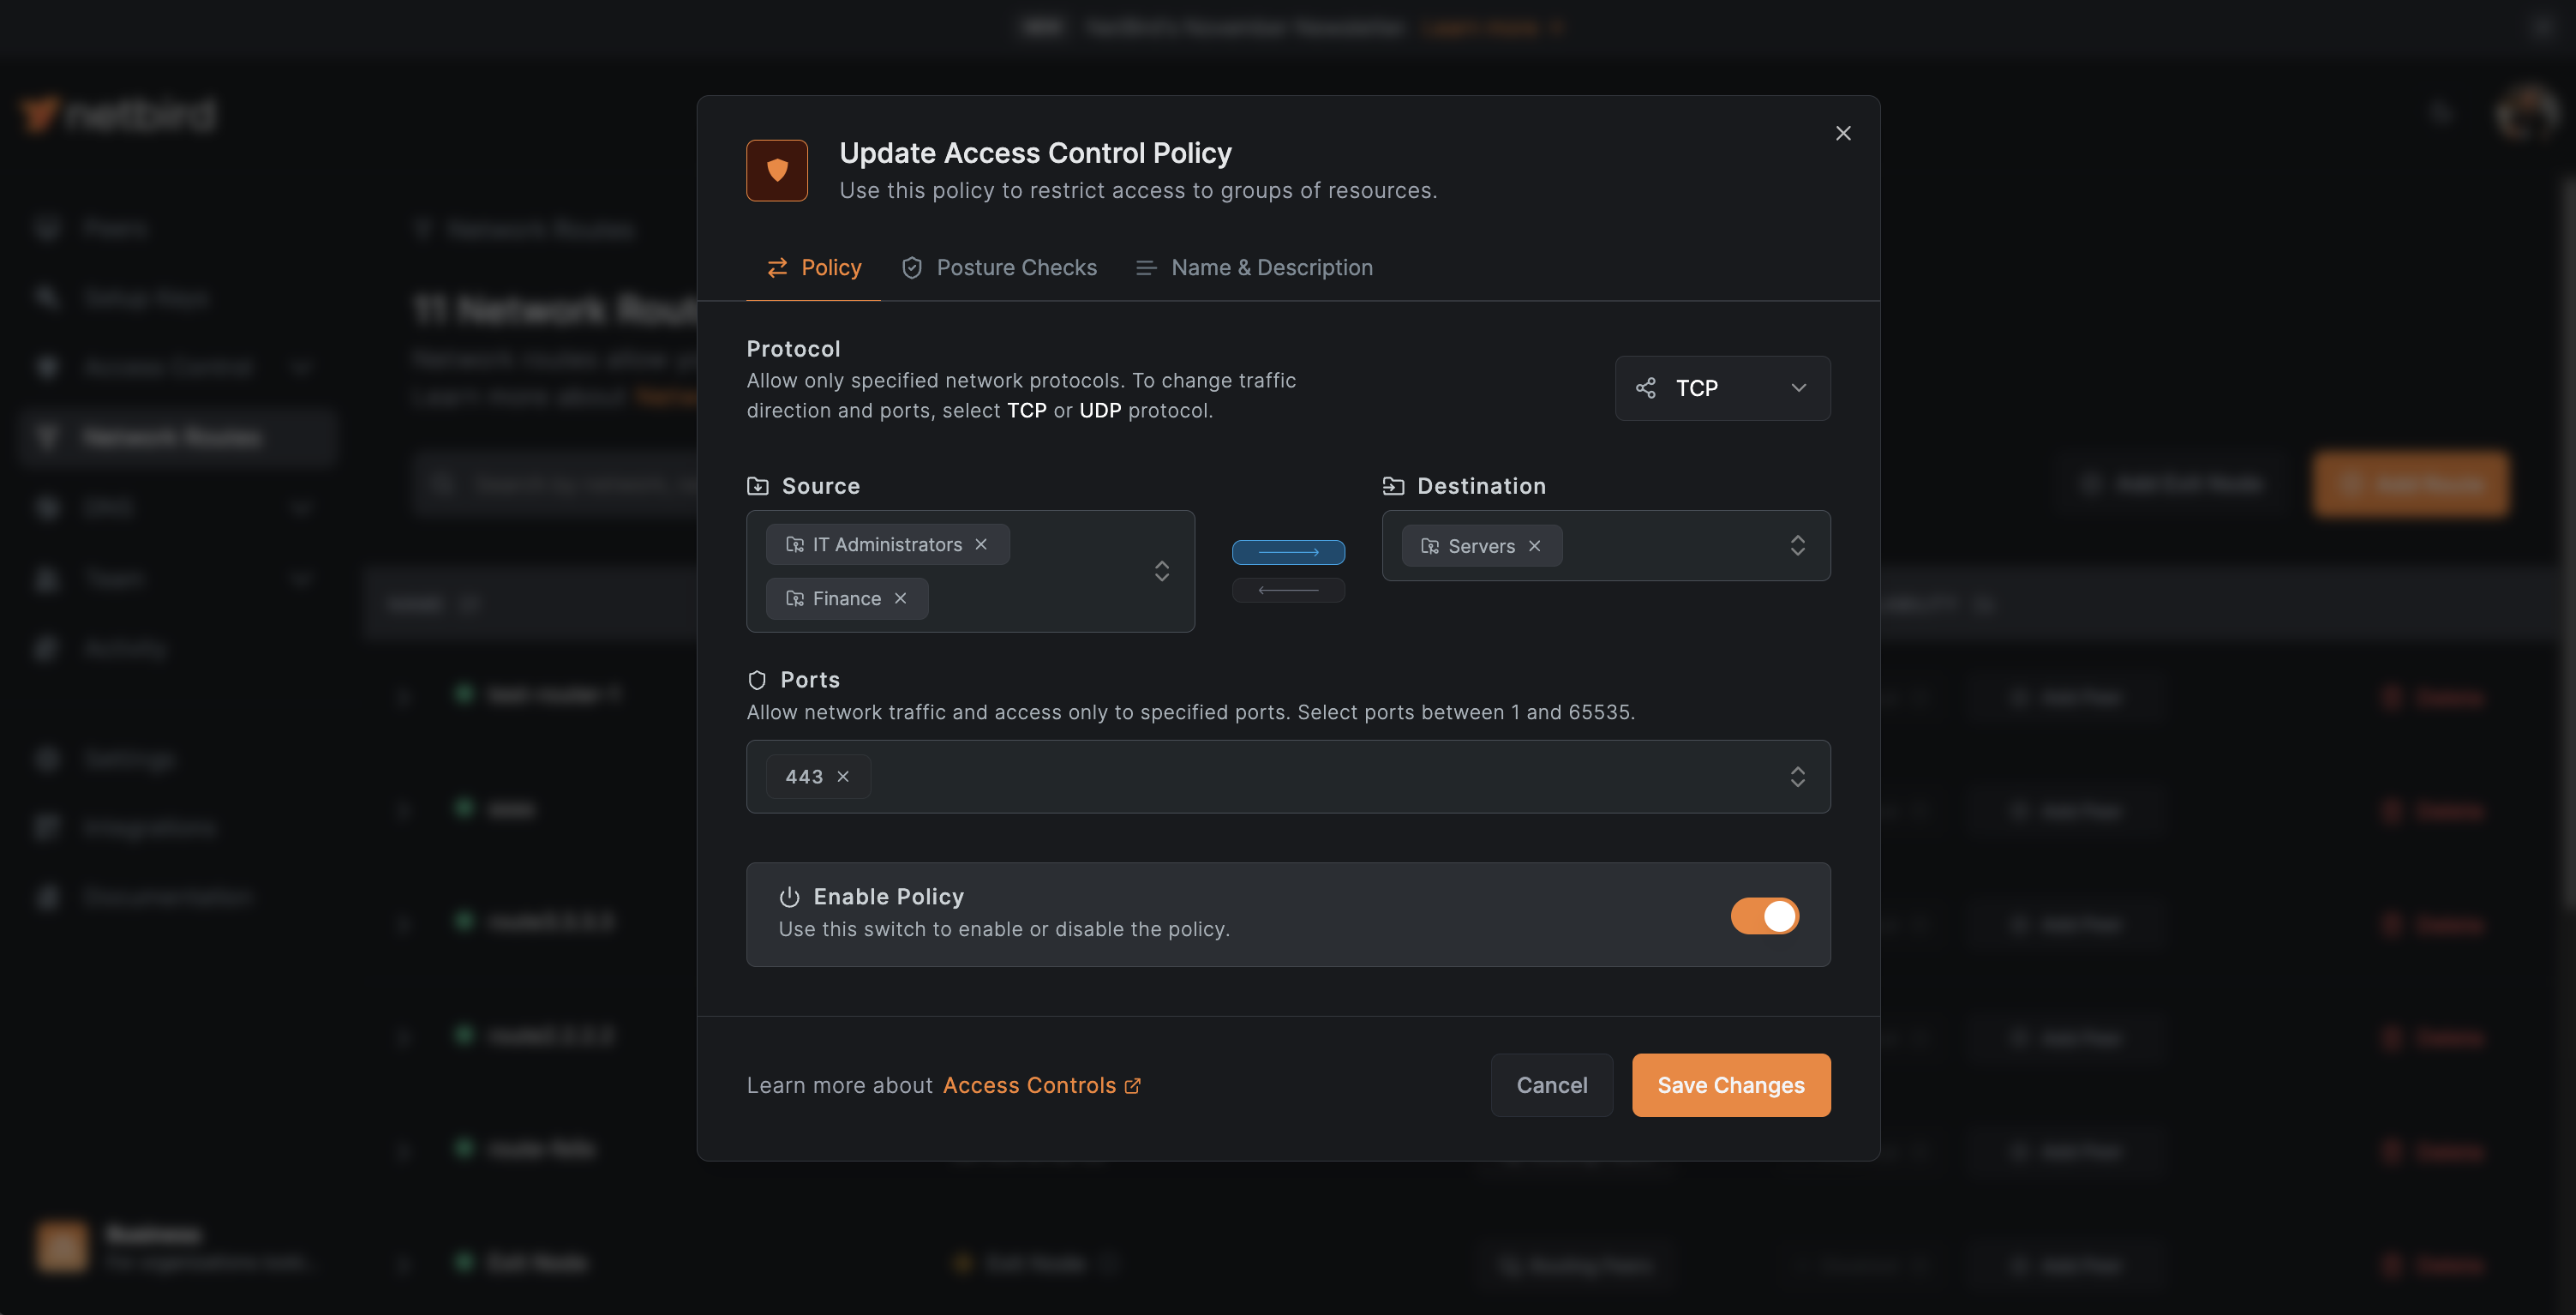
NetBird lets you strike a balance between security and convenience. While it may require additional configuration, the enhanced control over your network access significantly outweighs the minimal extra effort. It empowers you to implement the principle of least privilege, ensuring that only authorized peers can access specific routes.
Highly Available(HA) Network Routes provide enhanced reliability and fault tolerance for critical network connections. By setting up a network route with multiple routing peers, you ensure continuous connectivity even if one peer fails, making HA routes ideal for production environments, financial systems, mission-critical databases, vital business applications or any scenario where network downtime could significantly impact operations.
To create a HA network route in NetBird, you can either add multiple routing peers during the initial route creation using the tab or enhance an existing route by adding more peers. Let's implement the latter.
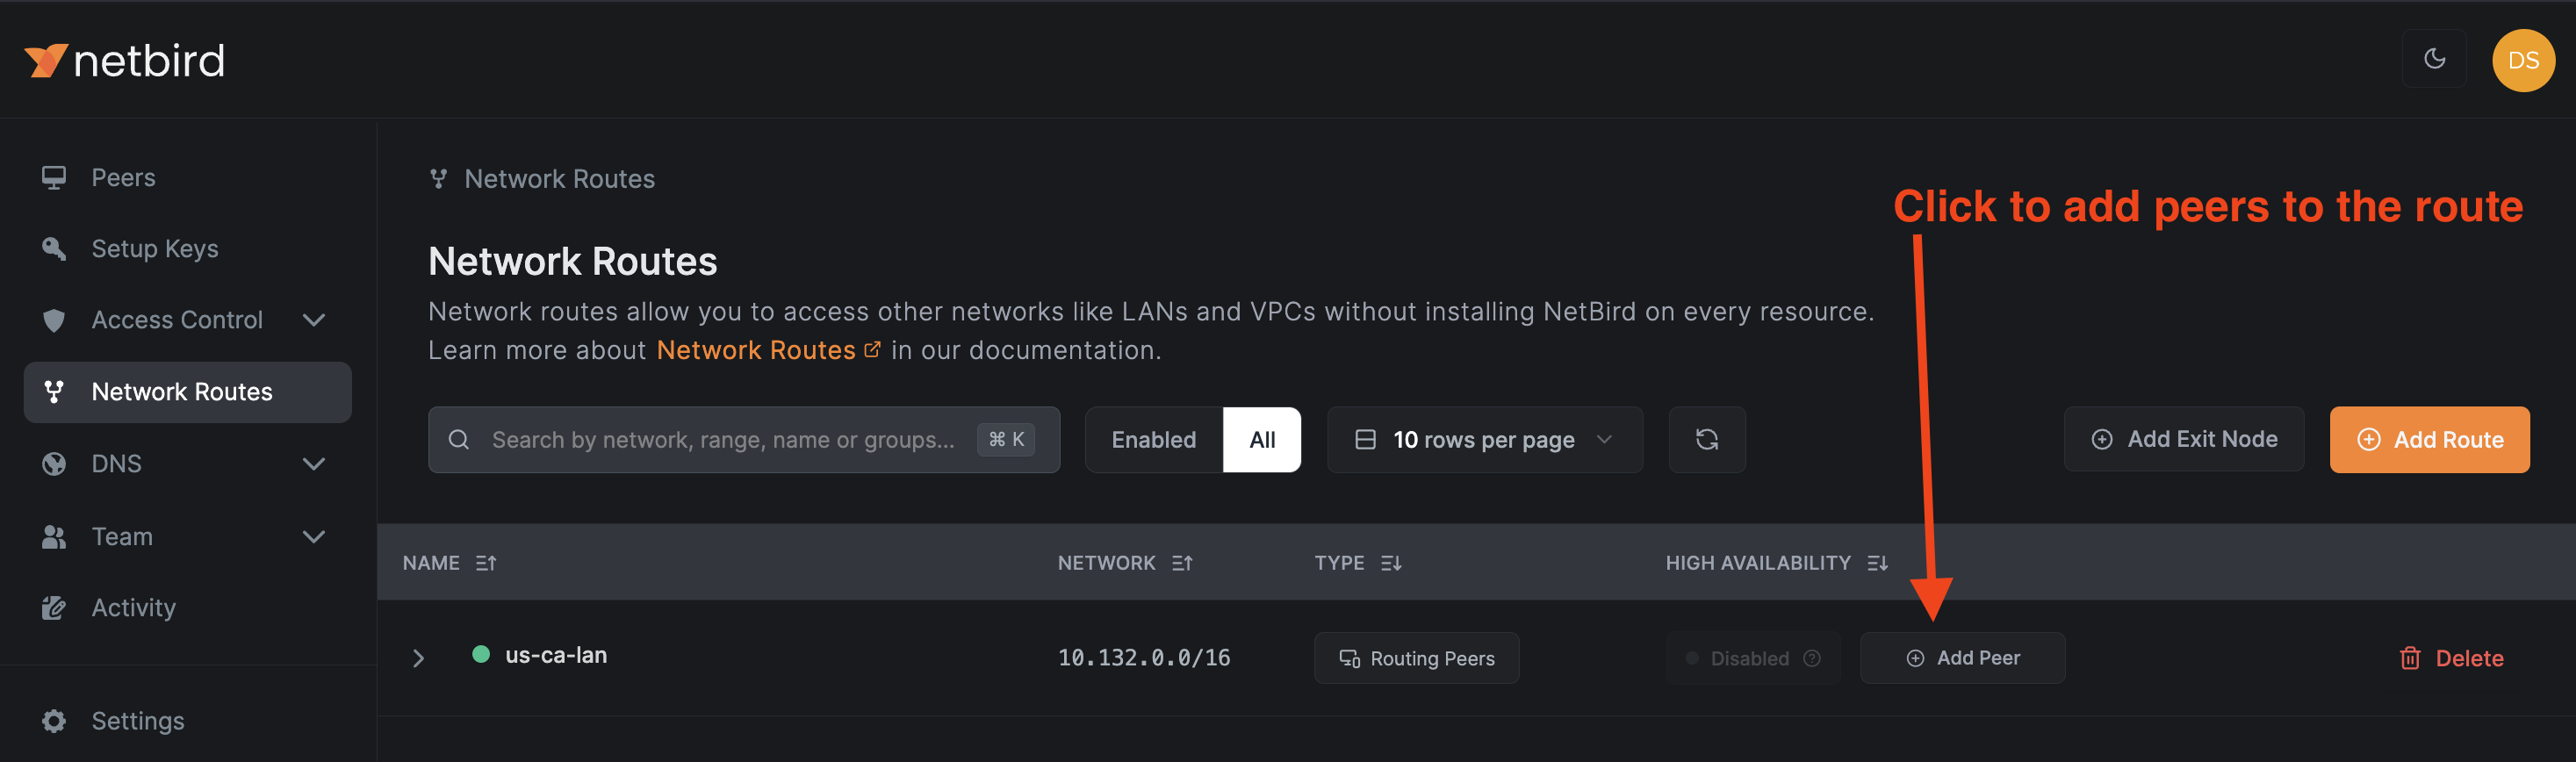
From the screen, locate your recently created route. Click the button next to the route to add another peer to the route.
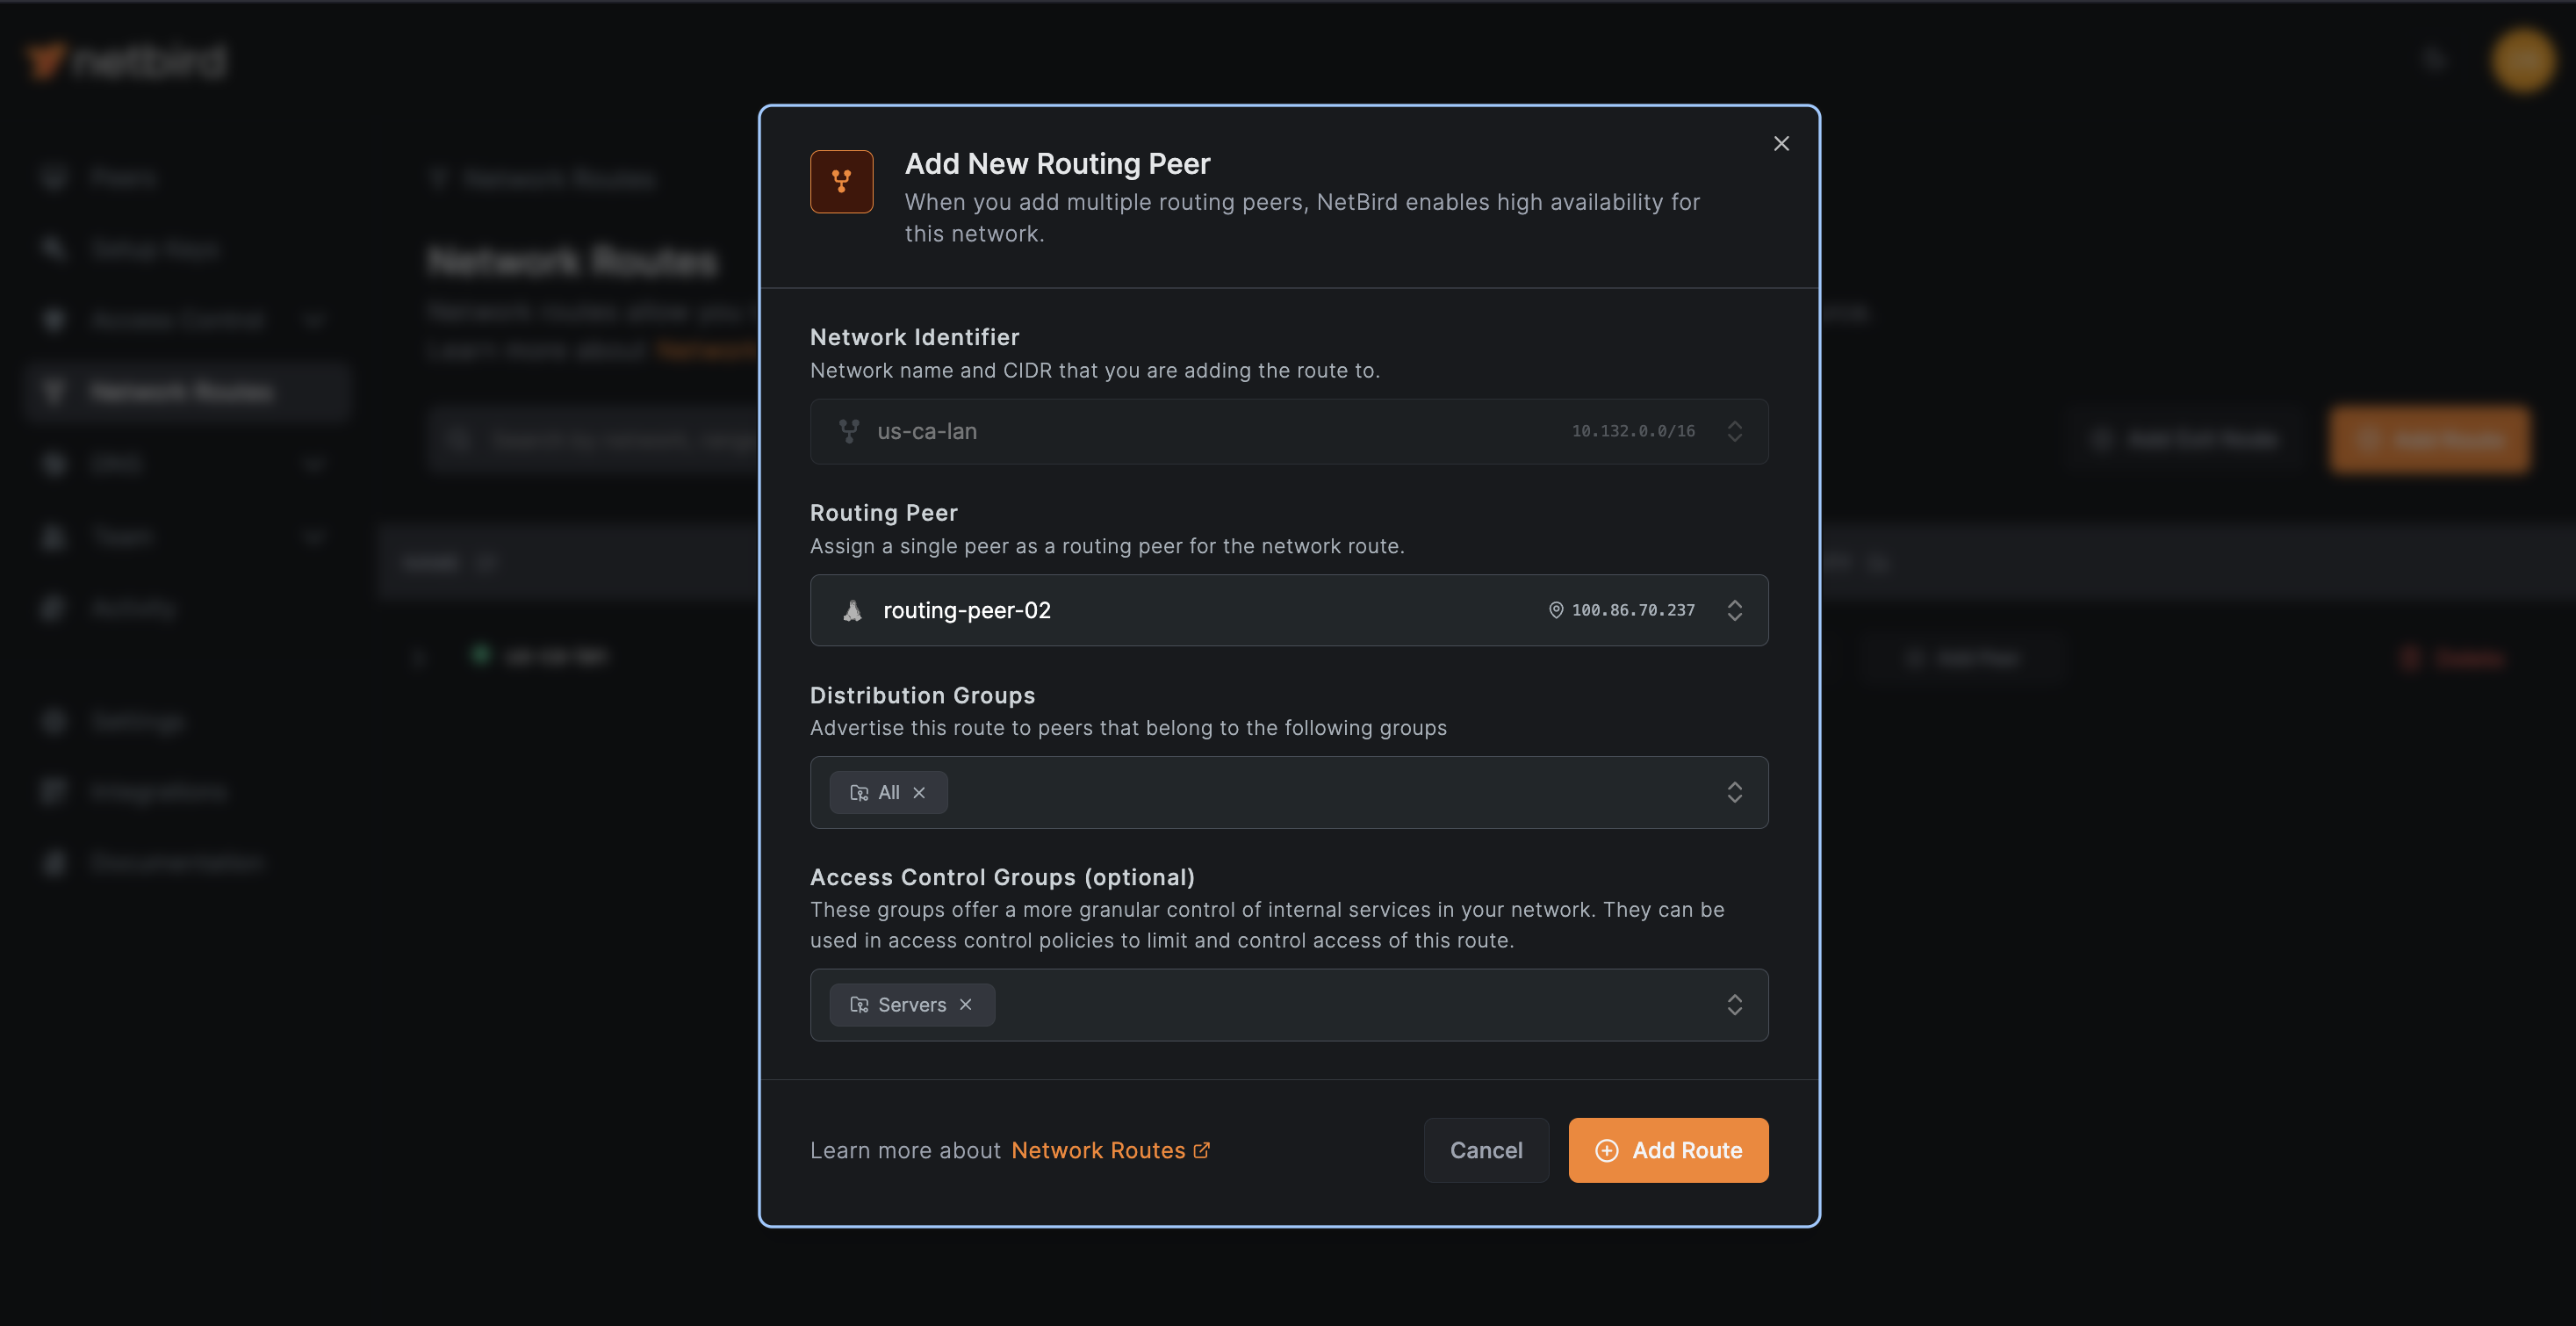
Under select a routing peer. Notice that you can also specify and . Click when ready.
Once you add another peer to the network route, it becomes highly-available as indicated in the column. You can repeat the procedure to add as many routing peers as required.
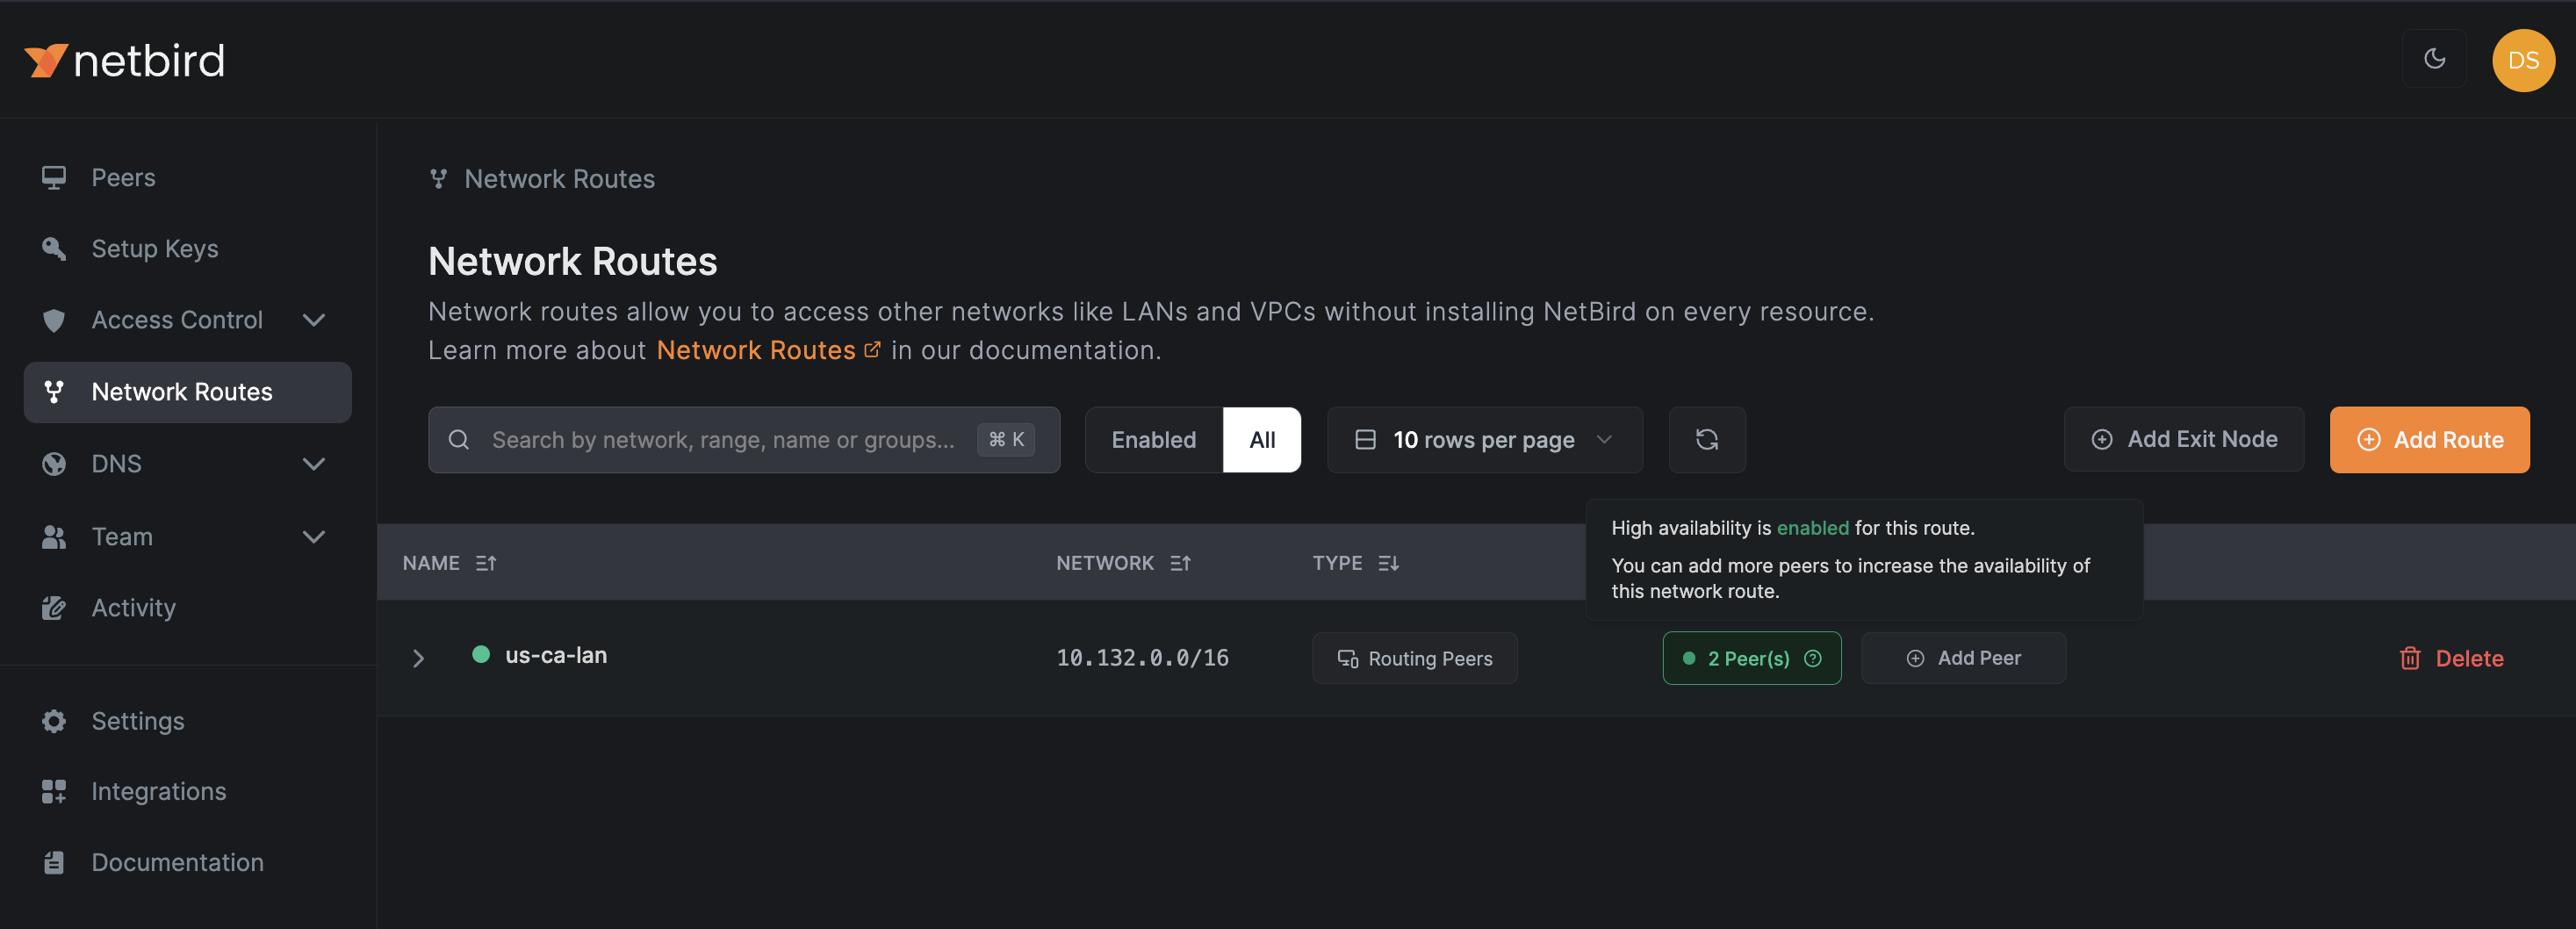
This approach adds fault tolerance, as NetBird can automatically switch to an alternative peer if one becomes unavailable.
Remember that for optimal HA performance, it's recommended to distribute routing peers across different physical or virtual locations to mitigate the risk of simultaneous failures.
By default, NetBird peers use a route specified with the network address , which acts as a catch-all for internet-bound traffic from your devices. This default configuration allows peers to access the internet directly through their local connections.
However, you can create a special type of network route to direct all outgoing internet traffic from other peers to a designated peer called exit node . This approach is particularly useful when your organization wants to add a layer of protection to the private network in scenarios where installing NetBird on each machine is not viable.
Exit nodes provide several benefits:
To designate a peer as an exit node:
Navigate to in the left menu and click on the desired peer. Under , click the button.
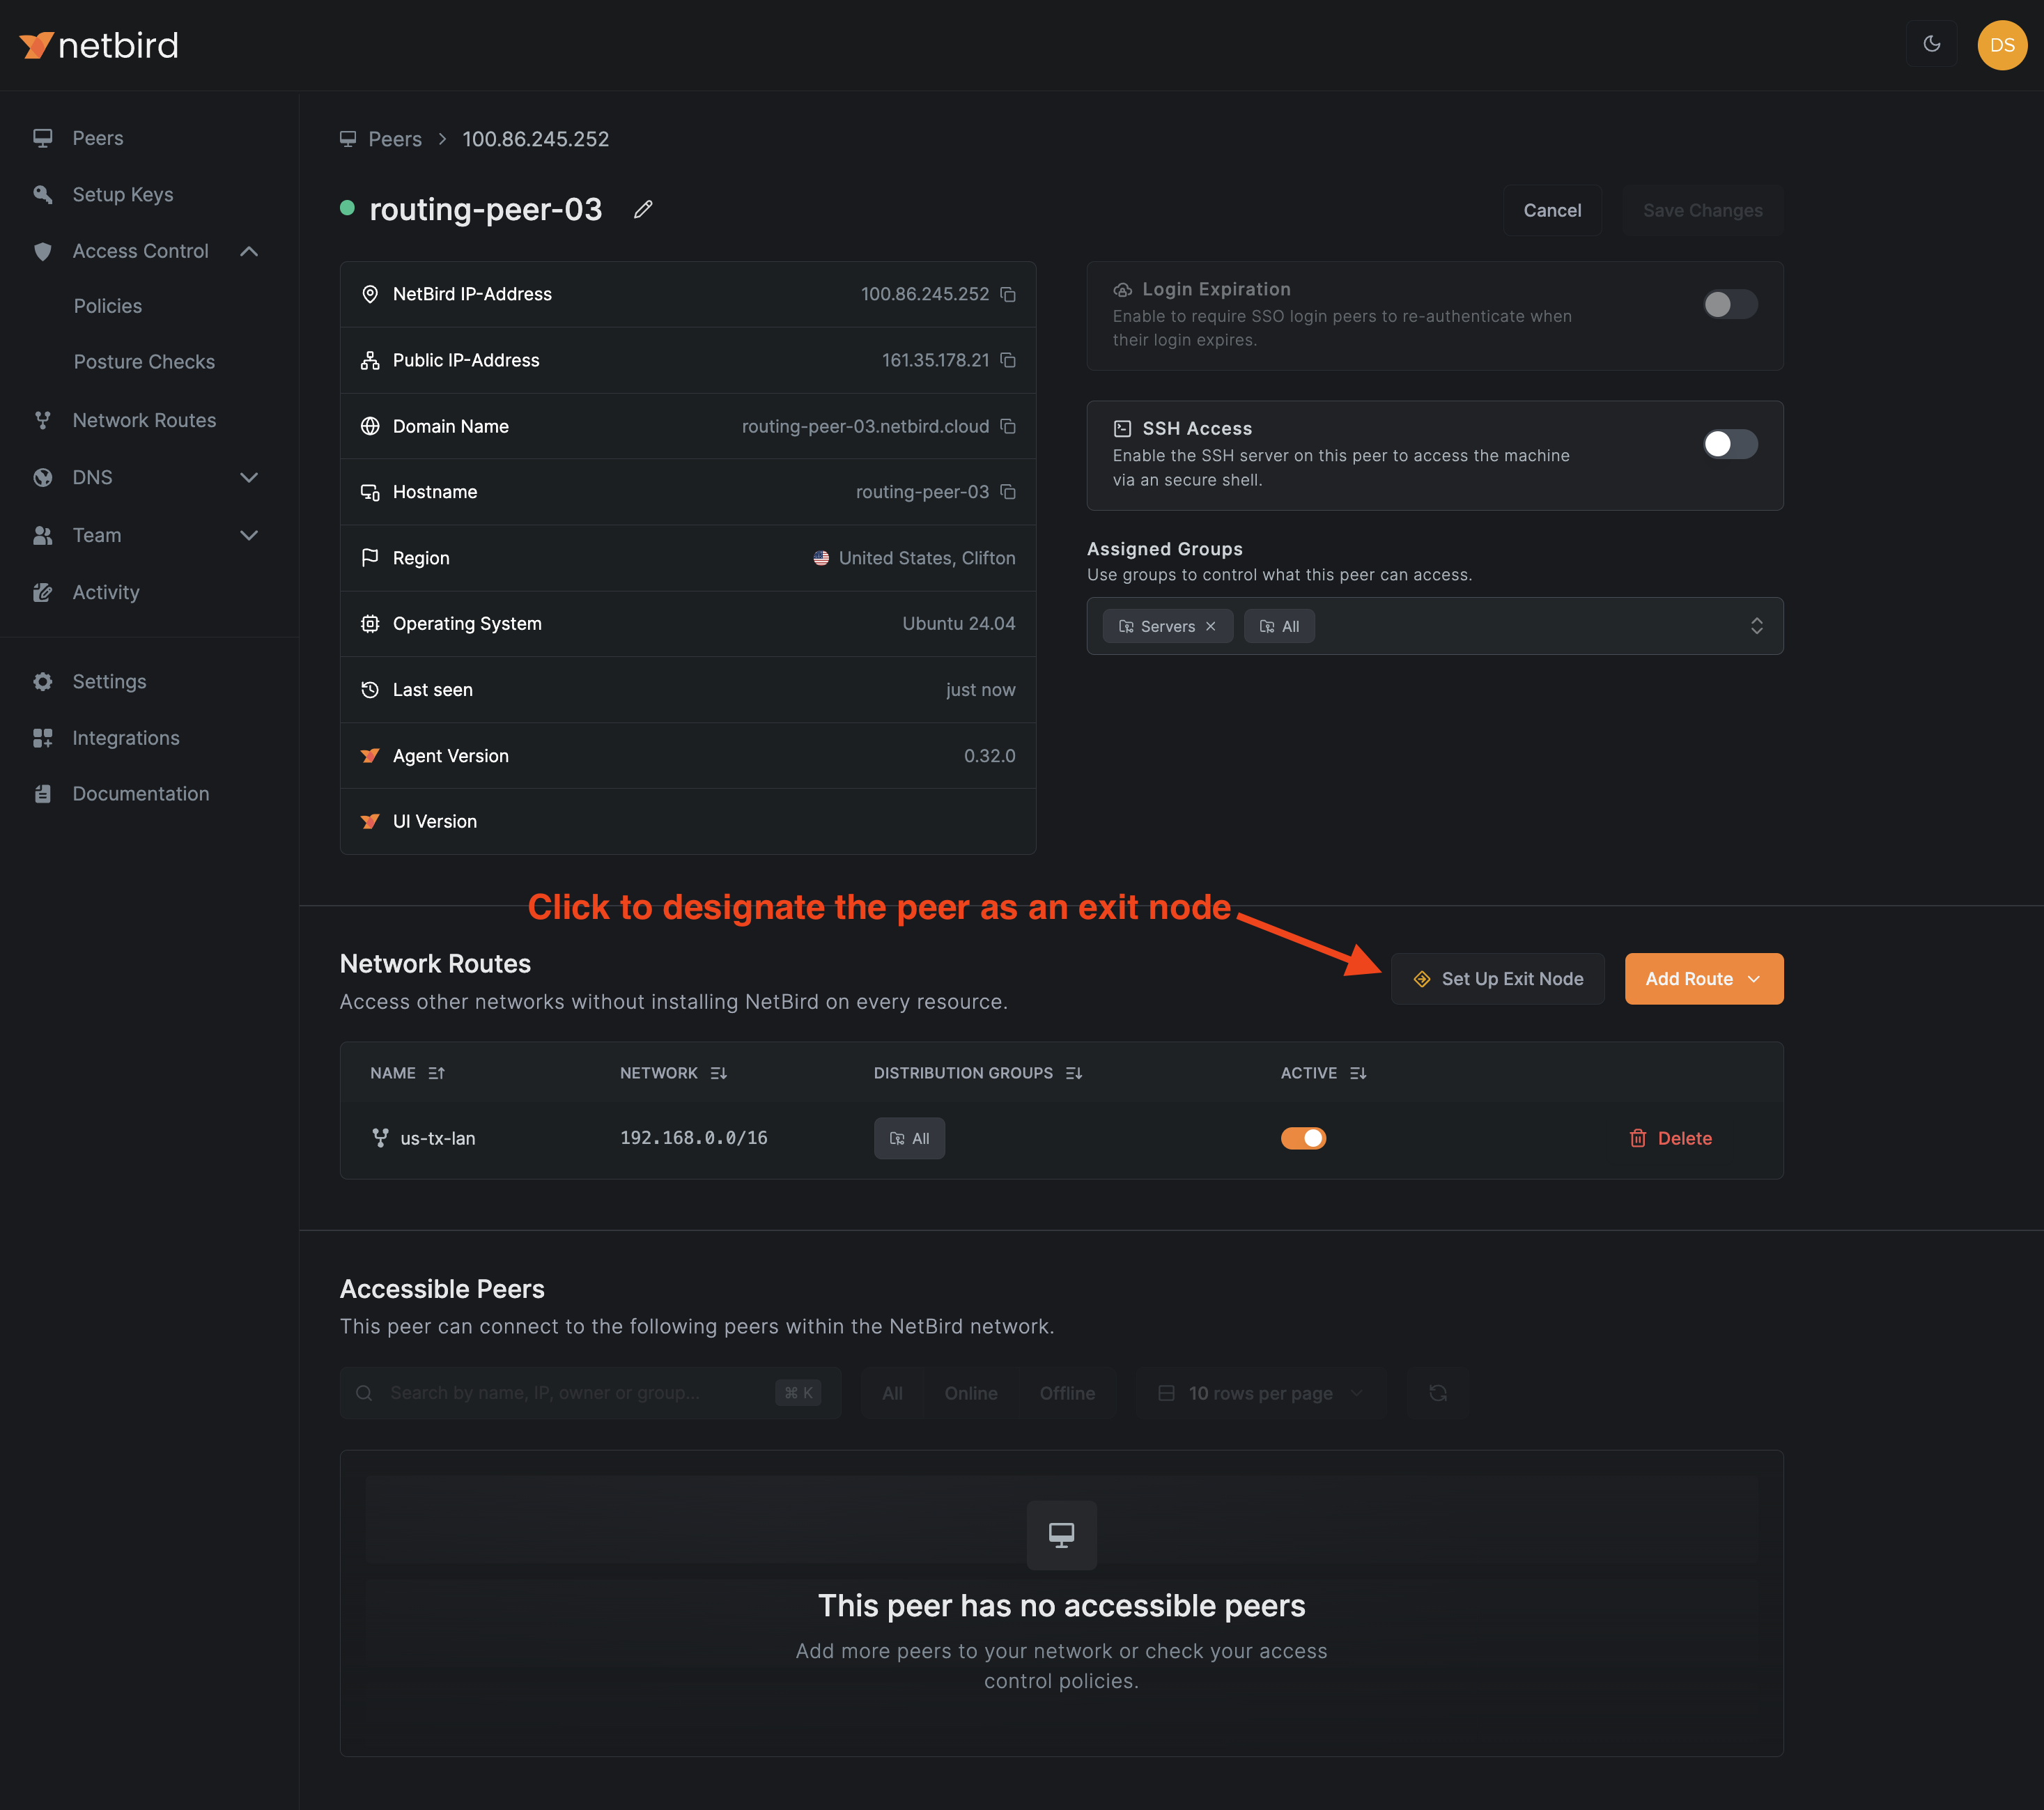
Then, in the tab, configure:
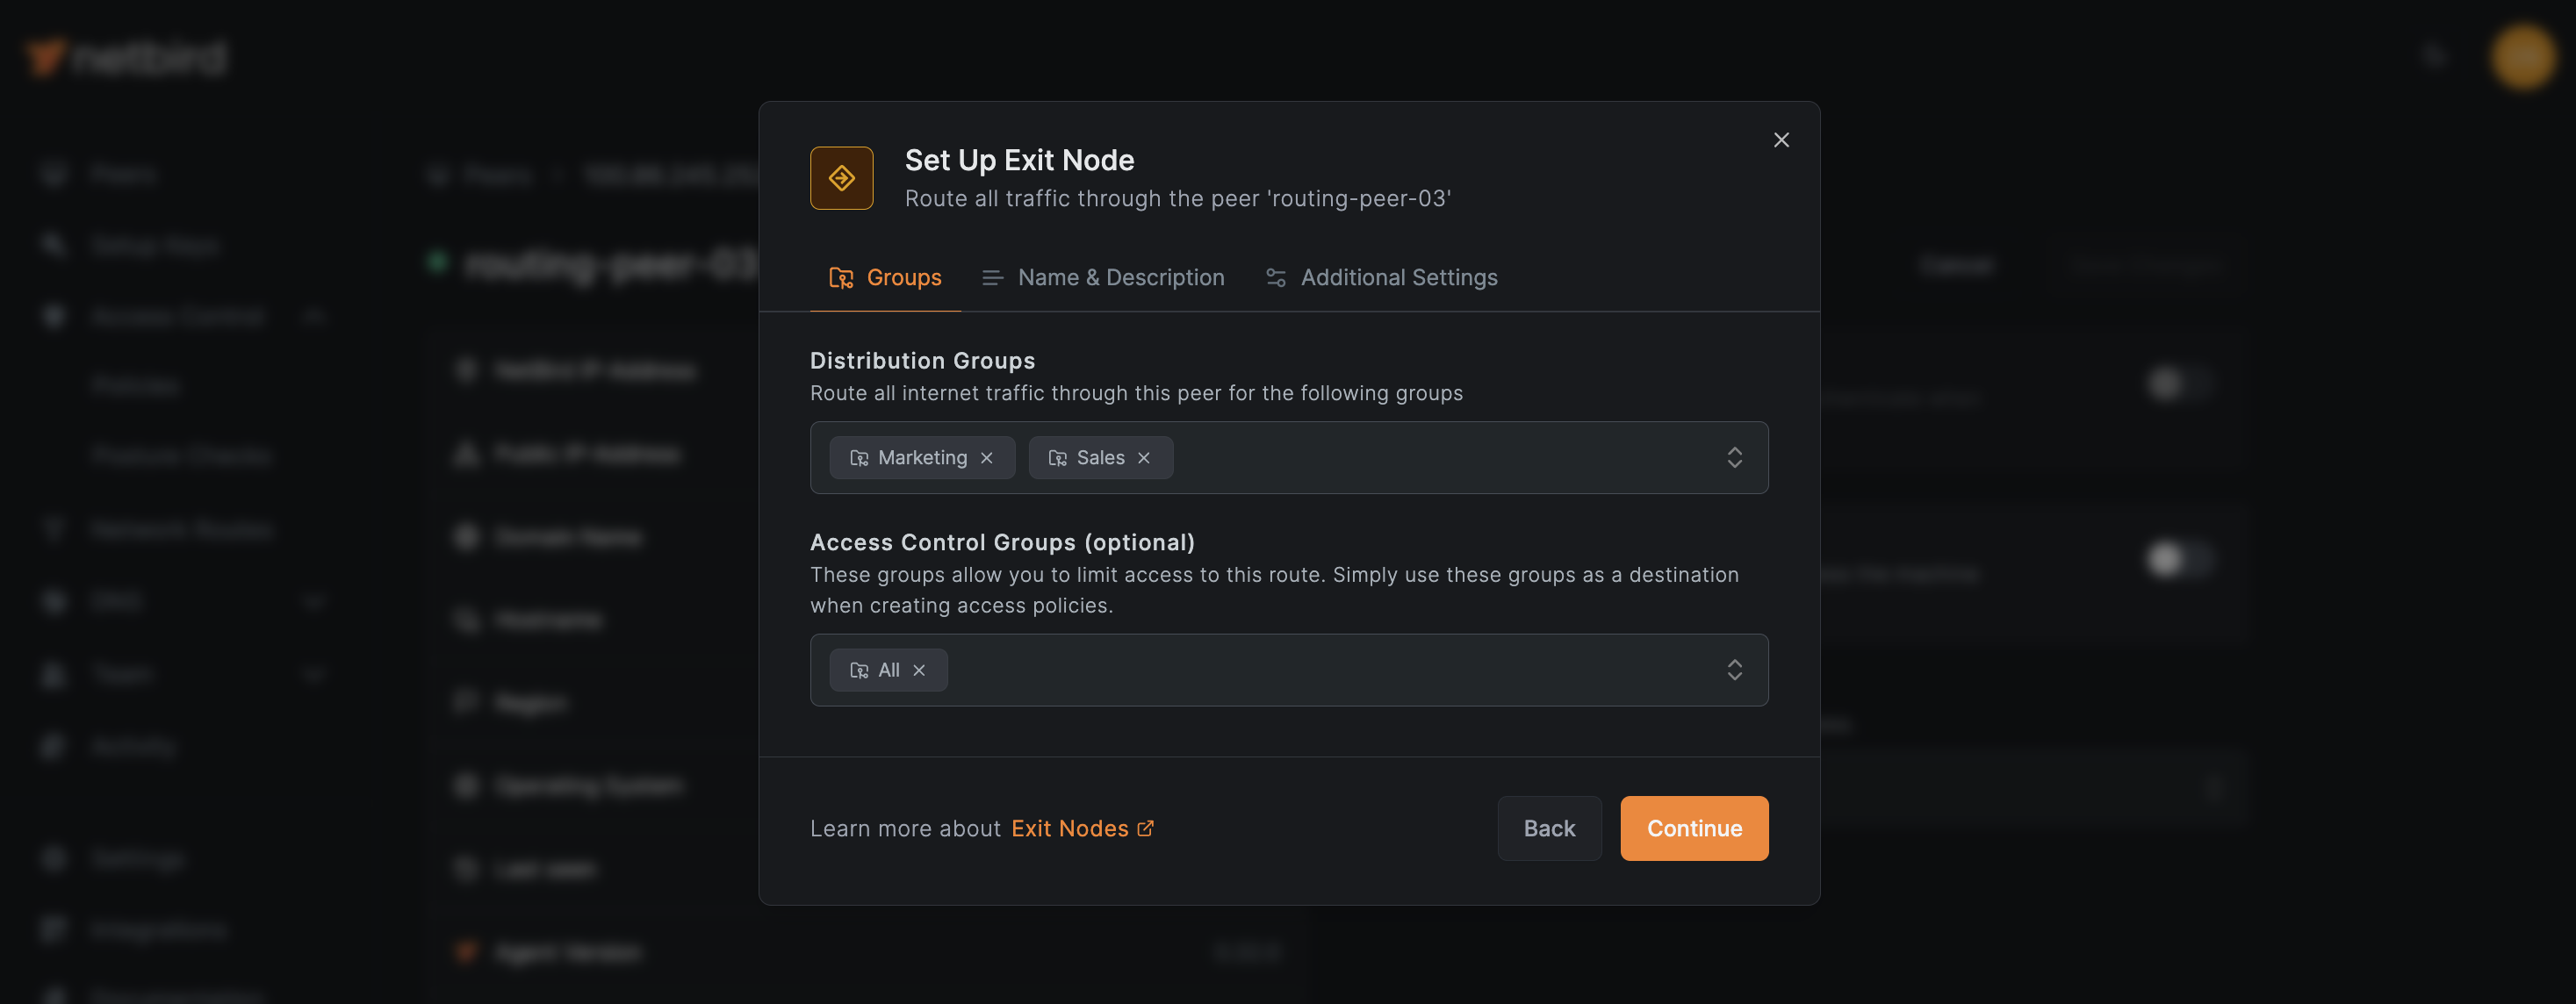
Next, enter a descriptive name for the exit node in the tab, and in the tab, set the value (lower values indicate higher priority). Review your settings and click to finalize the exit node configuration.
Note that a peer in NetBird can serve multiple functions simultaneously, enhancing network flexibility and resource utilization. Specifically, you can configure a peer already being used for a network route to also function as an exit node.
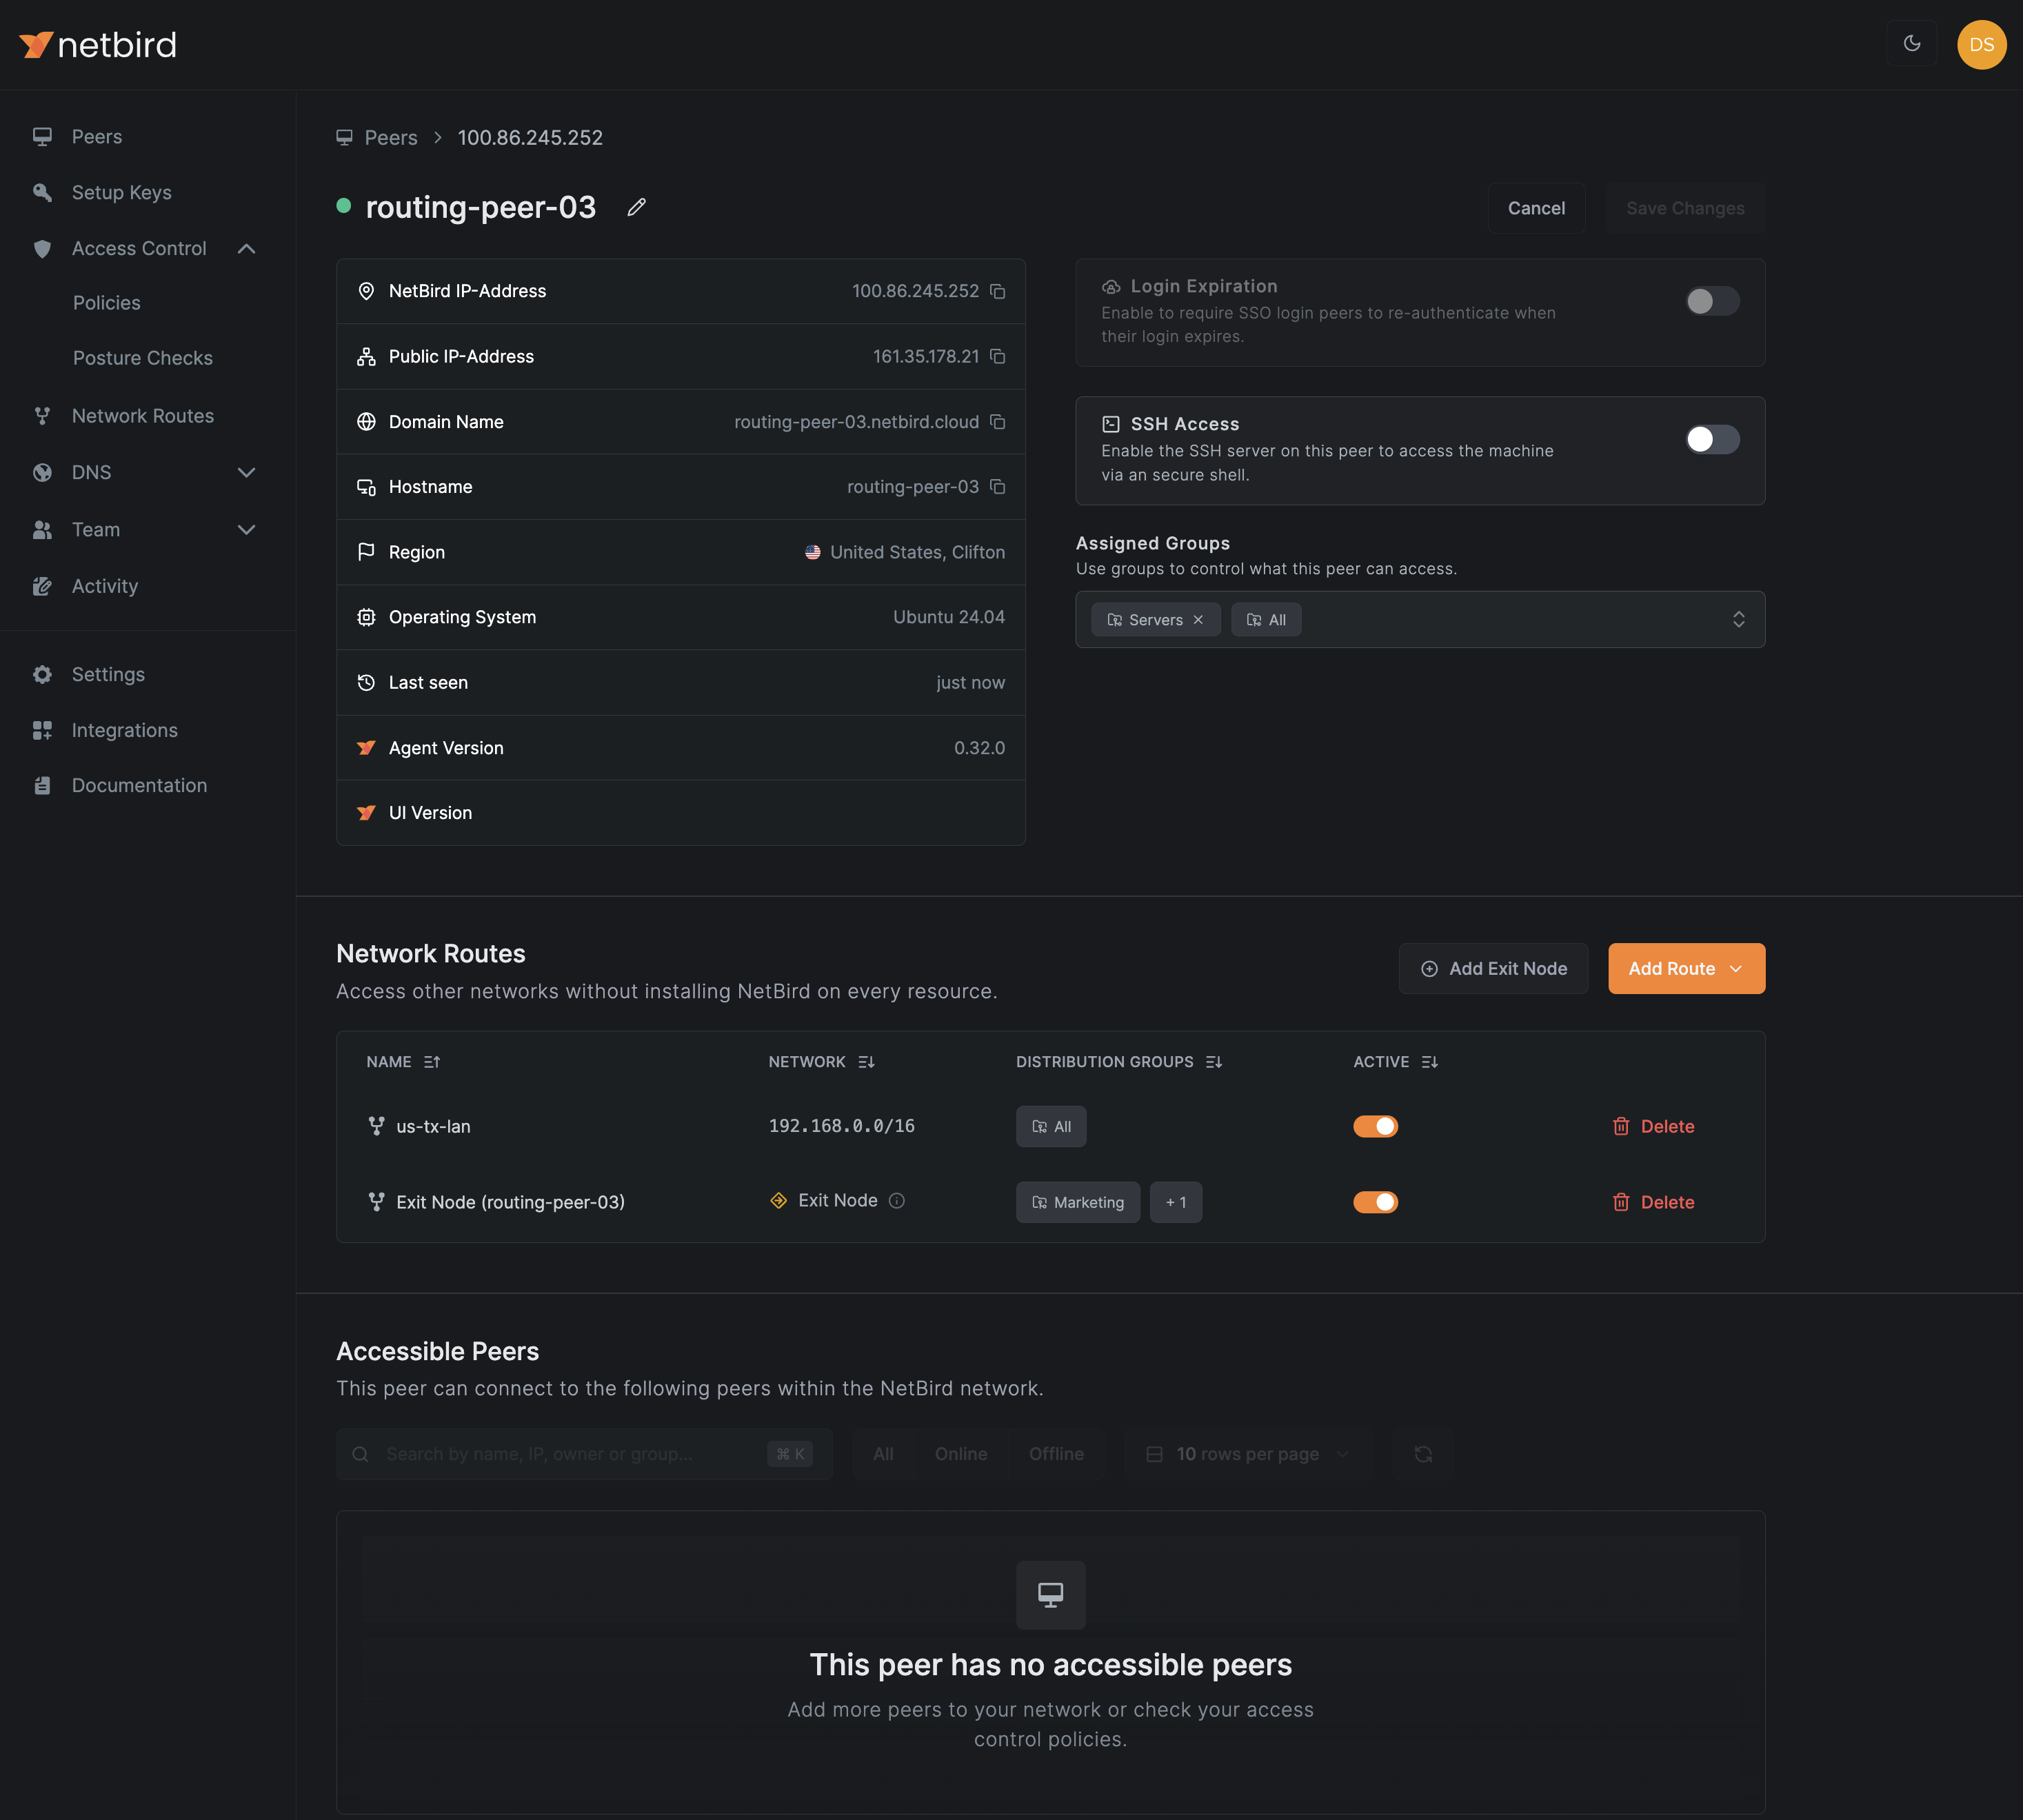
Aside from the peer details view, you can also check the dual role of this peer in the dashboard.
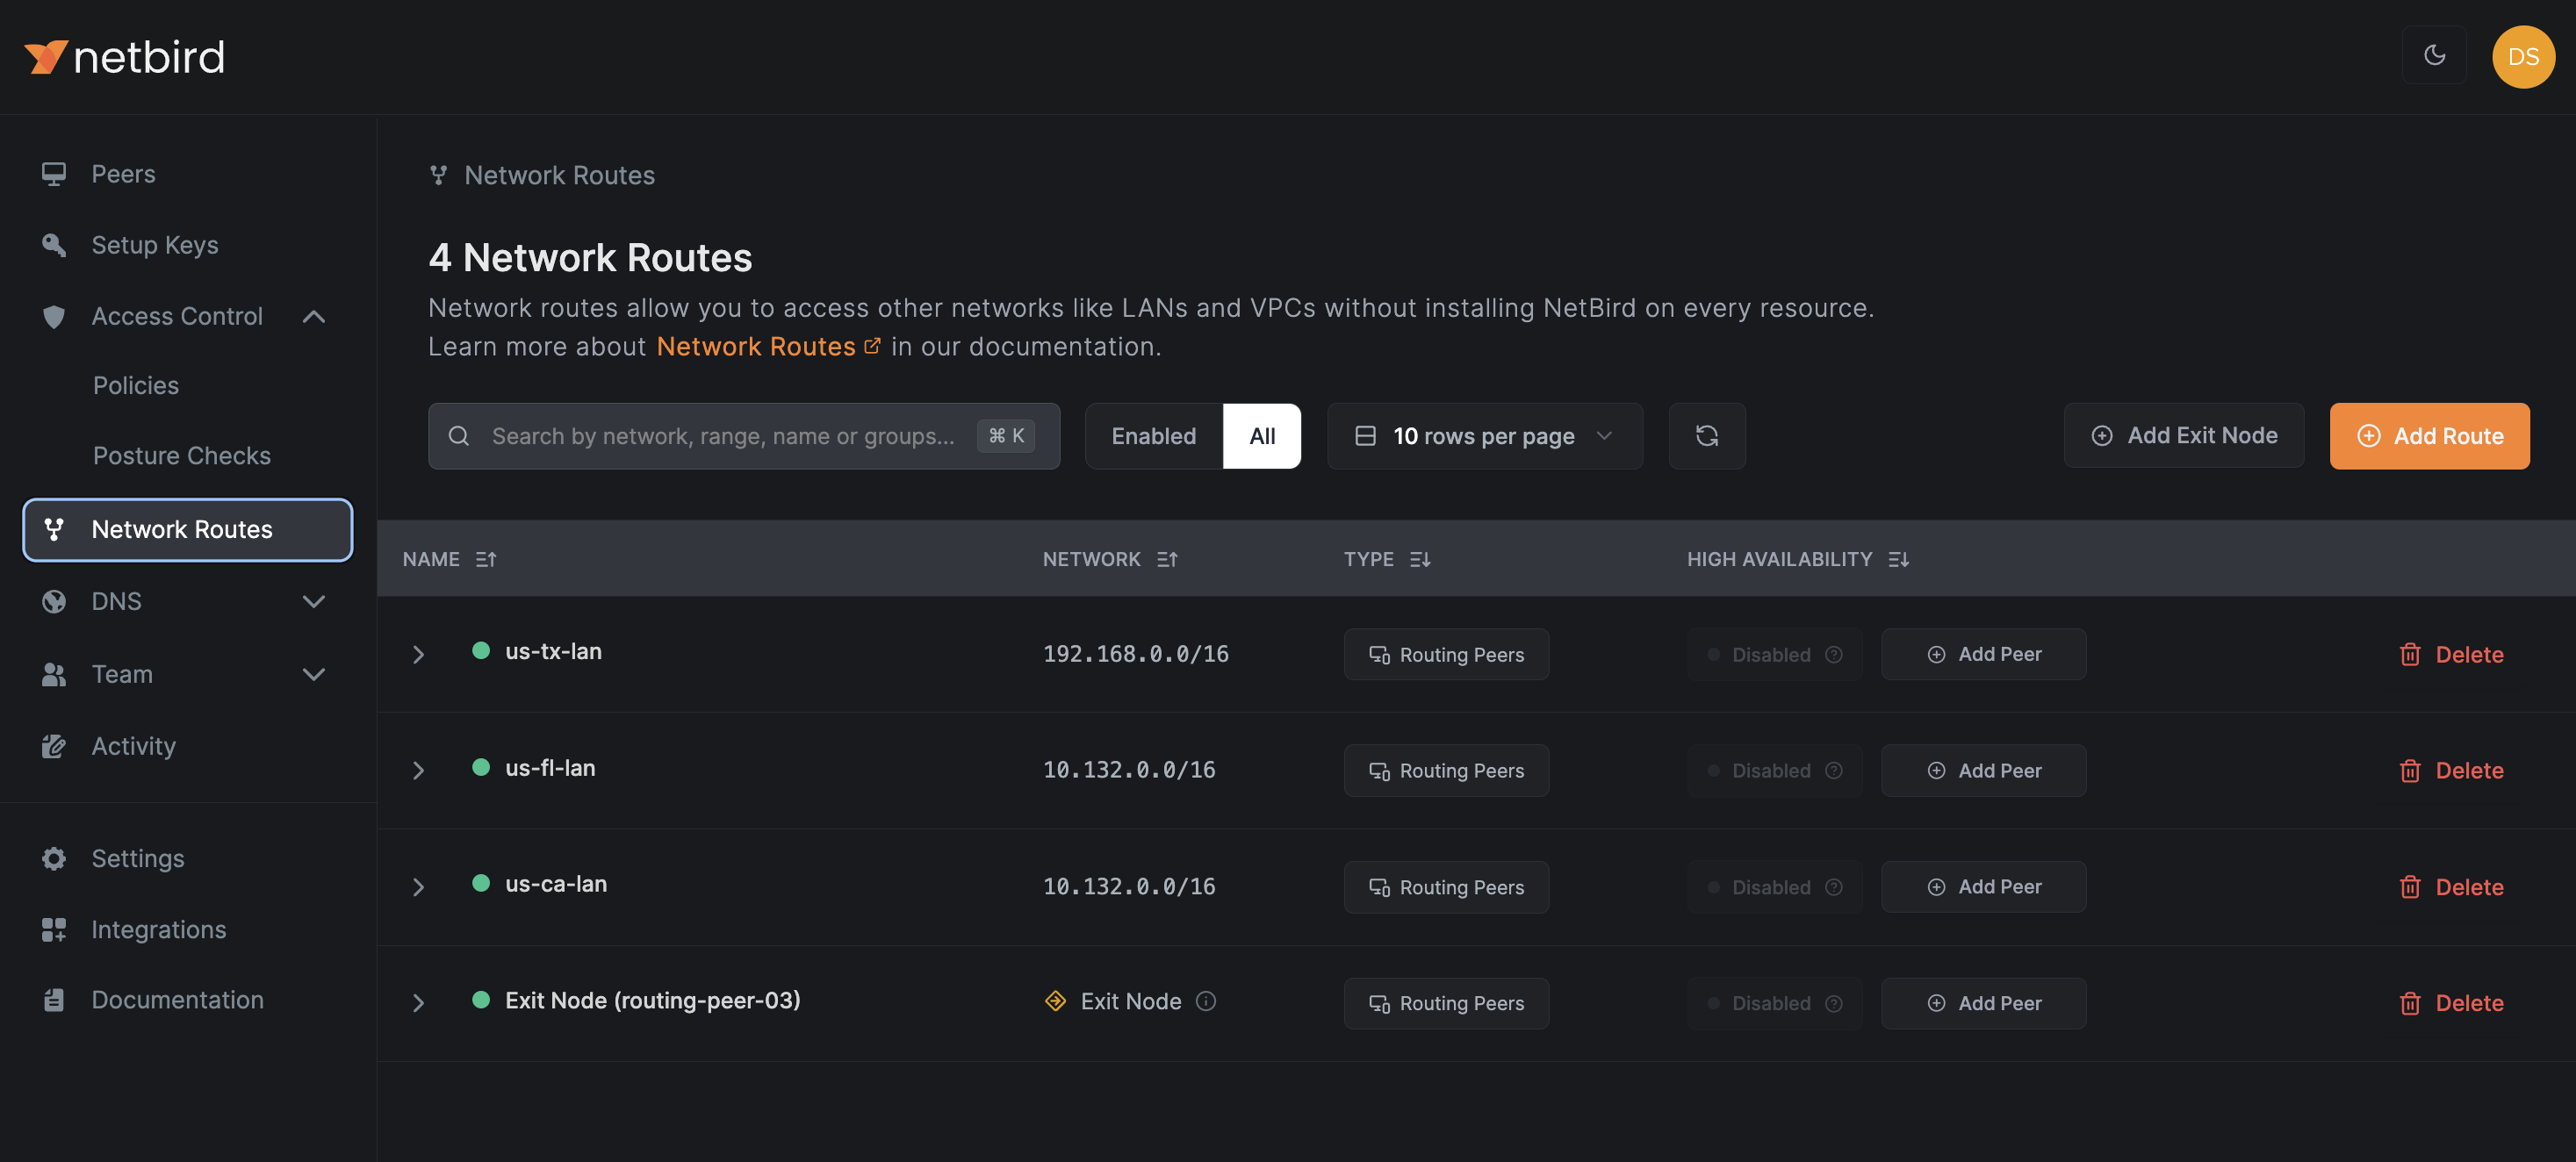
NetBird's route selection feature offers a solution for organizations using network routes with overlapping IP ranges. This feature allows users to explicitly choose which routes to apply on the client side, ensuring that peers connect to the correct private network without conflicts.
For instance, consider a company with different office locations that use identical private IP ranges.
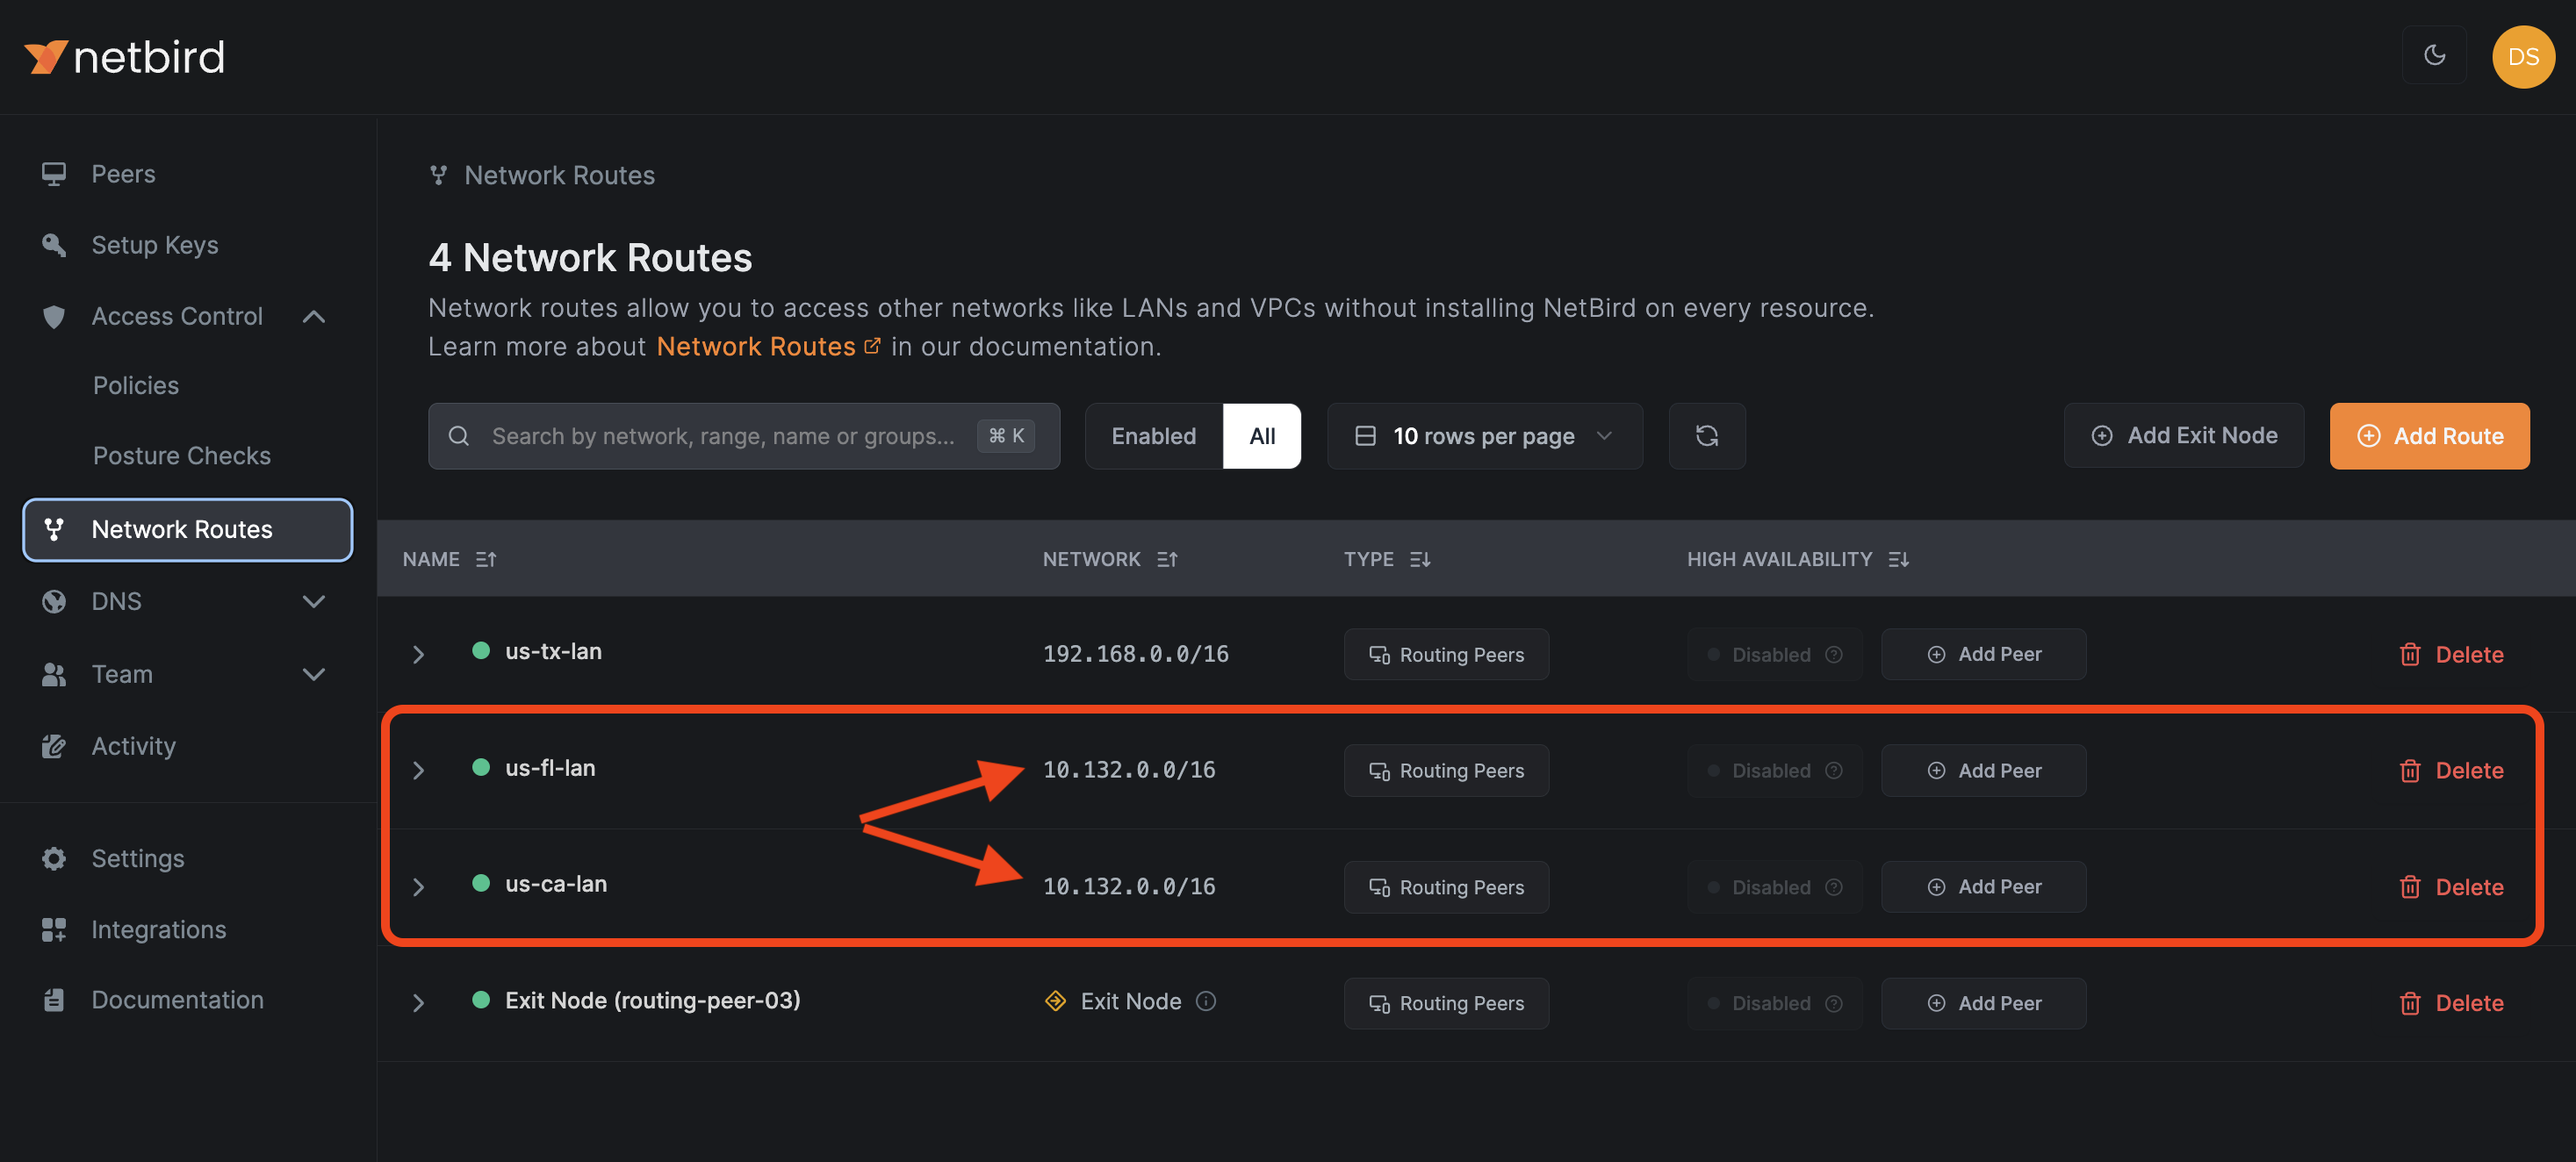
NetBird's route selection feature enables precise routing, maintaining seamless connectivity across your distributed network infrastructure.
There are two ways to use the route selection in NetBird:
You can list available routes using the command :
By default, all routes are selected. To choose a specific route, you can use the command :
Verify the changes running again:
Open the NetBird system tray application and navigate to the menu. Select or deselect routes using checkboxes.
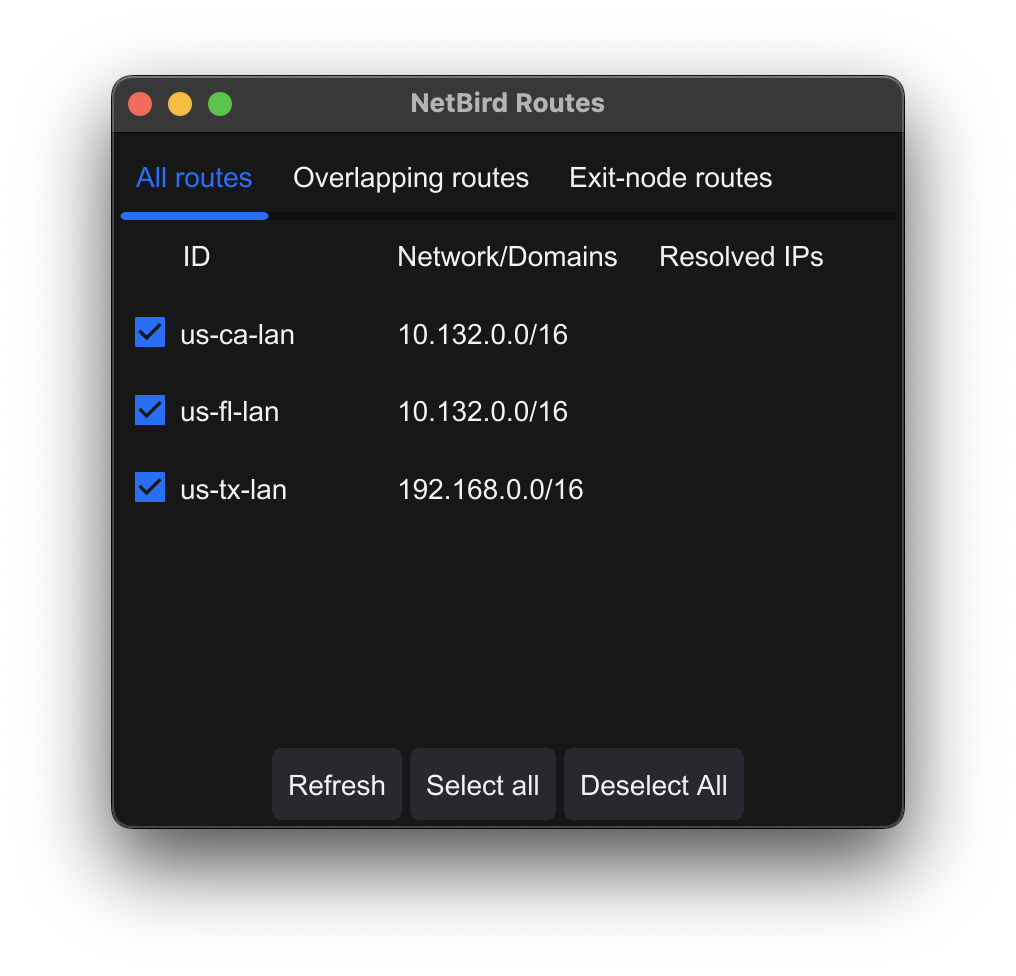
Alternatively, you can click the tab to filter the list:
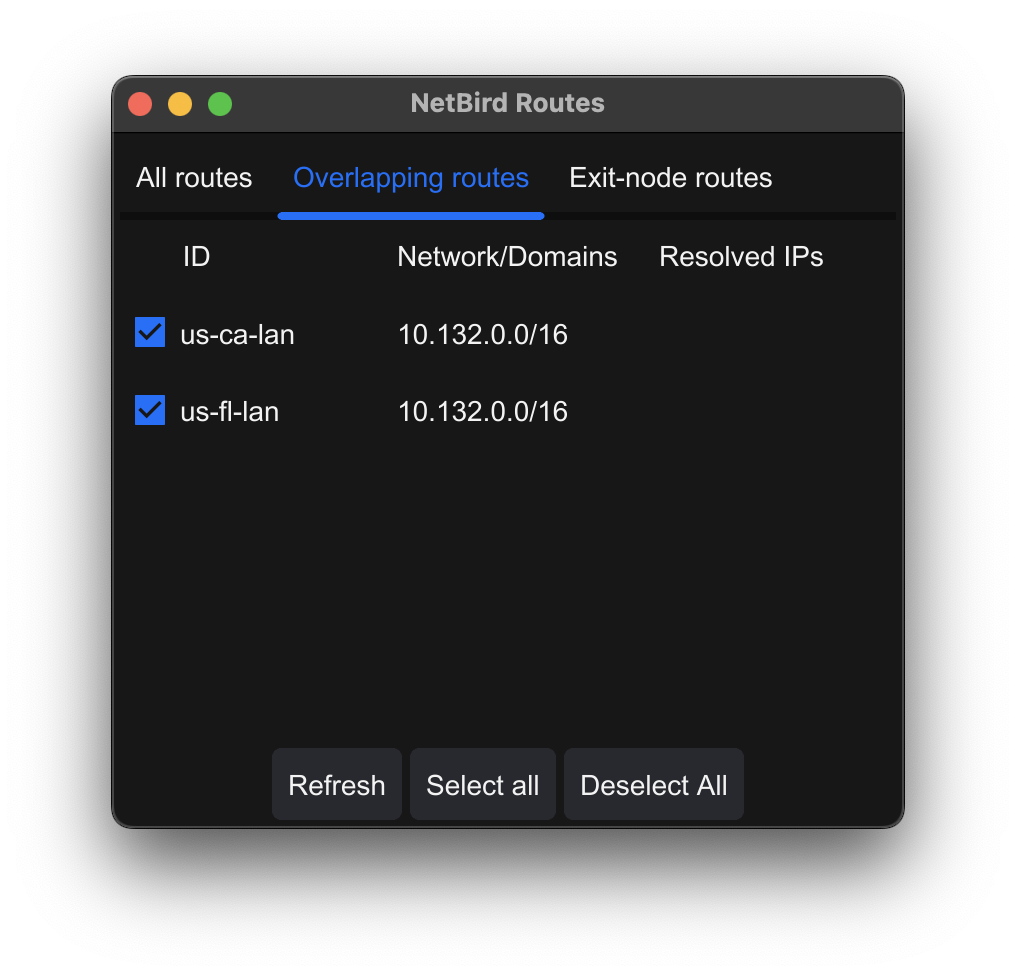
For more information and additional options, read Resolve overlapping routes with the route selection feature .
此内容由惯性聚合(RSS阅读器)自动聚合整理,仅供阅读参考。 原文来自 — 版权归原作者所有。