





Securing access to your Kubernetes clusters is crucial as inadequate security measures can lead to unauthorized access and potential data breaches. However, navigating the complexities of Kubernetes access security, especially when setting up strong authentication, authorization, and network policies, can be challenging.
NetBird simplifies Kubernetes access with its zero-configuration approach, leveraging WireGuard's simplicity and strength. It seamlessly integrates with various tools, offering transparency and high reliability as an open source solution.
In this article, you'll learn how to set up the NetBird CLI to ensure a secure connection to a Kubernetes cluster on the Google Cloud Platform (GCP) , complete with a fail-safe route for uninterrupted access.
In this tutorial, you'll follow these steps to enable secure access to your Kubernetes cluster using NetBird:
Please note that to follow this tutorial, you need and command line tools installed and properly configured on your local machine.
With the procedure outlined, let's get started.
If you haven't already, sign up for a free NetBird account . After confirming your email, you'll receive a message with instructions on how to install the NetBird agent on your local machine. This agent includes NetBird's CLI, which is used to control it.
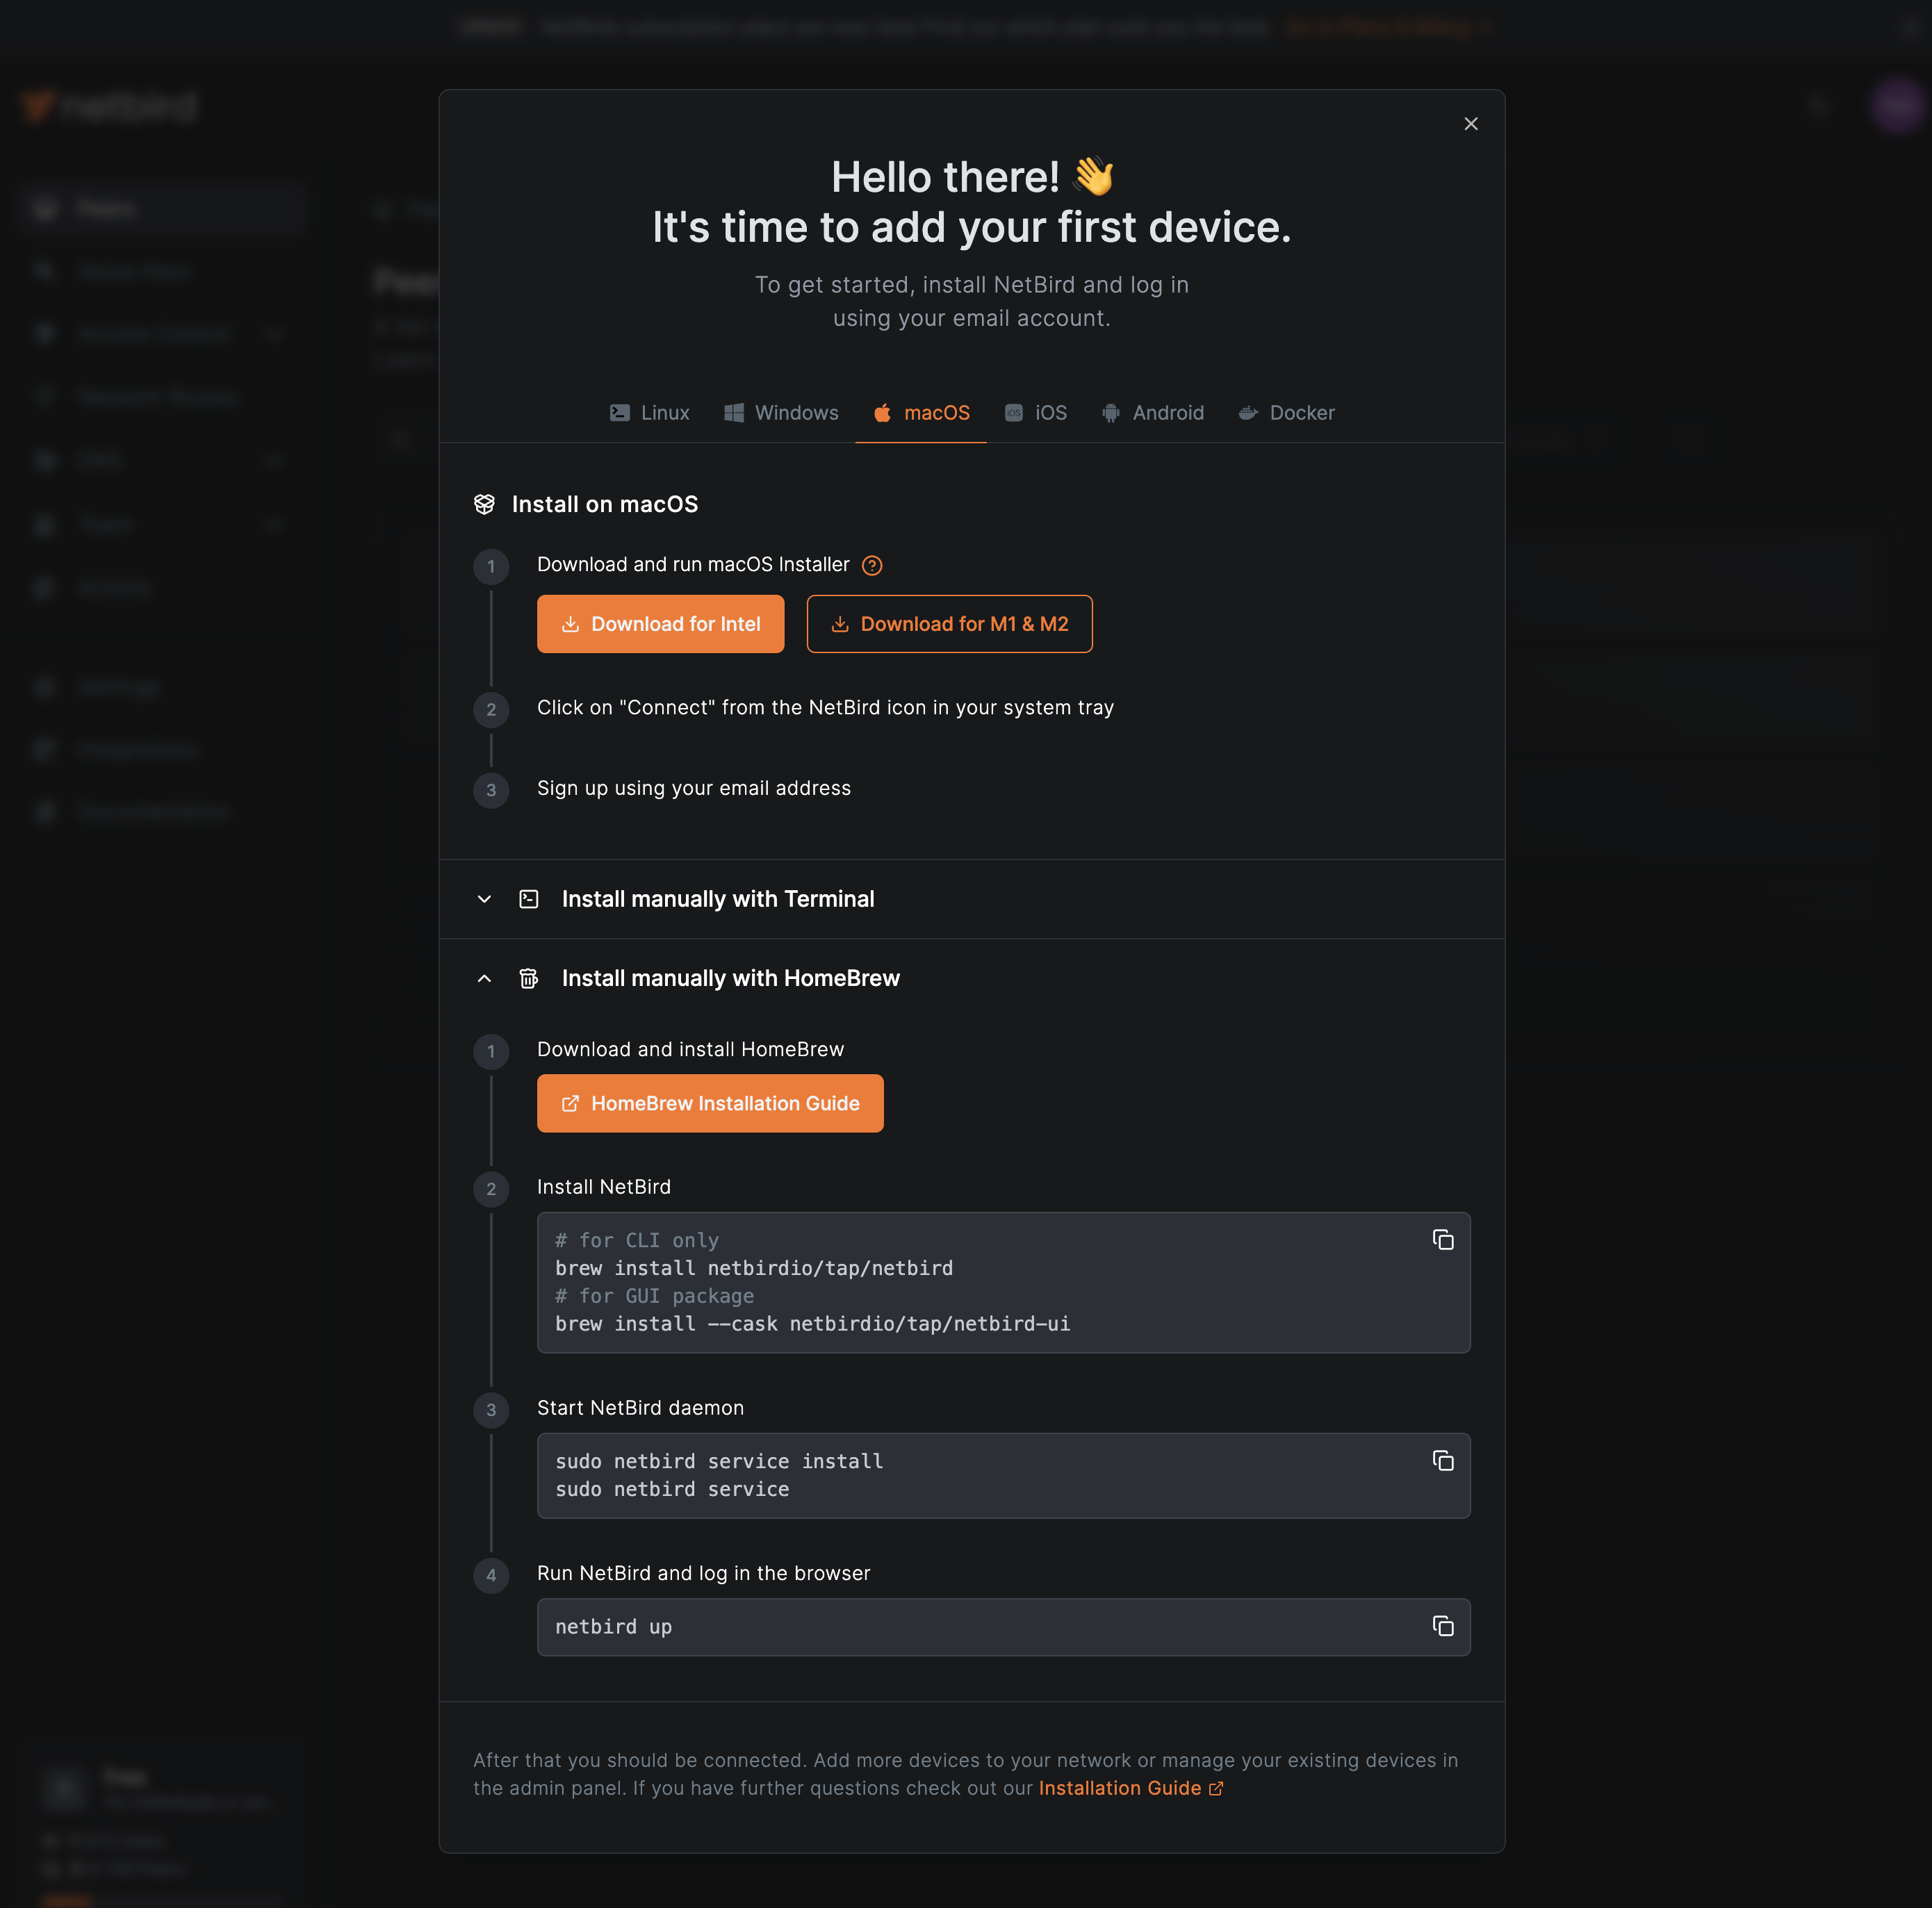
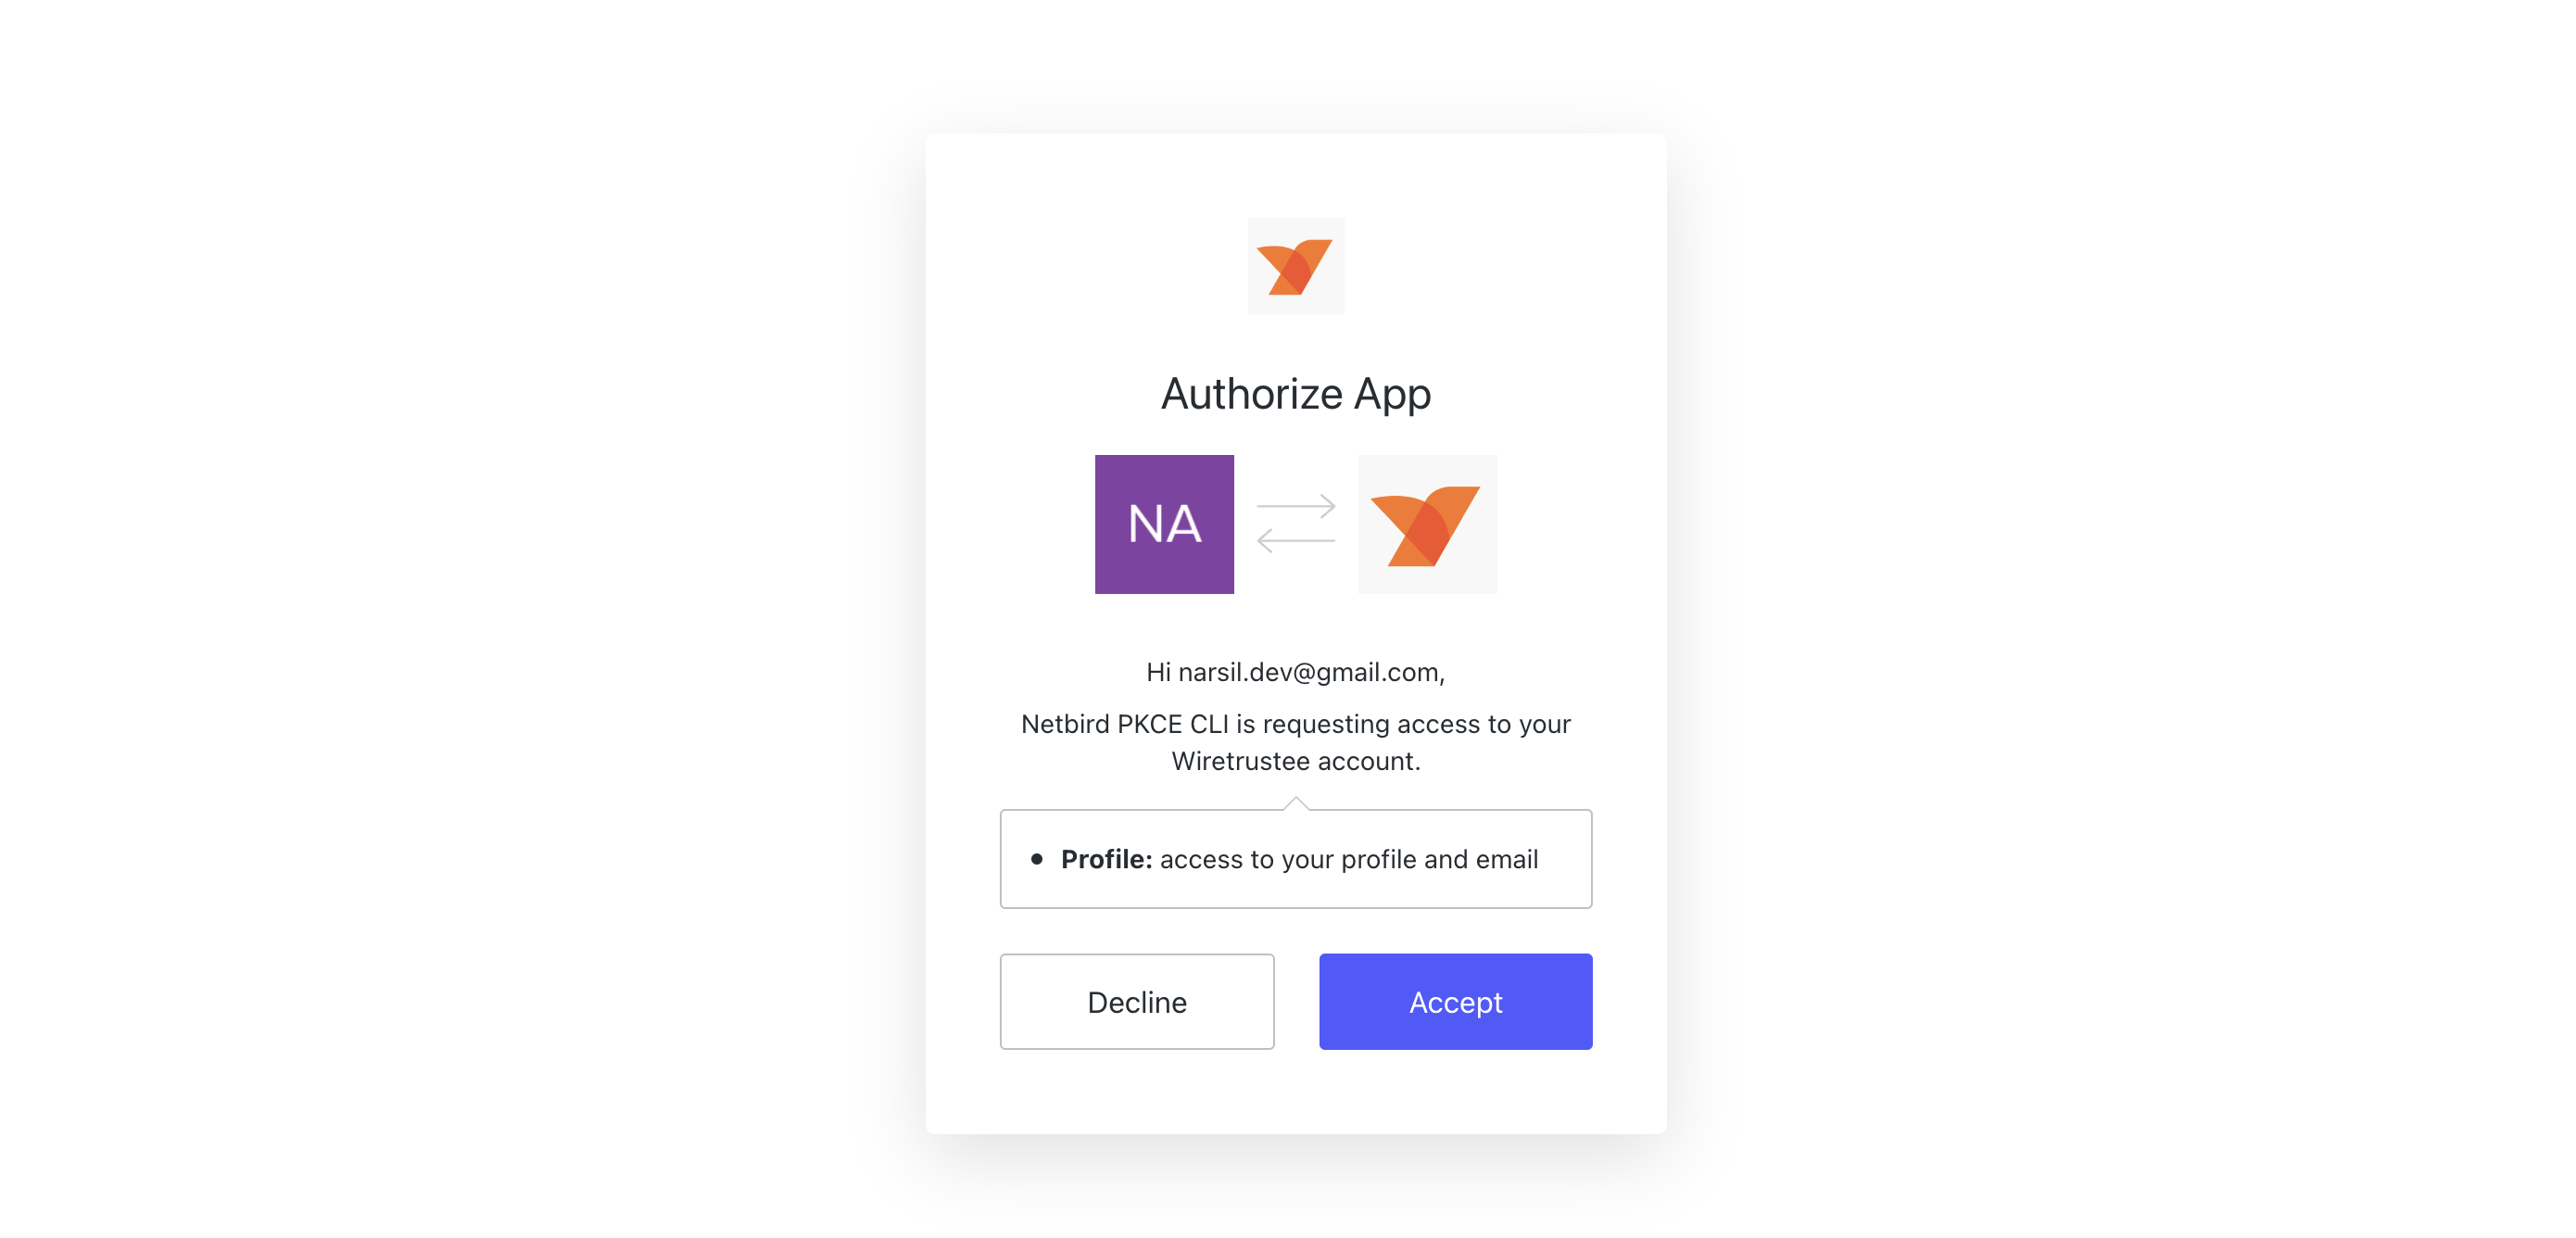
Follow the instructions for your operating system and finish by authorizing the NetBird app to access the NetBird dashboard using the command :
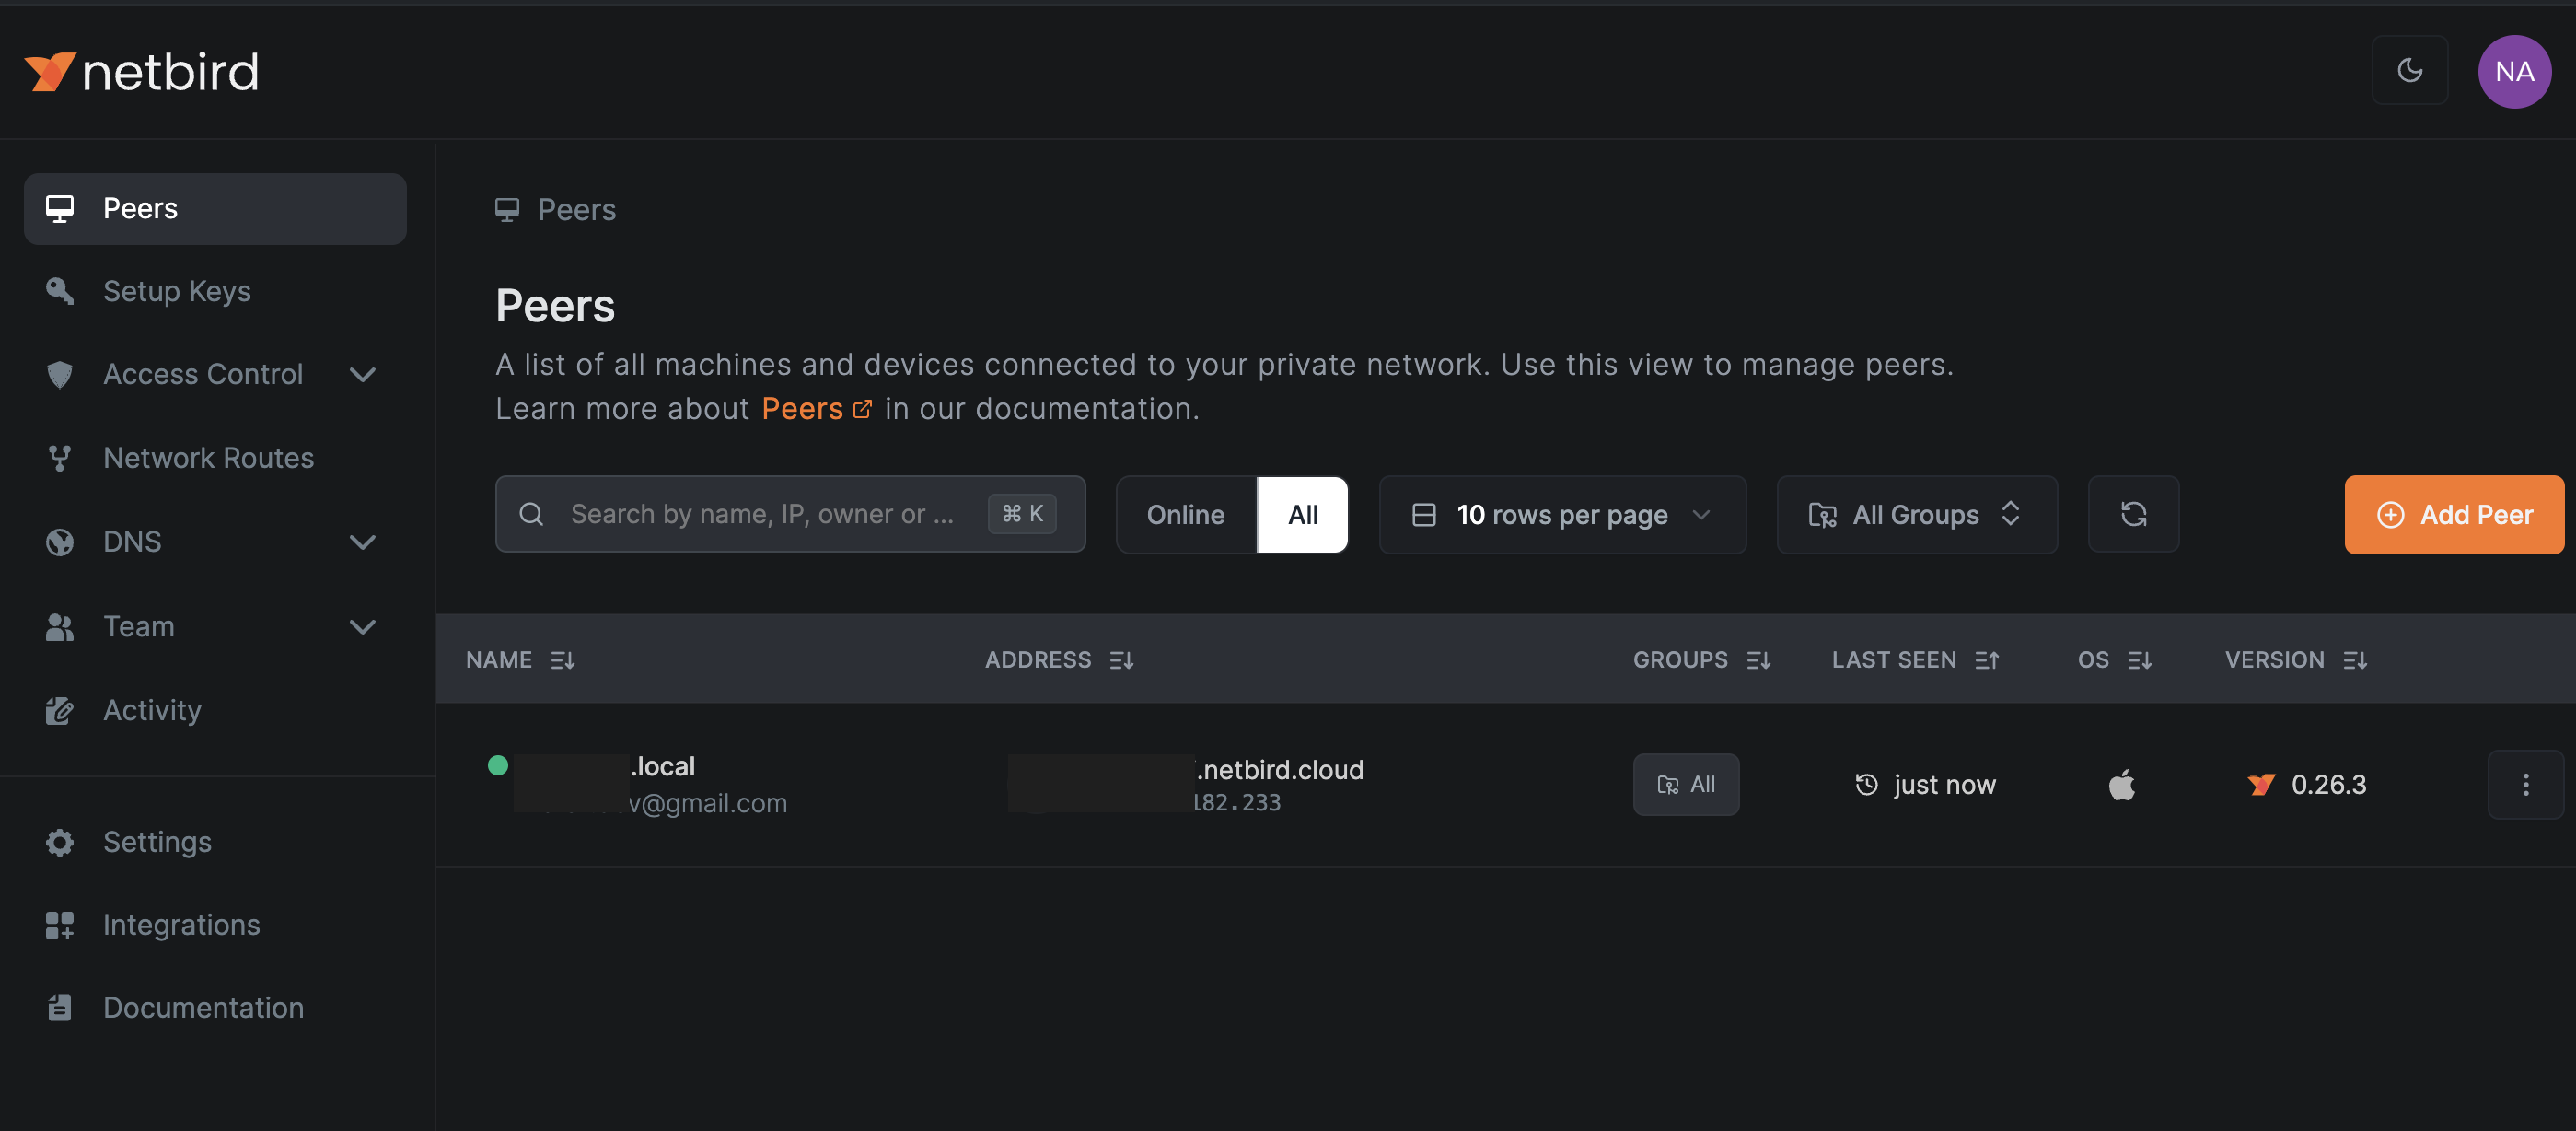
You should see your local machine in the Peers dashboard, which means that it's now connected to the NetBird peer-to-peer (P2P) network:
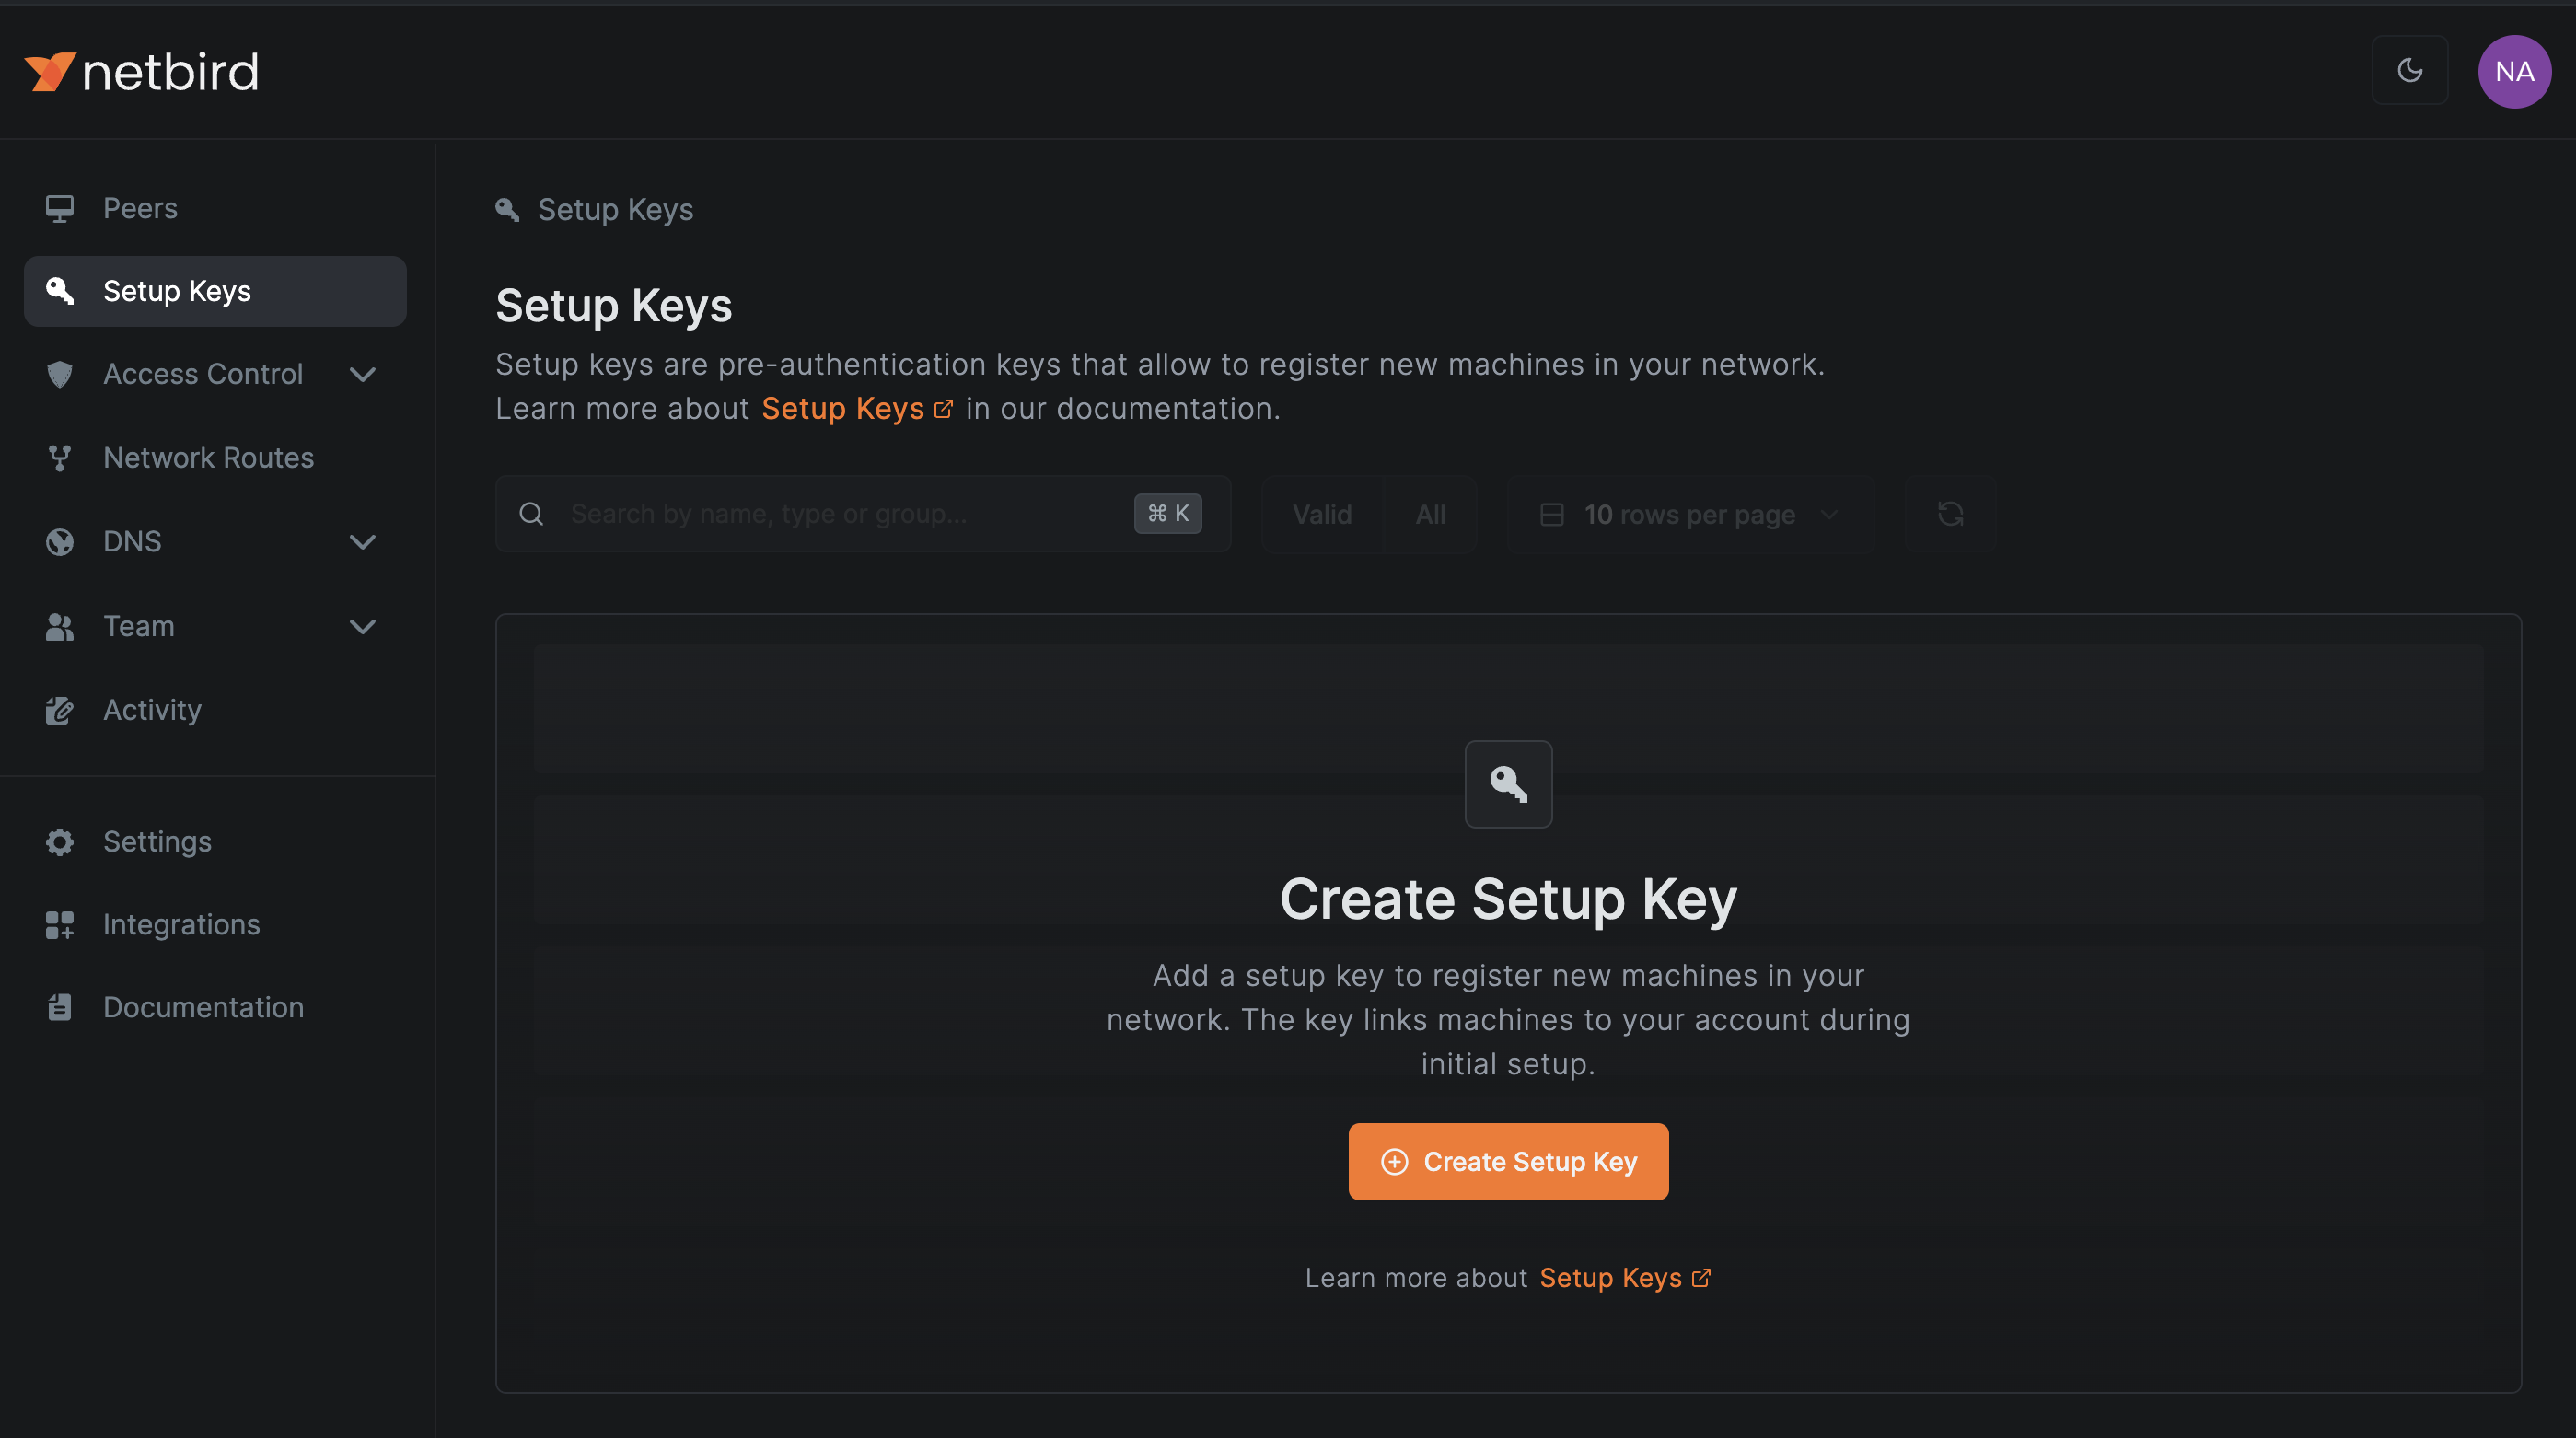
Now that you're connected to the network, it's time to add a Kubernetes cluster to this network. To do that, you need to create a setup key that your Kubernetes cluster can use to authenticate with NetBird.
Click on the Setup Keys tab on the left-hand side of your screen and then click on the Create Setup Key button:
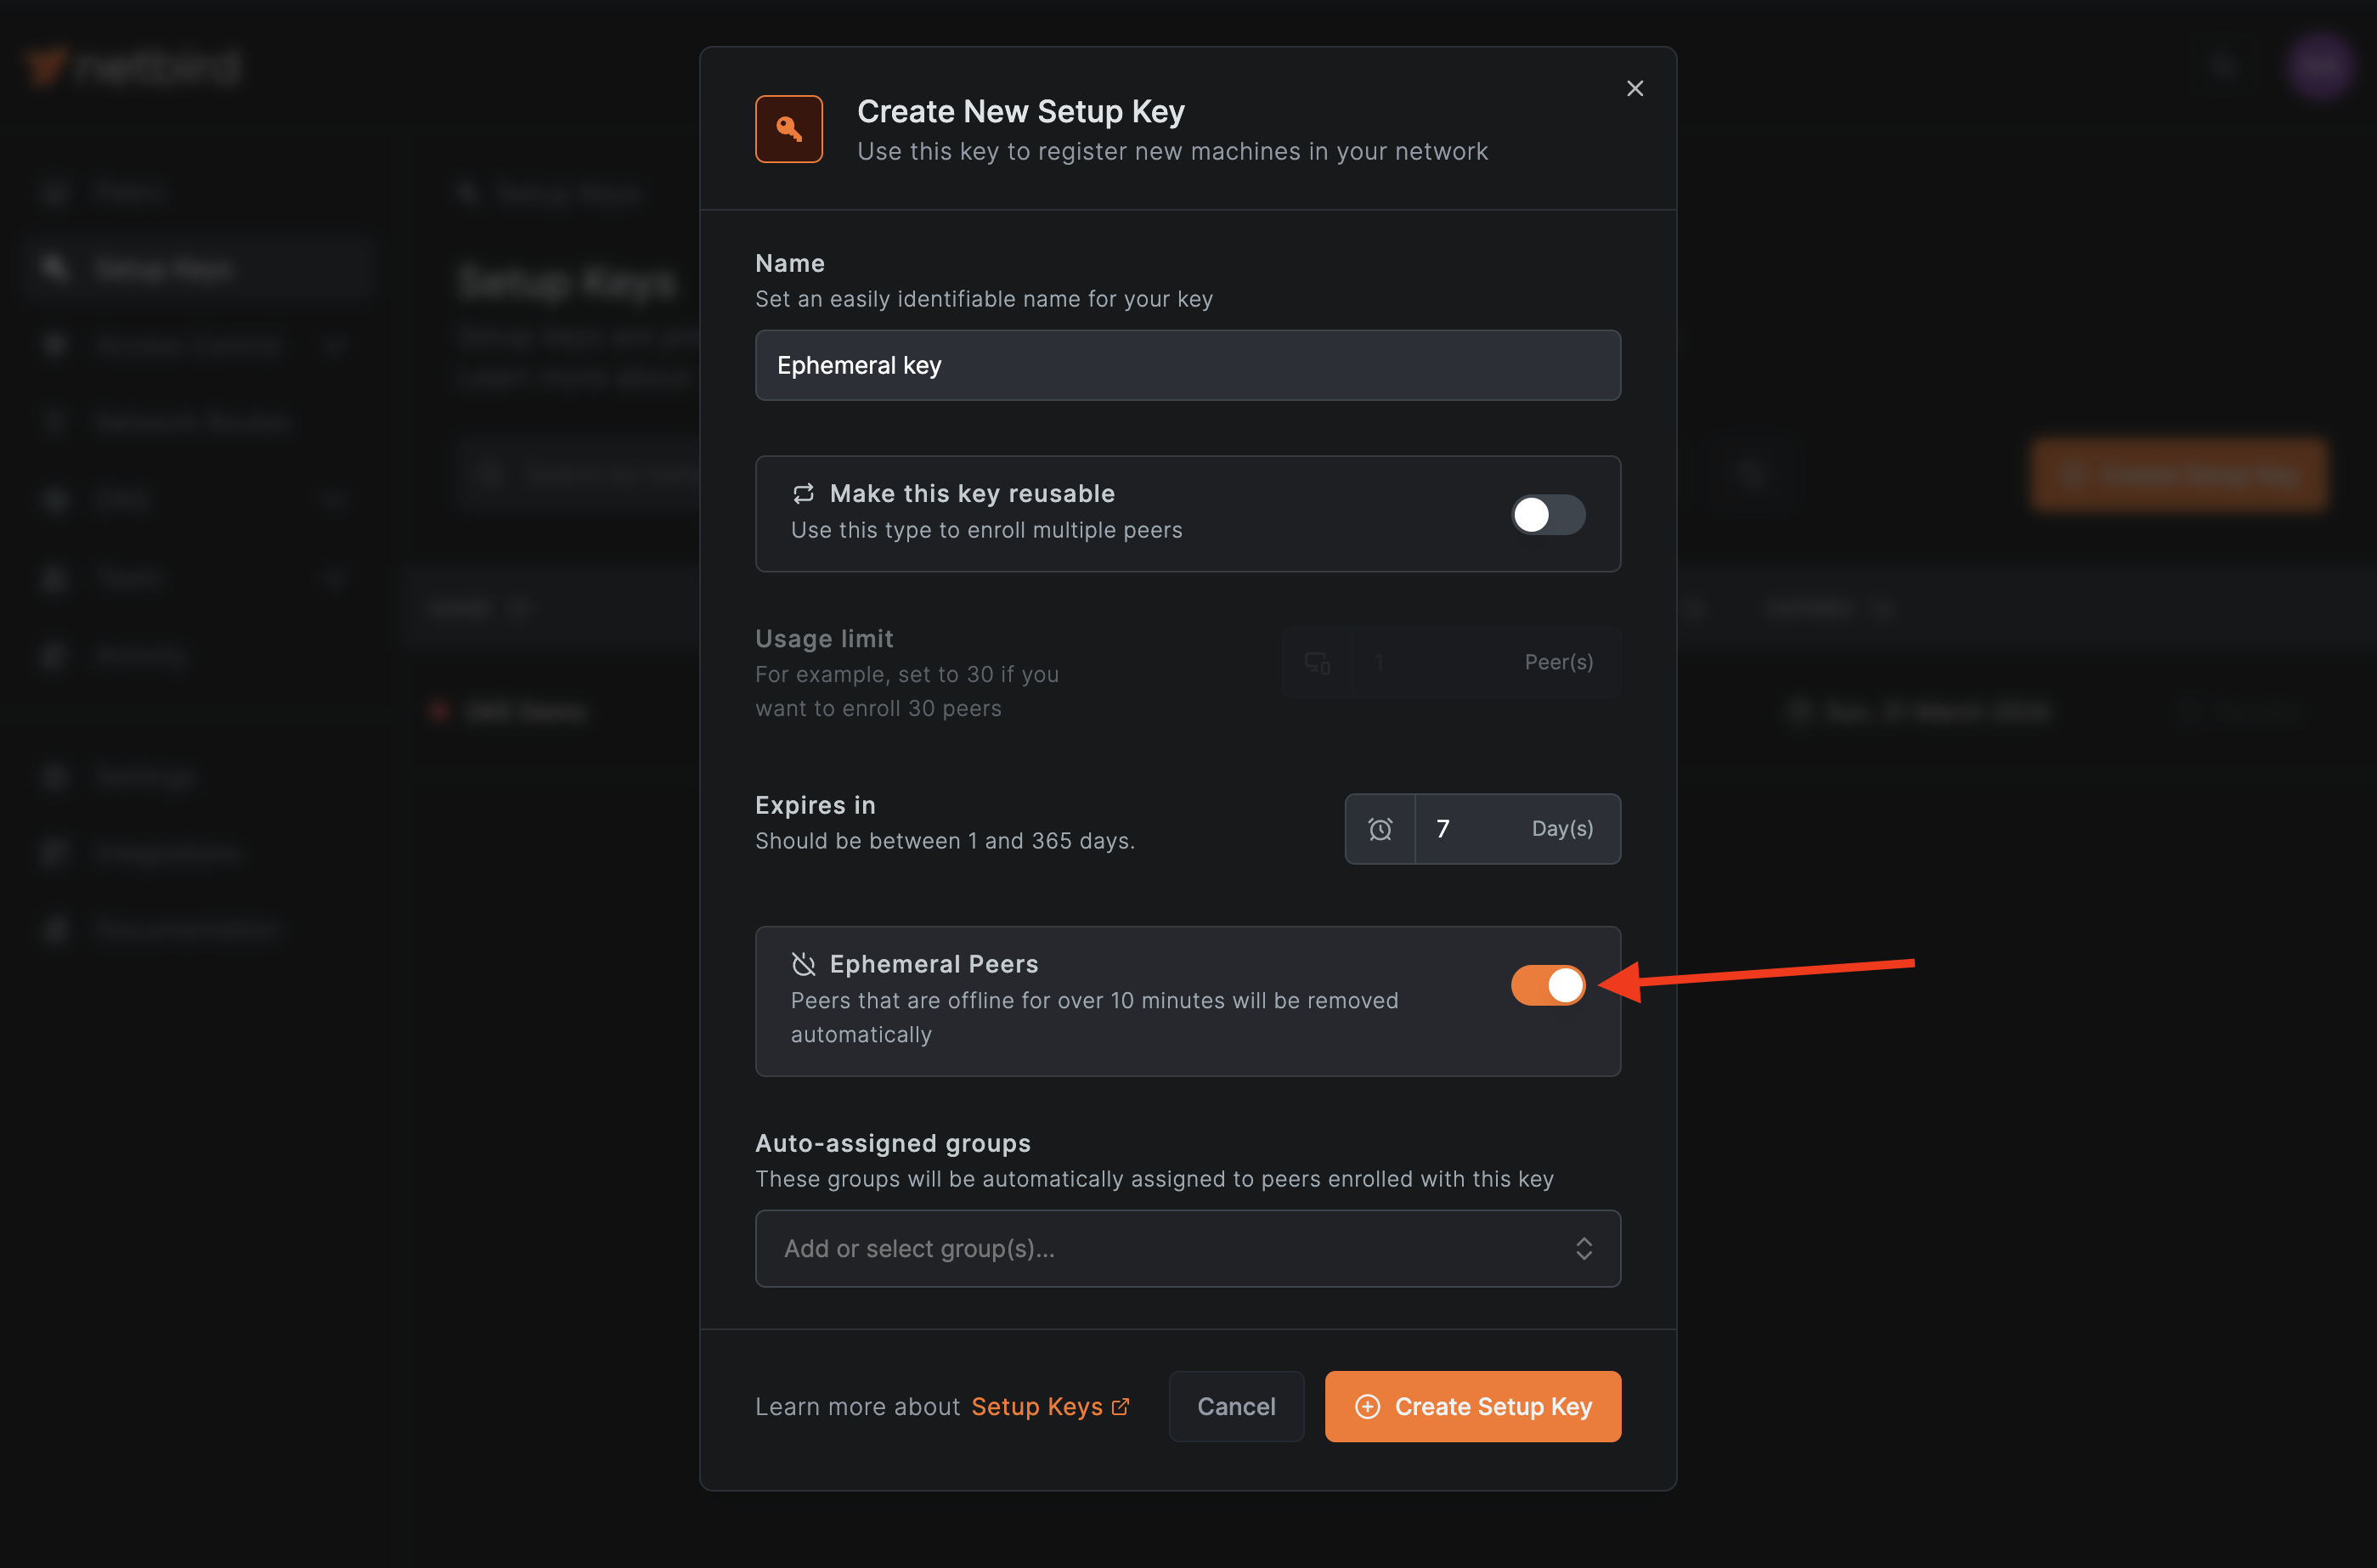
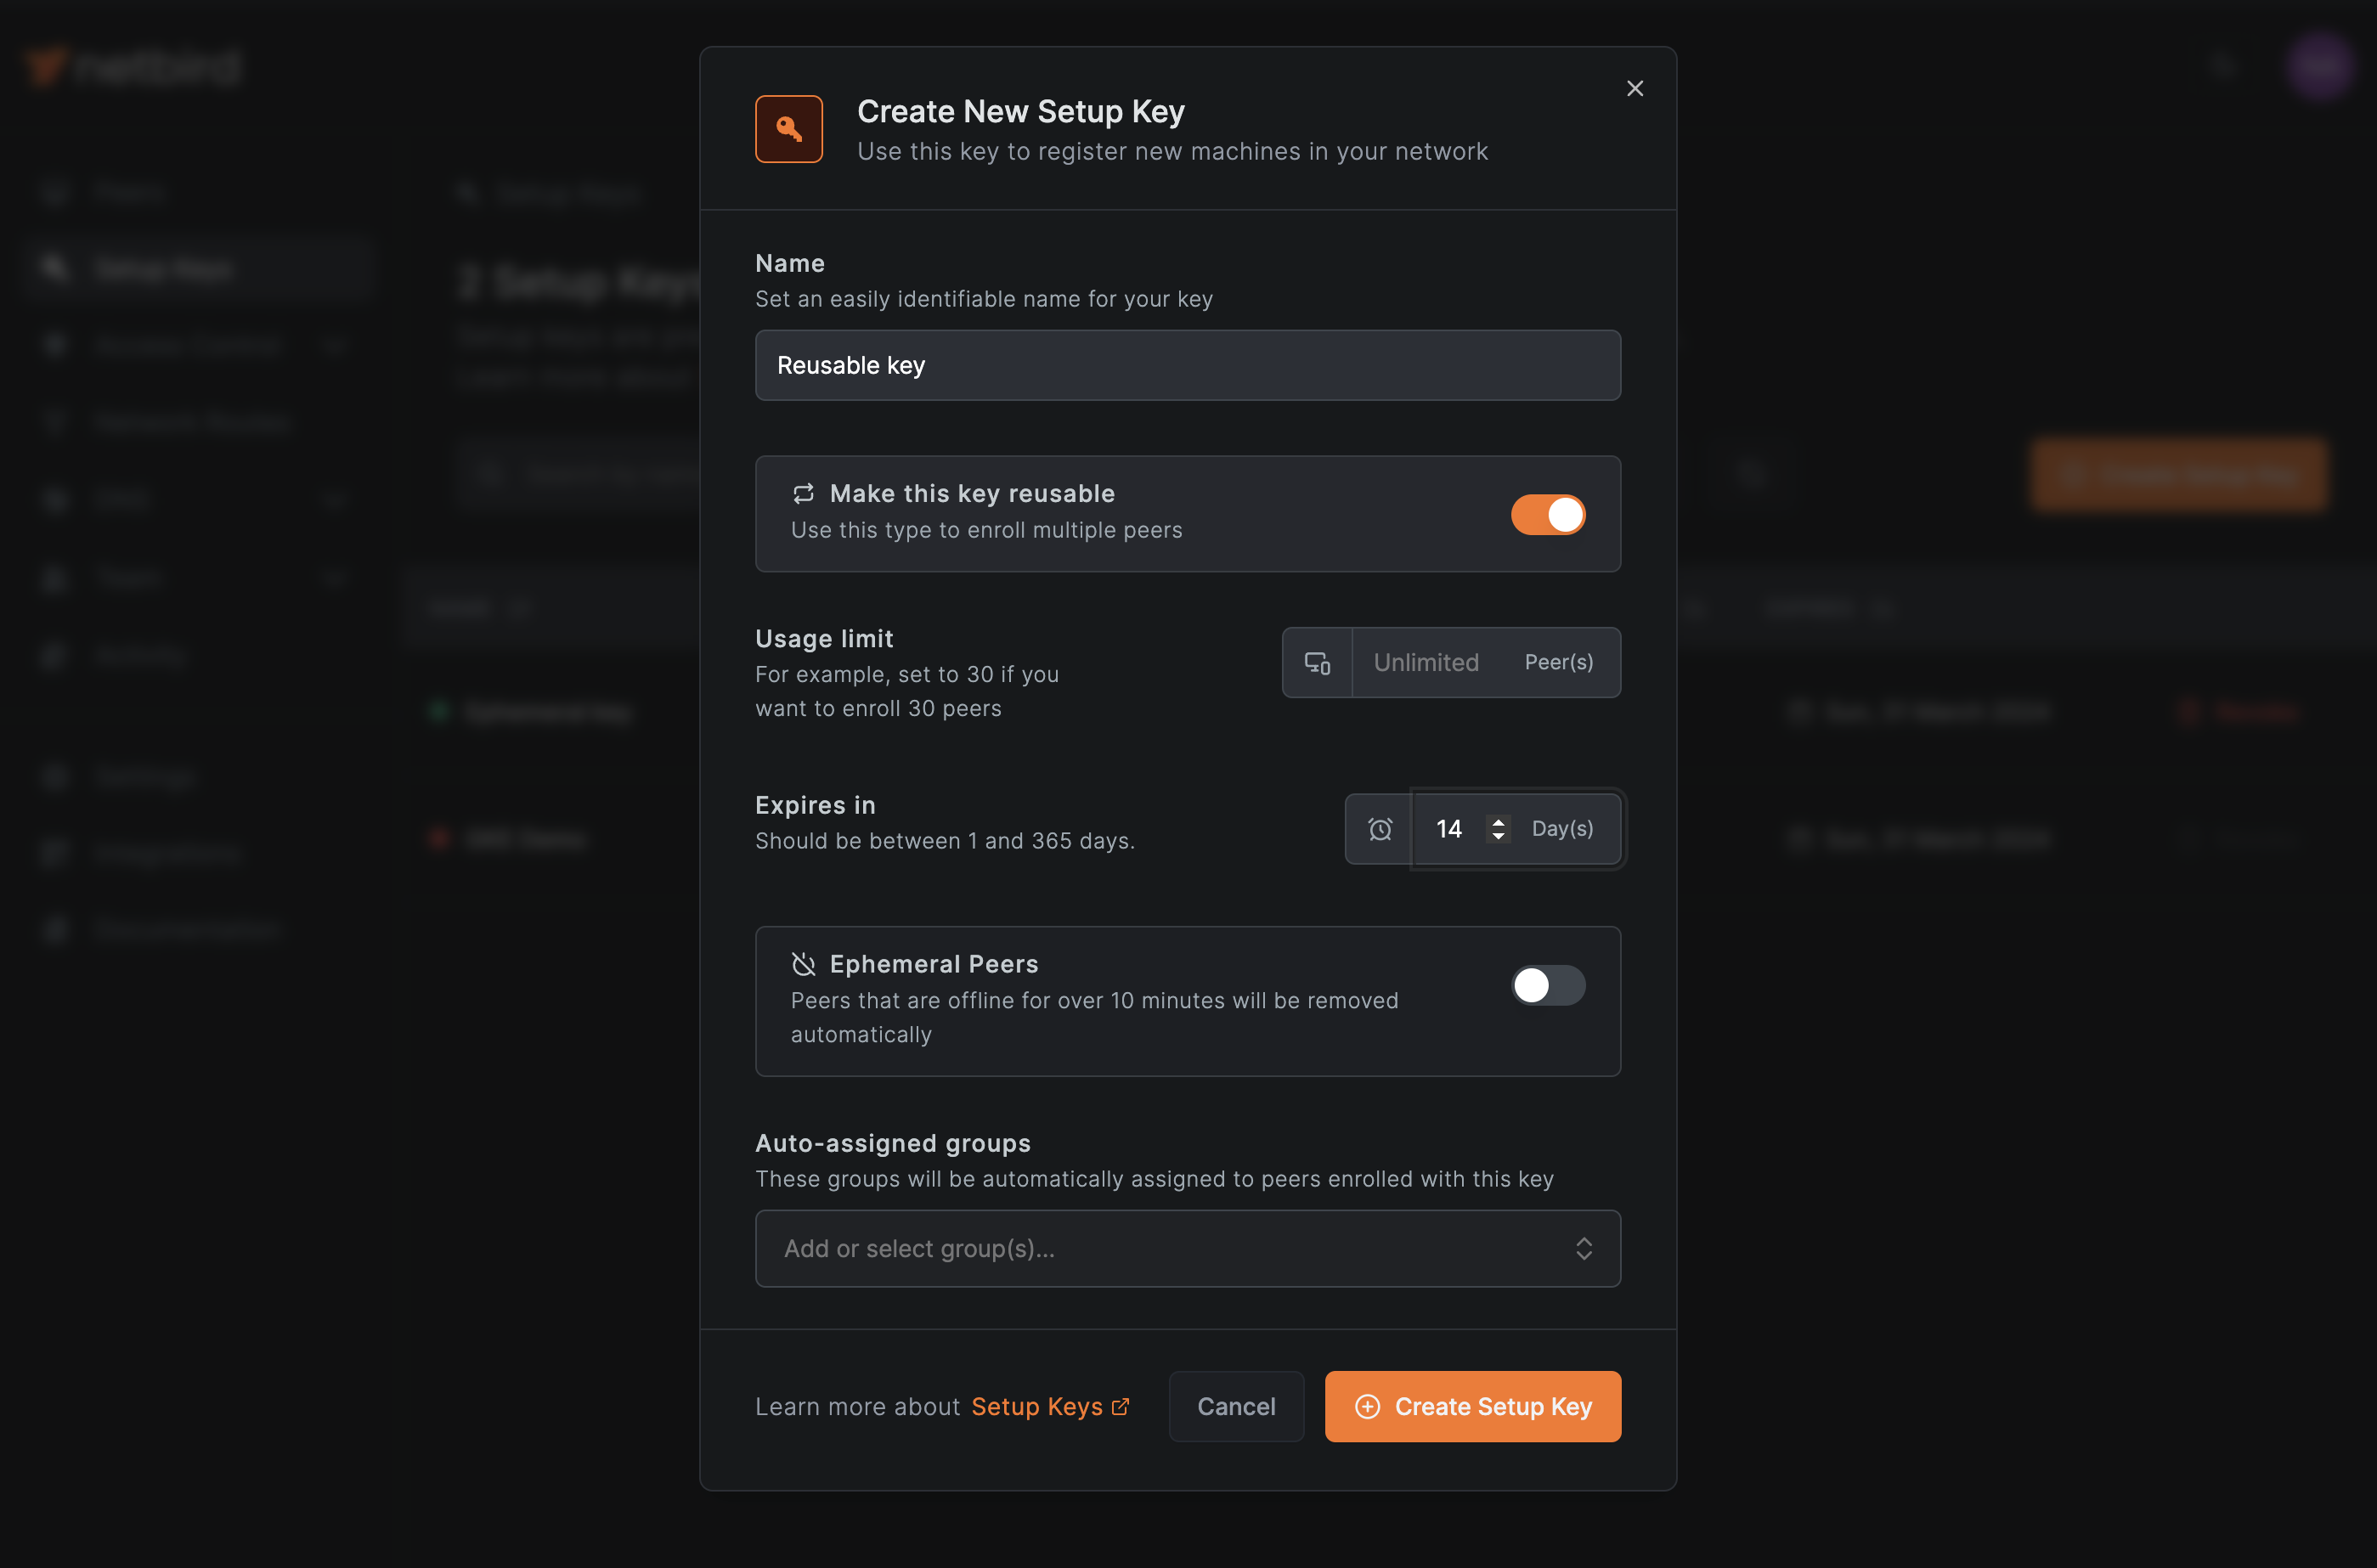
A pop-up window opens where you can name the key, set the maximum number of peers that can use it, and determine its expiration date. Additionally, you can also select auto-assigned groups . With this option, any peer that registers with the key will be automatically added to these groups, meaning that the access control rules set for these groups will automatically apply to them. Set it to , it will help you to avoid adding each peer to the group manually later in the tutorial.
You'll also see two toggle switches there: one for making the key reusable and another to mark a peer as ephemeral . Reusable setup keys are useful when there is no human behind a machine that can use SSO and MFA, e.g., to associate servers with a NetBird account , so they can authenticate to the network automatically. On the other hand, ephemeral keys automatically remove machines from NetBird if they are offline for more than 10 minutes. This feature helps prevent offline machines from cluttering the NetBird peer dashboard, such as when a Kubernetes pod gets replaced by a new one.
The following screenshot shows the creation of an ephemeral key:
Likewise, this screenshot shows how to create a reusable key:
Given the reasons mentioned earlier, using ephemeral keys for this tutorial is recommended. This is because Kubernetes might restart services, causing machines to go offline.
To ensure a highly available network route with NetBird, there are some considerations to keep in mind when deploying the GKE cluster:
You can use the Google Cloud console UI to set up a Kubernetes cluster like the one described earlier, or you can adapt this command to fit your needs:
Replace with the ID of your project. Additionally, replace the region and the zones , , and according to your preferences.
If you want to create a cluster with a specific version, use the flag to match the latest available version in your region.
Pay attention to the instance type configuration. In this case, guarantees NetBird has sufficient CPU and memory resources. is set to since it deploys one node per zone (three nodes in total), and the flag is set to allow a maximum of two nodes per zone or a maximum of six nodes in total.
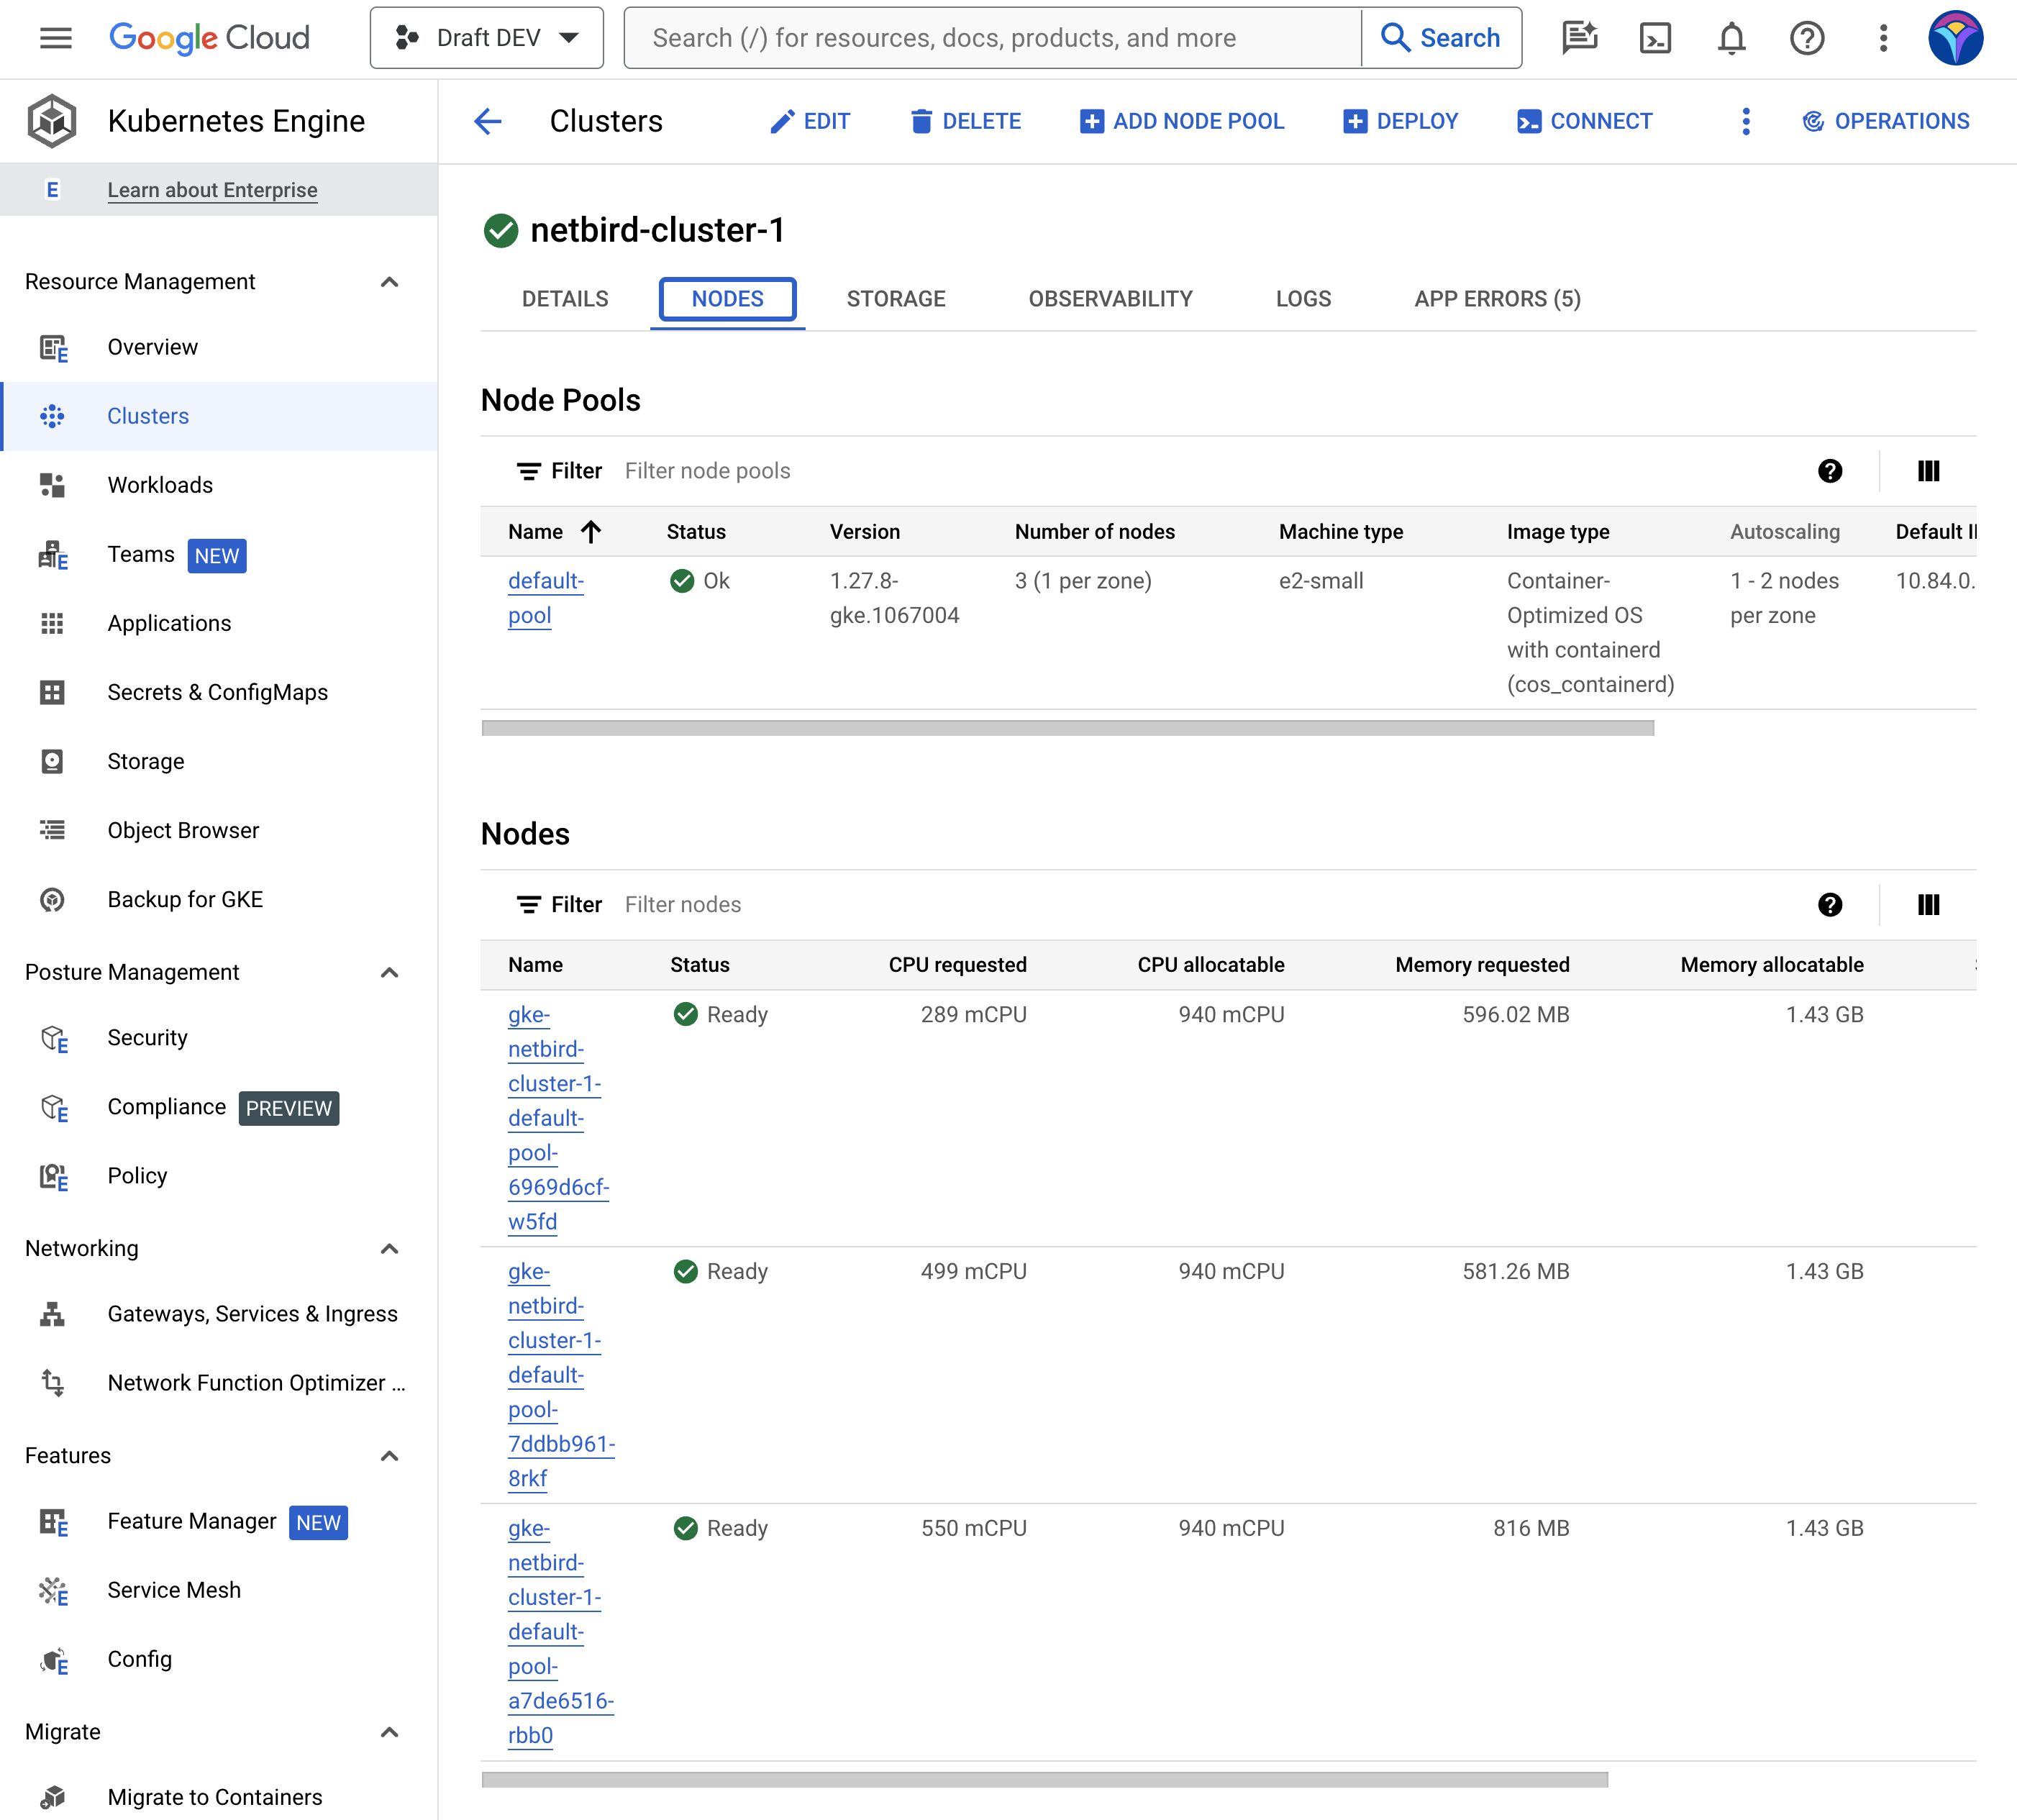
Once the cluster is deployed, log in to the Google Cloud console and check that everything is working as expected (cluster status is and status of the nodes' is ):
You can also verify the nodes using from your local machine:
With the GKE cluster up and running, it's time to add the NetBird ephemeral key.
To register your Kubernetes cluster to the NetBird secure P2P network, create a YAML file on your local machine called and paste the following content in it:
Let's break down the key arguments of this deployment:
Remember to replace with the previously created ephemeral setup key. Once you're ready, add the ephemeral key to the cluster by running the following command:
You can check the status of the deployment using :
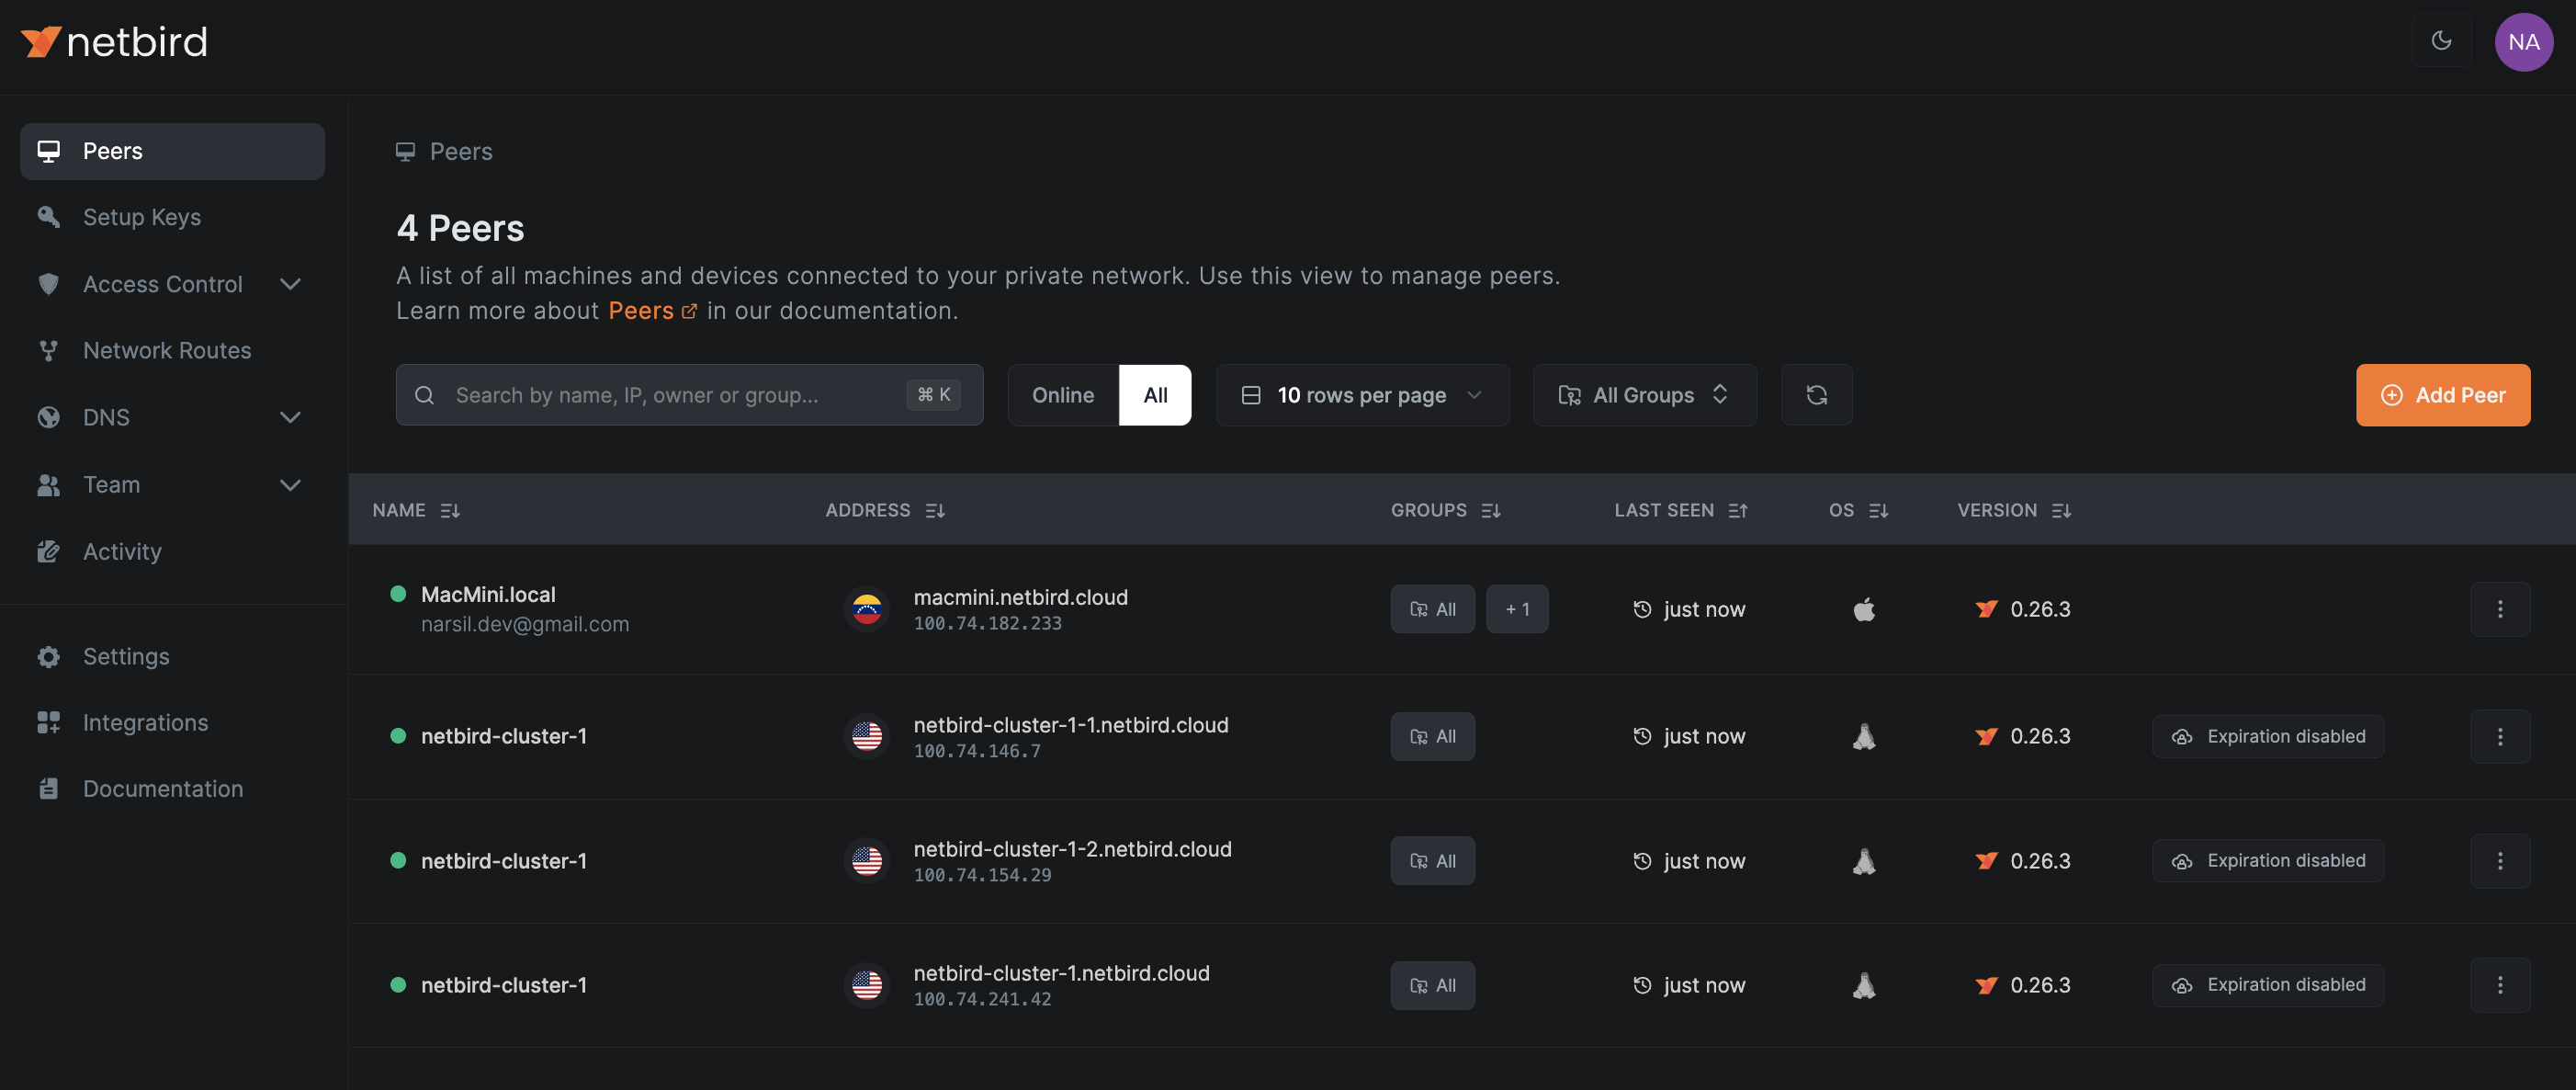
At this point, if you go to the NetBird Peers tab, you should see the GKE nodes:
With your local machine and GKE nodes now part of the NetBird P2P network, you're ready to establish a secure HA network route for communication.
Simply having all GKE nodes on the same peer-to-peer network doesn't guarantee accessibility. For instance, if you attempt to ping a node, you'll receive a "request timeout…" message. This happens because you need to set up a network route and define an access policy before you can connect to the nodes.
To facilitate the process of creating network routes and access policies , NetBird lets you create peer groups. Do you remember that you created and assigned the group to the GKE nodes when you created the ephemeral key? If you haven't done this then, you can create and assign the group manually to the peers now.
To do so, click on the first GKE node in the Peers view. This takes you to a screen with the peer details. On the right side, you should see Assigned Groups:
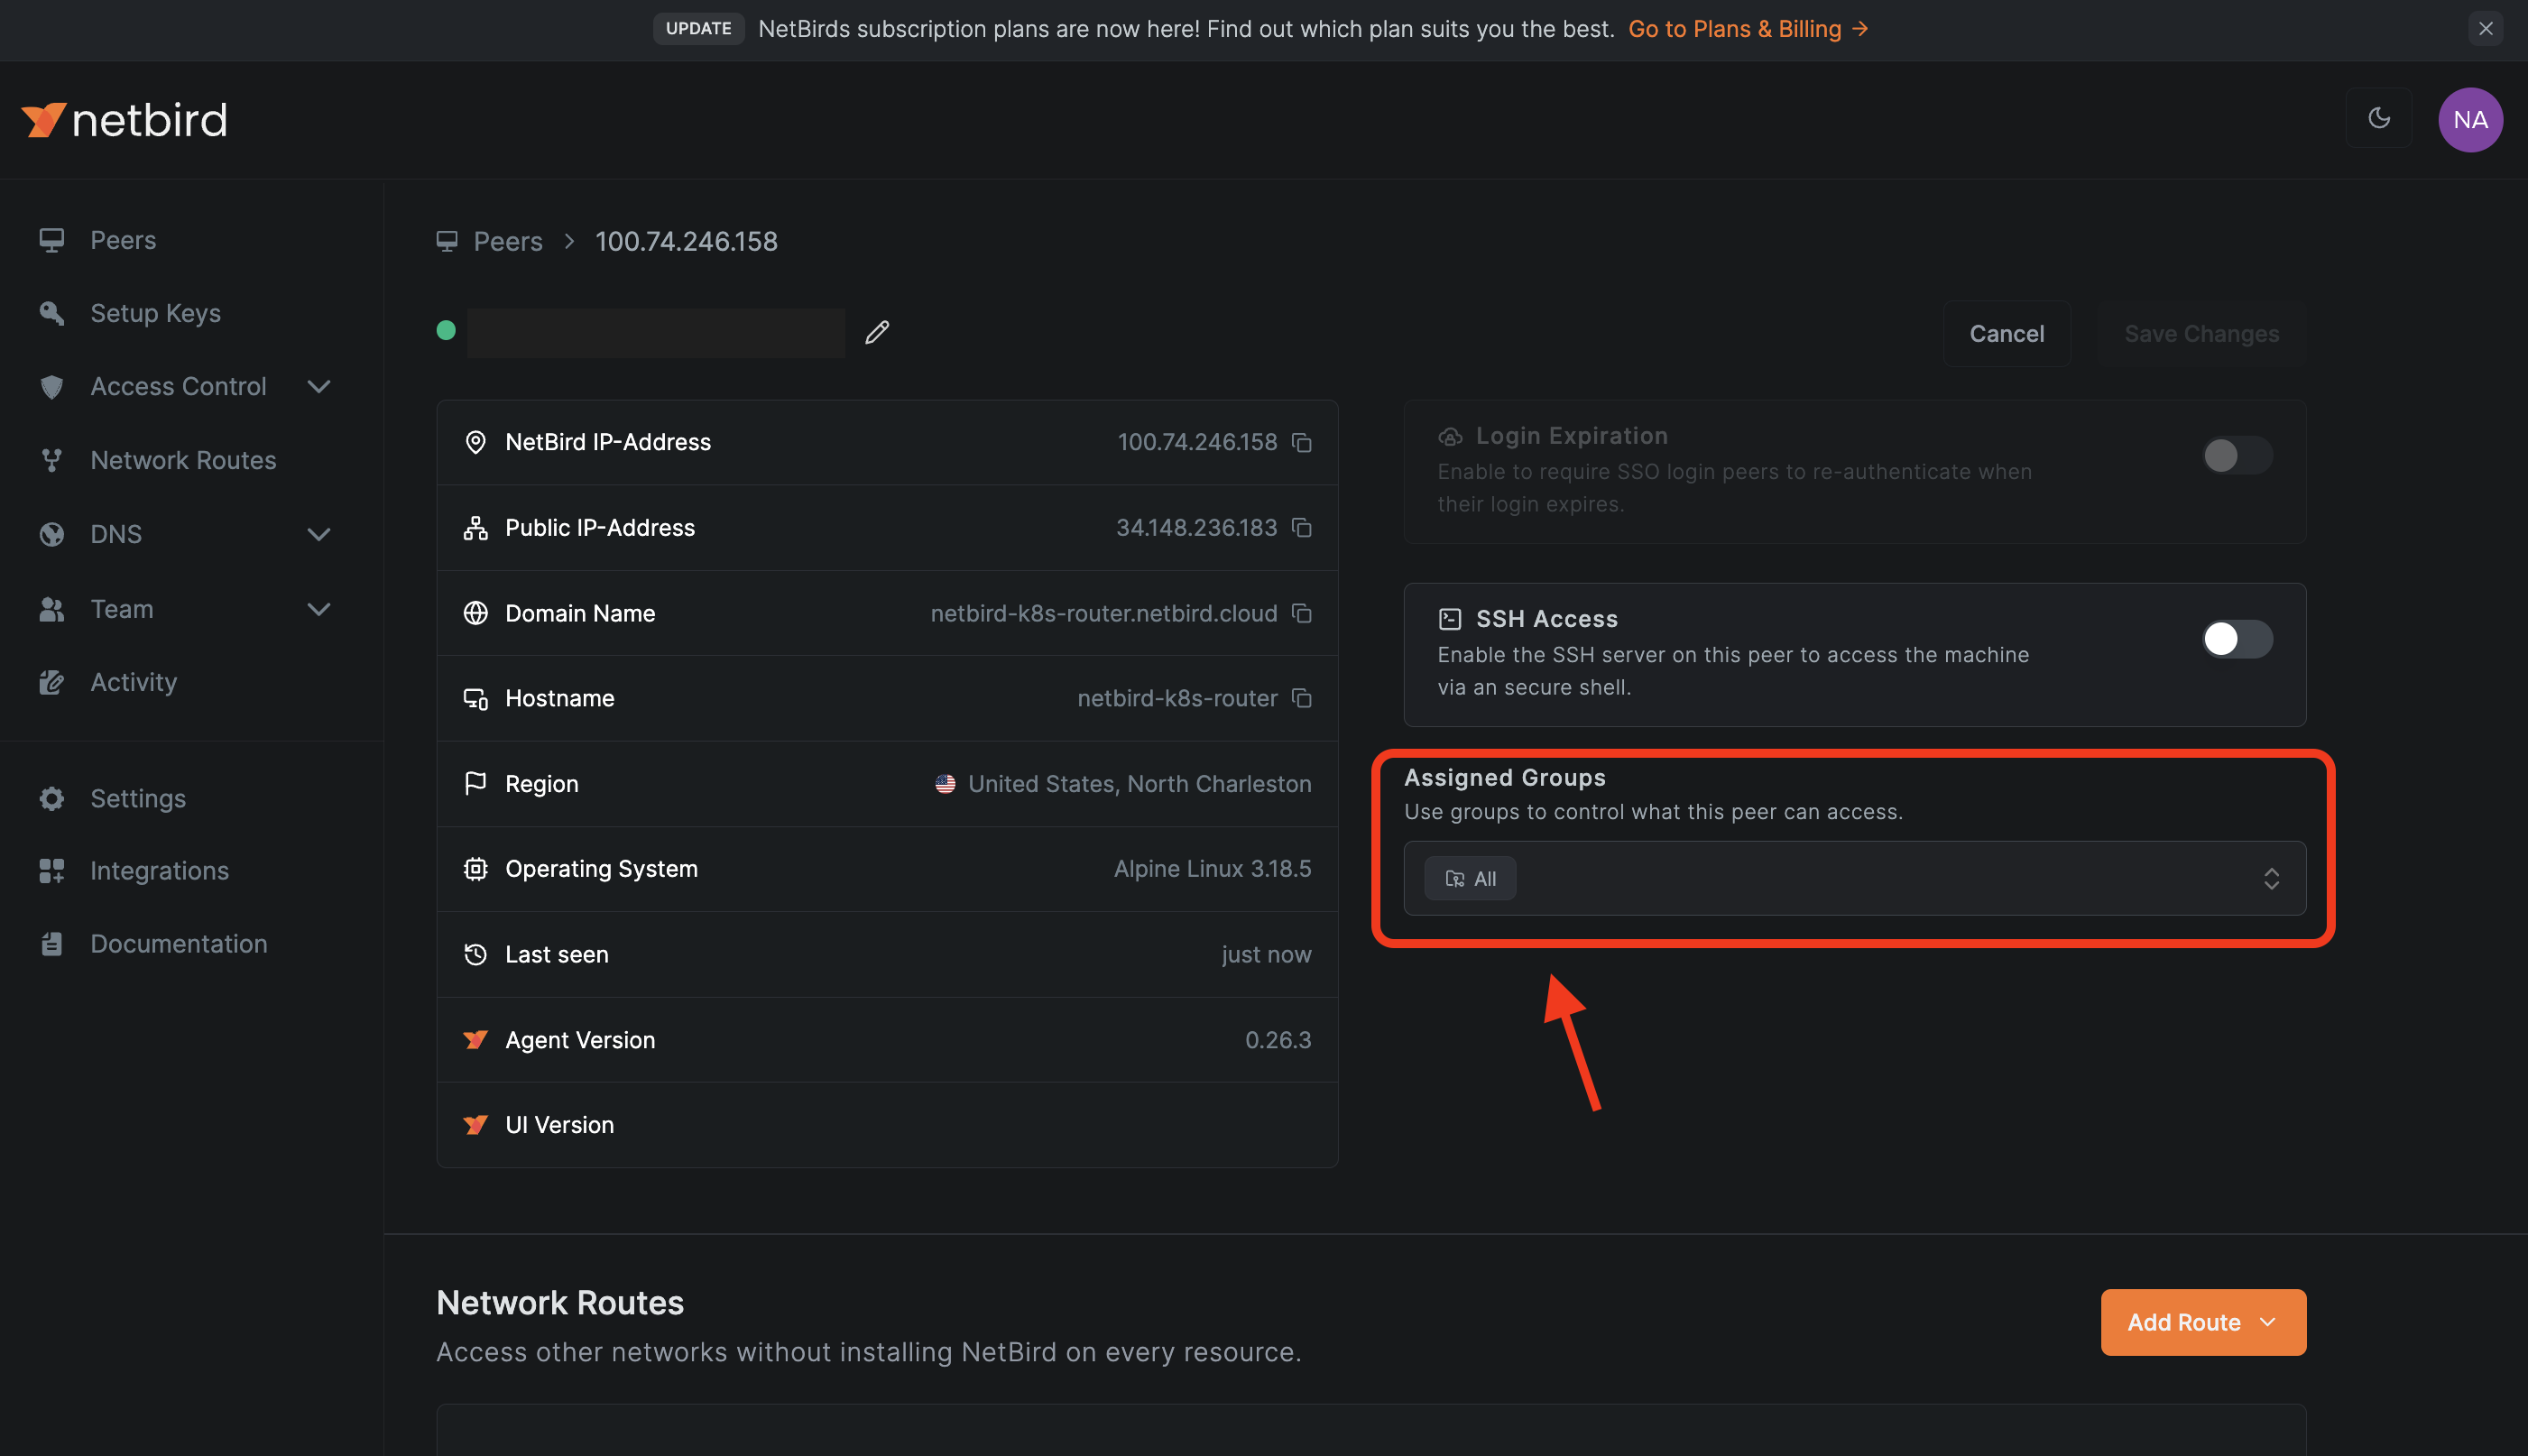
Start typing a name (ie ) to create a new group. After you've entered the name, click Save Changes to apply the new configuration:
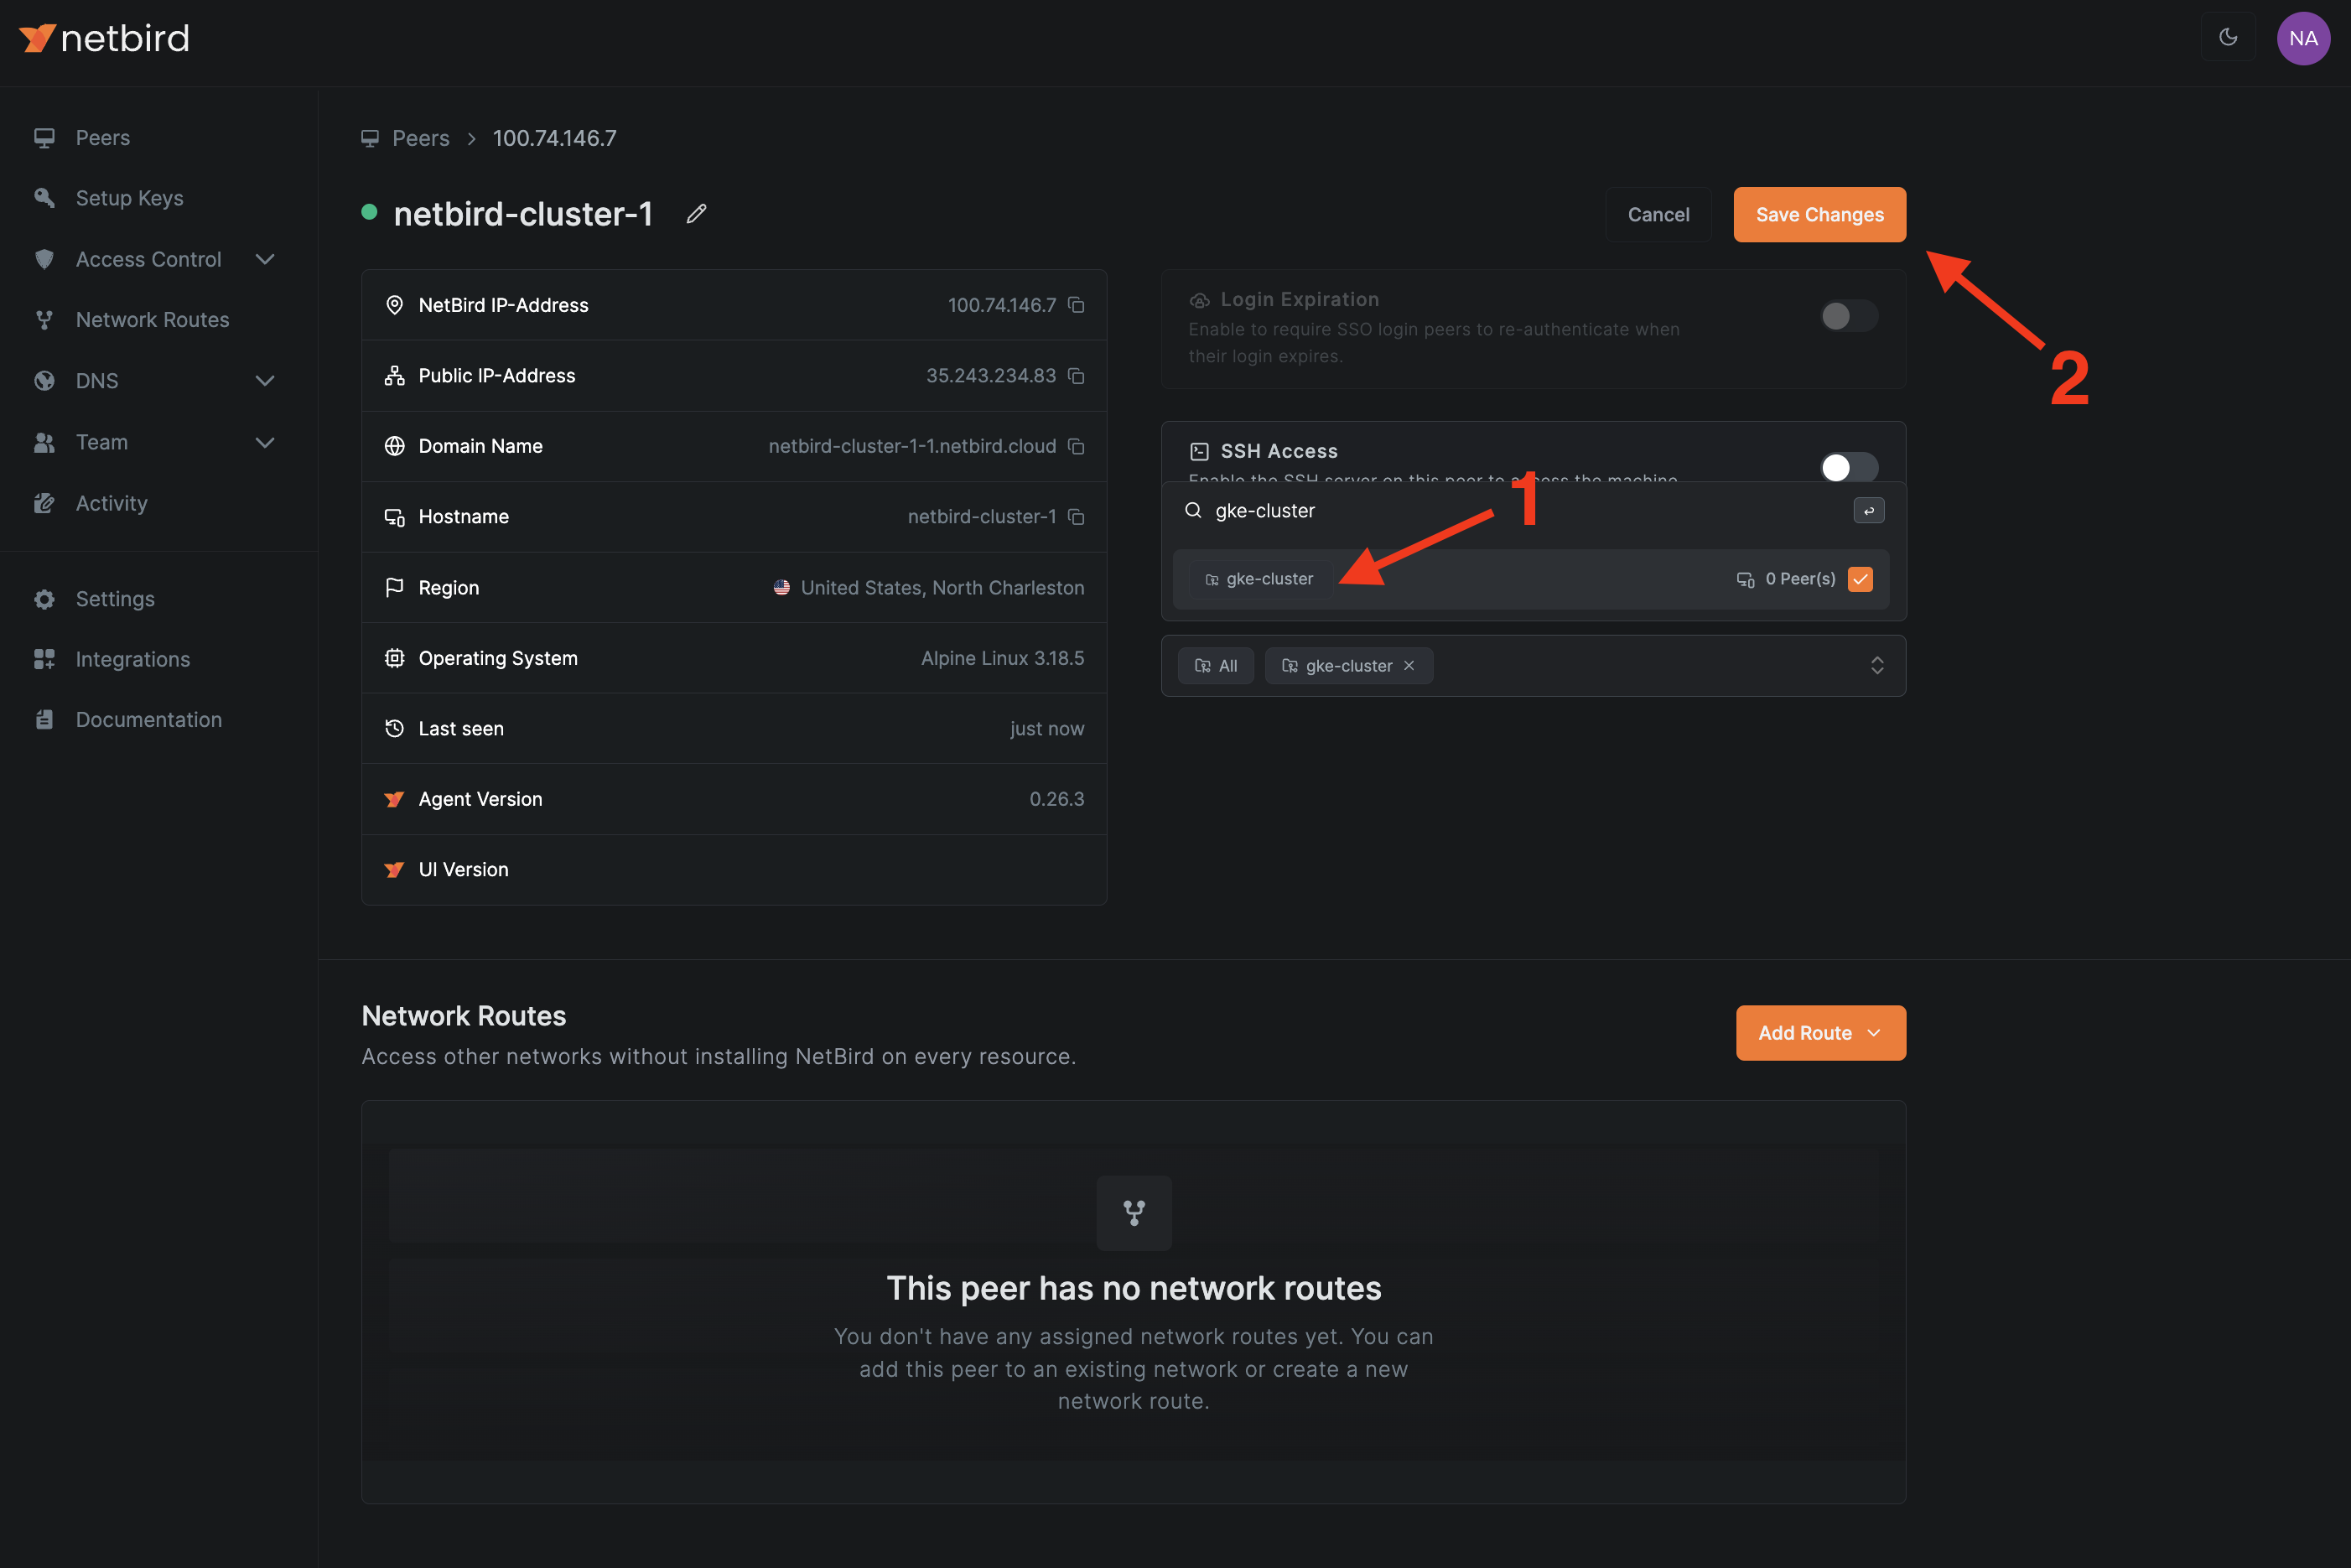
Repeat the procedure for the remaining two GKE nodes; remember to choose the same group and save the changes.
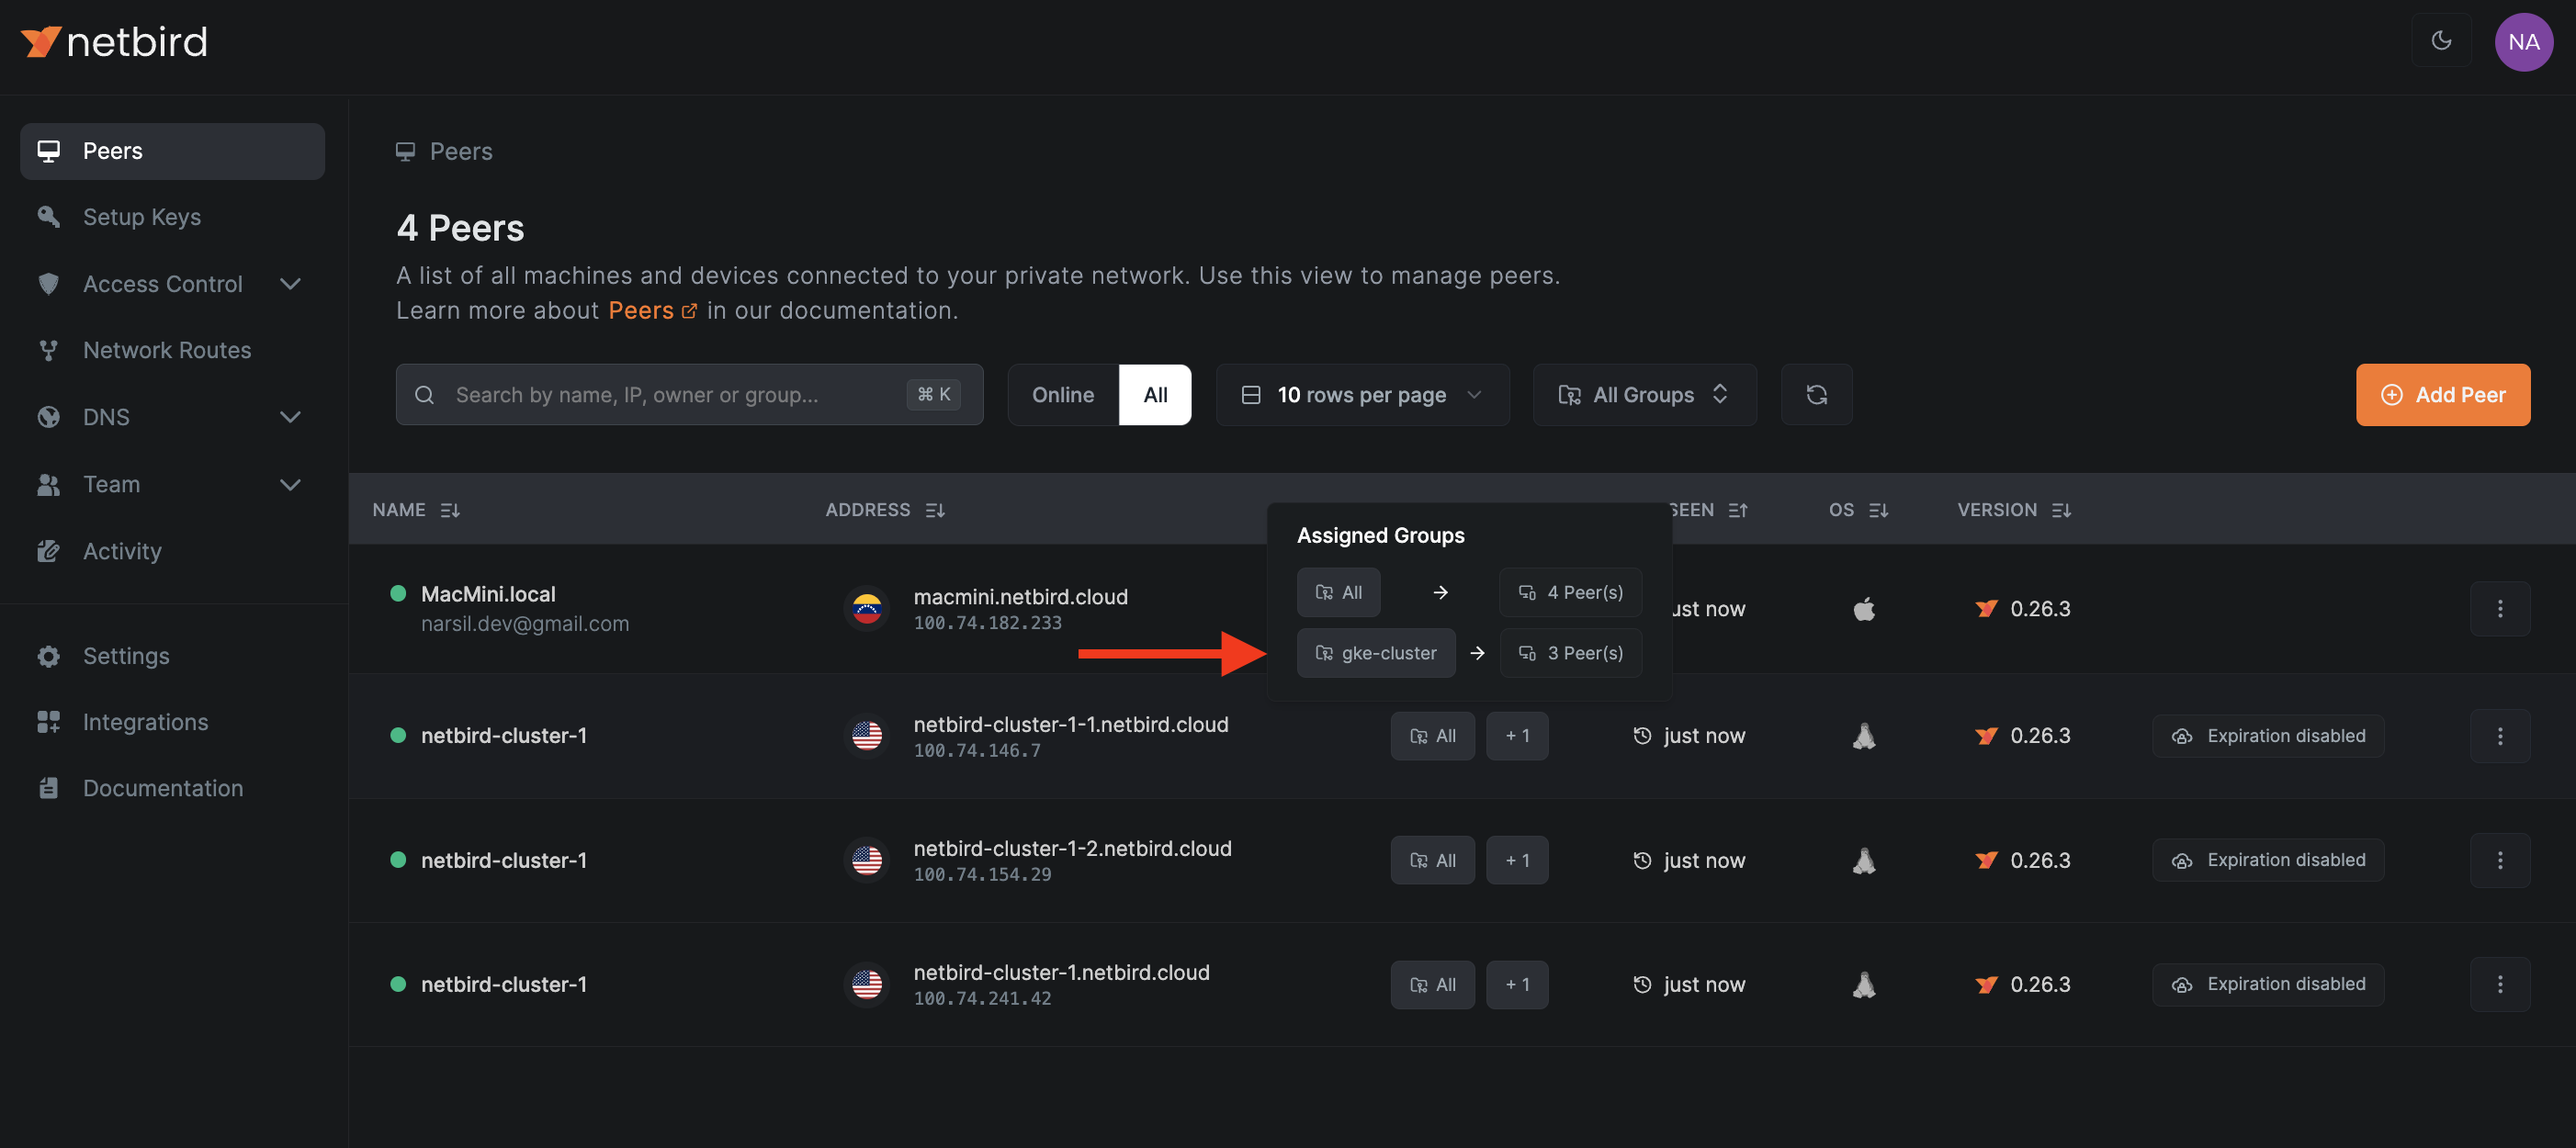
Once finished, hover the mouse pointer over the GROUPS column on any of the nodes to verify that they belong to the desired group:
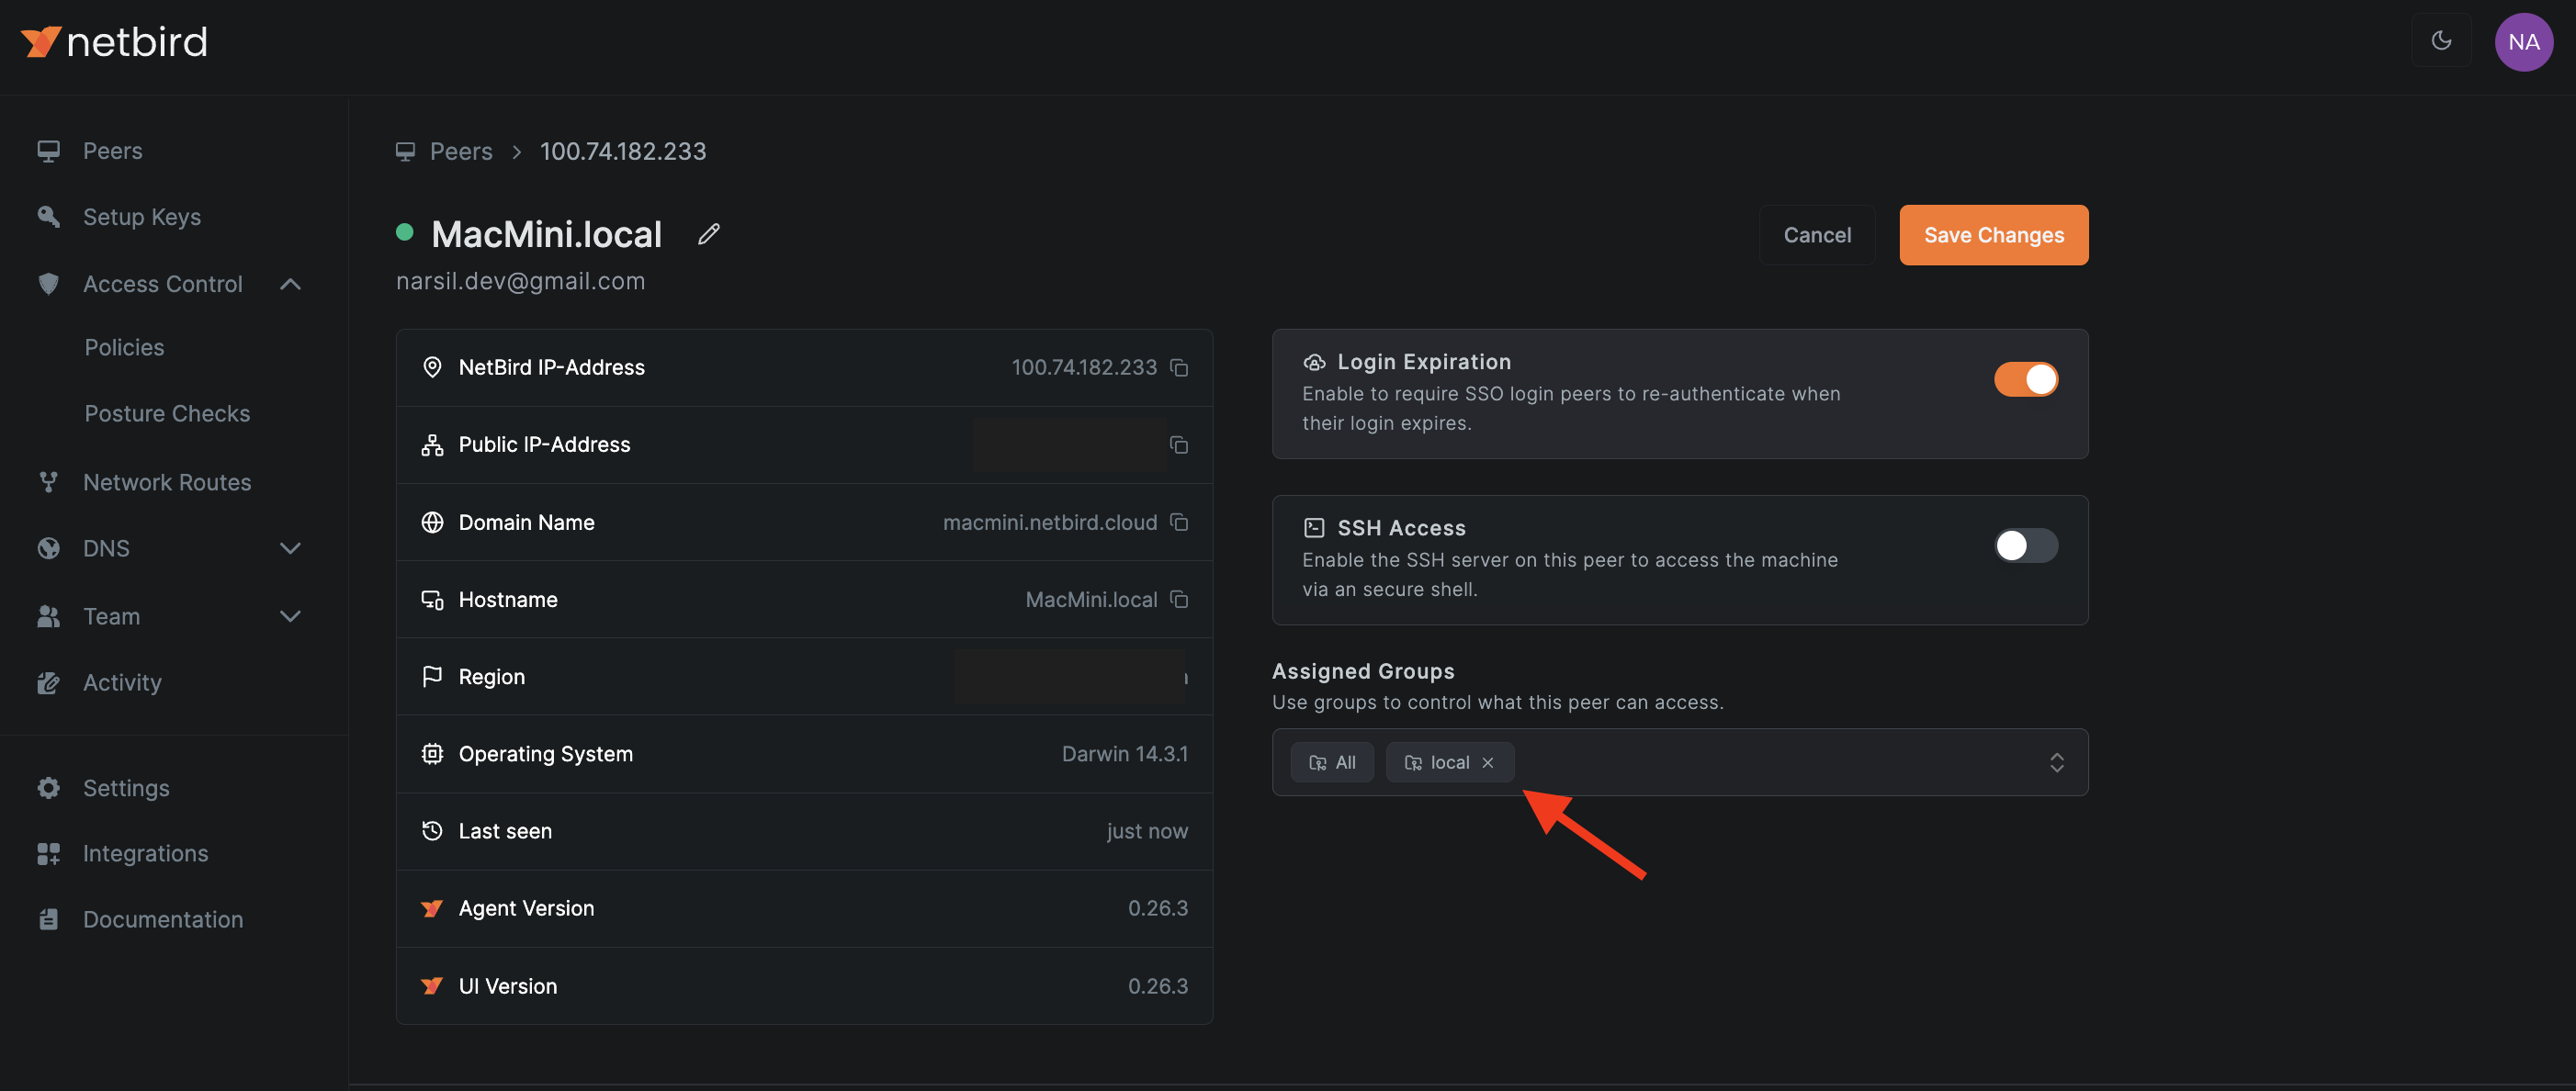
Similarly, to simplify setting a route, you can assign a group to your local machine, such as :
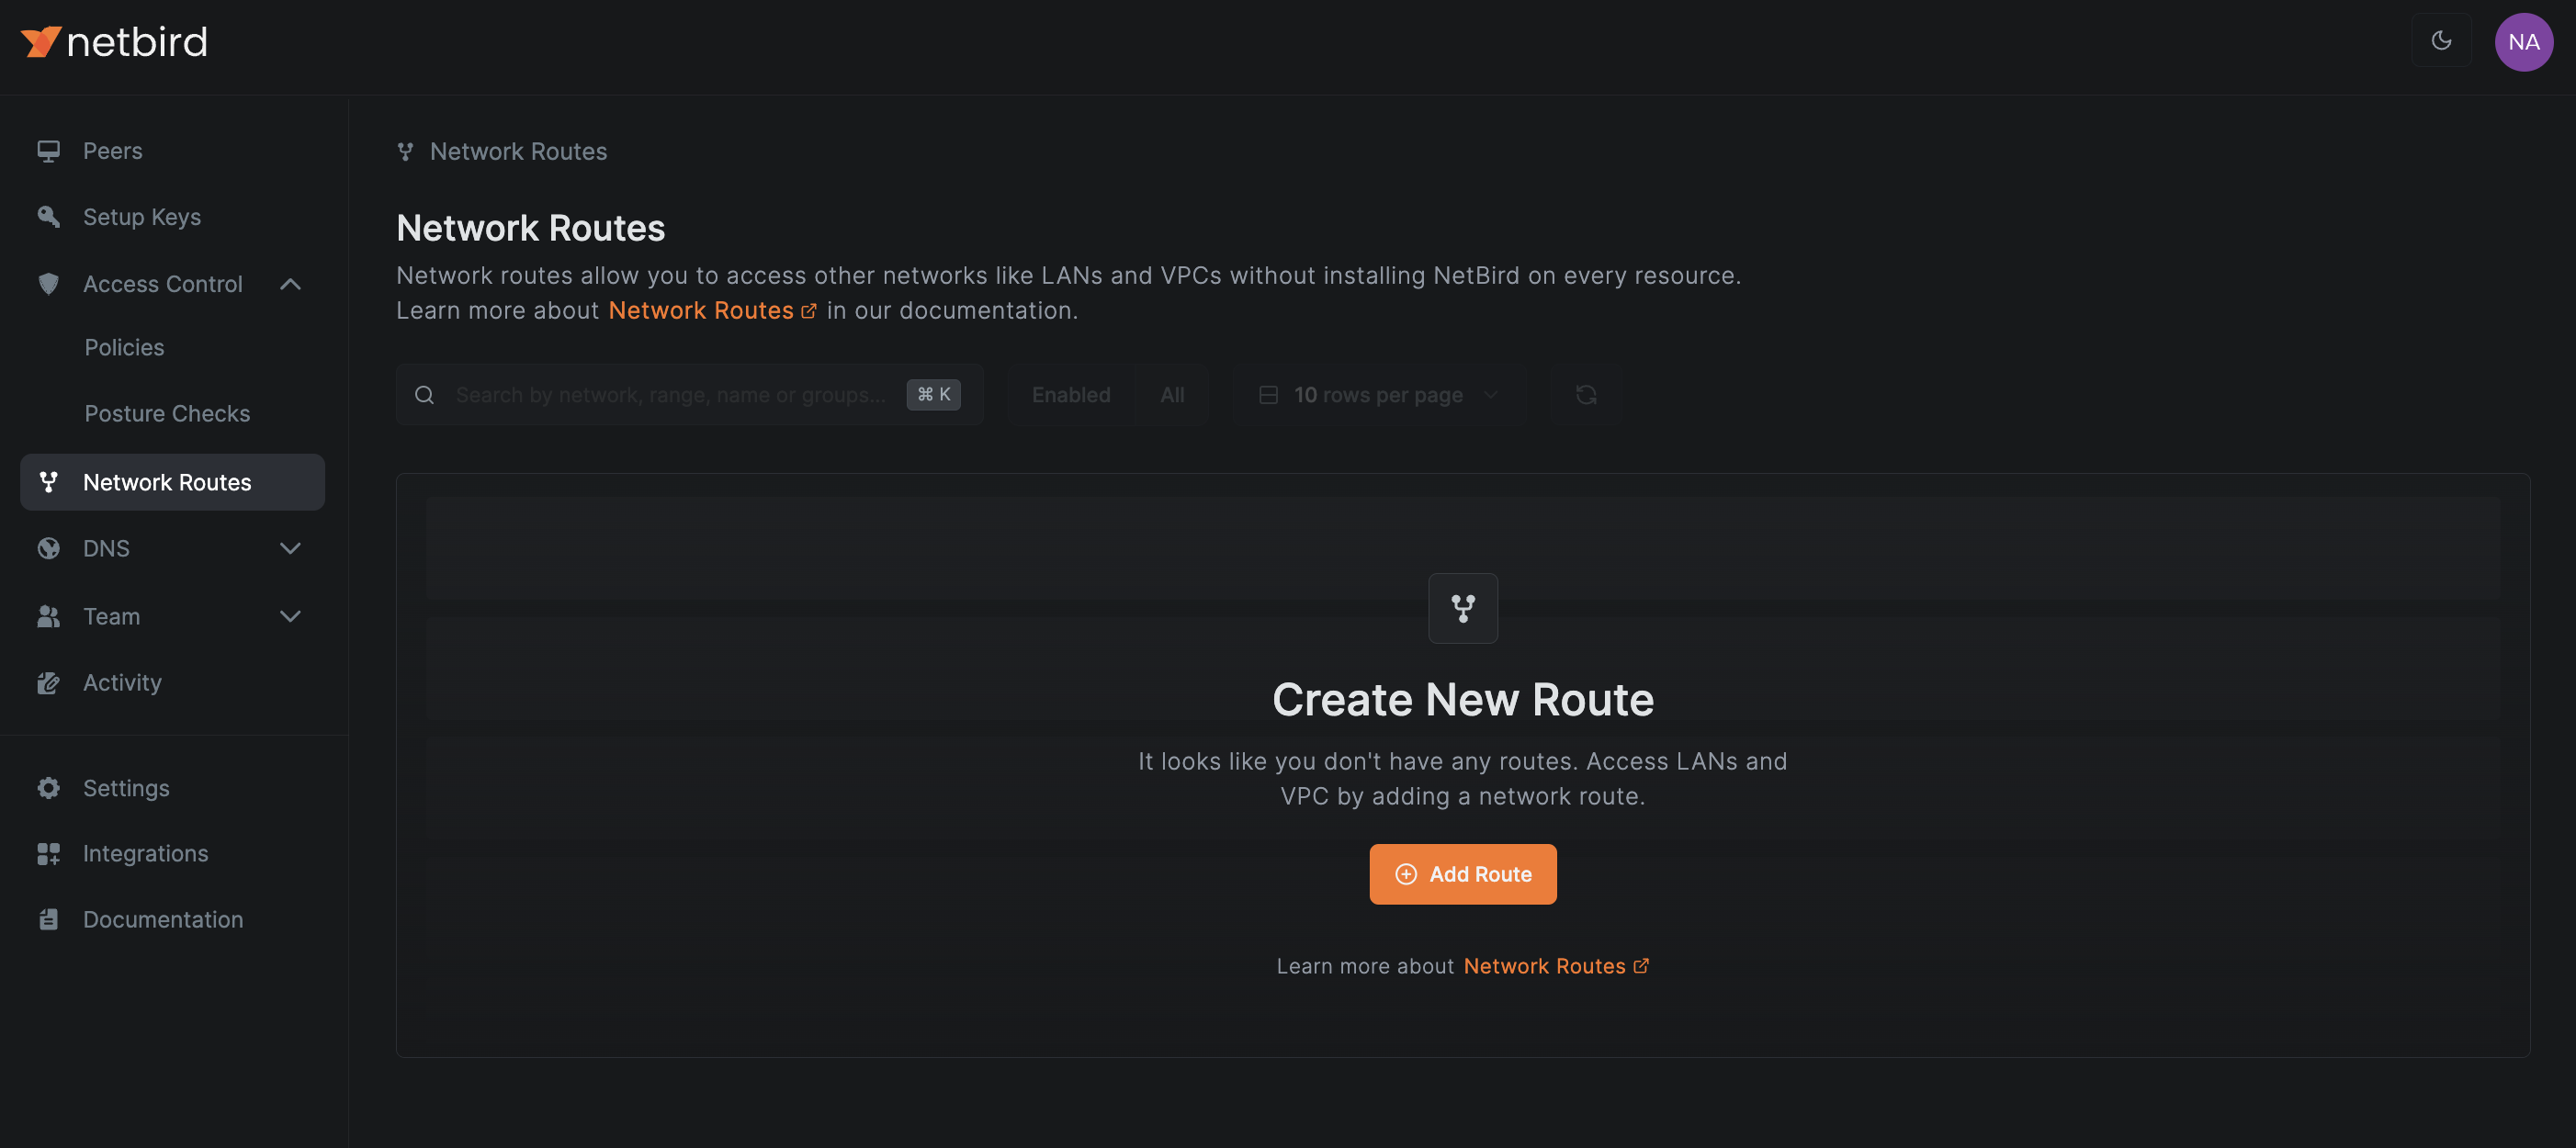
With the peer groups ready, it's time to move to the Network Routes tab, which you can find on the left-hand side of your screen:
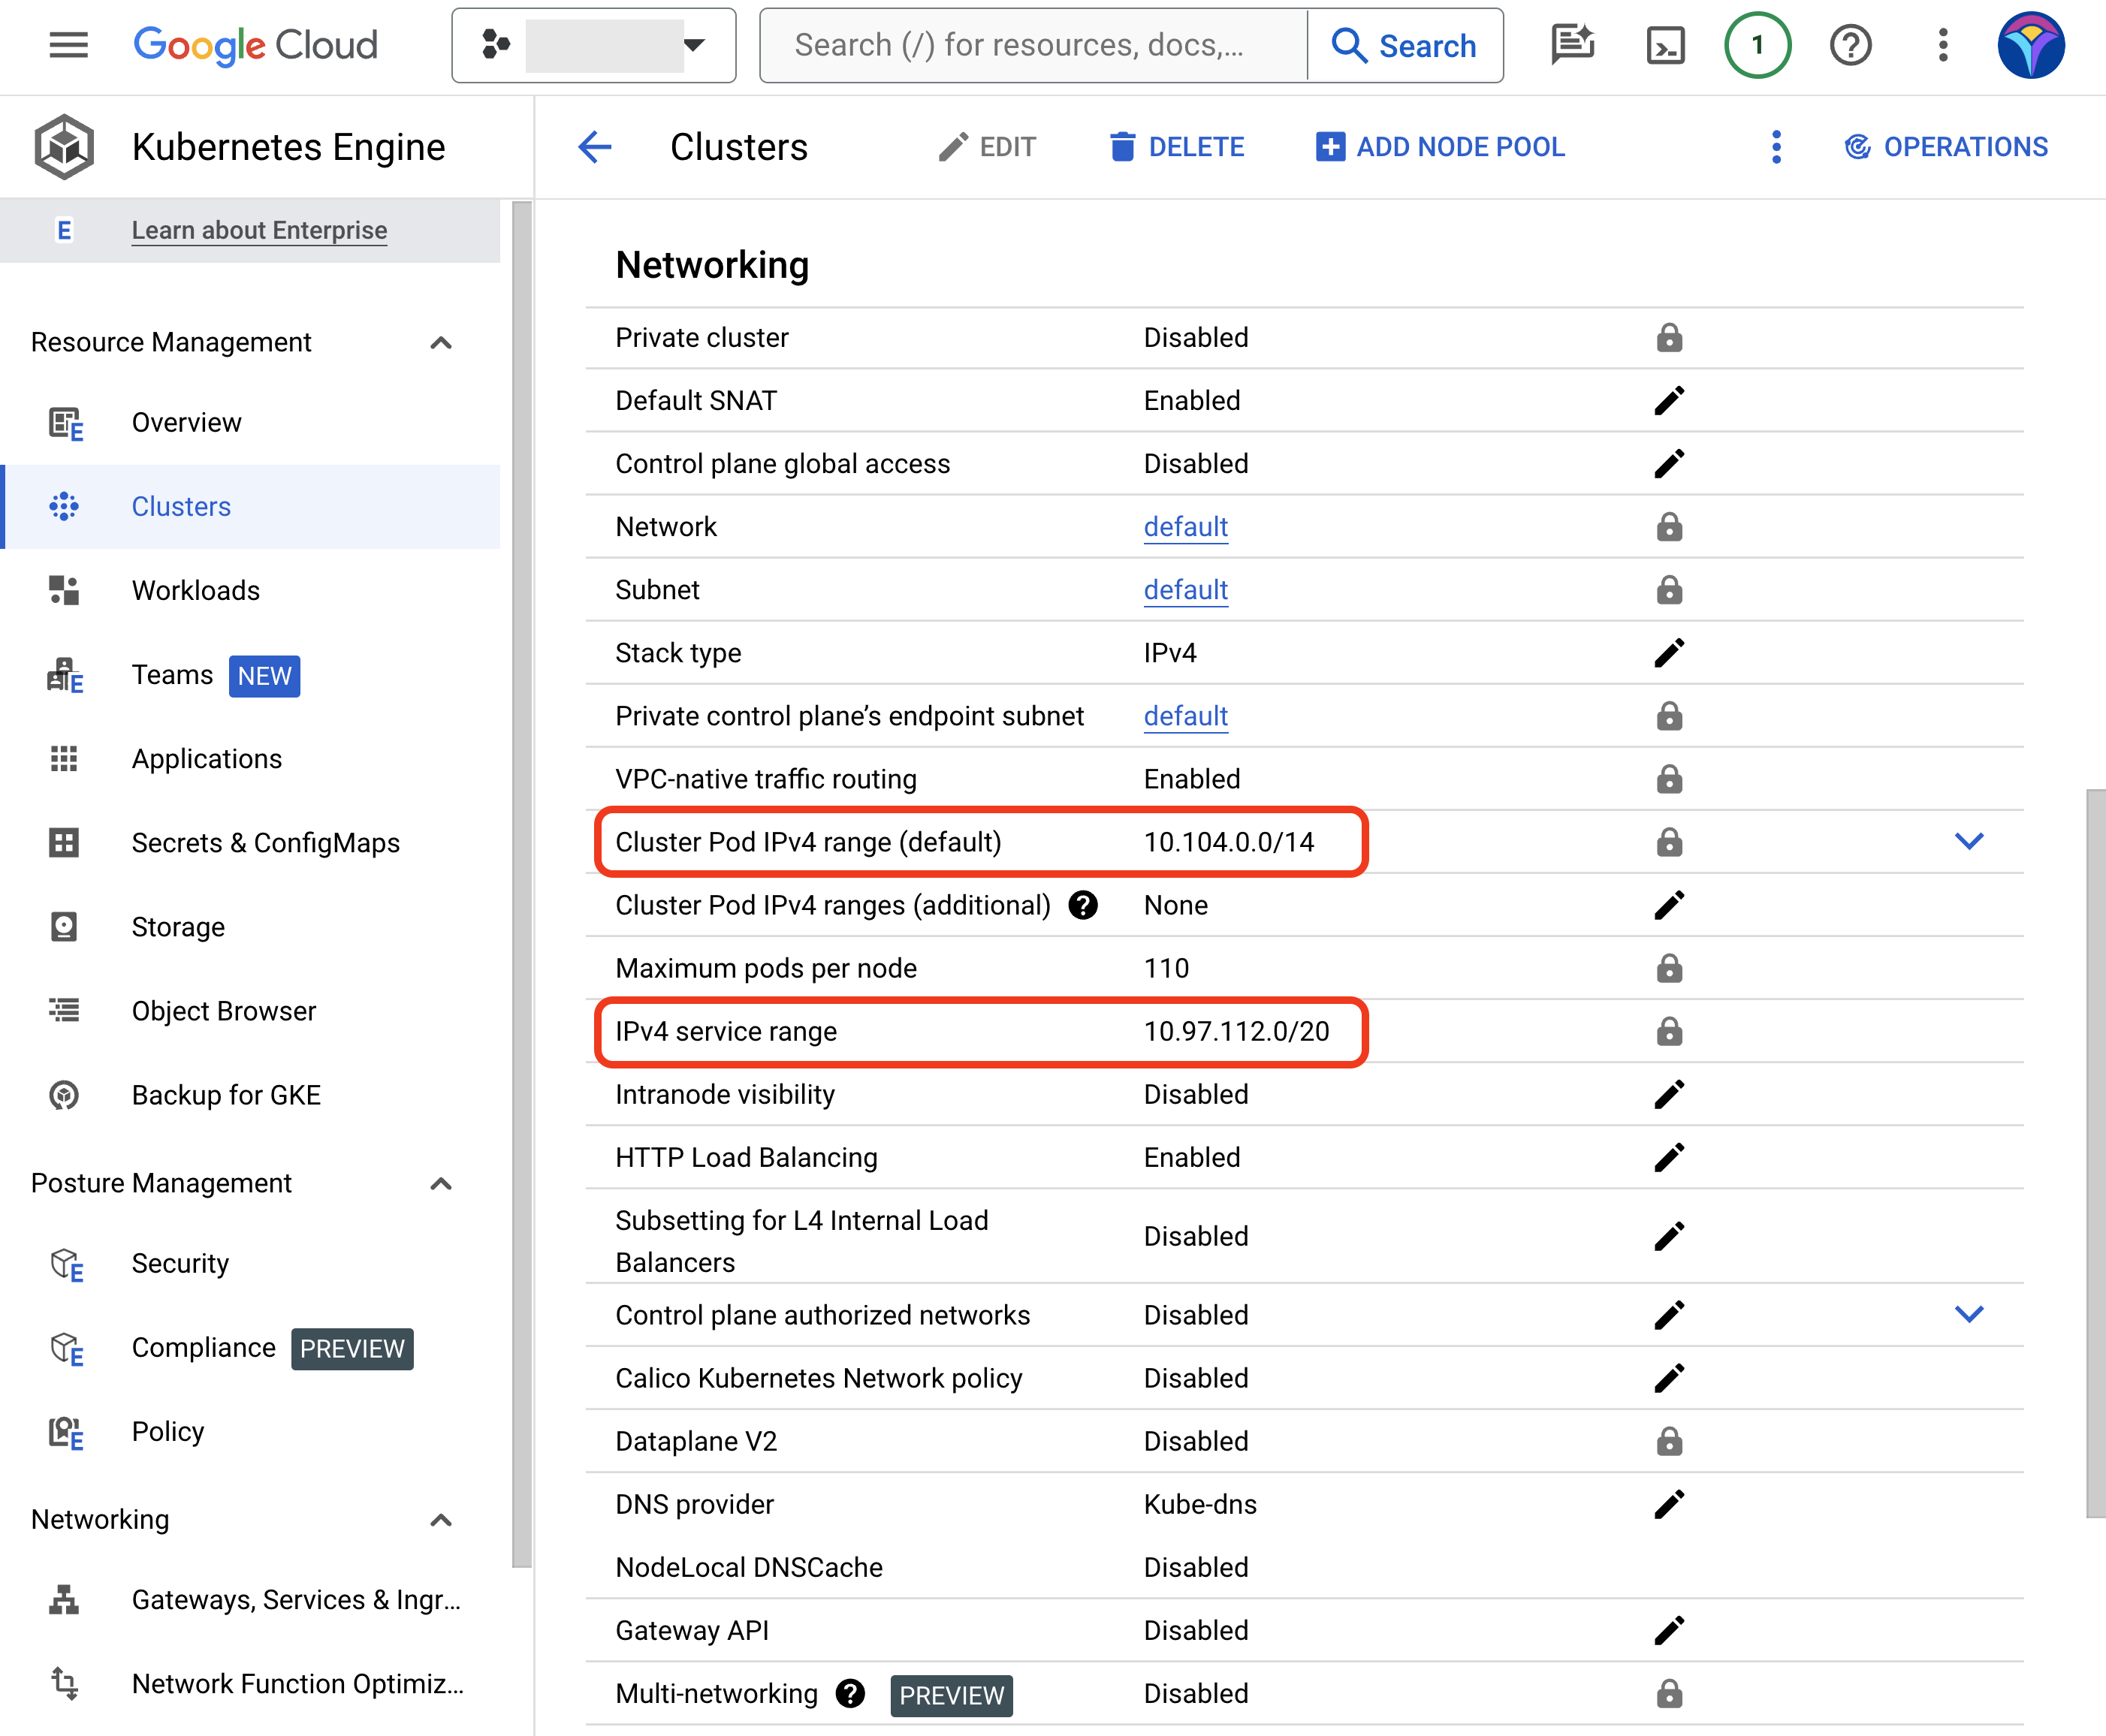
Before setting up your first network route, you need to determine which network you wish to connect with. For instance, if you want to access pods and services in your Kubernetes cluster, you'll need the GKE cluster Pod IPv4 and IPv4 service ranges. To find these, navigate to the Networking section in the Google Cloud console:
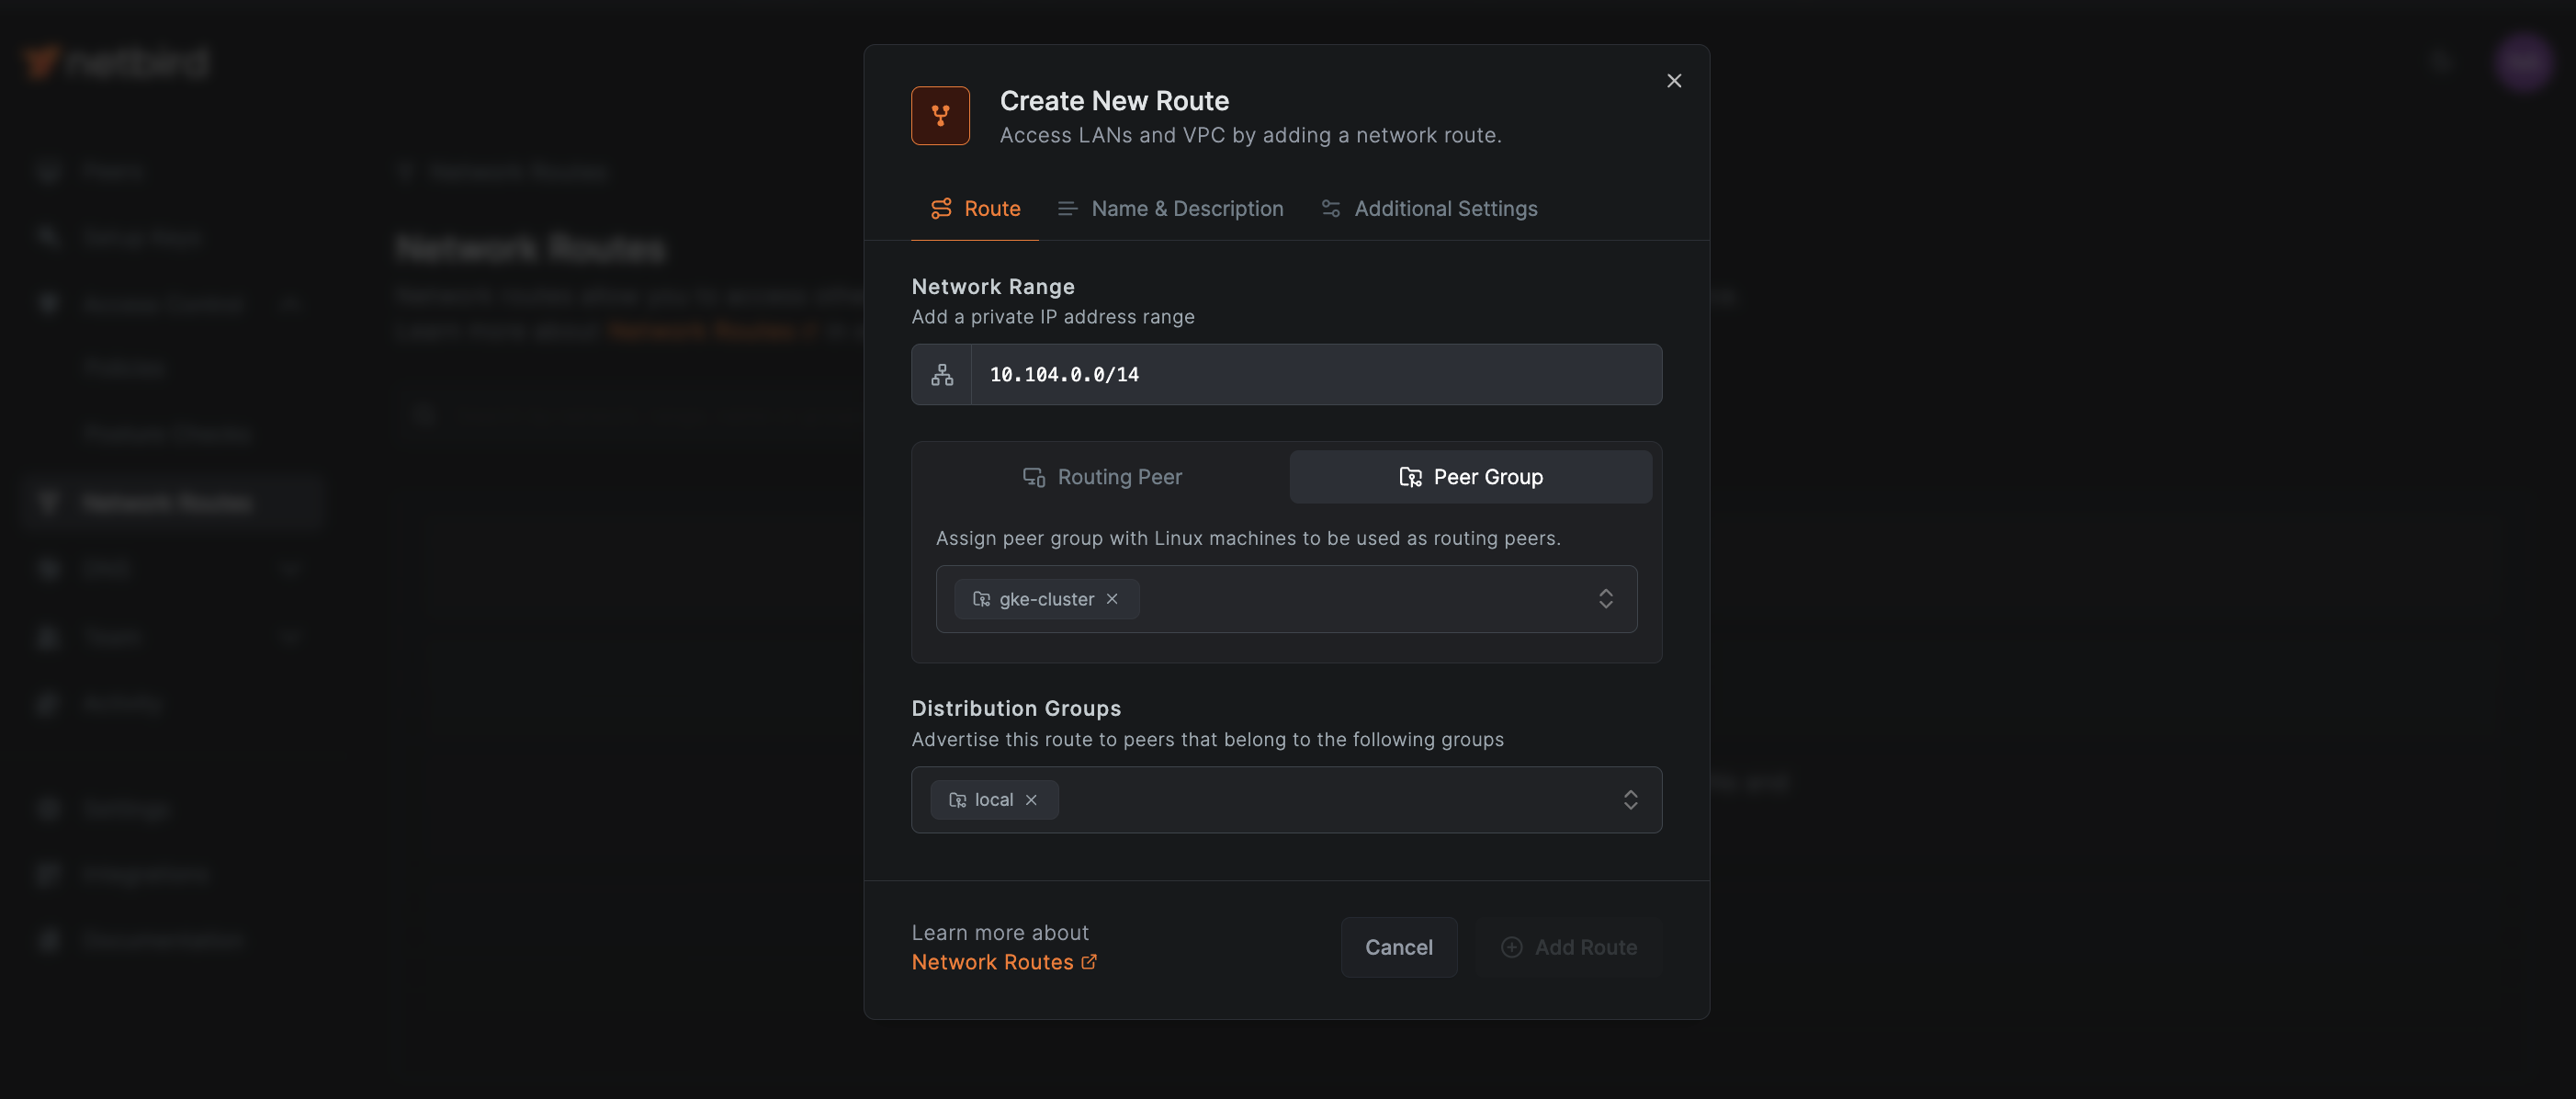
Click on the Add Route button, and a pop-up opens, allowing you to create a new route.
Input the Network Range, then click on Peer Group and choose gke-cluster (or the group you've established for your nodes). Under Distribution Groups, pick the group you just created to make this route known to your local machine:
In the Name & Description tab, provide a name (network identifier) for the route and click Add Route to finalize its creation:

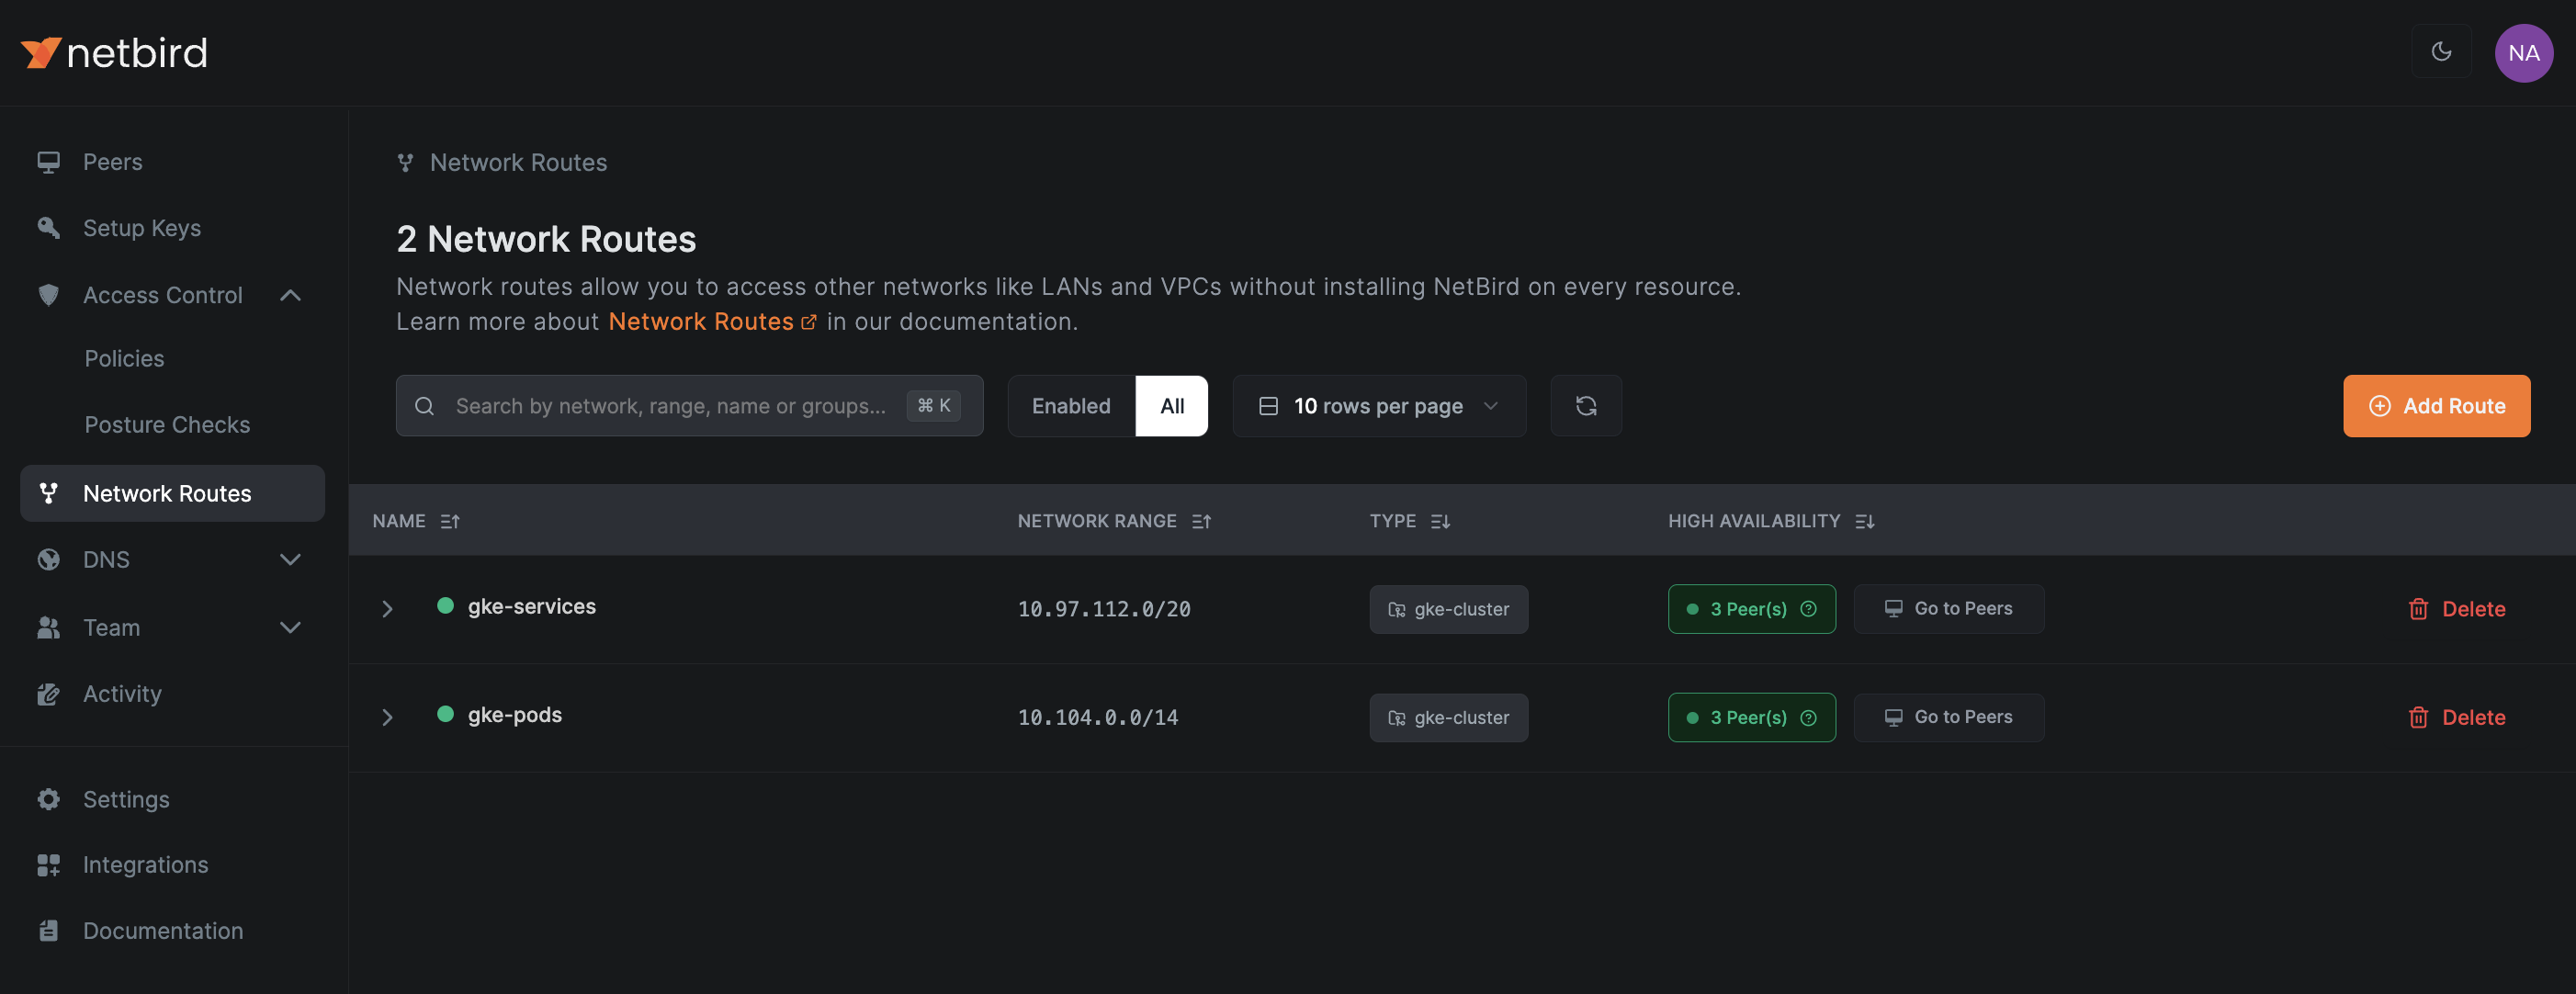
Following is an example of two networks: one for the GKE pods and another for the GKE services. Note that the HIGH AVAILABILITY column shows 3 Peer(s) in green to indicate that it is a highly available route:
While these routes create a link between your local machine and the GKE cluster, you still need one more component to enable communication: an access control policy (ACP).
To create an ACP, go to Access Control > Policies and click on Add Policy. A pop-up appears where you can define a new ACP. Select the group as Source and the group as Destination. This allows bidirectional communication between both peers:
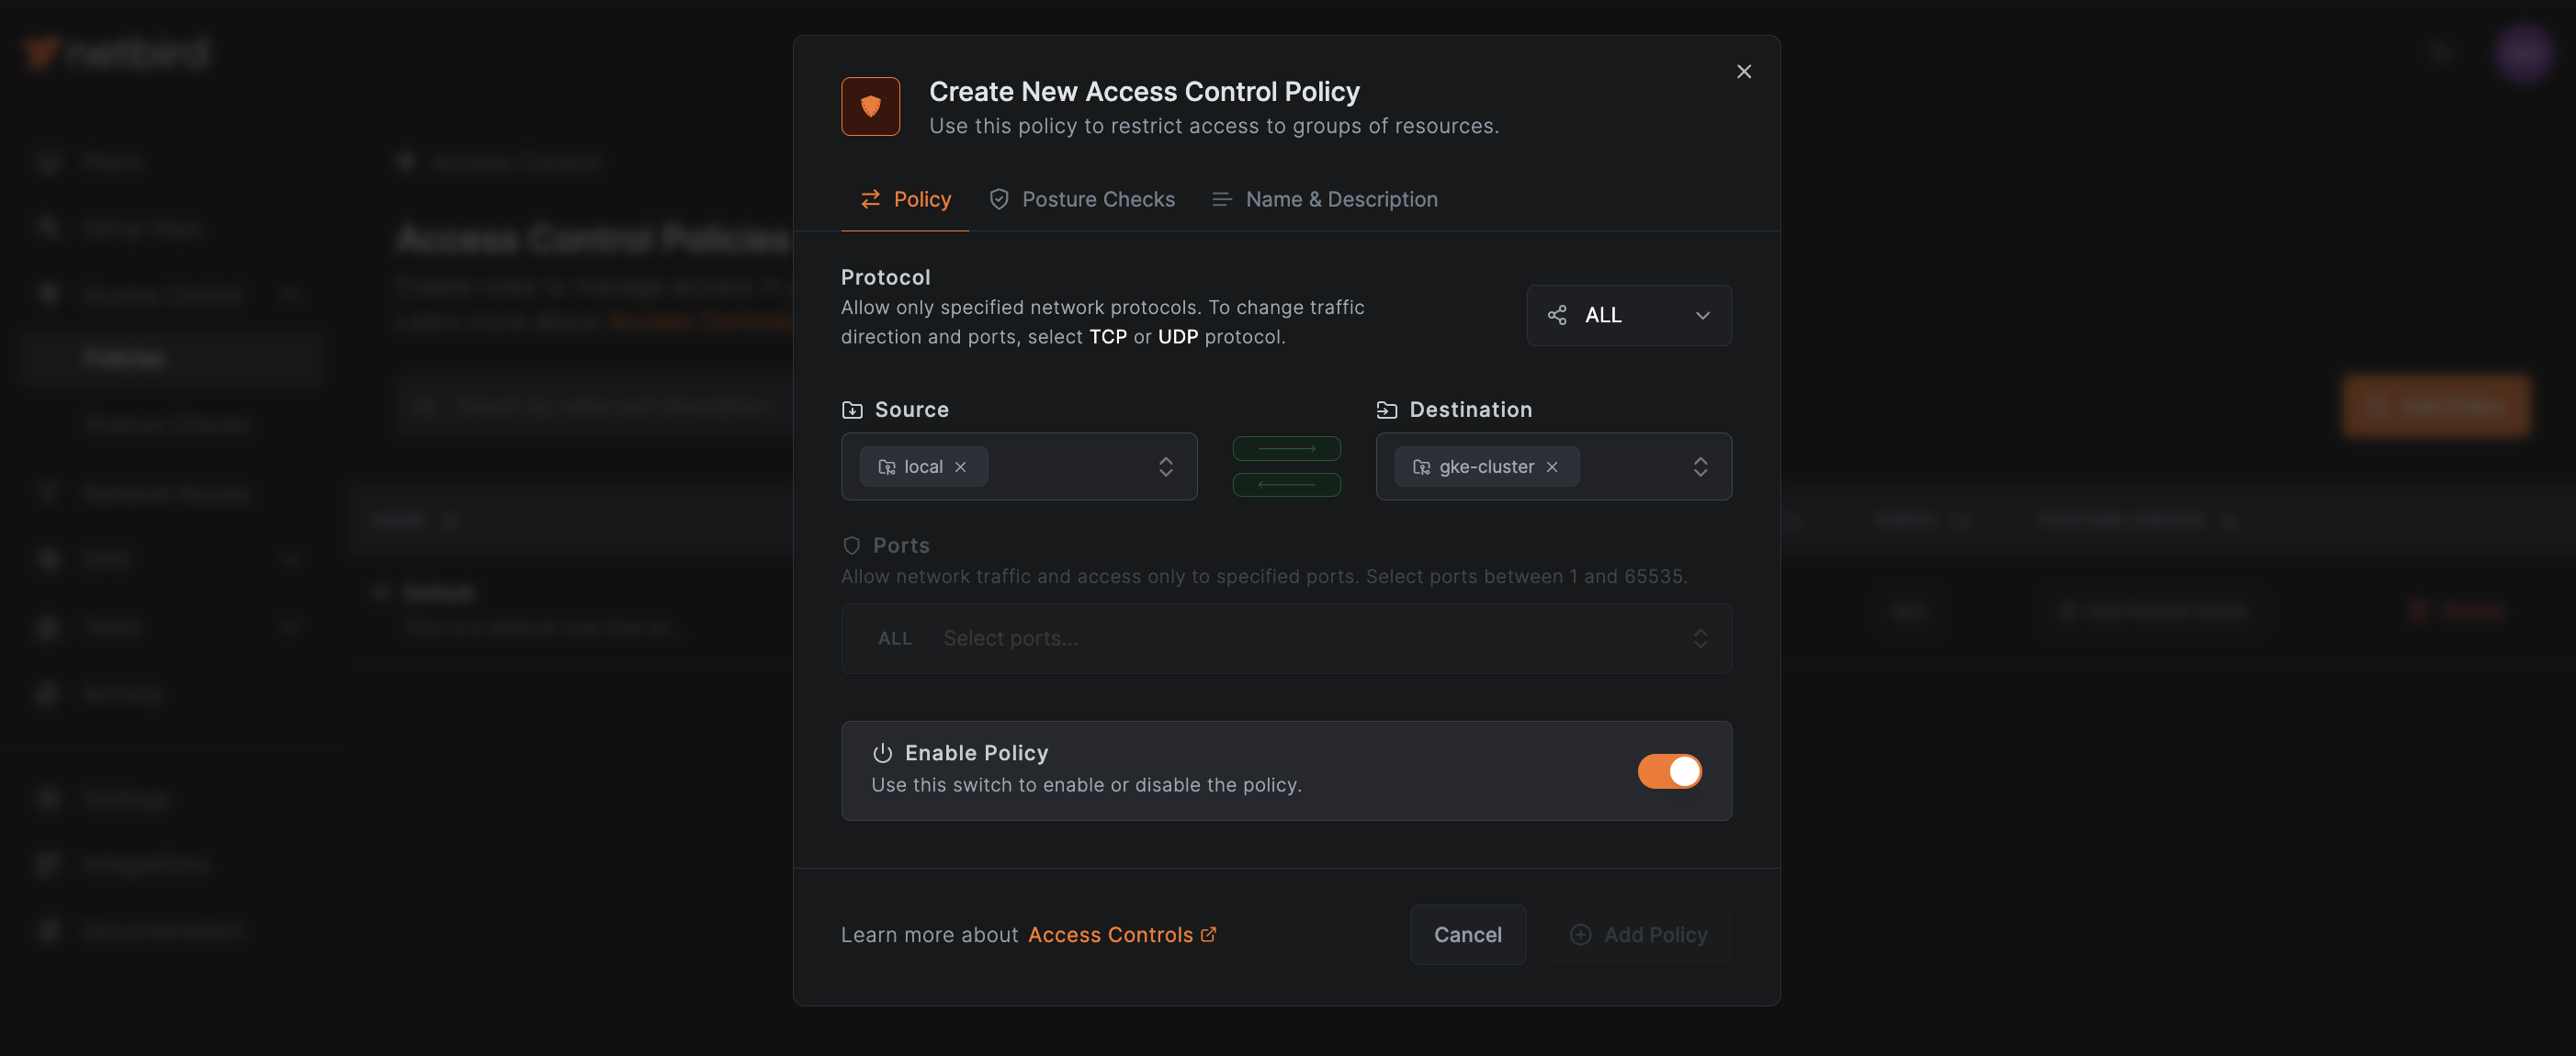
Configuring security posture checks is beyond the scope of this guide, but in a nutshell, the Posture Checks tab lets you enhance access control by blocking peers that fail to meet certain conditions, such as client version, country of origin, and operating system. If you are interested in this and other Zero Trust Security features, check the Open-Source Zero Trust Networking Guide .
To create the new policy, go to the Name & Description tab and enter an appropriate name for the rule (eg Local to GKE):
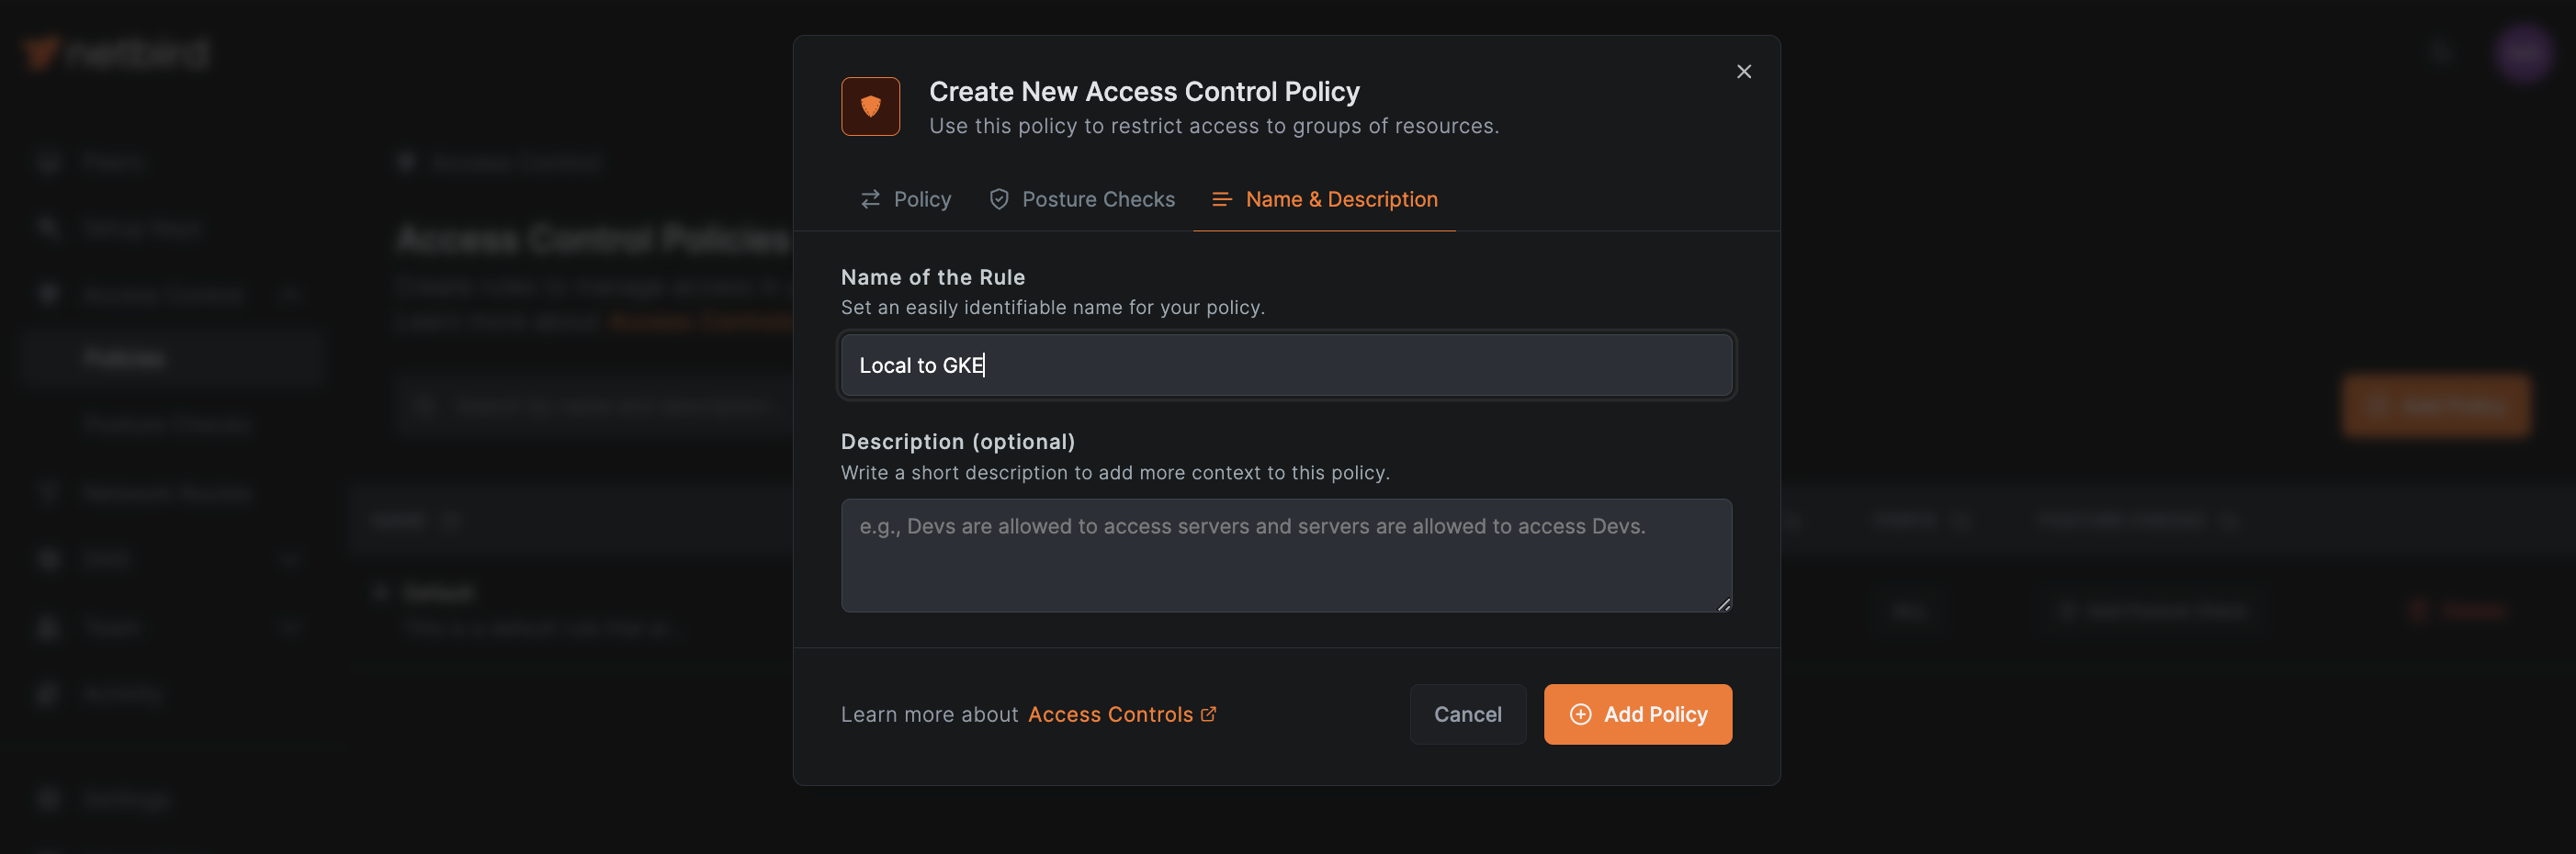
To finish setting up the new ACP, select Add Policy.
The following are two example policies: Local to GKE and the NetBird Default policy. In this example, the default policy has been turned off, so there's only Local to GKE active:
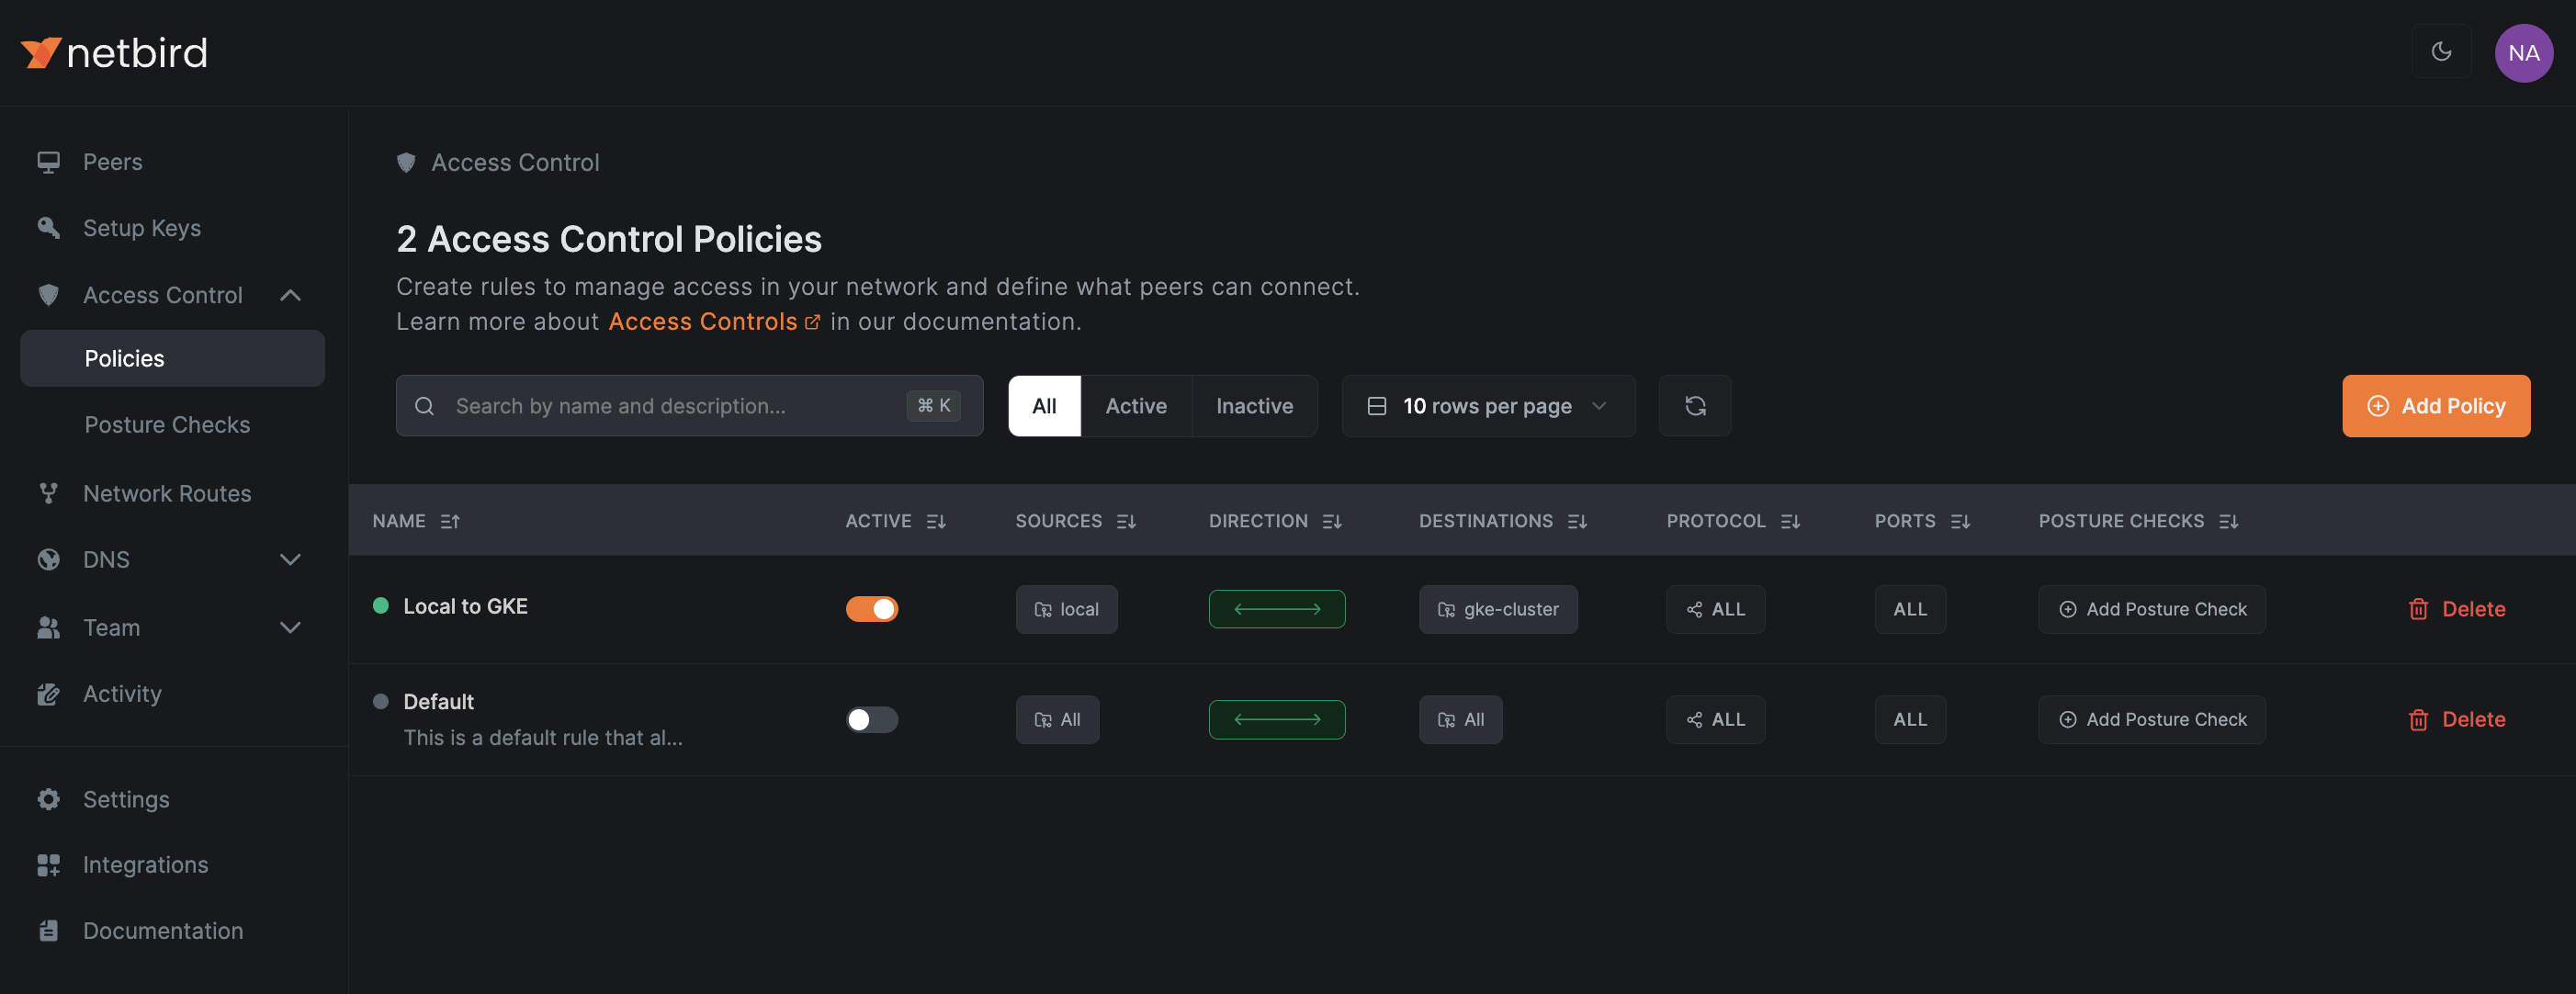
Congratulations! You just configured secure access to Kubernetes using NetBird P2P. To check the connection, navigate to the Peers tab and take note of the IP address or domain assigned by NetBird to any of the nodes.
The following image shows the response when pinging one of the GKE nodes:
In this tutorial, you installed the NetBird CLI, configured a Kubernetes cluster on GCP, integrated a NetBird ephemeral key, created a high-availability route, and set an access control policy for secure local access.
Take your network management to the next level—explore more features and enhance your setup with the NetBird cutting-edge peer-to-peer network .
此内容由惯性聚合(RSS阅读器)自动聚合整理,仅供阅读参考。 原文来自 — 版权归原作者所有。