


I wrote recently that some developers are wary of jumping on the JAMstack bandwagon due to client expectations. When your client wants dynamic form processing, and your site is “static,” what are you going to do?
In this article, we’ll explore two methods to do dynamic form routing based on a user’s answer to a form field.
The simple use case for this code is when clients want to send an email to different places internally depending on the “department” selected by a user.
We’ll explore two different methods for accomplishing this. One with no code beyond HTML and one with a simple serverless function to handle the form processing.
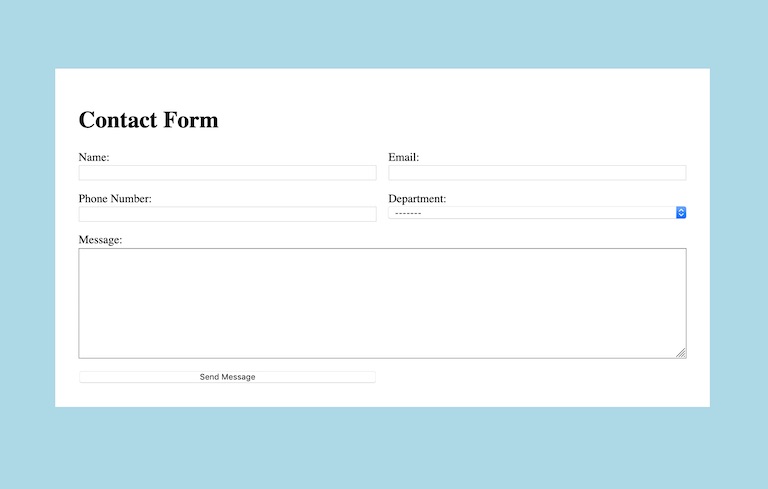
Whether we write our form processing ourselves or outsource it to a third party, we need to structure our form.
For this example, we’ll assume a simple contact form.
<form name="contact-form" action="/thank-you" netlify>
    <label for="name">Name: <input type="text" name="name"></label>
    <label for="email">Email: <input type="email" name="email"></label>
    <label for="phone">Phone Number: <input type="text" name="phone"></label>

    <label for="department">Department:
    <select name="department" id="department">
        <option value="bryan@codecontemporary.com">-------</option>
        <option value="bryan+sales@codecontemporary.com">Sales</option>
        <option value="bryan+speaking@codecontemporary.com">Speaking</option>
        <option value="bryan+careers@codecontemporary.com">Careers</option>
    </select>
    </label>

    <label class="full-width" for="message">Message:
      <textarea name="message" id="message" rows="10"></textarea>
    </label>
    <button type="submit">Send Message</button>
</form>
This form will capture a few pieces of information from the user: name, email, phone number and a message. The form will also have a select field that will allow a user to select a “department” from a dropdown. For ease of processing, we’ll allow the value of each option to be the email address we want to send the email to.
We turn this form into a form that Netlify will recognize by simply adding a netlify attribute to the HTML <form> element.
When Netlify builds our site, it will automatically set up basic form processing for this form. Handy!
If we don’t want to mess with writing our own form handler, we can use a service like Zapier to do it for us. No code necessary.
First thing’s first, if you don’t have a Zapier account, go create one. You can tap into a lot of different services that have APIs using Zapier. It can be handy beyond just this example.
Once you’re logged in, you’ll make your first Zap (the name Zapier gives your mini applications).
Name your Zap and then choose a “trigger.”

A trigger is what will set your application in motion. In this case, we can use the “Netlify” trigger app. There are various triggers in each app. In our case, we’ll use the “New Form Submission” trigger.
On the next screen, you’ll be asked to log in to your Netlify account. Once authenticated, you can choose which of your Netlify sites to use and which of that site’s forms to use.
You’ll be able to select a form submission to base your data on and then move on to building your “action.”
You can choose from thousands of apps to handle the next step (even apps that integrate with CRMs). For our purposes, we’ll use the default “Email” app that Zapier provides.
You’ll choose “Send Outbound Email” as the action and continue.
Here’s where the fun begins. You can specify any data from our form to populate any of the fields in this action.
In the “Subject” field you can put a generic message (or go back and add a Subject field to your form and populate that).
In the “Body” field, I use the “Summary” field that Netlify provides. I like this option because it includes both the name and the message in the field. You can build your own custom HTML to populate this field and include any data your client needs.
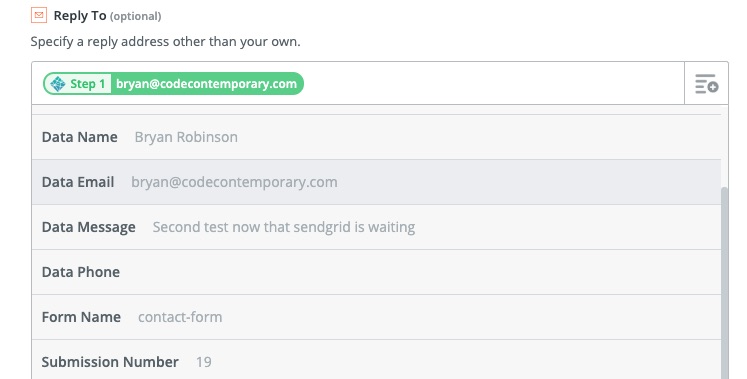
For the “Reply To” field, I’ll use the “Data Email” field sent from Netlify.
Finally, for our “To” field, I’ll use the data provided by the “Data Department” sent from Netlify (the value of our “Department” field).
With all this in place and saved, Zapier will send an email to the department email address any time that contact form is submitted.
One interesting thing to note: when you make this connection, Zapier and Netlify are setting up a webhook behind the scenes. The webhook lives in your Netlify admin panel in your form settings. Whenever your form gets a submission, Netlify will fire an “Outgoing Webhook” that hits the Zapier API for you.
We’ll do something similar in the next section, but for our own API endpoint!
If you like writing code and want to have full control over what happens in your application, you can create your own form processor.
We’ll use Netlify Functions to create a Lambda function that will do our emails for us.
To send the emails, we’ll need some form of Node.js email API. For this example, we’ll use Twilio’s SendGrid product. The API is easy to understand and there are loads of examples out there. Bonus: For low-level usage, it’s free.
Aside: Chris Coyier recently wrote an article on CSS Tricks about sending emails from serverless functions. In it, he uses SparkPost which looks pretty handy as well.
First, we have to configure our project to use Netlify Functions. The easiest way to do this is to set up the project using the Netlify Dev CLI.
Run the following and it will set things up for you:
netlify functions:create --name contact-route
From there, you can choose the “Hello World” examples and replace the basic example with our new handler.
We’ll continue to use Netlify’s basic form functionality. I find the functionality I get out of the box with their forms to be worth it. I’ll take spam protection with no code, thank you very much!
First, set up an account with SendGrid. From there, you’ll need an API key for your application. It’s best to store this in your Netlify environment variables. Netlify’s Dev CLI will sync your environment variables from your account to your local version.
Next, we’ll need to grab the Node SendGrid package.
bashnpm install --save @sendgrid/mail
In our contact-route.js function, we’ll need to include the SendGrid package and initialize the script with our API key.
const sgMail = require('@sendgrid/mail');
sgMail.setApiKey(process.env.SENDGRID_API_KEY);
Inside our handler function, we’ll want to parse the form data in a way that will make sense for SendGrid to use.
Netlify’s form webhook will send us the data as the event’s body. We’ll need to turn that data into JSON.
let formData = JSON.parse(event.body).data;
Next, we’ll want to format an HTML string that SendGrid will use as the body of our email. We can do a lot of nice formatting here with some simple HTML and JS template literals.
let html = `<h1>Form submission from ${formData.name}</h1>
               <p><strong>Email Address:</strong> ${formData.email}</p>
               <p><strong>Phone Number:</strong> ${formData.phone ? formData.phone : 'Not Submitted'}</p>
               <p><strong>Message:</strong> ${formData.message}</p>`;
Finally, we build the options for SendGrid and then invoke SendGrid’s send() method with the options.
const msg = {
       to: formData.department,
       from: formData.email,
       subject: 'Contact Form Submission',
       text: formData.message,
       html: html,
     };

     sgMail.send(msg);
The final function is only 20 lines long.
'use strict';
const sgMail = require('@sendgrid/mail');
sgMail.setApiKey(process.env.SENDGRID_API_KEY);

export function handler(event, context, callback) {
let formData = JSON.parse(event.body).data;

let html = `<h1>Form submission from ${formData.name}</h1>
               <p><strong>Email Address:</strong> ${formData.email}</p>
               <p><strong>Phone Number:</strong> ${formData.phone ? formData.phone : 'Not Submitted'}</p>
               <p><strong>Message:</strong> ${formData.message}</p>`;

const msg = {
       to: formData.department,
       from: formData.email,
       subject: 'Contact Form Submission',
       text: formData.message,
       html: html,
     };
     sgMail.send(msg);
}
In our Zapier example, our third-party application set up our webhook for us. In our custom example, we’ll need to go into our Netlify admin and add an outgoing webhook to the form.
The settings for this exist in Settings > Forms > Notifications. You can choose “Outgoing Webhook.” The URL to notify will be the final URL for your serverless function and the form will be the form name for this specific form.
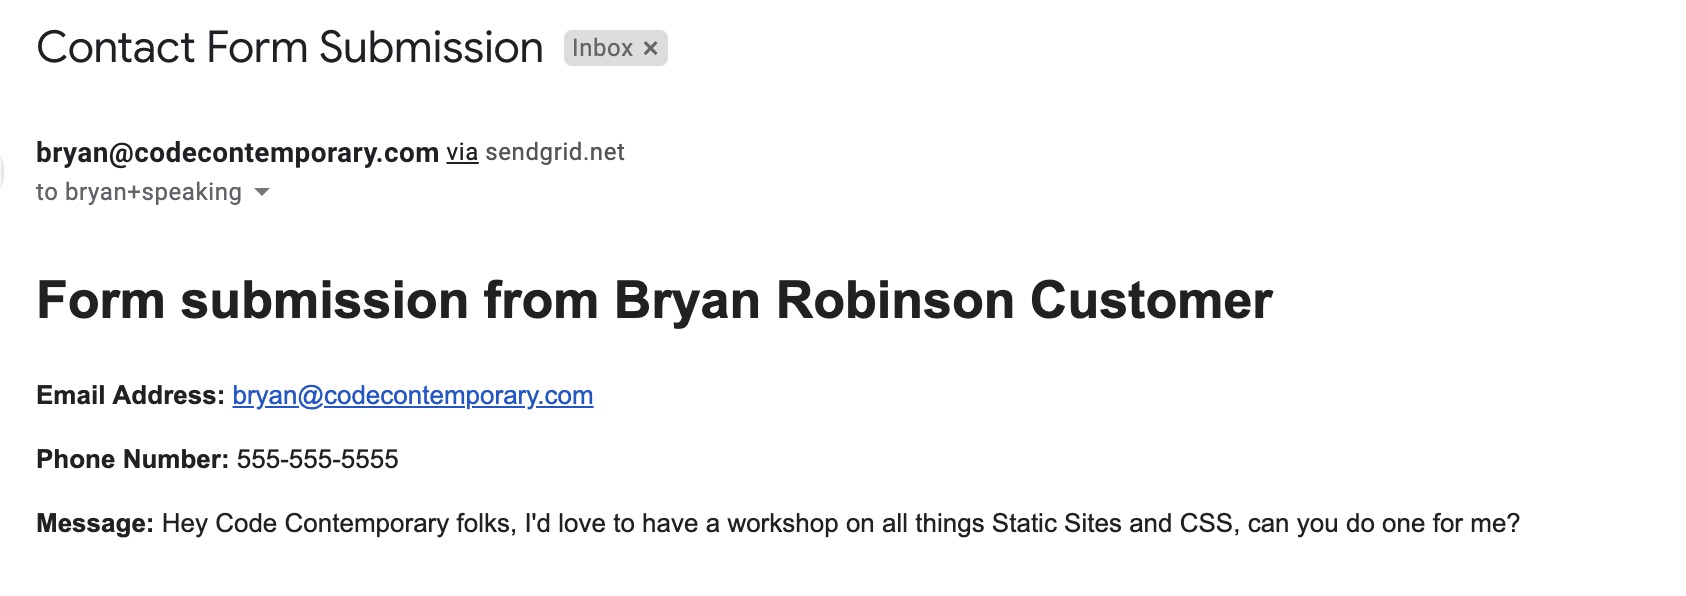
Finally, the emails are sending and finding their way to our inboxes. Here’s what the SendGrid example looks like. The formatted HTML makes a big difference!
As it turns out, we can do almost anything a client could ask for with the JAMstack.
Both of these examples take less than two hours to build out and can be extended to do even more amazing things. Don’t be fooled into thinking that static sites can’t be powerful.
I hope that people use these technologies more and more in client work. I find that it makes projects much easier to come back to, since they’re all written in HTML, CSS and JS.
What could you do with a combination of Netlify and Zapier or SendGrid?
此内容由惯性聚合(RSS阅读器)自动聚合整理,仅供阅读参考。 原文来自 — 版权归原作者所有。