


Written by
Contributor
Opinions expressed by Twilio contributors are their own
This post is part of Twilio’s archive and may contain outdated information. We’re always building something new, so be sure to check out our latest posts for the most up-to-date insights.
At my previous company, I was chatting with a coworker about getting more into open source. I told him I wanted to release an open source npm package. He suggested I try it with a custom React hook/effect I had written the month prior. It had the purpose of closing a dropdown menu or container when you clicked outside of it.
Together, we ambitiously tackled the goal and released a package called react-use-click-away 🎉 It isn’t a perfect package but it gave us that experience we were longing for.
While figuring out how to do all this, I realized it felt more intimidating than it should have. To solve that, I’m going to show you all the things you need to know in order to release your own custom React component, hook or effect as an npm package 😎 Let’s do it!

Before we jump in, there are a few things I want to make sure we define. Some things on which you might need a refresher:
> Conceptually, components are like JavaScript functions. They accept arbitrary inputs (called “props”) and return React elements describing what should appear on the screen. - Official React docs
> Hooks are functions that let you “hook into” React state and lifecycle features from function components. - Official React docs
> The Effect Hook, useEffect, adds the ability to perform side effects from a function component. - Official React docs
Now that all the bases are covered, let’s move forward assuming you have basic React experience and experience with Hooks. - Intro to React Hooks Tutorial
As with any coding tutorial, we must make sure your machine has what it needs to accomplish the task. You should have the following installed on your computer or laptop:
Once you have all of that, you are ready to go!

create-react-hook is a “CLI for easily creating reusable react hooks..” This came as a recommendation from Dominik Kundel who has spent a lot of time releasing npm packages. It’s been great so far and will make this process much easier.
Open up your command line application and find a good place where you want to keep this project. For me, I have a directory called dev where I keep all my projects. Once you’re there, let’s use npx to use this package:
(npx comes with npm 5.2+ and higher)
Once we’ve executed this command and run it locally, it will walk us through an interactive command prompt asking some questions about our package:
Package Name
We’re going to make this a “scoped package” so that we don’t have to worry about name conflicts. Go ahead and use the following: “@NPM-REGISTRY-USERNAME/react-use-the-things”
Replace “NPM-REGISTRY-USERNAME” with the username associated with your npmjs account so for me, that looks like @jsjoeio/react-use-the-things.
Package Description
You can put whatever you want here but I’m going to put “a package that gives you custom react things”
Author’s GitHub Handle
It should automatically grab this from the package name and show it in parentheses. If it does, you can hit return. If not, type in your GitHub handle without the “@” symbol.
GitHub Repo Path
We’re going to change the default option and write “GITHUB-USERNAME/react-use-the-things” so for mine, I’ll write “jsjoeio/react-use-the-things” and press return.
License
For now, we’ll go with the default MIT license but you can always change this later.
Package Manager
Since we didn’t ask you to install yarn earlier, we’re going to select “npm” using the up arrow key and pressing return.
Template
This CLI supports TypeScript, but we’ll stick with the regular JavaScript for now so make sure that default is selected and press return.
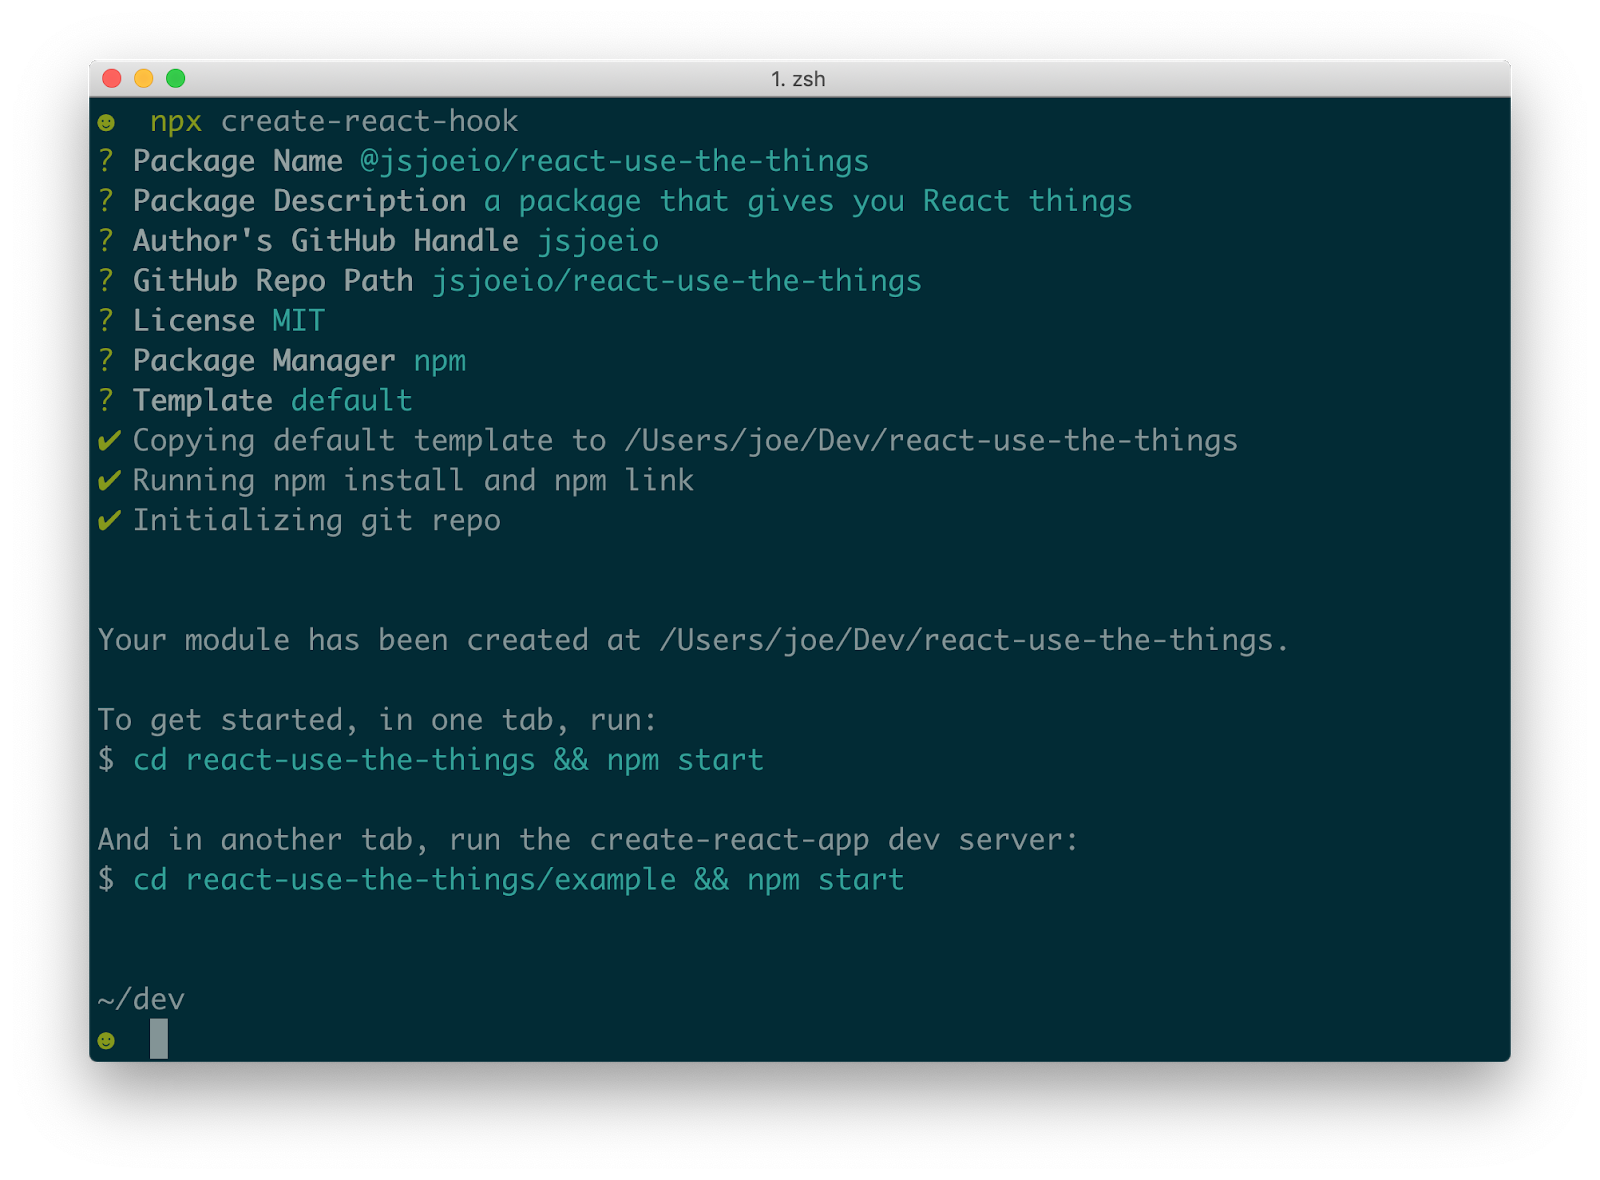
Now that we’ve configured all our options, the create-react-hook will set everything up for us and then we’ll be able to start writing some code soon.
Before we continue, head to GitHub to create a new repository and call it react-use-the-things.
Then, on your machine, cd into the project folder and paste the command from GitHub for pushing an existing repository from the command line:
cd react-use-the-things
git remote add origin https://github.com/jsjoeio/react-use-the-things.git
git push -u origin masterNow that we have our boilerplate set up and ready to go, let’s look at a brief overview of what it gave us:
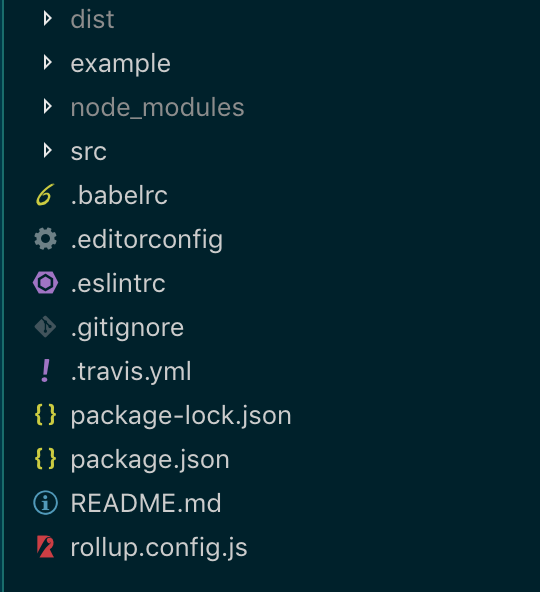
Walking through each directory, here’s what we’re working with:
dist
This is our “distribution” directory - the one that we’re use when distributing our code to the open source community when they download our package. You’ll see various files in there, each of which target different module formats. Typically, you don’t publish this to GitHub because it’s usually generated as a result of the build step.
example
The author of this CLI tool included this directory which is a simple create-react-app project where we can test our project locally.
src
This is where we’ll be spending the majority of our time. We’ll be writing all our custom React code here.
Files in root
You’ll see some other files, some of which might be familiar like .eslintrc and others, which might look new like rollup.config.js. The gist is that our package will use Rollup for bundling
And Babel for transpiling. You can read more about the details of the CLI in the repo.
The first custom React code we’re going to write is our React component. Navigate to the src directory and create a file called TwilioLogo.js. This will be a functional component that shows the Twilio logo.
Inside the file, add the following code:
import React from 'react'

export const TwilioLogo = ({ height = '120px' , width = '260px' }) => (
  <div>
    <img
      style={{ height, width }}
      src='https://www.twilio.com/marketing/bundles/company/img/logos/red/twilio-logo-red.png'
      alt='Twilio logo in red.'
    />
  </div>
)
In order for our package to include this, we need to update the index.js file in the src directory.
import { TwilioLogo } from './TwilioLogo'

export { TwilioLogo }
Lucky for us, this package has already set up npm/yarn link so add we need to do is test it out.
In the example directory, open up the src/App.js file and replace it with this:
import React from 'react'

import { TwilioLogo }  from '@NPM-REGISTRY-USERNAME/react-use-the-things'

const App = () => {
  return (
    <div>
      <TwilioLogo
        height='240px'
        width='520px'
        customStyles={{ border: '1px solid black' }}
      />
    </div>
  )
}

export default App
In your browser, navigate to http://localhost:3000 and you should see something like this:
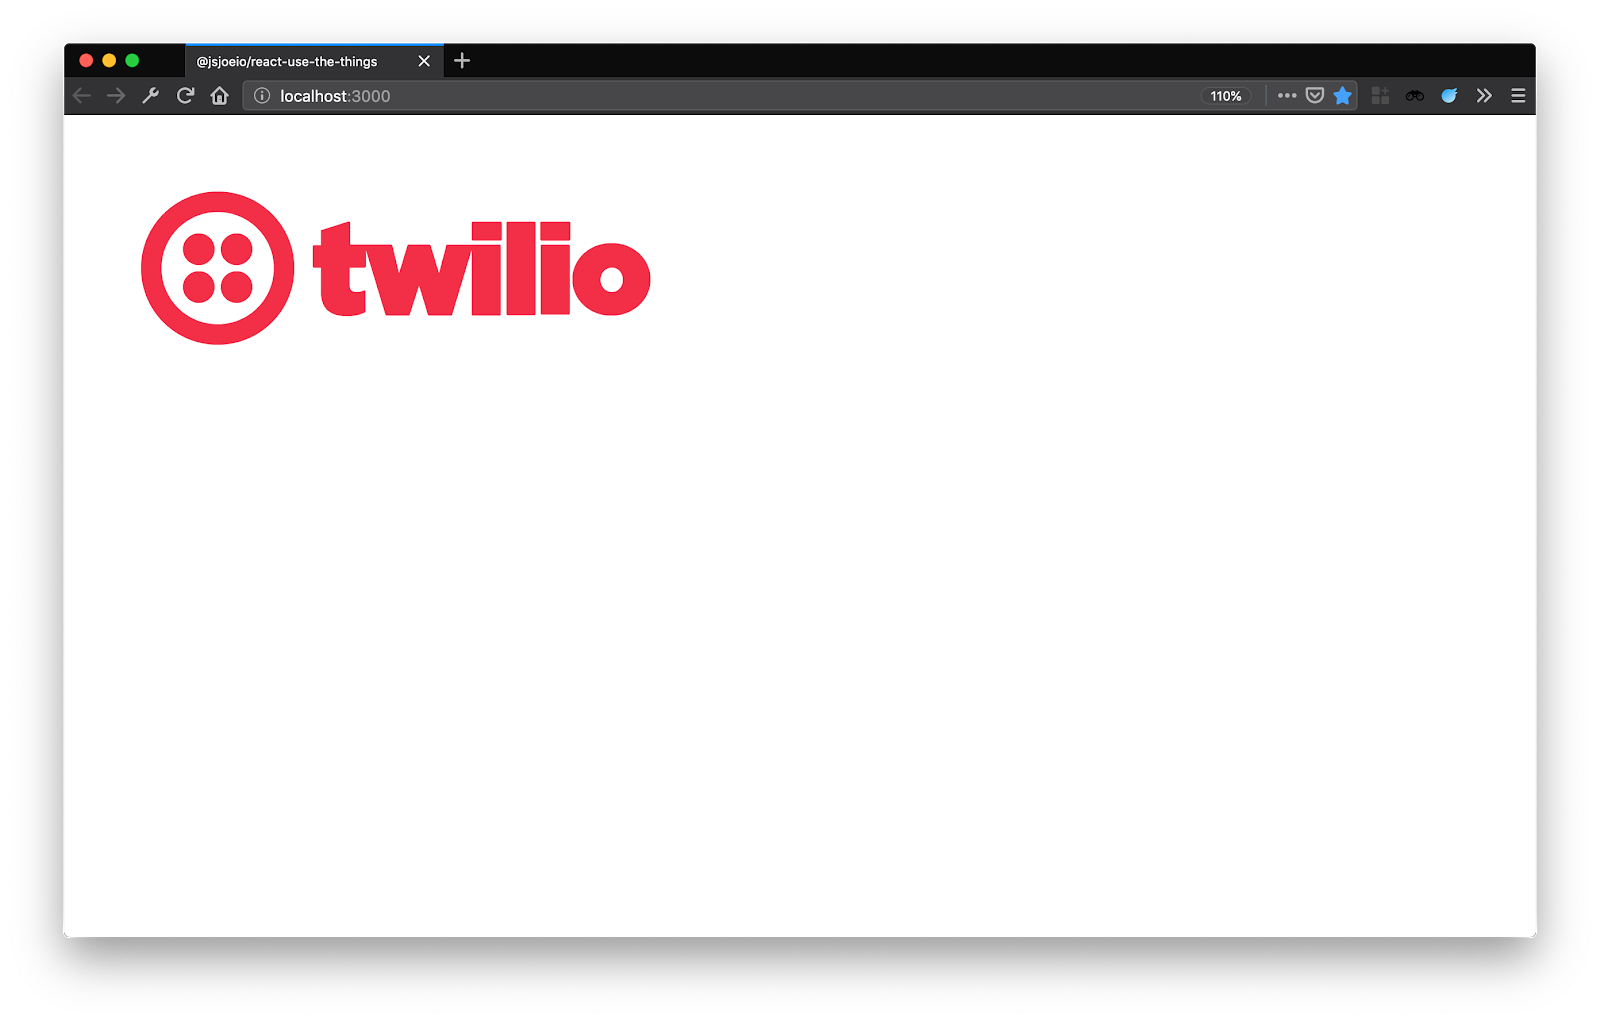
Nicely done! We’ve created our first custom React component. 🕺🏼 Pat yourself on the back, dance a little maybe, take a quick break and then come back for the second piece 😎
To keep things simple, we’re going to write a very rewrite the counter example in the Introducing Hooks section of the React docs and make a custom useCounter hook. Create a new file called useCounter.js in the src directory and paste the following code:
import { useState } from 'react'

export function useCounter (initialCount) {
  return useState(initialCount)
}
Next, go to the src/index.js file and add our useCounter hook:
import { TwilioLogo } from './TwilioLogo'
import { useCounter } from './useCounter'

export { useCounter, TwilioLogo }
Head back to our /example directory and update App.js:
import React from 'react'

import { TwilioLogo, useCounter } from '@NPM-REGISTRY-USERNAME/react-use-the-things'

const App = () => {
  const [count, setCount] = useCounter(4)
  return (
    <div>
      <TwilioLogo
        height='240px'
        width='520px'
        customStyles={{ border: '1px solid black' }}
      />
      <p>Currently, the count is: {count}</p>
      <button onClick={() => setCount(count + 1)}>Add 1</button>
      <button onClick={() => setCount(count - 1)}>Subtract 1</button>
    </div>
  )
}

export default App
If we rerun npm start from the /example directory, we’ll see we our useCounter in action!
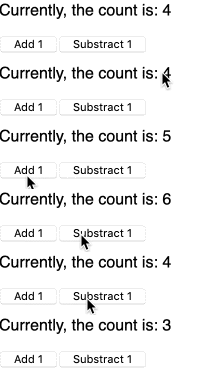
⅔ done so far - woot woot! 🙌 Onto the last part.
Similar to the previous steps, let’s write a custom React effect borrowing the example from the React docs. Create a new file in the src directory called useDocumentTitle.js and add the following code:
import { useEffect } from 'react'

export function useDocumentTitle (count) {
  useEffect(() => {
    // Check that the window and document are defined
    if (typeof window !== 'undefined' && document) {
    // Update the document title using the browser API
      document.title = `You clicked ${count} times`;
    }
  })
}
Update the index.js file to export our new useDocumentTitle:
import { TwilioLogo } from './TwilioLogo'
import { useCounter } from './useCounter'
import { useDocumentTitle } from './useDocumentTitle'

export { useCounter, TwilioLogo, useDocumentTitle }
Inside /example/App.js, let’s update our code to match this:
import React from 'react'

import { TwilioLogo, useCounter, useDocumentTitle } from '@jsjoeio/react-use-the-things'

const App = () => {
  const [count, setCount] = useCounter(4)
  useDocumentTitle(count)
  return (
    <div>
      <TwilioLogo
        height='240px'
        width='520px'
        customStyles={{ border: '1px solid black' }}
      />
      <p>Currently, the count is: {count}</p>
      <button onClick={() => setCount(count + 1)}>Add 1</button>
      <button onClick={() => setCount(count - 1)}>Subtract 1</button>
    </div>
  )
}

export default App
And if we run npm start again for our example, we’ll see useDocumentTitle in action:
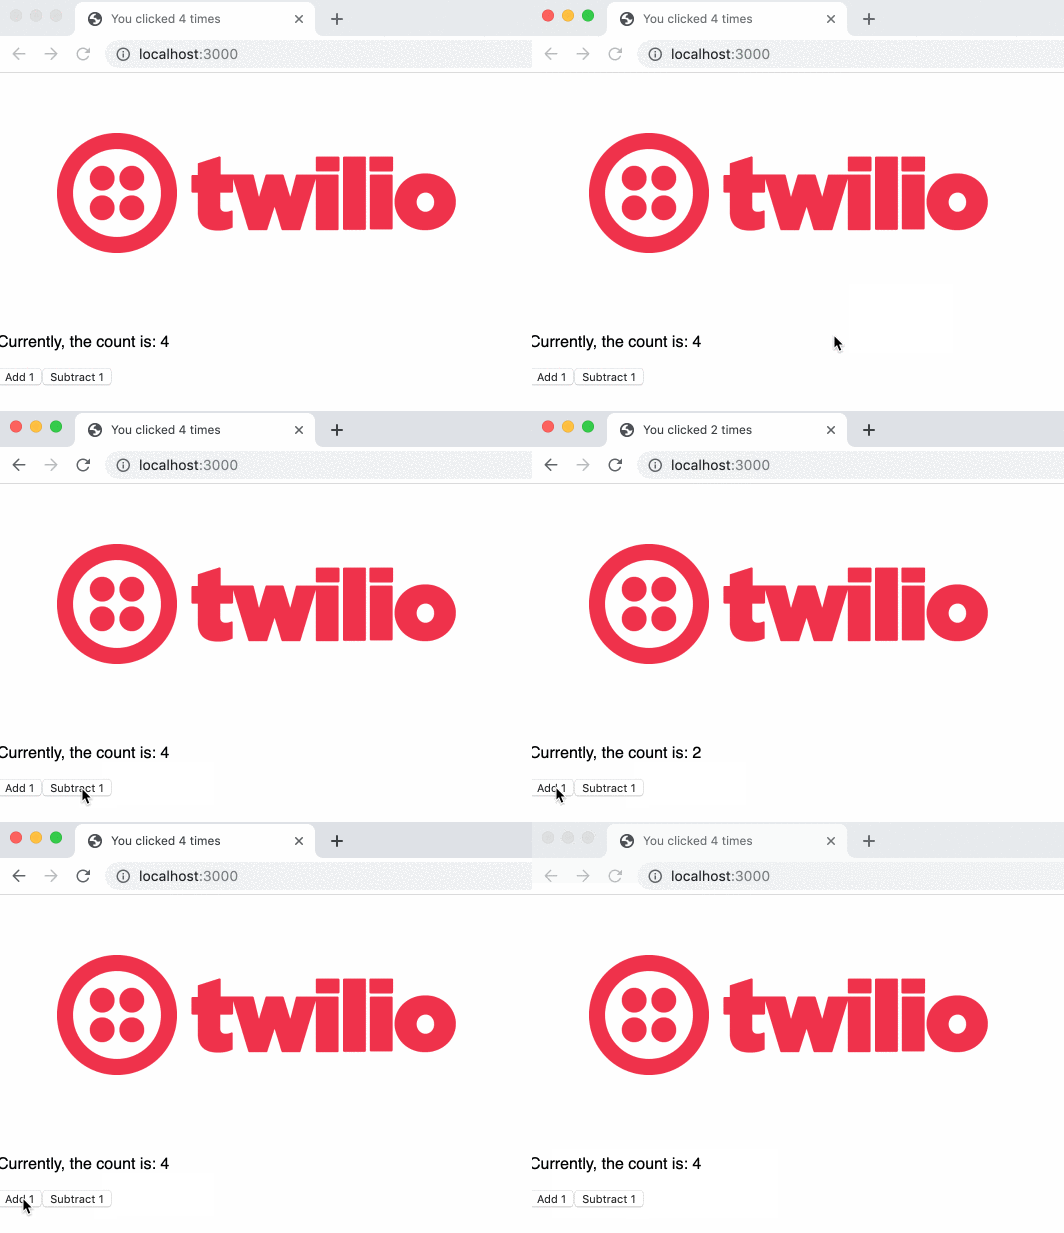
Hooray! We did it. 🎉 Nice work, team!
Now that we’ve written a custom React component, hook and effect, we’re ready to publish it as a package on the npm registry. We’ll do this in the following steps:
From the root directory, run the command:
When prompted for your username and password, use the username and password associated with your account when you signed up on the npm registry. It will also ask for you email address, which will be displayed publicly.
Before you publish your package, make sure the README.md at the root of your directory is up to date. This is what the npm registry will use on the package homepage so it’s essential that yours is up to date. We’ll update the example in the README at the root using the /example/App.js code we used to test our package:
# @GITHUB-USERNAME/react-use-the-things

> a package that gives you custom React things

## Usage…

import React from 'react'

import { TwilioLogo, useCounter, useDocumentTitle } from '@GITHUB-USERNAME/react-use-the-things'

const App = () => {
  const [count, setCount] = useCounter(4)
  useDocumentTitle(count)
  return (
        <div>
          <TwilioLogo
            height='240px'
            width='520px'
            customStyles={{ border: '1px solid black' }}
        />
        <p>Currently, the count is: {count}</p>
        <button onClick={() => setCount(count + 1)}>Add 1</button>
        <button onClick={() => setCount(count - 1)}>Subtract 1</button>
        </div>
  )
}

## License

MIT © [@GITHUB-USERNAME](https://github.com/GITHUB-USERNAME)Since this is our first version - 1.0.0 - we don’t need to do anything. But if you do release a package and maintain it, you’ll need to update the version every time you make changes and want to re-publish the package. It’s recommended you use semantic versioning. Check out the npm version command. It will update the version and generate a Git Tag for you 😄
This might be the scariest part of this tutorial: publishing your package.

But it doesn’t have to be scary! Remember, we’re going to publish a scoped package so in reality, someone will only find it if they search the npm registry based on your GitHub handle.
Run the following command:
npm publish --access publicBecause scoped packages are private/restricted by default, we have to pass the --access public flag. An alternative way to do this is by adding this to your package.json:
"publishConfig": {
  "access": "public"
 }
It costs money to host private packages, so we’re also doing it for that reason 😅
Now if you go to the npm registry website and look under your Packages, you’ll see your package:
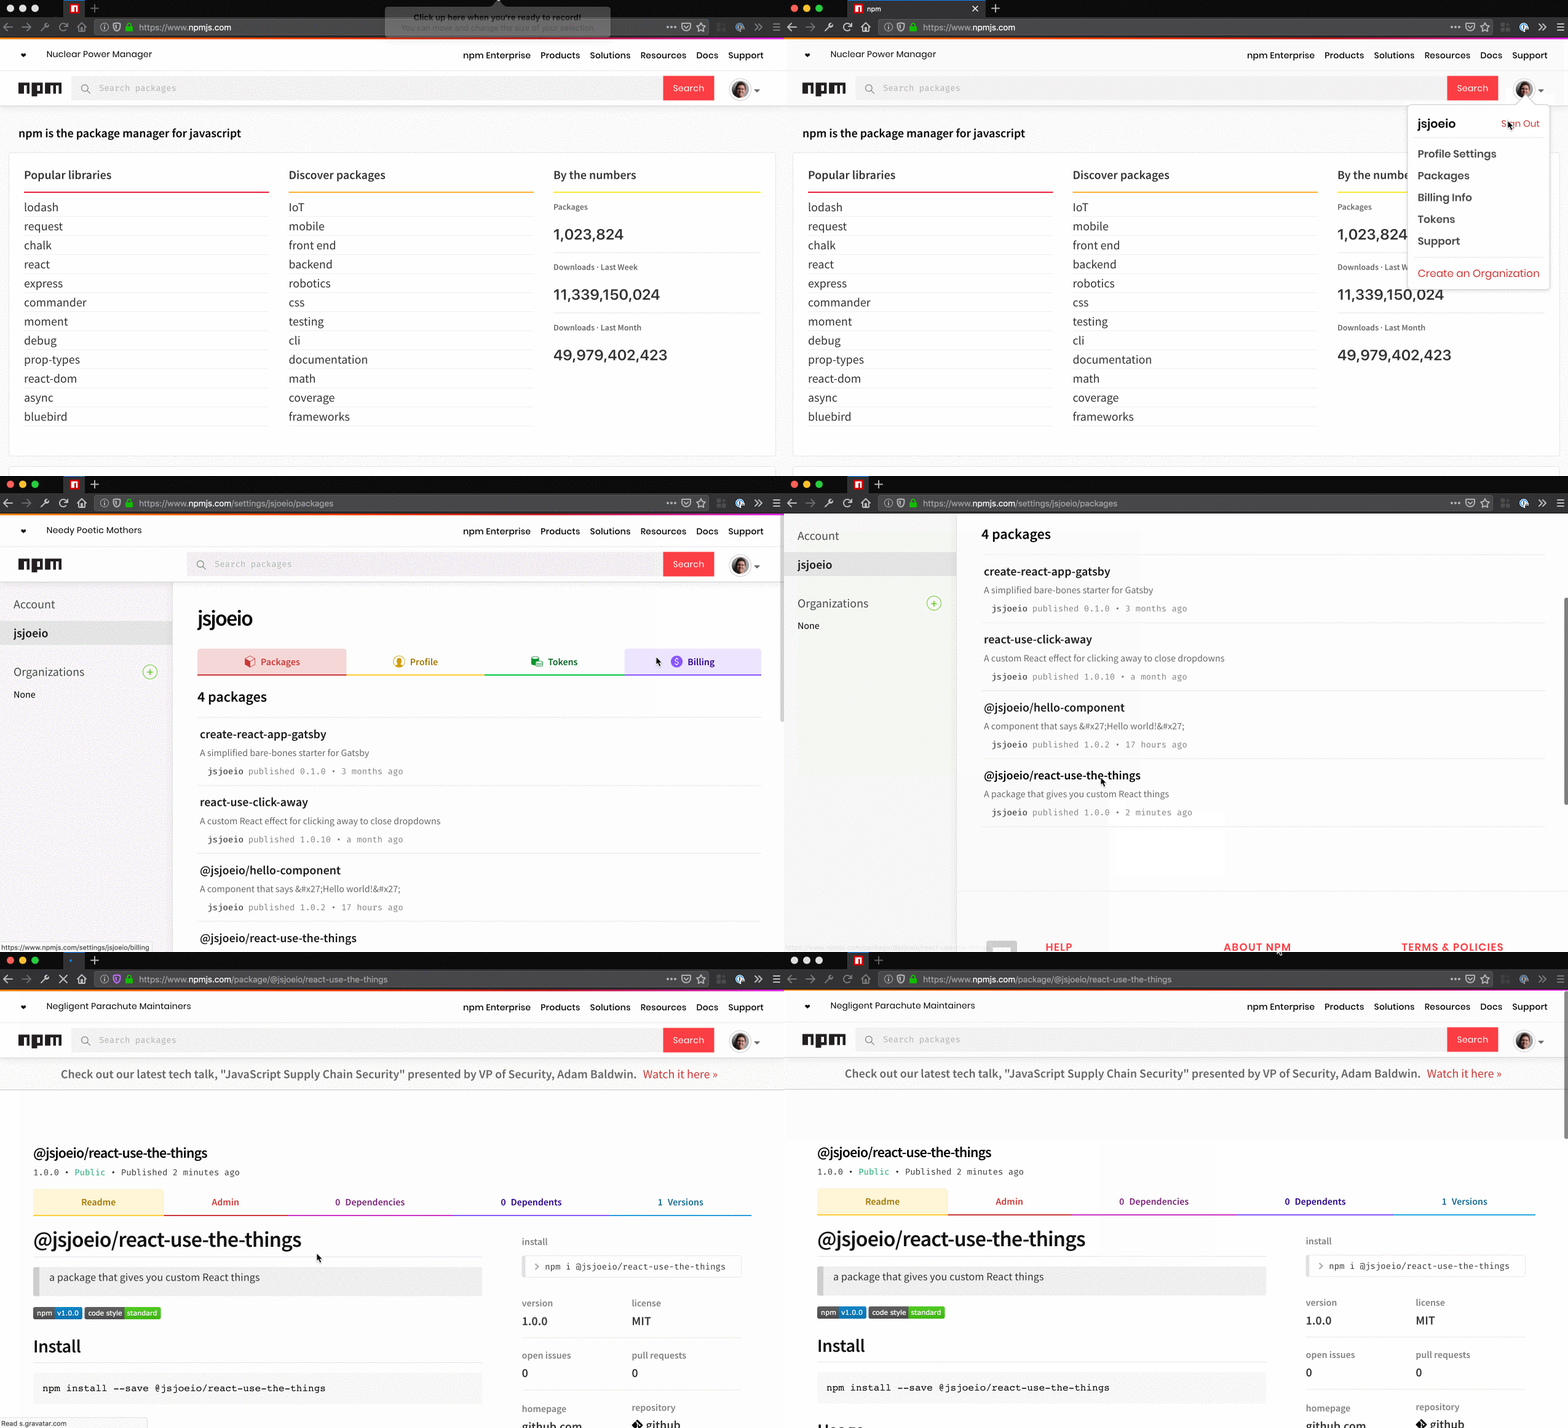
And you’ll see that it’s there! Woah! 😱
Last thing you want to do is push to GitHub with git push origin master --tags. This will push the version tags. Super cool, right? 😎 You did it!
Even though we verified everything works locally with npm/yarn link, it doesn’t hurt to also verify in “production” that it still works. Head over to CodeSandbox and create a new React sandbox. Then under dependencies, add your package:
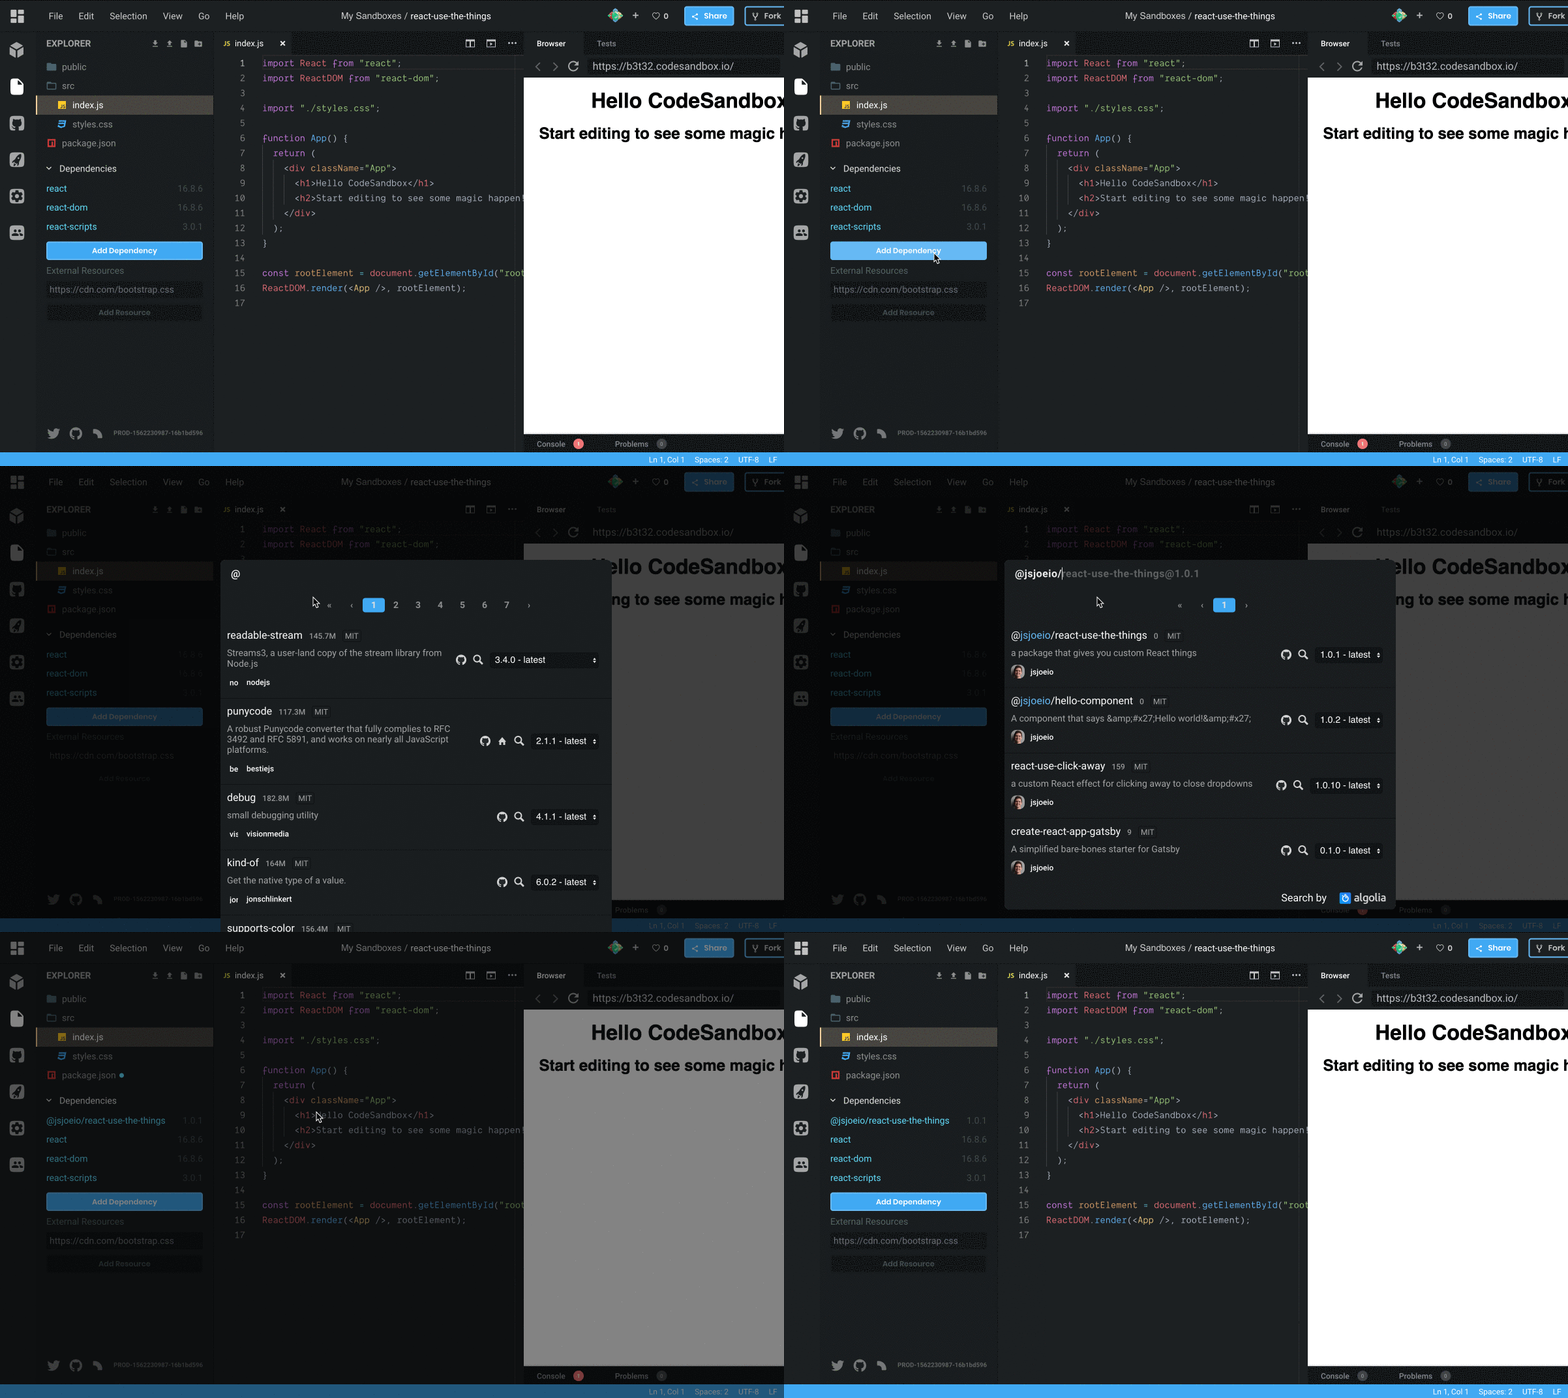
Now, we can copy the example from our README and add it to the index.js file in our sandbox. Then we can open up the app in a new tab to see the document title update:
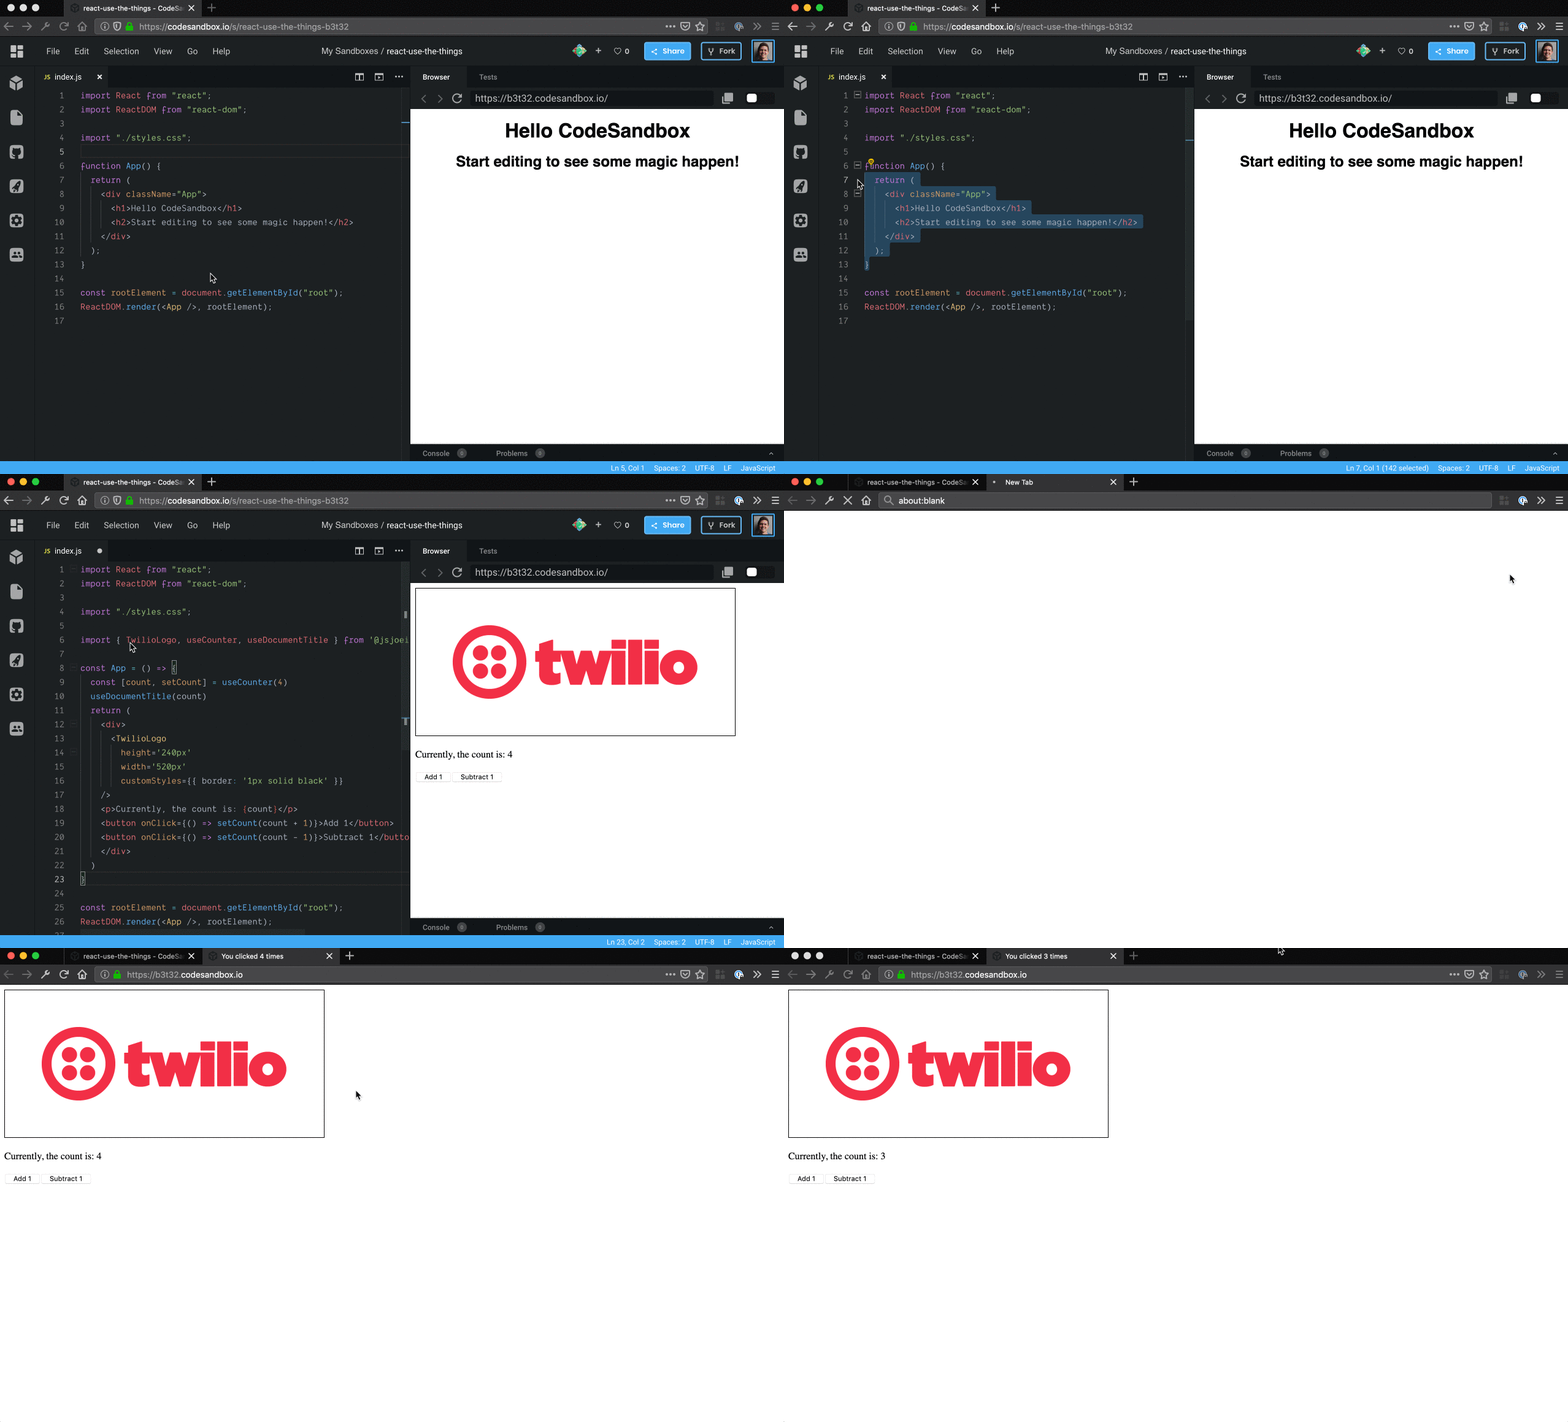
Verified in a “production” environment - time to share it with all our friends! 🤓
If you’ve made it this far, give yourself a pat on the back. We learned a lot today about React and publishing npm packages. Let’s recap on everything we did:
create-react-hookHopefully now you can see releasing custom React packages on npm is not as intimidating as you previously thought. Lucky for us, we can stand on the shoulders of create-react-hook and npm/yarn link to achieve this quicker than on our own.
If you end up creating your own package, tweet me @jsjoeio and let me know :) Happy open-sourcing!
此内容由惯性聚合(RSS阅读器)自动聚合整理,仅供阅读参考。 原文来自 — 版权归原作者所有。