








Providing content editors with the ability to apply rich text formatting, be it in long-form content with styled headings, or providing emphasis in places of particular importance can greatly enhance a user’s reading experience. Sanity Studio supports many different formatting methods using their editor interface and within this guide we’ll explain how to ensure those same formatting rules are applied when the data is displayed on a web page.
In a previous guide we built a simple Astro site that uses Sanity as the CMS.
Within this guide, you’ll discover how to use Portable Text to enable rich text formatting and the process for embedding images within the content body.
You can see a preview of the deployed site and the repository for the code on the following links.
These are the things you’ll need to set up before starting this tutorial:
Portable Text is a JSON based rich text specification for modern content editing platforms. Portable text is an agnostic abstraction of rich text that can be serialized into pretty much any markup language, be it HTML, Markdown, SSML, XML, etc.
Portable Text is built on the idea of rich text as an array of blocks. Each block can have a style and a set of mark definitions, which describe how the data could be presented. Portable Text also allows for custom content objects, enabling editing and rendering environments to mix rich text with custom content types.
Here’s an example.
{
"style": "normal",
"_type": "block",
"children": [
{
"_type": "span",
"marks": ["a-key", "emphasis"],
"text": "some text"
}
],
"markDefs": [
{
"_key": "a-key",
"_type": "markType",
"extraData": "some data"
}
]
}
There two dependencies required to enable Portable Text and embedded images are astro-portabletext and @sanity/image-url. You’ll need both installed before proceeding.
Run the following in your terminal.
npm install astro-portabletext @sanity/image-url
Open sanity.config.ts and add the following types to the schema.
// sanity.config.ts
import { defineConfig } from "sanity";
import { defineConfig, defineArrayMember } from "sanity";
import { structureTool } from "sanity/structure";
export default defineConfig({
title: "Netlify Astro Sanity",
projectId: import.meta.env.PUBLIC_SANITY_STUDIO_PROJECT_ID,
dataset: import.meta.env.PUBLIC_SANITY_STUDIO_DATASET,
plugins: [structureTool()],
schema: {
types: [
{
type: "document",
name: "post",
title: "Post",
fields: [
{
name: "title",
title: "Title",
type: "string",
},
{
name: "slug",
title: "Slug",
type: "slug",
options: {
source: "title",
maxLength: 96,
},
},
{
title: "Block Content",
name: "blockContent",
type: "array",
of: [
defineArrayMember({
title: "Block",
type: "block",
styles: [
{ title: "H2", value: "h2" },
{ title: "H3", value: "h3" },
{ title: "H4", value: "h4" },
{ title: "Normal", value: "p" },
{ title: "Quote", value: "blockquote" },
],
lists: [
{ title: "Bullet", value: "bullet" },
{ title: "Number", value: "number" },
],
marks: {
decorators: [
{ title: "Strong", value: "strong" },
{ title: "Emphasis", value: "em" },
],
annotations: [
{
title: "URL",
name: "link",
type: "object",
fields: [
{
title: "URL",
name: "href",
type: "url",
},
],
},
],
},
}),
{
title: "Image",
type: "image",
fields: [
{
name: "alt",
title: "Alt",
type: "string",
},
],
},
],
},
],
},
],
},
});
The new content is of type blockContent. Within this object we can use the of type to create an array of the two new content types. The first type is block, the second is image.
blockThe block type schema is where you can define the fields that will appear in Sanity Studio and will allow editors to create headings, blockquotes, lists, marks for bold and italic text and annotations such as links.
You can read more about the available bocks in the Sanity docs: Usage.
The image type is for images that can be added to the body of a blog post, we’ve also defined a field for the alt text which will be the text added to the alt attribute on the HTML img element.
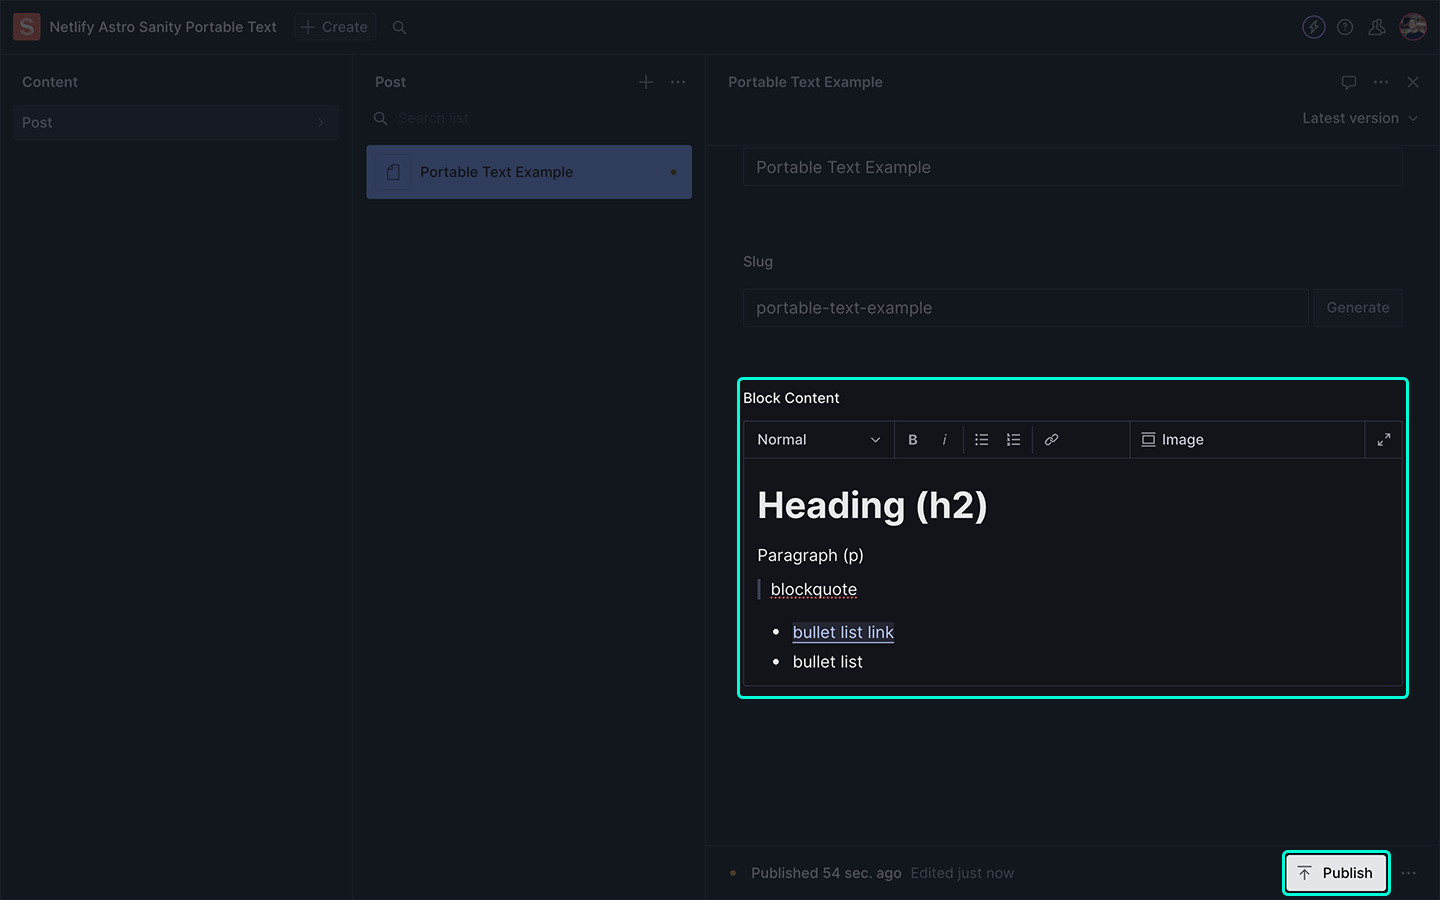
imageIf you’ve added both of the above, head back over to /admin and you should see a new field in one of your posts where you can format headings, and add an image etc. Be sure to click publish to save your changes!
You can read more about images in the Sanity docs: Presenting Images.
Open src/pages/posts/[slug].astro and make the following changes.
// src/pages/posts/[slug].astro
---
export const prerender = true;
import { sanityClient } from 'sanity:client';
import { PortableText } from 'astro-portabletext';
import { List } from 'astro-portabletext/components';
export async function getStaticPaths() {
const posts = await sanityClient.fetch(`*[_type == "post" && defined(slug.current)]`);
return posts.map((post) => {
return {
params: {
slug: post.slug.current,
},
};
});
}
const { slug } = Astro.params;
const { title } = await sanityClient.fetch(`*[_type == "post" && slug.current == $slug][0]`, { slug });
const { title, blockContent } = await sanityClient.fetch(`*[_type == "post" && slug.current == $slug][0]`, { slug });
const components = {
list: List,
}
---
<html>
<body>
<a href='/'>Back</a>
<h1>{title}</h1>
<PortableText value={blockContent} components={components} />
</body>
</html>
The main changes here are that we’re now destructuring blockContent from the sanityClient query and passing it onto the <PortableText /> component via the value prop.
In order to ensure the new Portable Text values within blockContent can be correctly converted into HTML we’re passing a components object onto the <PortableText /> via the components prop. It’s here where we can define which components map to which content schema types and ensure HTML elements are used.
You’ll notice in the components object we’ve defined a key for list. This key maps to a helpful Sanity component named List.
Sanity’s List component can determine which HTML list type, ol (ordered list) or ul (unordered list) to use based on the listItem type that is present within the response.
You can also provide your own components.
Here’s an example of a custom list component which uses the listItem type to determine which HTML list element is returned.
// src/components/list.astro
---
const {
node: { listItem },
...attrs
} = Astro.props;
---
{
listItem === 'number' ? (
<ol {...attrs}>
<slot />
</ol>
) : (
<ul {...attrs}>
<slot />
</ul>
)
}
The usage in the components object would remain the same. E.g
const components = {
list: List,
}
For images there’s a similar setup, but this time we will be using a custom image component.
The custom image component contains a number of other Sanity helpers to convert the image _ref into an image url that can be used as the src on an HTML img element.
Create a new file named image.astro in src/components and add the following code.
// src/components/image.astro
---
import imageUrlBuilder from '@sanity/image-url';
const builder = imageUrlBuilder({
projectId: import.meta.env.PUBLIC_SANITY_STUDIO_PROJECT_ID,
dataset: import.meta.env.PUBLIC_SANITY_STUDIO_DATASET,
});
const {
node: {
asset: { _ref },
alt,
},
...attrs
} = Astro.props;
const src = builder.image(_ref).auto('format').fit('max').width(512).toString();
---
<img src={src} alt={alt} {...attrs} />
This component has access to the asset _ref which looks something like this: image-1085765fe253da8ca898a06fce40c049fd6f63e2-1024x576-jpg.
By passing the _ref to Sanity’s imageUrlBuilder helper function it can construct the correct path to the image asset based on your projectId and dataset.
Add console.log(src) to see the final constructed url. In our example it looks something like this:
https://cdn.sanity.io/images/hvpty17w/production/1085765fe253da8ca898a06fce40c049fd6f63e2-1024x576.jpg?w=512&fit=max&auto=format
The additional builder methods are to help with image formatting. You can read more about those in the Sanity docs: Builder methods.
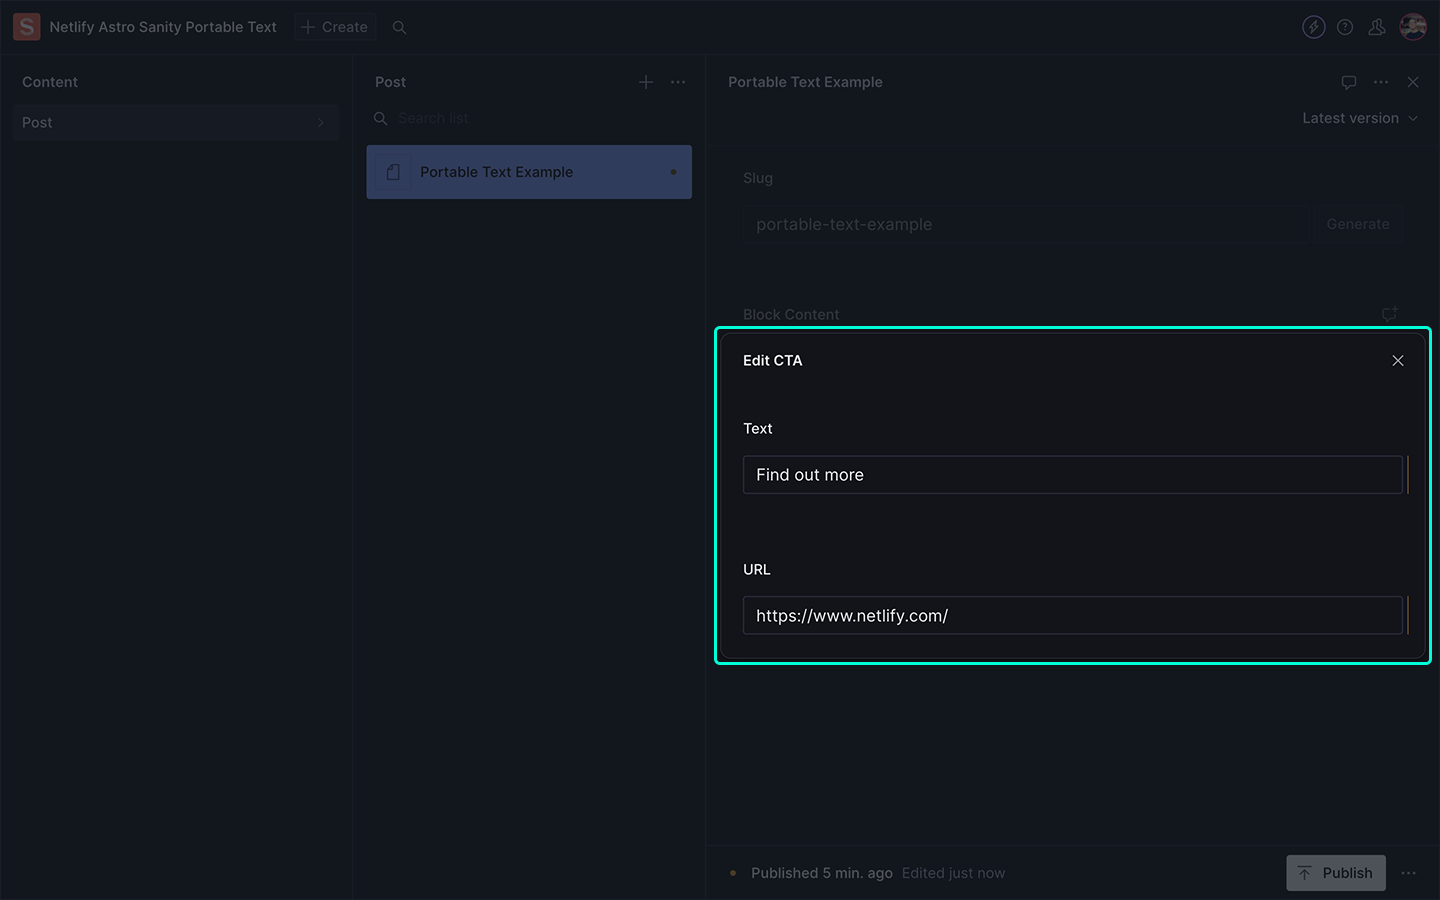
In this next part we’ll explain how to add custom components to the content schema. In our example we’ve added a CTA (Call to action) which has two fields. Text, which is the text to display, and URL, which is the url to open in a new browser window.
The HTML anchor element is wrapped within a div which can be styled to suit your needs.
Open src/pages/posts/[slug].astro and make the following changes below the image schema type.
{
title: 'Image',
...
},
{
title: 'CTA',
type: 'object',
name: 'cta',
fields: [
{
name: 'text',
title: 'Text',
type: 'string',
},
{
title: 'URL',
name: 'href',
type: 'url',
},
],
},
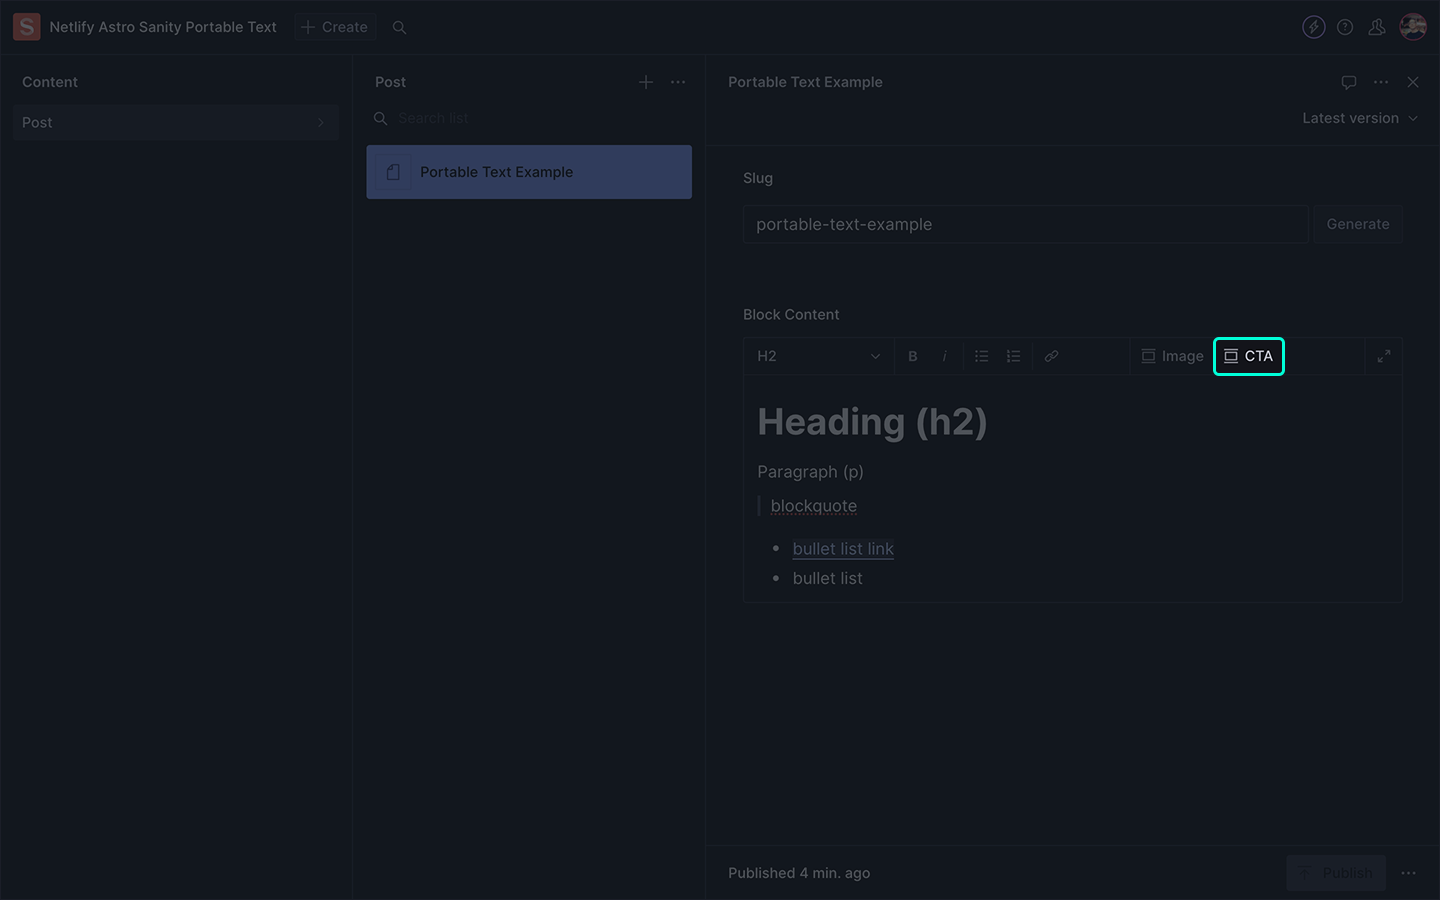
If you head back over to Sanity Studio (/admin) you should see the following CTA button has been added to the editor toolbar.
Clicking this will open a new modal where you can add the Text and URL for the call to action.
And that’s it, you’re now able to add rich tech formatting and images to the body of your content, as well as being able to create custom components. Congrats!
此内容由惯性聚合(RSS阅读器)自动聚合整理,仅供阅读参考。 原文来自 — 版权归原作者所有。