




Working with a git-based content workflow can be a powerful way to manage content for a site. But sometimes you need to add an image to a blog post or other content. Managing images in a git-based workflow either means adding another service or needing to be super diligent about managing images in your repository.
This guide will show you how to add an image uploader to your Astro site to make it easy to manage images in your content. The uploader is only present in local development, and enforces a repeatable structure for storing images in your repository which surfaces when you serve your site in production.
Although this is specific to Astro, the concepts could be applied to other site framework where components are supported within your markdown content.
If you’d prefer to just clone and deploy an example to explore, click the button below and you’ll very quickly have an example Astro site when an uploader ready to use in local development.

If you already have a project ready to go, skip to the next section.
Let’s create a new Astro project.
Be sure to choose Use blog template when prompted on where to start. The blog template will have what we need to build out the image uploader.
> npm create astro@latest
Where should we create your new project? [default]
How would you like to start your new project? Use blog template
...
This approach uses an API route (server endpoint) to process the uploaded file. For this to work, we have to enable server-side rendering (SSR) in Astro. We can do this by leaving the site as static and enabling SSR only for specific routes.
For API endpoints to work, we need to enable SSR in Astro. Many content sites can be built with Astro without server-side rendering, or with minimal server-side rendering. We’re going to assume that is the case for your site and use hybrid rendering mode.
Hybrid rendering mode defaults to rendering all pages as static. Pages and API endpoints that should be dynamically rendered on the server can be individually configured to do so.
import mdx from "@astrojs/mdx";
import sitemap from "@astrojs/sitemap";
import { defineConfig } from "astro/config";
export default defineConfig({
site: "https://example.com",
integrations: [mdx(), sitemap()],
output: "hybrid",
});
The rest of the guide assumes we’re working in hybrid mode. If you’re using server mode, you’ll have to adjust
accordingly.
Add an uploader component to your Astro project. This will be the upload form that will post to an API endpoint to handle the file upload.
Place this file in your src/components directory.
---
interface Props {
id: string;
}
const { id } = Astro.props;
const url = Astro.url.href;
if (import.meta.env.MODE !== "development") {
throw new Error("This component can not be used in production");
}
---
<form action="/actions/upload" method="post" enctype="multipart/form-data">
<input type="hidden" value="{url}" name="url" required />
<input type="hidden" value="{id}" name="id" required />
<div>
<label for="{`file-input-${id}`}">Image file</label>
<input type="file" name="file" required id="{`file-input-${id}`}" accept="image/png, image/jpeg, image/gif" />
</div>
<div>
<label for="{`filename-input-${id}`}">Filename</label>
<input type="text" name="filename" id="{`filename-input-${id}`}" required />
</div>
<div>
<label for="{`alt-input-${id}`}">Alt text</label>
<input type="text" name="alt" id="{`alt-input-${id}`}" />
</div>
<input type="submit" value="Upload image" />
</form>
<script>
const form = document.querySelector("form")!;
form.addEventListener("submit", async (event) => {
event.preventDefault();
const formData = new FormData(form);
const response = await fetch(form.action, {
method: form.method,
body: formData,
});
if (!response.ok) {
console.error("Failed to upload image");
}
});
</script>
There are a few things to note about this component:
/actions/upload, which we’ll set up in the next step.url (from Astro) and id (prop) in the form to help the API endpoint know where to save the file and which content to replace.As long as MDX is enabled, you can now add the component to any blog post on your site.
---
# ...
---
import Uploader from "../components/Uploader.astro";
Nisi nulla officia Lorem ad dolore consectetur cupidatat. Est veniam ut ipsum et. Aute ut excepteur occaecat reprehenderit pariatur in ea voluptate tempor commodo dolor laboris esse. Dolor pariatur dolore veniam sunt.
<Uploader id="1" />
Non ad eiusmod do exercitation esse voluptate amet exercitation do eiusmod duis ullamco velit. Irure ipsum qui labore laboris voluptate dolor nulla duis dolore pariatur duis id duis reprehenderit. Fugiat consequat elit veniam sit anim in do excepteur ipsum.
Note that the path to the component may need to be adjusted based on your project structure.
View that post in your browser and you should now see the unstyle image upload form.
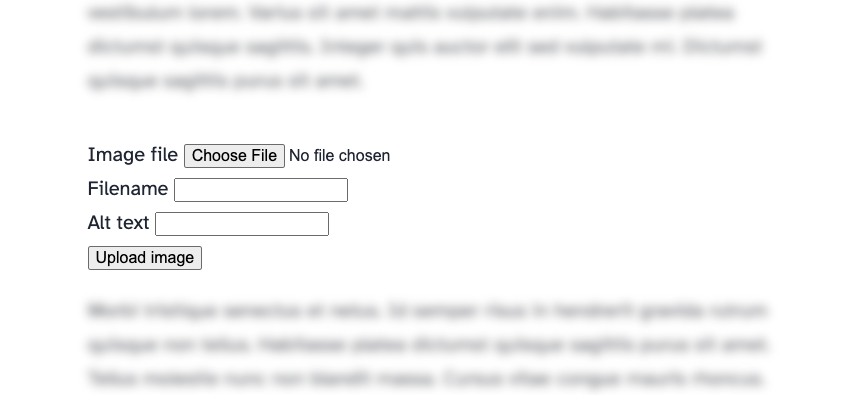
Now we need to set up the API endpoint to handle the file upload. This will be a simple function that saves the file to the repository, then replaces the uploader component with the image in the blog post.
Create a new file at src/actions/upload.ts.
import fs from "fs";
import type { APIRoute } from "astro";
export const prerender = false;
const FILE_TYPE_MAP: Record<string, string> = {
"image/jpeg": "jpg",
"image/png": "png",
"image/gif": "gif",
};
export const POST: APIRoute = async ({ request, url, redirect }) => {
if (import.meta.env.MODE !== "development") {
return new Response("Uploader not available", { status: 404 });
}
const formData = await request.formData();
const data = {
file: formData.get("file") as File,
url: formData.get("url") as string,
id: formData.get("id") as string,
alt: formData.get("alt") as string,
filename: formData.get("filename") as string,
};
if (!data.file) throw new Error("No file provided");
if (!data.url) throw new Error("No URL provided");
if (!data.id) throw new Error("No ID provided");
if (!data.filename) throw new Error("No filename provided");
const slug = new URL(data.url).pathname.split("/").filter(Boolean).pop();
// Identify the source file
const sourceFilePath = `./src/content/blog/${slug}.mdx`;
const sourceFile = fs.readFileSync(sourceFilePath, "utf-8");
const componentString = sourceFile.match(/<Uploader\s+id="(\d+)"\s*\/>/)?.[0];
if (!componentString) {
throw new Error("No Uploader component found in source file");
}
// Create folder for the post if it doesn't exist
const imageDirname = `./public/images/${slug}`;
if (!fs.existsSync(imageDirname)) {
fs.mkdirSync(imageDirname, { recursive: true });
}
// Save the file to the folder
const filename = `${data.filename}.${FILE_TYPE_MAP[data.file.type]}`;
const file = Buffer.from(await data.file.arrayBuffer());
const imageFilePath = `${imageDirname}/${filename}`;
fs.writeFileSync(imageFilePath, file);
// Replace the Uploader component with the image
const newComponentString = `})`;
const newSourceFile = sourceFile.replace(componentString, newComponentString);
fs.writeFileSync(sourceFilePath, newSourceFile);
return new Response(JSON.stringify({ success: true }), {
headers: { "Content-Type": "application/json" },
});
};
Note that this creates a specific structure for storing your images:
public/images directory.<Uploader id="x" />, where x is the ID of the uploader component.That’s it! Now you can drop an image into the uploader form. The image will be saved to your repository in the proper directory, and then the uploader component will be replaced with markdown image syntax in your content file.
Where you had the component in your content file:
You’ll now have the markdown image syntax:

And the content will be automatically updated in your browser.

I hope this gave you some inspiration for introducing tools that can augment your content workflow to make it more efficient, enjoyable, and maintainable.
Here are a few ideas for consideration as you bring this functionality into production.
You’ll also need an adapter when deploying the project. For deploying to Netlify, you can use Astro’s Netify adapter. To install and configure this automatically run the following command:
Pro-tip! You can use astro-auto-import to avoid having to manually import the component into each blog post. I like doing this to keep my content files clean and focused on the content.
> yarn add astro-auto-import
Then add the integration to your astro.config.mjs file.
import mdx from "@astrojs/mdx";
import sitemap from "@astrojs/sitemap";
import { defineConfig } from "astro/config";
import AutoImport from "astro-auto-import";
export default defineConfig({
site: "https://example.com",
integrations: [
AutoImport({
imports: ["./src/components/Uploader.astro"],
}),
mdx(),
sitemap(),
],
output: "hybrid",
});
此内容由惯性聚合(RSS阅读器)自动聚合整理,仅供阅读参考。 原文来自 — 版权归原作者所有。