





Every action available in the Netlify UI is powered by an API endpoint. This means you can integrate these same capabilities directly into your own tools and automation workflows.
We’re going to walk through a process that generates the access token you’ll need to act on behalf of your users to do things like:
With these actions comes the risk of bad actors circumventing your access and using it nefariously. While showing you this workflow, we’ll also work through building safeguards to help protect you and your users.
This is going to be a simple static site where:
Before we dive into the code, we need to create a new OAuth application. From the Netlify Dashboard navigate to your “User Settings” and from there to Applications.
Select “New OAuth app” and fill in any details for your project. For this guide we’ve filled it in as follows:
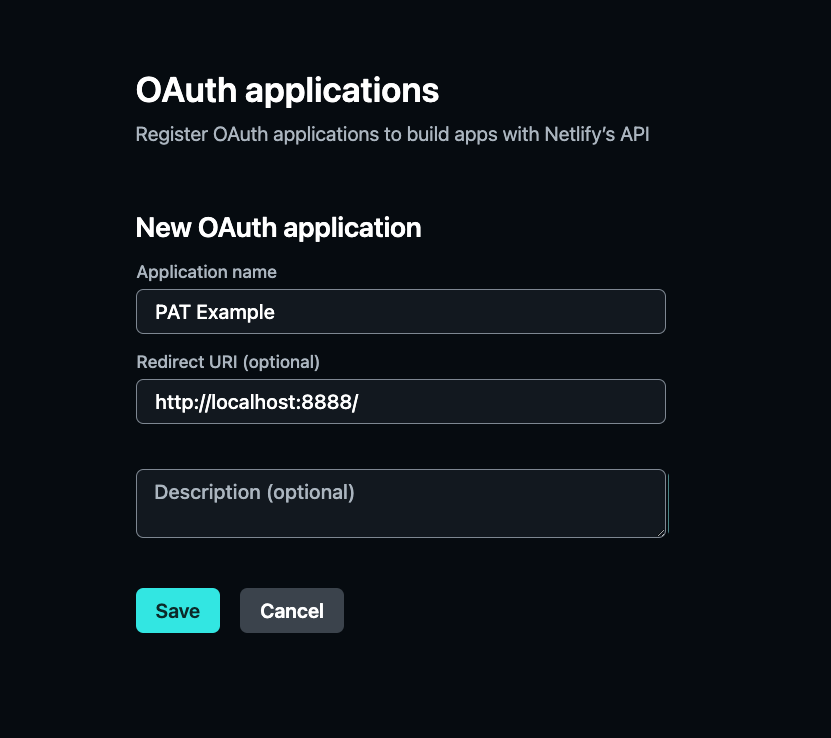
Save your Client ID and Secet key somewhere safe. You’ll be using the Client ID in your app.js file in the next section.
With that setup, we can move into the code.
Since we’re not going to use any frameworks, getting set up is as easy as creating a folder with two files: app.js and index.html in your project directory.
First, let’s set up our HTML so we have elements we can utilize in our js file.
<!doctype html>
<html>
<head>
<title>Netlify OAuth & Personal Access Token Generation</title>
</head>
<body>
<h1>Netlify OAuth & PAT Generation</h1>
<button id="oauth-button">Start OAuth Flow</button>
<script src="/app.js"></script>
</body>
</html>
Next, we’ll fill in our app file:
// Input your CLIENT_ID here -- this ID fine to be public and is needed to craft our OAuth URL
const CLIENT_ID = "";
const REDIRECT_URI = "http://localhost:8888/";
// Simple and secure way to generate state. This state is used to help us prevent CSRF attacks while moving through the OAuth flow
function generateState() {
return crypto.randomUUID();
}
function handleNetlifyOAuth() {
const clientId = CLIENT_ID;
const redirectUri = REDIRECT_URI;
const state = generateState();
// Setting our state enables us to use the value to check the validity of the requester
localStorage.setItem('oauth_state', state);
const authLink = `https://app.netlify.com/authorize?client_id=${clientId}&response_type=token&redirect_uri=${redirectUri}&state=${state}`;
window.location.href = authLink;
}
document.addEventListener('DOMContentLoaded', () => {
const oAuthButton = document.querySelector("#oauth-button");
if (oAuthButton) {
oAuthButton.addEventListener("click", handleNetlifyOAuth);
} else {
console.error('OAuth button not found');
}
});
const hash = document.location.hash;
/*
* This function is called when a user returns from Netlify and has accepted the
* request to authorize your app.
*
* It extracts the token from the response and use it to do a simple API request
* fetching the latest sites from the user from Netlify.
*/
function handleAccessToken() {
// The access token is returned in the hash part of the document.location
// #access_token=1234&response_type=token&state=...
const response = new URLSearchParams(hash.replace(/^#/, ''));
const state = response.get('state');
const accessToken = response.get('access_token')
const savedState = localStorage.getItem('oauth_state');
// Clean up immediately
localStorage.removeItem('oauth_state');
if (!savedState || savedState !== state) {
console.log('Security Error: Invalid state parameter. Possible CSRF attack.');
return;
}
// Remove the token so it's not visible in the URL after we're done
document.location.hash = '';
// Send the access token to the create-token endpoint to generate a PAT
fetch('/create-token', {
method: "POST",
headers: {
'Authorization': `Bearer ${accessToken}`,
'Content-Type': 'application/json'
}
})
.then(response => response.json())
.then(json => {
console.log(json);
})
.catch(error => {
console.log(error)
});
}
/*
* If we have any hash, it's because the user is coming back from Netlify and we
* can start doing API requests on their behalf.
*/
if (document.location.hash) {
handleAccessToken();
}
While the comments above do a decent job of breaking down the pieces of our js file — let’s take a moment to understand what’s happening:
CLIENT_ID and our REDIRECT_URI (we’re using localhost:8888 since we’re using netlify dev as our development server)/create-token endpointAll that’s left is to wire up our serverless function and generate our personal access token.
Let’s start by installing our single dependency in our project to help setup our function
npm install @netlify/functions
After successful OAuth authentication, the returned access token can be used as a Bearer token for Netlify API calls. However, for more granular control over authentication, Personal Access Tokens (PATs) provide additional benefits. PATs offer configurable lifespans and enhanced security features that may be better suited for production environments.
We will build an example of protecting our function using the OAuth access token, while also passing through that token to an API call generating our PAT.
Let’s create a file for our function using Netlify’s functions folder named create-token.ts and fill in our function:
import type { Context, Config } from "@netlify/functions"
export default async (req: Request, context: Context) => {
const accessToken = req.headers.get('Authorization')?.split(' ')[1]
if (!accessToken) {
return new Response('Unauthorized', { status: 401 })
}
try {
// Our fetch to our endpoint that creates the PAT includes a body describing the structure we explained earlier
const response = await fetch('https://api.netlify.com/api/v1/oauth/applications/create_token', {
method: 'POST',
headers: {
'Authorization': `Bearer ${accessToken}`,
'Content-Type': 'application/json'
},
body: JSON.stringify({
administrator_id: null,
expires_in: 604800,
grant_saml: false,
name: "token-from-state-example"
})
})
const data = await response.json()
return new Response(JSON.stringify({message: "Token created successfully!"}), {
headers: { 'Content-Type': 'application/json' }
})
} catch (error) {
return new Response(JSON.stringify({ error: 'Failed to create token' }), {
status: 500,
headers: { 'Content-Type': 'application/json' }
})
}
}
// This path config makes calling the endpoint easier, without having to match the route of the document
export const config: Config = {
path: "/create-token"
}
Above you’ll see we take and check for the access token we’ve sent through our original fetch. Applying that same token to the POST request that creates our new PAT and return a success message. This token is now usable, within it’s lifespan, to authorize new API requests made to Netlify.
We’ve got everything we need to continue building out new API requests to Netlify. If you’d like to see the code we’ve built in repo, feel free to visit our examples repo and good luck with your projects!
此内容由惯性聚合(RSS阅读器)自动聚合整理,仅供阅读参考。 原文来自 — 版权归原作者所有。