惯性聚合 高效追踪和阅读你感兴趣的博客、新闻、科技资讯
阅读原文 在惯性聚合中打开

推荐订阅源

雷峰网
雷峰网
奇客Solidot–传递最新科技情报
奇客Solidot–传递最新科技情报
大猫的无限游戏
大猫的无限游戏
Google DeepMind News
V
V2EX
T
The Blog of Author Tim Ferriss
H
Hackread – Cybersecurity News, Data Breaches, AI and More
Hugging Face - Blog
Hugging Face - Blog
Stack Overflow Blog
Stack Overflow Blog
I
InfoQ
博客园_首页
钛媒体:引领未来商业与生活新知
钛媒体:引领未来商业与生活新知
Last Week in AI
Last Week in AI
Recent Announcements
Vercel News
Vercel News
freeCodeCamp Programming Tutorials: Python, JavaScript, Git & More
T
Tailwind CSS Blog
美团技术团队
Martin Fowler
Martin Fowler
宝玉的分享
宝玉的分享
Blog — PlanetScale
Blog — PlanetScale
GbyAI
GbyAI
OSCHINA 社区最新新闻
OSCHINA 社区最新新闻
J
Java Code Geeks

Netlify Developers

AI model comparison using Netlify's AI Gateway | Netlify Developers Build an AI agent to automatically process and summarize form submissions | Netlify Developers Build an AI agent to automatically generate relevant images for blog posts | Netlify Developers Prerendering SPA content pages to enable AI agent access | Netlify Developers Identify image optimization opportunities with Netlify Observability | Netlify Developers Fix top 404 page not found errors with Netlify Observability | Netlify Developers Introducing AI Gateway: built-in AI model access on Netlify | Netlify Developers Introducing Observability: your project insights on Netlify | Netlify Developers From first publish to first update with AI agents | Netlify Developers How to use Agent Runners on Netlify | Netlify Developers Add forms to your project with AI + Netlify | Netlify Developers Track Real User Metrics | Netlify Developers Lighthouse performance scores on Netlify | Netlify Developers Review your AI project before you ship | Netlify Developers Using environment variables in AI Projects on Netlify | Netlify Developers Build prototypes and MVPs fast with AI + Netlify | Netlify Developers Pause auto-publishing on Netlify | Netlify Developers Run serverless functions, storage, and more natively in Nuxt dev | Netlify Developers Netlify Office Hours: The AX Arcade challenge | Netlify Developers Netlify Office Hours: Prompting with style | Netlify Developers Netlify Office Hours: RAG Apps with OpenAI + Netlify DB | Netlify Developers How to build a RAG application with Neon, Netlify & OpenAI | Netlify Developers Netlify Office Hours: Netlify DB (powered by Neon) | Netlify Developers Netlify Office Hours: Netlify MCP Server | Netlify Developers Netlify Office Hours: Netlify Vite Plugin | Netlify Developers Building MCPs with Netlify | Netlify Developers Deploying sites from your AI tool | Netlify Developers Adding your domain using Netlify API | Netlify Developers Build a context driven chat bot with Netlify Blob and OpenAI | Netlify Developers Simplify deployments with Netlify’s branch-matching environment variables | Netlify Developers
Getting started with the new Auth0 extension on Netlify |...
2025-02-28 · via Netlify Developers

In collaboration with Auth0, we’ve released a new extension to connect your Auth0 tenants to your Netlify account dashboard and add authentication to your Netlify site!

#TL;DR

We’ll walk through:

  • Creating a new Astro project in Netlify
  • Configuring the Auth0 extension through Netlify
  • Connecting a tenant to our Netlify account
  • Using the generated Environment variables to authenticate an Astro site & protect our Netlify functions

Want to jump straight to the code?

Deploy a complete working example by clicking the button below:

Deploy to Netlify

#Prerequisites

Before getting started, you’ll need:

#Create a new site on Netlify

Already have a site?

If you already have a site and just want to enable the extension, you can skip to the next section.

For educational purposes, we’re going to start with a brand new website on our Netlify account. We’ll be using Astro to build our app. Run the following command and select the default values:


Once our project is created, we’ll need to make a couple changes to the Layout.astro and index.astro files:

<!doctype html>

<html lang="en">

<head>

<meta charset="UTF-8" />

<meta name="viewport" content="width=device-width, initial-scale=1.0" />

<title>Auth0 Authentication Example</title>

</head>

<body>

<slot />

</body>

</html>

---

import Layout from '../layouts/Layout.astro';

---

<Layout>

<header>

<h1>Welcome to Auth0 Authentication Example</h1>

</header>

<main>

<div id="auth0-login-container">

<button id="login">Log In</button>

<button id="logout" style="display: none">Log Out</button>

<button id="test-function">Test Function</button>

</div>

<div id="profile" style="display: none">

<h2>Profile</h2>

<pre id="profile-data"></pre>

</div>

</main>

</Layout>

Next, we’ll install the Auth0 JS SDK to streamline login, logout, and help us generate a token to protect our serverless functions.

npm install @auth0/auth0-spa-js

This page, while not authenticated, will show a header and a log in button. Eventually, when authenticated, we’ll be able to see a logout button and some of the logged in user’s details. (We append these later in index.astro within a script tag to the profile-data container.)

With our scaffold ready, let’s push up to GitHub and connect the site to Netlify.

#Install the extension

Now that we’ve completed setting our site up and connecting to Netlify we can move to installing and enabling the extension:

  1. In the team Dashboard, navigate to the Extensions page from the sidebar.
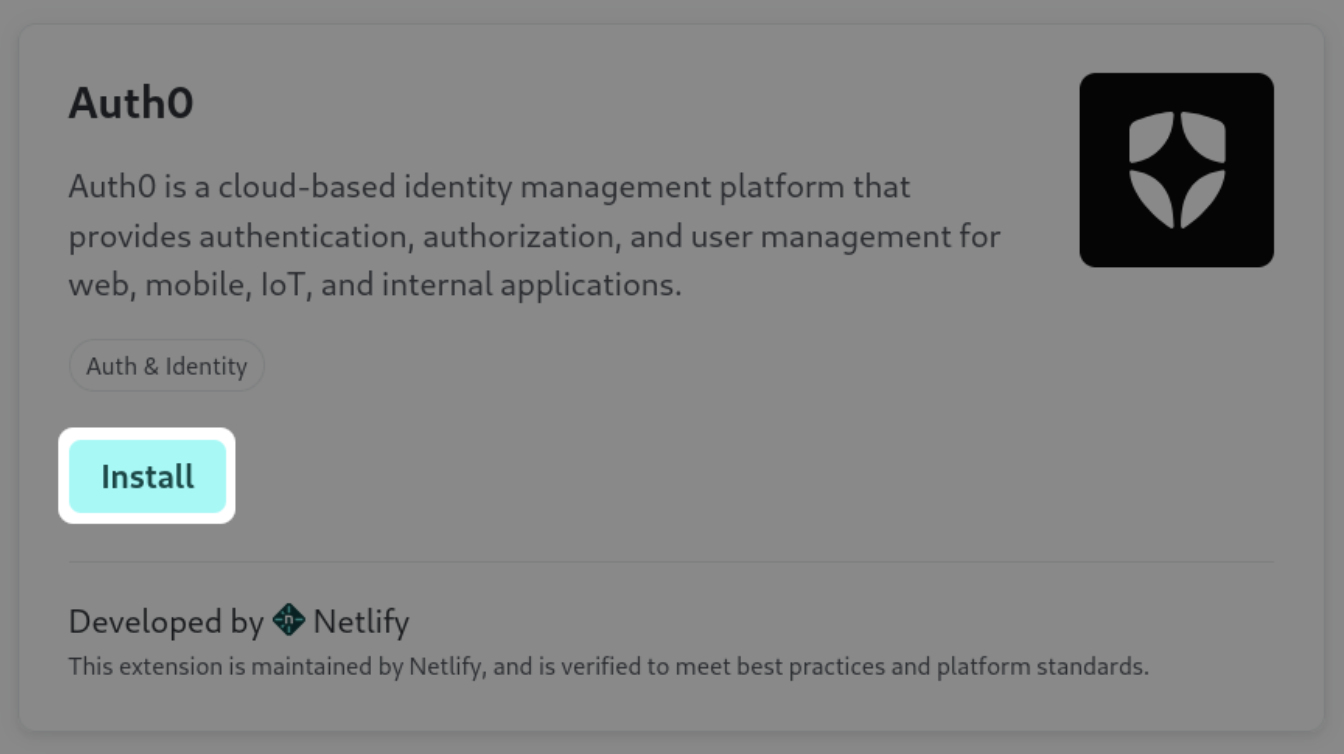
  2. Search for Auth0 and select it from the results, then install from the details page.

Select "Install" from the Auth0 Extension details page

  1. From the team’s Sites list, select the site you plan to use with this extension, navigate to the Access & security settings page and scroll to find the Auth0 extension settings.
  2. Next, start the process to link your Auth0 tenant to our Netlify account. Select Link an Auth0 tenant and follow the prompts to authorize Netlify to access your tenant.

Once you’ve connected your tenant, your next step is to configure the extension for your site.

#Configure the extension

  1. Under Site tenants, select Add a tenant and select a tenant to use for your site’s deploy contexts.
  2. Select the Auth0 application and, optionally, an API. If you don’t already have Auth0 application and APIs, we recommend that you create them from the Netlify UI. Creating Auth0 applications and APIs from the Netlify UI optimizes their settings for use with Netlify.

If you already have Auth0 applications and APIs, you can select and assign them to each tenant.

  1. Select one or more deploy contexts for your site tenant.

Branch deploy limitations

This extension does not support assigning a tenant to individual branch deploys. The tenant selected for the Branch Deploys context applies to all branch deploys.

  1. This extension automatically creates a set of environment variables based on your configuration. If your framework or build system requires the use of a specific prefix in environment variable names, input your desired prefix or select one from the Preset dropdown. If your framework or build system doesn’t require a prefix, leave this blank.

Environment Variables

For our project, we’re going to need to add prefixes for Astro to recognize a few of our environment variables in the client. Add PUBLIC as the prefix. This will prefix all of your client based environment variables with PUBLIC.

You can review these variables at any time by navigating to Site configuration > Environment variables.

To configure multiple tenants, repeat these steps for each tenant.

#Using Auth0 in your Astro site

With the extension now enabled, it’s time to dig into some code and set our application up to utilize Auth0 to set up our authorization flow alongside protected Netlify functions.

Over the next section, we’ll:

  • Build utility functions to:
    • handle client authentication actions like login, log out, and token generation to pass to our Netlify functions
    • handle server side authentication actions like reading & verifying the token from the request inside of our functions
  • Build a serverless function that will verify your token and fail or succeed based on that verification
  • Connect to Auth0’s SDK and send the user to an Auth0 hosted Sign in/up page

#Setting up the project structure

First, we’ll create a couple of files to hold the functions we’ll be using across the client and server. Inside of your base directory, create a utils folder with two files:

mkdir utils

touch utils/server-auth.ts utils/client-auth.ts

Client vs Server Code

To make sure we don’t bundle our server code into our client bundle, we make this distinction between client and server utilities.

#Building the client utilities

Let’s build out our client-auth.ts file first:

import { Auth0Client, createAuth0Client } from '@auth0/auth0-spa-js';

let auth0Client: Auth0Client | null = null;

// Let each function invoke the client in scope & make sure we have the proper authorization scopes

export async function getAuth0Client(): Promise<Auth0Client> {

if (auth0Client) return auth0Client;

auth0Client = await createAuth0Client({

domain: import.meta.env.PUBLIC_AUTH0_DOMAIN,

clientId: import.meta.env.PUBLIC_AUTH0_CLIENT_ID,

authorizationParams: {

audience: import.meta.env.PUBLIC_AUTH0_AUDIENCE,

redirect_uri: window.location.origin,

scope: 'openid profile email'

}

});

return auth0Client;

}

// This function will bring us to the hosted Auth0 sign in/up page

export async function login(): Promise<void> {

const client = await getAuth0Client();

await client.loginWithRedirect({

authorizationParams: {

redirect_uri: window.location.origin

}

});

}

export async function logout(): Promise<void> {

const client = await getAuth0Client();

await client.logout({

logoutParams: {

returnTo: window.location.origin

}

});

}

// Make sure we're properly redirected and our data is represented properly afterward

export async function handleCallback(): Promise<void> {

const client = await getAuth0Client();

await client.handleRedirectCallback();

window.history.replaceState({}, document.title, '/');

}

// Utility function to make fetching protected endpoints easier

export async function callProtectedEndpoint<T>(endpoint: string, options: RequestInit = {}): Promise<T> {

const client = await getAuth0Client();

const token = await client.getTokenSilently();

const response = await fetch(endpoint, {

...options,

headers: {

...options.headers,

'Authorization': `Bearer ${token}`,

'Content-Type': 'application/json'

}

});

if (!response.ok) {

const errorText = await response.text();

console.error('Full error response:', {

status: response.status,

statusText: response.statusText,

body: errorText,

headers: Object.fromEntries(response.headers)

});

throw new Error(`HTTP error! status: ${response.status}`);

}

return response.json() as Promise<T>;

}

#Building the server-side utilities

Our server function will be used to verify the token from the request inside of our functions. First, we’ll need to install the jose package for JWT verification:

npm install jose

npm install @types/node -D

Why jose?

jose is a JavaScript module that implements JSON Web Token (JWT) and JSON Web Signature (JWS) standards. It’s particularly well-suited for token verification in Node.js environments.

Now we can build our token verification function:

import { type JWTVerifyResult, createRemoteJWKSet, jwtVerify } from "jose";

export type VerifyAuth0TokenResult<

CustomClaims extends Record<string, unknown> = Record<string, unknown>,

> = {

token: string;

result: JWTVerifyResult & { payload: CustomClaims };

};

export const verifyAuth0Token = async <

CustomClaims extends Record<string, unknown>,

>(

request: Request,

): Promise<VerifyAuth0TokenResult<CustomClaims>> => {

const authorization = request.headers.get("Authorization") ?? "";

const [type, token, ...parts] = authorization

.replace(/\s+/g, " ")

.trim()

.split(" ");

if (type !== "Bearer" || parts.length !== 0) {

throw new Error("Missing or invalid Authorization header");

}

const AUTH0_ISSUER = process.env.AUTH0_ISSUER;

const AUTH0_AUDIENCE = process.env.PUBLIC_AUTH0_AUDIENCE;

const JWKS = createRemoteJWKSet(

new URL(".well-known/jwks.json", AUTH0_ISSUER),

);

const result = (await jwtVerify(token, JWKS, {

issuer: AUTH0_ISSUER,

audience: AUTH0_AUDIENCE,

})) as unknown as JWTVerifyResult & { payload: CustomClaims };

return { token, result };

};

Learn more about token verification

Want to learn more about how token verification works? Check out these docs from Auth0.

#Building the Protected Function

Before we wire up our client utilities, let’s build out our serverless function. First, install the functions package from Netlify:

npm install @netlify/functions

Create a new folder structure for our function:

mkdir -p netlify/functions

touch netlify/functions/auth-gated-function.ts

Now let’s create our protected function:

import type { Context } from "@netlify/functions";

import { verifyAuth0Token } from "../../utils/server-auth";

export default async function handler(req: Request, context: Context) {

try {

const { token, result } = await verifyAuth0Token(req);

if (!token) {

return new Response('Unauthorized - No token', { status: 401 });

}

const response = {

message: 'Authenticated',

result

};

return new Response(JSON.stringify(response), {

status: 200,

headers: {

'Content-Type': 'application/json'

}

});

} catch (error) {

console.error('Auth error:', error);

return new Response(error instanceof Error ? error.message : 'Unauthorized', {

status: 401

});

}

}

#Implementing the Client-Side Authentication

Now let’s wire up our authentication UI. Add this script tag below your HTML in index.astro:

<script>

import { login, logout, handleCallback, getAuth0Client, callProtectedEndpoint } from '../../utils/client-auth';

interface Auth0Profile {

name: string;

picture: string;

}

interface DOMElements {

loginButton: HTMLElement;

logoutButton: HTMLElement;

profileElement: HTMLElement;

testButton: HTMLElement;

}

async function updateUI(): Promise<void> {

const auth0Client = await getAuth0Client();

const isAuthenticated = await auth0Client.isAuthenticated();

const userProfile = await auth0Client.getUser<Auth0Profile>();

const elements: DOMElements = {

loginButton: document.getElementById("login") as HTMLElement,

logoutButton: document.getElementById("logout") as HTMLElement,

profileElement: document.getElementById("profile") as HTMLElement,

testButton: document.getElementById("test-function") as HTMLElement

};

if (isAuthenticated && userProfile) {

elements.loginButton.style.display = "none";

elements.logoutButton.style.display = "block";

elements.profileElement.style.display = "block";

elements.profileElement.innerHTML = `

<p>${userProfile.name}</p>

<img src="${userProfile.picture}" alt="Profile" />

`;

} else {

elements.loginButton.style.display = "block";

elements.logoutButton.style.display = "none";

elements.profileElement.style.display = "none";

}

}

function attachEventListeners(): void {

document.getElementById('login')?.addEventListener('click', login);

document.getElementById('logout')?.addEventListener('click', logout);

document.getElementById('test-function')?.addEventListener('click', async () => {

try {

const result = await callProtectedEndpoint('/.netlify/functions/auth-gated-function');

console.log('Function response:', result);

alert(JSON.stringify(result, null, 2));

} catch (error: unknown) {

if (error instanceof Error) {

console.error('Error details:', error);

alert(`Error calling function: ${error.message}`);

} else {

console.error('Unknown error:', error);

alert('An unknown error occurred');

}

}

});

}

if (location.search.includes("code=") && location.search.includes("state=")) {

await handleCallback();

attachEventListeners();

await updateUI();

} else {

attachEventListeners();

await updateUI();

}

</script>

Local Development

During the process of enabling the extension, Netlify will set the site URL for the Auth0 Application URIs. If you’re developing locally, don’t forget to set your URL for your local server in your Auth0 application settings.

#Testing the Authentication Flow

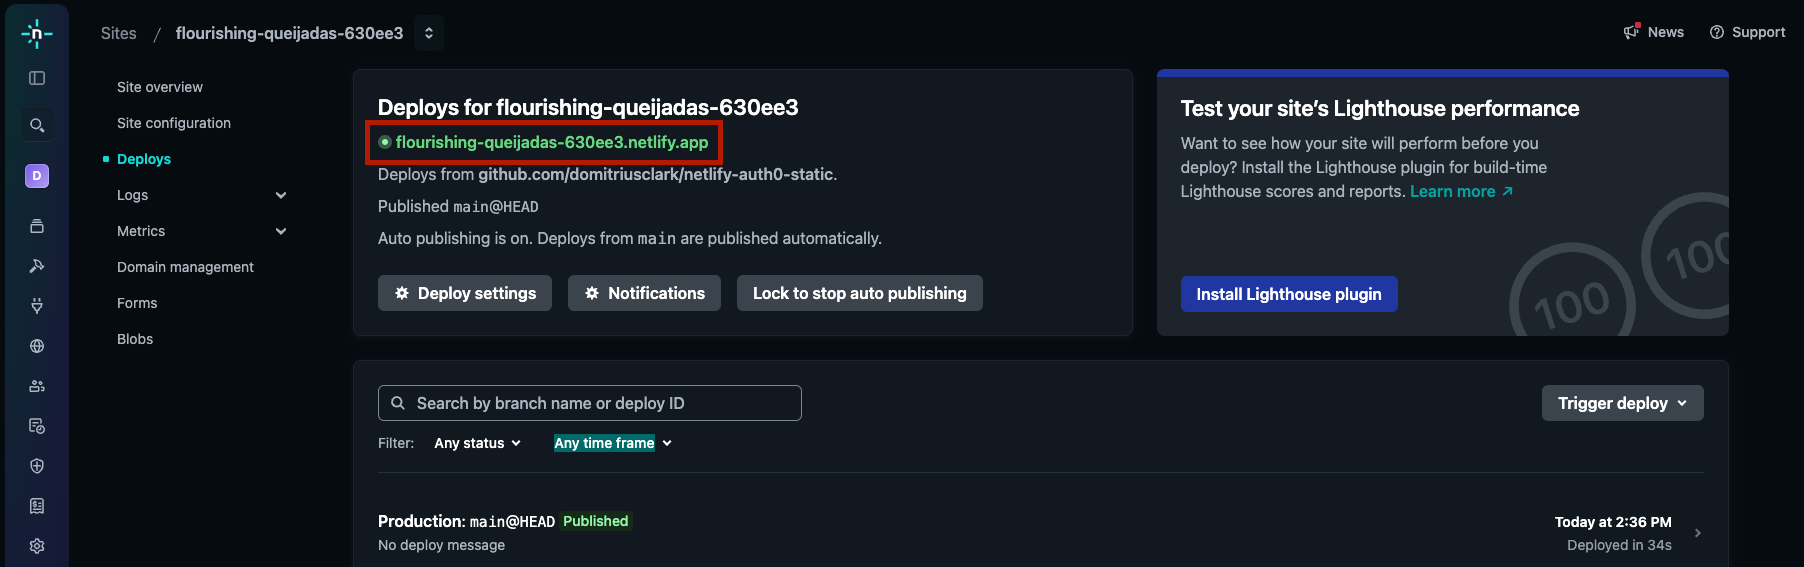
  1. Push your changes to your repository (a succesful deploy can be seen in the image below)
  2. Visit your deployed Netlify site
  3. Click the “Log In” button
  4. Complete the Auth0 signup/signin process
  5. You should see your profile picture and name appear
  6. Try the “Test Function” button to verify the protected endpoint

Once you push your changes, a successful deploy will show a published badge and your site link should be updated to the latest build

Tenant Management

If you go back to the extension settings and choose your tenant, you should see the new user you just created!

#Next Steps

Now that you have authentication working in your site, here are some ways to build upon this foundation:

  • Remove the Flash of Content (FOC) after redirecting using loading states
  • Build custom authentication UI with the @auth0/react package
  • Add role-based access control (RBAC) to your protected functions

These additions will help create a smoother, more secure experience for your users.

#Additional Resources