




Microservices-oriented architecture has evolved from a buzzword to standard architecture practice for building large-scale applications. Applications are designed as blocks of independently deployable services and communicate with each other via lightweight mechanisms.
Microservices offer a lot of advantages, including flexible language selection, functionality-based scalability, independent deployment and independent product development teams. They can, however, bring challenges as well. One of those challenges is authentication and authorization of resources.
If an authorization mechanism is implemented as a global shared provider, it will help remove duplication, freeing the development team to focus on the business logic. In this tutorial, you will be building REST API endpoints in Python and adding resource access permissions to these endpoints using Cerbos.
If an authorization mechanism is implemented as a global shared provider, it will help remove duplication, freeing the development team to focus on the business logic.
In this tutorial, you will be building REST API endpoints in Python and adding resource access permissions to these endpoints using Cerbos.
You will be building RESTful APIs on Python with permission management. To get started with this tutorial, make sure you have the following prerequisites:
In this tutorial, you will be creating REST APIs for the TODO service. The APIs will be built using Flask web framework.
Initialize the API by importing the Flask module into your application:
from flask import Flask
from flask_restful import Resource, Api, reqparse

app = Flask(__name__)
api = Api(app)
The API you’re building will have Create, Update, Read, and Delete REST API endpoints.
Now add the API endpoints for the TODO resource:
from flask import Flask
from flask_restful import Resource, Api, reqparse

app = Flask(__name__)
api = Api(app)

class TODO(Resource):
	pass

api.add_resource(TODO, '/todo')
Here you’ve added a TODO class that will contain all the necessary methods to handle the request to the provided routes. The line api.add_resource(TODO, '/todo') is to define the routes from which the API will be accessed.
Once you have the resource, add the methods to handle the GET, POST, PUT, EDIT requests:
class TODO(Resource):
    def get(self):
        return {'data': 'data'}, 200

api.add_resource(TODO, '/todo')
Before running the Python file, make sure to install the Flask and flask_restful dependencies:
> pip3 install Flask
> pip3 install flask_restful
Now you can start the Flask server by running the main.py file:
> python3 main.go
This will start the Flask app in the default port 5000. To check the GET /todo API, use the curl command:
> curl http://127.0.0.1:5000/todo
#=> {"data": "data"}
Now that you have the server up and running, add the remaining endpoints create, update, delete including authentication.
Authentication
class TODO(Resource):
    @app.route("/todo/<string:id>")
    def get(id):
        if not TODO.__authenticate(request.headers["token"]):
            return {'message': 'API key invalid'}, 401

        return {'data': id}, 200

    def post(self):
        if not TODO.__authenticate(request.headers['TOKEN']):
            return {'message': 'API key invalid'}, 401

        return {'message': 'success'}, 201

    @app.route("/todo/<string:id>", methods = ['PUT'])
    def put(id):
        if not TODO.__authenticate(request.headers['TOKEN']):
            return {'message': 'API key invalid'}, 401

        return {'data': id}, 200

    @app.route("/todo/<string:id>", methods = ['DELETE'])
    def delete(self):
        if not TODO.__authenticate(request.headers['TOKEN']):
            return {'message': 'API key invalid'}, 401

        return {'message': id}, 200

    def __authenticate(token):
        if token in Tokens:
            return True
        else:
            return False

api.add_resource(TODO, '/todo')
The API key for the users is managed in a dict. Create a new file resources.py with the API tokens. This file is imported by the main file to check if the token is valid.
# format => { "token": "userid" }
Tokens = {
	"user1SecretToken": "1",
	"user2SecretToken": "2",
	"user3SecretToken": "3"
}
Here you can see that an authentication mechanism is added to check if the API key provided by the user is valid. If the token is invalid, the user will receive the message “API key invalid.”
The next step is to add an authorization mechanism in the API. You will need to set up the following authorization policies.
GET
admin role can get their todo or any other user’s todouser role can get only their todo and cannot get other users’ todoCREATE
user or admin role can create a todo for selfUPDATE
admin role can update their todo or any other user’s todouser role can update only their todo and cannot update other users’ todoDELETE
admin role can delete any todouser role cannot delete any todoI will be using Cerbos for authorization of the user requests. Cerbos helps you to authorize by defining context-aware access control policies for your application resources.
There are three steps to add managing your permissions using Cerbos:
Create a policies directory where all the policies will be stored:
mkdir -p cerbos-bin/policies
Start the Cerbos server using the container image.
docker run --rm --name cerbos -d -v $(pwd)/cerbos-bin/policies:/policies -p 3592:3592 ghcr.io/cerbos/cerbos:0.4.0
This will start the Cerbos server in port 3592. Navigate to the port, where you can see documentation about the Cerbos API. You can also try out the API from the web page.
The policies will be defined in a user-friendly YAML format. Not only developers, but any non-technical person can go through the YAML file and understand the defined policies, which are found in a central place and easy to manage.
Create a file derived_roles.yml inside the cerbos-bin/policies directory:
---
apiVersion: "api.cerbos.dev/v1"
derived_roles:
  name: todo_derived_roles
  definitions:
    - name: admin
      parentRoles: ["admin"]

    - name: user_that_owns_the_record
      parentRoles: ["user"]
      condition:
        match:
          expr: request.resource.attr.user == request.principal.id

    - name: any_user
      parentRoles: ["user"]
There are three derived roles created to which the policies will be attached. Create a file resource_policy.yml to store the resource policies:
---
apiVersion: api.cerbos.dev/v1
resourcePolicy:
  version: "default"

  importDerivedRoles:
  - todo_derived_roles

  resource: todo
  rules:
  - actions: ["*"]
    effect: EFFECT_ALLOW
    roles:
    - admin

  - actions: ["create", "view", "update"]
    derivedRoles:
    - user_that_owns_the_record
    effect: EFFECT_ALLOW

  - actions: ["view"]
    derivedRoles:
    - any_user
    effect: EFFECT_ALLOW
    condition:
      match:
        expr: request.resource.attr.public == "true"
The final step is to check the permissions in the API endpoint to validate if the user is authorized to access the TODO resource.
Create a generic Python file that will handle the permission check. To check the permission, make an API call to the Cerbos server with data about the user, their attributes, and the role of the user in a JSON format. Modify the get method to include the permissions check using Cerbos:
  from flask import Flask, request
  from flask_restful import Resource, Api, reqparse
  from resources import Tokens, TodoItems, Users

  import cerbos
  import uuid

  def get(id):
    if not TODO.__authenticate(request.headers["token"]):
      return {'message': 'API key invalid'}, 401
    # Initialize cerbos client
    client = cerbos.Client(host=CERBOS_URL)
    # initialize the resource instance which is being accessed
    todo_request = cerbos.ResourceInstance(
        attr=TodoItems[id]
    )
    # Initialize the principal
    userId = Tokens[request.headers["token"]]
    user = Users[userId]
    principal = cerbos.Principal(
        id=userId,
        roles=[user["role"]],
        attr=user,
    )
    # Check the user is permitted to access the resource
    if not TODO.check(client, principal, "view", todo_request):
      return { 'data': 'Not authorized' }, 401

    return {'data': id}, 200

  def check(
        client: cerbos.Client,
        principal: cerbos.Principal,
        action: str,
        resource: cerbos.ResourceInstance,
    ):
        # Build the Cerbos request
        request = cerbos.CheckResourceSetRequest(
            request_id=str(uuid.uuid4()),
            actions=[action],
            principal=principal,
            resource=cerbos.ResourceSet(
                kind="todo", instances={resource.attr["id"]: resource}
            ),
        )
        try:
            # Make a Cerbos request
            response = client.check_resource_set(request)

            # Check whether the Cerbos response indicates that this action is allowed
            return response.is_allowed(resource.attr["id"], action)
        except cerbos.ClientException as e:
            print(f"Request failed: {e.msg}")
Note: The generic implementation for Cerbos check and calls can be found in the GitHub repo.
In the resource.py file, add the Users resource and the TodoItems resource.
TodoItems = {
	"1": {
    	"id": "1",
    	"user": "1",
    	"title": "learn python",
    	"status": "completed",
    	"public": "false"
	},
	"2": {
    	"id": "2",
    	"user": "1",
    	"title": "learn flask",
    	"status": "in_progress",
    	"public": "false"
	},
	"3": {
    	"id": "3",
    	"user": "1",
    	"title": "learn cerbos",
    	"status": "in_progress",
    	"public": "false"
	},
	"4": {
    	"id": "4",
    	"user": "2",
    	"title": "learn cerbos",
    	"status": "in_progress",
    	"public": "false"
	},
	"5": {
    	"id": "5",
    	"user": "1",
    	"title": "learn cerbos",
    	"status": "in_progress",
    	"public": "true"
	}
}

Users = {
	"1": {
    	'role': 'user',
	},
	"2": {
    	'role': 'user',
	},
	"3": {
    	'role': 'admin',
	}
}
These resources would ideally be in a database, but for simplicity I am adding them to a file.
Now try to access the TODO resource with the token of a user. I am using Postman to make the requests.
When User 2 Tries to Access Resource 4
Resource 4 belongs to user 2, so the user should be able to access the resource: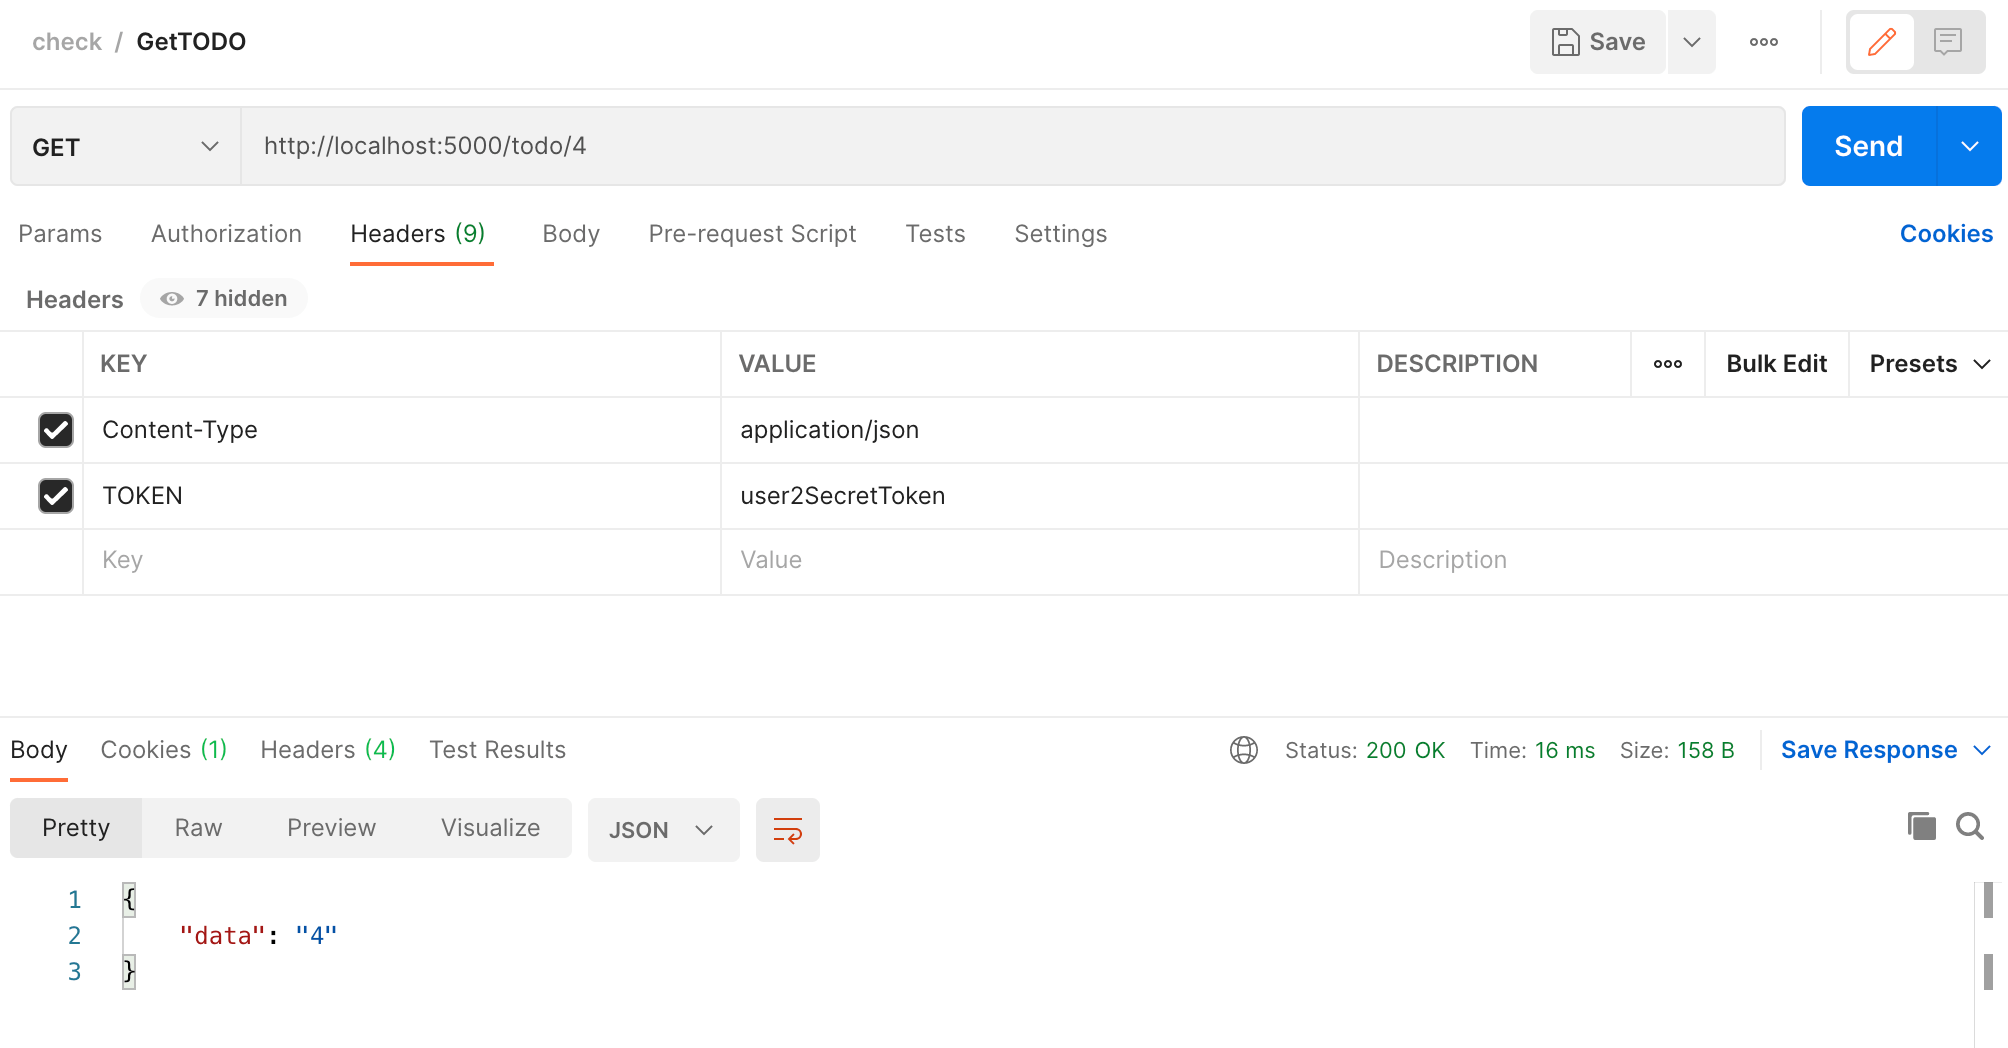
When User 2 Tries to Access Resource 5
Resource 5 belongs to user 1 but is a public resource. In the policy file, I have defined the policy to “view” public resources to everyone, so the user will be able to access it: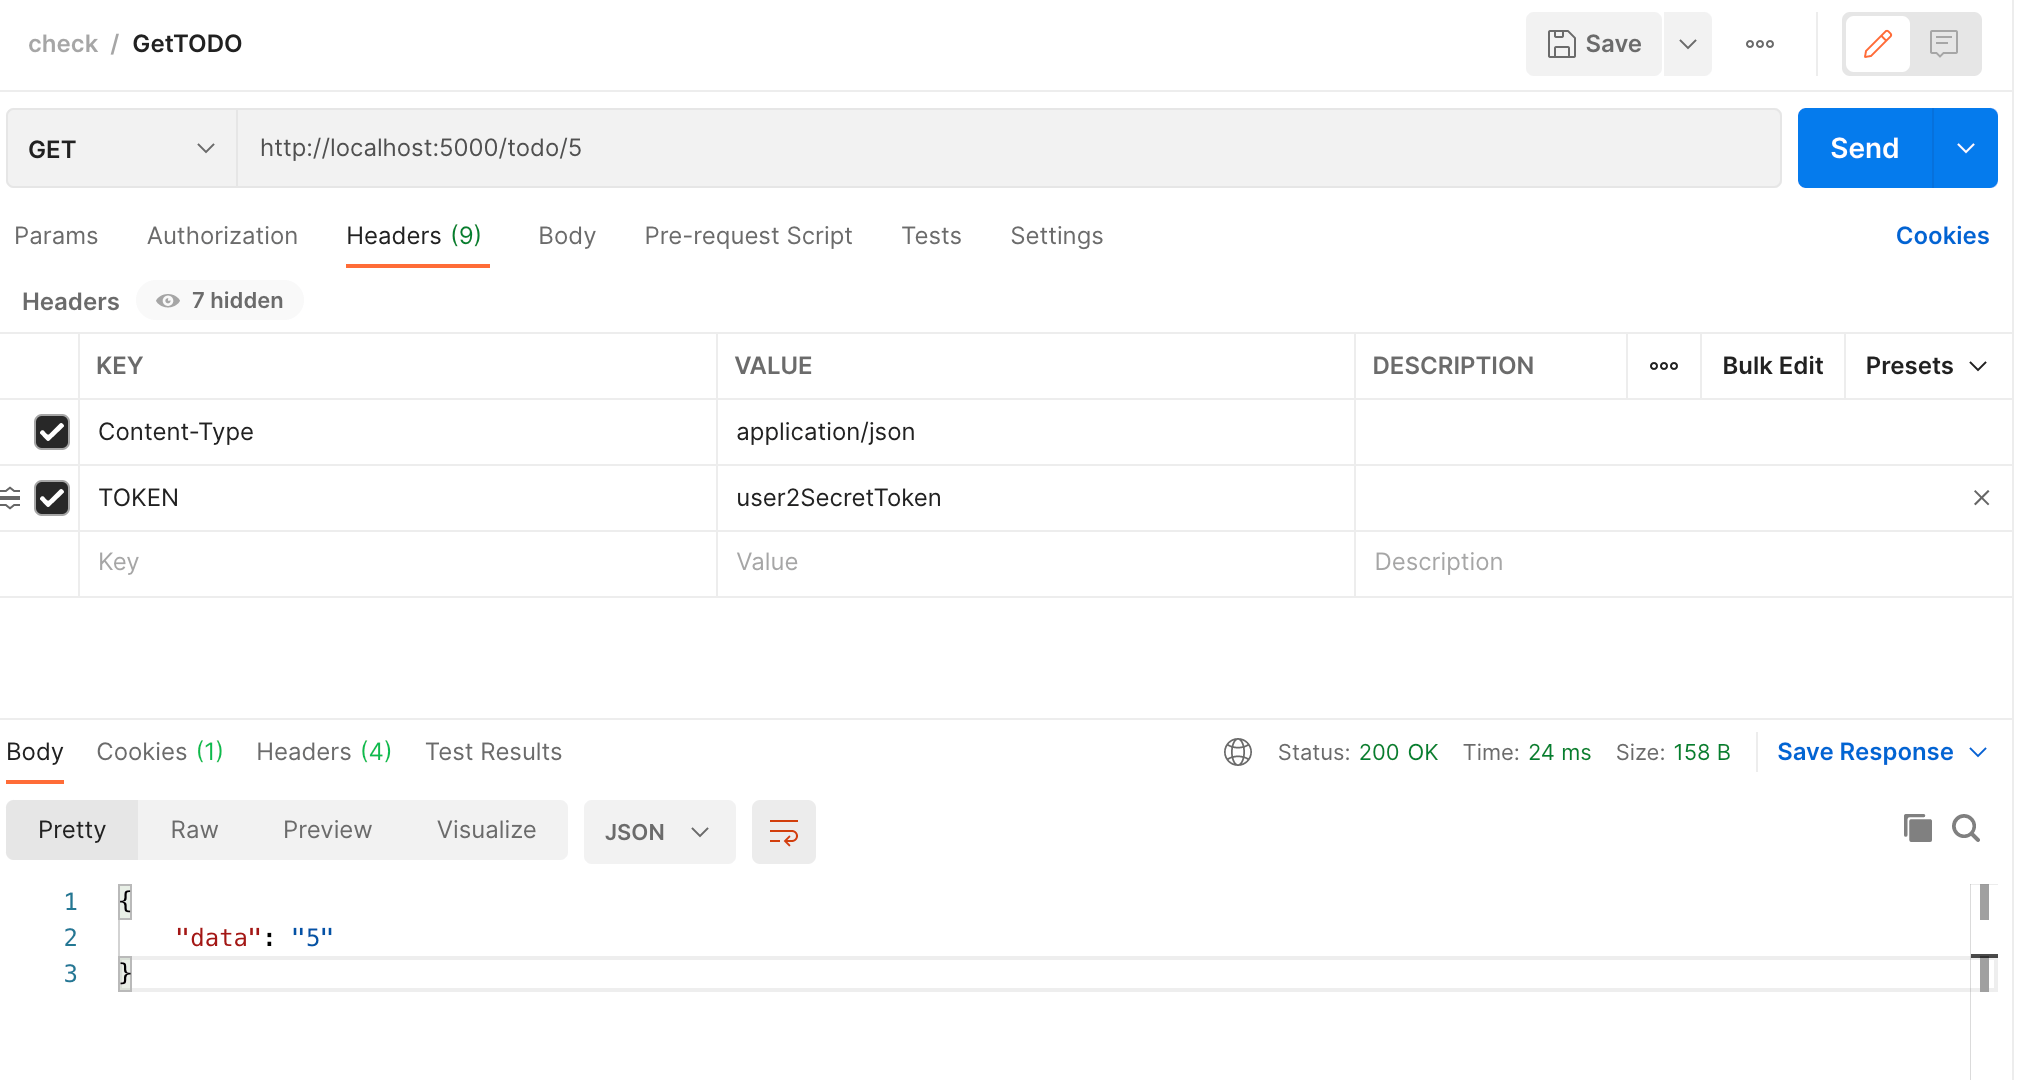
When User 2 Tries to Access Resource 3
Resource 3 belongs to user 1 and is not a public resource, so the user will not be able to access it: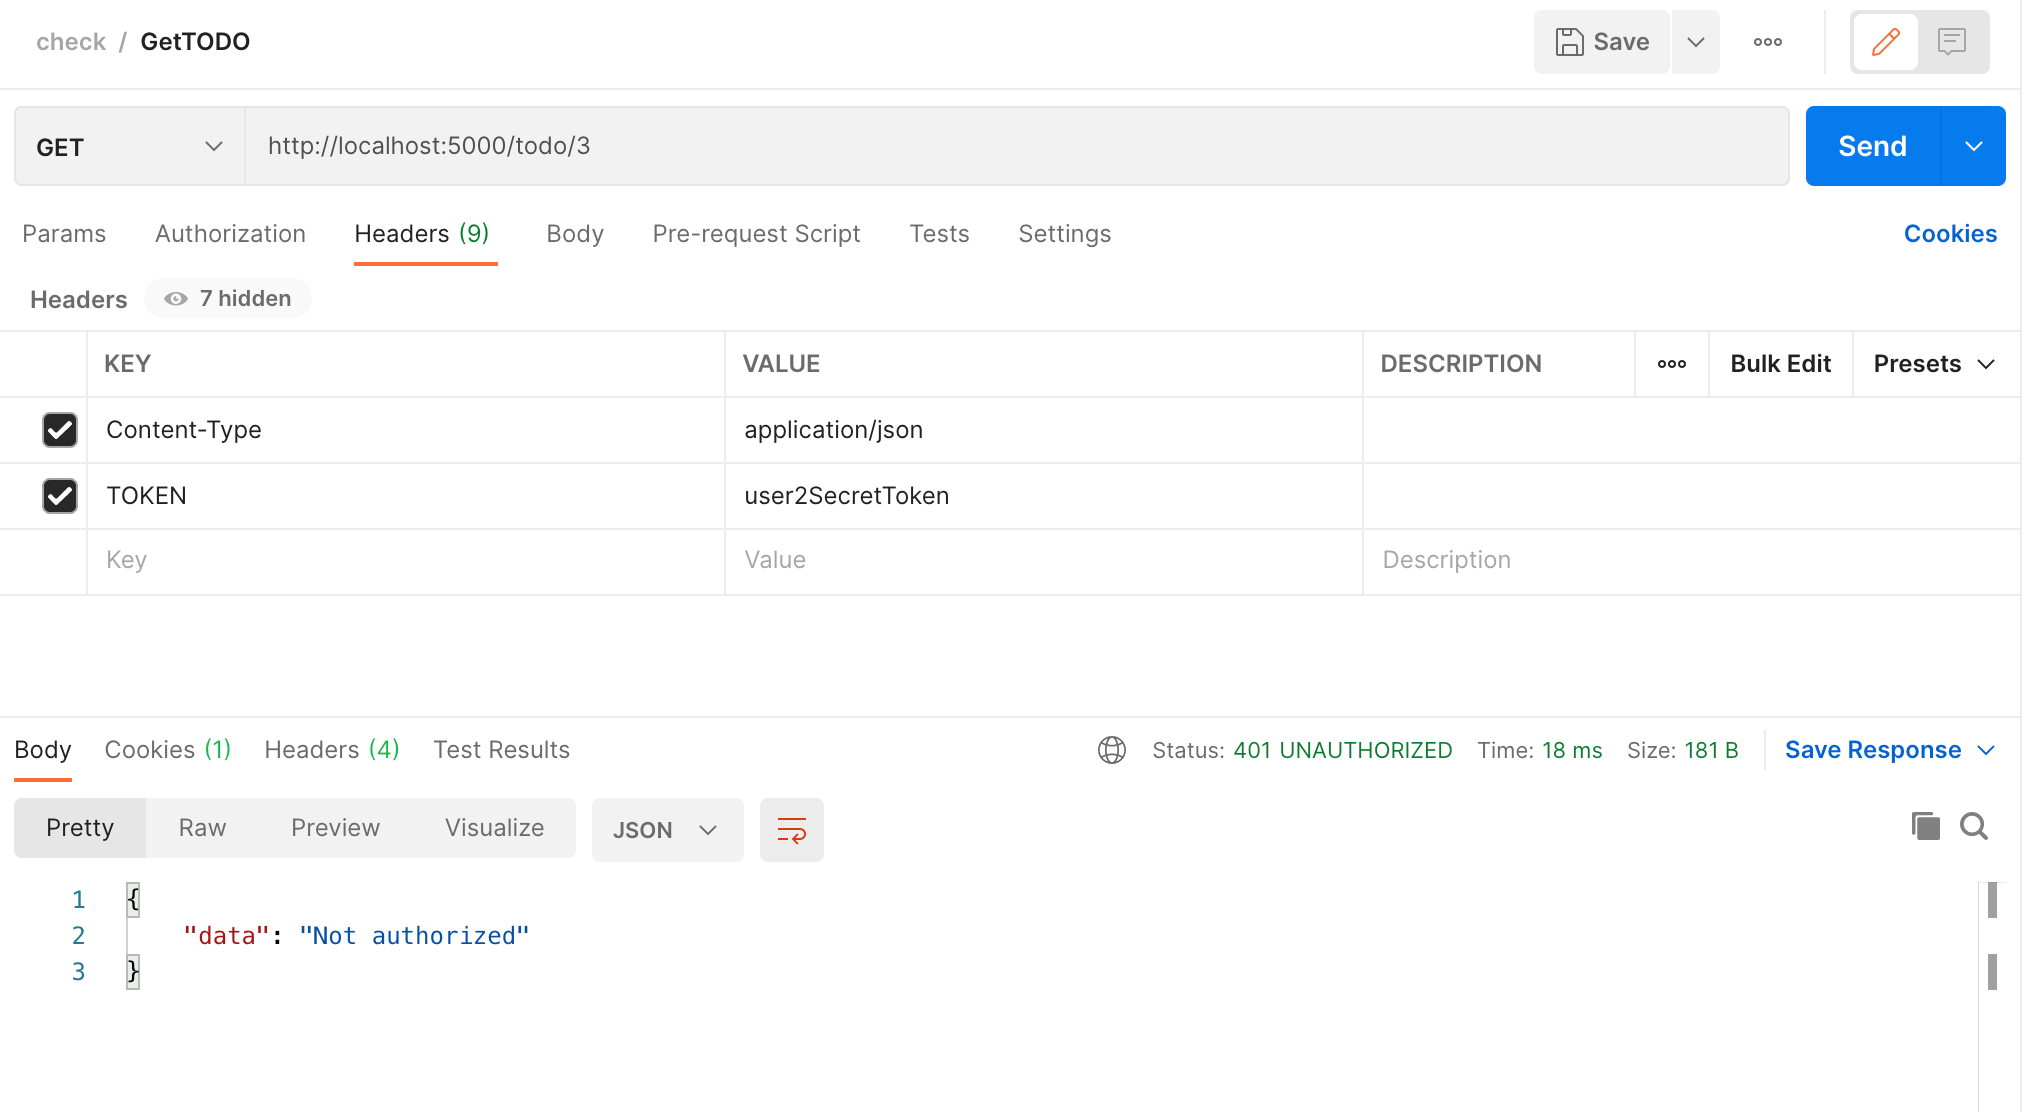
Similarly, you can add the check to all the remaining endpoints and validate the authorization of the resources. The complete code can be found in the GitHub repo. You can play around by changing the policies and see how it changes the resource access permission.
While designing your API, permission management is a key functionality to keep in mind for the security of the resources. If any permission checks are missing, you will be compromising the data of your platform. It is important to have a proper permission check for each resource, but you also do not want to spend a lot of time thinking about permissions while developing each API. The permission check should be easy to implement and easy to test.
Using an external provider like Cerbos is a smart choice because it helps to centralize permission management in an easy-to-understand format. This solves the access permissions problem for developers and non-technical users alike.
此内容由惯性聚合(RSS阅读器)自动聚合整理,仅供阅读参考。 原文来自 — 版权归原作者所有。