






环境:Python3.11.9 stabled
IDE:Pycharm2023.3.1.1 Typora 1.9.5
成品:upload.exe
项目背景
之前本地博文是用Typora + Picgo + COS,对于上传到Minio,需要安装额外的插件,也不支持对图片的转换。目前所有附件和图片都迁移至自建的Minio中,COS并不承担任何业务数据的存储,只保留备份的数据。为了满足本地博文图片上传的需要,用 Python 编写一个上传图片到 Minio 的脚本,并将其打包成exe文件。这个过程不仅适用于图片上传功能,也可以应用到其他 Python 脚本的打包需求中。
脚本编写
安装库
- Minio SDK 用于与 Minio 服务进行交互。
- Pillow 用于处理和转换图片格式。
- aiohttp 用于处理异步请求,支持从 URL 获取图片。
- requests 用于 HTTP 请求。
pip install minio pillow aiohttp requests
这些都是必须要安装的,开发过程中其他库可以选用更轻量的库来减小打包后的体积。
查看文档
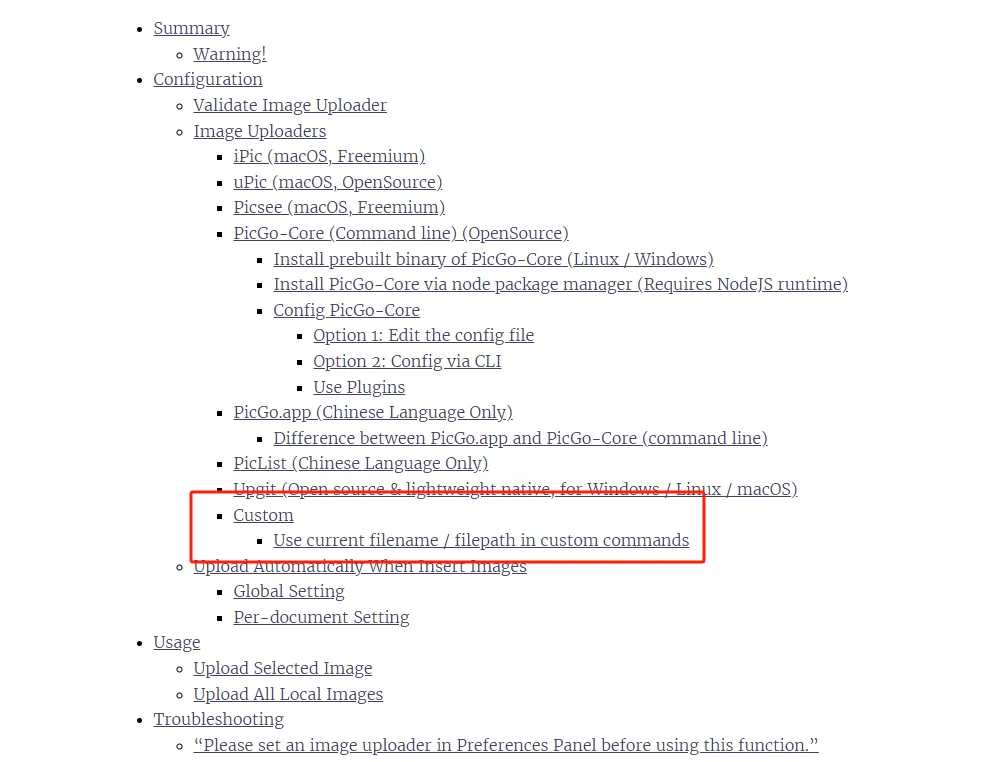
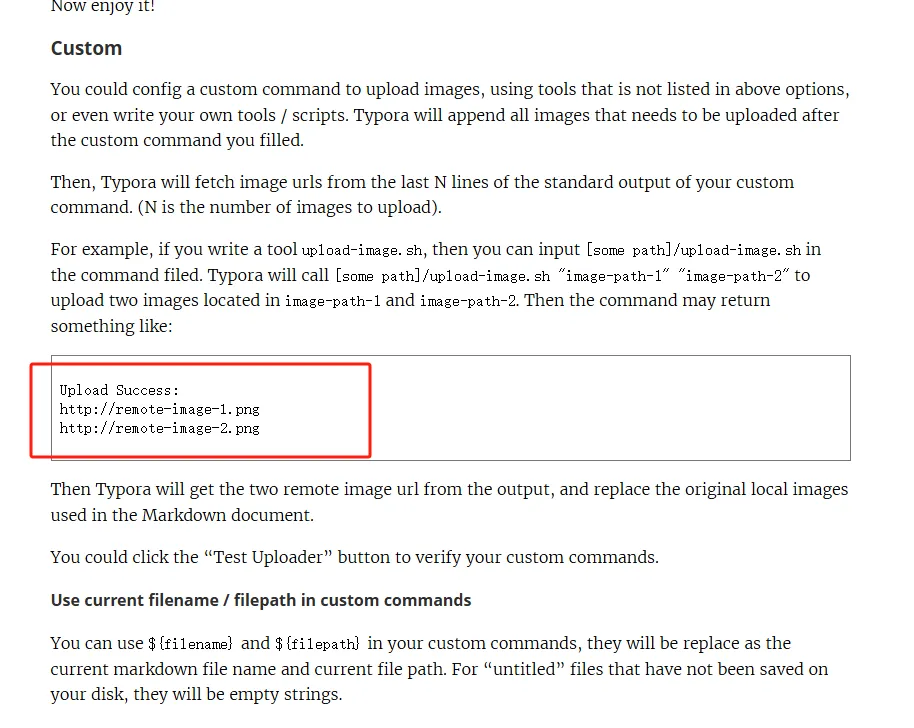
根据文档,最重要的是Typora会传入${filename}或者${filepath},可以一次性上传多张图片,脚本要返回值要用url以换行进行切分,且url必须是干净的,不能有其他输出。
配置约定
- 定义Minio的配置如下:
host = "xxxx.xxxx.com"
port = "xxxx"
access_key = "xxxxxxxxxxxxxxxxxxxx"
secret_key = "xxxxxxxxxxxxxxxxxxxx"
bucket_name = "xxxxxx"
这样拼出来的endpoint就是endpoint = f"{host}:{port}",保留host没有直接用host:port主要是后面我们要返回url给typora
- 定义上传路径为
host/bucket/files/${year}/${month}/ - 定义文件名规则是 日期+6位随机UUID 即
currentDate-uuid4[6].webp
给定脚本
import argparse
import asyncio
import datetime
import io
import logging
import uuid
from asyncio import Semaphore
from PIL import Image
from aiohttp import ClientTimeout, ClientSession, ClientError
from minio import Minio

# 配置 Minio
host = ""
port = ""
access_key = ""
secret_key = ""
bucket_name = ""
endpoint = f"{host}:{port}"
# 创建 Minio 客户端
client = Minio(endpoint,
               access_key=access_key,
               secret_key=secret_key,
               secure=False)
# 配置日志
logging.basicConfig(level=logging.INFO)
logger = logging.getLogger(__name__)
# 限制并发数
semaphore = Semaphore(4)
# 图片上传函数
async def upload_image_to_minio(session, image_path):
    try:
        # 获取当前时间,格式化为图片名称和路径
        current_time = datetime.datetime.now()
        year, month = current_time.year, current_time.month
        # 生成文件名:日期+6位随机UUID
        current_date = current_time.strftime("%Y-%m-%d")
        random_uuid = uuid.uuid4().hex[:6]  # 生成6位UUID
        file_name = f"{current_date}-{random_uuid}.webp"
        # 构造上传路径:/files/2025/01/2025-01-16-randomfile.webp
        upload_path = f"files/{year}/{month:02d}/{file_name}"
        # 判断图片是本地文件还是URL
        if image_path.lower().startswith(('http://', 'https://')):
            # 请求图片并转换为WebP格式
            async with session.get(image_path) as response:
                response.raise_for_status()
                # 打开图片并转换为WebP格式
                img = Image.open(io.BytesIO(await response.read()))
                img_webp = io.BytesIO()
                img.convert("RGB").save(img_webp, format="WEBP")
                img_webp.seek(0)
                # 上传图片到Minio
                await asyncio.to_thread(client.put_object, bucket_name, upload_path, img_webp,
                                        length=len(img_webp.getvalue()))
                logger.info(f"图片上传成功: {upload_path}")
                return f"https://{host}/{bucket_name}/{upload_path}"
        else:
            # 处理本地图片
            with open(image_path, 'rb') as file:
                img = Image.open(file)
                img_webp = io.BytesIO()
                img.convert("RGB").save(img_webp, format="WEBP")
                img_webp.seek(0)
                # 上传图片到Minio
                await asyncio.to_thread(client.put_object, bucket_name, upload_path, img_webp,length=len(img_webp.getvalue()))
                logger.info(f"图片上传成功: {upload_path}")
                return f"https://{host}/{bucket_name}/{upload_path}"
    except ClientError as e:
        logger.error(f"图片上传失败: Minio 客户端错误 {e}")
    except Exception as e:
        logger.error(f"图片上传失败: {e}")
    return None
# 批量处理函数:并发上传
async def upload_images_concurrently(image_paths):
    timeout = ClientTimeout(
        total=None,
        connect=10,
        sock_read=60,
        sock_connect=None
    )
    # 使用 ClientSession 并传入 timeout 参数
    async with ClientSession(timeout=timeout) as session:
        tasks = [upload_image_with_semaphore(session, image_path) for image_path in image_paths]
        results = await asyncio.gather(*tasks)
        # 输出符合Typora要求的上传结果
        print("Upload Success:")  # Typora需要以这一行开始
        for result in results:
            if result:
                print(result)  # 输出成功上传的图片URL
            else:
                print("上传失败")  # 失败的图片不输出URL
# 带有信号量控制的上传函数,控制并发数
async def upload_image_with_semaphore(session, image_path):
    async with semaphore:  # 限制最大并发数
        return await upload_image_to_minio(session, image_path)
# 解析命令行参数
def parse_args():
    parser = argparse.ArgumentParser(description="上传图片到Minio")
    parser.add_argument('image_paths', nargs='+', help='图片的URL或本地路径,可以传入多个路径')
    parser.add_argument('--filename', help='当前Markdown文件名', default='')
    parser.add_argument('--filepath', help='当前Markdown文件路径', default='')
    parser.add_argument('--compress-quality', type=int, help='图片压缩质量,0-100', default=85)
    return parser.parse_args()
# 执行上传任务
async def main():
    args = parse_args()
    image_paths = args.image_paths
    # 输出当前的文件名和路径(可选)
    if args.filename:
        logger.info(f"当前文件名: {args.filename}")
    if args.filepath:
        logger.info(f"当前文件路径: {args.filepath}")
    # 执行并发上传
    await upload_images_concurrently(image_paths)
# 执行
if __name__ == "__main__":
    asyncio.run(main())
这段脚本提供了一些基本的功能:
-
异常处理,且不进行错误重试
-
减小代码冗余,上传不成功就不处理了。
-
异步并发上传
-
使用
asyncio和aiohttp进行异步操作,通过限制最大并发数(使用Semaphore)来控制上传任务的数量,避免一次性上传过多图片导致系统资源消耗过大。 -
图片格式转换
-
使用
Pillow将图片转换为 WebP 格式,个人需要,也比较建议将PNG和JPEG的图片进行处理。WebP相较于前两种,压缩率更高,可以减少存储空间。
程序打包
-
选用
pyinstaller打包,本来源码就不大,因此用UPX简单压缩优化下就可以了。pip install pyinstaller -
UPX下载地址:UPX下载地址
-
执行打包
pyinstaller --onefile --icon=icon.ico --noconsole upload.py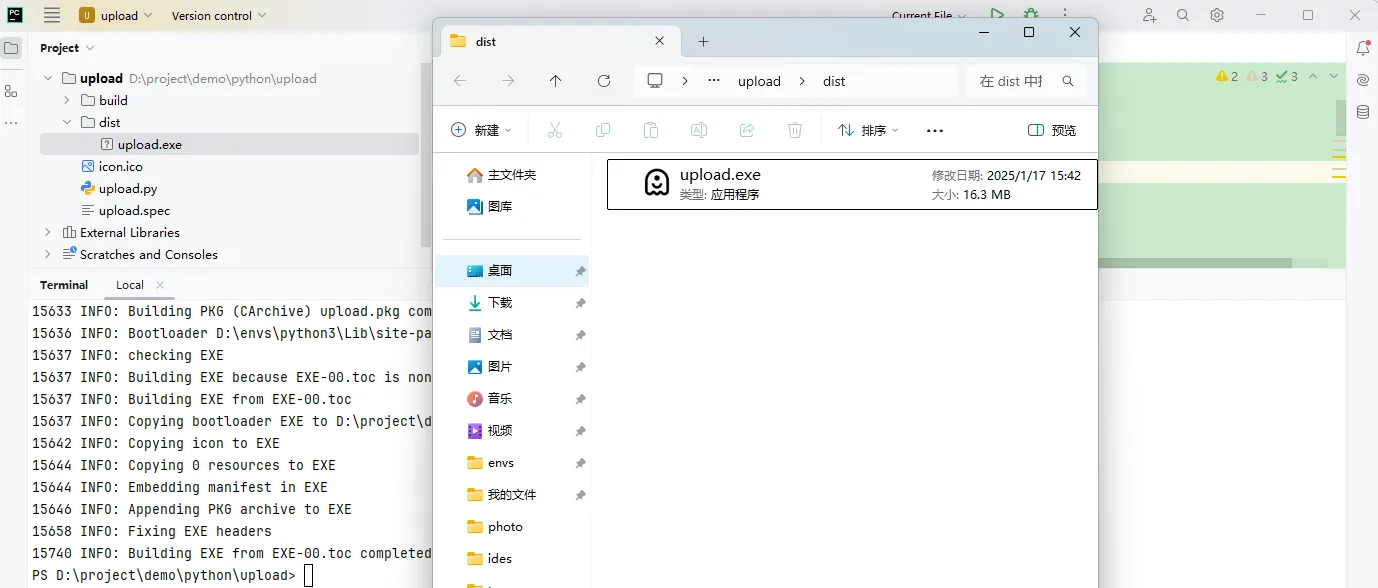
-
执行打包(upx压缩)
pyinstaller --onefile --icon=icon.ico --noconsole --upx-dir="D:\envs\to\upx-4.2.4-win64" upload.py
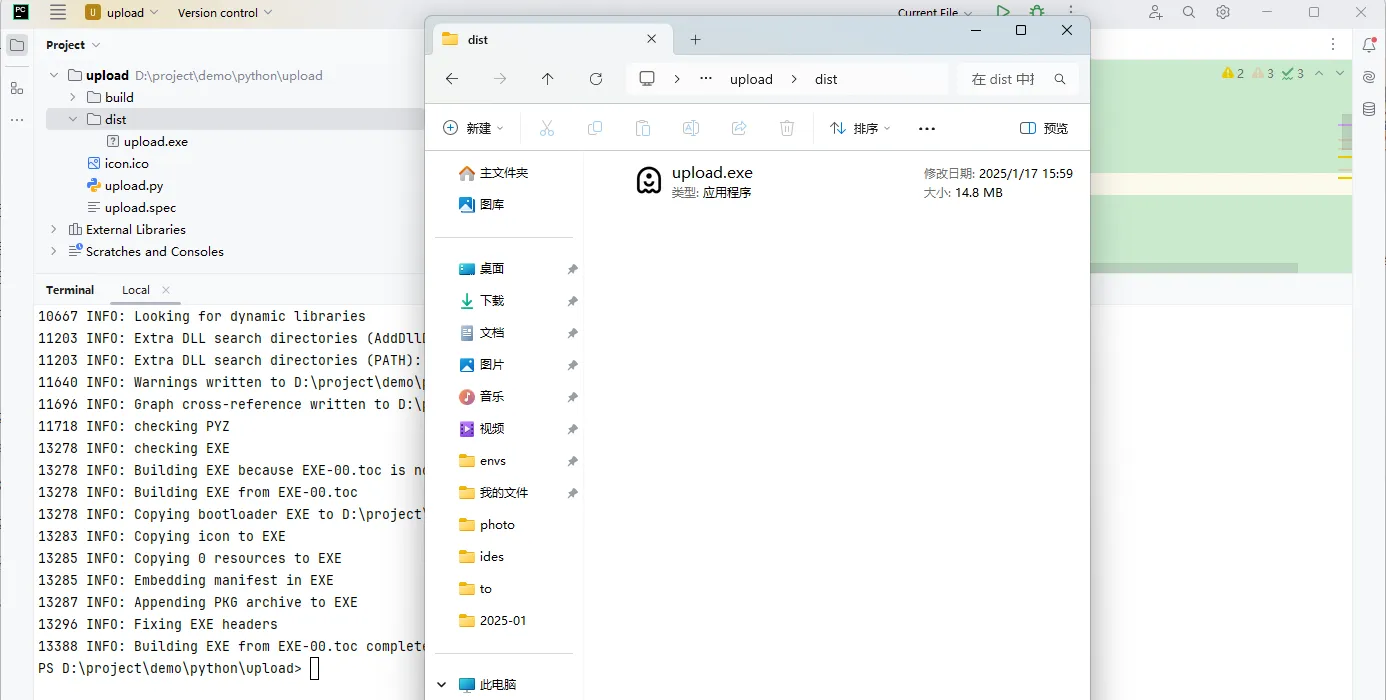
对比发现优化了9.2%,体积小于15M问题不大,不需要过分优化了。压缩前的的体积也不是很大,建议用压缩前的,UPX压缩后可能会导致Win报毒。
脚本使用
-
偏好设置上传图片,指定脚本
-
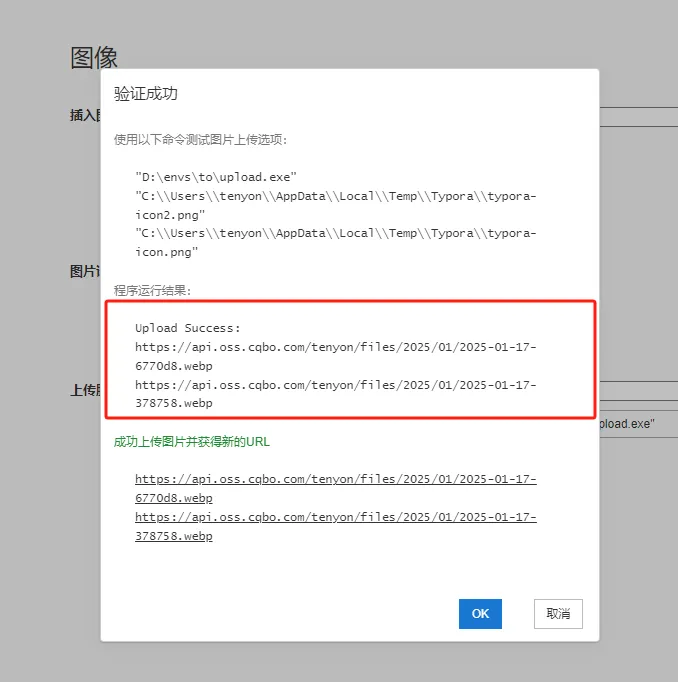
验证图片,可以看到我们打印的结果符合官网自定义的结果
扩展
给定几个以下扩展(利用AI实现起来简单)
- 多存储策略
- GUI页面开发
- 水印功能
总结
很多配置都是写死了,有需要可以针对源码对原有功能二开,对于已经打包的exe文件就可以扩展到其他项目的打包和分发。