


filebeat是传统elk组件中logstach的升级替代,能够高性能的采集一些中间件的日志到es中,供检索分析。
首先要安装filebeat到nginx所在服务器,因为我的服务器是rocky linux属于redhat系,故这里通过yum安装,先设置安装源
导入GPG-KEY
rpm --import https://artifacts.elastic.co/GPG-KEY-elasticsearch新建一个elastic.repo文件在/etc/yum.repos.d下,并粘贴安装源地址
vim /etc/yum.repos.d/elastic.repo
[elastic-9.x]
name=Elastic repository for 9.x packages
baseurl=https://artifacts.elastic.co/packages/9.x/yum
gpgcheck=1
gpgkey=https://artifacts.elastic.co/GPG-KEY-elasticsearch
enabled=1
autorefresh=1
type=rpm-md
接下来执行安装,直到安装完成
yum install filebeat -y首先确认nginx的日志路径和日志格式,一般日志路径默认就是:
/var/log/nginx/access.log 常规访问日志/var/log/nginx/error.log 错误日志在nginx.conf配置文件中,默认的日志格式是:
log_format  main  ' $remote_addr - $remote_user [$time_local] "$request" '
                  '$status $body_bytes_sent "$http_referer" '
'"$http_user_agent" "$http_x_forwarded_for"';为了区分各个主机的访问记录,我选择增加一个主机的字段:$host
log_format  main  '$host $remote_addr - $remote_user [$time_local] "$request" '
                  '$status $body_bytes_sent "$http_referer" '
                  '"$http_user_agent" "$http_x_forwarded_for"';
亲测filebeat可以识别上述的日志格式,自动提取有效信息
然后设置filebeat,通过yum安装的filebeat,默认全局配置文件位于/etc/filebeat/filebeat.yml,有这样几项需要修改
output.elasticsearch:
  # 改成自己es地址和端口
  hosts: ["localhost:9016"]

  # 改成自己的索引格式
  index: "nginx-logs-%{+yyyy.MM.dd}"
  # 通信协议按需要修改
  protocol: "http"

  # es用户名密码,必须设置
  username: "elastic"
  password: "***************"

# 需要新增这两项,索引数据格式模板名称
setup.template.name: "nginx-logs"
setup.template.pattern: "nginx-logs-*"然后对nginx的采集功能进行设置,filebeat支持很多中间件的日志采集,通过yum安装的filebeat,默认的各中间件的采集配置文件位于:/etc/filebeat/modules.d/
首先要将默认的nginx配置文件nginx.yml.disabled复制出一份nginx.yml,因为最后filebeat只会自动导入读取.yml结尾的文件
cp /etc/filebeat/modules.d/nginx.yml.disabled /etc/filebeat/modules.d/nginx.ymlvim编辑/etc/filebeat/modules.d/nginx.yml配置文件,针对nginx的采集进行配置
- module: nginx
  # 打开常规访问日志采集,指定日志路径
  access:
    enabled: true
    var.paths: ["/var/log/nginx/access.log"]
    var.timezone: "Asia/Shanghai"


  # 打开错误日志采集,指定日志路径
  error:
    enabled: true
    var.paths: ["/var/log/nginx/error.log"]
    var.timezone: "Asia/Shanghai"
都修改完成后,通过filebeat test config命令,验证配置文件是否有语法错误
[root@VM-0-3-rockylinux ~]# filebeat test config
Config OK
然后启动filebeat,并且能看到进程,启动成功
[root@VM-0-3-rockylinux ~]# systemctl start filebeat
[root@VM-0-3-rockylinux ~]# ps -ef | grep filebeat
root      279214       1  0 Apr17 ?        00:00:09 /usr/share/filebeat/bin/filebeat --environment systemd -c /etc/filebeat/filebeat.yml --path.home /usr/share/filebeat --path.config /etc/filebeat --path.data /var/lib/filebeat --path.logs /var/log/filebeat
root 484905 454652 0 14:33 pts/2 00:00:00 grep --color=auto filebeat登录kibana,打开开发工具,就能看到filebeat建的索引和采集到的日志了,还可以根据业务需要制作图表等
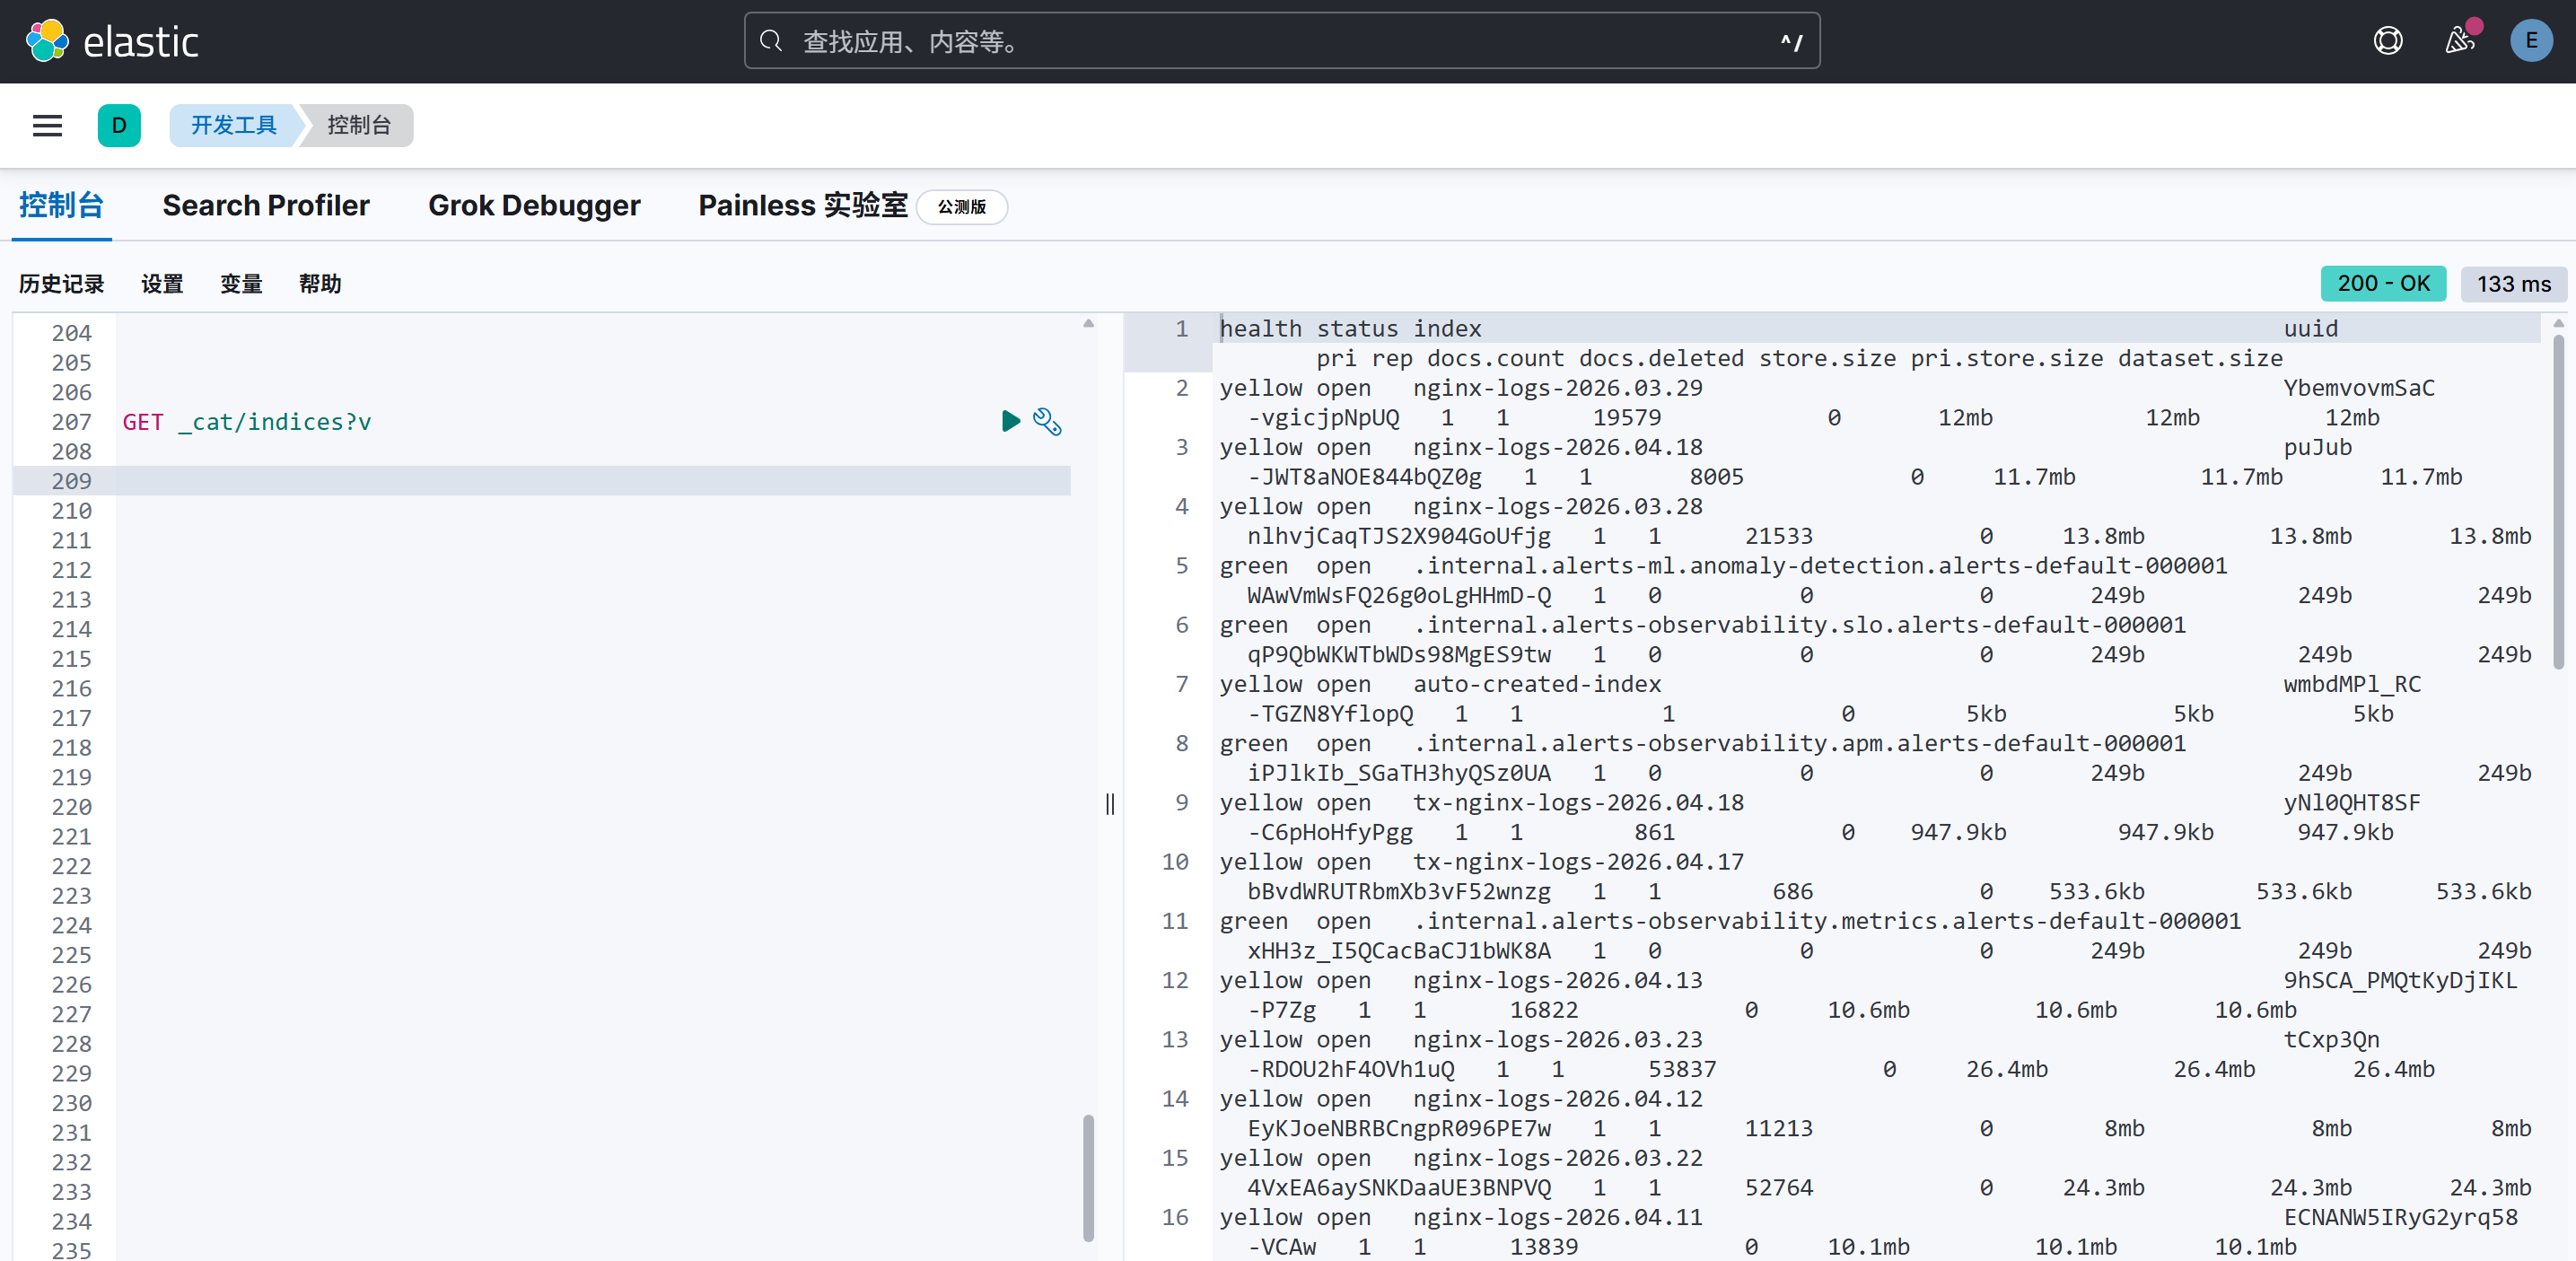
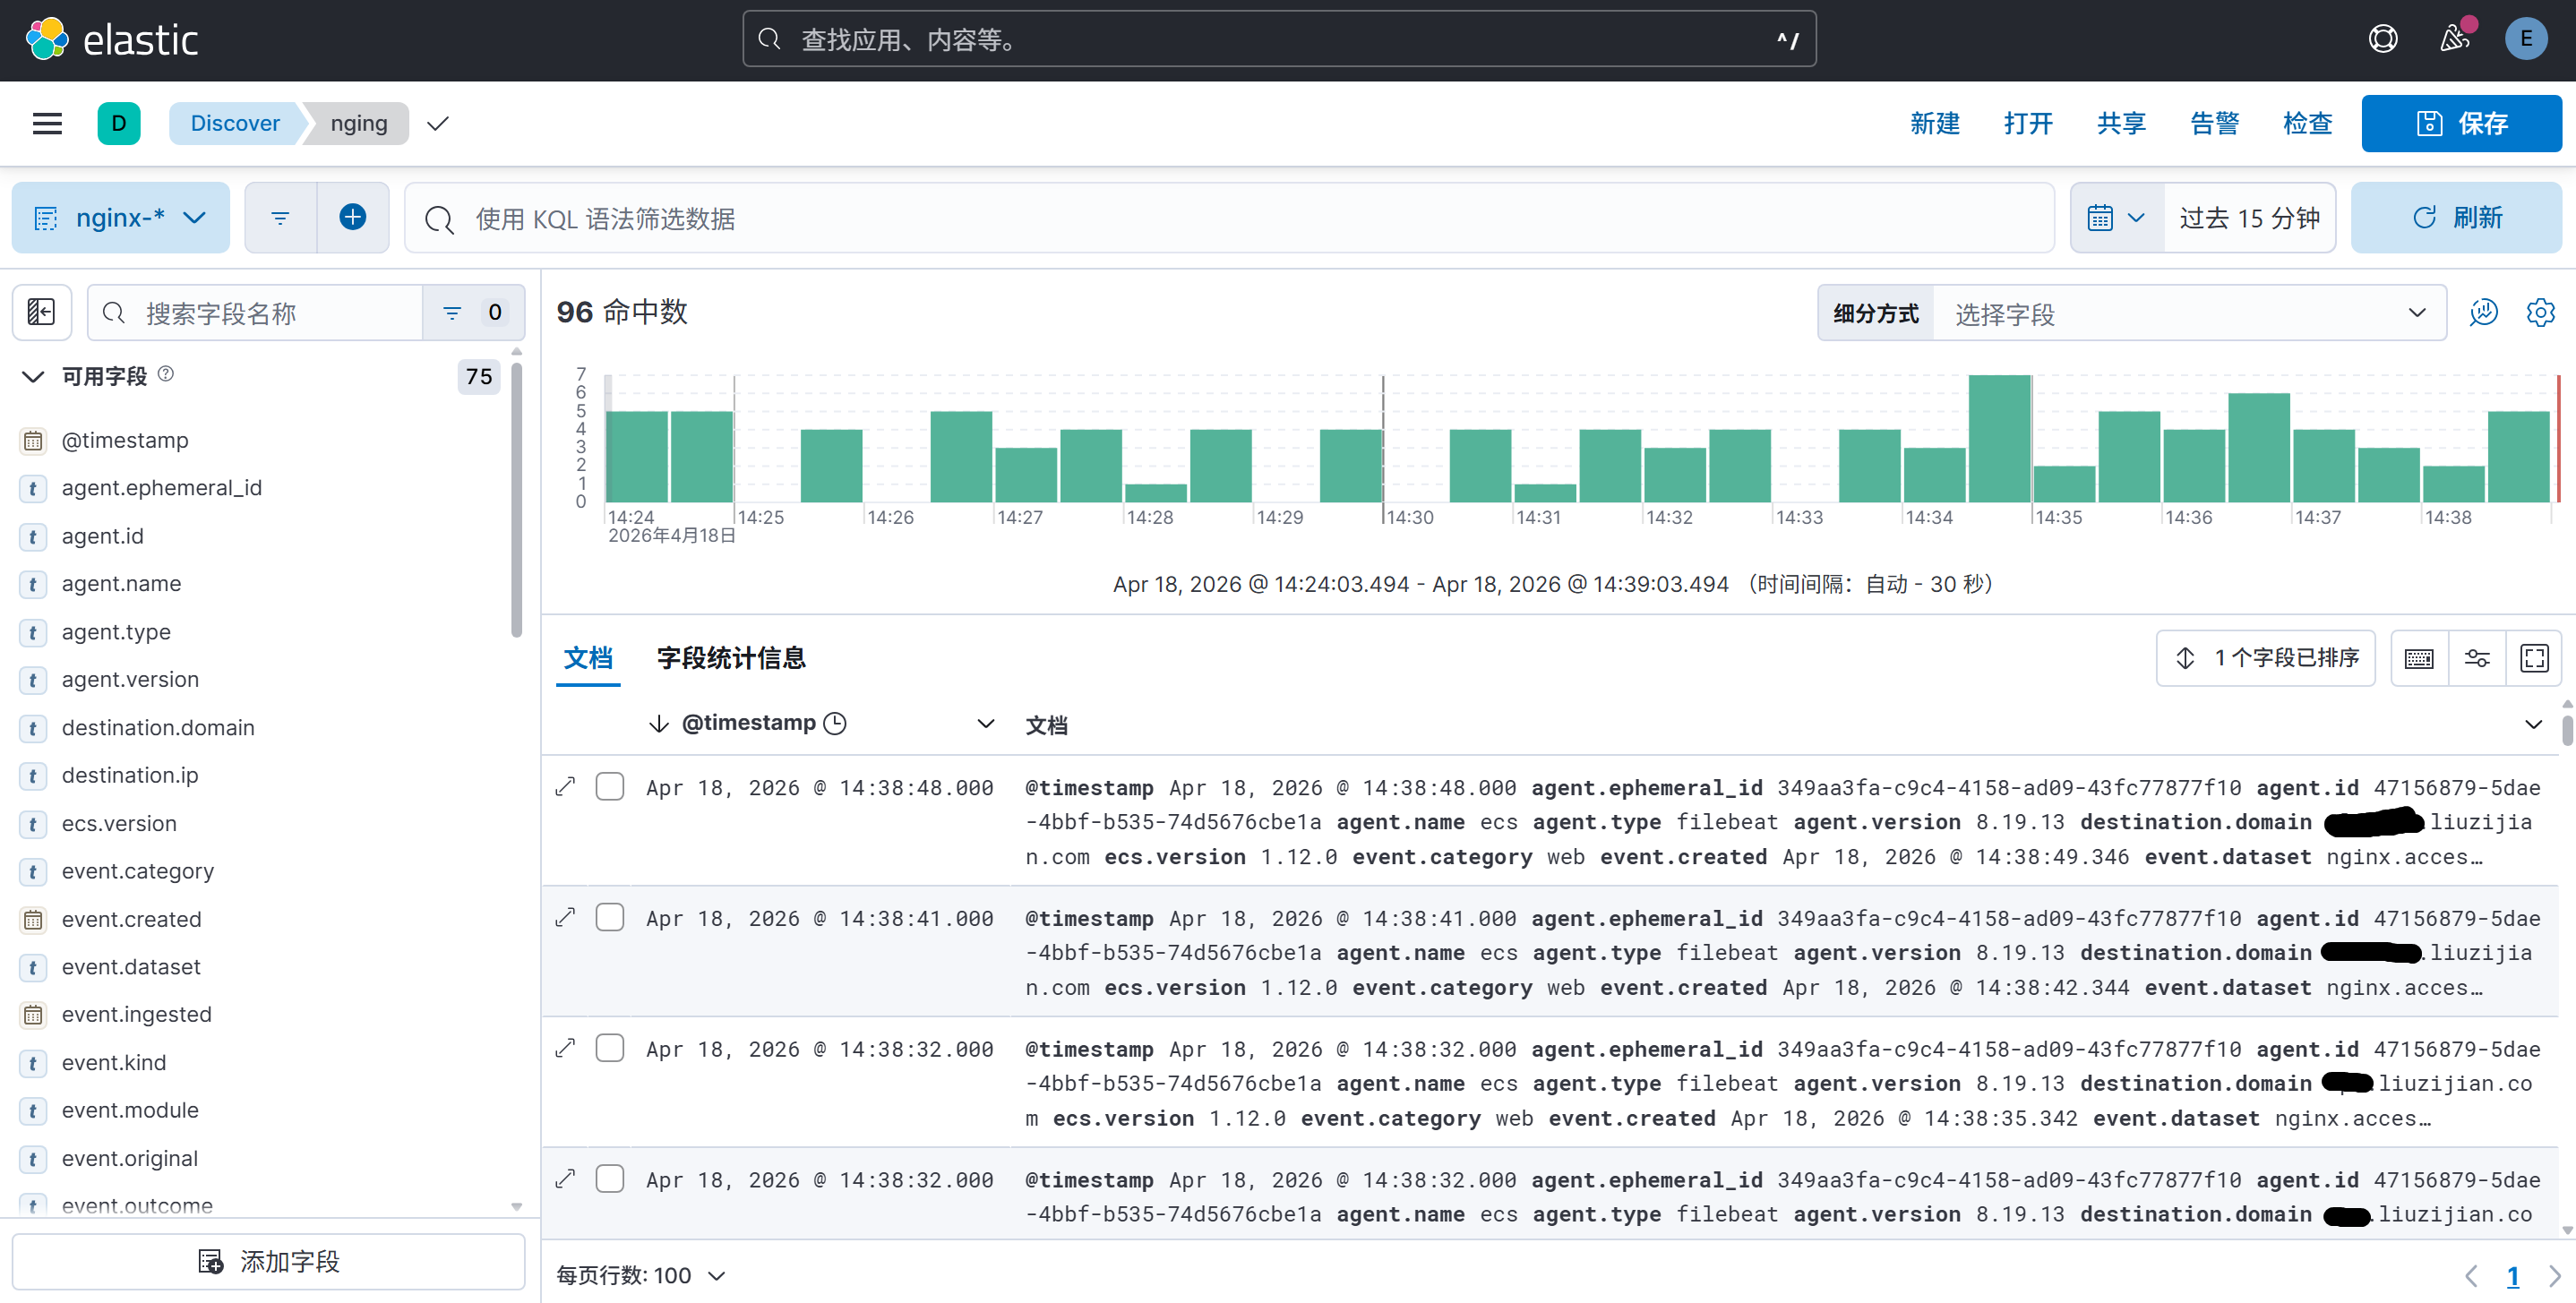
还可以通过检索,根据各种字段进行聚合,通过访问规律查出一些攻击和刺探的恶意请求,例如:
1.查询某一天,某个主机下,某个IP访问某个路径的次数,可以很容易发现恶意请求的规律,揪出恶意访问者
GET /nginx-logs-2026.04.18/_search
{
  "size": 0,
  "aggs": {
    "domain_counts": {
      "terms": {
        "field": "url.domain",
      "size": 20000
      },
      "aggs": {
        "domains_per_ip": {
          "terms": {
            "field": "source.ip",
            "size": 20000

          },
          "aggs": {
            "domains_per_path": {
              "terms": {
                "field": "url.path",
                "size": 20000

              }
            }
          }
        }
      }
    }
  }
}
2.查询某个IP地址段的访问记录
GET /nginx-logs-2026.04.25/_search
{
  "size": 8000,
  "query": {
    "match": {
      "source.ip": "221.229.0.0/16"
    }
  },
  "sort": [
    {
      "@timestamp": {
        "order": "asc"
      }
    }
  ]

}还可以将检索结果,交由AI大模型分析,然后出具一份报告通过钉钉/飞书机器人等手段主动推送给我们,最近推出的1M上下文的deepseek-v4系列就很合适,ES聚合结果JSON很大,官方API每次分析大约1元人民币左右,截止成文时间,魔搭社区提供每日限量的免费API
import json
import os
import time
import requests
from datetime import datetime, timedelta
from elasticsearch import Elasticsearch
from openai import OpenAI
from dotenv import load_dotenv

load_dotenv()

# ============ ES 配置 ============
ES_HOST = os.getenv("ES_HOST")
ES_USER = os.getenv("ES_USER")
ES_PASS = os.getenv("ES_PASS")
YESTERDAY = (datetime.now() - timedelta(days=1)).strftime("%Y.%m.%d")
ES_INDEX = f"*ginx-logs-{YESTERDAY}"

# ============ LLM 配置(OpenAI 兼容接口) ============
LLM_API_KEY = os.getenv("LLM_API_KEY")
LLM_BASE_URL = os.getenv("LLM_BASE_URL")
LLM_MODEL = os.getenv("LLM_MODEL")

# ============ 钉钉配置 ============
DINGTALK_WEBHOOK = os.getenv("DINGTALK_WEBHOOK")

# ============ 飞书配置 ============
FEISHU_WEBHOOK = os.getenv("FEISHU_WEBHOOK")

SYSTEM_PROMPT = """
你是一个运维和网络安全AI助理,能按照以下指令不折不扣完成分析任务:
1.逐一分析各个域名(主机)的请求,每一个都要单独列出分析, 用非域名访问的单独分析,每个域名都要用表格具体呈现!表格展现: IP/IP(段),访问次数,访问路径,IP(段)要标注属地
2.揪出恶意请求,对于恶意请求加上判定原因
3.每个IP都要分析,IP段成段访问的可以成段分析
4.要写一个小总结,简述当天访问情况
5.为了配合钉钉/飞书机器人要求,生成的内容,至少包含关键词:“AI”一次。生成的内容是直接发给机器人的,开头要先简短的向主人问好
"""


def query_es():
    """查询ES聚合数据"""
    es = Elasticsearch(
        ES_HOST,
        basic_auth=(ES_USER, ES_PASS),
    )

    query = {
        "size": 0,
        "aggs": {
            "d": {
                "terms": {
                    "field": "destination.domain",
                    "size": 200000,
                    "order": {"_count": "desc"},
                },
                "aggs": {
                    "i": {
                        "terms": {
                            "field": "source.ip",
                            "size": 200000,
                            "order": {"_count": "desc"},
                        },
                        "aggs": {
                            "p": {
                                "terms": {
                                    "field": "url.path",
                                    "size": 200000,
                                    "order": {"_count": "desc"},
                                }
                            }
                        },
                    }
                },
            }
        },
    }

    resp = es.search(index=ES_INDEX, body=query)
    return resp.body


def analyze_with_llm(es_data):
    """将ES原始返回JSON直接交给大模型分析"""
    client = OpenAI(
        api_key=LLM_API_KEY,
        base_url=LLM_BASE_URL,
    )

    raw_json = json.dumps(es_data, ensure_ascii=False)
    print(f"发送至LLM的数据大小: {len(raw_json)} 字符")

    response = client.chat.completions.create(
        model=LLM_MODEL,
        temperature=0.1,
        messages=[
            {"role": "system", "content": SYSTEM_PROMPT},
            {"role": "user", "content": f"以下是ES聚合查询的原始返回结果,请按要求逐一分析:\n\n{raw_json}"}
        ],
    )

    if not response.choices:
        print(f"LLM返回异常,choices为空。完整响应: {response}")
        time.sleep(120) # 应对魔搭免费API不稳定的情况
        return analyze_with_llm(es_data) # 应对魔搭免费API不稳定的情况

    return response.choices[0].message.content


def send_dingtalk(content):

    """通过钉钉机器人api发送分析报告"""
    headers = {"Content-Type": "application/json"}

    title = f"Nginx日志分析报告 - {YESTERDAY}"

    payload = {
        "msgtype": "markdown",
        "markdown": {"title": title, "text": content},
    }

    try:
        resp = requests.post(DINGTALK_WEBHOOK, json=payload, headers=headers, timeout=10)
        result = resp.json()
        if result.get("errcode") == 0:
            print(f"钉钉消息  发送成功")
        else:
            print(f"钉钉消息   发送失败: {result}")
    except Exception as e:
        print(f"钉钉消息  发送异常: {e}")


def send_feishu(content):
    """通过飞书机器人api发送分析报告"""
    headers = {"Content-Type": "application/json"}
    title = f"Nginx 日志分析报告 - {YESTERDAY}"

    payload = {
        "msg_type": "interactive",
        "card": {
            "header": {
                "title": {"tag": "plain_text", "content": title},
                "template": "blue",
            },
            "elements": [
                {"tag": "markdown", "content": content}
            ],
        },
    }

    # 飞书客户端普通消息对html/md支持还不是很好,可以换成支持html的自定义卡片
    # payload = {
    #     "msg_type": "interactive",
    #     "card": {
    #         "type": "template",
    #         "data": {
    #             "template_id": "",
    #             "template_version_name": "1.0.2",
    #             "template_variable": {
    #                 "": title,
    #                 "": content
    #             }
    #         }
    #     }
    # }

    try:
        resp = requests.post(FEISHU_WEBHOOK, json=payload, headers=headers, timeout=10)
        result = resp.json()
        if result.get("code") == 0:
            print("飞书消息 发送成功")
        else:
            print(f"飞书消息 发送失败: {result}")
    except Exception as e:
        print(f"飞书消息 发送异常: {e}")


def main():
    print("正在查询 ES...")
    es_data = query_es()

    print("正在调用大模型分析...")
    analysis = analyze_with_llm(es_data)
    print("LLM 分析完成")
    print(analysis)

    #print("正在发送钉钉消息...")
    #send_dingtalk(analysis)

    print("正在发送飞书消息...")
    send_feishu(analysis)


if __name__ == "__main__":
    main()
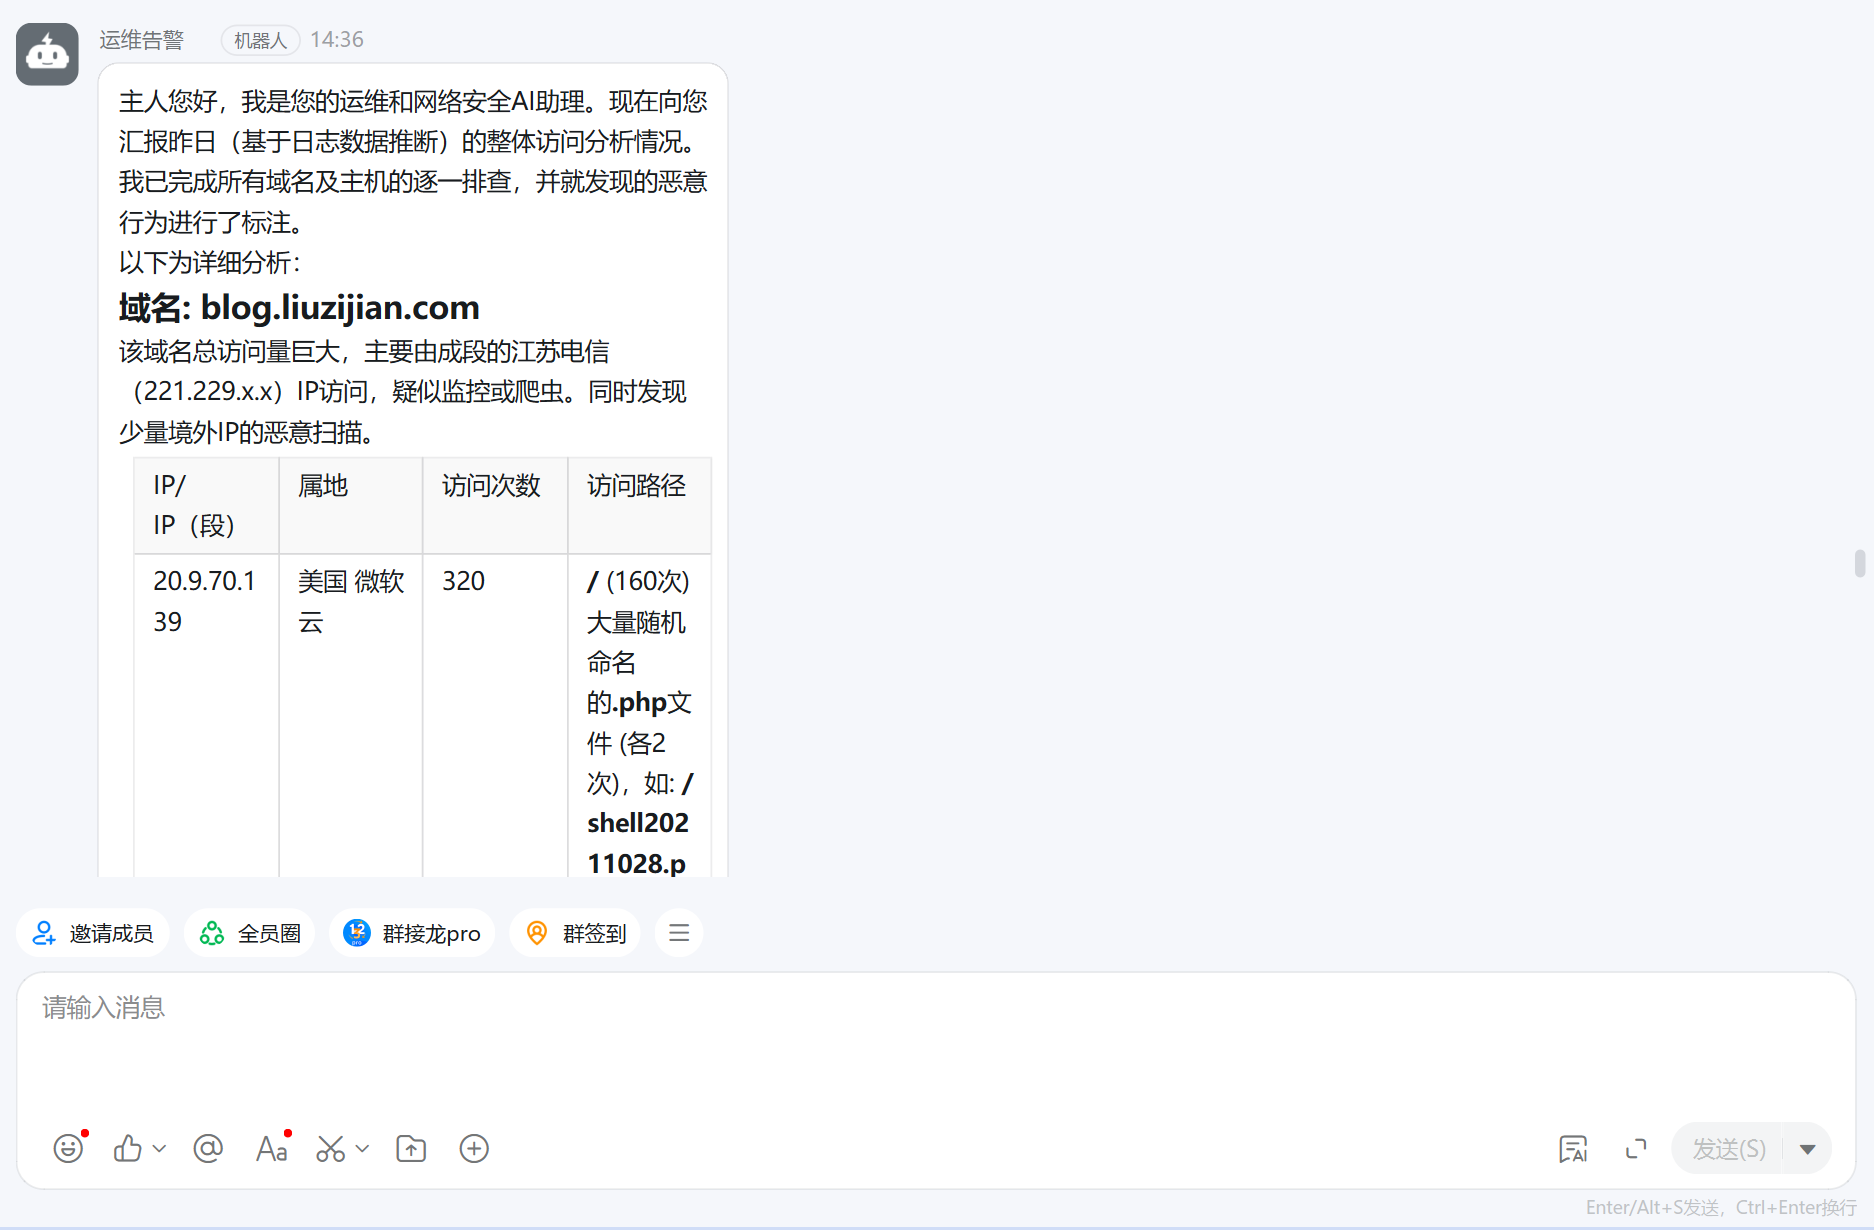
还可以基于tools/阿里云MCP等方式让大模型实现自定义IP属地查询,自动封锁恶意IP等。
此内容由惯性聚合(RSS阅读器)自动聚合整理,仅供阅读参考。 原文来自 — 版权归原作者所有。