





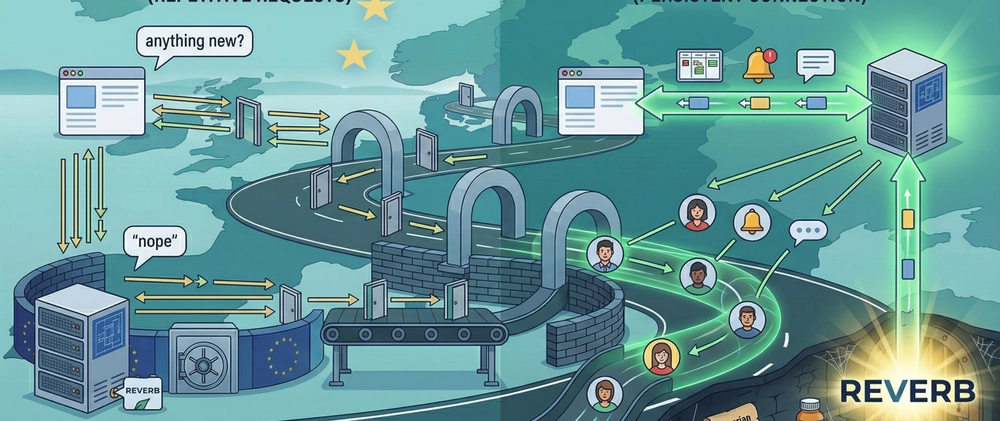

Most web applications are built on a simple model: the browser sends a request, the server processes it, the server sends a response, and the connection closes. This request-response cycle has powered the web for decades, and it works perfectly for the vast majority of interactions. But there are moments when it falls short.
Imagine a project management app where multiple team members are viewing the same task board. Alice moves a task from "In Progress" to "Done." Bob, who is looking at the same board, does not see the change until he refreshes the page. In a traditional HTTP application, Bob's browser has no way to know that something changed on the server. It would have to poll repeatedly, asking the server "did anything change?" every few seconds, which is wasteful and introduces latency.
WebSockets solve this problem elegantly. Instead of closing the connection after each request-response cycle, a WebSocket connection stays open. The server can push data to the browser the instant something happens, without the browser asking. Alice moves the task, the server broadcasts the change, and Bob's browser updates in real time.
This guide takes you from zero WebSocket knowledge to a working real-time feature in your Laravel application, deployed and running on Deploynix.
How WebSockets Work
A WebSocket connection starts as a regular HTTP request. The browser sends an HTTP request with a special Upgrade header that says "I would like to switch to the WebSocket protocol." If the server supports WebSockets, it responds with a 101 status code (Switching Protocols), and the connection transitions from HTTP to WebSocket.
Once the connection is upgraded, it becomes a full-duplex communication channel. Both the browser and the server can send messages at any time, independently of each other. The connection remains open until either side explicitly closes it, or a network interruption occurs.
The key differences from regular HTTP:
- Persistent: The connection stays open for the duration of the session. No repeated handshakes, no connection overhead for each message.
- Bidirectional: The server can push data to the client without the client requesting it. The client can also send data to the server at any time.
- Low latency: Messages are delivered in milliseconds because there is no connection setup for each message.
- Low overhead: WebSocket frames have minimal headers compared to HTTP requests, so the per-message overhead is tiny.
WebSockets are ideal for features like live notifications, real-time dashboards, chat applications, collaborative editing, live activity feeds, and any situation where users need to see changes as they happen.
Laravel Broadcasting: The Framework Layer
Laravel does not ask you to work with raw WebSocket connections. Instead, it provides a Broadcasting system that abstracts the complexity into a clean, event-driven API. You define events in PHP, broadcast them, and listen for them in JavaScript. Laravel handles the plumbing.
The broadcasting system has three components:
Events: Standard Laravel events that implement the ShouldBroadcast or ShouldBroadcastNow interface. When these events are dispatched, Laravel serializes their public properties and sends them to the broadcasting driver.
Channels: Named channels that organize broadcasts. Laravel supports three types:
- Public channels that anyone can listen to.
- Private channels that require authentication. The server verifies that the user is authorized to listen on the channel before allowing the connection.
- Presence channels that are private channels with the additional ability to see who else is listening. These are perfect for showing "who's online" indicators.
Laravel Echo: A JavaScript library that connects to the WebSocket server and provides a clean API for subscribing to channels and listening for events.
Reverb vs. Third-Party Services
Before Reverb, Laravel developers had two main options for WebSocket infrastructure: Pusher (a paid, hosted service) and laravel-websockets (a community package that ran a WebSocket server alongside your Laravel app). Each had trade-offs.
Pusher is easy to set up but introduces a third-party dependency, ongoing costs, and the latency of routing messages through an external service. The laravel-websockets package kept everything in-house but was a community project with varying maintenance and could be tricky to run reliably in production.
Laravel Reverb changed the equation. Reverb is a first-party Laravel package, maintained by the Laravel team, that provides a high-performance WebSocket server designed specifically for Laravel Broadcasting. It runs on your own servers, so there is no third-party dependency, no per-message pricing, and no added latency from routing through an external service.
Reverb is built on ReactPHP and handles thousands of concurrent connections efficiently. It integrates seamlessly with Laravel's authentication system for private and presence channels, and it works out of the box with Laravel Echo.
For most Laravel applications deploying on Deploynix, Reverb is the clear choice. You get full control over your WebSocket infrastructure, zero external dependencies, and first-party support from the Laravel team.
Setting Up Reverb in Your Laravel Application
Let's walk through adding Reverb to an existing Laravel application.
Step 1: Install Reverb
Install Reverb using the Artisan installer:
php artisan install:broadcasting
This command installs the Reverb package, publishes the configuration file, adds the necessary environment variables to your .env file, and installs the JavaScript dependencies (Laravel Echo and the Pusher JS client, which Echo uses as its WebSocket client library).
Step 2: Configure Environment Variables
After installation, your .env file will have new Reverb-related variables:
BROADCAST_CONNECTION=reverb

REVERB_APP_ID=your-app-id
REVERB_APP_KEY=your-app-key
REVERB_APP_SECRET=your-app-secret
REVERB_HOST="localhost"
REVERB_PORT=8080
REVERB_SCHEME=https
In development, localhost is fine. For production on Deploynix, you will configure these differently (we will cover that in the deployment section).
Step 3: Create a Broadcastable Event
Create an event that implements ShouldBroadcastNow:
php