






Introduction
Imagine an employer or recruiter landing on your profile. Instead of a standard, static PDF, they are greeted with a fast, responsive, and live-hosted website that showcases your professional journey with precision. It doesn’t just show them your experience, it proves you have the technical initiative to build, manage, and deploy your own digital footprint.
In this article, I’ll walk you through how I took a professional Pilot’s resume from a local code editor to a live URL using HTML, CSS, and GitHub Pages, including specific terminal hurdles I cleared along the way.
Learning Objectives:
- Configure my global Git identity.
- Initialize and manage a clean local workspace.
- Troubleshoot common terminal errors like fatal: not a git repository.
- Deploy a live project using GitHub Pages.
For this exercise, Git Bash is an essential command-line interface. It provides the Unix-style environment necessary to run these commands seamlessly on a Windows machine.
Step 1: Setting the Foundation
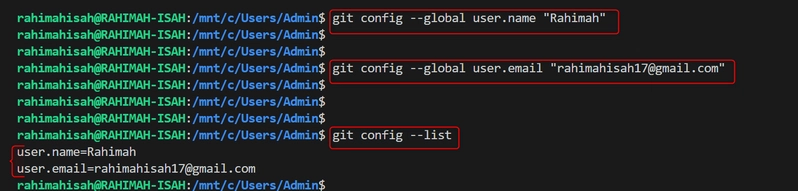
Every successful deployment starts with identity. Before Git can track your progress, it needs to know who is behind the code. I started by configuring my global credentials in the terminal to ensure every commit was correctly attributed to my profile.
Using git config --list is a quick way to verify your setup and avoid Permission Denied errors later in the workflow.
NOTE: Only two lines of output appeared because I have configured my environment before this exercise.
Step 2: Building the Workspace
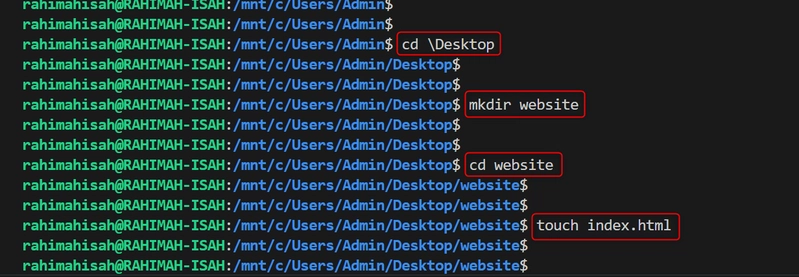
Organization is key to a smooth deployment. Instead of working out of a cluttered root directory, I used the terminal to create a dedicated space for my project. By navigating to the Desktop and using mkdir and touch, I established a clean environment for my source files.
The Workflow:
cd: Navigating to the right environment.
mkdir website: Creating a isolated container for the project.
touch index.html: Generating the entry point for my live site.
Step 3: Bridging Local to Remote
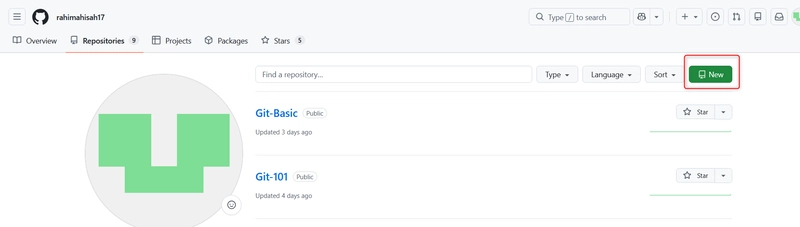
With the local code ready, the next step was creating a remote repository on GitHub. This is where the magic of Hosting begins. By clicking that New button, I created a central hub (Git-Basics101) that would eventually serve my resume to the world.
Creating a remote repository is like setting up a destination for a flight—you need a clear target before you can push your data into the clouds.
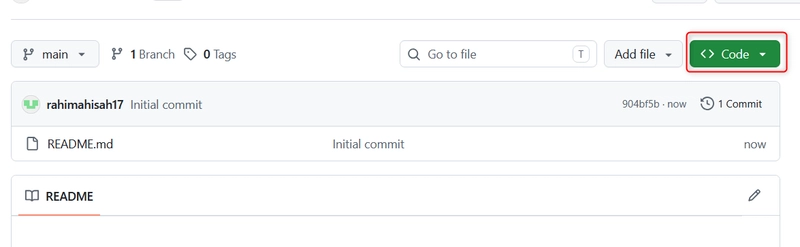
Then I copied the HTTPS url, to use in the terminal.
Step 4: Troubleshooting the Workflow
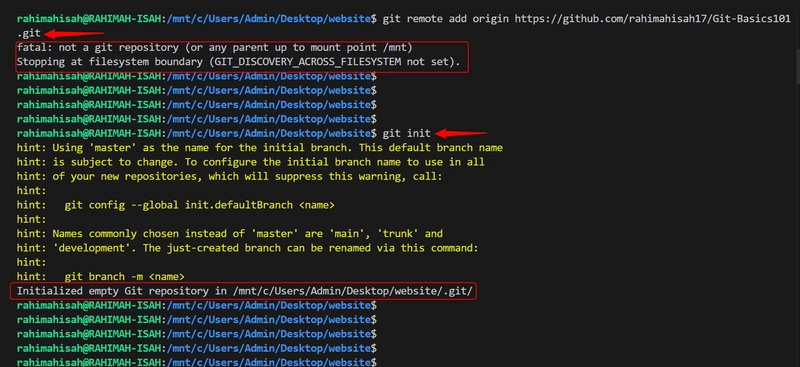
The Git Discovery Error occurred when trying to link my remote. I hit the fatal: not a git repository error. This was a great reminder that git init must be the very first step before any remote connections can be made.
Step 5: Mastering the Editor
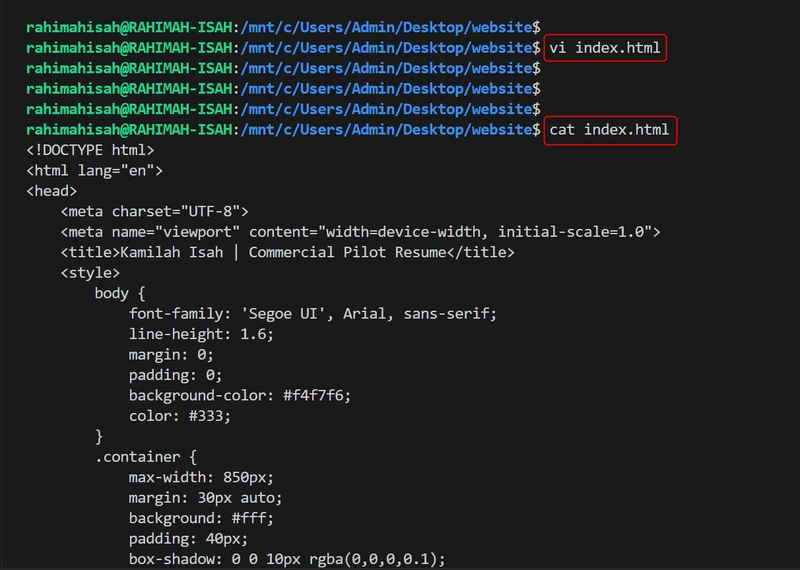
To ensure the final product was polished and free of errors, I utilized the Vim (vi) editor directly within the terminal. This allowed me to inspect the index.html file in a raw environment.
I used the cat command to verify my code before it goes live.
NOTE: This resume is for demo purpose.
Step 7: Staging for Deployment
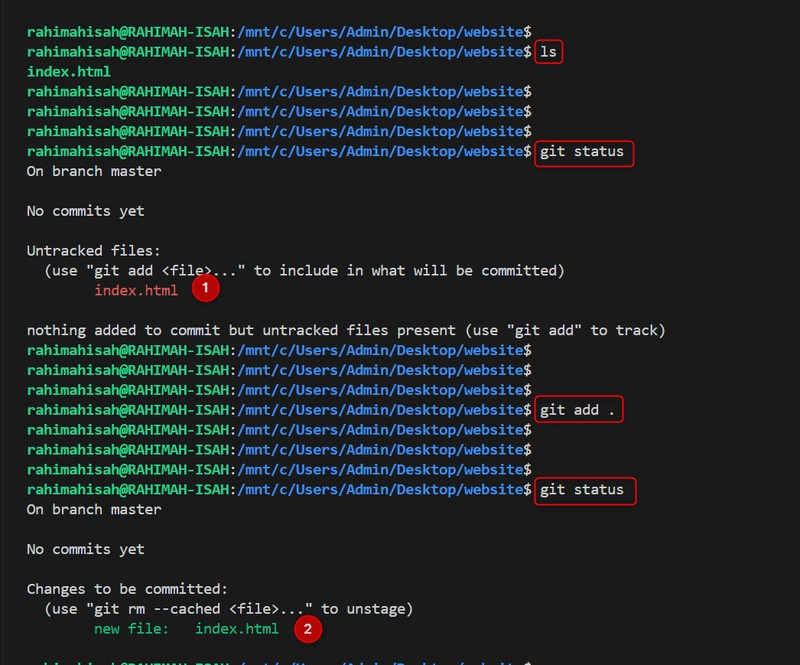
Here am moving files from untracked zone to the staged zone. By using git status, I could see exactly what Git was watching. But before that, I used the ls to very that the file is in that particular location in my local environment. Initially, my index.html was in red (untracked), but with a quick git add ., it turned green—ready and waiting to be committed.
This visual confirmation in the terminal is the developer's safety check to ensure only the right files are being sent to the server.
Step 8: Sealing the Version
With the files staged, it was time to create a permanent snapshot of my work. Running git commit -m "create index.html" acted as the official seal for this version of the project.
The terminal output showing 1 file changed" and "130 insertions is more than just text, it’s a receipt of my progress. By providing a clear, descriptive message, I’ve ensured that any future collaborator (or even my future self) understands exactly what this change was for.

Step 9: Overcoming the "Origin" Obstacle by authentication
One of the most common hurdles for any developer is connecting a local project to a remote server. As seen in my terminal, I initially hit a fatal: origin does not appear to be a git repository error. This happened because my local folder hadn't been introduced to GitHub yet.
Note: I resolved this by explicitly adding the remote origin URL. It was a great reminder that Git needs a clear map of where your code is supposed to go before it can start the journey.
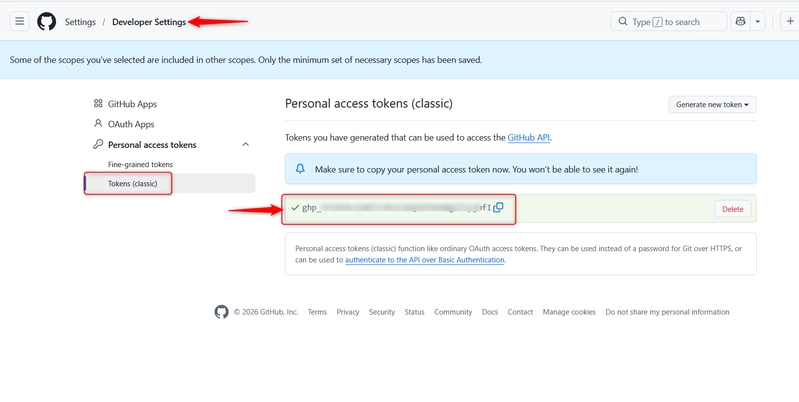
In the modern Git workflow, security is paramount. GitHub requires a Personal Access Token (PAT) instead of a regular password. So I navigated to my Developer Settings to generate a Classic token. This token acts as a secure key, allowing my terminal to communicate safely with my GitHub account.
Step 10: The Successful Push
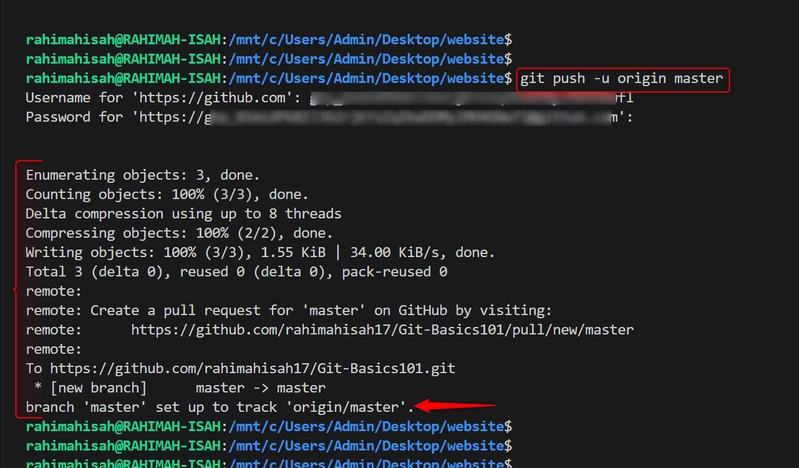
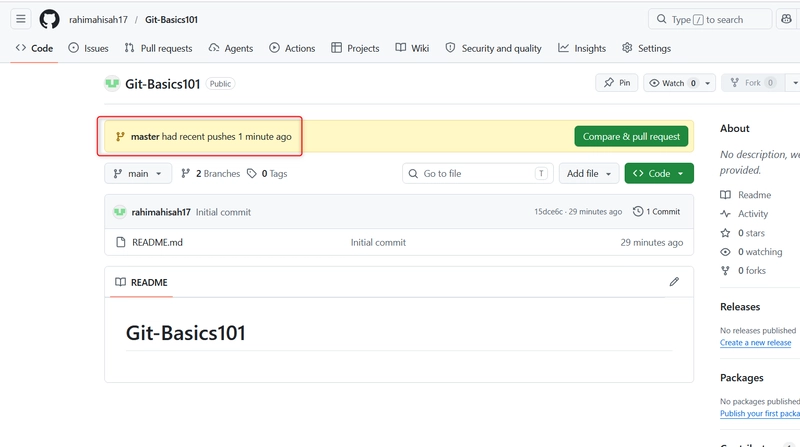
With the connection established, I ran the final command: git push -u origin master. Seeing those lines of code: Enumerating objects, Counting objects, and finally the URL to the remote repository—is the ultimate mission accomplished moment for a developer.
The code was no longer just on my laptop, it was officially live in the cloud.
Step 11: Activating GitHub Pages
With the code successfully pushed to the Git-Basics101 repository, the final piece of the puzzle was turning on the hosting.
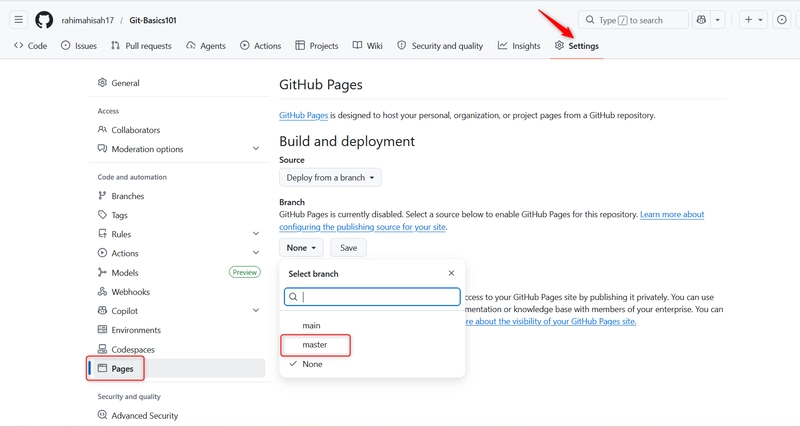
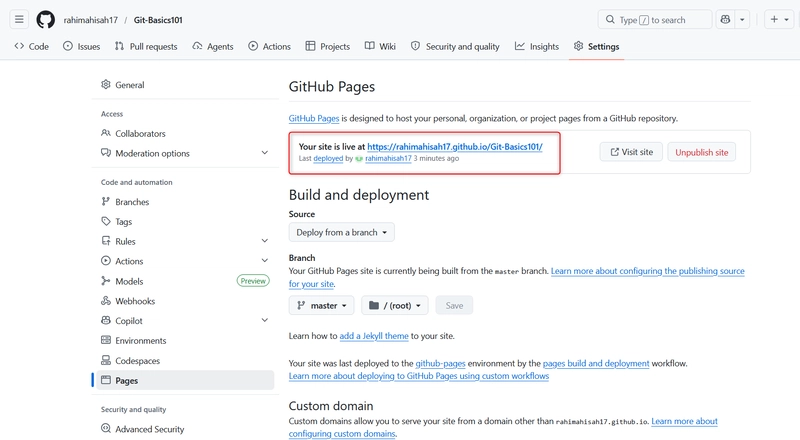
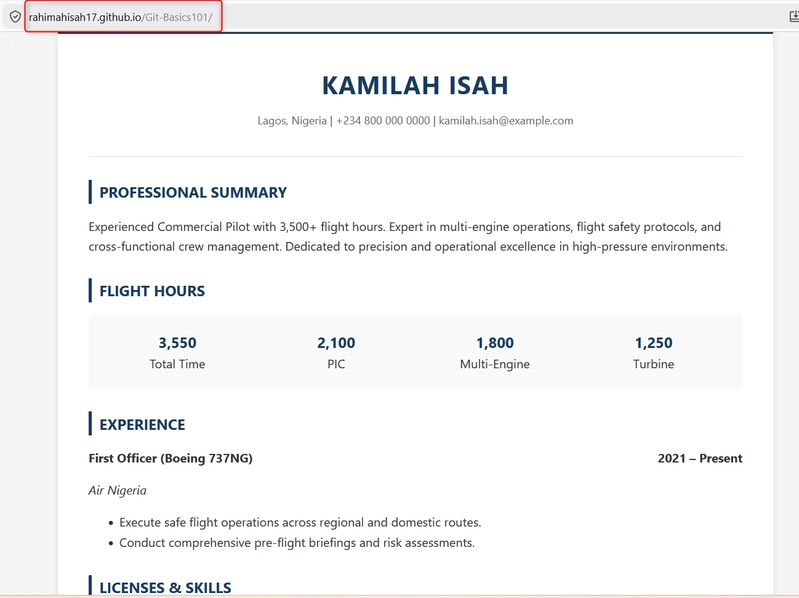
I navigated to the Settings tab of my repository, selected the Pages menu on the left, and set the build source to the master branch and saved the change. Within seconds, GitHub provided a live link. This transition from a local index.html file to a globally accessible URL is the ultimate goal of any web deployment project.
Conclusion:
Building this resume was more than just a coding exercise, it was a lesson in the modern developer's workflow. Errors aren't failures, they are the terminal's way of teaching you the correct sequence of operations.
The result? A professional, responsive resume that is ready for the world to see.