






5 Rotary Encoder Projects That Add Precision Input to Your Projects
Build interactive control systems: digital volume knob, menu navigation, motor speed control, synthesizer sequencer, and playlist browser
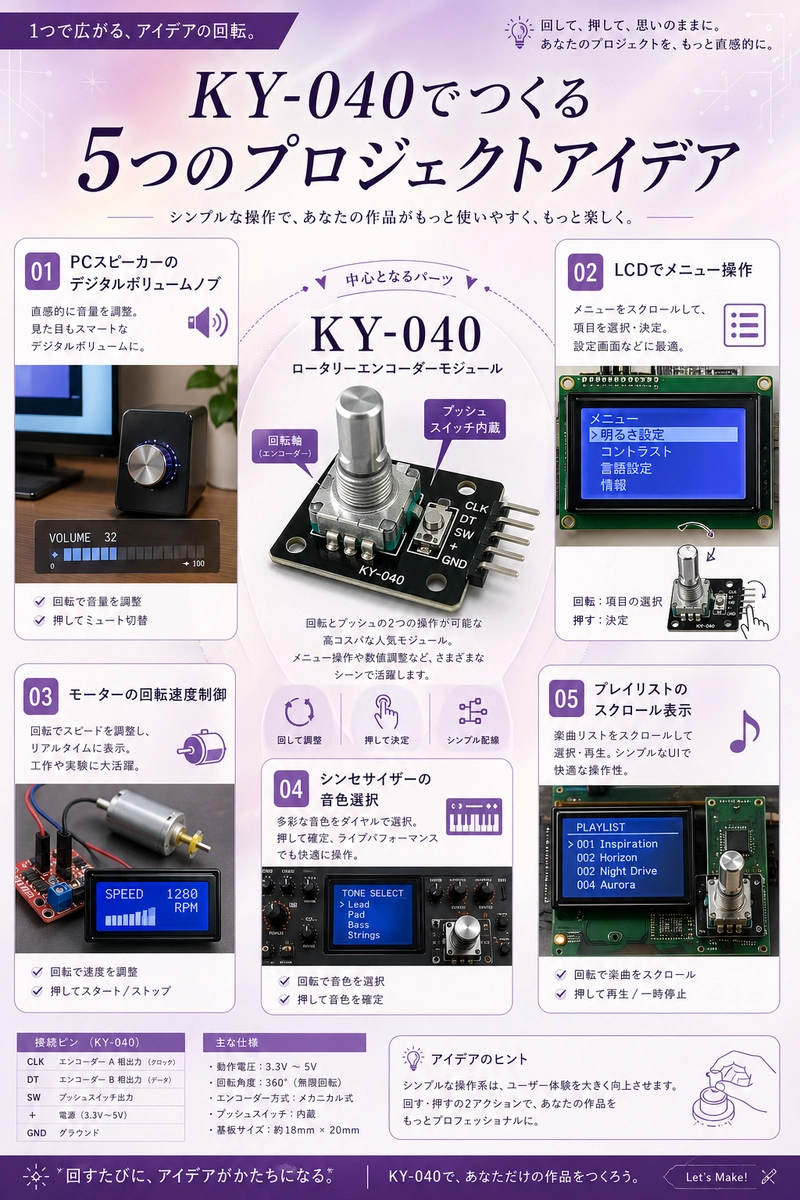
The KY-040 rotary encoder is an incremental encoder that outputs pulse signals as you rotate the shaft. Unlike potentiometers (which wear out), encoders give you clean digital signals that can count rotations in both directions. In this guide, we build five interactive control projects that use rotary encoders to add satisfying, precise input to your Arduino projects.
What You'll Need
- KY-040 rotary encoder (×1-2)
- Arduino Nano (×1)
- 16×2 LCD I2C display
- 128×64 OLED display
- Speaker or buzzer
- L298N motor driver module
- DC motor
How the KY-040 Works
The KY-040 has two signal pins (CLK and DT) that output square waves 90° out of phase. By tracking which pin leads, you determine rotation direction. The shaft also has a push-button.
Arduino    KY-040 Encoder
 Pin 2   ────  CLK (clock)
 Pin 3   ────  DT (data)
 Pin 4   ────  SW (push button)
 5V      ────  VCC
 GND     ────  GND
// WF1 Run #042 - Basic Encoder
#define CLK_PIN  2
#define DT_PIN   3
#define SW_PIN   4

int counter = 0;
int lastCLK;

void setup() {
  Serial.begin(115200);
  pinMode(CLK_PIN, INPUT);
  pinMode(DT_PIN, INPUT);
  pinMode(SW_PIN, INPUT_PULLUP);
  lastCLK = digitalRead(CLK_PIN);
}

void loop() {
  int currentCLK = digitalRead(CLK_PIN);
  if (currentCLK != lastCLK) {
    int direction = digitalRead(DT_PIN) == currentCLK ? 1 : -1;
    counter += direction;
    Serial.print("Position: ");
    Serial.println(counter);
  }
  lastCLK = currentCLK;

  if (digitalRead(SW_PIN) == LOW) {
    counter = 0;
    Serial.println("RESET");
    delay(200);
  }
}
Project 1: Digital Volume Knob
Goal: Control your computer's volume using a rotary encoder as a hardware volume control.
Hardware
- KY-040 encoder
- Arduino Nano (connected via USB)
- USB cable
Code
// WF1 Run #042 - Project 1: Volume Knob
#define CLK_PIN  2
#define DT_PIN   3
#define SW_PIN   4

int counter = 50;  // 0-100 volume

void setup() {
  Serial.begin(115200);
  pinMode(CLK_PIN, INPUT);
  pinMode(DT_PIN, INPUT);
  pinMode(SW_PIN, INPUT_PULLUP);
}

void loop() {
  static int lastCLK = digitalRead(CLK_PIN);
  int currentCLK = digitalRead(CLK_PIN);

  if (currentCLK != lastCLK) {
    int direction = digitalRead(DT_PIN) == currentCLK ? 1 : -1;
    counter = constrain(counter + direction * 2, 0, 100);
    Serial.println(counter);
  }
  lastCLK = currentCLK;

  if (digitalRead(SW_PIN) == LOW) {
    Serial.println("MUTE");
    delay(200);
  }
}
Project 2: LCD Menu Navigator
Goal: Navigate through a settings menu on an LCD display using the encoder's rotation and button.
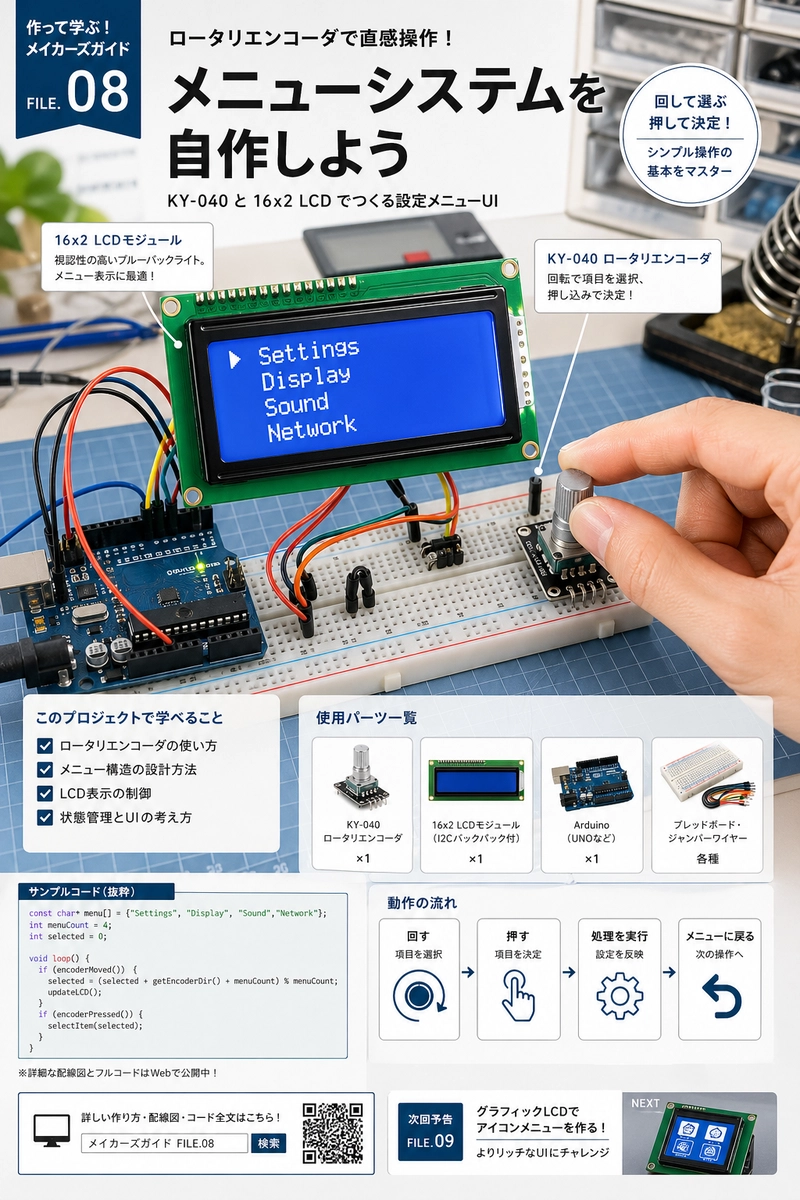
Hardware
- KY-040 encoder
- Arduino Nano
- 16×2 LCD I2C display
Code
// WF1 Run #042 - Project 2: LCD Menu
#include <LiquidCrystal_I2C.h>

#define CLK_PIN  2
#define DT_PIN   3
#define SW_PIN   4

LiquidCrystal_I2C lcd(0x27, 16, 2);
int menuIndex = 0;
const char* menuItems[] = {"Display", "Sound", "Network", "About"};
int lastCLK;

void setup() {
  lcd.begin();
  lcd.backlight();
  pinMode(CLK_PIN, INPUT);
  pinMode(DT_PIN, INPUT);
  pinMode(SW_PIN, INPUT_PULLUP);
  lastCLK = digitalRead(CLK_PIN);
  lcd.print(menuItems[0]);
}

void loop() {
  int currentCLK = digitalRead(CLK_PIN);
  if (currentCLK != lastCLK) {
    int direction = digitalRead(DT_PIN) == currentCLK ? 1 : -1;
    menuIndex = (menuIndex + direction + 4) % 4;
    lcd.clear();
    lcd.setCursor(0, 0);
    lcd.print(">");
    lcd.setCursor(1, 0);
    lcd.print(menuItems[menuIndex]);
  }
  lastCLK = currentCLK;

  if (digitalRead(SW_PIN) == LOW) {
    lcd.setCursor(0, 1);
    lcd.print("Selected!   ");
    delay(500);
  }
}
Project 3: DC Motor Speed Control
Goal: Precisely control a DC motor's speed and direction using the encoder, with OLED display.
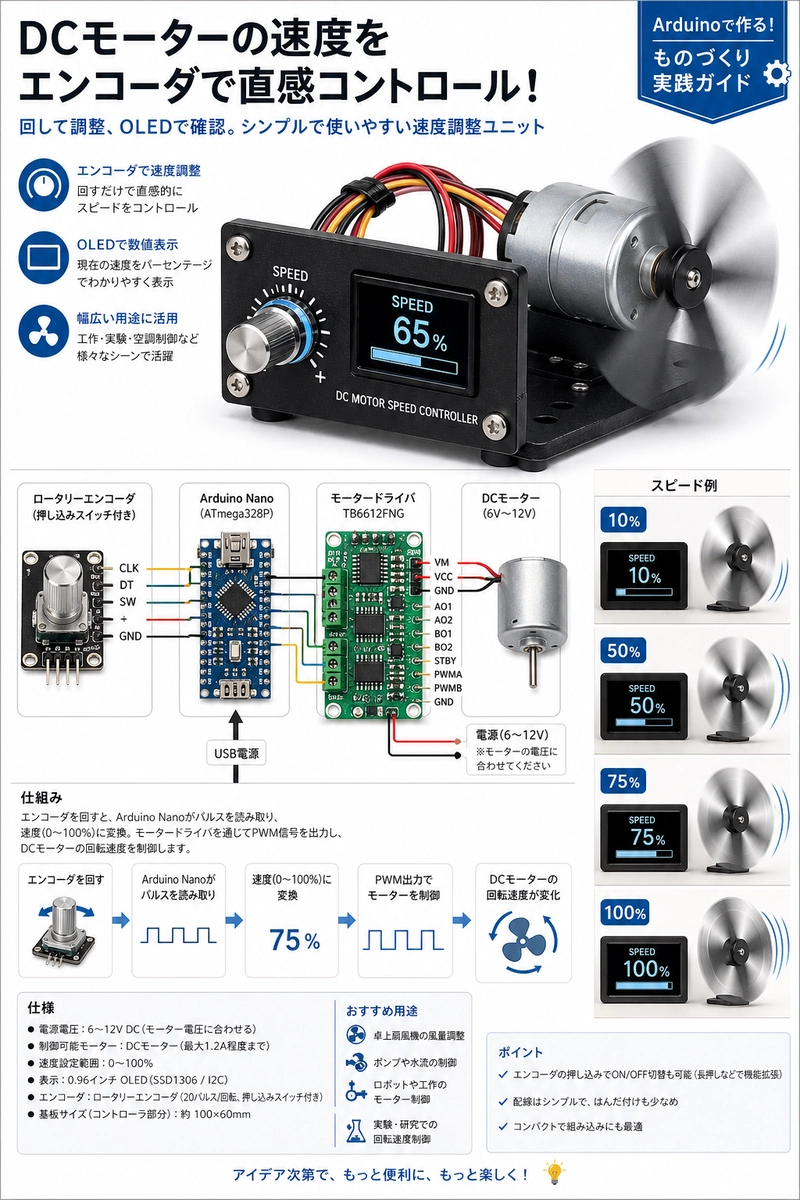
Hardware
- KY-040 encoder
- Arduino Nano
- L298N motor driver
- 12V DC motor
- 128×64 OLED I2C
Code
// WF1 Run #042 - Project 3: Motor Speed
#include <Wire.h>
#include <Adafruit_GFX.h>
#include <Adafruit_SSD1306.h>

#define CLK_PIN    2
#define ENA_PIN    9
#define IN1_PIN    8
#define IN2_PIN    7

Adafruit_SSD1306 display(128, 64);
int speed = 0;
int lastCLK;

void setup() {
  display.begin(SSD1306_SWITCHCAPVCC, 0x3C);
  pinMode(CLK_PIN, INPUT);
  pinMode(ENA_PIN, OUTPUT);
  pinMode(IN1_PIN, OUTPUT);
  pinMode(IN2_PIN, OUTPUT);
  lastCLK = digitalRead(CLK_PIN);
}

void loop() {
  int currentCLK = digitalRead(CLK_PIN);
  if (currentCLK != lastCLK) {
    int direction = digitalRead(3) == currentCLK ? 1 : -1;
    speed = constrain(speed + direction * 5, -255, 255);
    analogWrite(ENA_PIN, abs(speed));
    digitalWrite(IN1_PIN, speed > 0 ? HIGH : LOW);
    digitalWrite(IN2_PIN, speed < 0 ? HIGH : LOW);
  }
  lastCLK = currentCLK;

  display.clearDisplay();
  display.setTextSize(2);
  display.setCursor(0, 20);
  display.print("Speed:");
  display.setCursor(0, 40);
  display.print(speed);
  display.display();
  delay(50);
}
Project 4: Synthesizer Sequencer
Goal: Select musical notes using the encoder and play them through a speaker.
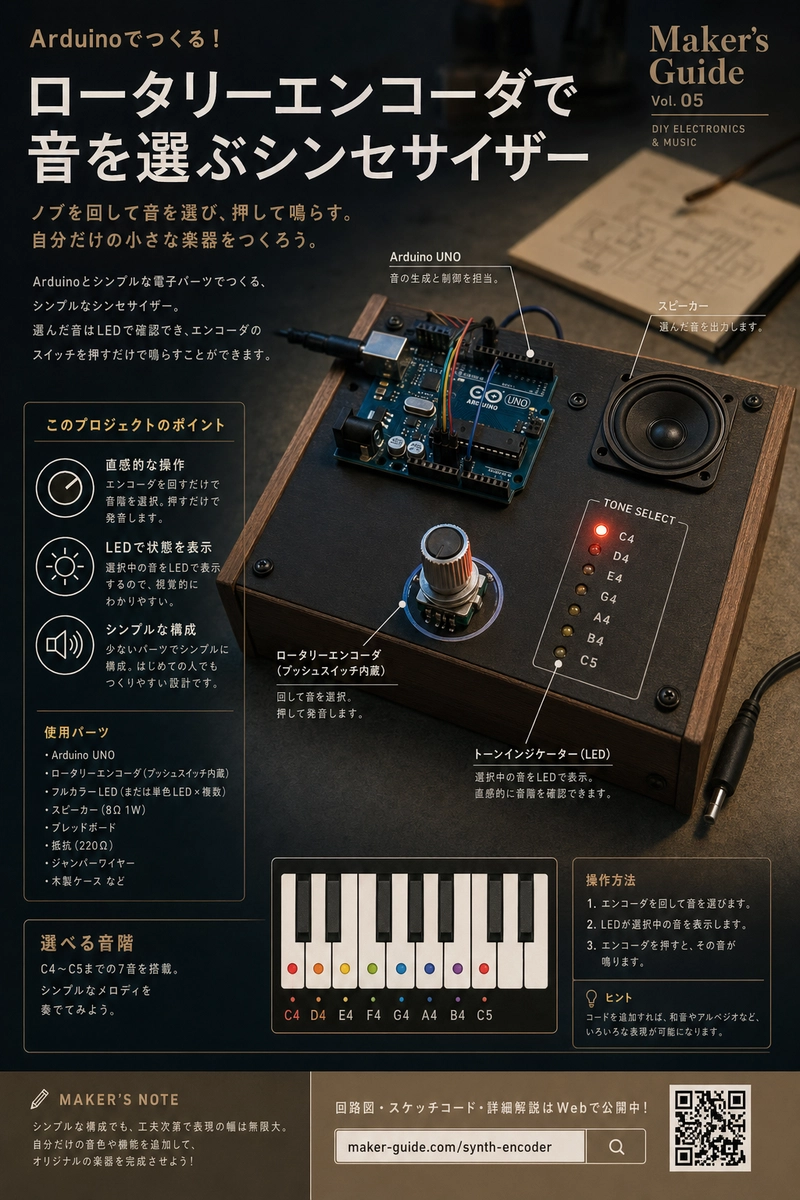
Hardware
- KY-040 encoder
- Arduino Nano
- 8Ω speaker
Code
// WF1 Run #042 - Project 4: Synthesizer
#define CLK_PIN    2
#define DT_PIN     3
#define SPEAKER    9

int notes[] = {262, 294, 330, 349, 392, 440, 494, 523};  // C4 to B4
int noteIndex = 0;
int lastCLK;

void setup() {
  pinMode(CLK_PIN, INPUT);
  pinMode(DT_PIN, INPUT);
  lastCLK = digitalRead(CLK_PIN);
  Serial.begin(115200);
}

void loop() {
  int currentCLK = digitalRead(CLK_PIN);
  if (currentCLK != lastCLK) {
    int direction = digitalRead(DT_PIN) == currentCLK ? 1 : -1;
    noteIndex = (noteIndex + direction + 8) % 8;
    tone(SPEAKER, notes[noteIndex], 200);
    Serial.print("Note index: ");
    Serial.println(noteIndex);
  }
  lastCLK = currentCLK;
}
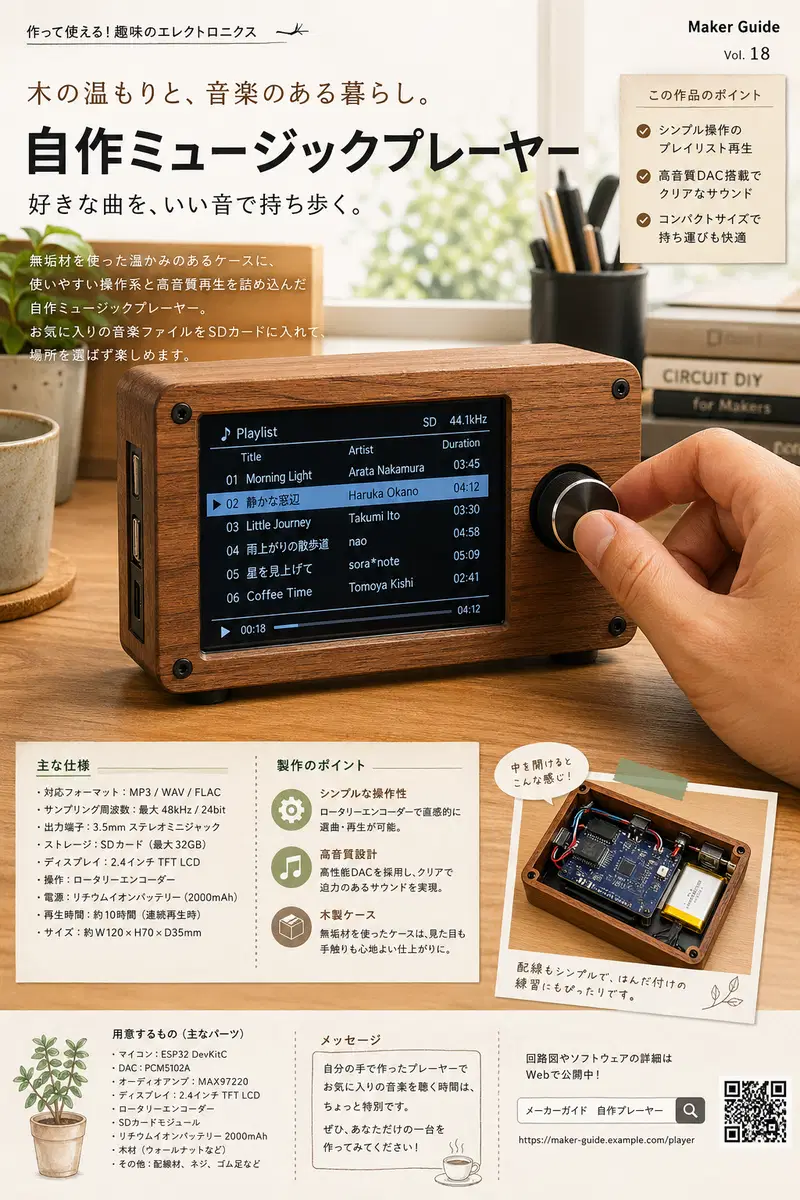
Project 5: Playlist Browser
Goal: Scroll through a music playlist on an LCD display using the encoder.
Hardware
- KY-040 encoder
- Arduino Nano
- 16×2 LCD I2C display
- Push button (for play/pause)
Code
// WF1 Run #042 - Project 5: Playlist Browser
#include <LiquidCrystal_I2C.h>

#define CLK_PIN    2
#define DT_PIN     3
#define PLAY_BTN   4

LiquidCrystal_I2C lcd(0x27, 16, 2);
const char* playlist[] = {"Track 01", "Track 02", "Track 03", "Track 04", "Track 05"};
int current = 0;
bool playing = false;
int lastCLK;

void setup() {
  lcd.begin();
  lcd.backlight();
  pinMode(CLK_PIN, INPUT);
  pinMode(DT_PIN, INPUT);
  pinMode(PLAY_BTN, INPUT_PULLUP);
  lastCLK = digitalRead(CLK_PIN);
  displayTrack();
}

void displayTrack() {
  lcd.clear();
  lcd.setCursor(0, 0);
  lcd.print(playing ? "|> " : "|| ");
  lcd.print(playlist[current]);
  lcd.setCursor(0, 1);
  lcd.print("Track ");
  lcd.print(current + 1);
  lcd.print("/");
  lcd.print(5);
}

void loop() {
  int currentCLK = digitalRead(CLK_PIN);
  if (currentCLK != lastCLK) {
    int direction = digitalRead(DT_PIN) == currentCLK ? 1 : -1;
    current = (current + direction + 5) % 5;
    displayTrack();
  }
  lastCLK = currentCLK;

  if (digitalRead(PLAY_BTN) == LOW) {
    playing = !playing;
    displayTrack();
    delay(300);
  }
}
Troubleshooting
| Problem | Cause | Fix |
|---|---|---|
| Encoder counts double | Both edges counted | Count only on one edge (rising OR falling, not both) |
| Direction reversed | CLK/DT pins swapped | Swap the CLK and DT wire connections |
| LCD shows garbled text | I2C address wrong | Run I2C scanner; common addresses: 0x27, 0x3F |
| Motor runs without input | Speed variable not zeroed | Initialize speed = 0; use constrain() |
| Encoder button unresponsive | Missing pull-up | Use INPUT_PULLUP or add 10K external pull-up |
Start Here
Affiliate disclosure: As an Amazon Associate, I earn from qualifying purchases.
The right parts make the difference:
KY-040 Rotary Encoder — Reliable encoder with push-button.
Arduino Nano — Compact and versatile.
16×2 LCD I2C Display — Clear text output for menu projects.
OLED 128×64 I2C — Sharp graphics for speedometer display.
Next Step: From Scene to Sensor, Without Writing Code
If this guide gave you ideas for your own setup — but you're not sure which sensors and outputs work best for your specific space — I can help you map that out.
I offer a personalized interactive device design guide at Fiverr:
👉 https://www.fiverr.com/phd_hfchang/generate-an-arduino-interactive-prototypef
What you get:
- A custom guide based on your actual scene (not generic recommendations)
- Sensor selection matched to user behavior and physical constraints
- Interaction logic without needing to write code from scratch
- Testing methodology with pass/fail criteria for each output
Tags: Arduino Rotary Encoder Input Control Motor Control LCD OLED Interactive